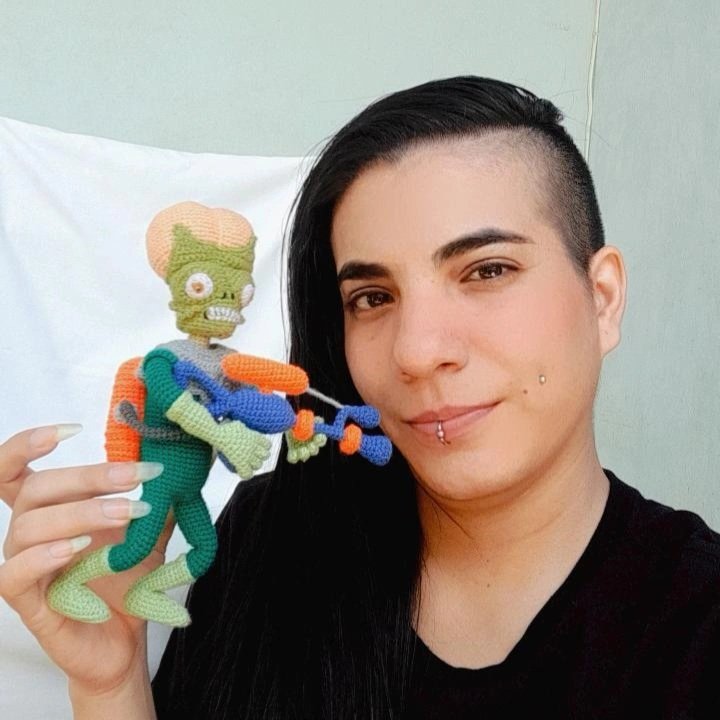
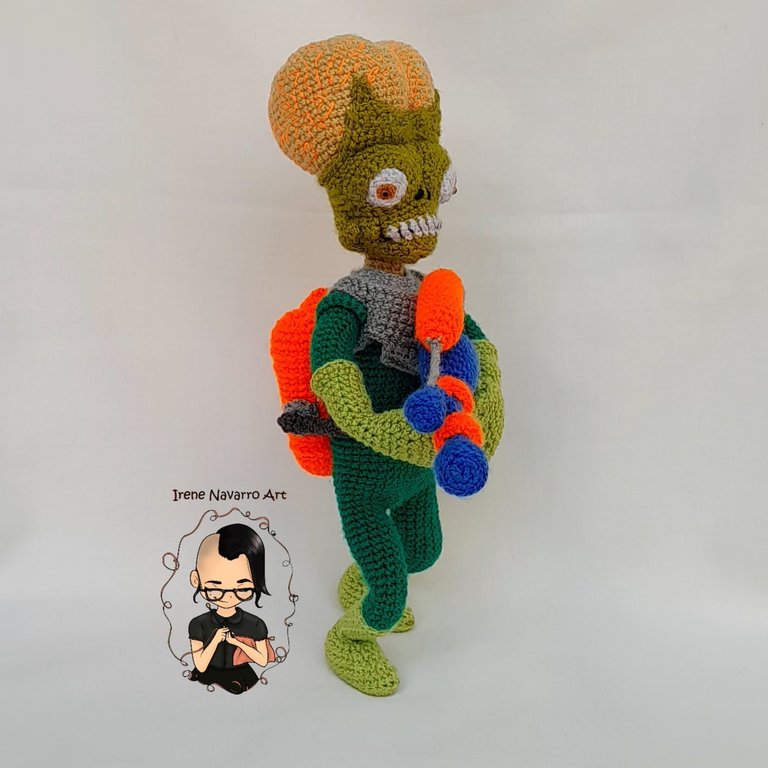
Saludos querida comunidad, estoy feliz porque hoy finalmente puedo compartir con ustedes el resultado final de mi amigurumi de Martians Attack del cual les había hablado en mi publicación pasada, muchos días han pasado pero la mayor parte de esos no trabajé debido a que el hilo verde se acabó y debía esperar hasta el lunes pasado para poder comprar en mi ciudad, pues el vendedor solo viene los lunes, tenia mucho miedo de conseguir el hilo verde exactamente del tono que necesitaba, pero afortunadamente lo encontré y pude reanudar mi trabajo, en el post pasado solo les compartí como hice la cabeza y las piernas, así que a partir de allí les comparto hoy mi proceso.
Greetings dear community, I am happy because today I can finally share with you the final result of my Martians Attack amigurumi that I had told you about in my last post, many days have passed but most of those I did not work because the green thread it's over and I had to wait until last Monday to be able to buy in my city, because the seller only comes on Mondays, I was very afraid of getting the green thread exactly the tone I needed, but fortunately I found it and I was able to resume my work, in the last post I only shared with you how I made the head and the legs, so from there I share my process with you today.

Proceso/ Process
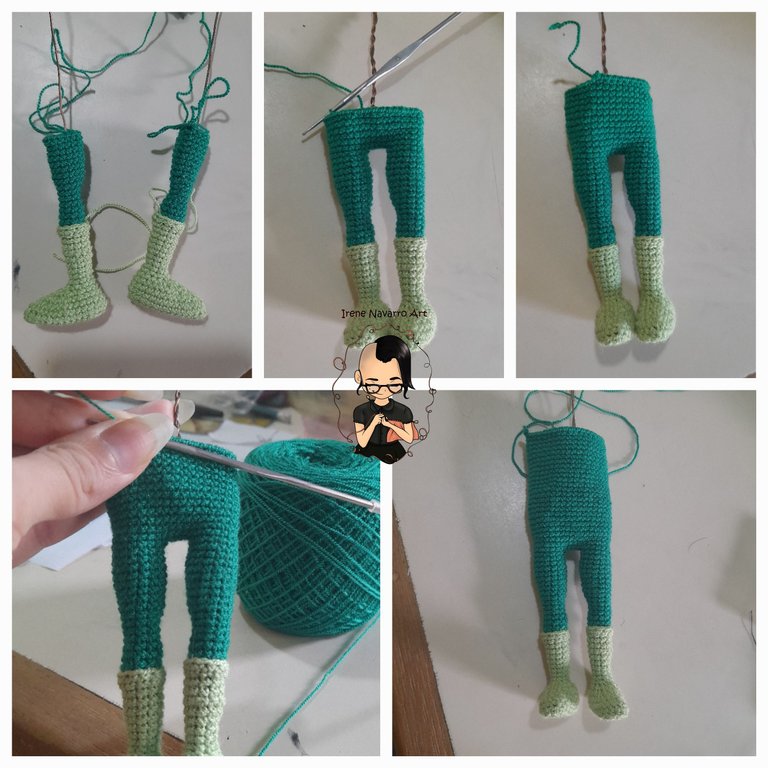
I joined the two legs by 4 chains, worked the stitches of one leg and then single crocheted in each of the chains, doing the same at the beginning of the next row, for which the crotch separation is 4 stitches, worked straight for 26 rows, I left the trunk hanging to make the arms.
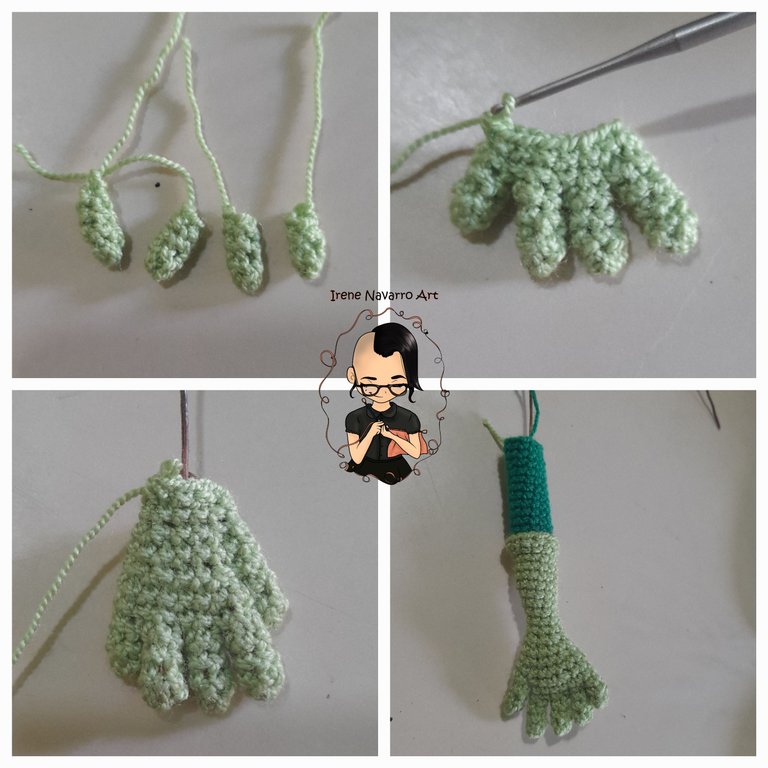
I started by making the fingers with 4 single crochet in a ring, just like in other projects I inserted wire into each of their fingers so that they could hold the objects. When I got the desired length of the arm I made the one for the other arm.
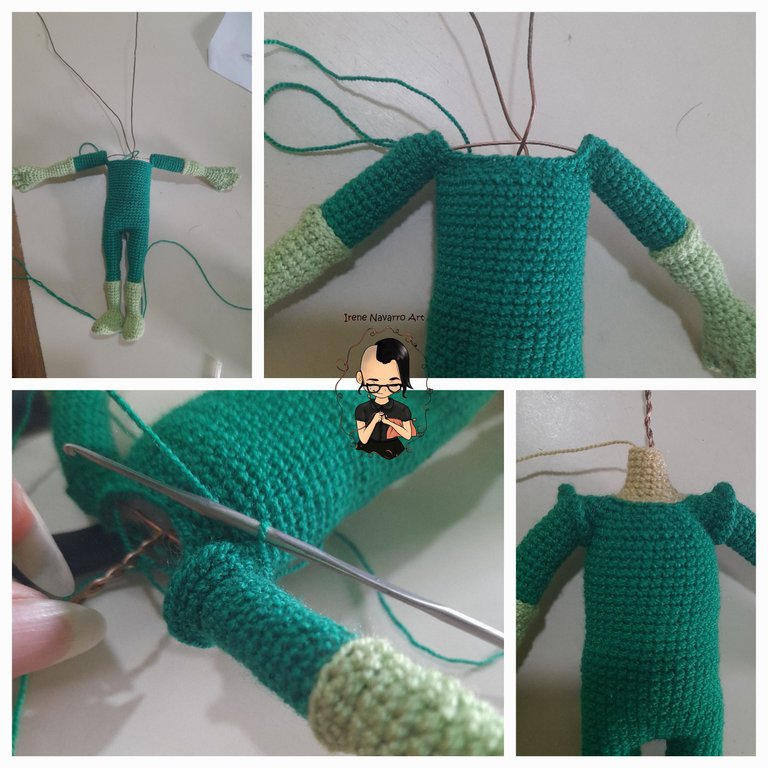
I located the arms on each side, crossing the wire in the center. I worked with single crochet and then decreases to create the trapezoid and then the neck.
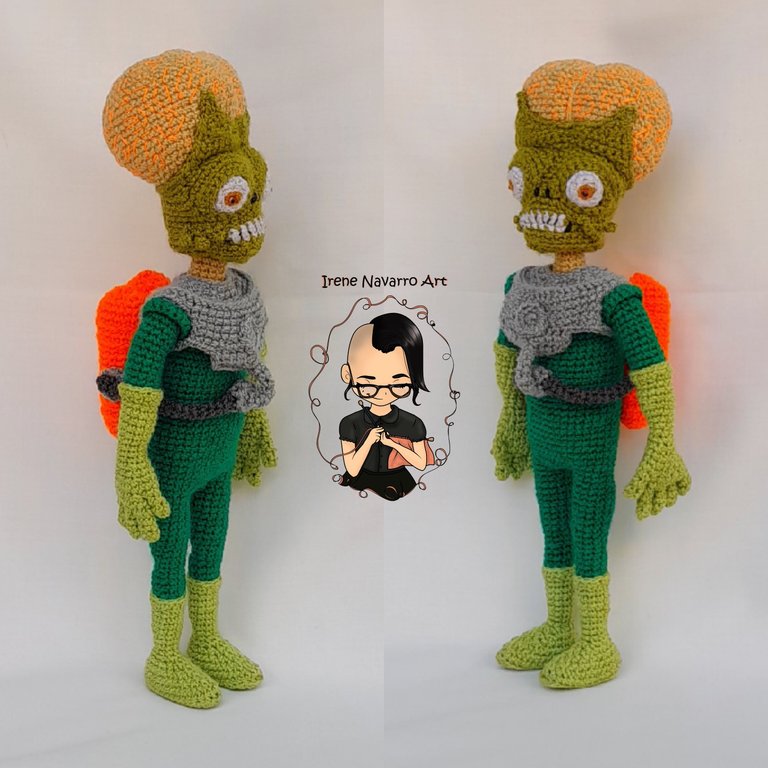
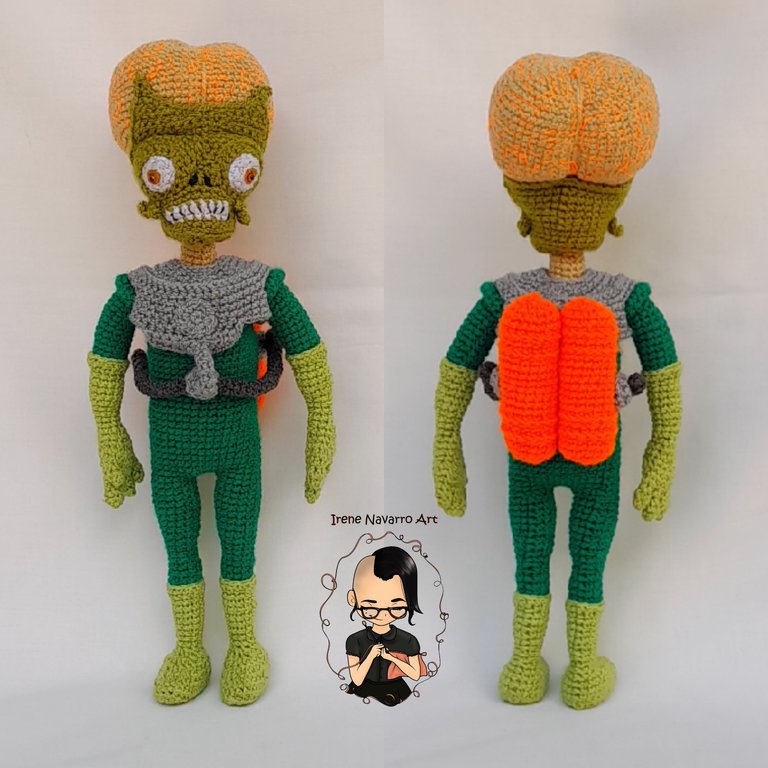
Despite not having the glass bubble it was necessary to make the base of the helmet, I made this with a circle of chains and worked on it to create a disc, the neck passes through the center, then taking the stitches from behind I followed the helmet until you reach the central part where the 10 single crochets are repeated for two more rows. Then I made the details of the tube in the center of the chest.
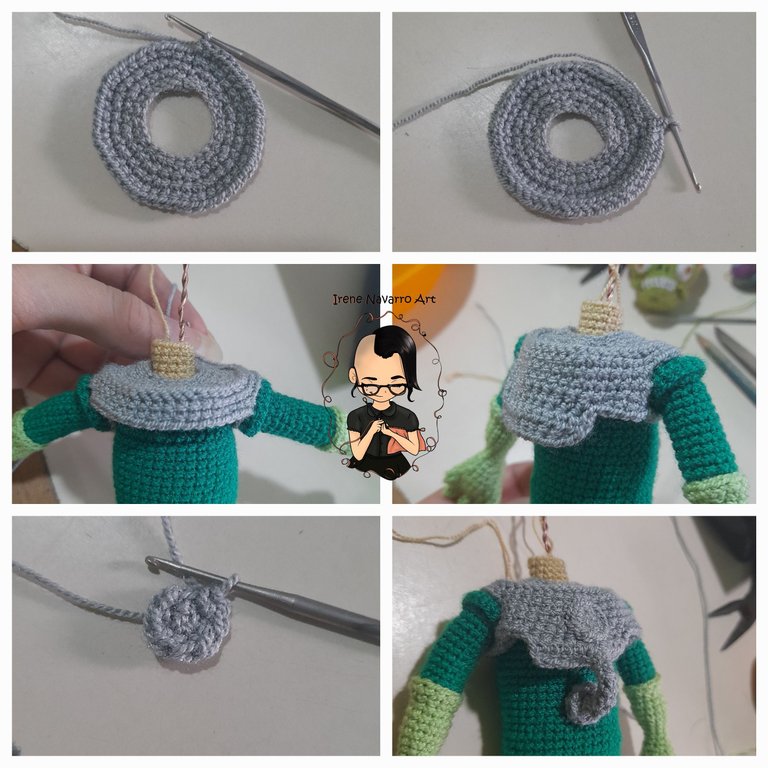
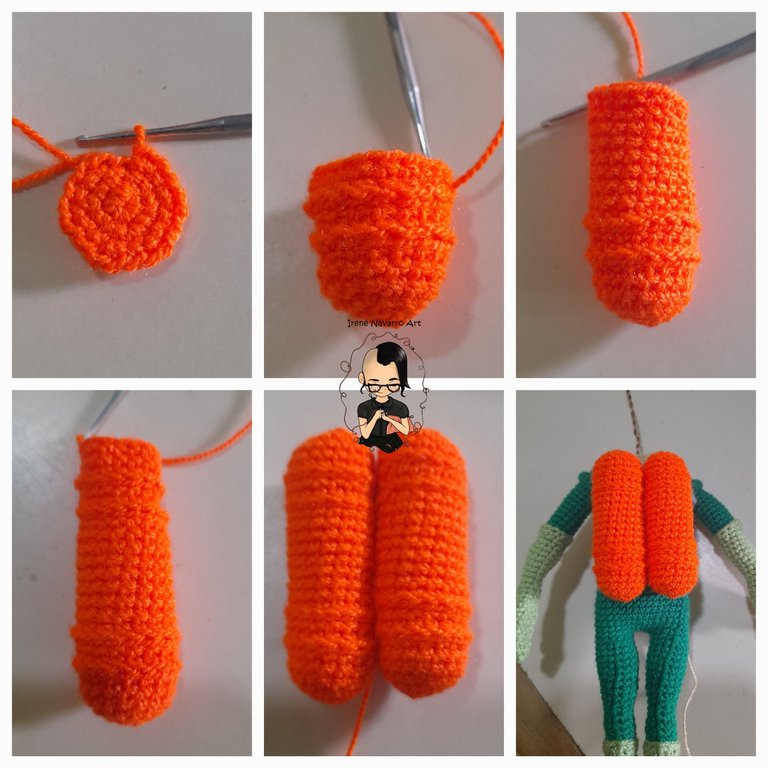
For the orange cylinders I started with 6 single crochets in a ring, I made two rows of six increases until I reached 18 single crochets, that would be the diameter, I made the edges and filled. I sewed to the body on the side of the back.
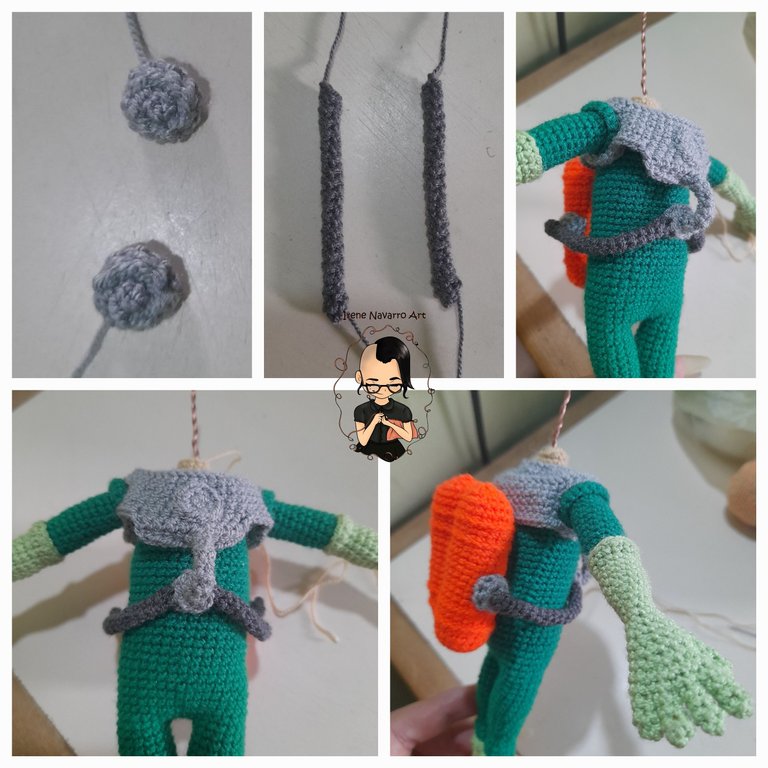
To make the tubes I used dark gray yarn, while for the base of the tubes I used light gray yarn. The tubes are made of 4 single crochets in a ring and 18 rows. I sewed the bases to the sides of the orange cylinders.
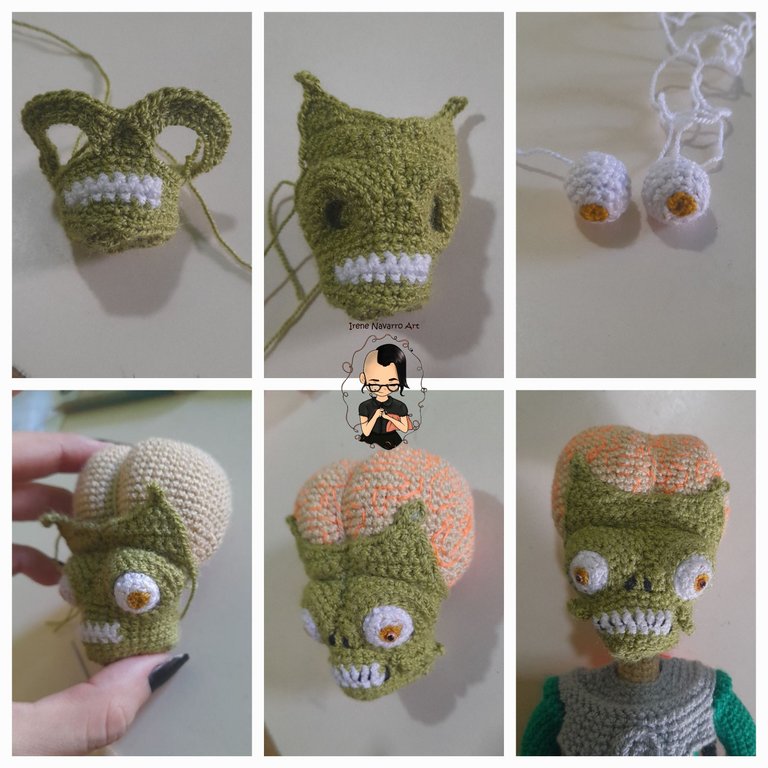
The next step is to sew the head, as I told you in the last post I made the head based on a triangle for the jaw, making the teeth, the eye sockets and the eyeballs differently, likewise the brain was embroidered with thread to simulate the cerebral bypass.
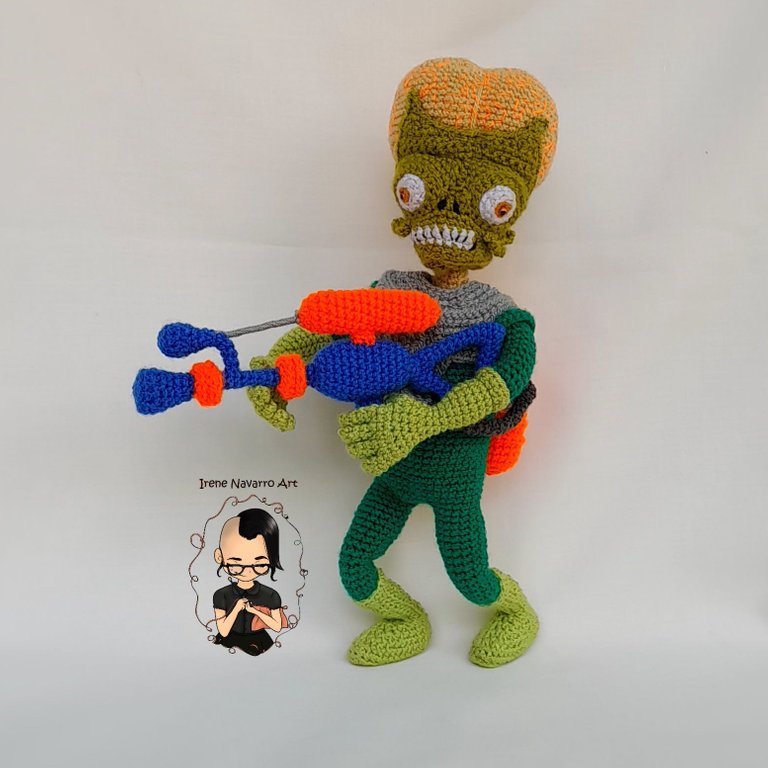
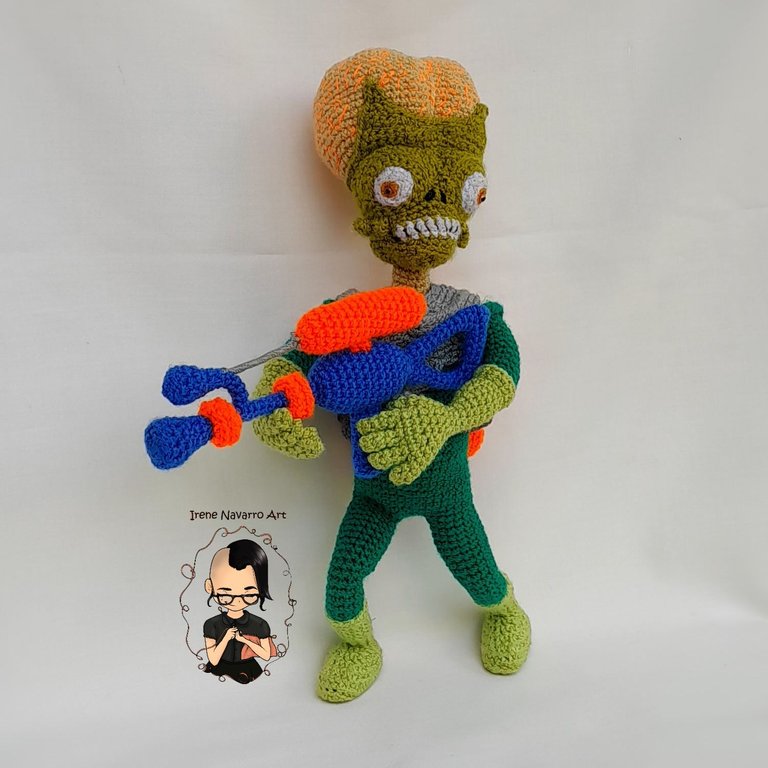
I really enjoyed making the Martian's weapon, this is like a futuristic shotgun, with a double barrel and a cylinder of what appears to be gas, but the interesting thing is that the weapon shoots a kind of laser or electric beam that ends up roasting the target. I didn't think that with a wireframe crocheting like this I could achieve such a result, this weapon along with the head and cylinders are my favorite part of the job.

Resultado / Result
This Tim Burton movie is an icon for culture, that's why I wanted to do this character for a long time. I hope you like it.


Imágenes tomadas con dispositivo Samsung A12. Portada editada en Canva
Pictures taken with Samsung A12 device. Cover edited in Canva
Invítenme un Café/Support Me on Ko-Fi

https://ko-fi.com/irenenavarroart
If you want to support my art you can also make donations for the value of a coffee (Ko-Fi)
Espero les haya gustado. Les invito a leer mis próximas publicaciones y siempre estaré dispuesta a responder sus preguntas y comentarios, también pueden seguirme y contactarme en cualquiera de mis redes sociales. ¡Muchas gracias!
I hope you liked it. I invite you to read my next publications and I will always be willing to answer your questions and comments, you can also follow me and contact me on any of my social networks. Thank you!
It's very beautiful
Thank you 😊
U are welcome dear👌
Excelente!! gracias por compartirlo.
Gracias a ti por comentar y apreciar mi trabajo. SALUDOS 🤗
The rewards earned on this comment will go directly to the people sharing the post on Twitter as long as they are registered with @poshtoken. Sign up at https://hiveposh.com.
Esta muy genial Irene!! Me encanta!💖
Gracias Yetsi 😘
Es genial la manera en que logras la proporciones del cuerpo, está increíble éste trabajo y muy bien logrado. Hermosos colores, y el personaje me encantó, felicidades amiga (。•̀ᴗ-)✧
Muchas gracias por tus amables palabras 🤗
Este amigurumi es espectacular , como todos los que posteas 😍 Se nota mucho trabajo y también un gran talento. Gracias por compartir
Muchas gracias 🥲🥰
Congratulations, your post has been upvoted by @dsc-r2cornell, which is the curating account for @R2cornell's Discord Community.
Enhorabuena, su "post" ha sido "up-voted" por @dsc-r2cornell, que es la "cuenta curating" de la Comunidad de la Discordia de @R2cornell.
Que gusto saludarte....Cómo estás? ¿Tu hijito? ¿Tu mami?
Como siempre nos compartes resultados espectaculares, realmente la arma del marciano ha quedado genial.
Un gran saludo
Es un trabajo genial, le ha quedado muy bien. Y se ve que tiene habilidad para hacer algo tan bueno, felicitaciones.
Cool amirugumi @irenenavarroart.. you make me can't wait to start making my own amirugumi doll :)
Omg te superas en cada uno 😘❤️ felicidades.
Saludo me encantó tu trabajo es impecable hermoso hay que tener una dedicación para crear los amigurumi te felicito hermoso trabajó
Muchas gracias @ingridmar 🤗🥰
How nice, you nailed it, and this work of yours made me want to watch the movie again.
Thank you very much, it's a very funny movie
You're welcome (^_^)