Saludos, como he comentado en ocasiones anteriores en mis ratos libres suelo arreglar, modificar y hacer prendas cosidas a mano, hace unos días estaba reduciendo de tamaño un suéter para mi hijo y me di cuenta el desastre que tenía en la mesa con mis alfileres, normalmente los guardaba en una bolsa y estos siempre rompían las bolsas y era como un círculo vicioso de recoger los alfileres regados por la mesa y volver a ponerlos en la bolsa rota, por un momento me dije a mi misma “Irene en casa de herrero cuchillo de palo”, me sentí un poco avergonzada de mi misma porque yo que he hecho muchos amigurumis que las personas usan de alfileteros nunca había hecho un amigurumi para mí para cumplir esa función y ordenar mis alfileres, así que decidí hacer uno para mí.
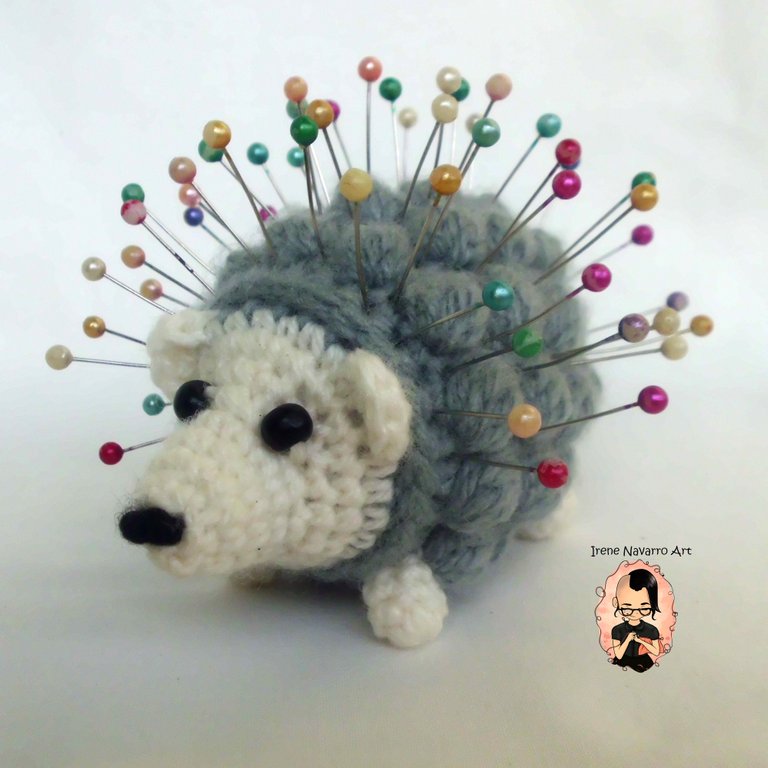
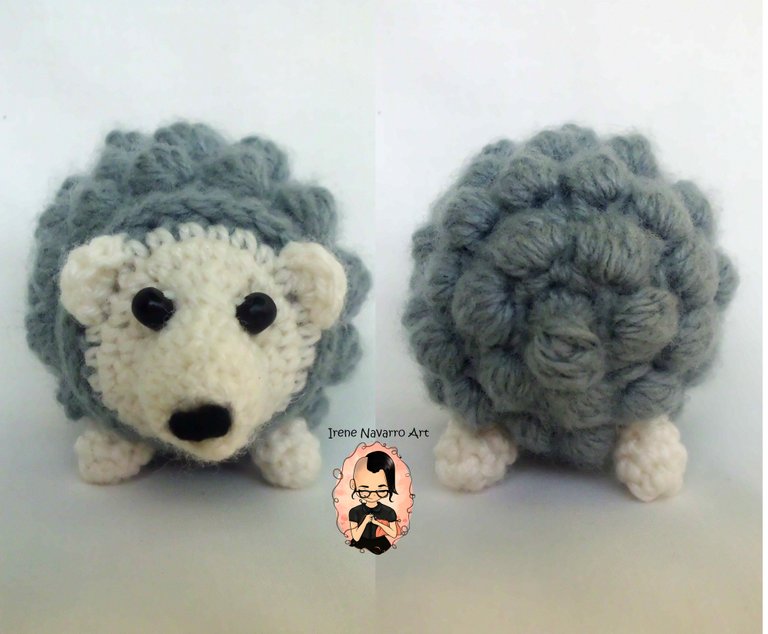
Es un erizo, porque fue la primera figura que vino a mi mente cuando pensé en los alfileres, solo por buscar imágenes referenciales en internet me di cuenta que muchas personas ya habían tenido la misma idea de hacer un erizo alfiletero, pero no me desanimé así que igualmente hice el mío y les comparto ahora el proceso.
Greetings, as I have commented on previous occasions in my spare time I usually fix, modify and make hand-sewn garments, a few days ago I was reducing the size of a sweater for my son and I realized the mess I had on the table with my pins, I usually kept them in a bag and they always broke the bags and it was like a vicious circle of picking up the pins scattered around the table and putting them back in the broken bag, for a moment I said to myself “Irene, in the blacksmith's house has wooden knives ”, I felt a bit ashamed of myself because I, who have made many amigurumis that people use as pincushions, had never made an amigurumi for me to fulfill that function and stick my pins, so I decided to make one for myself.
It is a hedgehog, because it was the first figure that came to my mind when I thought about pins, just by looking for reference images on the internet I realized that many people already had the same idea of making a pin cushion hedgehog, but I was not discouraged like that I also did mine and now share the process with you.
Materiales /Materials
- Estambre gris y blanco crudo.
- Relleno de fibra sintética.
- Gachillo #0 y #3,5
- Dos perlas de madera.
- Aguja de ojal grande
- Una hebra de estambre negro.
- Gray and white yarn.
- Synthetic fiber filling.
- Crochet # 0 and # 3,5
- Two wooden beads.
- Large buttonhole needle
- A strand of black yarn.
Proceso /Process
Hay que tener en cuenta que en este amigurumi se usan además del los puntos básicos como el punto deslizado y el punto bajo, también se usa un punto que recibe varios nombres según el país, algunos le dicen punto puff, popcorn, otros lo llaman punto garbanzo, este punto visualmente crea un relieve de bolitas, consiste en tejer cinco puntos altos hasta la mitad en un mismo punto y luego con las seis hebras de hilo en el ganchillo terminar todos los puntos altos juntos. En las graficas de crochet podemos reconocerlo por el siguiente símbolo.
Keep in mind that in this amigurumi, in addition to the basic stitches such as the slip stitch and the single stitch, a stitch is also used that receives various names depending on the country, some call it puff stitch, popcorn, others call it stitch Chickpea, this point visually creates a relief of balls, consists of knitting five double crochets halfway in the same stitch and then with the six strands of yarn on the hook finish all the double crochets together. In crochet graphics we can recognize it by the following symbol.

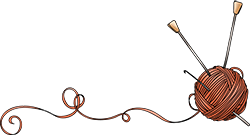
Comencé por el cuerpo con el gachillo # 3,5 y el estambre gris, tejí 5 puntos bajos y un punto puff en un anillo. Este primer punto puff creará la bolita que será la cola.
1 Ronda: Tejer 6 aumentos. Total de puntadas: 12
2 Ronda: Tejer 1 punto bajo, 1 punto puff y repetir hasta el final. Total de puntadas: 12
3 Ronda: Tejer 12 aumentos. Total de puntadas: 24
4 Ronda: Tejer 1 punto bajo, 1 punto puff y repetir hasta el final.
5 Ronda: Tejer 24 puntos bajos.
6 Ronda: Tejer 1 punto bajo, 1 punto puff y repetir hasta el final.
7 Ronda: Tejer 24 puntos bajos.
8 Ronda: Tejer 1 punto bajo, 1 punto puff y repetir hasta el final.
9 Ronda: Tejer 24 puntos bajos.
10 Ronda: Tejer 1 punto bajo, 1 punto puff y repetir hasta el final. Hacer un punto deslizado.
11 Ronda: Tejer 24 puntos medios altos.
12 Ronda: Tejer 24 puntos bajo tomándolos por detrás de los puntos de la ronda anterior.
I started from the body with the # 3,5 crochet and the gray yarn, I worked 5 single crochets and a puff stitch in a ring. This first puff stitch will create the ball that will be the tail.1 Round: Knit 6 increases. Total stitches: 122Round: Knit 1 single crochet, 1 puff stitch and repeat until the end. Total stitches: 123 Round: Knit 12 increases. Total stitches: 244Round: Knit 1 single crochet, 1 puff stitch and repeat until the end.5 Round: Work 24 single crochets.6 Round: Knit 1 single crochet, 1 puff stitch and repeat until the end.7 Round: Work 24 single crochets.8 Round: Knit 1 single crochet, 1 puff stitch and repeat until the end.9 Round: Work 24 single crochets.10 Round: Knit 1 single crochet, 1 puff stitch and repeat until the end. Make a slip stitch.Round 11: Knit 24 half double crochets.12 Round: Work 24 single stitches taking them from behind the stitches from the previous round.

Para la cara el erizo se debe cambia a estambre blanco y a ganchillo #0.
1 Ronda: Tejer 24 puntos bajos.
2 Ronda: Tejer 4 puntos bajos, 1 disminución y repetir hasta el final. Total de puntadas: 20
3 Ronda: Tejer 3 puntos bajos, 1 disminución y repetir hasta el final. Total de puntadas: 16
4 Ronda: Tejer 3 puntos bajos, 1 disminución y repetir hasta el final. Total de puntadas: 12
5-7 Ronda: Tejer 12 puntos bajos. Rellenar con fibra.
8 Ronda: Tejer seis disminuciones. Cerrar con un punto deslizado y esconder la hebra por dentro del erizo.
For the face, the hedgehog should be changed to white yarn and # 0 crochet.1 Round: Knit 24 single crochets.2 Round: Knit 4 single crochets, 1 decrease and repeat until the end. Total stitches: 203 Round: Knit 3 single crochets, 1 decrease and repeat until the end. Total stitches: 164 Round: Knit 3 single crochets, 1 decrease and repeat until the end. Total stitches: 125-7 Round: Knit 12 single crochets. Fill with fiber.8 Round: Knit six decreases. Close with a slip stitch and hide the strand inside the hedgehog.
Con la aguja de ojal grande y una hebra de estambre negro bordar la nariz. Con el estambre blanco cosí las perlas de madera a ambos lados del hocico.
Para tejer las orejas se debe insertar la hebra blanca en un punto y con el ganchillo #0 tejer 5 puntos altos en el punto siguiente, tejer 1 punto deslizado en el siguiente punto y esconder las hebra por dentro del erizo. Ubicar las orejas en la ronda donde comienza el color blanco.
Embroider the nose with the large buttonhole needle and a strand of black yarn. With the white yarn I sewed the wooden beads on both sides of the muzzle.
To knit the ears, you must insert the white strand in one stitch and with the # 0 hook knit 5 double crochets in the next stitch, knit 1 slip stitch in the next stitch and hide the strands inside the hedgehog. Place the ears in the round where the white color begins.

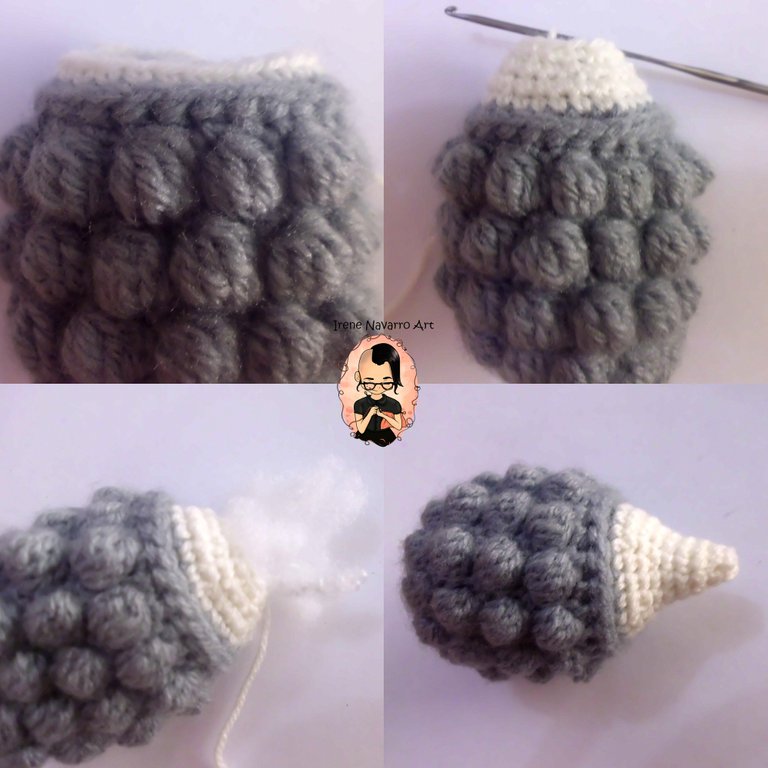
Para las patas con hilo blanco y ganchillo #0 tejí 6 puntos bajos en un anillo. Tejí dos rondas de puntos bajos y terminé con un punto deslizado dejando una hebra larga para coser. Hice las cuatro patas iguales, las rellené con fibra y las cosí por la parte posterior del cuerpo del erizo.
For the legs with white yarn and # 0 crochet I worked 6 single crochets in a ring. I worked two rounds of single crochets and finished with a slip stitch leaving a long strand to sew. I made all four legs the same, stuffed them with fiber, and sewed them across the back of the hedgehog's body.
Resultado/ Result
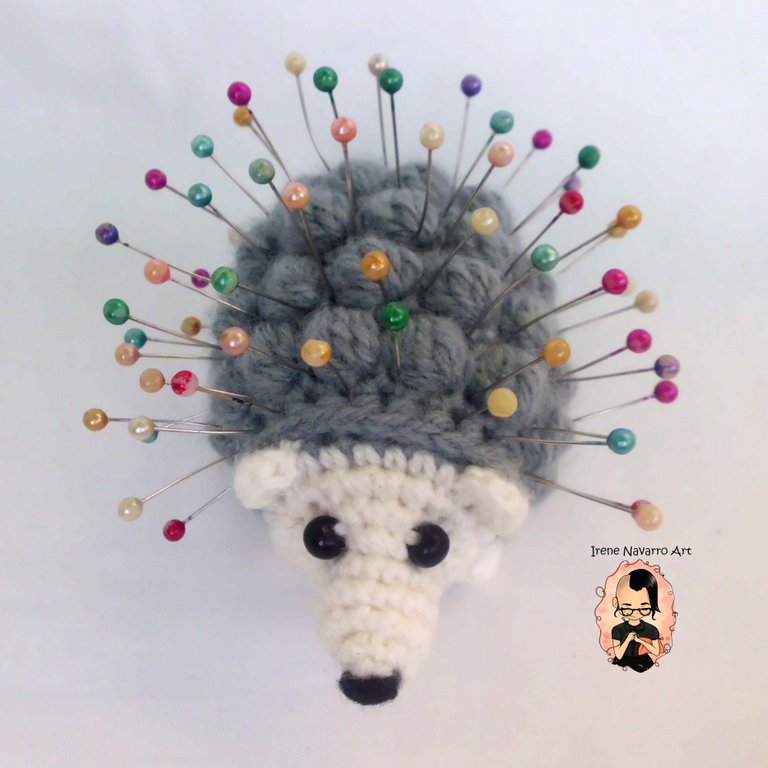
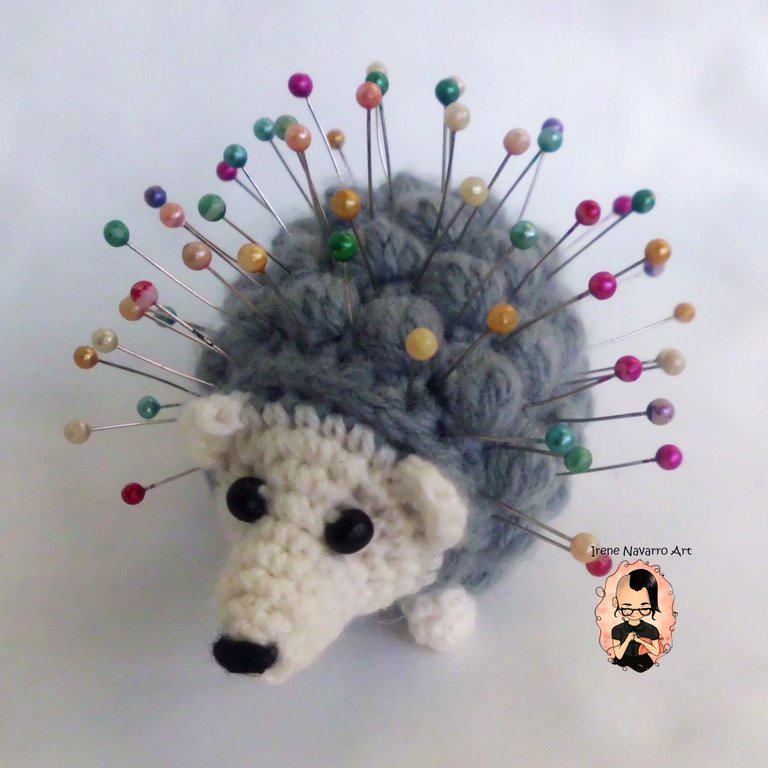
De vedad estoy muy feliz de por fin tener mis alfileres en orden, así evitaré que se pierdan y que terminen accidentalmente en un lugar donde puedan lastimar a alguien. Es un proyecto muy sencillo y toma poco tiempo de elaboración por los cual si siguen mis instrucciones tendrán un buen resultado.
I'm really very happy to finally have my pins in order, so I will prevent them from getting lost and accidentally ending up in a place where they can hurt someone. It is a very simple project and takes little time to prepare, so if you follow my instructions you will have a good result.

Imágenes tomadas con cámara Casio QV-R100 y editadas en Adobe Photoshop Cs6
Images taken with Casio QV-R100 camera and edited in Adobe Photoshop Cs6
Invítenme un Café/Support Me on Ko-Fi
Si te gusta mi contenido y quieres apoyarme a seguir dibujando, pintando, escribiendo y tejiendo puedes invitarme un Ko-fi en el enlace que les dejo aquí abajo, les recuerdo que es fácil, se usa Paypal y Tarjeta. ¡Muchas gracias a todos!
If you want to support my art you can also make donations for the value of a coffee (Ko-Fi) this uses Paypal, it is simple and with it I will be able to continue knitting and buying materials to create and share my publications

https://ko-fi.com/irenenavarroart
Espero les haya gustado. Les invito a leer mis próximas publicaciones y siempre estaré dispuesta a responder sus preguntas y comentarios, también pueden seguirme y contactarme en cualquiera de mis redes sociales. ¡Muchas gracias!
I hope you liked it. I invite you to read my next publications and I will always be willing to answer your questions and comments, you can also follow me and contact me on any of my social networks. Thank you!
Muy bonito el erizo, es muy creativo y se ve que es sencillo de hacer, mi novia se volvera loca al verlo
Muchas gracias :D si está fácil
So cute! And yes, a hedgehog is just right for your needles!
In German, the saying is that a shoemaker's kids always have holes in their shoe soles. Different craft, same meaning :)
Have a !BEER
oh I'm glad to know more about Germany XD thank you very much !!! Many people say that German beer is the best :D
View or trade
BEER.Hey @irenenavarroart, here is a little bit of
BEERfrom @muscara for you. Enjoy it!Learn how to earn FREE BEER each day by staking your
BEER.Hermoso ❤ Ese punto 'garbanzo' es muy lindo visualmente, quedó muy bien en este proyecto. Te felicito 😚
Muchas gracias,si es muy bonito el punto, lo he visto en prendas y tambien en otros amigurumis y se ve genial :) trataré de ponerlo mas en práctica. Un abrazo!
Que hermoso, me encanto.
Gracias por compartir @irenenavarroart.
Amazing work! What a cute little hedgehog. You really have the talent in making these beautiful amis especially those tiny little details. It takes me tons of tries before I could perfect on, let ong 4 little feet. Great job!
In the Philippines, my mom would say a dressmaker's clothes always have holes.
Oh is the same in Philippines XD Thanks for your comment :D Hugs!
que bello esta...me gusta mucho...te felicito por ese trabajo tan lindo
Muchas gracias :D