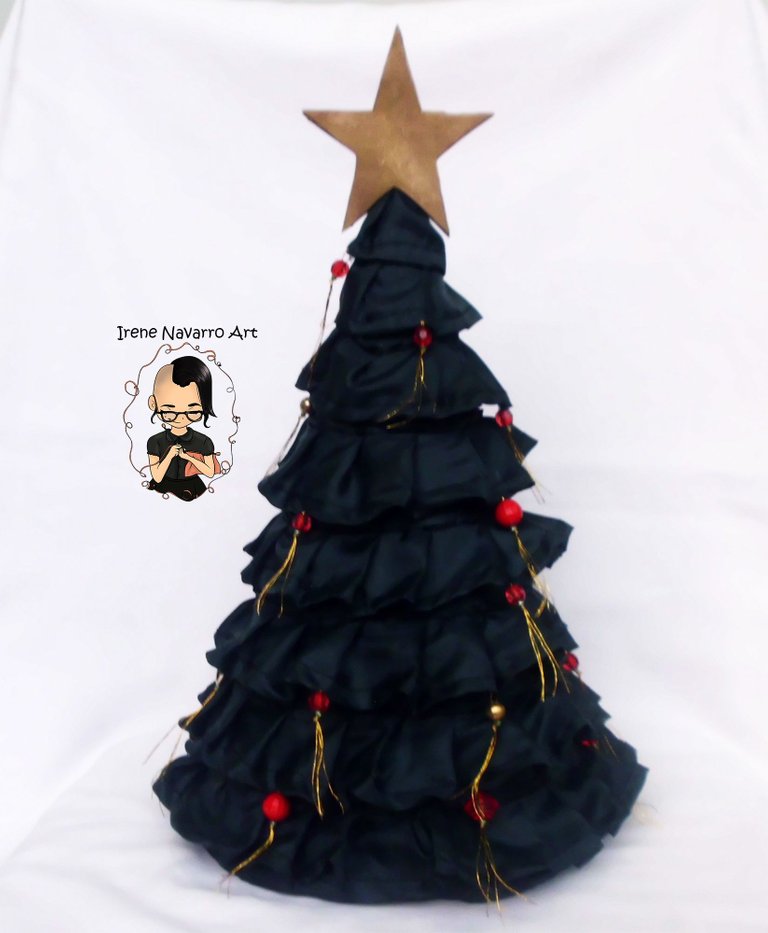
Saludos querida comunidad, el día hoy quiero compartirles un proyecto que a pesar de que me tomó más de lo previsto, me ha llenado de satisfacción, se trata de un arbolito de navidad hecho con tela, les cuento mis motivos y cómo lo hice.
Greetings dear community, today I want to share with you a project that although it took me longer than expected, it has filled me with satisfaction, it is a Christmas tree made with fabric, I will tell you my reasons and how I did it.
Avatar creado en Bitmoji
Motivos / Reasons
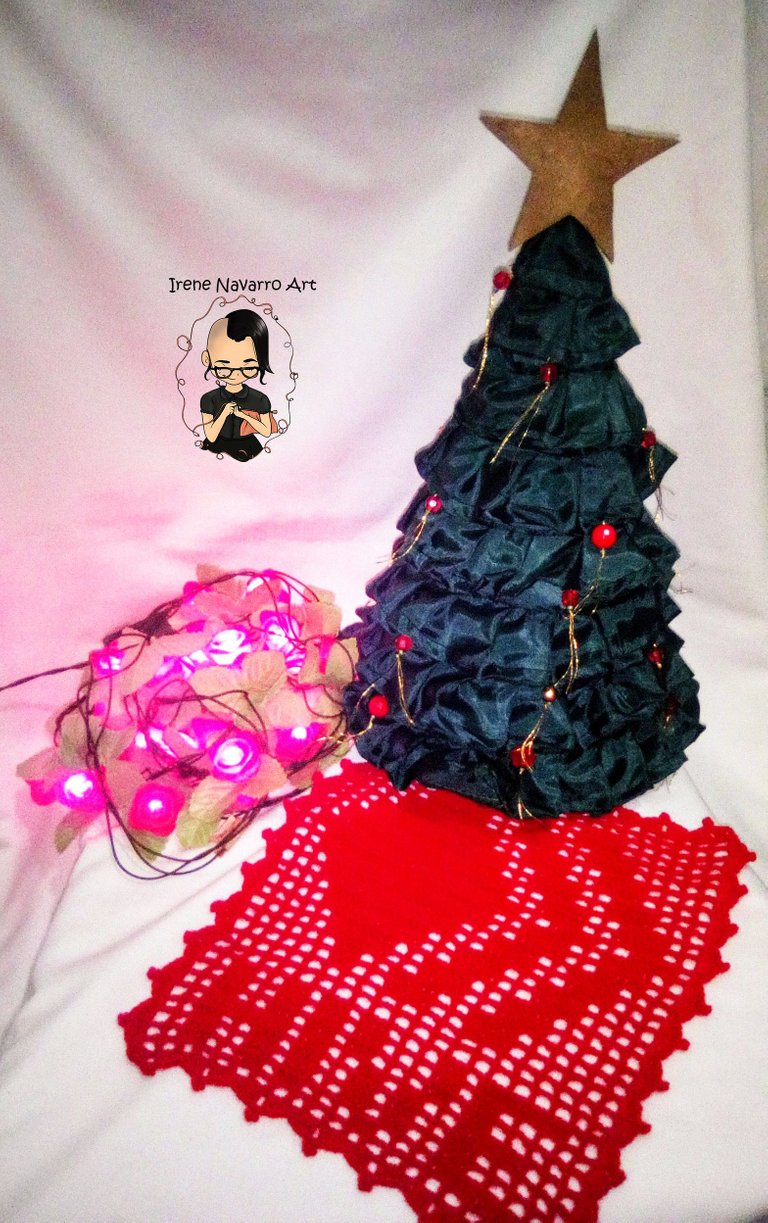
Anteriormente yo era el Grinch en mi casa, es decir, cada vez que mi mamá se emocionaba poniendo sus luces yo la apoyaba, sin embargo, le decía a ella que me parecía que eso era malgastar el dinero, pero desde hace un tiempo mi percepción de las cosas ha cambiado un poco, me alegra mucho ver que mi hijo se entusiasme con la navidad incluso cuando yo nunca le haya enseñado dicha tradición, antes del nacimiento de mi hijo mi mamá solo tenía dos nietos , hijos de mi hermana mayor, ellos antes vivían aquí pero cuando terminaron de construir su casa se mudaron, por eso mi mamá decidido regalarle a sus primeros nietos el arbolito de navidad con todas las decoraciones que ella colocaba en la sala.
Es por esto que mi hijo Rafael en todos sus años de vida años no ha visto que mi mamá coloque un árbol de navidad aquí, ahora mismo la prioridad para mi es la salud de mi hijo, no obstante decidí hacerle un pequeño árbol de tela para colocarlo en una mesita en la sala y que el viera que si estamos alegres de haber llegado a esta época del año juntos como familia, mi hijo se alegró muchísimo cuando lo vio, incluso durante el proceso el ya estaba emocionado dándome sugerencias para hacerlo.
Previously I was the Grinch in my house, that is, every time my mother got excited by putting her lights on I supported her, however, I told her that it seemed to me that this was wasting money, but for a while my perception Things have changed a bit, I am very happy to see that my son is enthusiastic about Christmas even when I have never taught him this tradition, before the birth of my son my mother only had two grandchildren, children of my older sister, they They used to live here but when they finished building their house they moved, so my mother decided to give her first grandchildren the Christmas tree with all the decorations that she placed in the living room.
This is why my son Rafael in all his years of life has not seen my mother place a Christmas tree here, right now the priority for me is the health of my son, however I decided to make a small fabric tree for him. place it on a table in the living room and let him see that if we are happy to have reached this time of year together as a family, my son was very happy when he saw it, even during the process he was already excited giving me suggestions to do it.
Proceso / Process
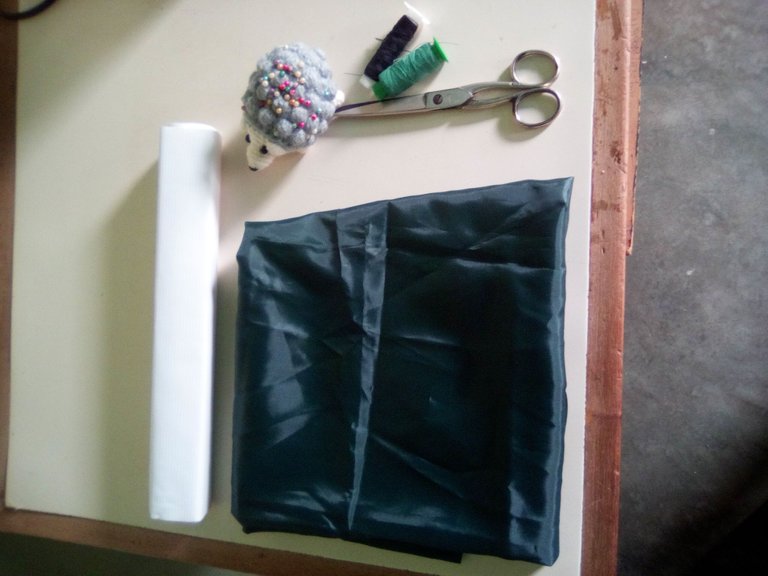
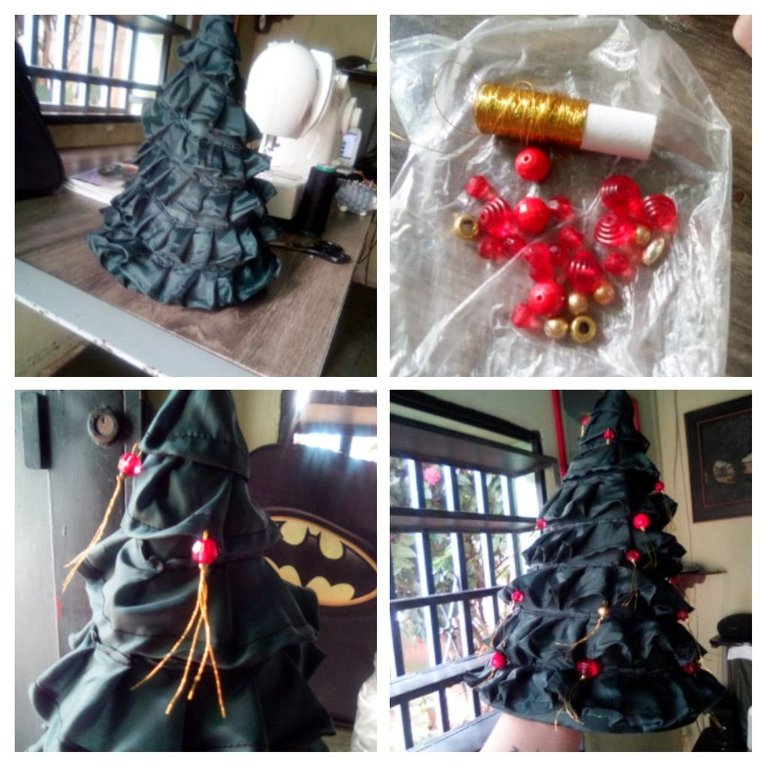
La idea principal al hacer este árbol era utilizar los materiales que tuviera en casa, es decir, reutilizar o reciclar cosas, afortunadamente conseguí una tela verde oscuro así que con eso en mente me dispuse a ver qué otras cosas podían servir como material, encontré un pedazo de pendón publicitario, este material es como una especie de plástico que tiene fibras lo que lo hace parecer más un tela, también usé alambre, hilo de coser, hilo dorado, foami, pintura dorada y unas cuentas de plástico que solían ser de una pulsera de mi mamá.
The main idea when making this tree was to use the materials I had at home, that is, to reuse or recycle things, luckily I got a dark green fabric so with that in mind I set out to see what other things could serve as a material, I found a piece of advertising banner, this material is like a kind of plastic that has fibers which makes it look more like a fabric, I also used wire, sewing thread, gold thread, foami, gold paint and some plastic beads that used to be made of a my mom's bracelet.
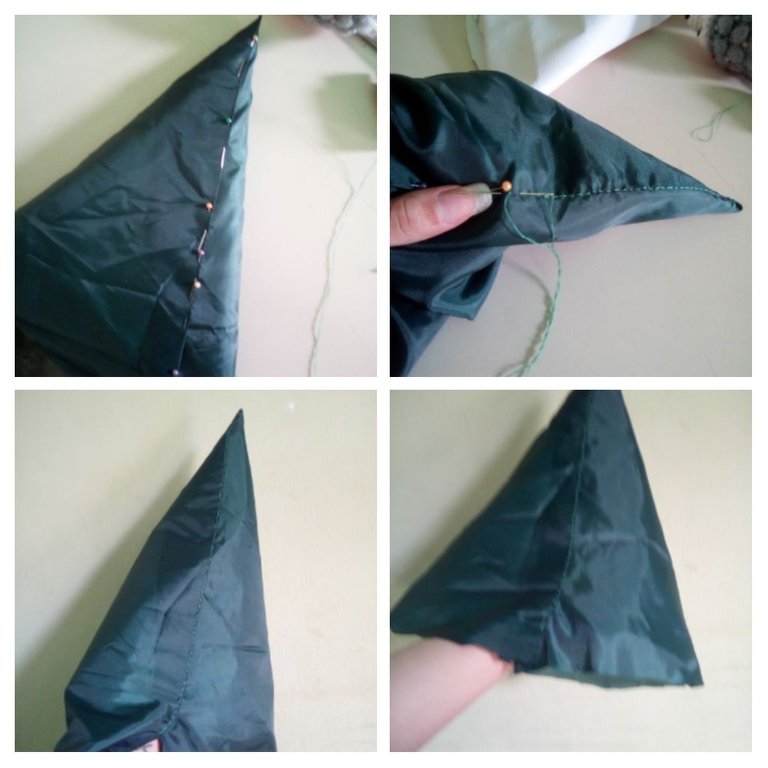
Lo primero que hice fue crear un cono con el material del pendón, aseguré lo bordes colocando alfileres, luego con una cinta métrica, medí 30,5 cm de distancia de punta al borde y corté con una tijera el excedente.
The first thing I did was create a cone with the material of the banner, I secured the edges by placing pins, then with a tape measure, I measured 30.5 cm of distance from point to edge and cut the excess with a scissors.
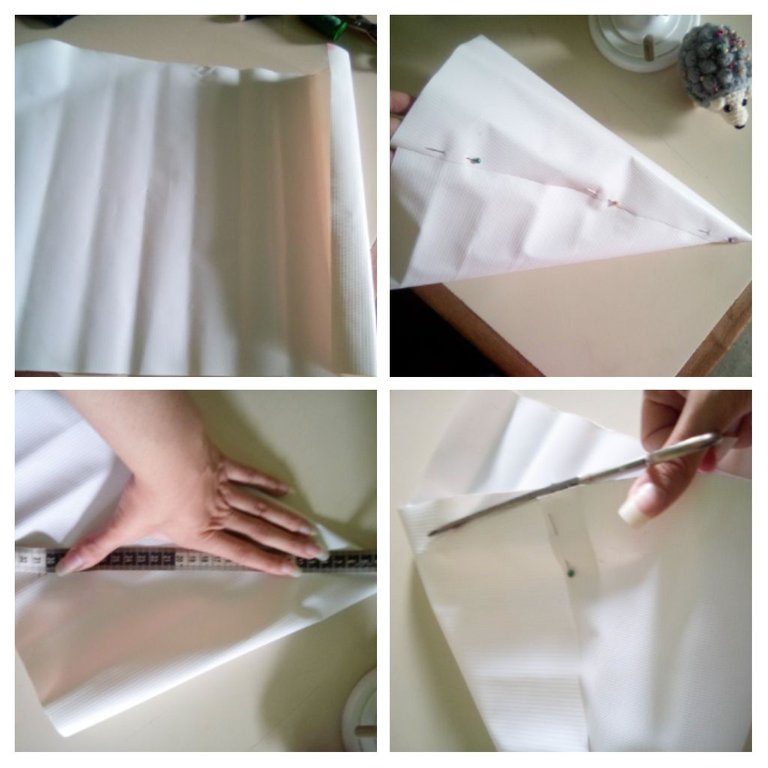
Como les mencionaba anteriormente el material de pendón parece más una tela que un plástico, es bastante pesado y su superficie no es fácil de pegar usando silicón así que lo más apropiado fue coser todo el cono con una costura a mano.
As I mentioned before, the banner material looks more like a fabric than a plastic, it is quite heavy and its surface is not easy to glue using silicone, so the most appropriate thing was to sew the entire cone with a hand seam.
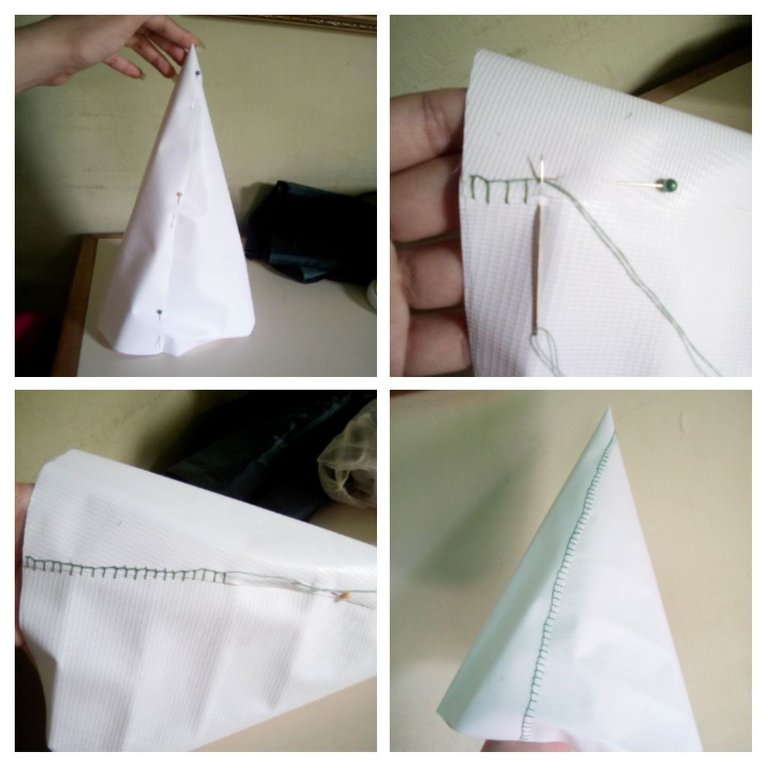
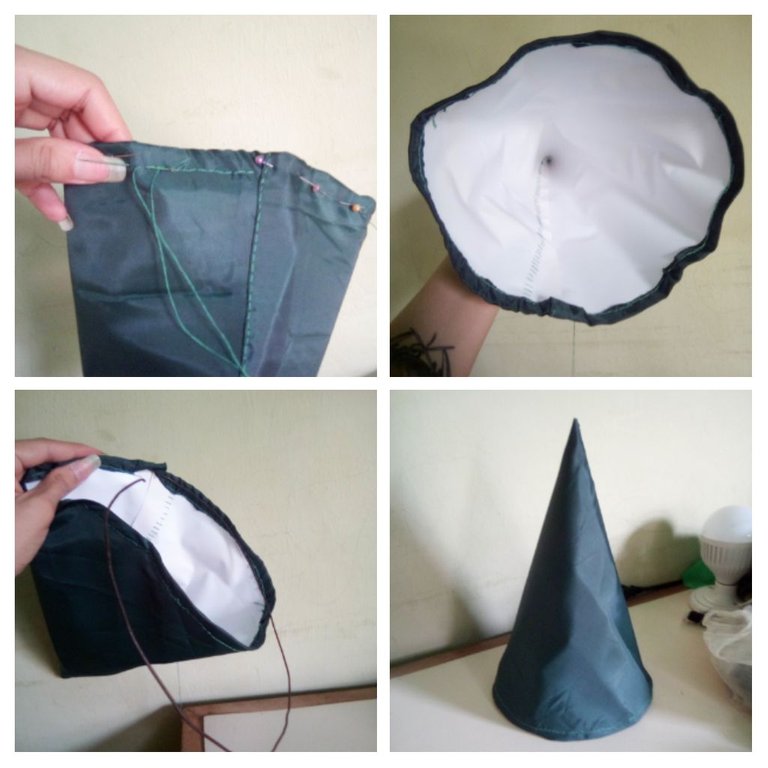
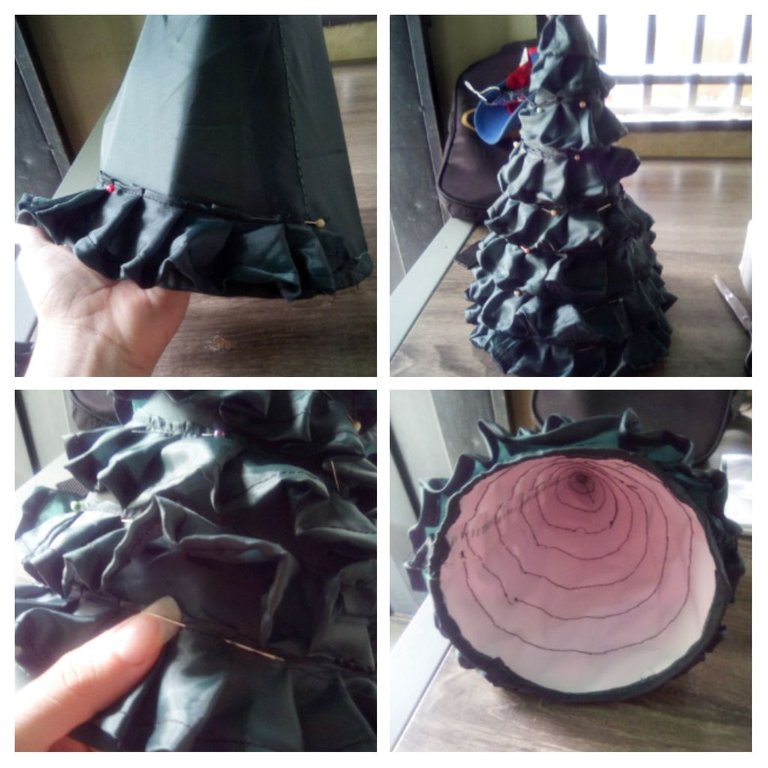
El paso siguiente fue forrar con la tela verde el cono, aseguré la tela con alfileres y realicé una costura lateral dejando un borde de aproximadamente 2 cm en la circunferencia.
The next step was to cover the cone with the green fabric, I secured the fabric with pins and made a side seam leaving an edge of approximately 2 cm in the circumference.
Doblé el borde dos veces hacia la parte de adentro del cono e hice una costura dejando un espacio suficiente para introducir el alambre por toda la circunferencia, luego dejé un pequeño espacio sin coser, introduje el alambre y cerré el espacio continuando la costura del borde.
I folded the edge twice towards the inside of the cone and made a seam leaving enough space to introduce the wire around the entire circumference, then I left a small space without sewing, inserted the wire and closed the space continuing the edge seam.
Con el resto de la tela corté tiras de 7,5 cm en forma de semicírculo, uní las puntas con una costura a máquina para formar una larga tira de tela. Luego hice dobleces en el borde e hice con la máquina una costura recta.
With the rest of the fabric I cut 7.5 cm strips in the shape of a semicircle, I joined the ends with a machine seam to form a long strip of fabric. Then I creased the edge and made a straight seam with the machine.
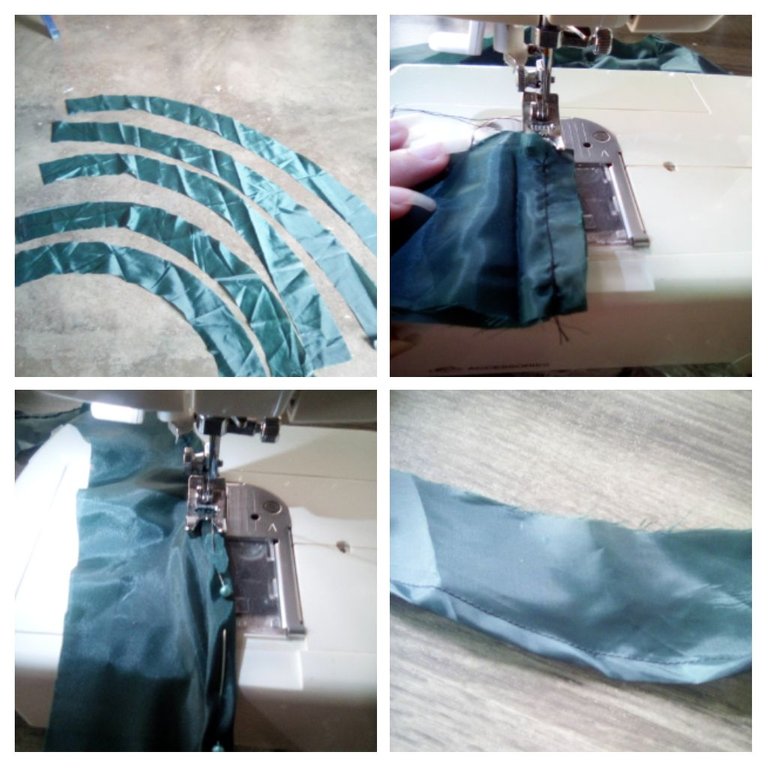
Con alfileres hice un pequeño dobles en el borde de la tela, luego aseguré los pliegues en la tela con alfileres para formar volados, esto me recordó al proceso de hacer volados par una falda, luego hice una costura recta con la máquina.
With pins I made a small fold on the edge of the fabric, then I secured the folds in the fabric with pins to form ruffles, this reminded me of the process of making ruffles for a skirt, then I made a straight seam with the machine.
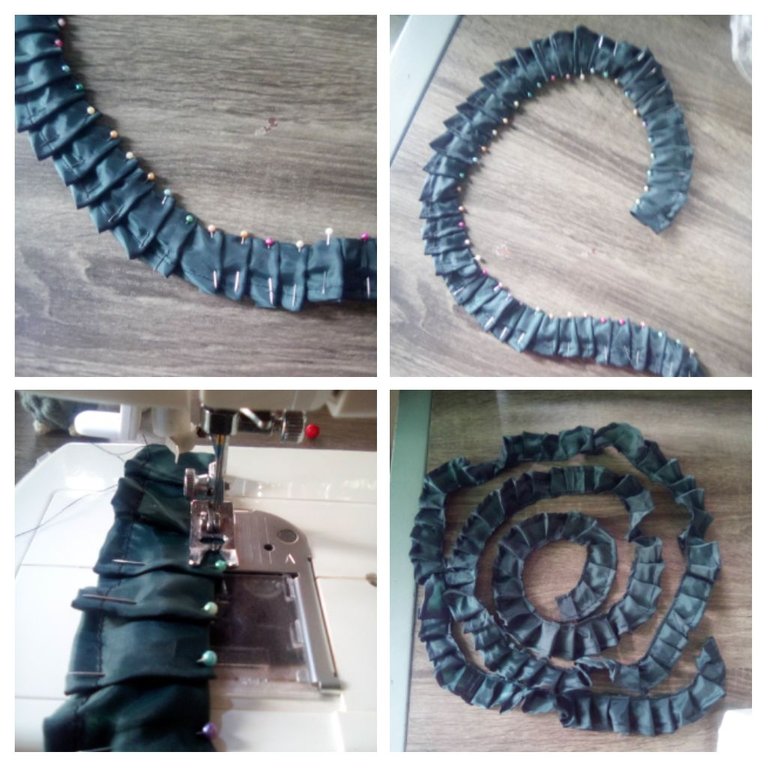
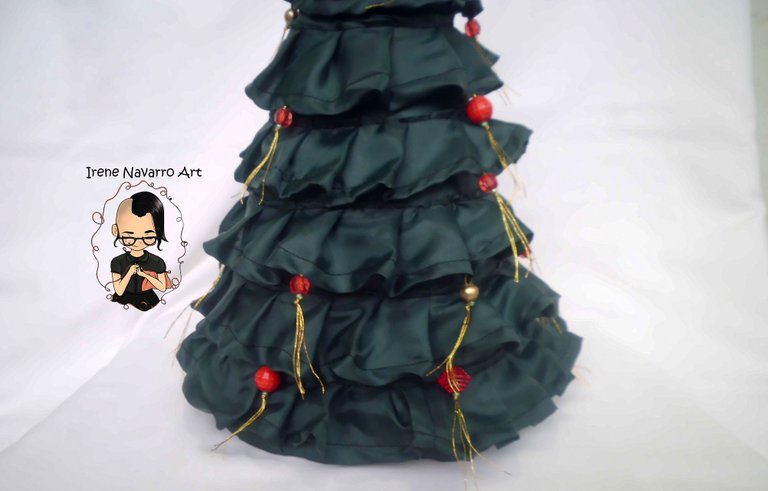
Con los volados hechos en la tela, con alfileres procedí a asegurar la tela al cono siguiendo una línea espiral. Luego procedí a coser la tela a mano haciendo puntadas anchas.
With the ruffles made in the fabric, with pins I proceeded to secure the fabric to the cone following a spiral line. I then proceeded to sew the fabric by hand making wide stitches.
Con hilo dorado el paso siguiente fue coser las cuentas de plástico, para ello dejé un poco del hilo dorado como una especie de fleco, me pareció buena idea que se viera el dorado.
With golden thread the next step was to sew the plastic beads, for this I left a bit of the golden thread as tassels, I thought it was a good idea to show the gold.
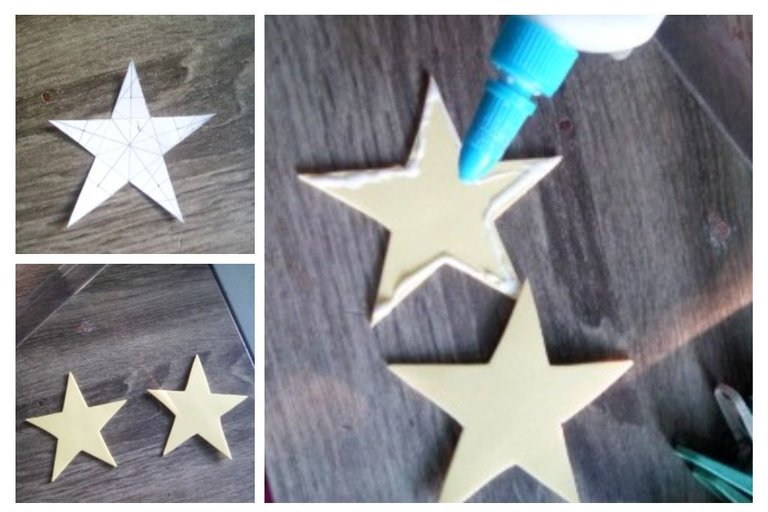
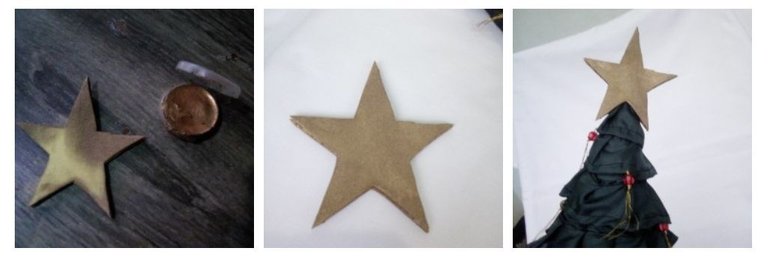
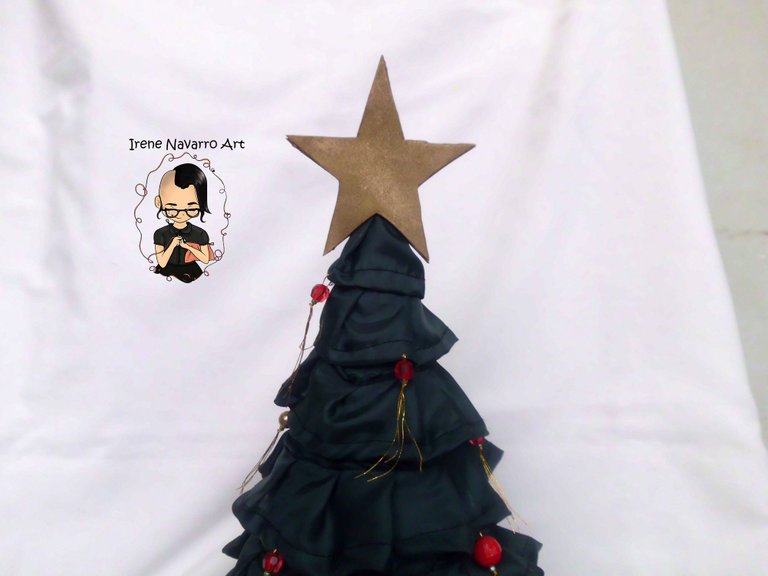
Dibujé una estrella en un papel, corté el dibujo y lo utilicé como plantilla para hacer dos estrellas con foami amarillo, pegué los bordes de ambas estrellas una sobre la otra dejando la parte de abajo sin pegar. Con pintura metalizada en crema de color dorado procedí a pintar la estrella, luego la coloqué en la punta del árbol gracias al espacio sin pegar ente ambas caras de la estrella.
I drew a star on a paper, cut the drawing and used it as a template to make two stars with yellow foami, I glued the edges of both stars one on top of the other leaving the bottom part unglued. With metallic cream paint of a golden color I proceeded to paint the star, then I placed it on the top of the tree thanks to the space without gluing between both sides of the star.
Resultado / Result
Espero les haya gustado y tengan una idea más que poner en práctica en Navidad, yo particularmente he disfrutado mucho el proceso y darle esa alegría a mi hijo no tiene precio.
I hope you liked it and have one more idea to put into practice at Christmas, I particularly have enjoyed the process a lot and giving that joy to my son is priceless.


Avatar creado en Bitmoji
Imágenes tomadas con cámara Casio QV-R100 y teléfono Krip 4, editadas en Adobe Photoshop Cs6
Images taken with Casio QV-R100 camera and Krip 4 and edited in Adobe Photoshop Cs6
Invítenme un Café/Support Me on Ko-Fi

https://ko-fi.com/irenenavarroart
Si deseas apoyar mi contenido también puedes hacer donaciones por el valor de un café en Ko-Fi
If you want to support my art you can also make donations for the value of a coffee (Ko-Fi)

Espero les haya gustado. Les invito a leer mis próximas publicaciones y siempre estaré dispuesta a responder sus preguntas y comentarios, también pueden seguirme y contactarme en cualquiera de mis redes sociales. ¡Muchas gracias!
I hope you liked it. I invite you to read my next publications and I will always be willing to answer your questions and comments, you can also follow me and contact me on any of my social networks. Thank you!
Yo actualmente y desde hace unos años tambien soy mi propia version del Grinch que solo disfruta la comida de la epoca hahhaha!
Te ha quedado muy bonito, me alegra que ya esten comenzando con lo preparativos navideños y que Rafael este feliz por ello. 😊
jajajaja es que la comida es lo que mueve a la gente, muchas gracias, espero este año sea una navidad tranquila a pesar de todo lo que pasa. Un abrazote!
Wow @irenenavarroart your just amazing with how you create and explore
Thank you 😊
Omg realmente muy hermoso, me gustan mucho tus creaciones tienes un gran talento, mucho éxito para ti 🌹
Muchas gracias, pongo el coranzocito en cada una, gracias por comentar ❤️
Te quedó precioso mi niña. Con hilo y agujas podemos solucionar cualquier cosa, tu lo demuestras con este bello arbolito. Un saludo!
Muchas gracias, así es, esas son las herramientas básicas para crear todo un universo de cosas. Un abrazo!
Bello y muy creativo...voy a tomar esta idea para compartirla con el círculo de abuelos del barrio, suguro los abuelos disfrutarán haciendo su arbolito. Gracias por compartir.