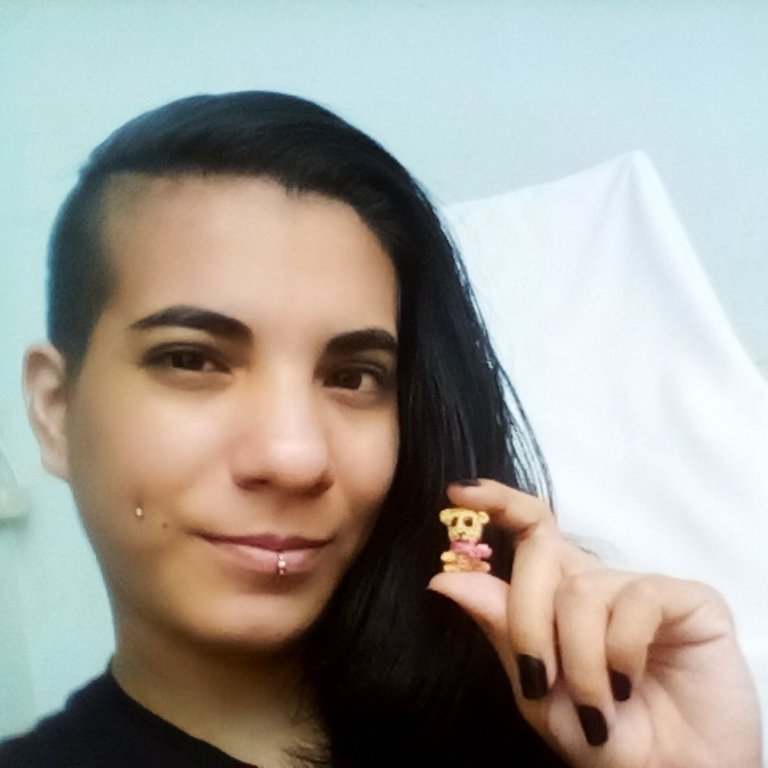
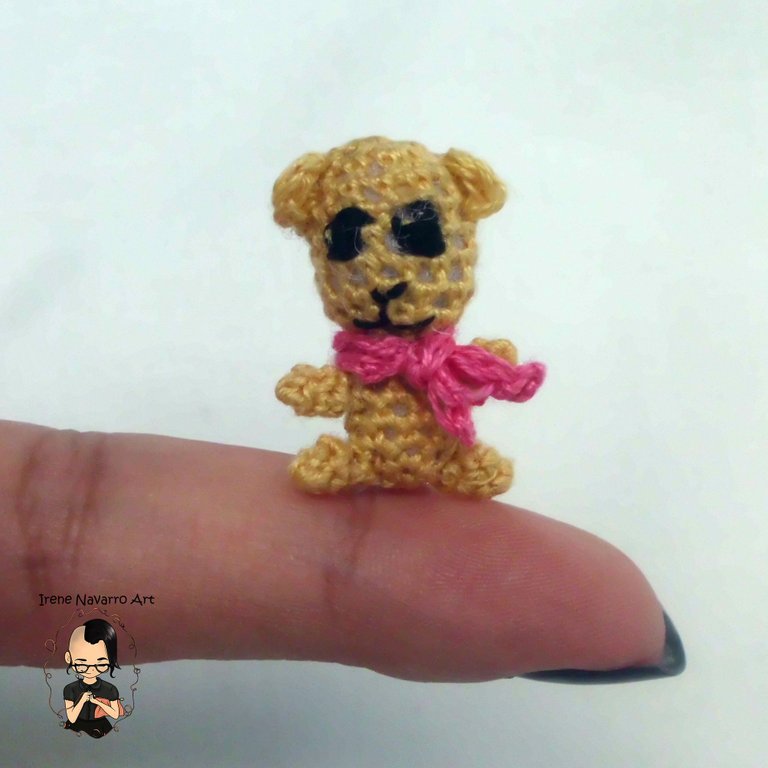
Saludos comunidad, hoy estoy muy feliz de compartir con ustedes algo muy especial para mí, ayer hice mi primer amigurumi en miniatura, hace mucho tiempo cuando apenas me iniciaba en el mundo del crochet vi unas imágenes de una artista asiática que hacía amigurumis miniatura, era impresionante como algunas figuras eran apena del tamaño de una uña de su dedo, yo no he logrado tal proeza pero me siento muy satisfecha con mi resultado, puesto que la mayoría de personas que hacen cosas miniatura utilizan lupas e implemento que le permiten trabajar con un tamaño tan reducido, pero yo solo disponía de materiales convencionales así que decidí improvisar y les cuento como logré hacer este pequeño oso de apenas 2,5 cm o quizá un poquito menos.
Greetings community, today I am very happy to share with you something very special for me, yesterday I made my first miniature amigurumi, a long time ago when I was just starting in the world of crochet I saw some images of an Asian artist who made miniature amigurumis, it was Impressive as some figures were just the size of a fingernail, I have not achieved such a feat but I am very satisfied with my result, since most people who make miniature things use magnifying glasses and implements that allow them to work with a Such a small size, but I only had conventional materials so I decided to improvise and tell you how I managed to make this little bear of just 2.5 cm or maybe a little less.
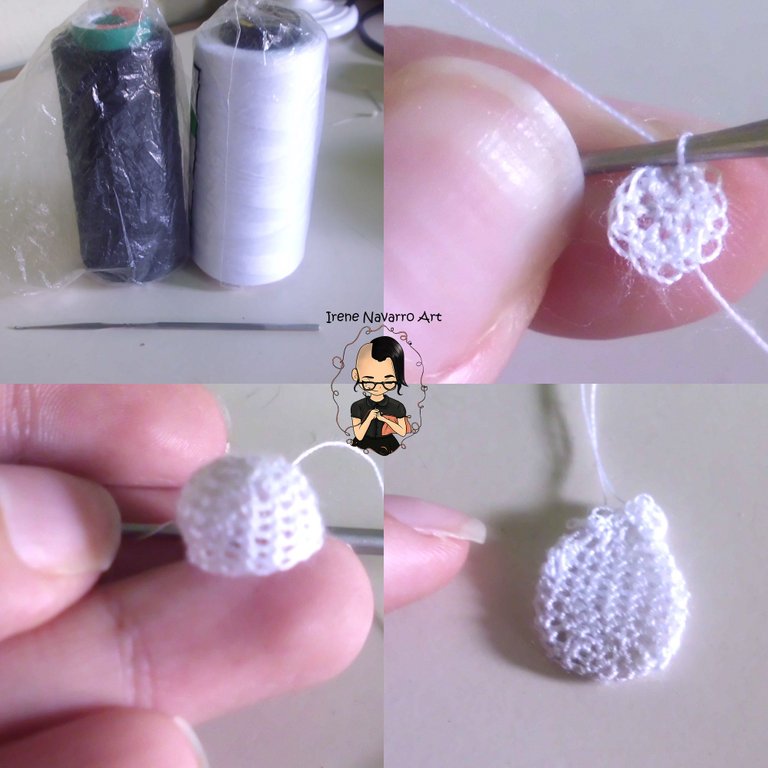
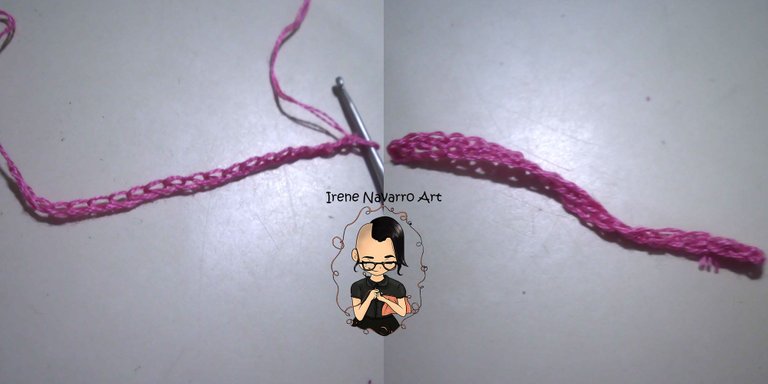
Primer experimento con hilo de coser / First experiment with sewing thread
Una de las primeros problema que enfrenté fue el hilo, porque el hilo acrílico que yo normalmente uso ya bastante delgado y con este he logrado tejer coas muy pequeñas como por ejemplo los dedos de las manos de alguno amigurumis, pero yo sé que para lograr un resultado aun más pequeño tengo que usar un hilo muy delgado, por eso para mi primer experimento utilicé nada más y nada menos que hilo de coser, este hilo me dio un increíble resultado en cuanto lo pequeño del producto, cuando logré cerrar el primer anillo formado por puntos bajos quedé asombrada por lo pequeño que era, sin embargo cuando la esfera que estaba formando estaba avanzada me di cuenta que el tamaño de mi aguja era muy grande aun cuando es la más pequeña que tengo, debido a esto decidí abandonar este hilo de coser, posiblemente para tejer detalles de un amigurumi puede servir, ejemplo algún vestuario, pero como lo que yo quería era un amigurumi el cual pudiera rellenar decidí intentar con otro hilo.
One of the first problems I faced was the thread, because the acrylic thread that I normally use is already quite thin and with this I have managed to weave very small things such as the fingers of the hands of some amigurumis, but I know that to achieve a Even smaller result I have to use a very thin thread, so for my first experiment I used nothing more and nothing less than sewing thread, this thread gave me an incredible result in terms of the smallness of the product, when I managed to close the first ring formed For single crochet I was amazed by how small it was, however when the sphere that I was forming was advanced I realized that the size of my needle was very large even though it is the smallest I have, because of this I decided to abandon this thread of sewing, possibly to weave details of an amigurumi can be used, for example a wardrobe, but since what I wanted was an amigurumi which I could fill, I decided to try another thread.
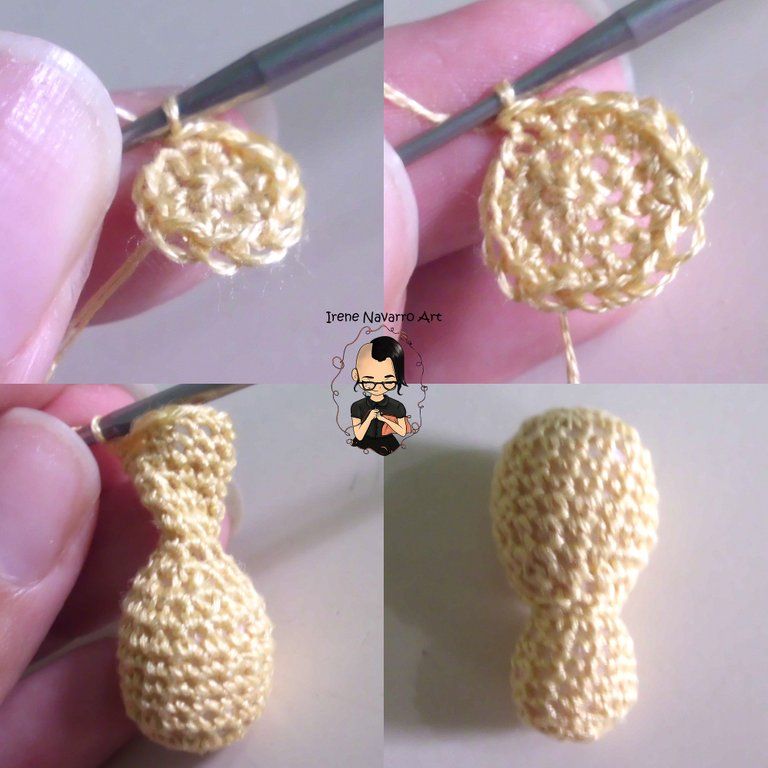
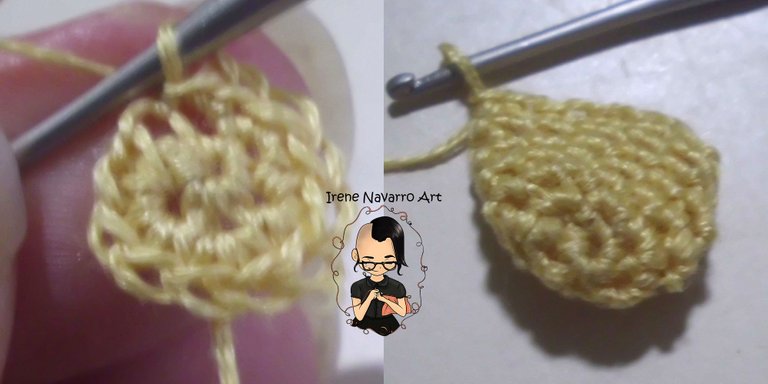
Segundo experimento con hilo para bordar / Second experiment with embroidery thread
En vista de que el hilo de coser no era lo que estaba buscando decidí experimentar con hilo para bordar, este es del que se usa sobre todo para bordar en punto cruz, viene en una presentación que posee 6 hebras, por ello lo que hice fue separar dos hebras y tejer con ellas, el proceso de separar las hebras fue un poco tedioso y en ocasiones se formaron muchos nudos, pero pude hacerlo, luego de que tuve el hilo listo para trabajar decidí tejer el amigurumi, comencé como siempre tejiendo 6 puntos bajos en un anillo, hice 6 aumentos y luego en la ronda siguiente tejí 4 aumentos, para obtener un circulo de 16 puntadas, a partir de este ancho decidí hacer la cabeza tejiendo recto por 6 rondas y luego haciendo diminuciones, hice aumentos hasta llegar a 12 puntadas nuevamente para el cuerpo. Es decir hice la cabeza y el cuerpo juntos como una pequeña pera, pero el resultado aunque fue bueno me pareció un poco grande para lo que yo esperaba, así que también lo deseché.
In view of the fact that the sewing thread was not what I was looking for, I decided to experiment with embroidery thread, this is the one used mainly to embroider in cross stitch, it comes in a presentation that has 6 strands, so what I did was separate two strands and crochet with them, the process of separating the strands was a bit tedious and sometimes many knots were formed, but I was able to do it, after I had the yarn ready to work I decided to make the amigurumi, I started crocheting as usual 6 Single crochets in a ring, I did 6 increases and then in the next round I did 4 increases, to obtain a circle of 16 stitches, from this width I decided to make the head by knitting straight for 6 rounds and then making decreases, I made increases until reaching to 12 stitches again for the body. In other words, I made the head and the body together like a small pear, but the result, although it was good, seemed a bit big for what I expected, so I also discarded it.
Experimento definitivo con hilo para bordar / Ultimate Embroidery Thread Experiment
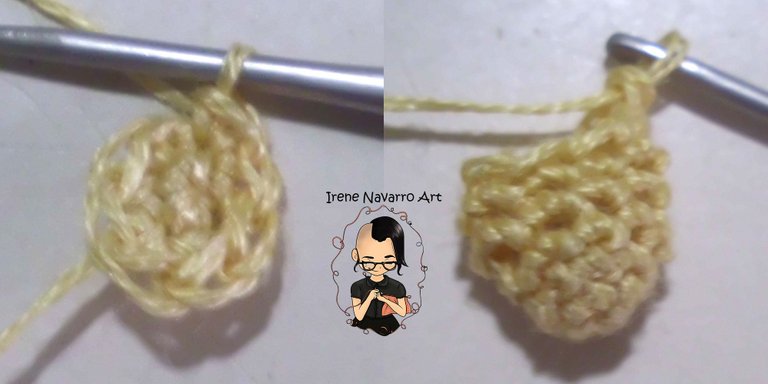
Teniendo el resultado anterior como base, decidí tejer nuevamente con dos hebras de hilo para bordar pero decidí hacer la cabeza y el cuerpo por separado y de esta forma hacerlo aun más pequeño. Para la cabeza tejí 6 puntos bajos en un anillo, tejí 6 aumentos para obtener 12 puntadas, tejí 5 rondas sin aumentos, luego tejí 4 diminuciones, cerré con un punto deslizado y dejé una hebra larga para coser.
Taking the previous result as a base, I decided to work again with two strands of embroidery thread but I decided to make the head and the body separately and in this way make it even smaller. For the head I worked 6 single crochets in a ring, I worked 6 increases to get 12 stitches, I worked 5 rounds without increases, then I worked 4 decreases, closed with a slip stitch and left a long strand to sew.
Para el cuerpo comencé tejiendo 4 puntos bajos en un anillo, tejí 4 aumentos para obtener 8 puntadas, luego tejí 4 rondas si aumentos, cerré con un punto deslizado y dejé una hebra larga para coser.
For the body I started by making 4 single crochets in a ring, I did 4 increases to get 8 stitches, then I did 4 rounds without increases, I closed with a slip stitch and left a long strand to sew.
Las patas y la cola las hice iguales entre sí, comencé tejiendo 4 puntos bajos en un anillo, luego tejí dos rondas in aumentos, cerré con un punto deslizado y dejé una hebra larga para coser.
The legs and the tail I made them equal to each other, I started by making 4 single crochets in a ring, then I worked two rounds in increases, closed with a slip stitch and left a long strand to sew.
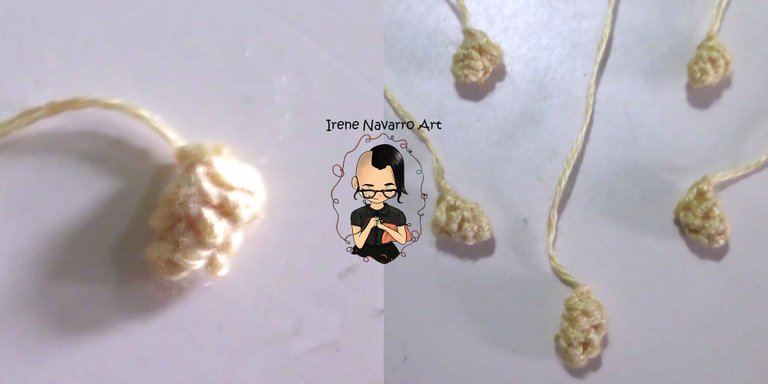
Rellené con fibra y cosí el cuerpo y la cabeza, la patas y la cola la cosí sin rellenó, noté que todavía mi aguja es muy grande, por lo cual me gustaría mucho poder conseguir una aguja de crochet mucho más pequeña para que los agujeros sean más pequeños en la figura, pero aun así con la aguja que tengo se pueden rellenar la figura con fibra aunque se pueda ver un poco de este desde afuera.
I filled with fiber and sewed the body and the head, the legs and the tail I sewed it without filling, I noticed that my needle is still very big, so I would very much like to be able to get a much smaller crochet needle so that the holes are smaller in the figure, but even so with the needle that I have, the figure can be filled with fiber even though you can see a little of it from the outside.
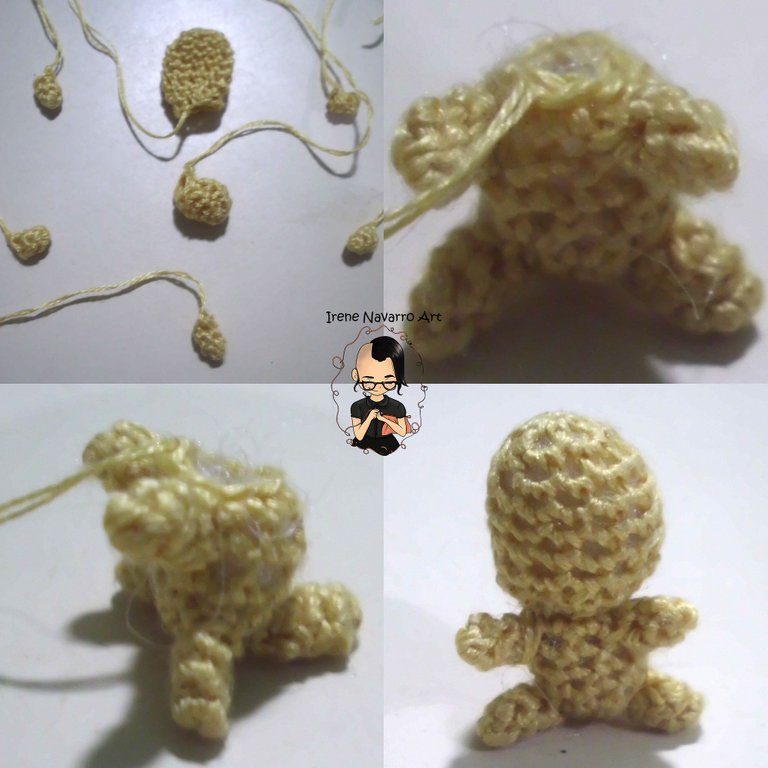
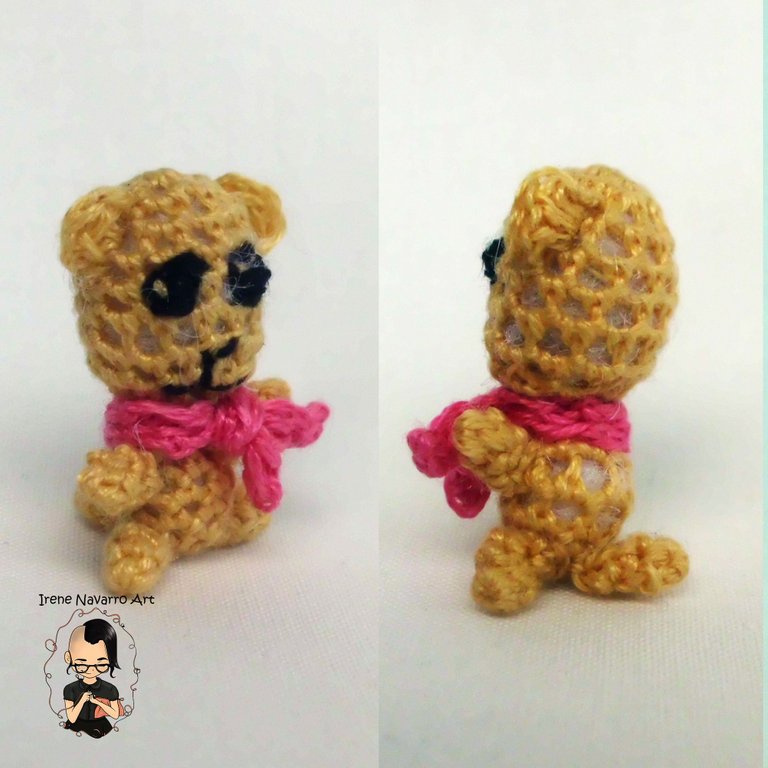
Con el mismo tipo de hilo para bordar pero de color rosado tejí una bufanda formada por 20 cadenas, teniendo 1 punto bajo en cada una de estas, Las orejas las hice tejiendo 1 punto deslizado, 3 puntos alto juntos y 1 punto deslizado. Con hilo de coser color negro bordé lo ojos.
With the same type of embroidery thread but pink in color I knitted a scarf made up of 20 chains, having 1 single crochet in each of these, I made the ears by knitting 1 slip stitch, 3 double crochets together and 1 slip stitch. With black sewing thread I embroidered the eyes.
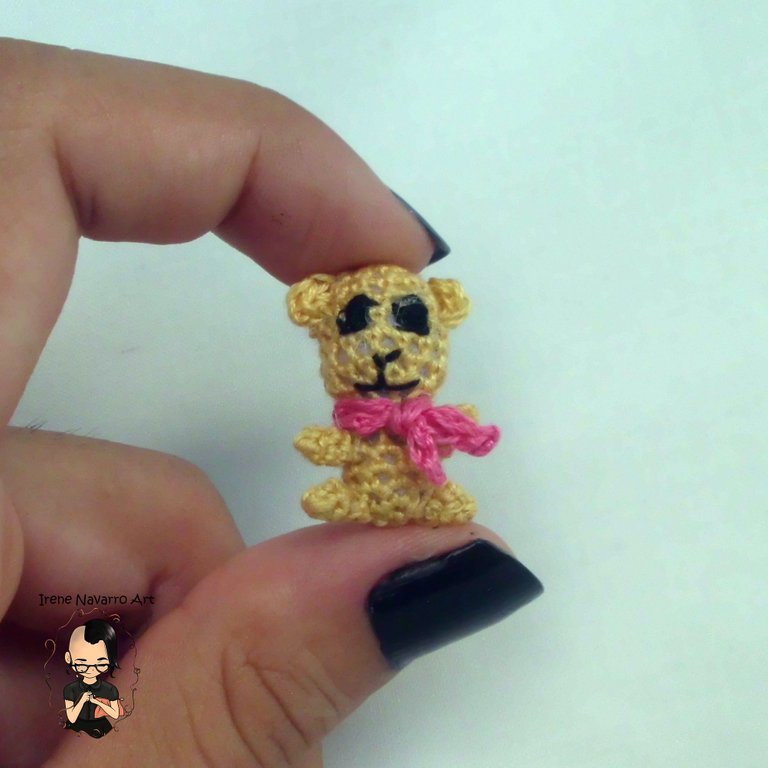
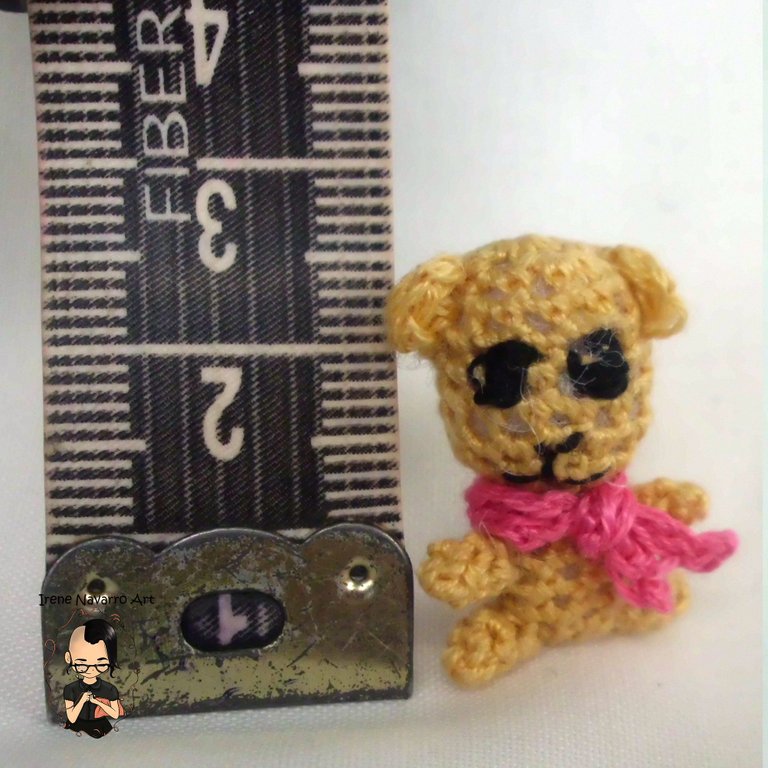
Resultado / Result
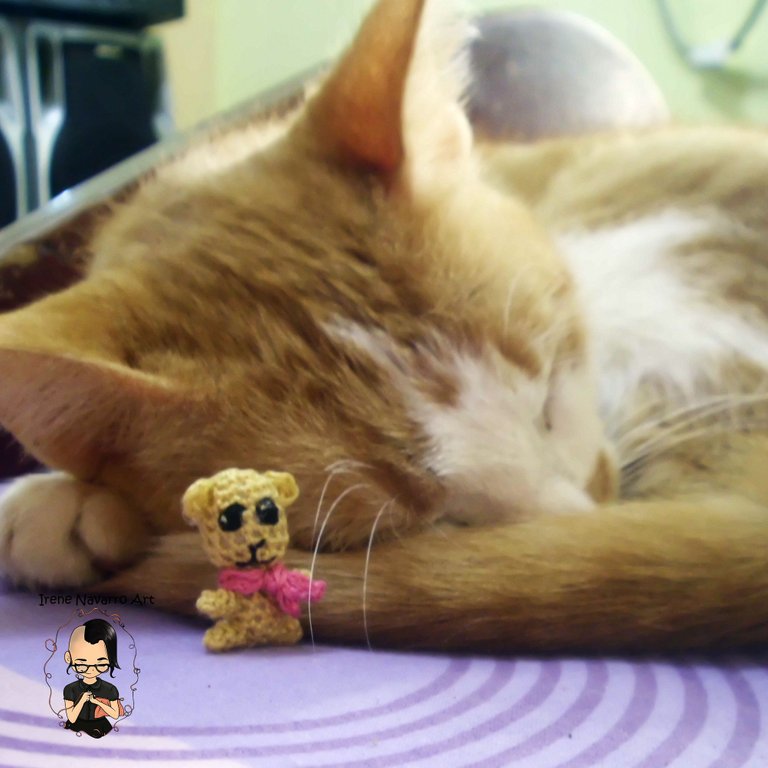
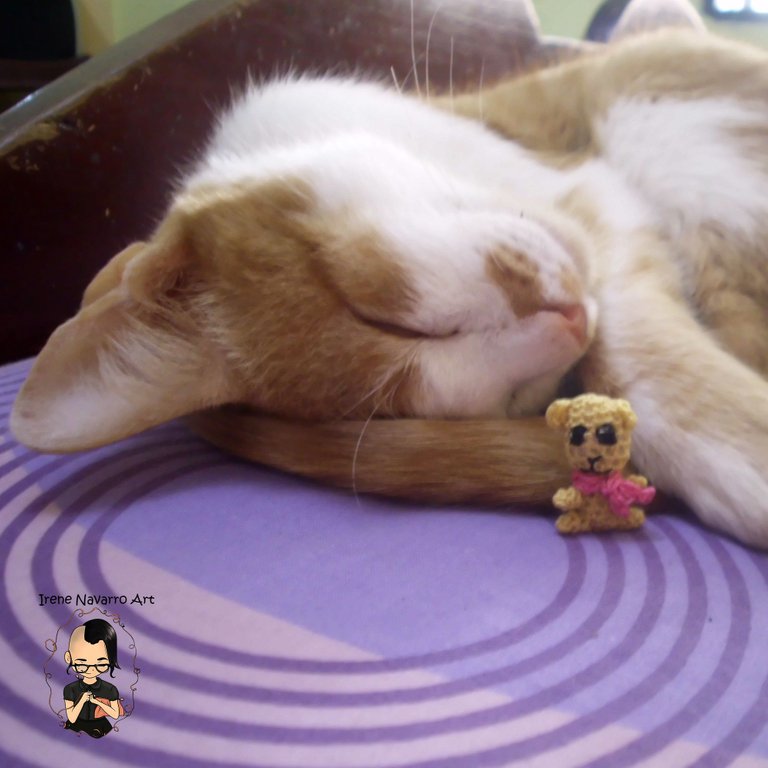
Estoy encantada con el tamaño de este pequeño oso y aunque me llevó casi todo el día trabajando para logar algo tan pequeño estoy muy feliz, miren nada más que chiquito y tierno es, aun no creo que yo haya podido hacer esas patitas tan chiquitas. Incluso aproveché que el gato estaba durmiendo para comparar el tamaño del gato con mi oso miniatura.
I am delighted with the size of this little bear and although it took me almost all day working to achieve something so small I am very happy, look at nothing but small and tender, I still do not think I could have made those little legs so small. I even took advantage of the fact that the cat was sleeping to compare the size of the cat with my miniature bear.
Imágenes tomadas con cámara Casio QV-R100 y teléfono Krip 4, editadas en Adobe Photoshop Cs6
Images taken with Casio QV-R100 camera and Krip 4 and edited in Adobe Photoshop Cs6
Invítenme un Café/Support Me on Ko-Fi

Si deseas apoyar mi contenido también puedes hacer donaciones por el valor de un café en Ko-Fi
If you want to support my art you can also make donations for the value of a coffee (Ko-Fi)
Espero les haya gustado. Les invito a leer mis próximas publicaciones y siempre estaré dispuesta a responder sus preguntas y comentarios, también pueden seguirme y contactarme en cualquiera de mis redes sociales. ¡Muchas gracias!
I hope you liked it. I invite you to read my next publications and I will always be willing to answer your questions and comments, you can also follow me and contact me on any of my social networks. Thank you!
Hola @irenenavarroart , muy hermosa la miniatura, y le hace honor a su nombre realmente una miniatura. ¿cuánto tiempo te llevó hacerla?. Saludos!
Hola Muchas gracias, bueno me tomé toda la tarde hasta la noche, porque tuve algunas interrupciones y obviamente era experimentado, ahora que se que ese hilo funciona podría durar menos, pero estoy en la búsqueda de una aguja pequeña para ver que tanto se puede mejorar el acabado de un tejido en ese tamaño. Saludos!
Ok gracias, se lleva su tiempo, me imagino es un trabajo de mucha paciencia por lo pequeño de las piezas que vas tejiendo. Bendiciones!
Es un osito tan cuchi. Excelente trabajo en miniatura, saludos
Muchas gracias :D Saludos!
I think it would be difficult to make.
yeah it is difficult because of the visual effort that must be made
Wow nice job am kinda surprise on how you were able to do such a tinny doll anyways thanks for sharing
Thank you very much for your comment, it is very small I am also surprised haha
😂 yeah and it was so cute ☺️
The rewards earned on this comment will go directly to the person sharing the post on Twitter as long as they are registered with @poshtoken. Sign up at https://hiveposh.com.
Wow, te quedó hermoso!!! un reto más logrado. Toda la tarde haciéndolo, pero de verdad valió la pena. Yo no lo voy a intentar, mis ojos no me ayudan en tan formidable proeza. Pero disfruto mucho viendo tan tiernos y adorables muñecos!
Muchas gracias @tibaire ciertamente e un gran esfuerzo visual pero el resultado me encantó :)
Aaaaw, que ternurita de osito el que has hecho amiga, sin duda eres increible en este arte, todo mi respeto y admiracion! 💖
Muchas gracias, que tu digas eso es muy importante para mi <3
Look how to how tiny it is!! I’m glad you found a better thread to work with. It’s really adorable and love the scarf you added. I like how you took it’s photo by the cat. This is incredible work @irenenavarroart. I love how you always challenge yourself to try new things ~
Do you plan on doing more miniature projects? I hope so!! 😃
Thank you very much I would like to do more miniature projects but I will wait to get a much smaller needle than the one I have :)
You’re welcome!
Got it! 👌🏽😉
Wow es extremadamente pequeño. que buen trabajo, tienes un gran talento.
Muchas gracias, es un ositito :D
Hola @irenenavarroart
Que cuchi está miniatura, está entre mi lista de proyectos tejer una miniatura. Realmente es un proyecto de paciencia.
Gracias por compartir los experimentos.
Seguramente estarás haciendo otras miniaturas.
Saludos
Ohh muchas gracias @jicrochet espero te animes pronto a hacerlo :D
¡Hola!, ese mini osito quedó curioso. Una vez tejí con hilo de bordar (anchor) y no me agradó el resultado. Quizá no era el momento para pasar a ligas mayores (jaja). Terminé renegando porque el crochet no era el adecuado respecto al grosor del hilo. ¡Buen trabajo! y gracias por compartirnos tú experiencia.
Mucha gracias, en efecto necesito un aguja mas pequeña para que los agueros no sean tan grandes, pero en general me gustó el resultado, es del mismo tipo de hilo anchor :)
Jajajajaja me encantó este mini osito Irene, me quedé ciega de solo pensar cómo pudiste tejer algo con forma y tan chiquito jajaja. Te quedó increíble, felicitaciones ❤️.
Muchas gracias jajajaja si ya yo también estoy media ciega XD