
Hi Hiveians! Today is my second participation to the #NeedleWorkMonday challenge! In this post, I'm going to show how I made this beautiful and simple Macrame keychain. 😀
To make this is really fun. I would like to sell them to people as well. After I took the first photo of this post, I even gave the fifth keychain from it to the mother of my friend Miguel, on his 10th birthday! :-)
Materials needed:
66cm yarn/string
As many pearls as you like. (Under five or six) I usually prefer to use one or two
Two straight pins and...
Love!
To make these, it only takes about three or four minutes depending on how long you would like your keychain to be. In the beginning, I wasn't very good at doing Macrame. I made two other keychains of Macrame with a different technique than this one, but they aren't very good. I'm glad I have improved with Macrame so now I can go forward. Anyway, making these keychains were fun for me and I hope they are for you too. Let's dive in! :-D
(If the process in the images is hard for you to understand, don't worry! Under them I wrote what to do in text if that's better). 🙂
Process:
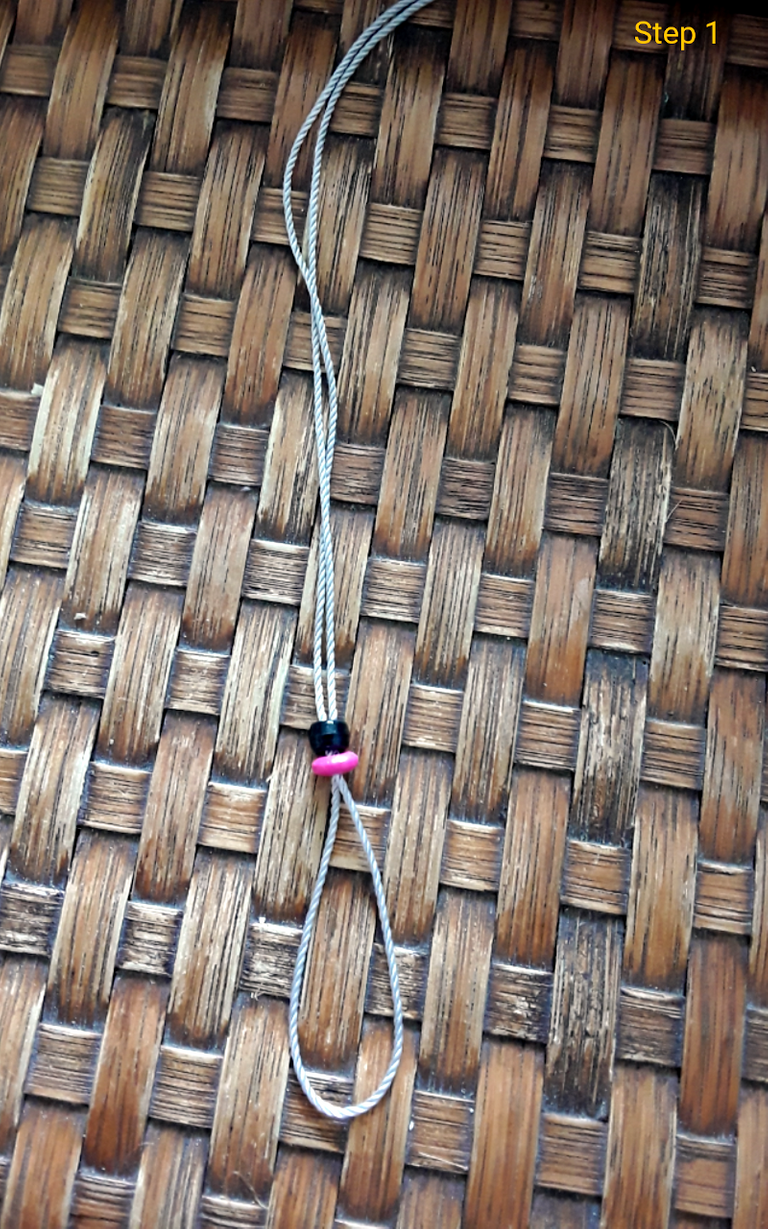
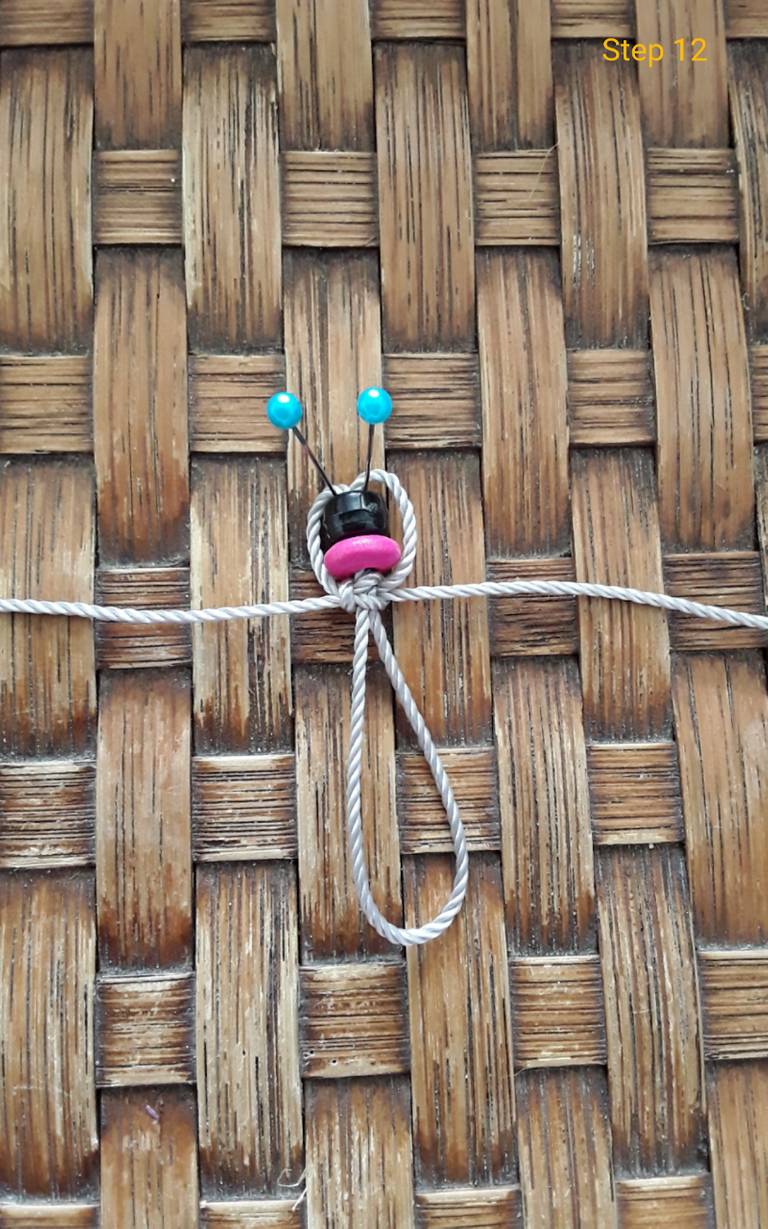
First, take your 66cm string and fold it this way shown in the first step image above. Then, you can put the pearls! Just so you know, the loop under the pearls shows the length that the finished keychain will be. That's what we'll be working on. :-)
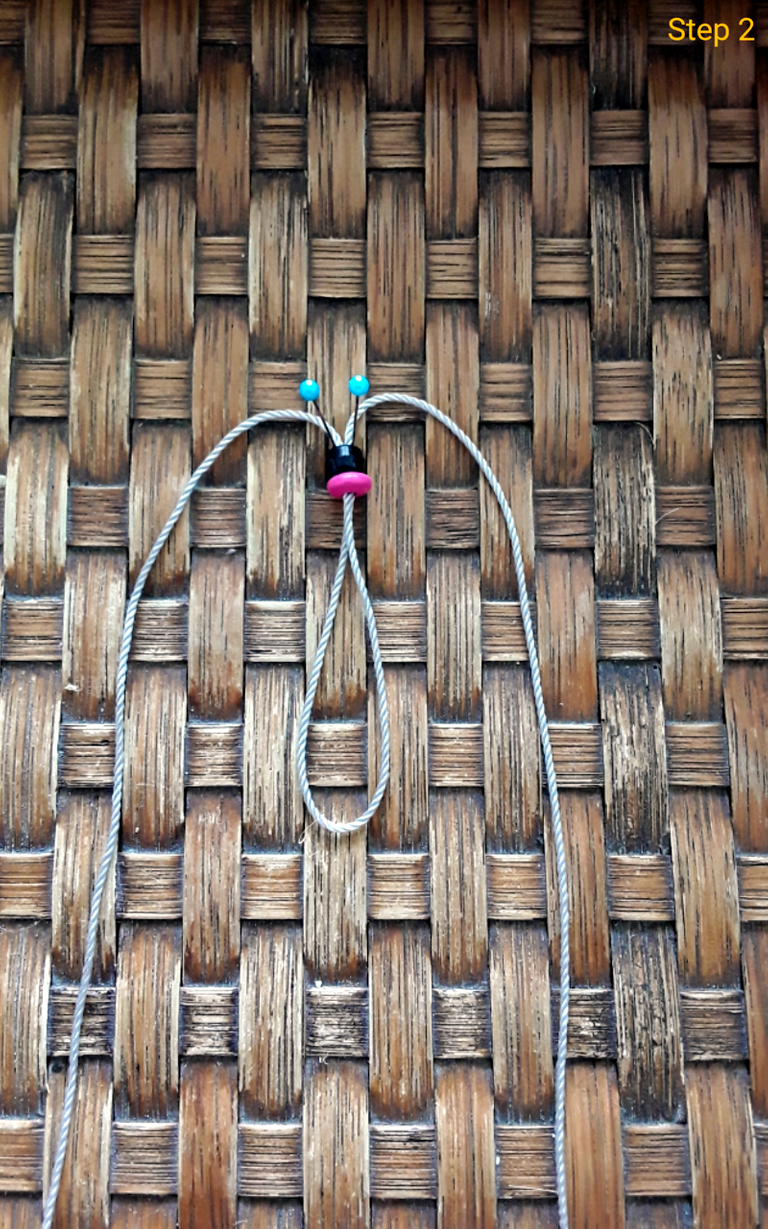
Next, stick the two straight pins into whatever you're working on. It's better to work on top of something soft that the pins can go through. For example, a pin cushion or something like that. (It doesn't have to be a pin cushion if you don' have one). The straight pins are there so that it's easier to make and so the project doesn't move around so much.
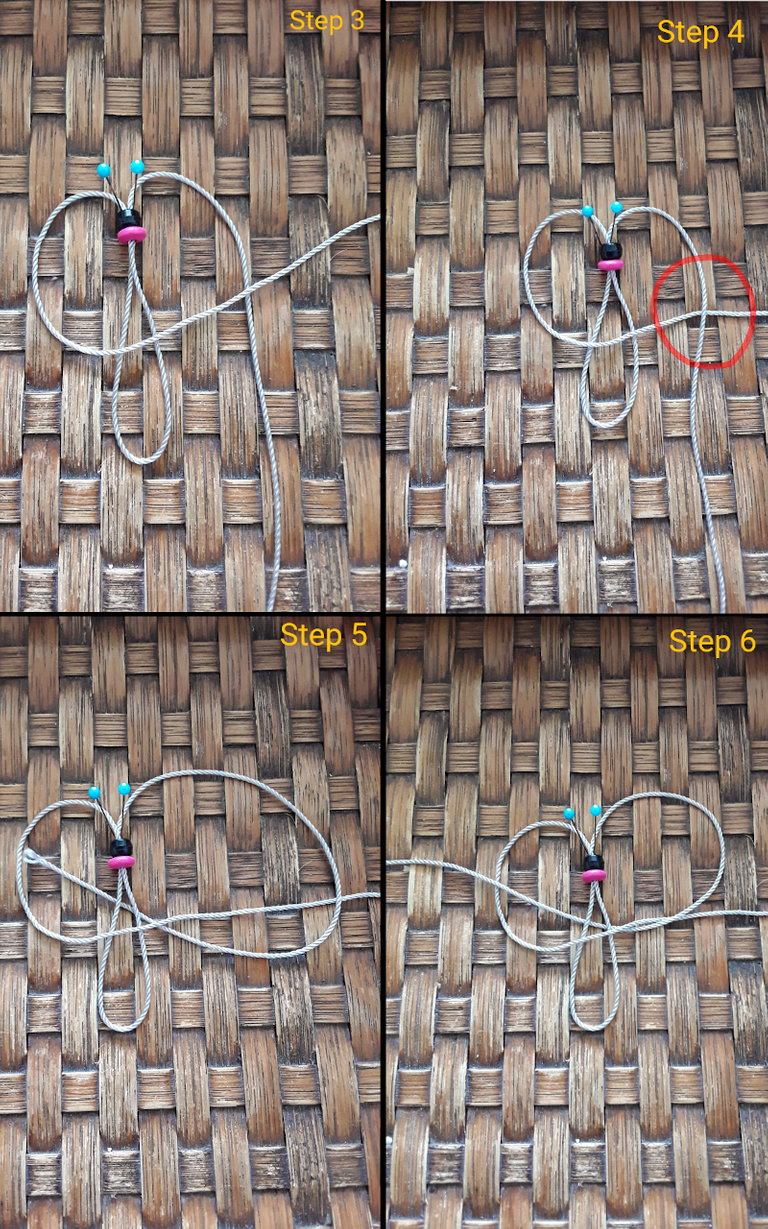
For step three, we will start with the strand on the left side and put it on top of all the others.
Step four, take the strand on the far right side and place it on top of the one that was sitting on him earlier.
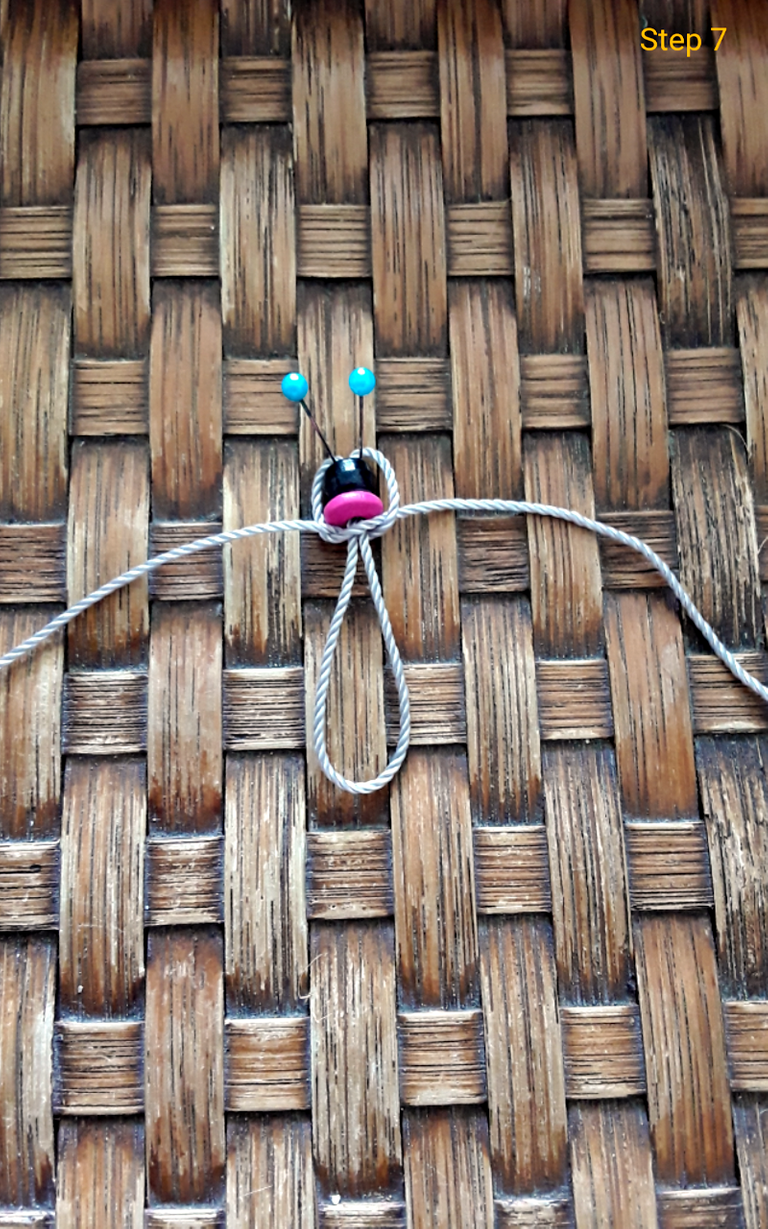
Then take the far right strand and make it go under the bottom loop and pull it out of the left side loop and pull so that it looks the way it does in step seven.
Now, we shall repeat these same steps, but only starting with the right strand. Earlier we did it starting with left, now the other side. I repeated the steps with the right side for you guys:
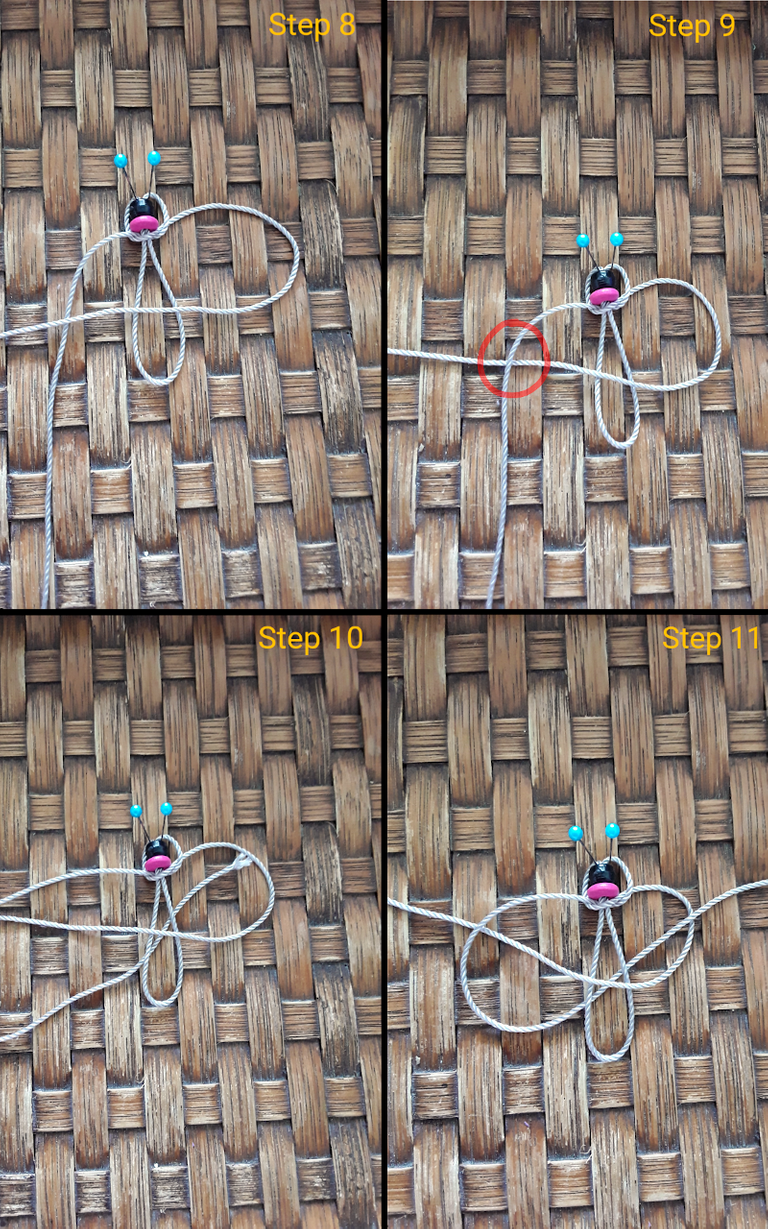
Starting with the far right strand, place it over all the others.
Then, put the far left strand over the right one.
Next, take the far left strand and tuck it under the bottom loop and take it out of the far right loop and pull.
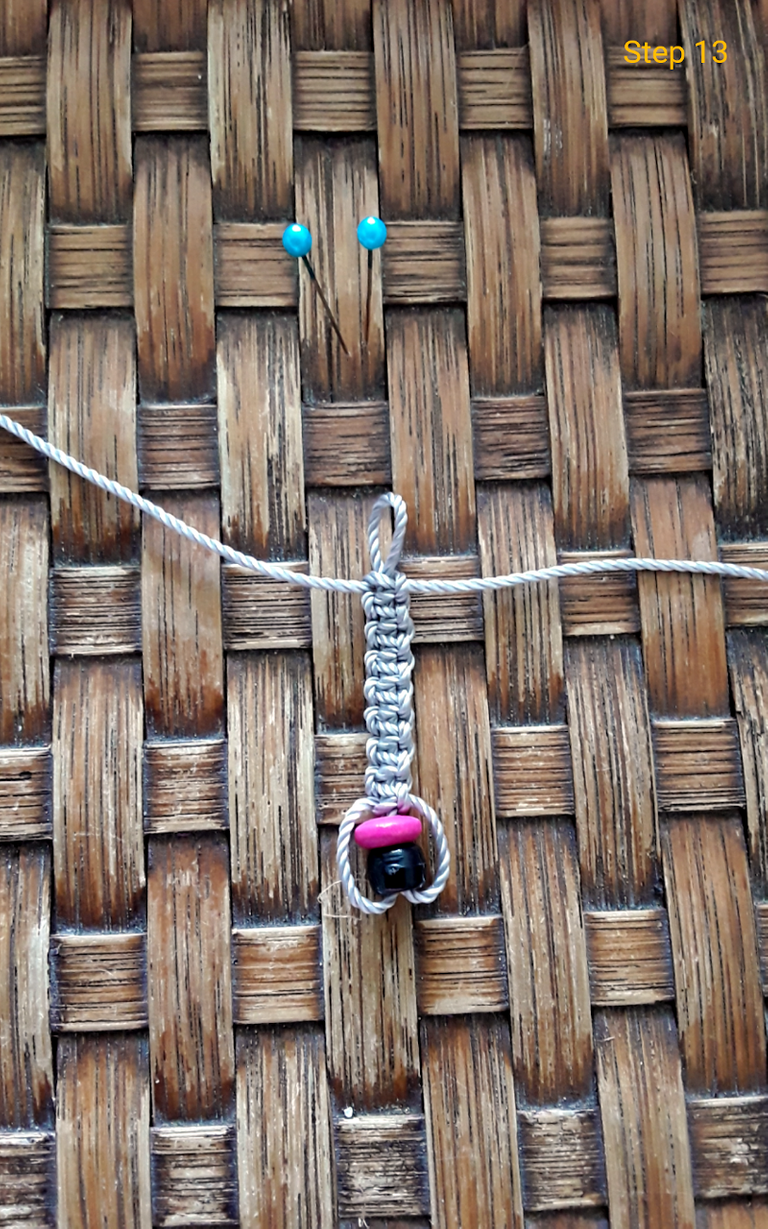
Repeat these steps and if possible try to always switch sides and keep track when doing the tecnique; left, right, left, right, left, right, until you eventually run out of space. When you do, you can take it out of the straight pins and cut off the excess yarn.
When you cut off the excess yarn, take a lighter and slightly burn it so your work does not open up. If you're a kid like me, it's better to ask your parents or any other adults to help you with this. Sorry I didn't get any photos of that part, because my mama did it quickly and my camera did not get any good photos in that moment, they were too blurry to tell what's happening..
Here are the results! 😀
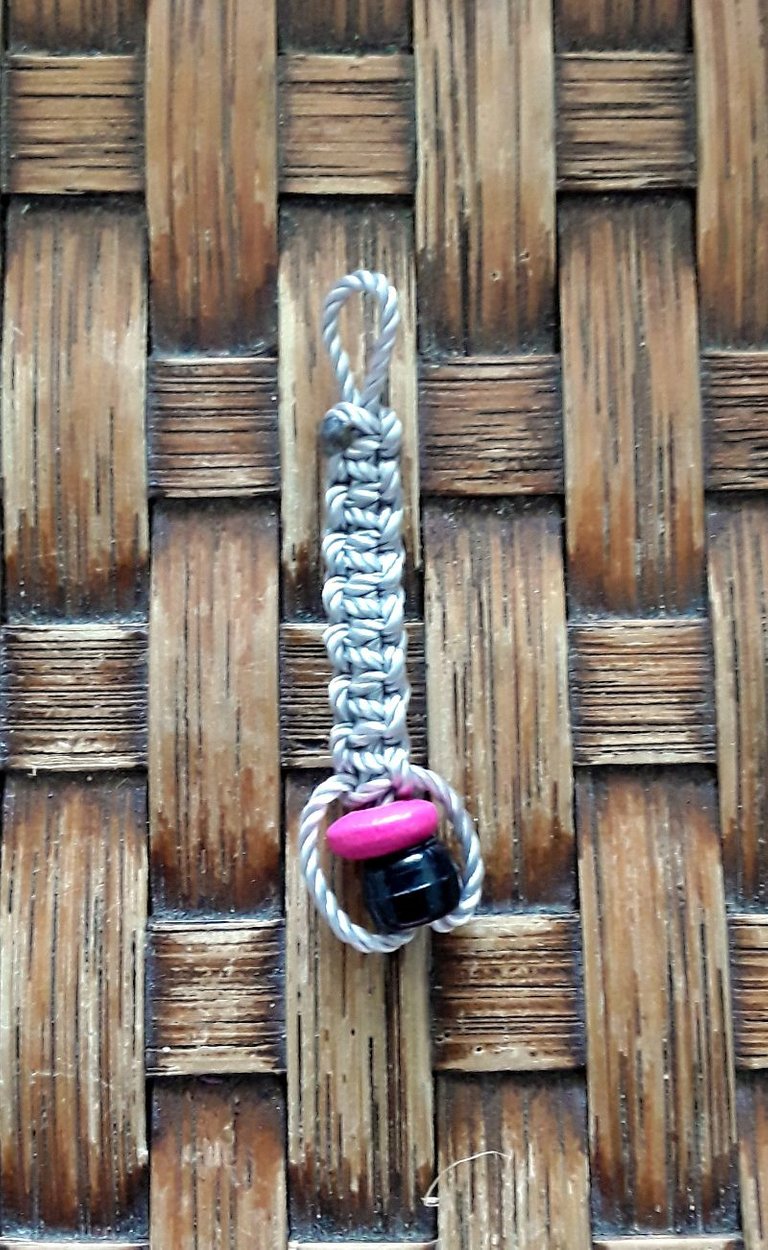
What do you think? I really like this technique because it's super simple and cute. Maybe I can make many other things with it. Thank you very much to my mama for teaching it to me and I'm happy to show you guys what I do. :-)
Thank you for viewing this post, I hope you enjoyed it and enjoy the rest of your day!

Please like, share and comment below, let's make this world a better place! 😄😄😄
Oh macrame keychain, thank you for sharing it. It's one on my wish list that I wanted to try. And the steps you presented along the pictures are easy to understand. I imagined you can make a bracelet too with this. Or a decoration on the headband.
Anyway, they are all cute. God bless you.
Thank you so much! You made my day. Those are very lovely ideas too. I make bracelets out of rubber bands and pearls and many other materials because I like to sell them. I have never thought using of this technique to make a bracelet. Maybe I can try that next. Thank you @jonalyn2020! 😊
These are lovely! I like that they don’t take much time to make and you can customize the colors. Thanks for sharing your project with us and I hope you’re able to sell many of these. 😉
Thank you so much @crosheille! Maybe later today I'll go to the pool and sell some. Thank you for your comment! 😀
You’re very welcome ~
Beautiful job weldon @jadeaca thanks for sharing 😊
Thank you very much @smilestitches and you're welcome! 😀
Beautiful. I have learnt something good today. I'll try mine out
Thanks for stopping by. That sounds great, enjoy! 😁
This macrame keychain is really usefull, i used for everything, nice tutorial!
Your welcome and thank you very much for your compliment! 😀