Hi creative stitching at Hive
All women, in order to look beautiful and gorgeous, carry our makeup bag in our handbag.
This case should be comfortable and allow us to carry what we need to be successful in any situation. As well as versatile and flirty.
This is how my project this time is a cosmetics or makeup case.
As Mother's Day is approaching, it is an ideal and useful gift for that special date.

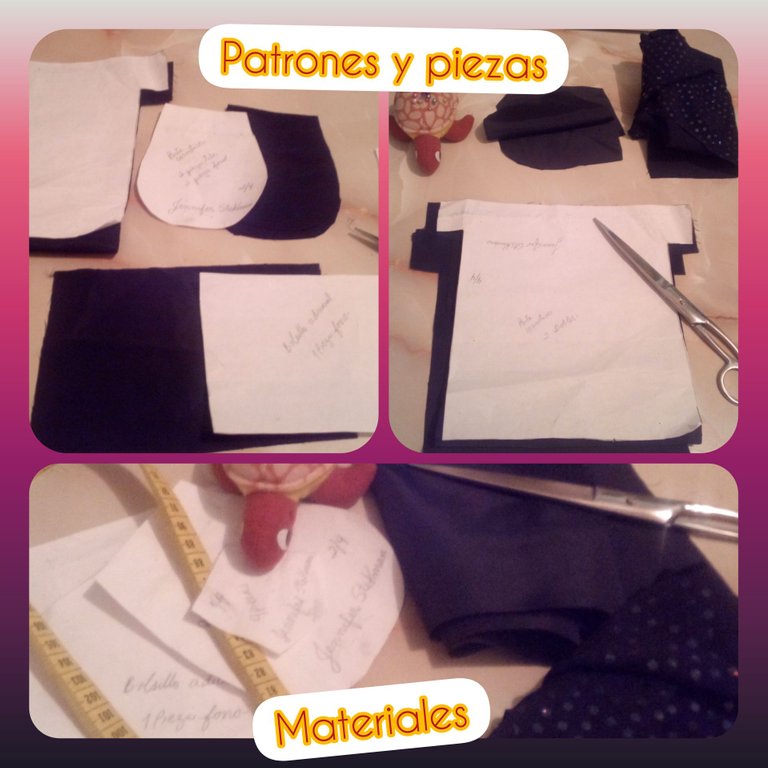
**Materials
- Piece of printed fabric
- Piece of lining
- Zipper
- Paper
- Pencil
- Thread
Making.
Here are the pieces of the patrol
From each piece, cut two pieces, one in lining and one in fabric.
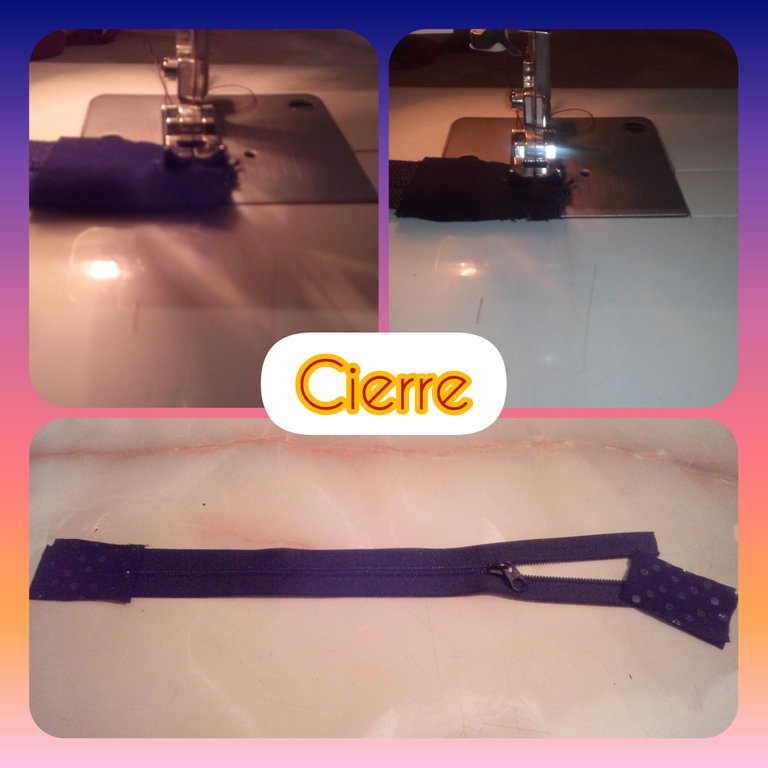
- First assemble the zipper, joining the large piece in fabric and lining.
- Sew the ears of the case

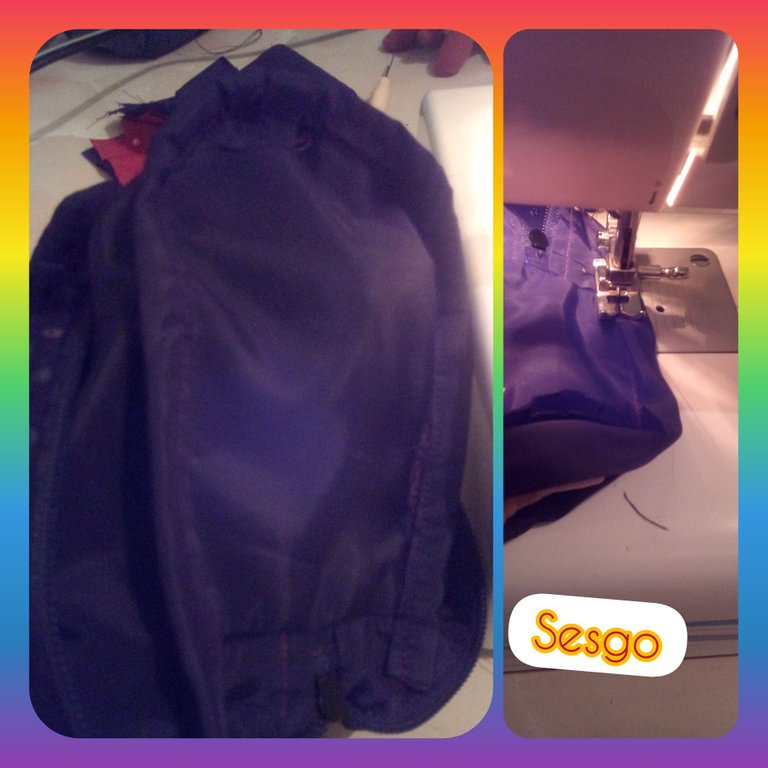
- Sew the sides. Taking into account that the ear should also be placed on each side.
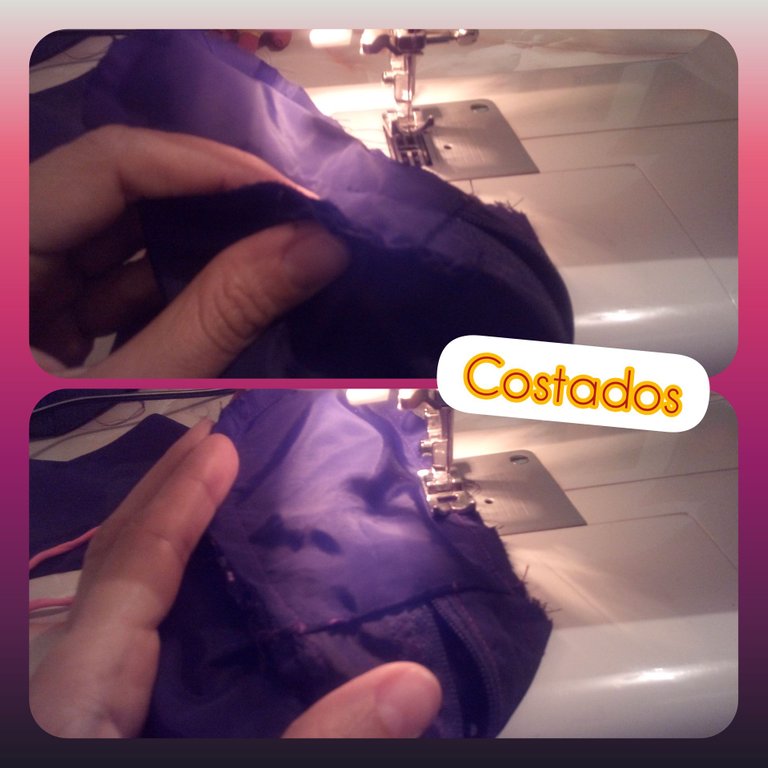
- Close the sides, be careful, and be aware to leave a clip at the back or at the bottom, which allows you to adjust the piece and give more amplitude.
- Sew bias binding on the inside seam so that the seam allowances are not visible.
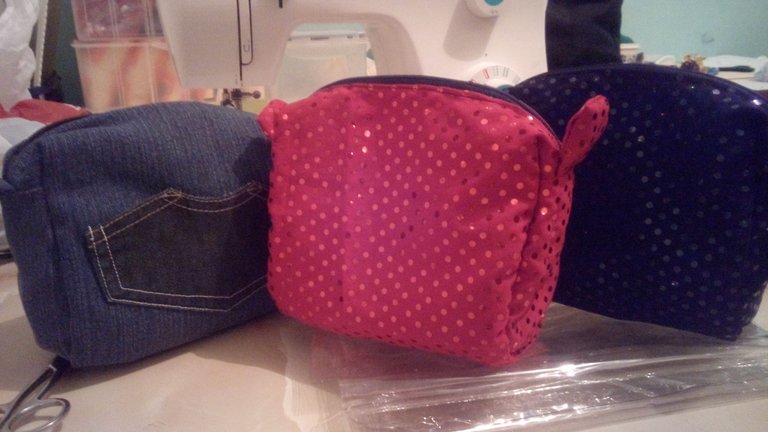
Ready case finishing, I made a black one, a red one and a jean one by recycling some old pants.
When there is creativity we can create nothing is impossible, with this project I have been wanting to make a bigger bag with this design.
So I will leave it for my next project. Thanks for reading, leave your comments and let me know what you think.

Translated with www.DeepL.com/Translator (free version)
Español
Hola creativos de la costuras en Hive
Todas las mujeres, para vernos bellas y hermosas llevamos dentro de la cartera nuestro estuche de maquillaje.
Este estuche debe ser cómodo que nos permita llevar lo necesario para salir airosas en cualquier situación. Asi como tambien, versátil y coqueto.
Es asi, como mi proyecto en esta oportunidad es un porta.cosmeticos o estuche de maquillaje.
Acercándose el dia de la madre, es un regalo ideal y útil para esa fecha especial.
Materiales
- Retazo de tela estampada
- Retazo de forro
- Cierre
- Papel
- Lápiz
- Hilo
Elaboración
Aqui las piezas del patrol
De cada pieza, cortar dos una en forro y otra en tela.
- En primer lugar se monta el cierre, uniendo la pieza grande en tela y forro
- Coser las orejas del estuche
- Coser costados. Tomando en cuenta que se debe colocar también la oreja, en cada lado
- Cerrar costados, hay que tener cuidado, y estar pendiente para dejar una pinza en la parte de atras o en la parte de abajo, que permita ajustar la pieza y dar mas amplitud.
- Coser sesgo en costura interna de forma que no se vean las uniones.
Listo estuche terminando, realice uno negro, otro rojo y otro de jean reciclando unos pantalones viejos.
Cuando existe creatividad podemos crear nada es imposible, con este proyecto he quedado con ganas de hacer un bolso mas grande con este diseño.
Asi que lo dejare para mi próximo proyecto. Gracias por leer, dejar tu comentario indicando que te pareció.

Congratulations @jennynas! You have completed the following achievement on the Hive blockchain and have been rewarded with new badge(s) :
Your next target is to reach 900 upvotes.
You can view your badges on your board and compare yourself to others in the Ranking
If you no longer want to receive notifications, reply to this comment with the word
STOPSupport the HiveBuzz project. Vote for our proposal!