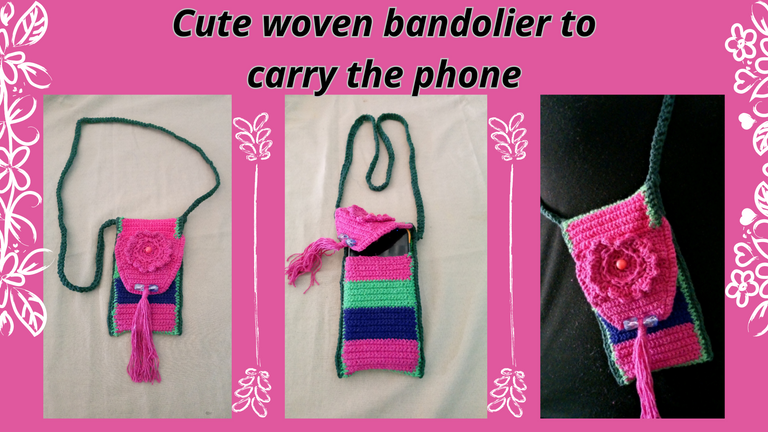

Hola queridos amigos amantes de los hilos y las agujas, el día de hoy quiero compartir con ustedes un bolso bandolero que tejí para llevar mi teléfono celular.
Hay algunos días y digo algunos porque nosotras las mujeres a menudo queremos llevar un bolso lleno de cosas, como maquillaje, colonias, cremas, entre muchas cosas jajajá soy una de esas, pero últimamente me ha hecho falta algo más cómodo para salir rápido a comprar algo cerca de casa sin tener que dejar el teléfono, ya que no podemos salir sin estar comunicados tampoco queremos llevar el teléfono en las manos, tampoco mezclarlo en la bolsa de las compras.
He estado Pensando en hacerme algo bastante práctico y cómodo, así que me hice este accesorio que me ha resultado bastante cómodo, además que combina muy bien con muchas cosas que quiera lucir, son colores muy vivos que hacen más lindo el día y no es que no me gusten los colores más casuales de hecho tengo pensado hacerme uno más casual para otras ocasiones.
Para mi gusto a menudo llevo un accesorio de acuerdo al momento, me encanta trabajar en proyectos de bolsos y carteras, este bolso bandolero es uno de los proyectos que me propuse hacer para cambiar un poco mi estilo de bolsos y llevar un accesorio más cómodo y liviano, con este ritmo de vida que llevamos tenemos que fijarnos en como hacer del día un día menos expresado en mi ciudad, está haciendo una ola de calor donde lo menos que quiero es llevar tantas cosas en una gran cartera y no es fácil porque siempre las necesito, pero para ir en metro, autobuses o taxis se me ha hecho más fácil de llevar.
Y aunque no parezca no lo dejo todo en casa, aquí puedo llevar un pañuelo, un labial, el dinero, la tarjeta del banco y un compacto jajaja, todo esto se puede llevar sin que mi bolso tejido pierda la forma, pues yo los coloco en la parte de atrás del teléfono y nada se nota.
Sin más de esta amena conversación, amigos, les voy a mostrar un poco de como hice mi porta celular.
Las fotografías que verán a continuación, fueron tomadas con mi teléfono modelo TECNO SPARK GO 2023.

Hello dear friends who love yarn and needles, today I want to share with you a shoulder bag that I knitted to carry my cell phone.
There are some days and I say some because we women often want to carry a bag full of things, like makeup, colognes, creams, among many things hahaha I am one of those, but lately I have been missing something more comfortable to go out quickly to buy something close to home without having to leave the phone, since we can not go out without being communicated we do not want to carry the phone in our hands, nor mix it in the shopping bag.
I have been thinking about making myself something quite practical and comfortable, so I made this accessory that has been quite comfortable, plus it combines very well with many things I want to wear, they are very bright colors that make the day more beautiful and it's not that I do not like the more casual colors in fact I plan to make me a more casual one for other occasions.
For my taste I often carry an accessory according to the moment, I love to work on projects of bags and purses, this shoulder bag is one of the projects that I proposed to do to change a little my style of bags and carry a more comfortable and light accessory, with this pace of life we lead we have to look at how to make the day a day less expressed in my city, is doing a heat wave where the least I want is to carry so many things in a big bag and it is not easy because I always need them, but to go on the subway, buses or cabs has become easier to carry.
And although it may not look like it I don't leave everything at home, here I can carry a handkerchief, a lipstick, money, the bank card and a compact hahaha, all this can be carried without my woven bag losing its shape, because I put them on the back of the phone and nothing is noticeable.
Without more of this pleasant conversation, friends, I'm going to show you a little bit of how I made my cell phone holder.
The pictures you will see below were taken with my TECNO SPARK GO 2023.

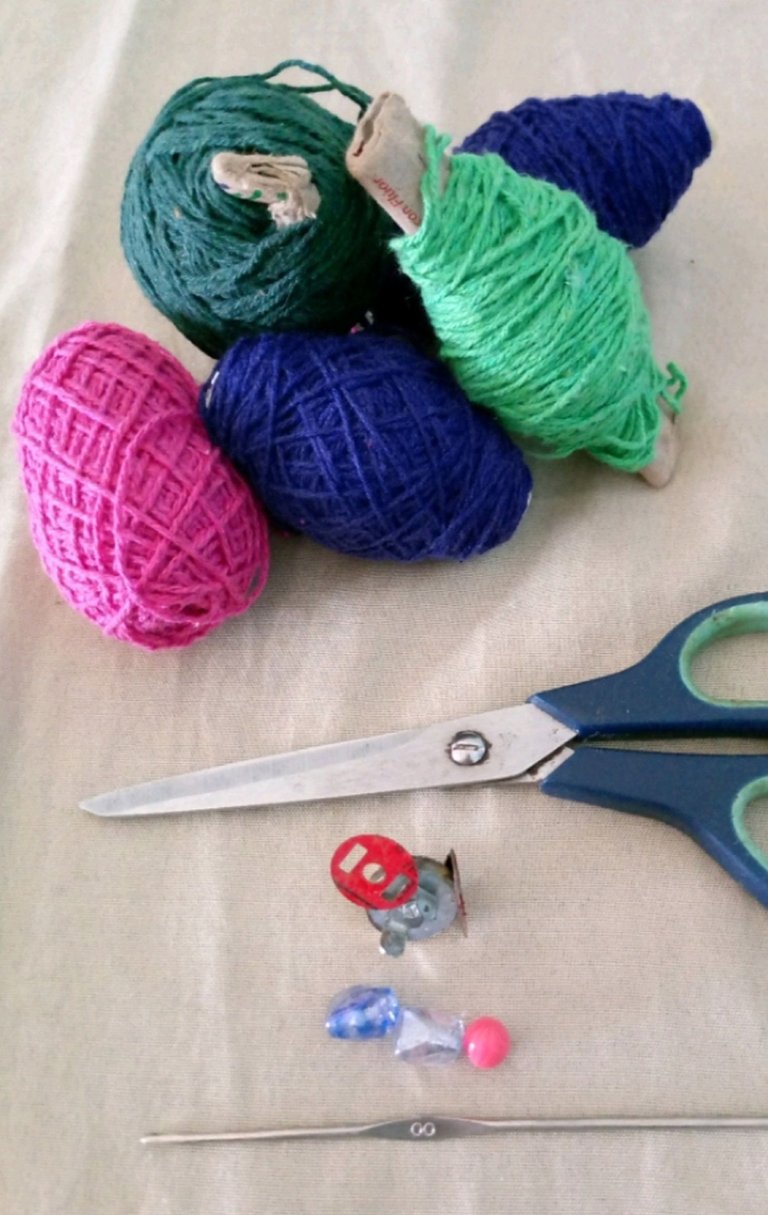
Hablaré un poco de los materiales.
Utilice 3 tonos de color de pabilo.
Una aguja número cero, que me pareció más cómoda por lo grueso del pabilo que en ocasiones lo voy a usar con el hilo doble.
Utilice una tijera para recortar los excedentes de hilo.
Adornos, y un broche, que luego vi que no hacía falta y termine dejándolo para otro de mis futuros bolsos.
I will talk a little about the materials.
I used 3 shades of wick color.
A number zero needle, which I found more comfortable because of the thickness of the wick that sometimes I will use it with the double thread.
Use a scissors to trim the excess thread.
Embellishments, and a brooch, which I later realized I didn't need and ended up leaving it for another of my future bags.
 |  |
|---|
 |  |
|---|
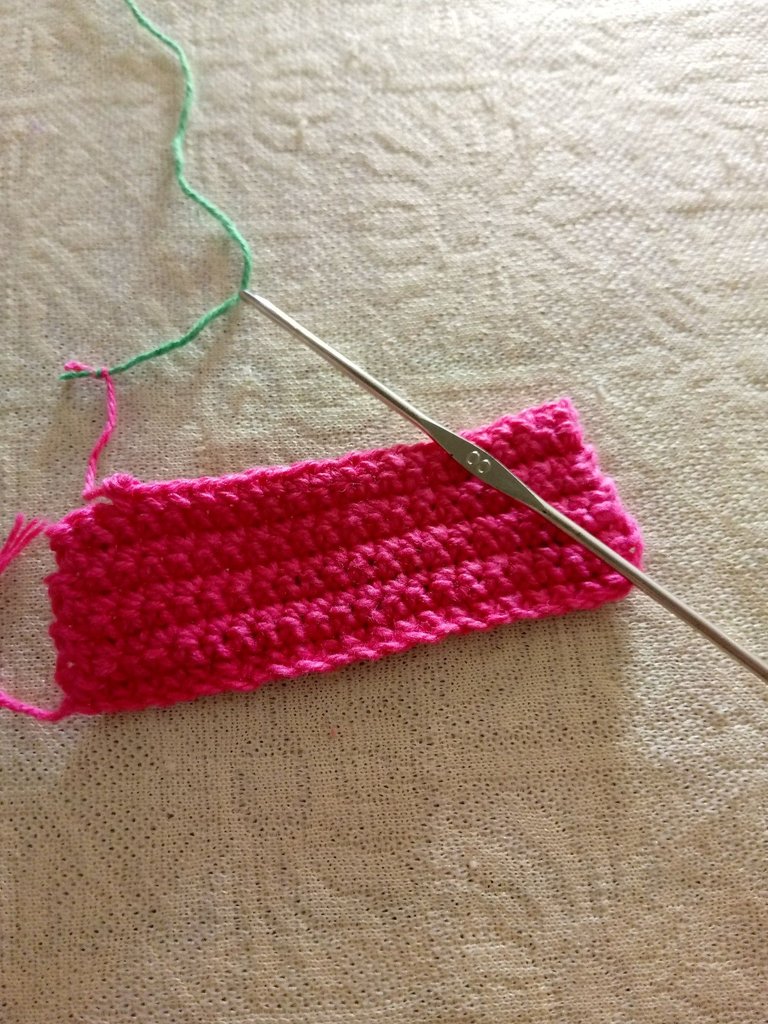
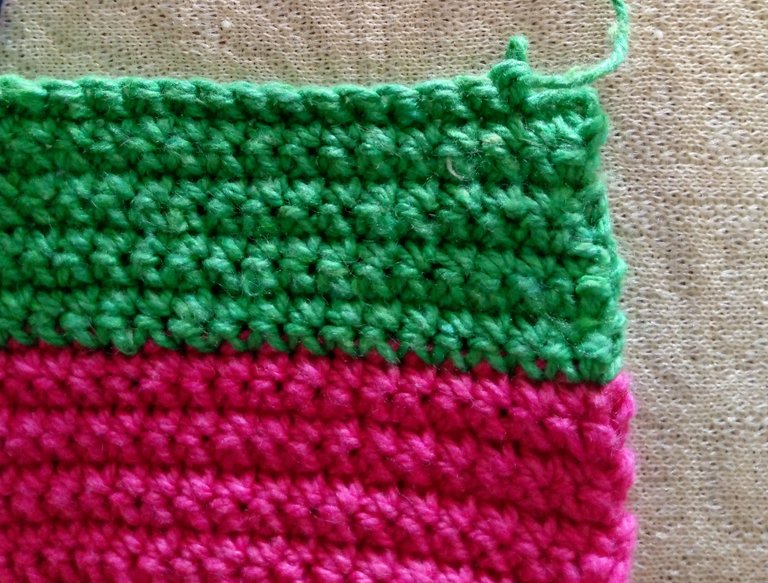
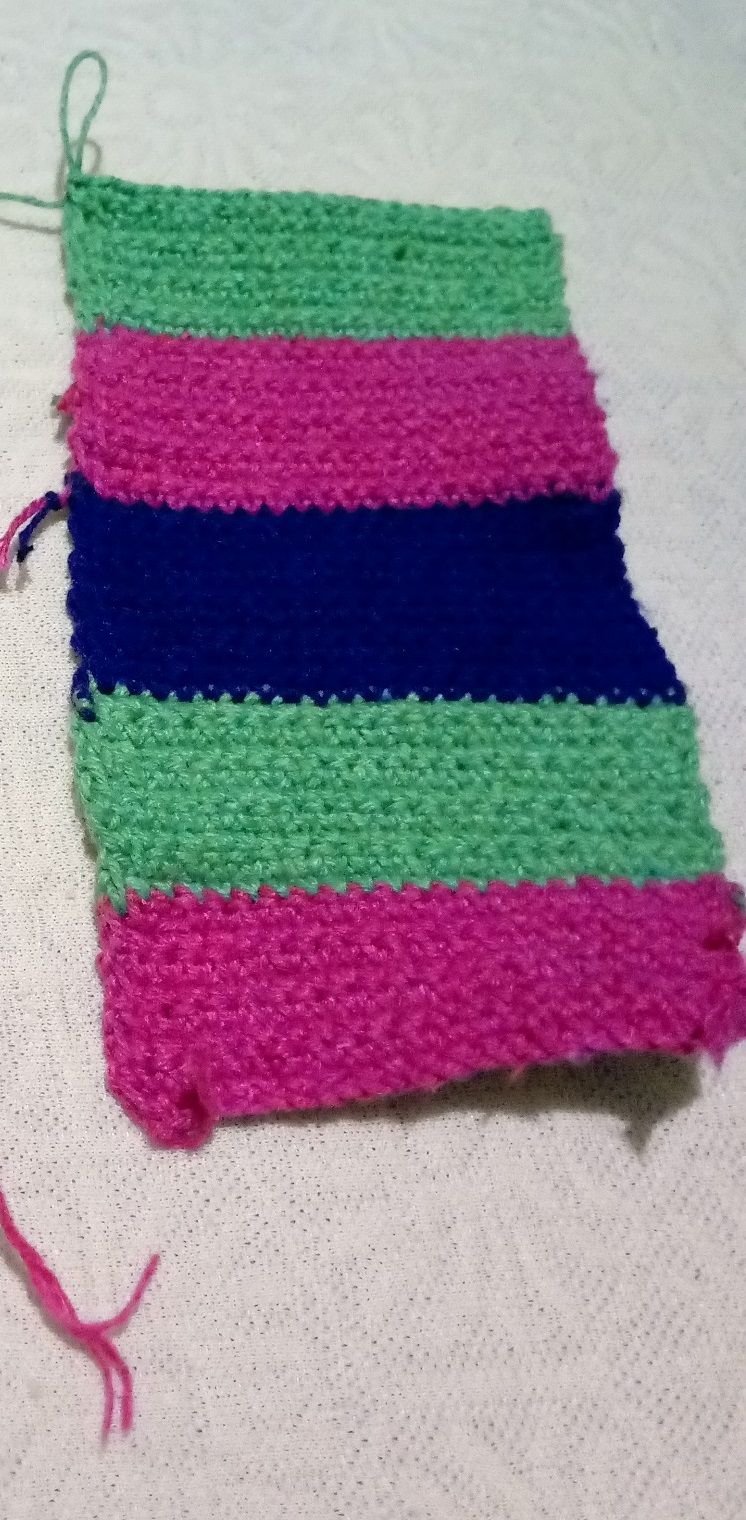
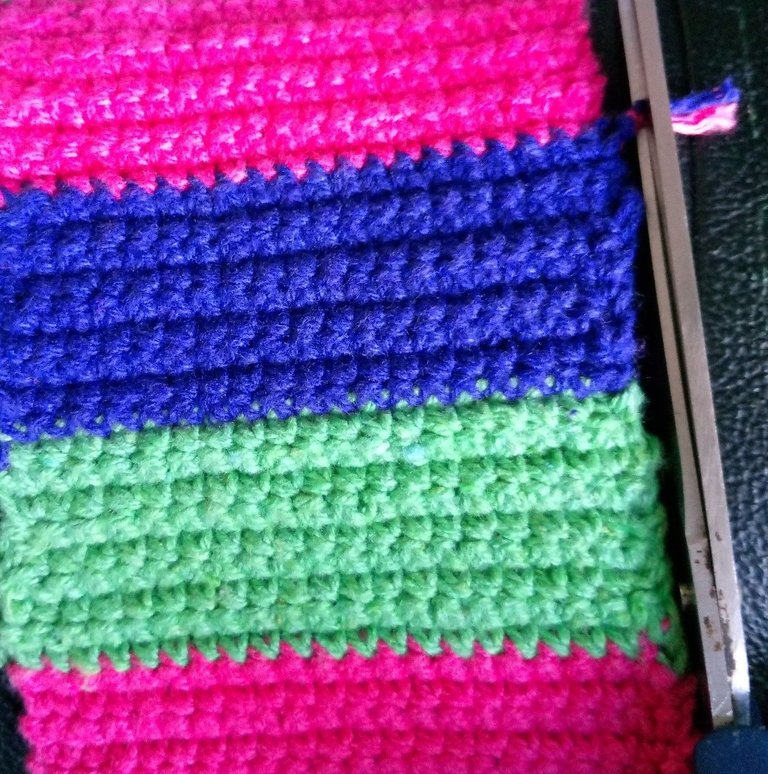
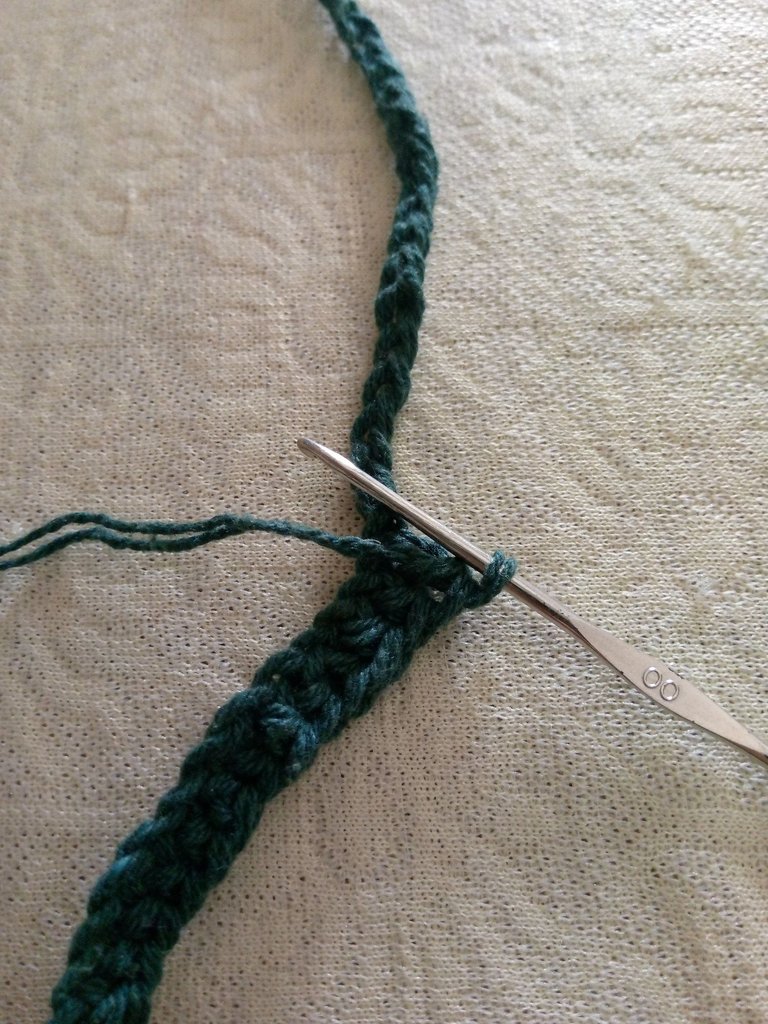
Comencé tejiendo trazos de 20 puntos en cadena posicionando el tejido de forma horizontal más 1 punto deslizado para cada inicio de vuelta, las vueltas las hice de puntos bajos por cada punto de cadena.
De esta forma repitiendo los mismos puntos realicé 2 partes iguales de 5 trazos de diferentes colores.
I started by knitting 20 chain stitch rows positioning the fabric horizontally plus 1 slip stitch for each beginning of the row, the rows were made of single crochet for each chain stitch.
In this way repeating the same stitches I made 2 equal parts of 5 strokes of different colors.
 |  |
|---|
 |  |
|---|
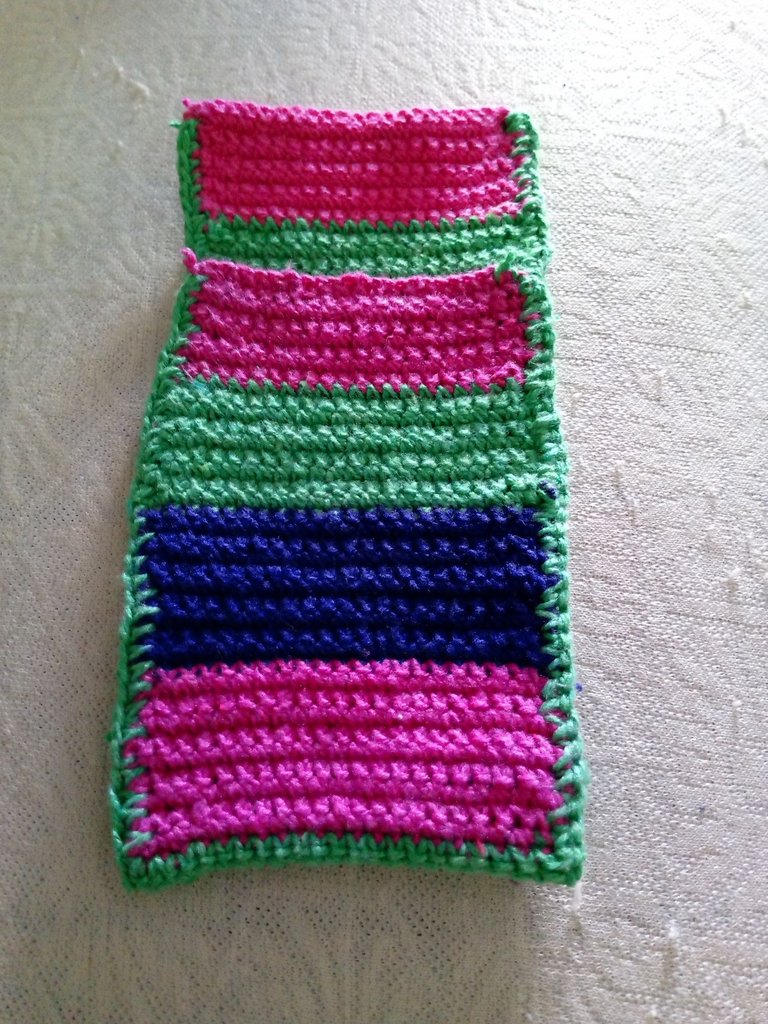
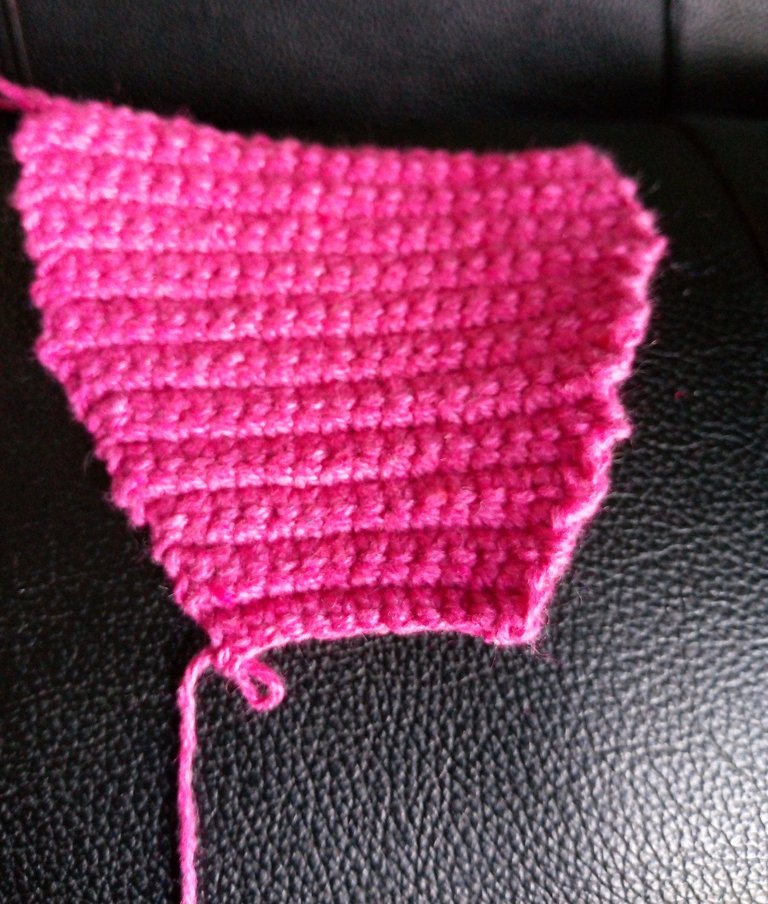
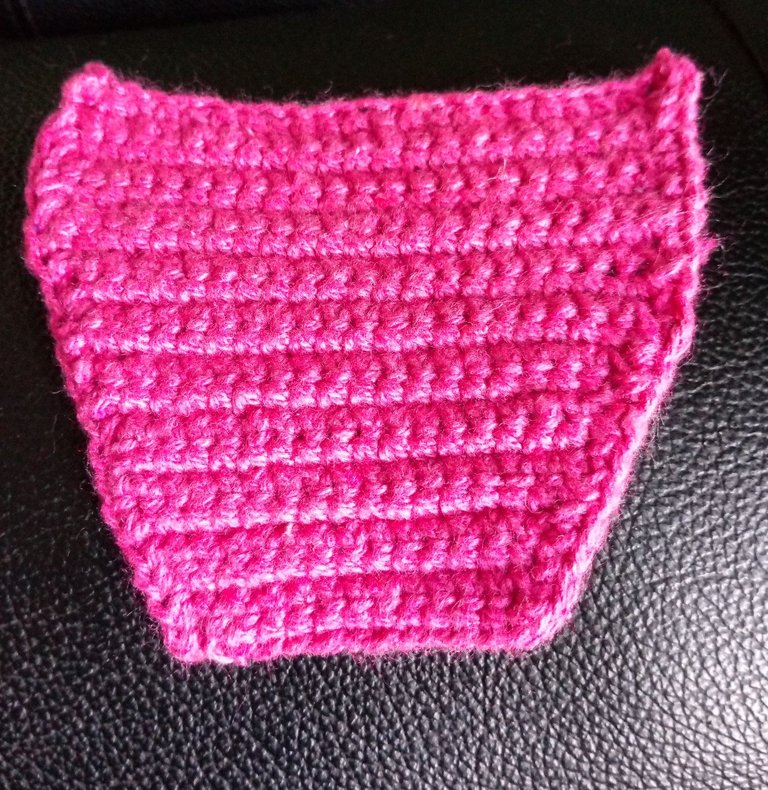
Culminando los 2 lados, recorte los excedentes de cada unión de hilos.
Coloque las dos capas y las uni dejando la capa del lado de atrás un poco más alta, cociendo la capa delantera a 4 trazos, dejando uno sobrante para la capa posterior.
Estas capas las tejí con puntos bajos por todo el borde para unirlas.
También hice la pieza que va a cubrir la parte de arriba, que es como una tapita, esta la hice con 20 puntos de cadena más 1 punto deslizado por cada vuelta, de 5 líneas de tejido con puntos bajos, luego de las 5 líneas disminuí 2 puntos en la línea 6 y para la línea 7 a 4 y así fui reduciendo a 2 puntos para hacer la forma más delgada.
Finalice la tapa tejiendo los lados con puntos bajos.
Finishing the 2 sides, trim off the excess from each yarn joint.
Place the two layers and join them together leaving the layer on the back side a little higher, knitting the front layer in 4 rows, leaving one extra for the back layer.
I knitted these layers with low stitches all around the edge to join them together.
I also made the piece that will cover the top, which is like a little lid, this I made with 20 chain stitches plus 1 slipped stitch for each row, 5 rows of knitting with low stitches, after the 5 rows I decreased 2 stitches in row 6 and for row 7 to 4 and so I was reducing to 2 stitches to make the shape thinner.
Finish the top by knitting the sides with single crochet.
 |  |
|---|
 |  |
|---|
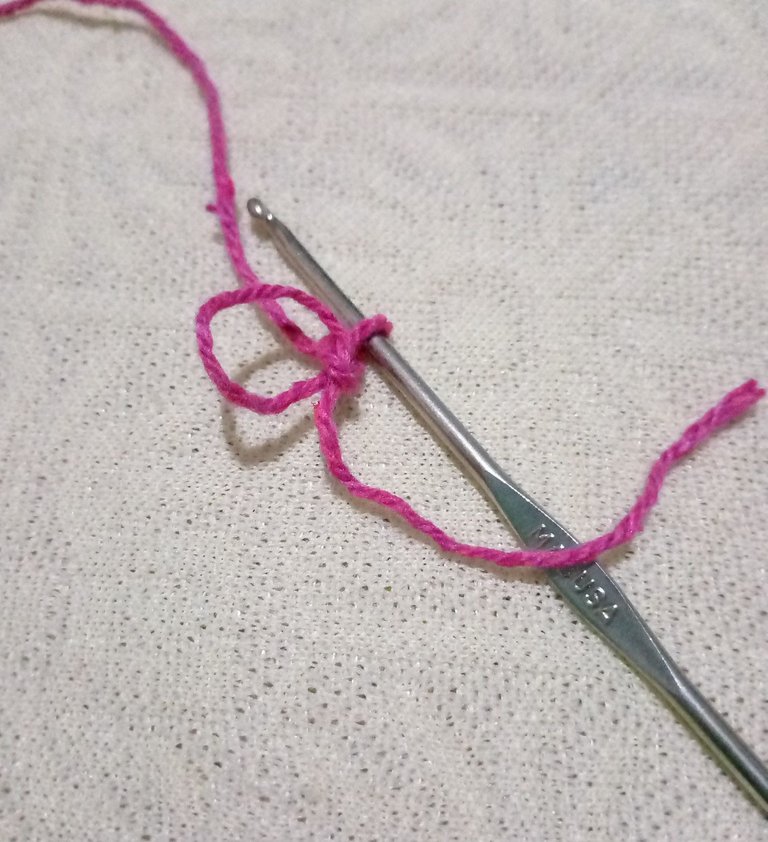
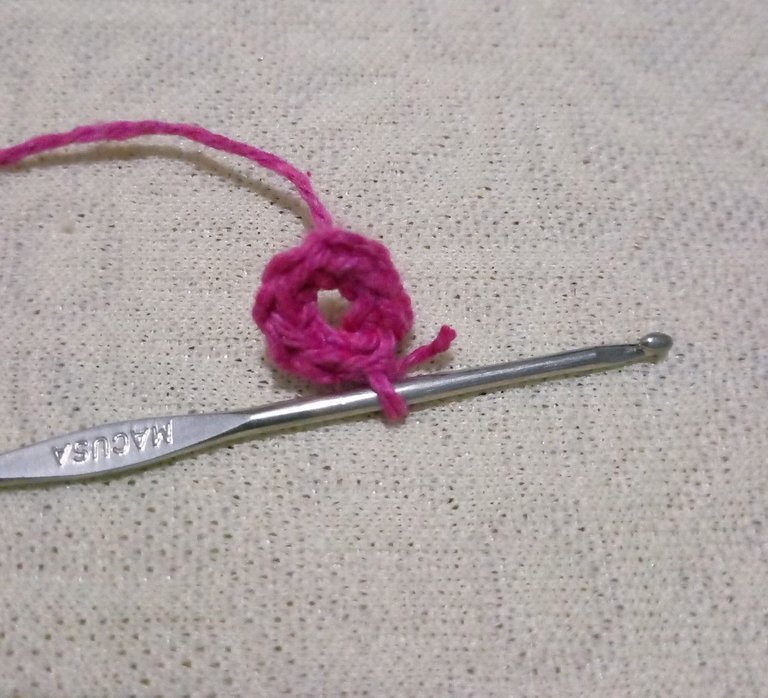
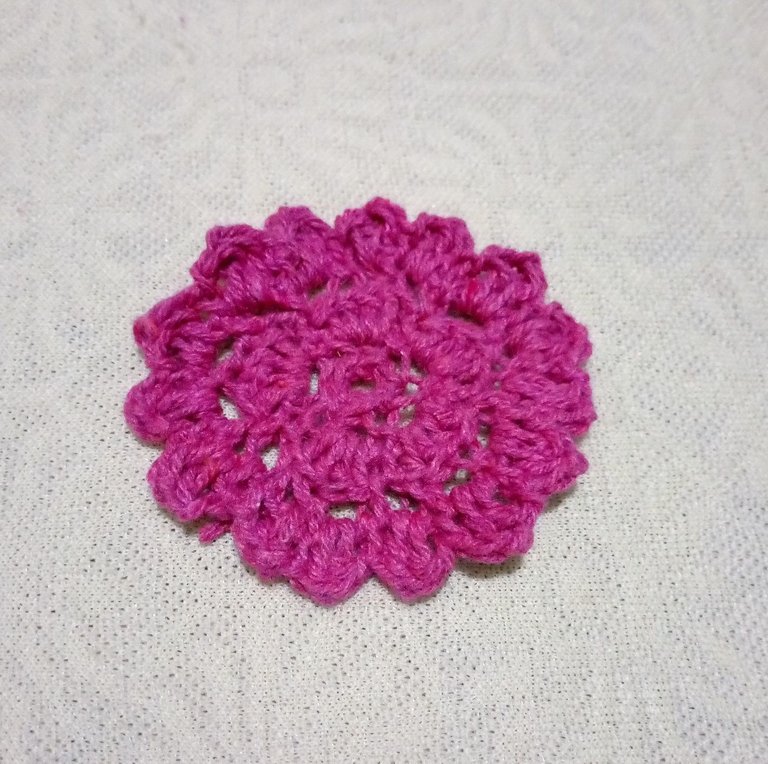
Después de completar todas las piezas, comencé hacer la decoración, realizando una flor con un anillo de 10 puntos, y por cada trazo de 2 puntos fije un pétalo de 4 puntos de cadena, para luego tejer cada pétalo, para comenzar tejí 2 cadenas arriba y un punto alto hasta completar 4 puntos altos por pétalo y cerrar cada pétalo repitiendo los puntos iguales por cada pétalo de la flor.
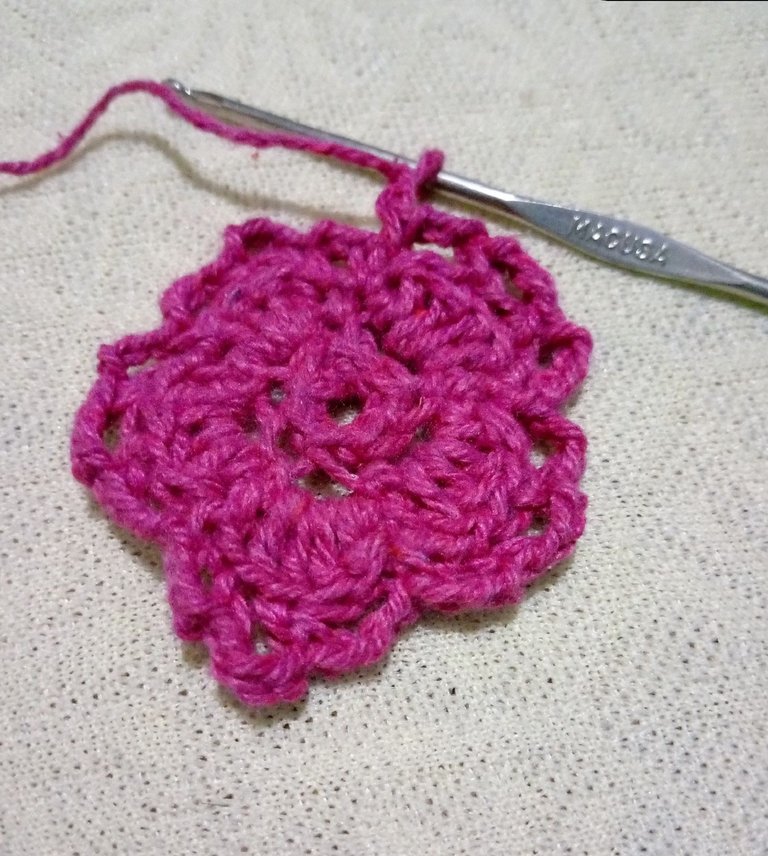
Para luego embellecer y aumentar la flor teji 3 petalos sobre los petalos anteriores y cada petalo lo teji con 2 puntos de cadena, sobre estos 5 petalos anteriores, aumente a 3 petalos mas pequeños por cada petalo, total de petalos superiores 15 con 2 puntos altos cada 1.
After completing all the pieces, I began to make the decoration, making a flower with a ring of 10 stitches, and for each trace of 2 stitches I fixed a petal with 4 chain stitches, to then knit each petal, to begin I knitted 2 chains above and a high stitch until completing 4 high stitches per petal and close each petal repeating the same stitches for each petal of the flower.
To embellish and enlarge the flower I knitted 3 petals over the previous petals and each petal I knitted with 2 chain stitches, over these 5 previous petals, I increased to 3 smaller petals for each petal, total of top petals 15 with 2 high stitches each 1.
 |  |
|---|
 |  |
|---|
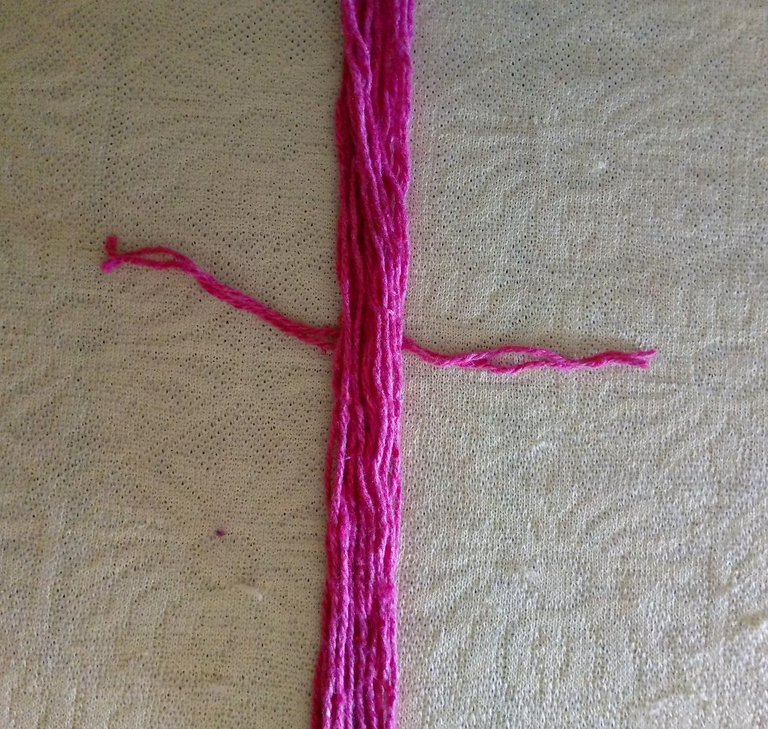
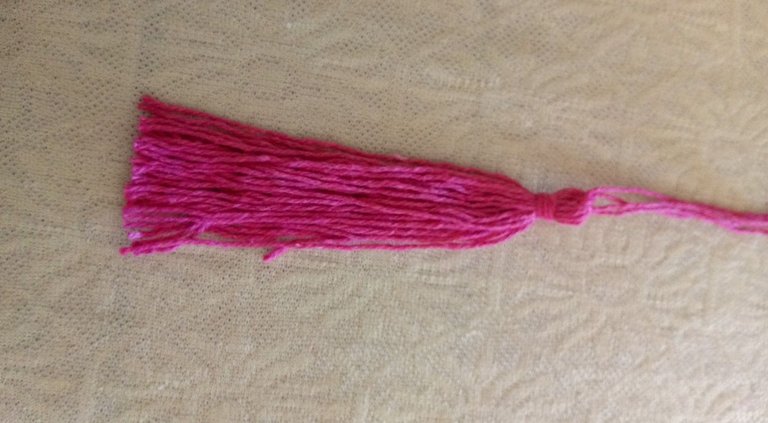
Por último realice una borla para decorar, también coloque el resto de los adornos que son unas piedras color lila y un botón color rosa para el centro de la flor, para la trenza o tira de colgar tejí 108 puntos de cadena con el hilo doble haciendo una segunda vuelta para engrosar la tira.
Les deseo un gran descanso esta noche mis queridos amigos, esperando siempre que todos se encuentren muy bien, también espero que le guste mi emprendimiento, una parte de mi nuevo proyecto.
Gracias por leer mi post, espero verlos pronto por aquí de vuelta, se les quiere un mundo. 💖💞💞
Finally I made a tassel to decorate, I also placed the rest of the ornaments which are some lilac stones and a pink button for the center of the flower, for the braid or hanging strip I wove 108 chain stitches with the double thread making a second round to thicken the strip.
I wish you a great rest tonight my dear friends, always hoping you all are very well, I also hope you like my venture, a part of my new project.
Thank you for reading my post, hope to see you all back here soon, you are loved a world. 💖💞💞
social networks / redes sociales
![]()
![]()
Traductor Deepl
Translated Deepl
Ediciones Canva
Editions Canva


Discord Server.This post has been manually curated by @steemflow from Indiaunited community. Join us on our
Do you know that you can earn a passive income by delegating to @indiaunited. We share more than 100 % of the curation rewards with the delegators in the form of IUC tokens. HP delegators and IUC token holders also get upto 20% additional vote weight.
Here are some handy links for delegations: 100HP, 250HP, 500HP, 1000HP.
100% of the rewards from this comment goes to the curator for their manual curation efforts. Please encourage the curator @steemflow by upvoting this comment and support the community by voting the posts made by @indiaunited.
Contáctenos para saber más del proyecto a nuestro servidor de Discord.
Si deseas delegar HP al proyecto: Delegue 5 HP - Delegue 10 HP - Delegue 20 HP - Delegue 30 HP - Delegue 50 HP - Delegue 100 HP.
Hola, @lauracraft! Es super bonita está idea de hacer algo pequeñito para llevar cuando hace calor. Me gustan mucho los colores que elegiste, son muy vibrantes y veraniegos.🌷 Te felicito por este trabajo!!🌼
Gracias por tu comentario que bueno que te halla gustado.Hola @imena cuando se me ocurrió la idea me pareció lindo,de vez en cuando queda bien lucir colores vibrantes.
@lauracraft es el tipo de bolso,que me encanta, pequeño, hermoso y muy cómodo, gracias por compartir tu creación,un abrazote 🤗
Amiga @anamariag. Gracias ❤️ que bueno que sea uno de tus preferidos 🤗
Congratulations @lauracraft! You have completed the following achievement on the Hive blockchain And have been rewarded with New badge(s)
Your next target is to reach 7000 upvotes.
You can view your badges on your board and compare yourself to others in the Ranking
If you no longer want to receive notifications, reply to this comment with the word
STOPCheck out our last posts:
Me encanta la florecita que formaste!