ESPAÑOL
En esta ocasión les traigo una idea sencilla que por cierto me lo hizo saber mi hija @nicxi, ella vio esta idea en Pinterest y me dio esa idea y que era necesaria para resguardar en su morral sus audífonos o cables.
Vi la imagen y me pareció súper sencillo de realizar y muy útil, además de que puede ser una excelente idea para regalar a nuestros amigos cuando no tenemos nada entre manos.

Aprovecho la oportunidad para hacerles saber que esta semana en especial no he estado de muy buen ánimo, ya que hace pocos días mi hermano fue diagnosticado con Covid y se encuentra muy delicado, él es venezolano pero reside en Perú hace 3 años con su hijo de 9 años.
Además que esta semana en mi país Venezuela pero muy específicamente en mi Isla de Margarita hemos tenido muchísimas fallas con la electricidad, el internet y las líneas telefónicas y pido disculpas por estar un poco ausente por este medio.
Aquí te muestro el paso a paso de mi proyecto:
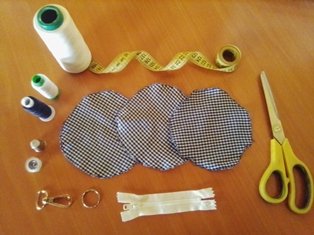
Materiales que utilice:
- Hilos
- Tijeras
- Máquina de coser
- Alfileres
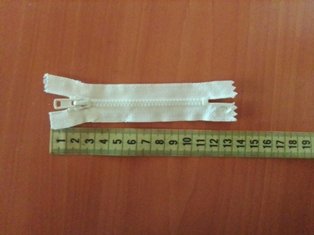
- Cierre blanco de 10cm
- Llavero
- Tela fieltro (Forro)
- Tela cuadritos
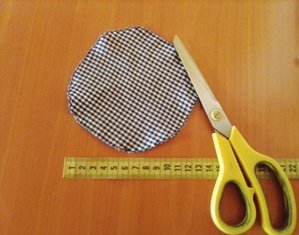
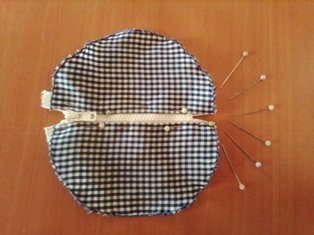
Paso 1
Corte 3 círculos de 12 cm de diámetro con la tela de cuadritos y 1 con la tela de fieltro

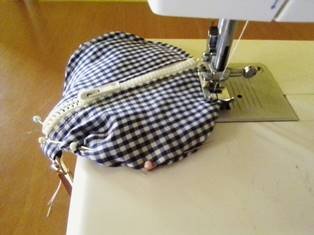
Paso 2
Fije con alfileres el cierre a la tela para dar mejor agarre y cosí
Te recuerdo que debes tener mucho cuidado al coser los cierres a cualquier pieza, ya que cualquier error podría costarte una aguja o un desperfecto a nuestra preciada máquina.
Paso 3
Corte una tira de tela de 4cm, doblé y cosí, para fijar mi llavero.
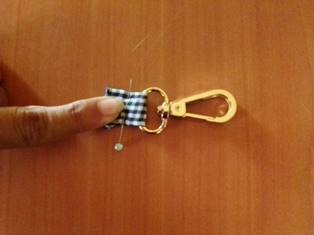
Paso 4
Nuevamente utilice mis alfileres, para fijar las dos piezas del llavero y coser con más seguridad.
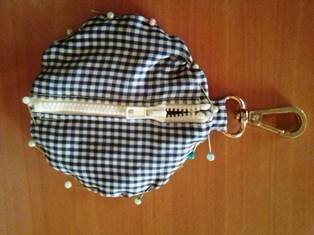
Paso 5
Ultimo paso, agregar a esta costura nuestra tira con el llavero.
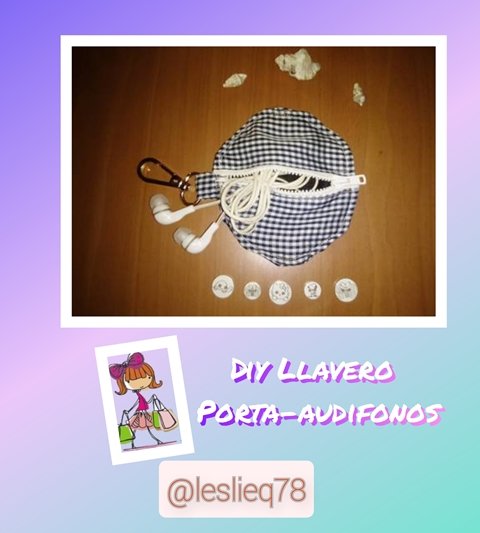
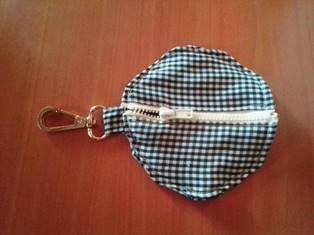
Así quedo terminado mi proyecto del llavero porta-audífonos para mi hija.
Es necesario hacer una acotación, este proyecto lo realice por una imagen que vi en Pinterest, pero hace días casualmente también lo compartió mi amiga @kiutvariedades , la cual felicito y admiro su trabajo, pero por razones que ya mencione no logre ver a tiempo su publicación antes de realizar este post.
Hasta aquí mi publicación por el día de hoy, espero que sea de tu agrado y pueda leer tus comentarios por alguna duda o sugerencia.
Te envío un caluroso abrazo virtual y muchas bendiciones. Continúen creando, nos leemos.

- Todas las fotografías aquí presentadas son de mi propiedad, tomadas con mi teléfono Blu Studio X10
- Los separadores los realice con ayuda de PowerPoint
- El collage lo realice con la aplicacion Collage Maker
- El banner lo realice en Canva
- Mi idioma natal es el español, realice la traducción con ayuda de Deepl.com
ENGLISH
This time I bring you a simple idea that by the way my daughter @nicxi let me know, she saw this idea on Pinterest and gave me that idea and that it was necessary to keep in her backpack her headphones or cables.
I saw the image and I found it super simple to make and very useful, plus it can be an excellent idea to give to our friends when we have nothing in our hands.
I take this opportunity to let you know that this week in particular I have not been in a very good mood, because a few days ago my brother was diagnosed with Covid and is very delicate, he is Venezuelan but lives in Peru for 3 years with his 9 year old son.
Also this week in my country Venezuelan but very specifically in my island of Margarita we have had many failures with electricity, internet and telephone lines and I apologize for being a little absent by this means.
Here I show you the step by step of my project:
Materials I used:
- Threads
- Scissors
- Sewing machine
- Pins
- 10cm white zipper
- Key ring
- Felt fabric (lining)
- Plaid fabric
Step 1
Cut 3 circles of 12 cm in diameter with the checkered fabric and 1 with the felt fabric.
Step 2
Pin the zipper to the fabric to give a better grip and sew the zipper to the fabric.
I remind you to be very careful when sewing the zippers to any piece, as any mistake could cost you a needle or damage to our precious machine.
Step 3
I cut a 4cm strip of fabric, folded and sewed, to attach my keychain.
Step 4
Again use my pins, to attach the two pieces of the keychain and sew more securely.
Step 5.
Last step, add to this seam our strip with the key ring.
This is how I finished my project for my daughter's earphone keychain.
It is necessary to make a note, this project was made by an image I saw on Pinterest, but a few days ago my friend @kiutvariedades also shared it, which I congratulate and admire her work, but for reasons I already mentioned I did not manage to see her publication in time before making this post.
So far my publication for today, I hope you like it and I can read your comments for any questions or suggestions.
I send you a warm virtual hug and many blessings. Keep on creating, we will read each other.
- All the photographs presented here are my own, taken with my Blu Studio X10 phone.
- The separators were made with the help of PowerPoint
- The collage was made with the Collage Maker application.
- The banner was made in Canva
- My native language is Spanish, I made the translation with the help of Deepl.com
Your content has been voted as a part of Encouragement program. Keep up the good work!
Use Ecency daily to boost your growth on platform!
Support Ecency
Vote for Proposal
Delegate HP and earn more
Mil gracias!
¡Hola!, su trabajo está súper práctico, útil para llevar los audífonos a cualquier lugar. Me diste una idea genial. ¡Buen inicio de semana y buenas vibras!.
Hola mi bella, si es super sencilla y practica, lo mejor es que ya no se enredaran los cables en nuestro bolso. Bendiciones para ti
Congratulations @leslieq78! You have completed the following achievement on the Hive blockchain and have been rewarded with new badge(s) :
Your next target is to reach 2250 upvotes.
You can view your badges on your board and compare yourself to others in the Ranking
If you no longer want to receive notifications, reply to this comment with the word
STOPThank you for sharing this amazing post on HIVE!
Your content got selected by our fellow curator @ashikstd & you just received a little thank you via an upvote from our non-profit curation initiative!
You will be featured in one of our recurring curation compilations and on our pinterest boards! Both are aiming to offer you a stage to widen your audience within and outside of the DIY scene of hive.
Join the official DIYHub community on HIVE and show us more of your amazing work and feel free to connect with us and other DIYers via our discord server: https://discord.gg/mY5uCfQ !
If you want to support our goal to motivate other DIY/art/music/homesteading/... creators just delegate to us and earn 100% of your curation rewards!
Stay creative & hive on!
Me siento super agradecida, muchisimas gracias. Bendiciones para uds.
Una de las tantas cosas que amo de la costura es que, incluso cuando se elabora el mismo proyecto, la técnica y el estilo que cada persona tiene es tan único que parece que fuesen proyectos totalmente distintos 😅, me alegra mucho que mi post no te haya impedido publicar el tuyo, porque realmente quede encantada con tu resultado. Creo que tu hija y y vimos la misma publicación de Pinterest 😂😂.
Totalmente de acuerdo contigo. Besitos para ti