Hola amigos amante de la costura como se encuentras e estado un poco perdida por mucho trabajo pero estos meses e realizados varios trabajo con respecto a blusas con cuellos y bueno quiero mostrarles como aprendí yo a realizar este corte en v con cuello Mao pero lo haré en dos partes porque siento que es mucha información.
Hello friends who love sewing, how are you and you have been a little lost due to a lot of work, but these months you have already done several jobs regarding blouses with clothes and I really want to show you how I learned to do this. I cut a v with my hand but I'm leaving in the hare because I feel like it's a lot of information.
Primero investigue y conseguí dos modos de hacer el cuello Mao con abertura en la parte de adelante uno que queda recto, y otro que queda en v hoy les voy a explicar el más fácil, bueno en realidad los dos son sencillos pero ayer hice una blusa con el cuello Mao con la abertura en v .
First I researched and found two ways to make the Mao collar with an opening in the front, one that is straight, and another that is in a v shape. Today I am going to explain the easiest one, well actually both are simple but yesterday I made a blouse with the Mao collar with the v opening.
Pasos a realizar para hacer este cuello
Steps to follow to make this collar
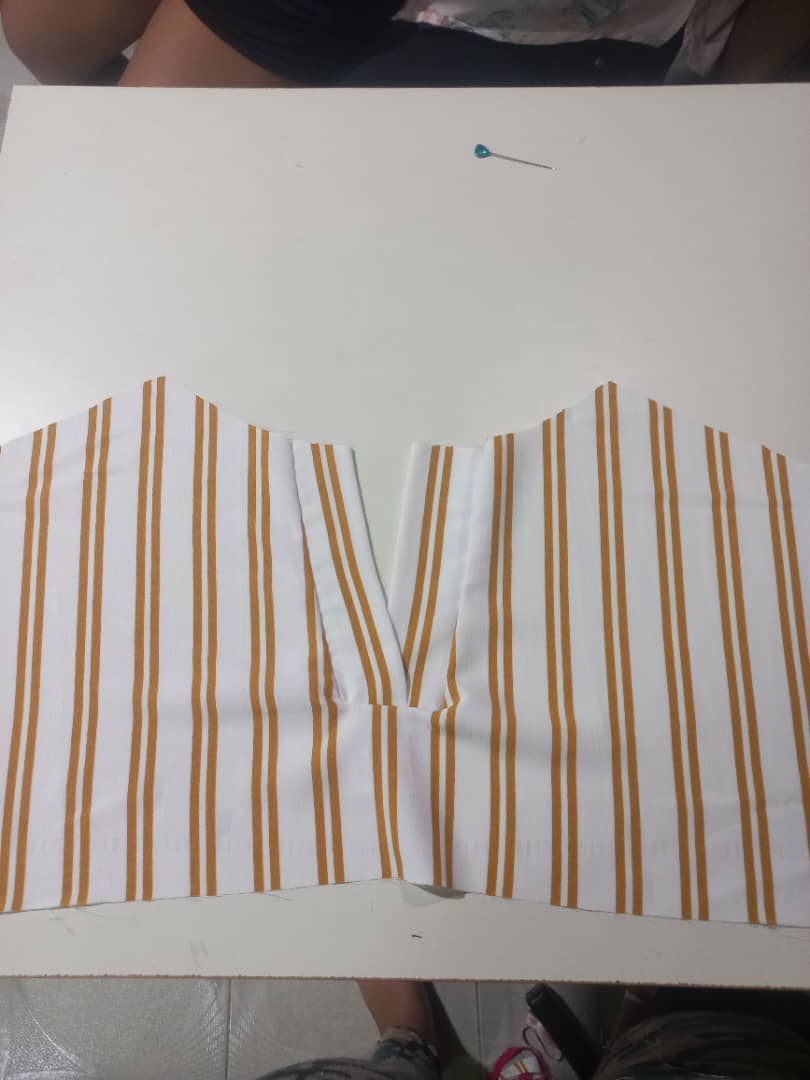
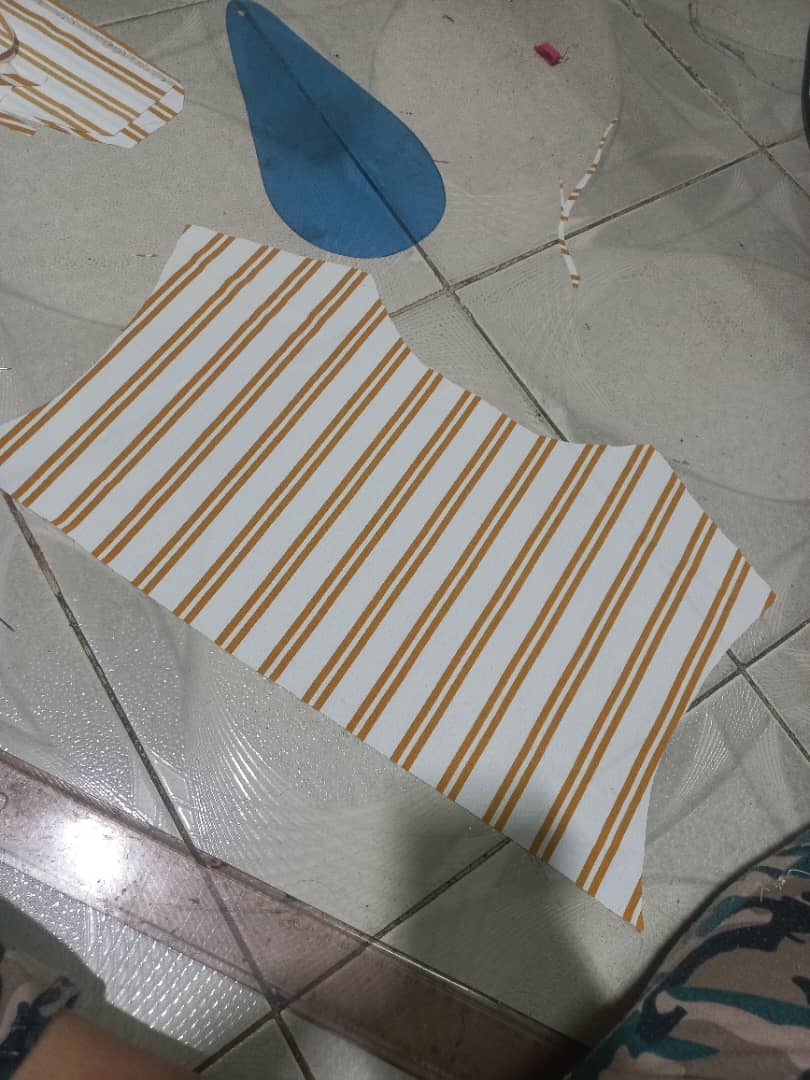
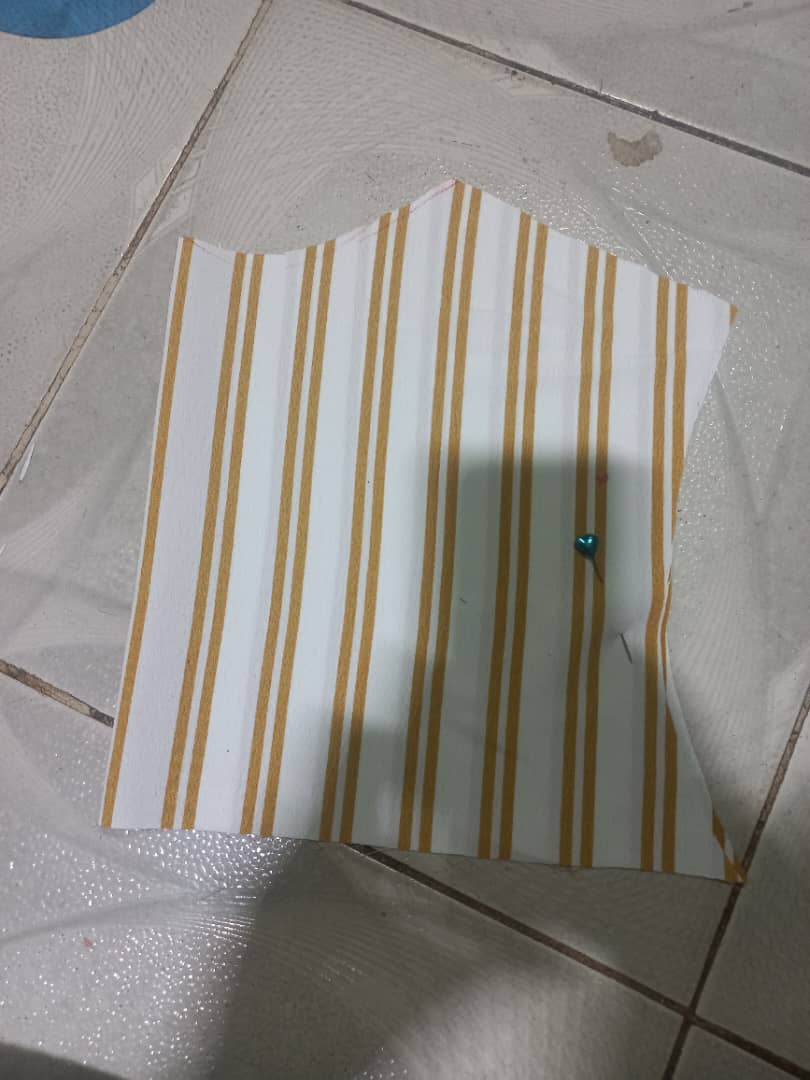
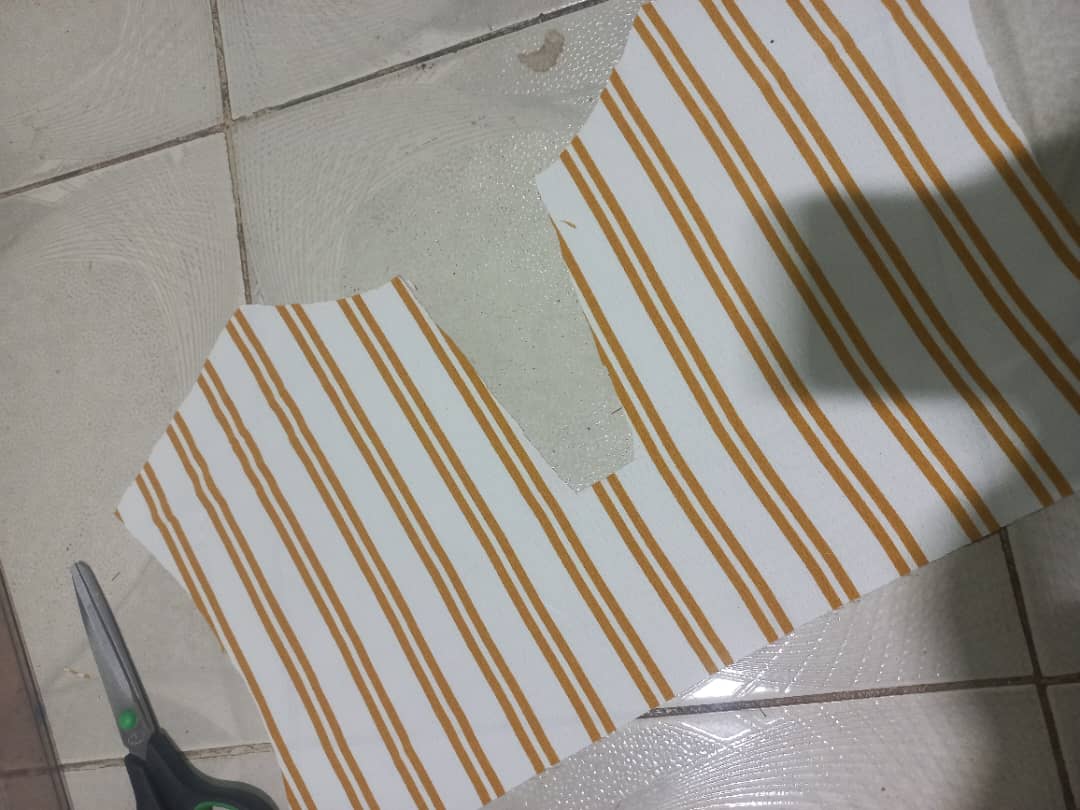
1.Primero que todo debemos de tener ya cortado la parte delantera y la parte trasera, de nuestra blusa ya cortado el cuello y todo yo le baje 1 cm en la parte de atrás, y 4cm en la parte delantera.
1. First of all, we must have the front and back part already cut, the neck of our blouse already cut and everything I lowered 1 cm in the back part, and 4 cm in the front part.
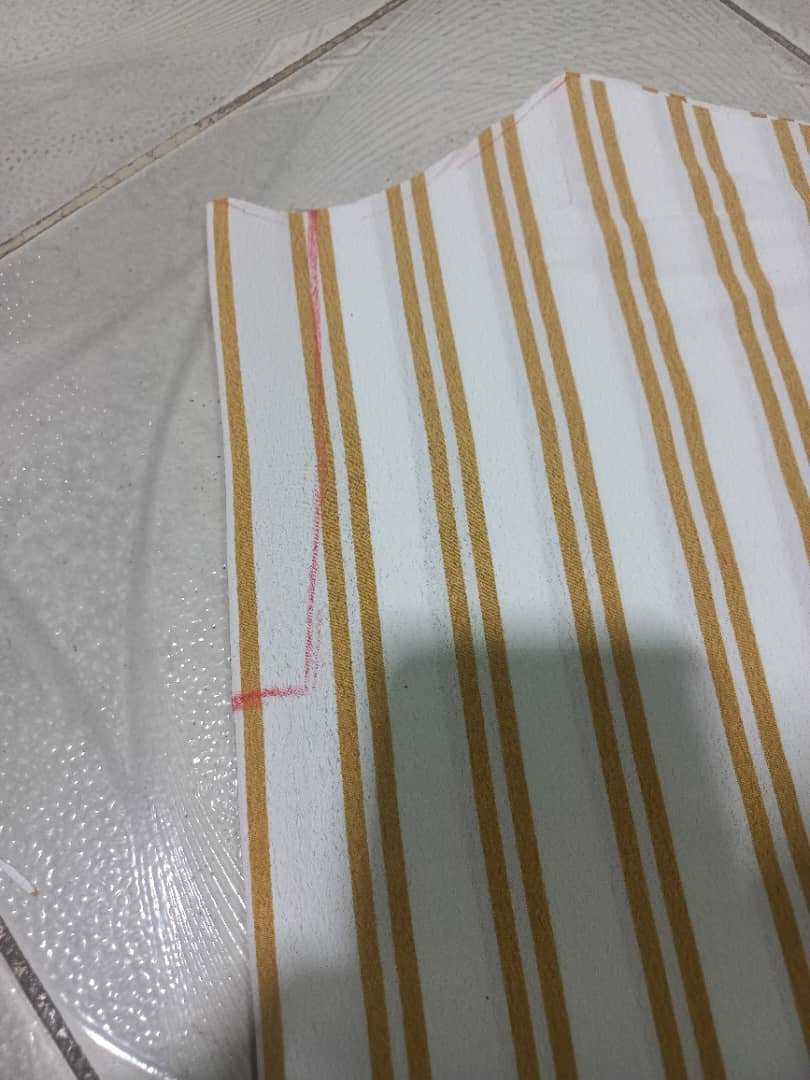
- Luego doblamos a la mitad la parte delantera, en todo el dobles vamos a marcar una línea de 15cm hacia abajo ahí tendríamos nuestro punto A y nuestro punto B.
2. Then we fold the front part in half, throughout the double we are going to mark a line 15cm downwards, there we would have our point A and our point B.
.jpeg)
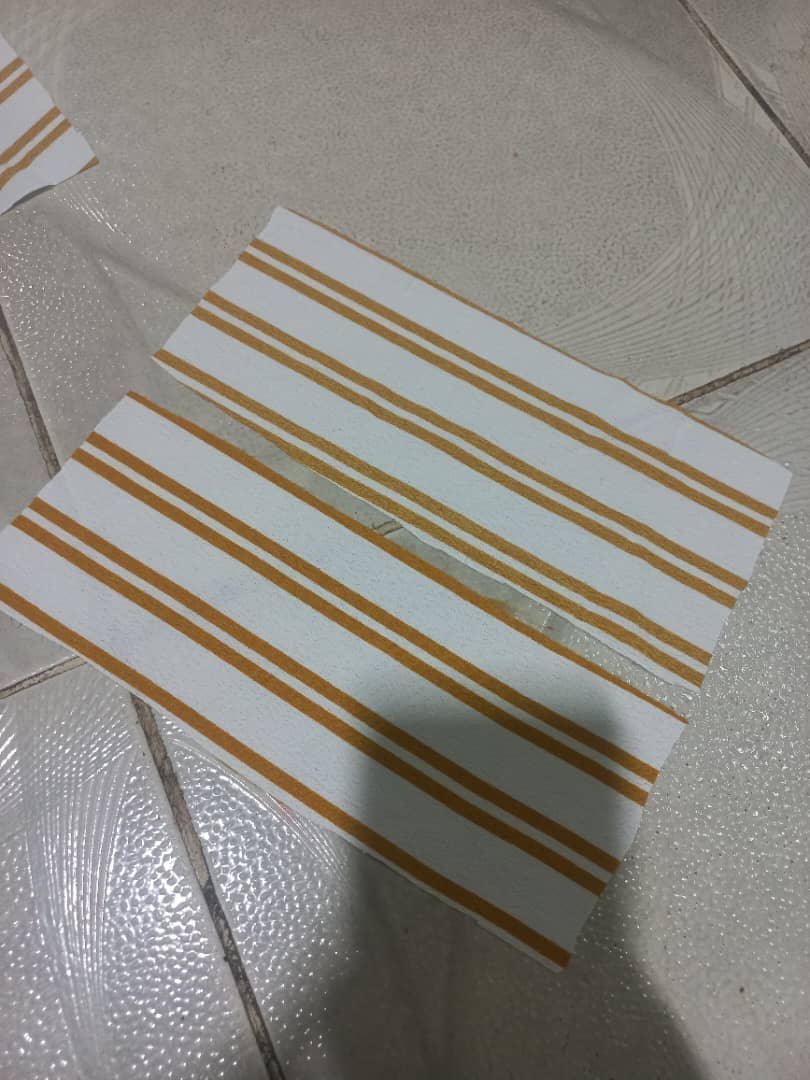
- Del punto A medimos hacia dentro 4 cm esta sería nuestro punto A1.
3. From point A we measure inwards 4 cm, this would be our point A1.
4. Después medimos 2cm hacia adentro desde el punto B que sería nuestro punto B1.
4. Then we measure 2cm inward from point B, which would be our point B1.
5. Con una regla y un lápiz trazamos desde A1 a B1.
5. With a ruler and a pencil we trace from A1 to B1.
.jpeg)
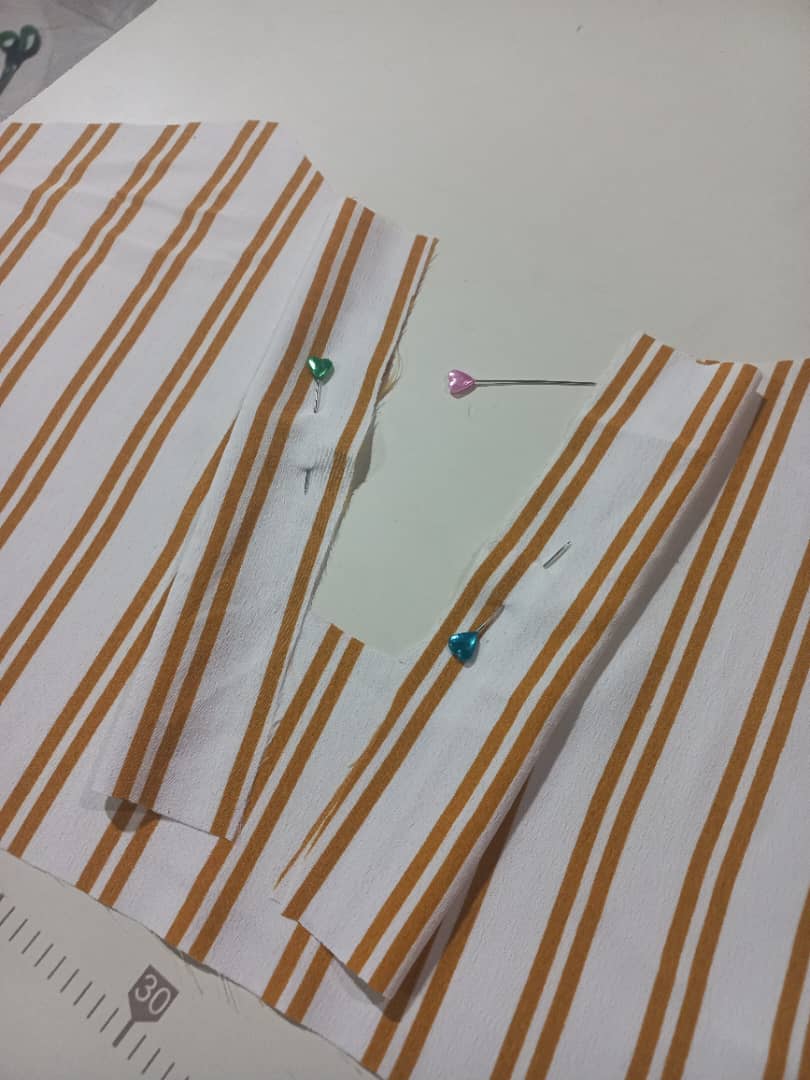
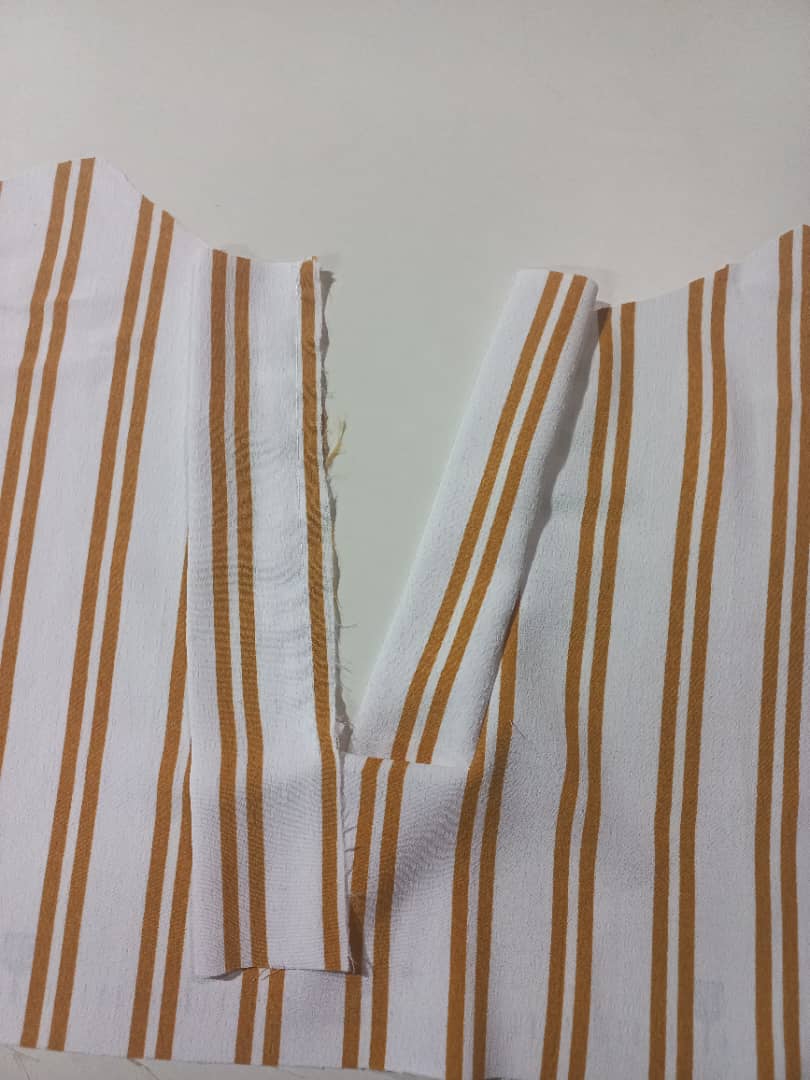
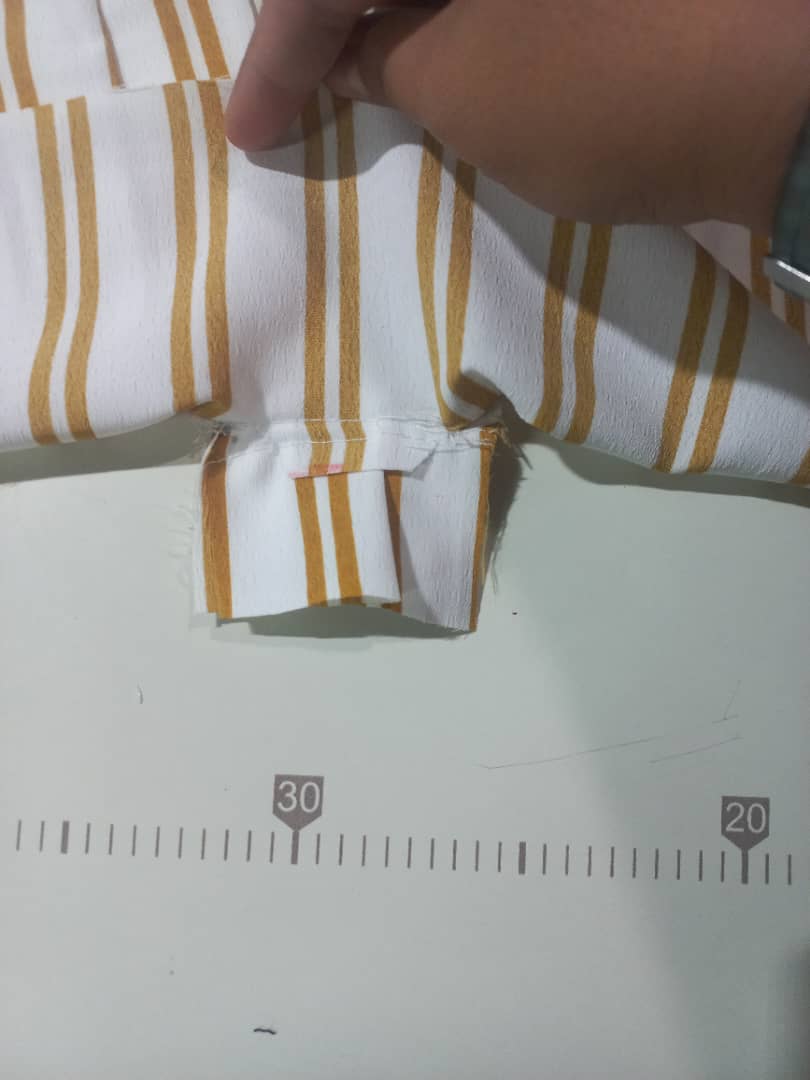
6. Luego cortamos por donde trazamos, desde A1 a B1 y después de de B1 a B.
Nos quedaría algo así:
6. Then we cut where we traced, from A1 to B1 and then from B1 to B. We would have something like this:
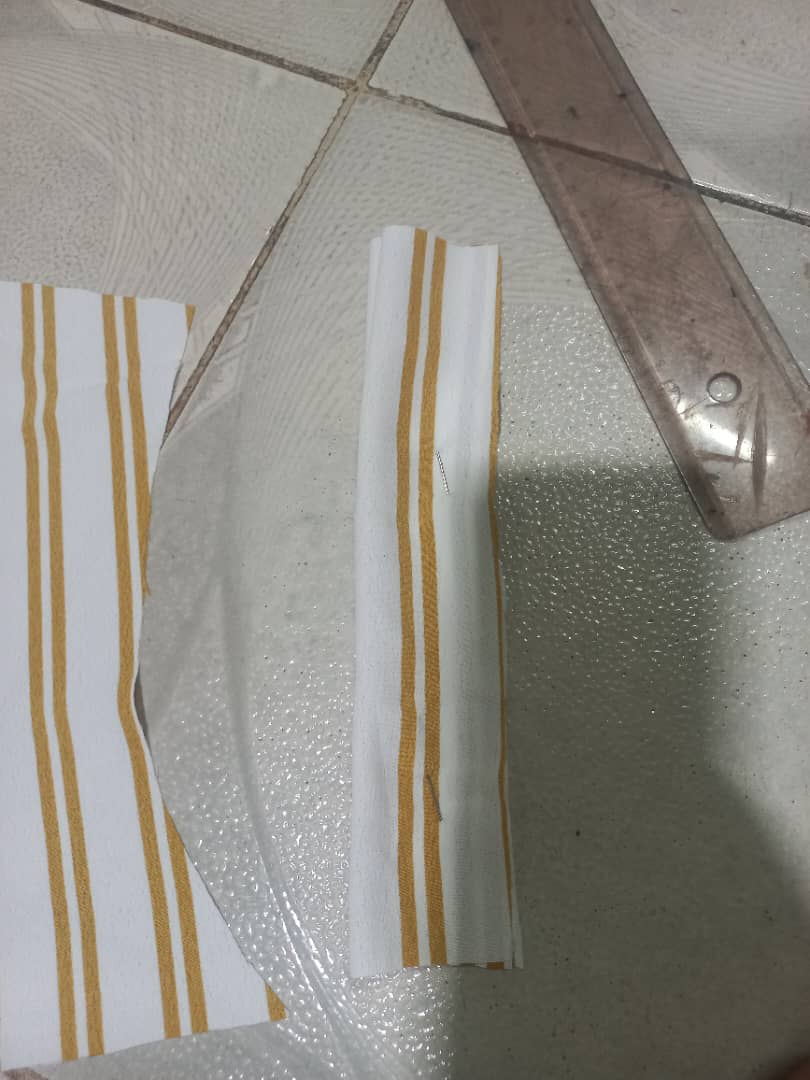
7. luego vamos a cortar dos tiras de 8cm por 20 cm cada una. En este paso puedes hacer el ancho de tu preferencia
7. Then we are going to cut two strips of 8 cm by 20 cm each. In this step you can make the width of your preference
8. Las tiras las doblamos a la mitad y planchamos.
8. We fold the strips in half and iron.
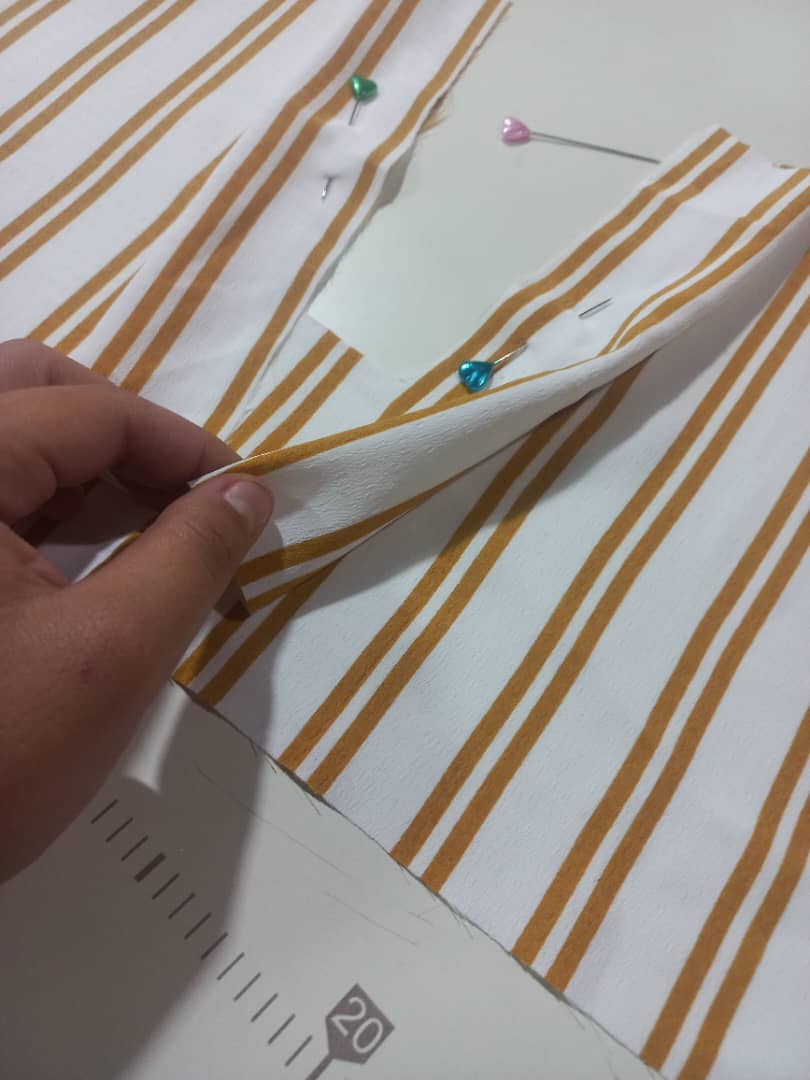
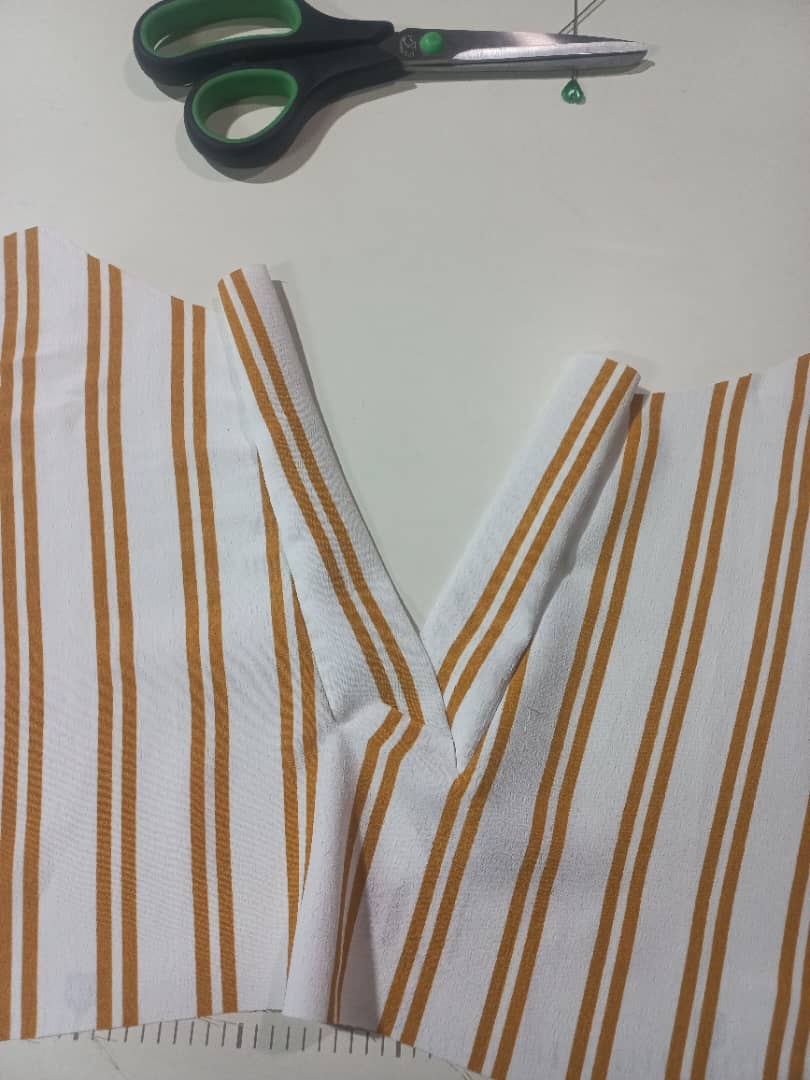
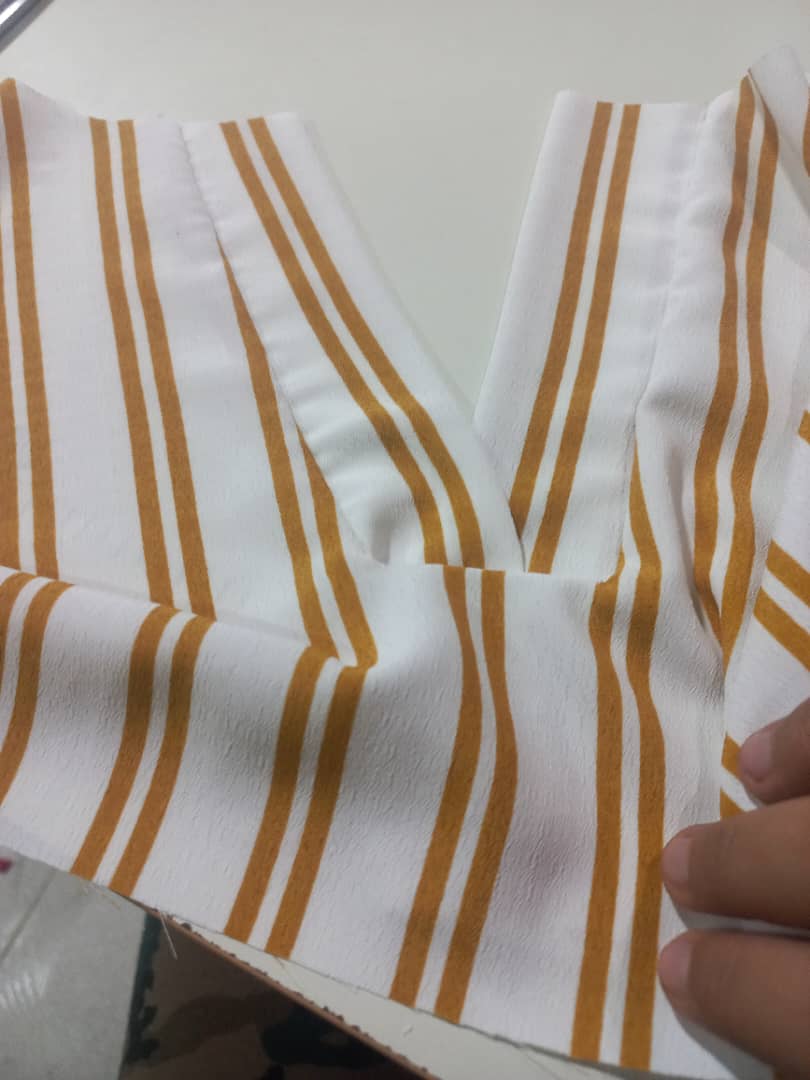
9. Aquí es donde debemos prestar atención, abrimos la parte delantera de nuestra blusa y a cada costado de lo que acabamos de hacer, colocaremos las tiras así doblabas como en el paso nro. 8
9. This is where we must pay attention, we open the front part of our blouse and on each side of what we just did, we will place the strips as folded as in step no. 8
Las sujetamos con alfileres, las tiras las colocaremos en diagonal como esta nuestra abertura, y coseremos por toda la orilla, hasta donde termina nuestra abertura, de los dos lados haremos lo mismo..
We fasten them with pins, we will place the strips diagonally like our opening, and we will sew along the entire edge, up to where our opening ends, on both sides we will do the same.
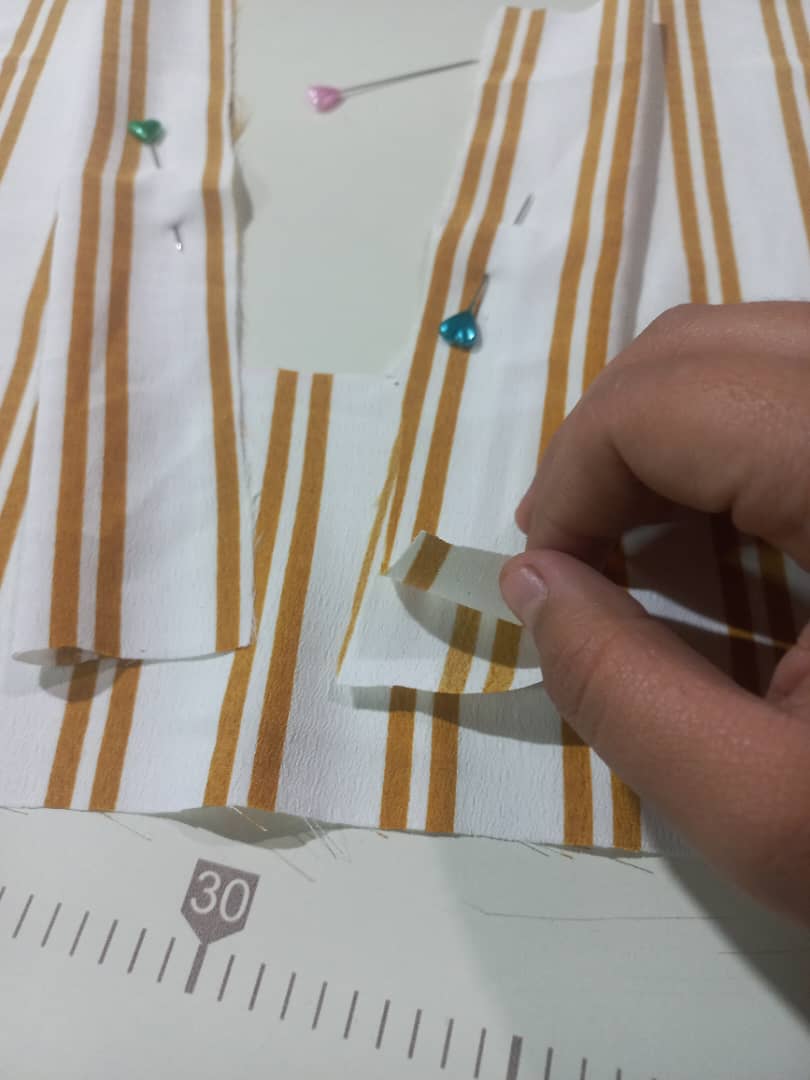
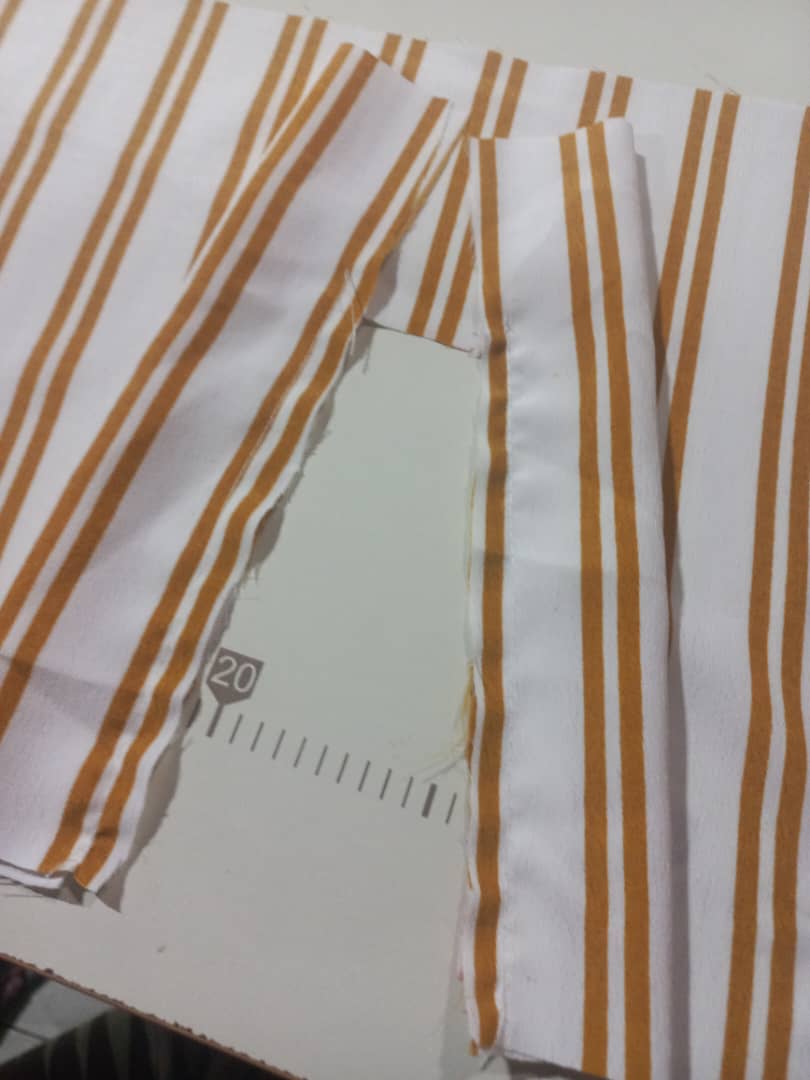
10.Luego de esto haremos dos piquetes uno de cada lado de forma diagonal hacia afuera.
10.After this we will make two pickets, one on each side diagonally outwards.
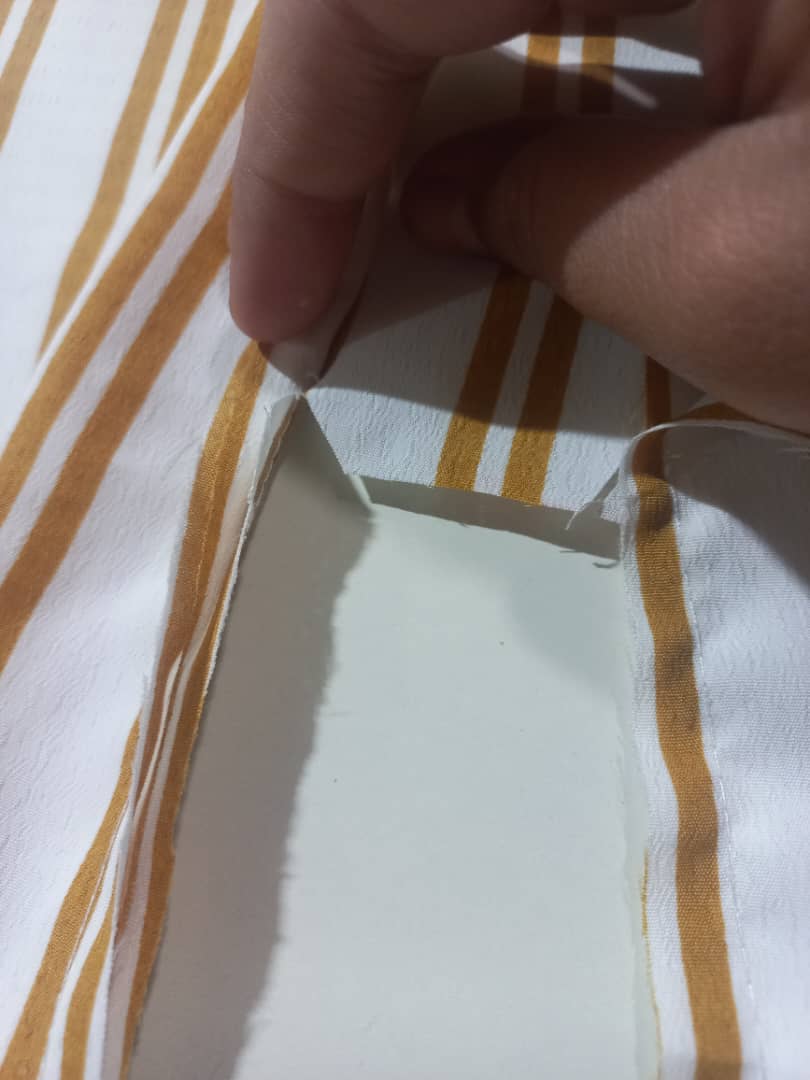
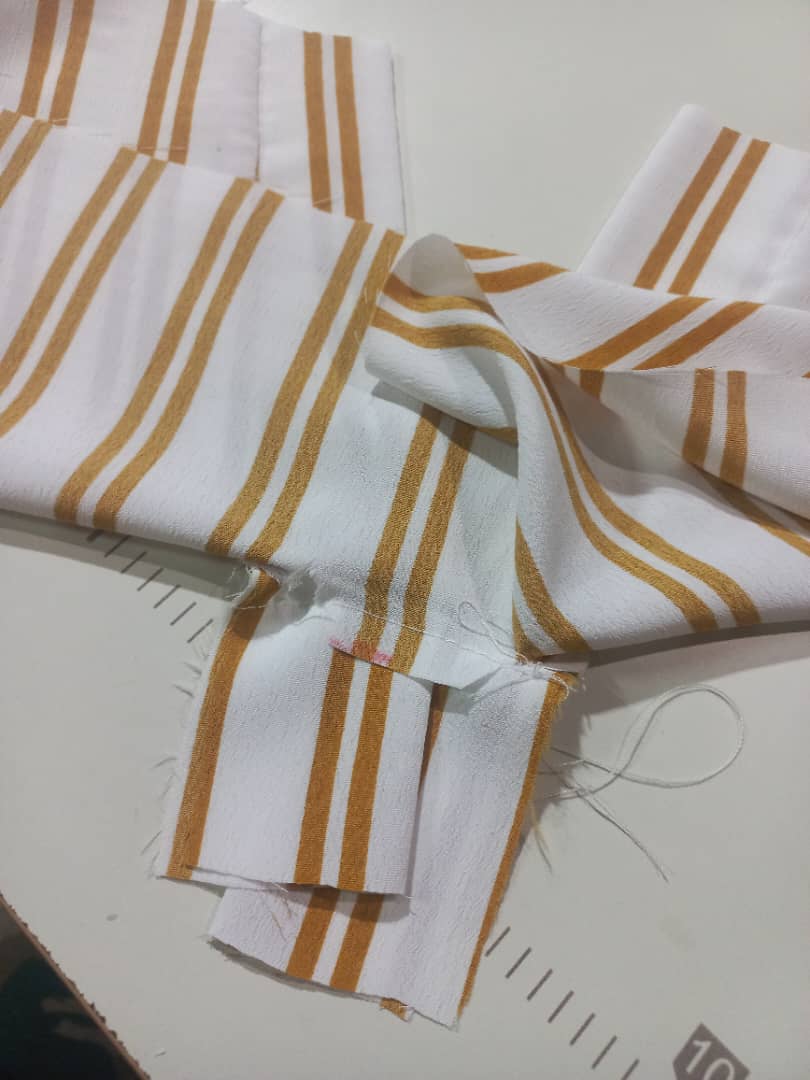
11-Este paso me cuesta explicar un poco jasjaj, nuestras dos tiras las meteremos hacia dentro, y el corte que nos queda también.
11-This step is difficult for me to explain a little hahaha, we will put our two strips inwards, and the cut that we have left too.
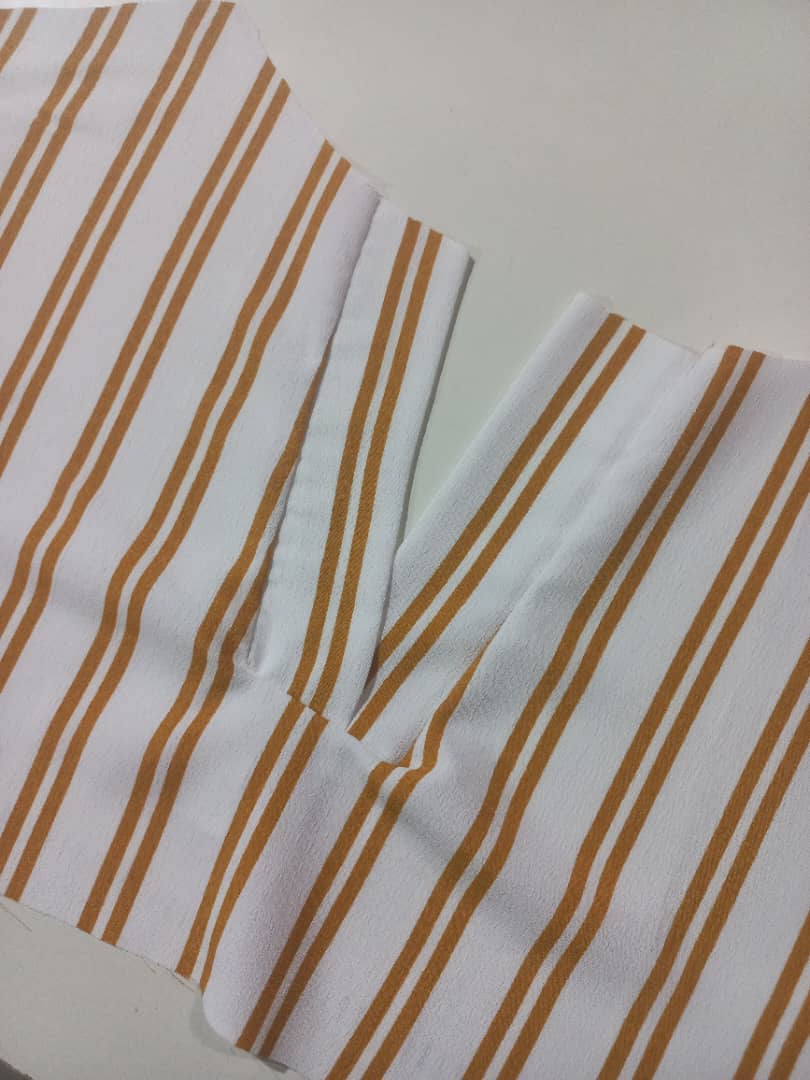
- Cosemos las dos tiras por dentro y el el corte que hicimos igual hacia dentro para que no se mueva, aquí les dejare unas fotos.
12. We sew the two strips inside and the cut that we made inwards so that it does not move, here I will leave you some photos.
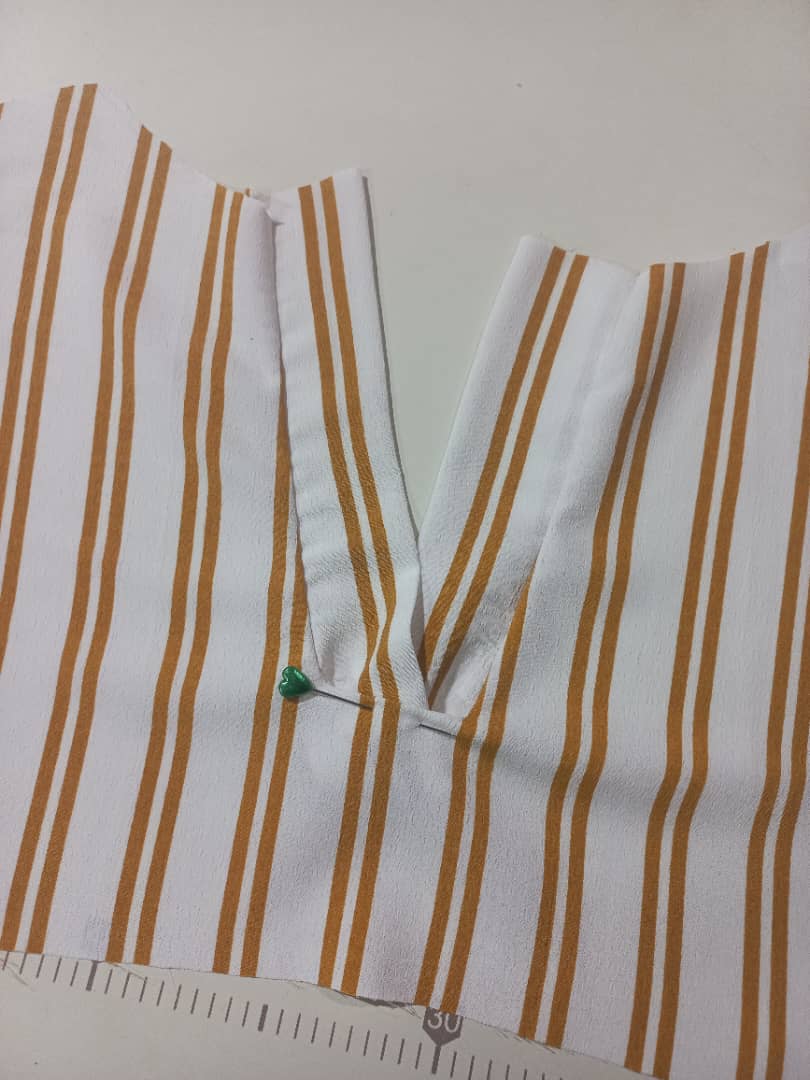
Y listo nos queda así nuestro cuello en v hasta este paso pueden hacer una blusa yo por que también quiero mostrarles como pueden hacer un cuello mao sencillo pero por este post les enseñare hasta aquí.
And that's it, our v-neck looks like this. Until this step, you can make a blouse because I also want to show you how you can make a simple mandarin collar, but for this post I will show you up to this point.
Espero les guste cuando lo aprendí no pare de hacer este tipo de cuello me parece que queda muy elegante, con esto me despido y espero que si tienen algún duda me lo digan en los comentarios espero tengan un feliz sábado un beso y abrazo desde la distancia.
I hope you like it. When I learned it, I didn't stop making this type of collar. I think it looks very elegant. With this I say goodbye and I hope that if you have any questions, tell me in the comments. I hope you have a happy Saturday. A kiss and hug from a distance. .
It looks pretty good. Love the V-shaped collar. Thank you for sharing this. Keep up the good work!
Buen material para aprender a hacer este cuello tan bonito. Gracias por compartir con nosotros. saludos.
Has sido votado por
PROYECTO ENLACE
'Conectando Ideas y Comunidades'
PROYECTO ENLACE es un proyecto de curación de habla hispana enfocado en recompensar contenido de calidad y apoyar autores en su proceso de crecimiento en HIVE.
Creemos y apostamos por el futuro de esta gran plataforma, y estamos muy emocionados de poder hacerla crecer junto a esta comunidad. Así que te invitamos a publicar en nuestra COMUNIDAD y estar atento a todas las actividades que tenemos preparadas y que estaremos publicando en breve.
¿QUIERES AUTOMATIZAR TUS GANANCIAS DE CURACIÓN? SE PARTE DEL PROYECTO ENLACE APOYANDO A NUESTRO TRAIL EN HIVE.VOTE INGRESA AQUÍ PARA CONOCER LOS DETALLES.
¿QUIERES INVERTIR ENLACE? DESCUBRE COMO HACERLO Y GENERAR INGRESOS DE FORMA SEMANAL MEDIANTE TU DELEGACIÓN DE HP AQUÍ TE EXPLICAMOS COMO.
Te invitamos a participar en nuestro servidor de Discord: https://discord.gg/3S9y7BbWfS
Atentamente
EQUIPO ENLACE 2024