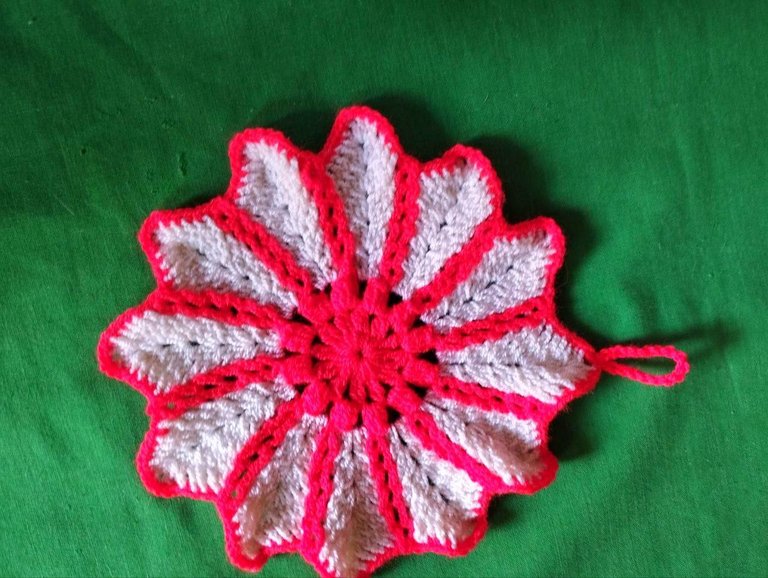
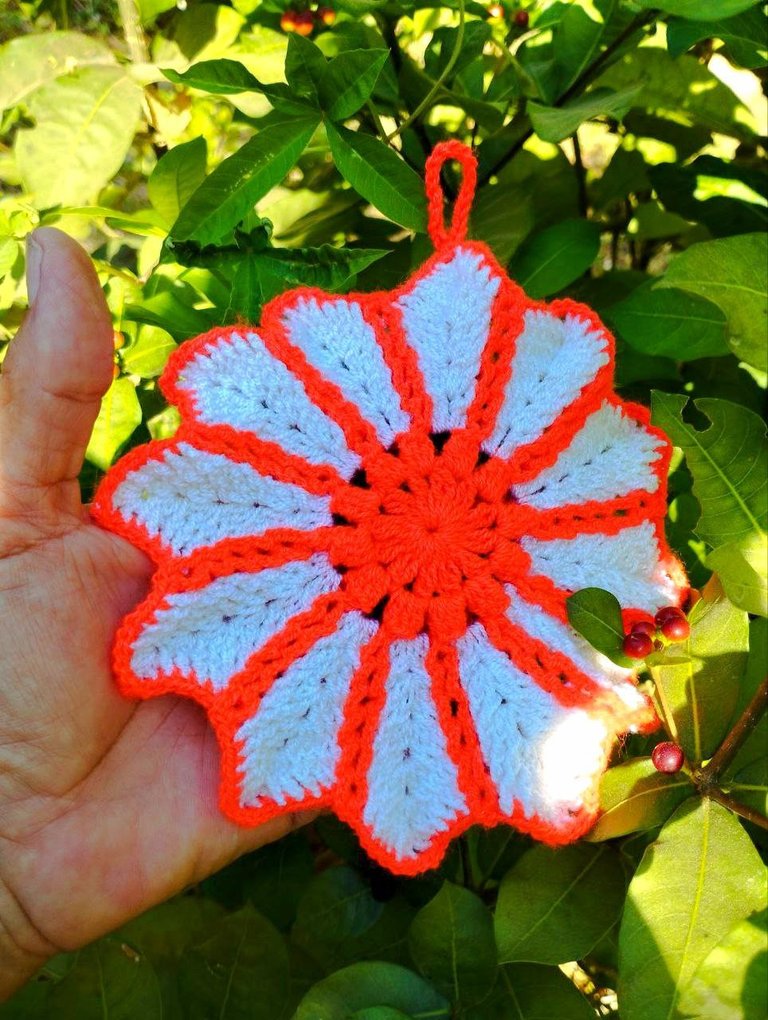
Hello my crochet friends, how are you? Today I'm sharing another beautiful flower with you, this time with fluorescent sparkles. It's shaped like a pot holder, very useful and decorative, and, as always, it's made entirely in crochet. 🏵🌺🧶
Hola mis amigos crocheteros cómo están, hoy les comparto de nuevo una hermosa flor en esta ocasion con destellos fosforescentes, esta formada como agarra ollas, muy útil y decorativa y como siempre esta elaborada totalmente en crochet. 🏵🌺🧶
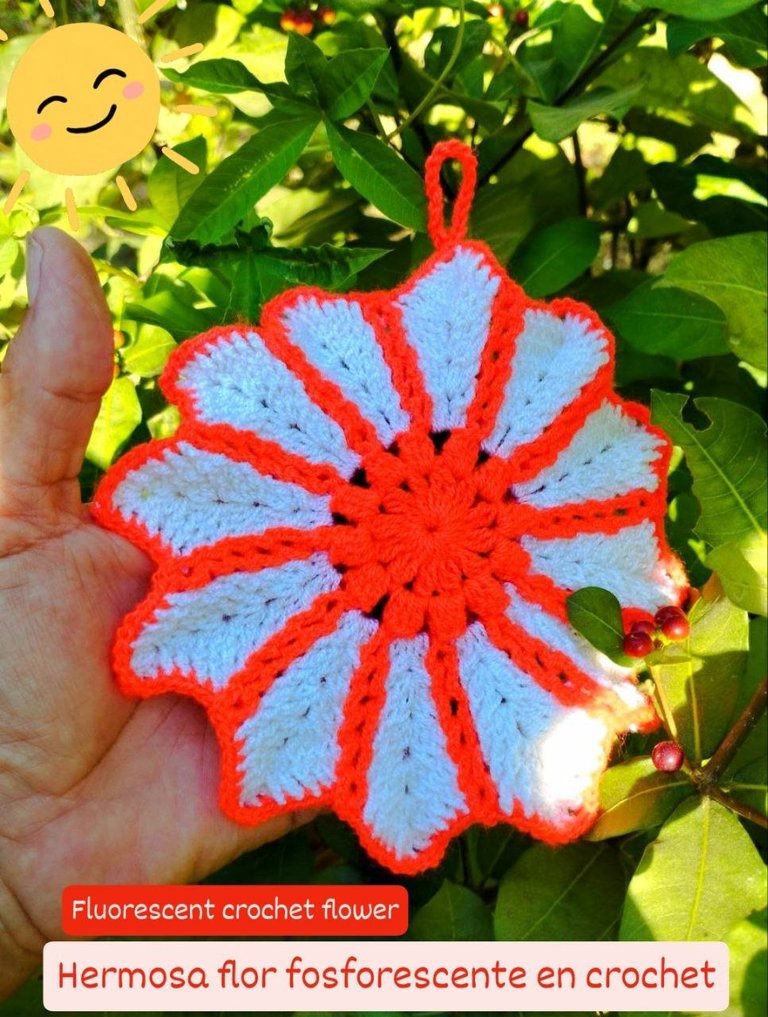
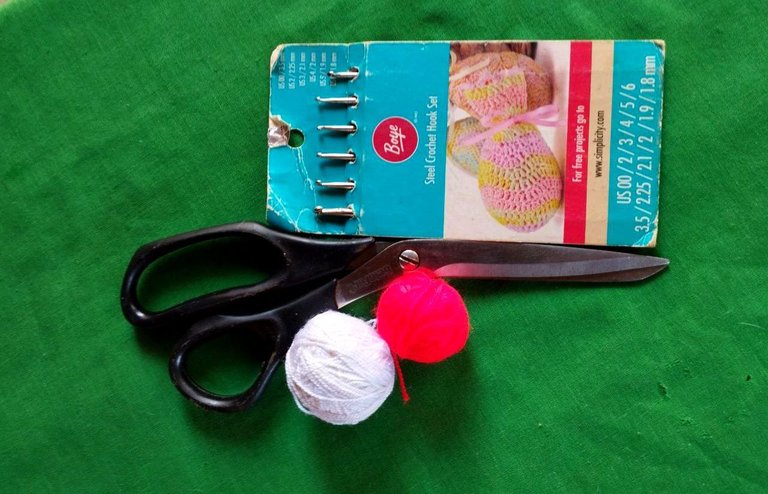
The materials used in this flower have been crochet threads in the colors: White and fluorescent orange 🧡, crochet hook number 4 and scissors, for the stitches I have used: Normal double crochets, double looped double crochets and chain stitches.
Los materiales utilizados ene sta flor han sido hilos de crochet en los colores: Blanco y naranja fosforescente 🧡, aguja de crochet número 4 y tijeras, para los puntos he usado: Puntos altos normales, puntos altos doble lazada y puntos cadenas.
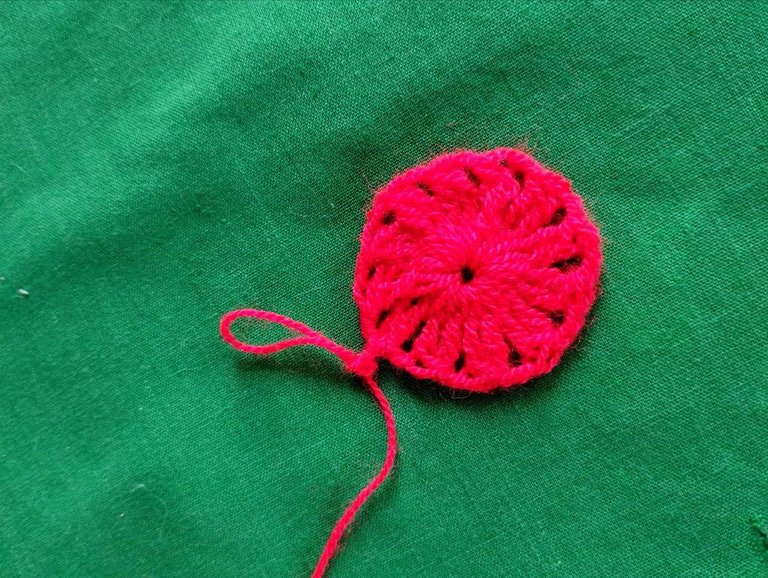
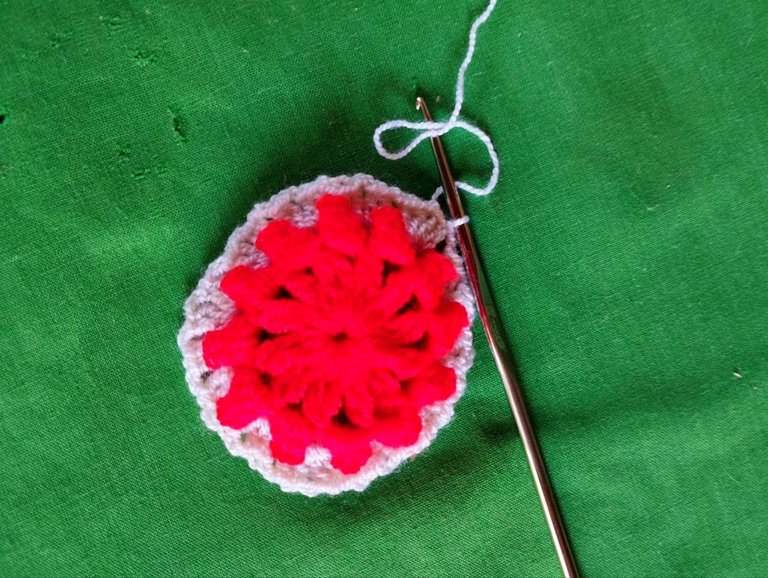
We'll start with the bright orange yarn, chain 6, and within these, we'll cast on 2 double crochet loops closed together, chain 2, and so on until we have 12 groups within the arch. In the space between the chains, we'll make 5 regular double crochets and insert them into the first stitch and close them, making a bud. Chain 3, and repeat again until we have 12 buds.
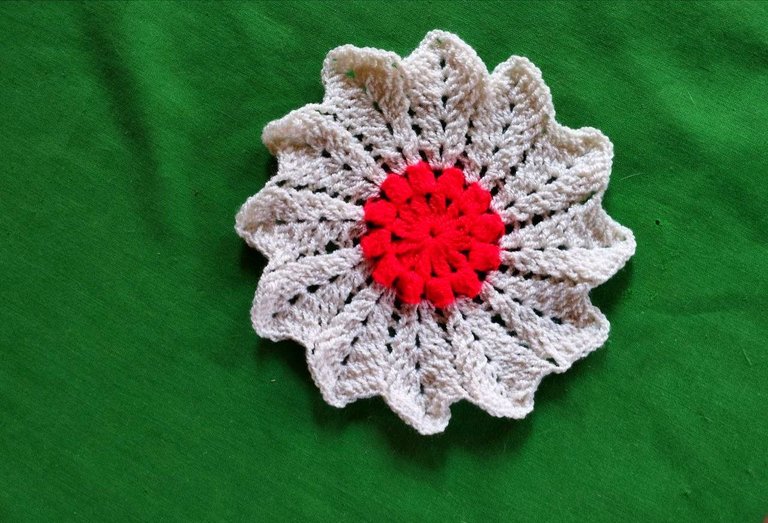
We place the white yarn and in each arch we make 2 regular double crochets, 2 chains, 2 regular double crochets, 2 separating chains, and we repeat in all the arches until we have 12 groups. In row 4 we skip the first stitch, make 1 stitch picked up in relief, and in the arch we repeat the fan of 2 regular double crochets, 2 chains, 2 regular double crochets, 1 stitch picked up in relief, sep.od with 2 chains. In all the following rows we will increase one relief stitch on each side of the fans until we have 6 rows of white and 5 relief stitches on each side of the fan.
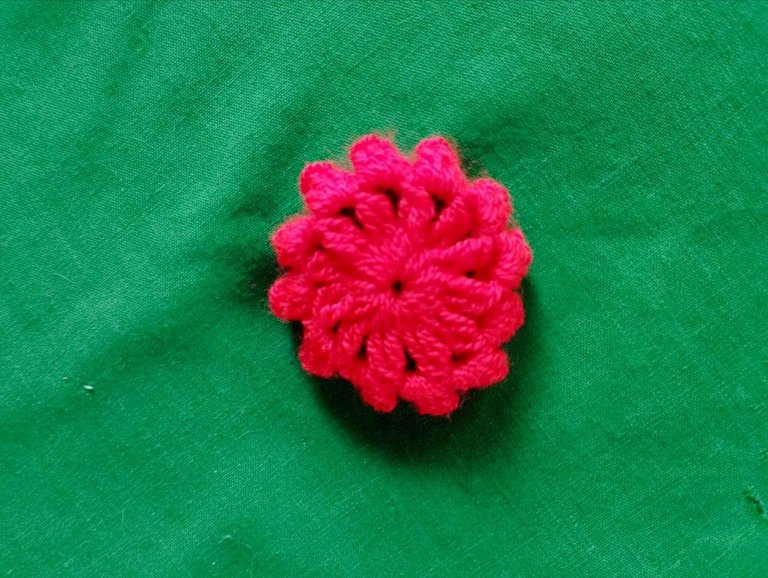
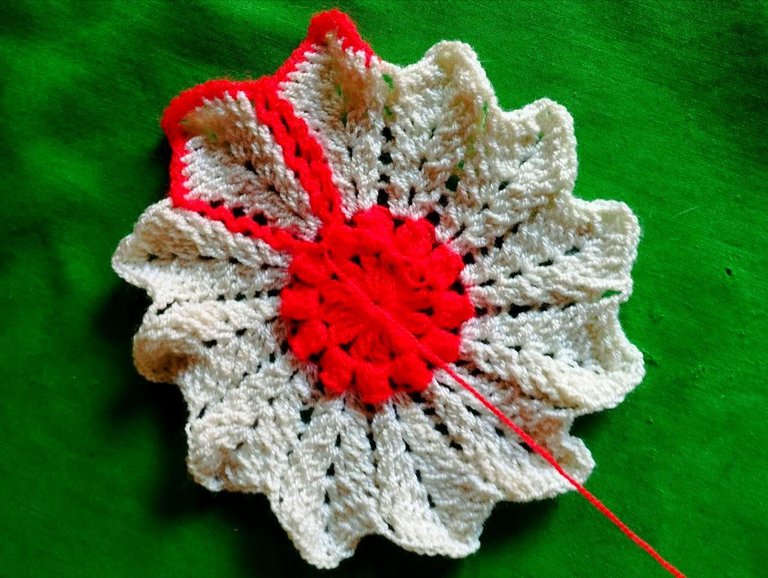
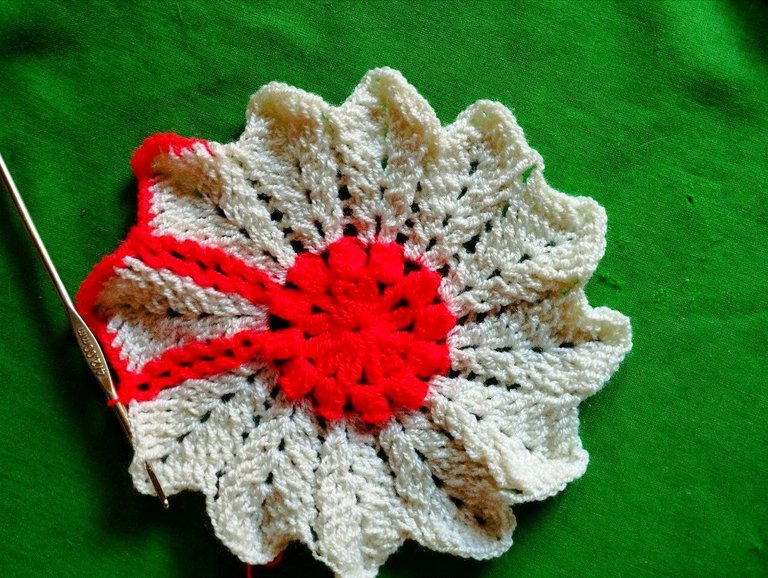
We change for the orange yarn and make 7 single crochets on each peak, 3 single crochets in the arch 7 single crochets, 3 chains and we make 1 single crochet taking the separation thread of the rows below, until we reach the bottom we make 1 single crochet taking the base of the popcorn, we make 3 chains and we go up in the same way making single crochets in the divisions of the rows, thus we repeat all the peaks, finally we make a handle to hang.
Comenzaremos con el hilo de color naranja intenso, hacemos 6 cadenas y dentro de estas montamos 2 puntos altos doble lazada cerrados juntos, 2 cadenas, así hasta obtener 12 grupos dentro del arco, en el espacio de las cadenas hacemos 5 puntos altos normales y lo pinchamos en el primer punto y cerramos haciendo un capullo, 3 cadenas y repetimos de nuevo hasta obtener 12 capullos.
Colocamos el hilo blanco y en cada arco hacemos 2 puntos altos normales, 2 cadenas, 2 puntos altos normales, 2 cadenas de separación y repetimos en todos los arcos hasta obtener 12 grupos, en la fila 4 saltamos el primer punto, hacemos 1 punto tomado por delante en relieve y en el arco repetimos el abanico de 2 puntos altos normales, 2 cadenas, 2 puntos altos normales, 1 punto tomado por delante en relieve, sepsra.od con 2 cadenas, en todas las filas siguientes iremos aumentando un punto de relieve en cada lado de los abanicos hasta obtener 6 filas de color blanco y 5 puntos relieve de cada lado del abanico.
Cambiamos por el hilo color naranja y hacemos sobre cada pico 7 puntos bajos, 3 puntos bajos en el arco 7 puntos bajos, 3 cadenas y hacemos 1 punto bajo tomando el hilo de separación de las filas por debajo, así hasta llegar hasta bajo hacemos 1 punto bajo tomando la base del popcorn, hacemos 3 cadenas y subimos de igual manera haciendo puntos bajos en las divisiones de las filas, así repetimos todos los pico, por ultimo elaboramos un asa para colgar.

Dear friends, it's a pleasure to share another project with you. Thank you for your time. 🫂🙏🏻
Apreciados amigos es un placer poder compartir un proyecto más con ustedes, gracias por su tiempo. 🫂🙏🏻
The photographs are my own, taken with my Redmi Note 11 cell phone and edited with the Instagram application, the translation of the text was done using this means: Google.
My Instagram account and work venture is:
Siriuscrochet, the magic of knitting.
Las fotografías son de mi autoría tomadas con mi celular Redmi Note 11 y editadas con la aplicación Instagram la traducción del texto la realice utilizando este medio: Google.
Mi cuenta de Instagram y emprendimiento laboral es:
Siriuscrochet, la magia de tejer.
Your flowery crochet looks beautiful. It is very nice! Well done.
Thanks You
Thanks You
It looks pretty good. Its design and color can grab anyone's attention. You did a wonderful job! Keep up the good work!
Thanks You