Saludos amigos de Needleworkmonday, espero estéis teniendo un excelente día 🥰❤️
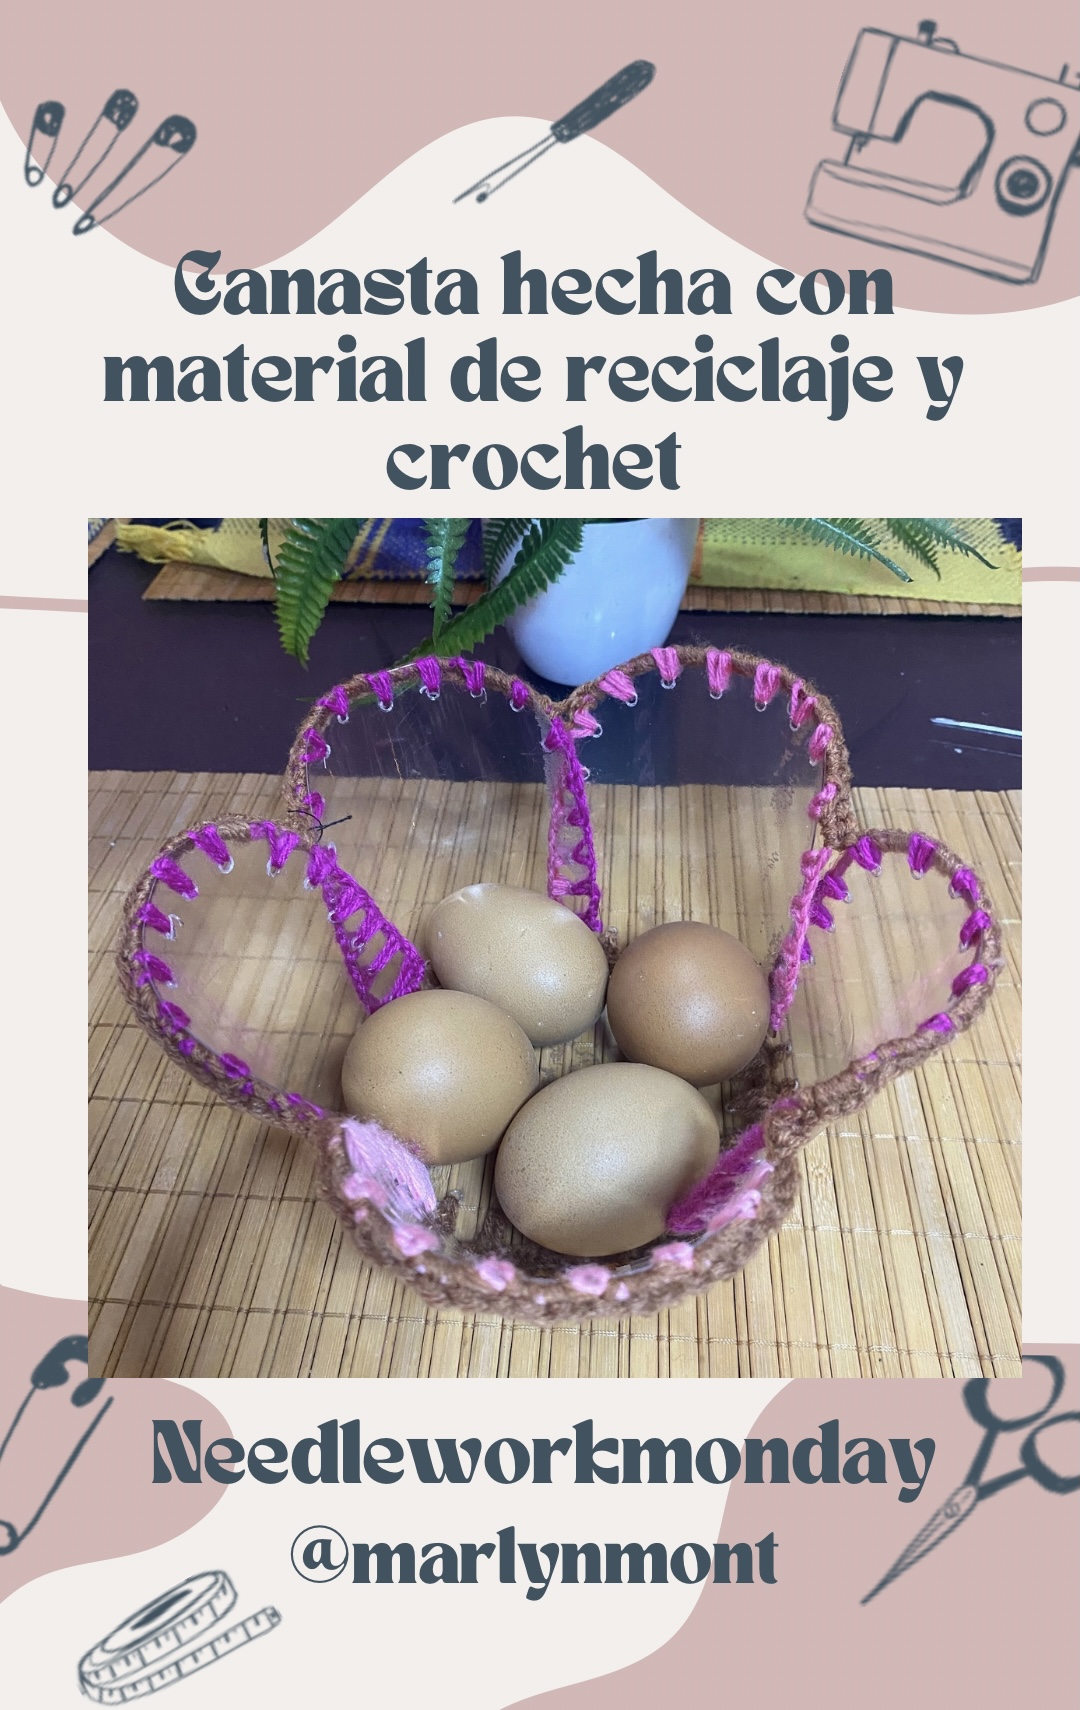
Hoy quise darle un descanso a mis máquinas y hacer otro tipo de trabajo, este trabajo es una linda manualidad hecha con materiales de reciclaje y un poco de crochet, desde hace tiempo tenía esta idea en mente pero a veces las ocupaciones diarias se nos hacen tantas que se nos es difícil lograr nuestros proyectos, pero al fin me tomé el tiempo y aquí les traigo el resultado, ven y te muestro cómo hice esta linda canasta para huevos:
Greetings friends of Needleworkmonday, I hope you are having a great day 🥰❤️
Today I wanted to give my machines a rest and do another type of work, this work is a nice craft made with recycling materials and a little crochet, I had this idea in mind for a long time but sometimes daily tasks become too much for us. It is difficult for us to achieve our projects, but I finally took the time and here I bring you the result, come and I will show you how I made this beautiful egg basket:
🐓-🐓-🧺-🥚-🧺-🐓-🐓
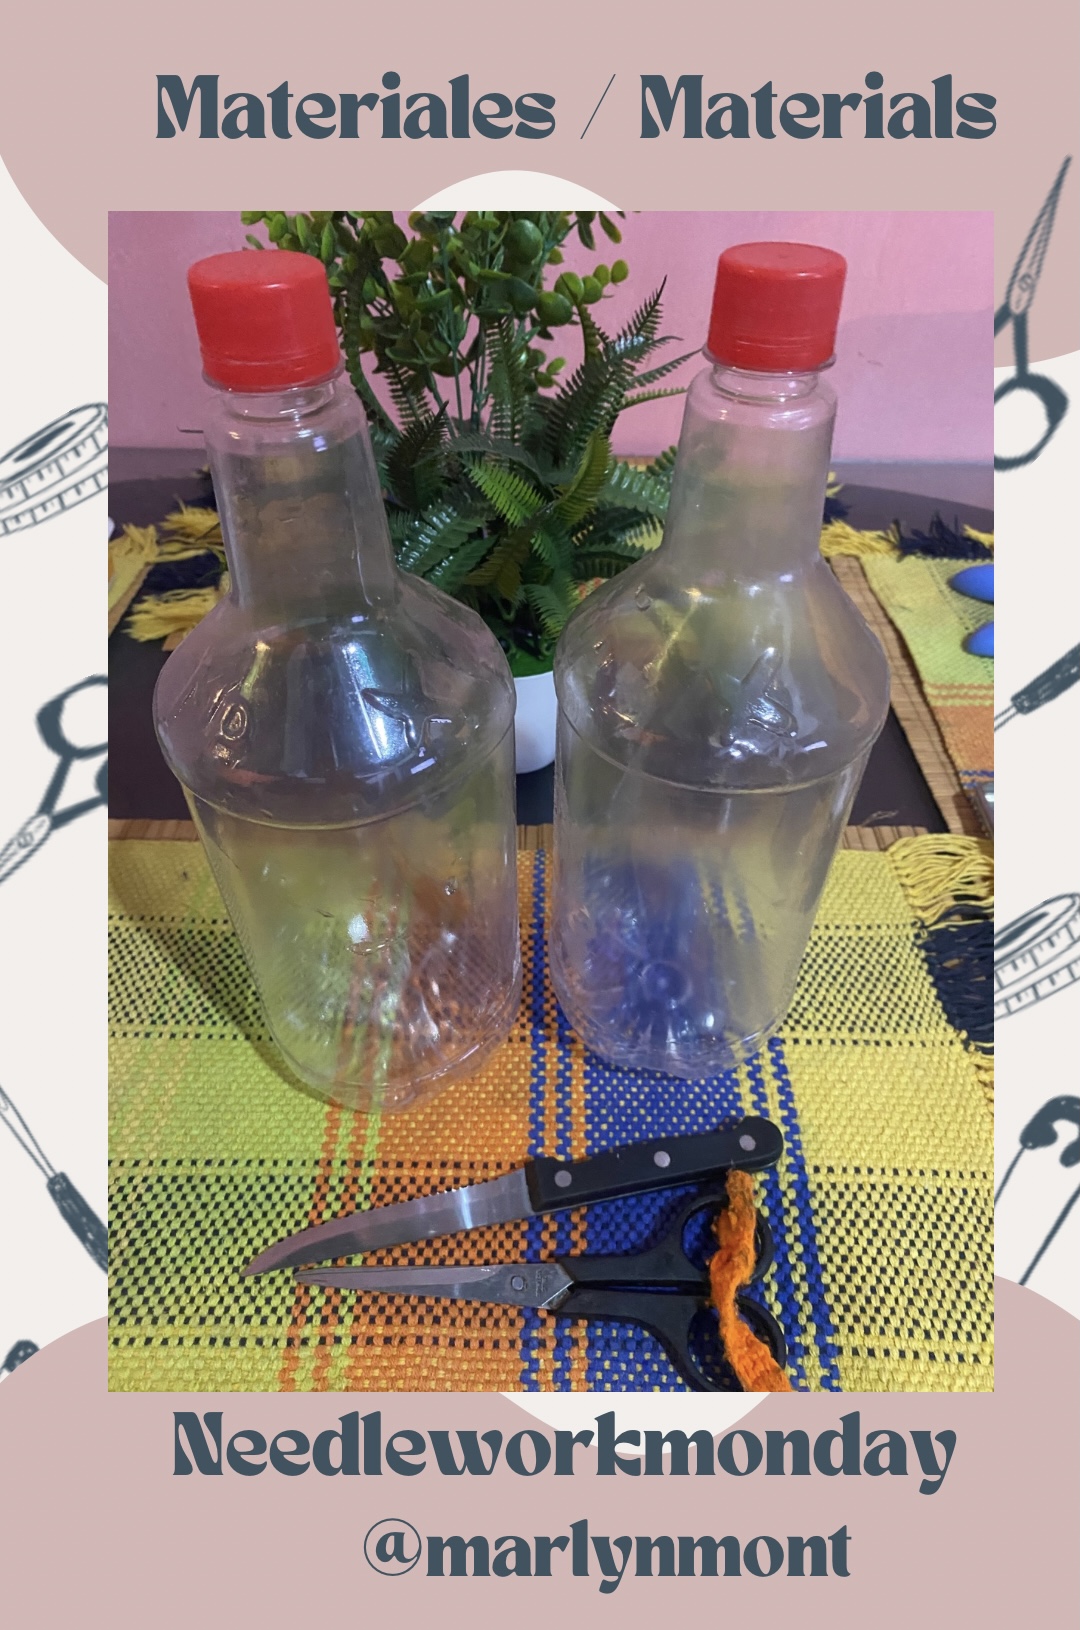
MATERIALES
MATERIALS
Los envases plásticos de refresco son un tipo de material que tienen muchas utilidades, muchas veces los desechamos, pero en esta oportunidad te traigo una linda manualidad que te aseguro vas a querer recolectar muchos de estos envases.
Esta idea ya venía revoloteándome en mi mente desde hace un tiempo, exactamente cómo hacerla no sabía, solamente me imaginaba hacer una linda canasta con este tipo de plástico ya que él es bastante resistente y en lo particular no me gusta dejar los huevos en el cartón en el que vienen y quería hacer algo lindo para colocarlos en mi cocina, los materiales son muy pocos, lo importante es que siempre tengamos a la mano todas esas herramientas útiles para nuestras manualidades, aquí te dejo la lista de todos los materiales que utilicé:
- 2 envases plásticos, en mi caso estoy utilizando de sangría, estás tienen una parte lisa bastante ancha y me pareció perfecta para esta manualidad
- Tijeras, cuchillo o algo que te sirva para cortar el plástico.
- Marcador
- Aguja de tejer
- Estambres
- aguja punta Roma
- objeto como un clavo o algo punzante con el que puedas calentar y abrir orificios al plástico
Plastic soda containers are a type of material that has many uses, many times we throw them away, but this time I bring you a nice craft that I assure you you will want to collect many of these containers.
This idea had been floating around in my mind for a while, I didn't know exactly how to make it, I just imagined making a nice basket with this type of plastic since it is quite resistant and I don't particularly like leaving the eggs in the carton. in which they come and I wanted to make something nice to place them in my kitchen, the materials are very few, the important thing is that we always have on hand all those useful tools for our crafts, here is the list of all the materials I used:
- 2 plastic containers, in my case I am using sangria, these have a fairly wide smooth part and I thought it was perfect for this craft
- Scissors, knife or something that can be used to cut the plastic.
- Marker
- Knitting needle
- Stamens
- blunt point needle
- object such as a nail or something sharp with which you can heat and open holes in the plastic
🐓-🐓-🧺-🥚-🧺-🐓-🐓
PASO A PASO
STEP BY STEP
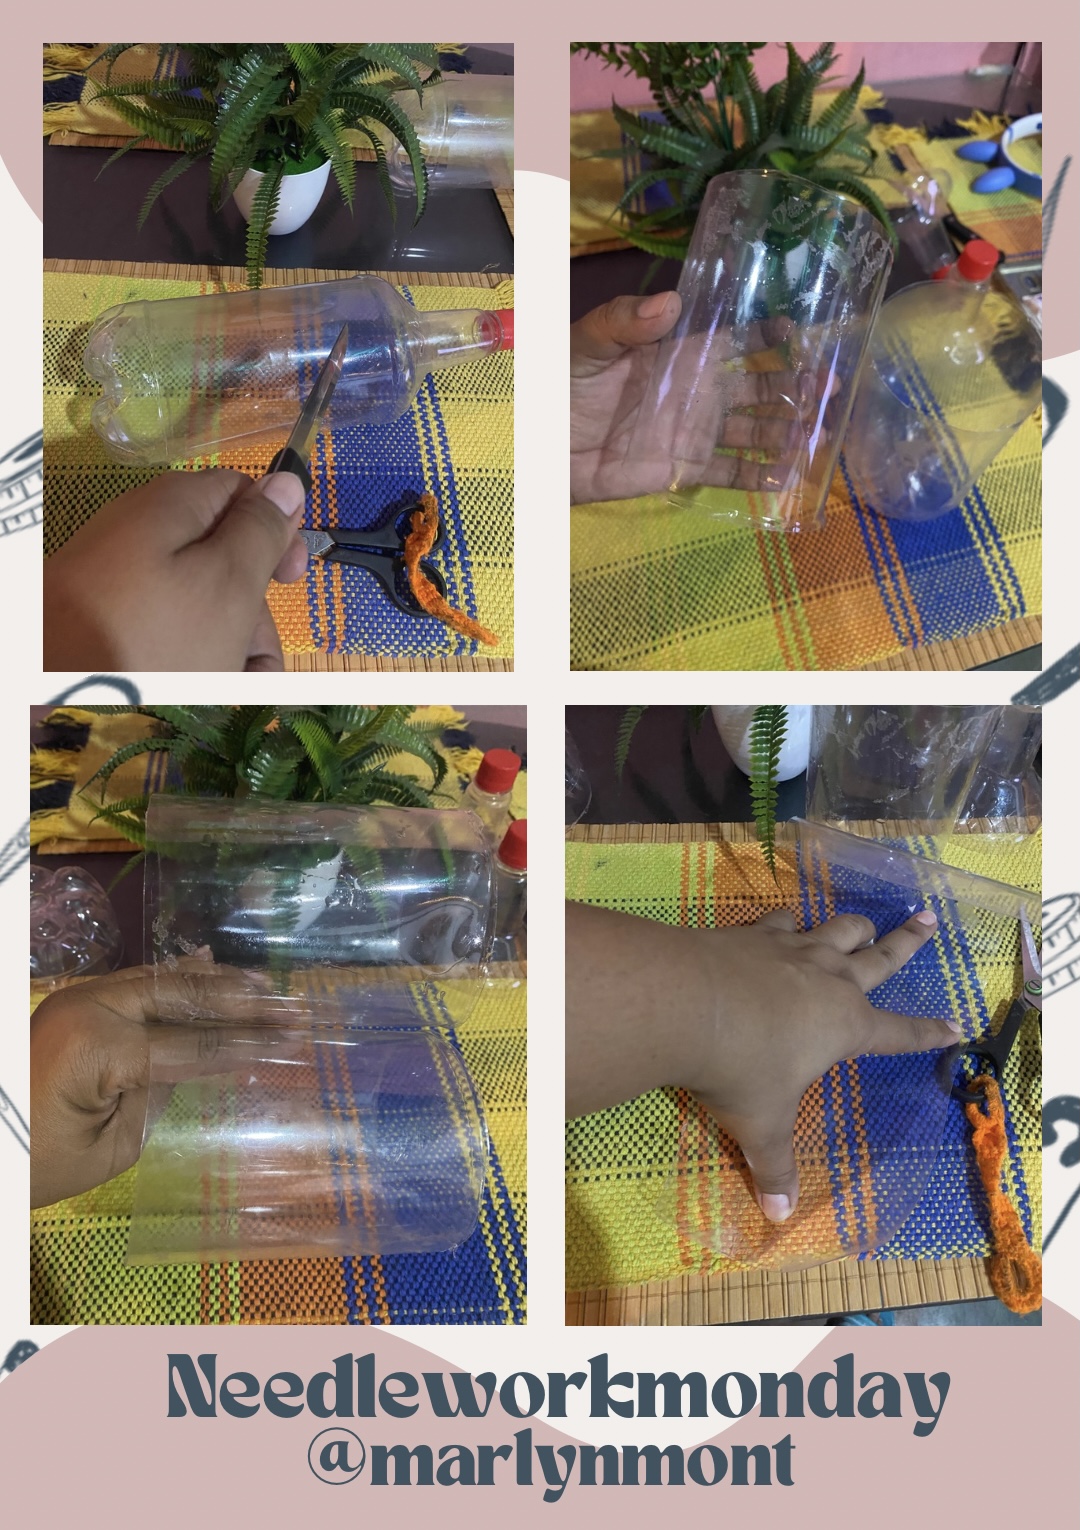
Para el primer paso vamos a sacarle o cortar la parte lisa a nuestros envases, para esto vamos a quitar las calcomanías que tengan y luego con ayuda de un cuchillo o algún objeto punzante hacemos una pequeña abertura, luego recortamos con una tijera y recortamos la parte lisa.
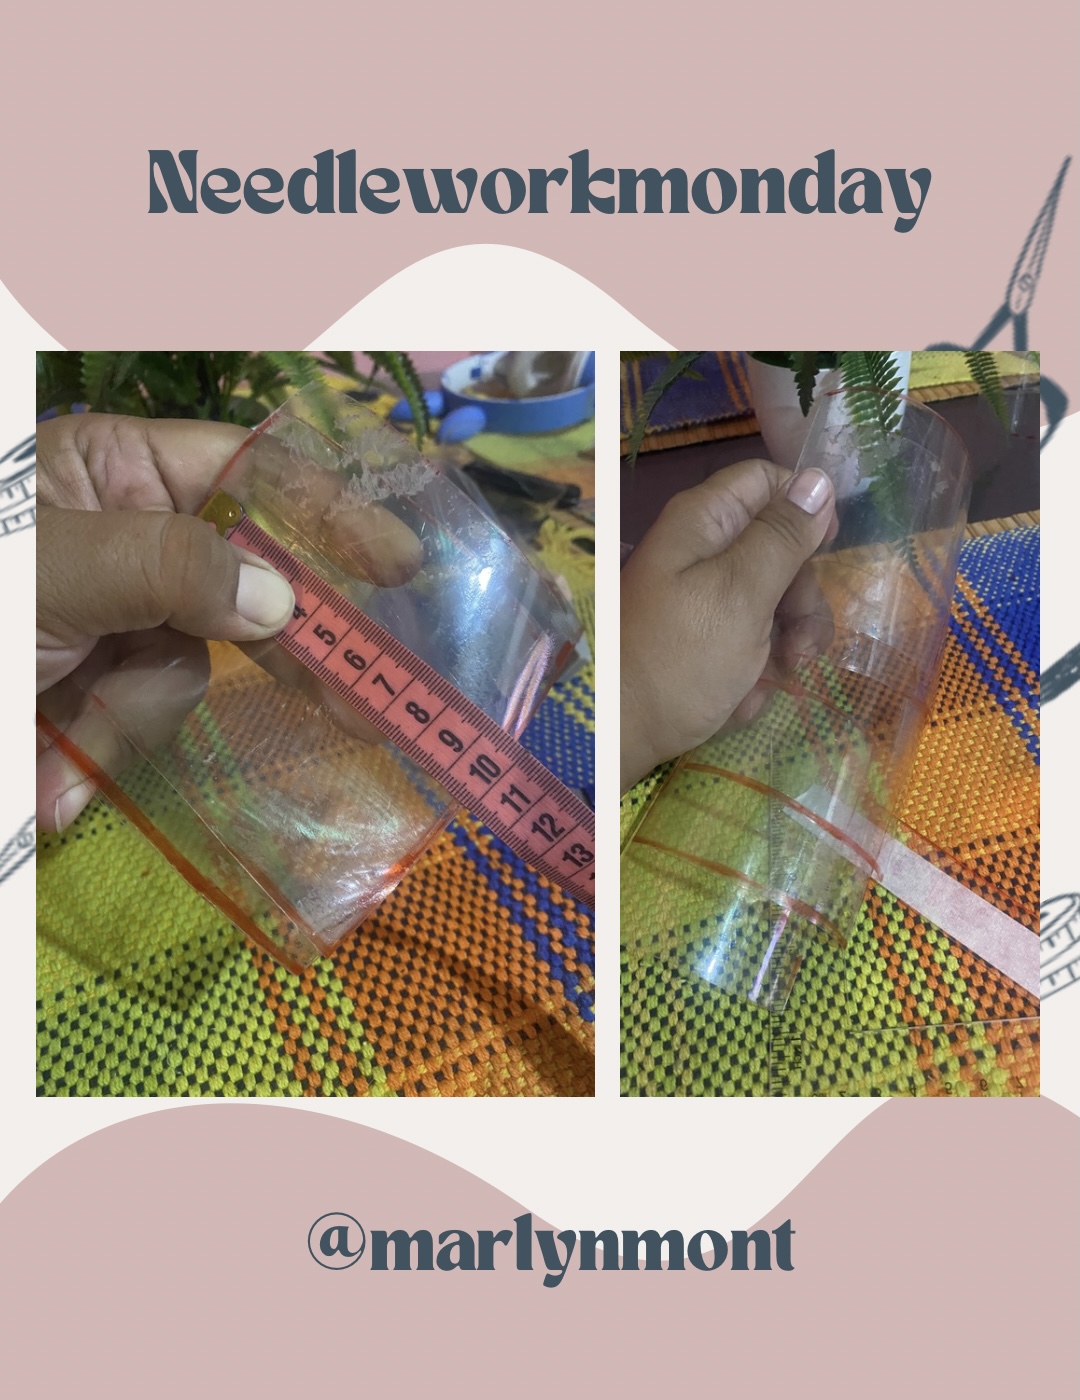
Los envases que yo estoy utilizando tienen una circunferencia aproximada de 32 cm y de alto tienen alrededor de 14 cm, ayudándome con un cuchillo y una tijera pude extraer esta parte lisa.
For the first step we are going to remove or cut the smooth part of our containers, for this we are going to remove the stickers that they have and then with the help of a knife or some sharp object we make a small opening, then we cut out with scissors and cut out the part smooth
The containers that I am using have an approximate circumference of 32 cm and are around 14 cm high. Using a knife and scissors, I was able to extract this smooth part.
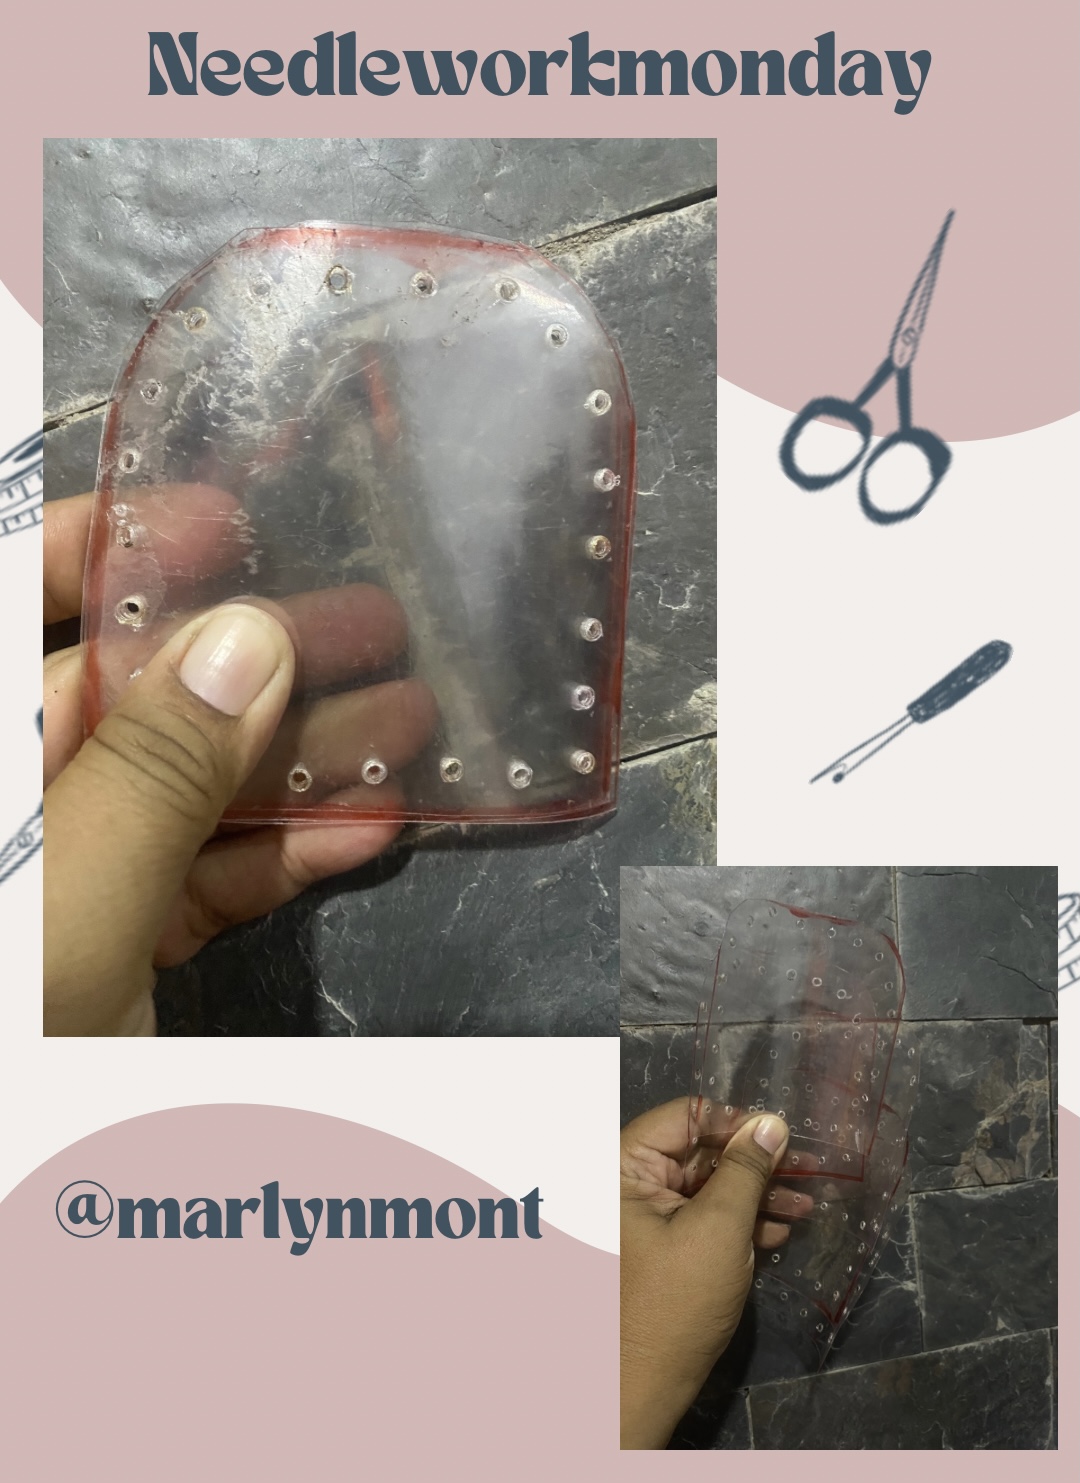
Luego de cortar la parte lisa de mis envases plásticos voy a medir 5 piezas cuadradas de 10 cm por cada lado, cortamos y a cada pieza le vamos a redondear sólo 2 puntas las cuales irán para la parte superior de la canasta.
Como esta era una idea que tenía en mente, no tenía la precisión de cómo sería cada pieza para mi canasta, a medida que fui dándole la forma ya tenía algo pensado de cómo quedaría.
After cutting the smooth part of my plastic containers, I am going to measure 5 square pieces of 10 cm on each side, we cut and we are going to round off each piece only 2 points which will go to the top of the basket.
Since this was an idea that I had in mind, I didn't have the precision of what each piece would be like for my basket, as I shaped it I already had something in mind about how it would look.
Con ayuda de un clavo caliente o con algún objeto punzante le vamos a abrir pequeños orificios por todo el alrededor, les dejaremos una distancia de 1 cm aproximadamente.
Para que me quedaran todas iguales las junté y le abrí los orificios juntas, al estar el objeto caliente estas se pegarán un poco, pero luego es fácil despegarlas con mucho cuidado lo lograrás.
With the help of a hot nail or some sharp object we are going to open small holes all around, leaving a distance of approximately 1 cm.
So that they would all look the same, I put them together and opened the holes together. Since the object is hot, they will stick a little, but then it is easy to take them off. With great care, you will be able to do it.
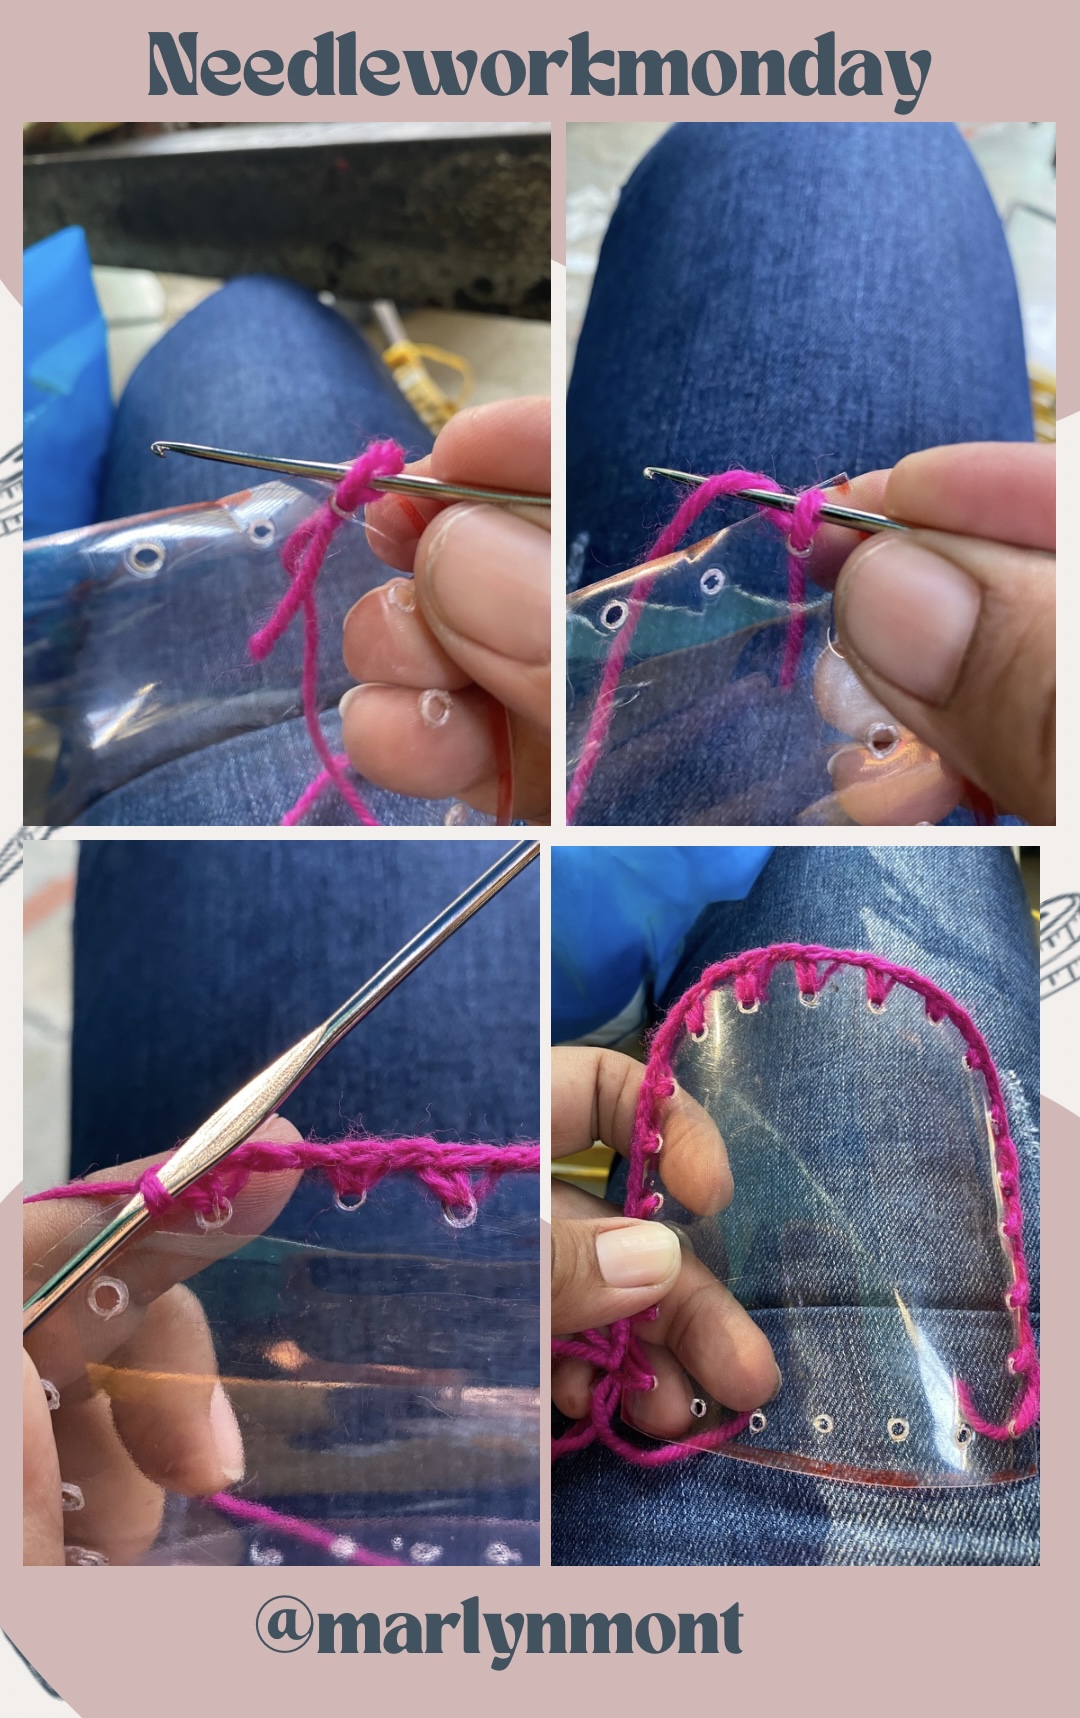
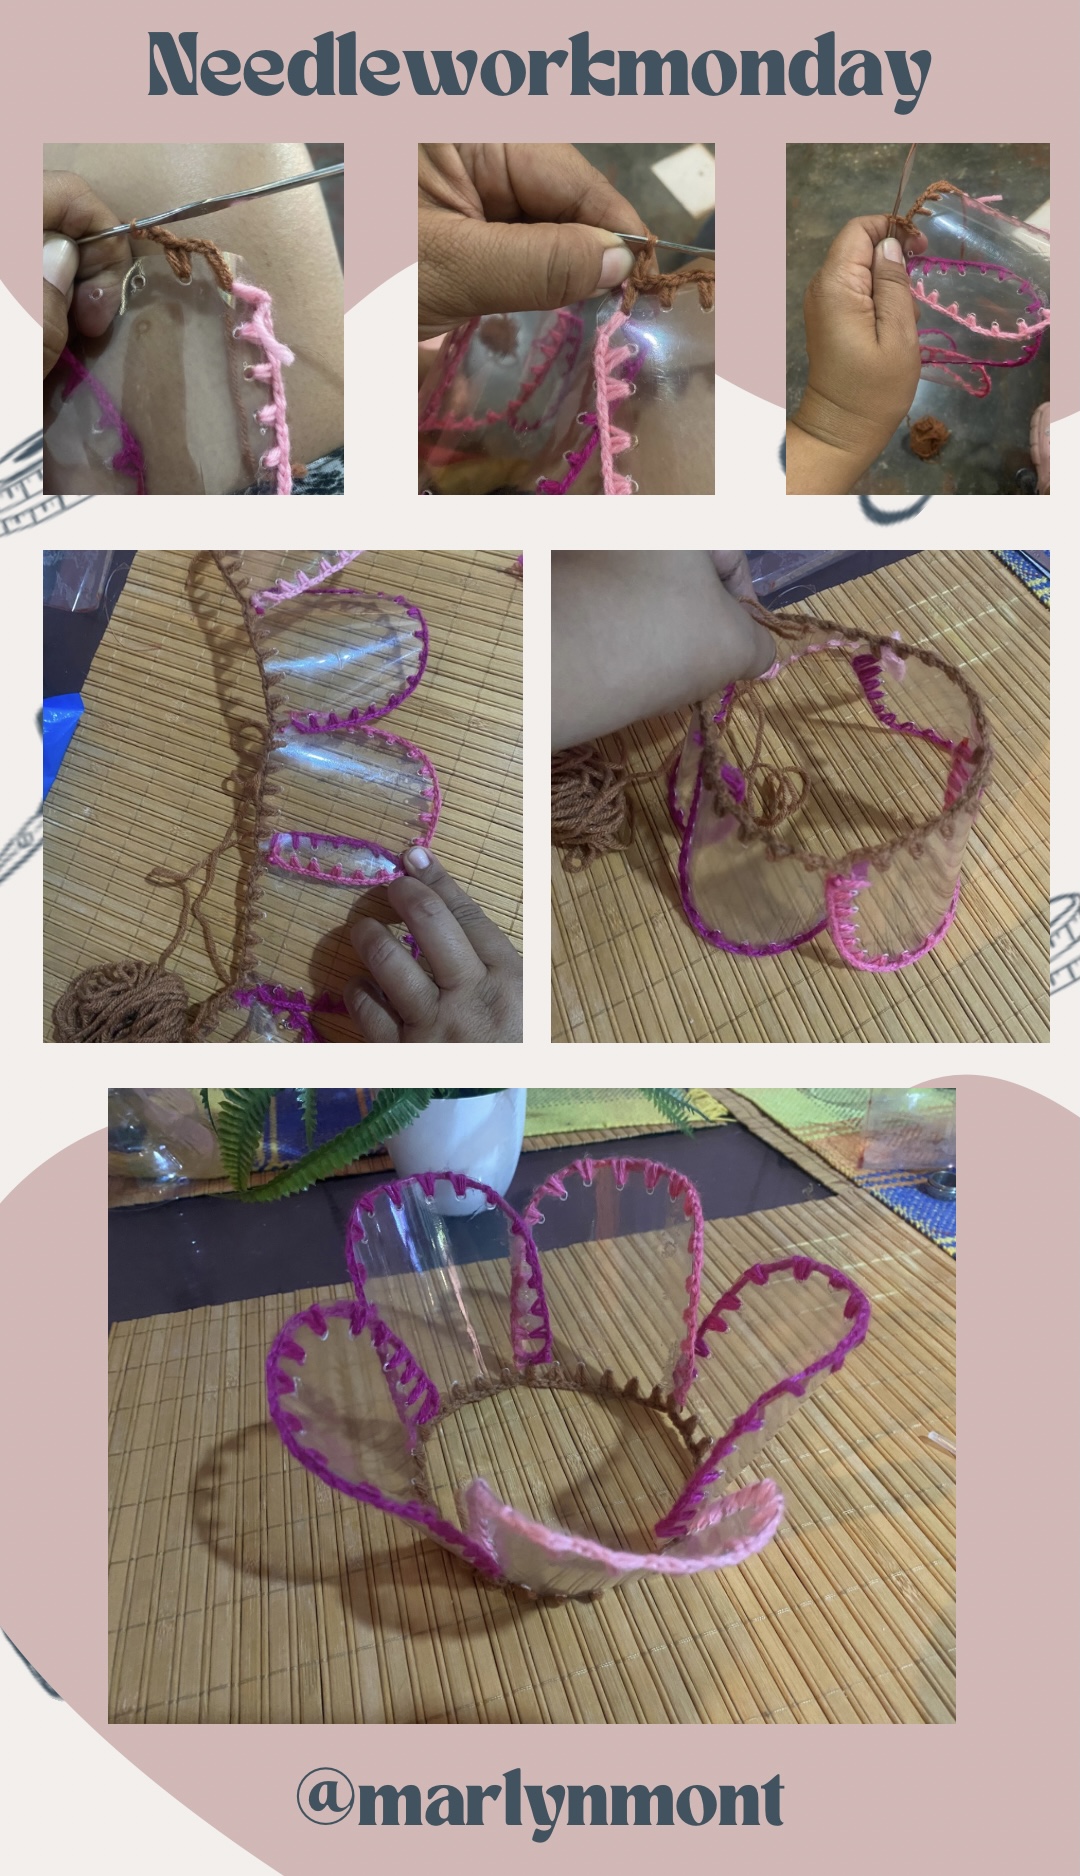
En el siguiente paso vamos a comenzar con el tejido, este tejido es bastante sencillo, comenzaremos haciendo un punto en el primer orificio en una de las orillas, vamos a hacer dos o tres cadenas y hacemos otro punto en el siguiente orificio y así sucesivamente hasta terminar toda la orilla con excepción de la orilla inferior.
En mi caso voy a utilizar estambres de varios colores y así aprovechar todos esos retazos de estambre que van sobrando de cada tejido y en lo particular cuando se trata de tejido me gustan los colores variados ya que hace que cada trabajo se vea más llamativo y hermoso
In the next step we are going to start with the weaving, this weaving is quite simple, we will start by making a stitch in the first hole on one of the edges, we are going to make two or three chains and we will make another stitch in the next hole and so on until finish the entire edge except for the bottom edge.
In my case I am going to use yarns of various colors and thus take advantage of all those pieces of yarn that are left over from each fabric and in particular when it comes to fabric I like varied colors since it makes each work look more striking and beautiful
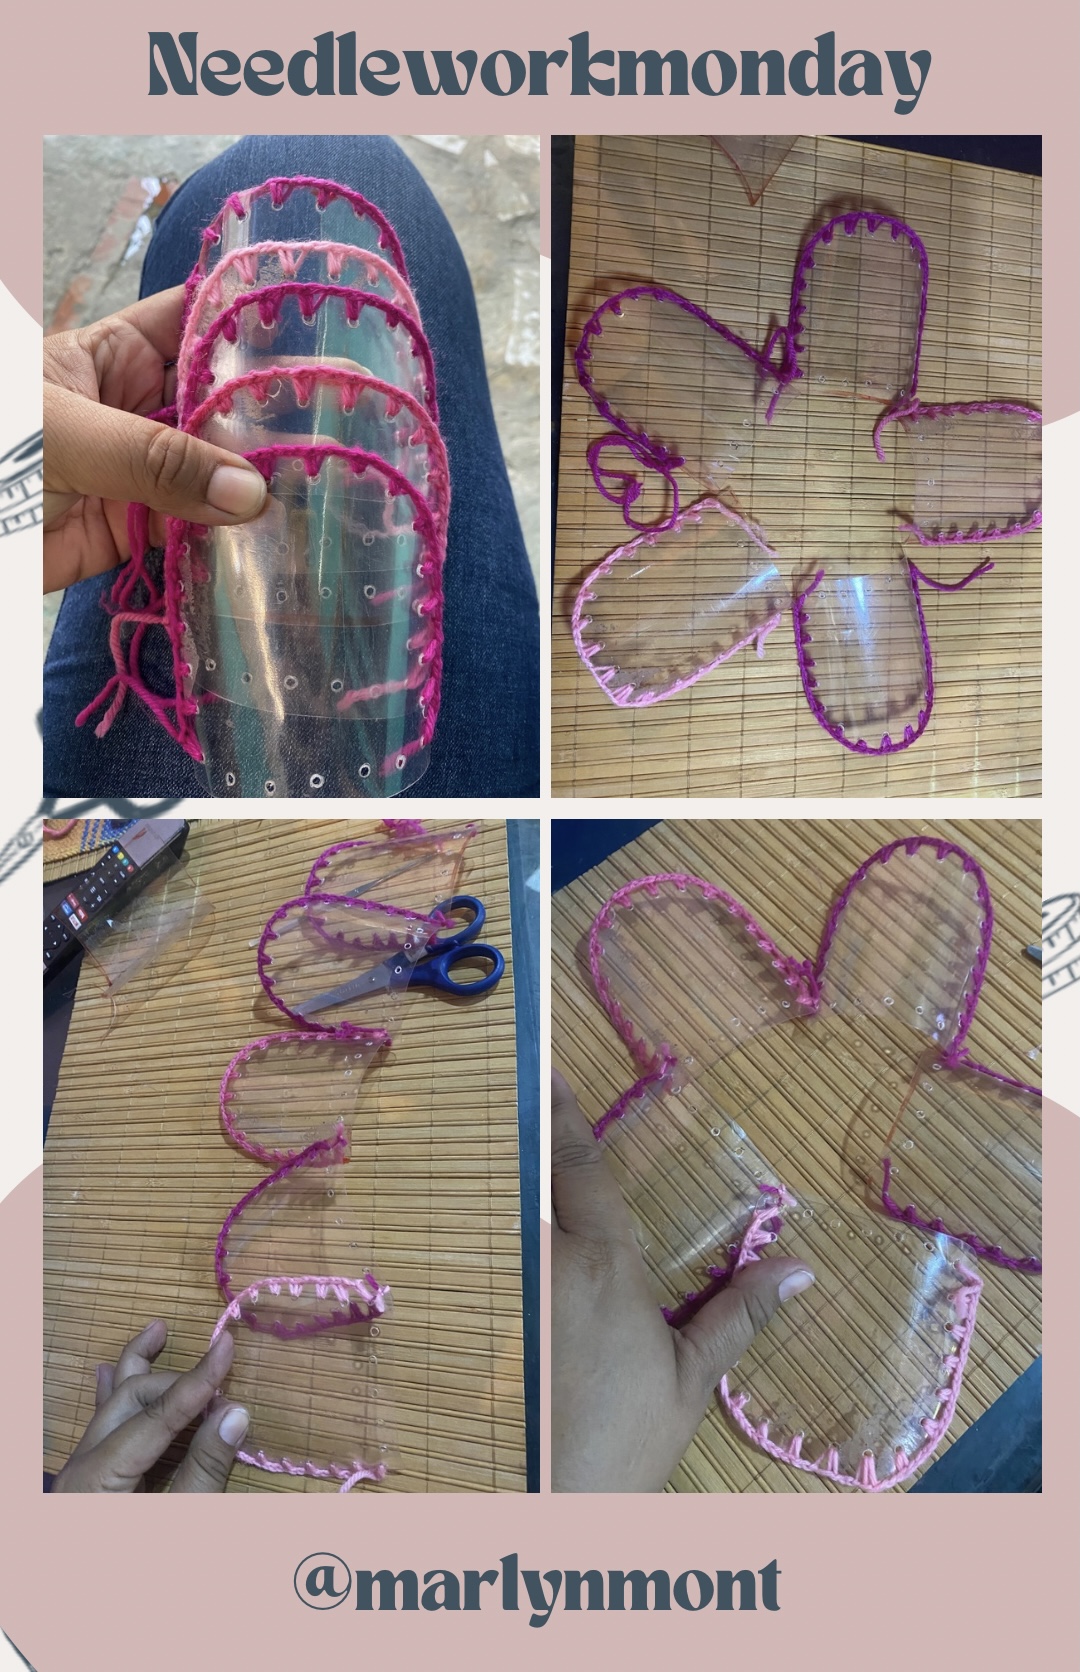
El procedimiento anterior lo vamos a hacer con las cinco piezas, al tenerlas listas vamos a proceder a unirlas, esto lo haremos por el punto de cada esquina inferior, podemos utilizar el sobrante de hilo de cada una y las atamos.
A medida que iba haciendo este proyecto iban surgiendo nuevas ideas, me pareció muy bonita la forma que se ve al unir las piezas ya que parece como una flor, sería una bonita idea hacer una flor con este tipo de plástico y el tejido.
We are going to do the previous procedure with the five pieces, once we have them ready we are going to proceed to join them, we will do this at the point of each lower corner, we can use the excess thread from each one and we tie them.
As I was doing this project, new ideas arose. I thought the shape that was seen when putting the pieces together was very pretty since it looked like a flower. It would be a nice idea to make a flower with this type of plastic and the fabric.
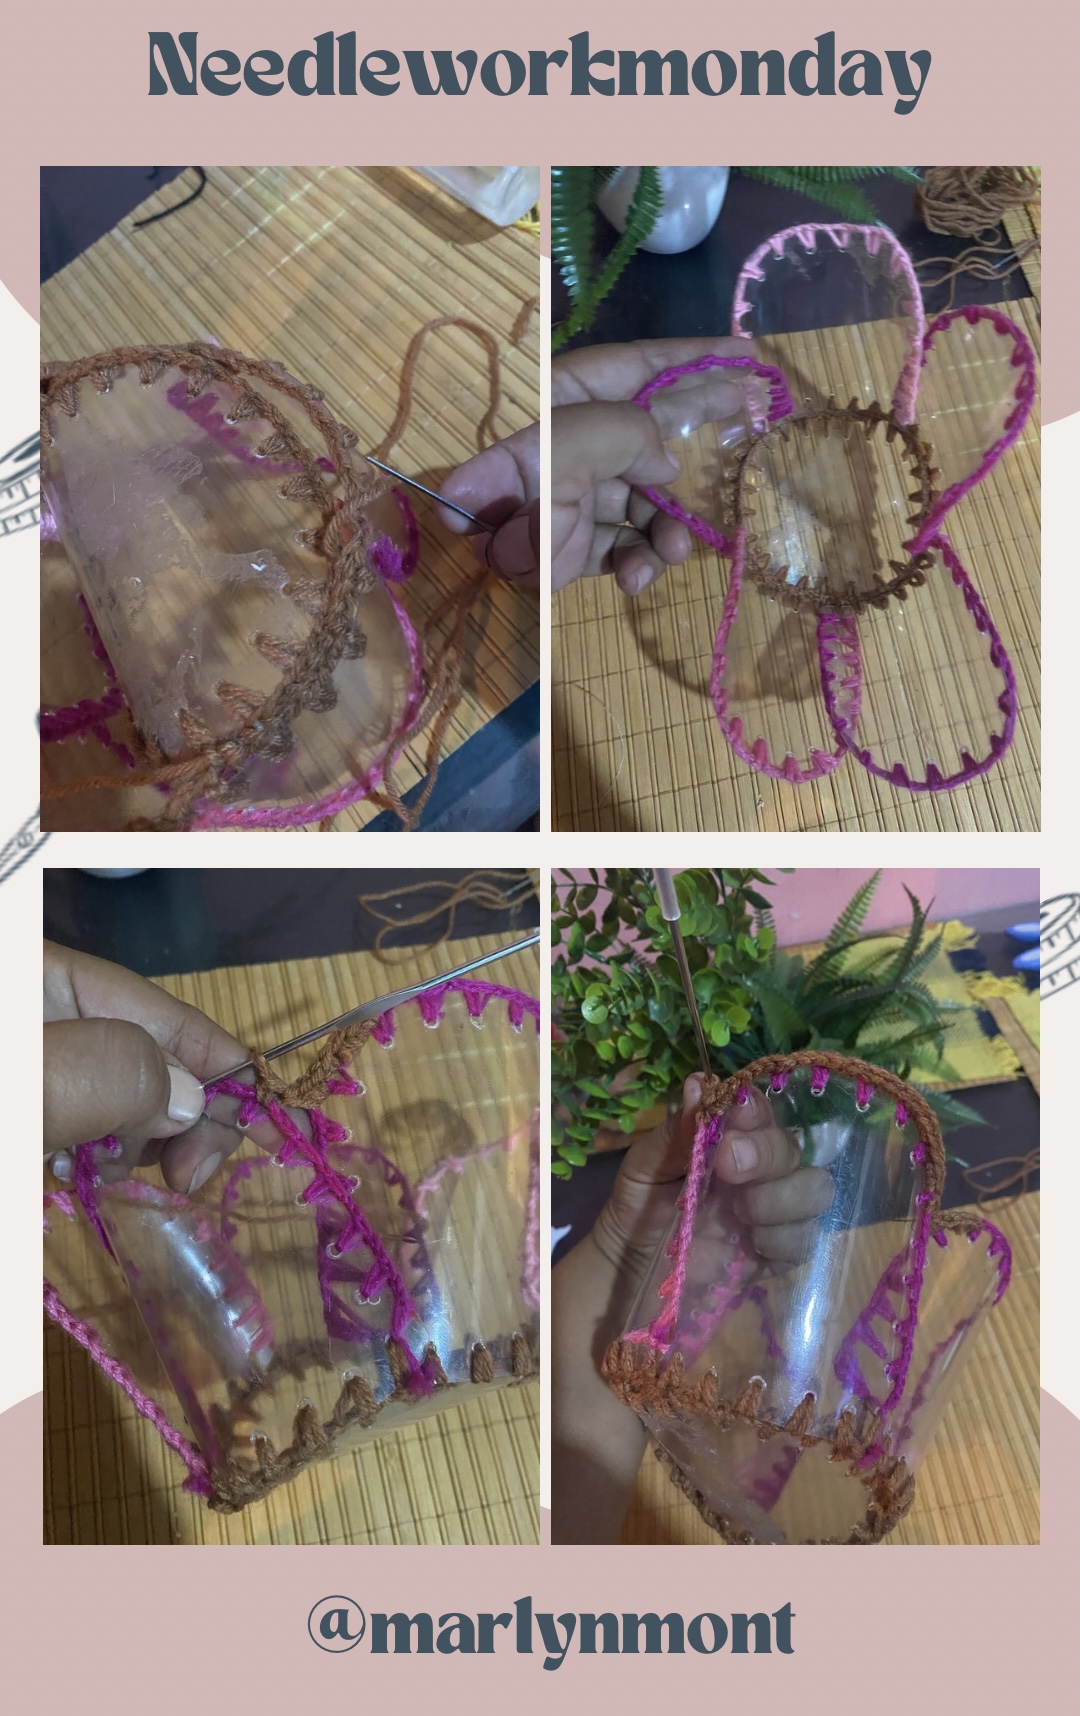
En este paso le vamos a hacer el fondo a nuestra canasta , del plástico cortado me sobró un cuadrado de aproximadamente 10 cm de ancho por 14 cm de alto a este le voy a redondear las puntas y le voy a abrir orificios por todo el alrededor, luego le hacemos el mismo procedimiento de tejido por toda la orilla.
In this step we are going to make the bottom of our basket. From the cut plastic I had a square left over that is approximately 10 cm wide by 14 cm high. I am going to round the ends of this one and open holes all around it, then we do the same weaving procedure along the entire edge.
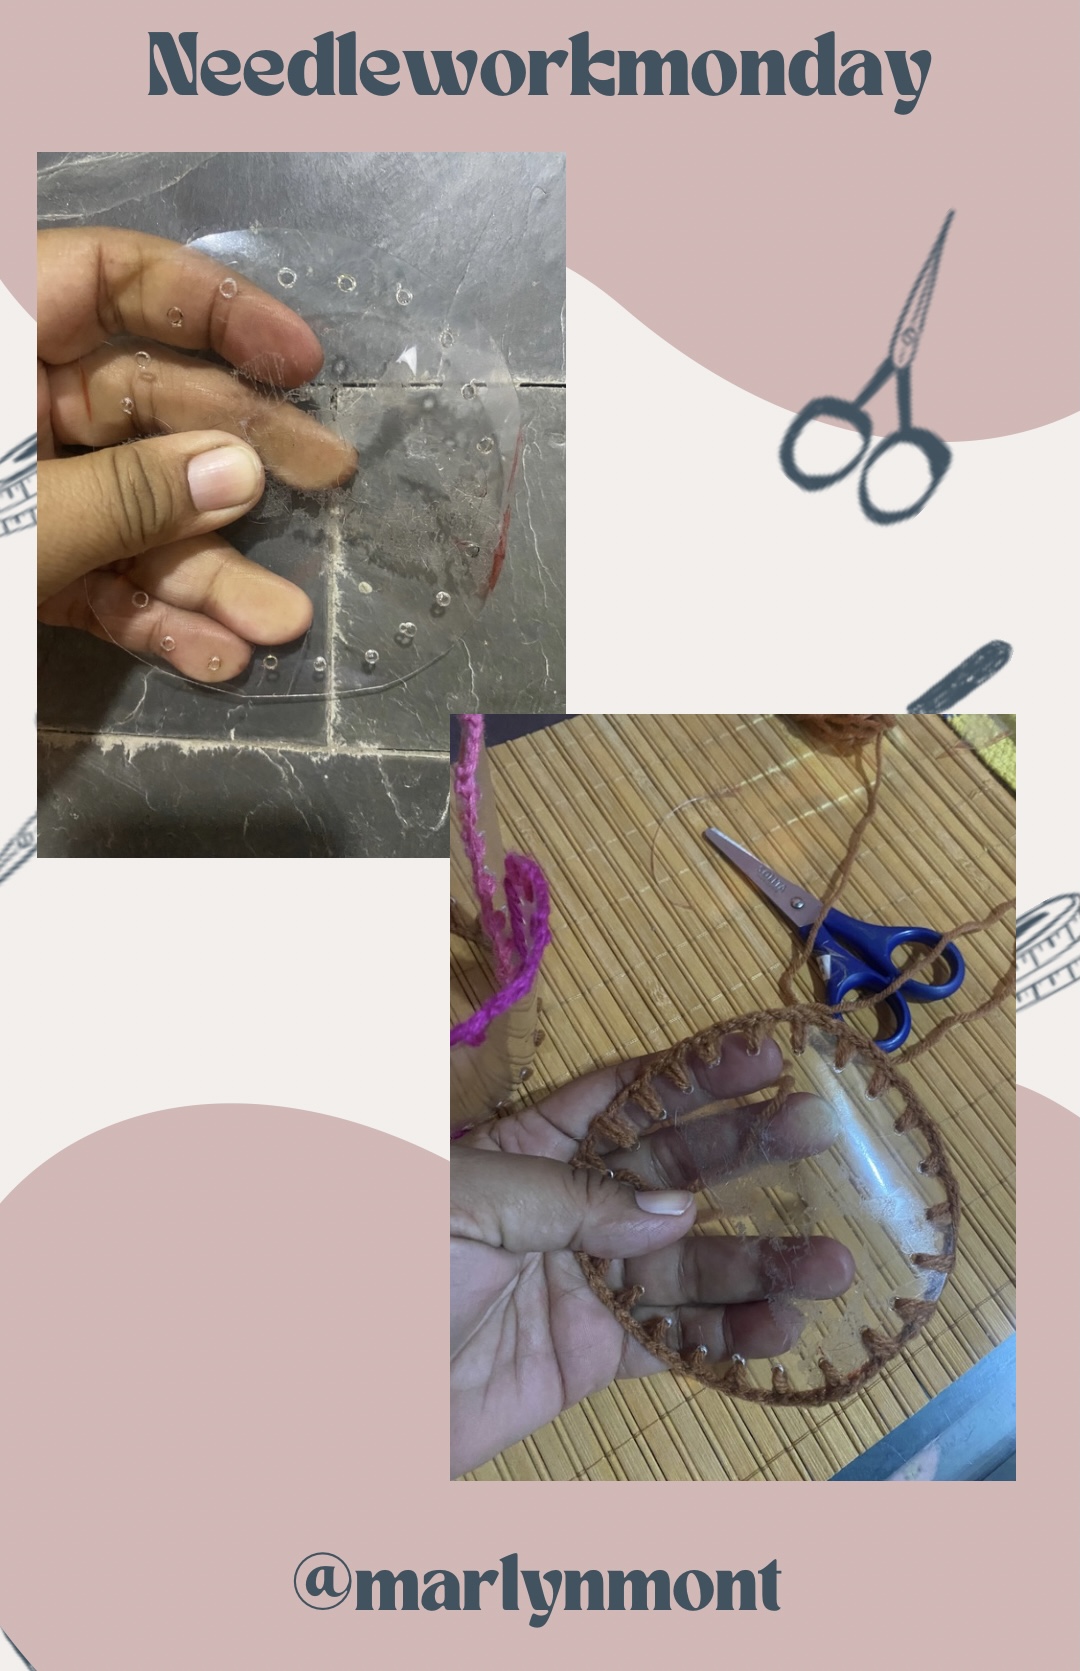
Ahora vamos a unir las piezas para así formar nuestra canasta, vamos a hacerle tejido a las 5 piezas por toda la orilla inferior, haremos tres cadenas en cada espacio de tejido y así sucesivamente hasta unirlas completamente, ya aquíí es a gusto de cada quien, puedes hacerle varias vueltas de tejido, yo le hice una sola línea de tejido, al finalizar cerramos la vuelta y hacemos un nudo para evitar que se vaya a soltar.
Now we are going to join the pieces to form our basket, we are going to weave the 5 pieces along the entire lower edge, we will make three chains in each weaving space and so on until they are completely joined, here it is to everyone's taste, You can make several rounds of fabric, I made a single line of fabric, at the end we close the round and tie a knot to prevent it from coming loose.
Pata finalizar con ayuda de una aguja punta roma y estambre vamos a unir la rueda del fondo con las otras piezas, cosemos por todo el tejido de las orillas, luego en las piezas superiores vamos a hacer una línea de tejido por todo el alrededor tratando de dejar la misma distancia en cada división espero que en mi imagen puedan apreciar como debe quedar.
To finish, with the help of a blunt needle and yarn we are going to join the bottom wheel with the other pieces, we sew all over the edge fabric, then in the upper pieces we are going to make a line of fabric all around trying to Leave the same distance in each division. I hope that in my image you can see how it should look.
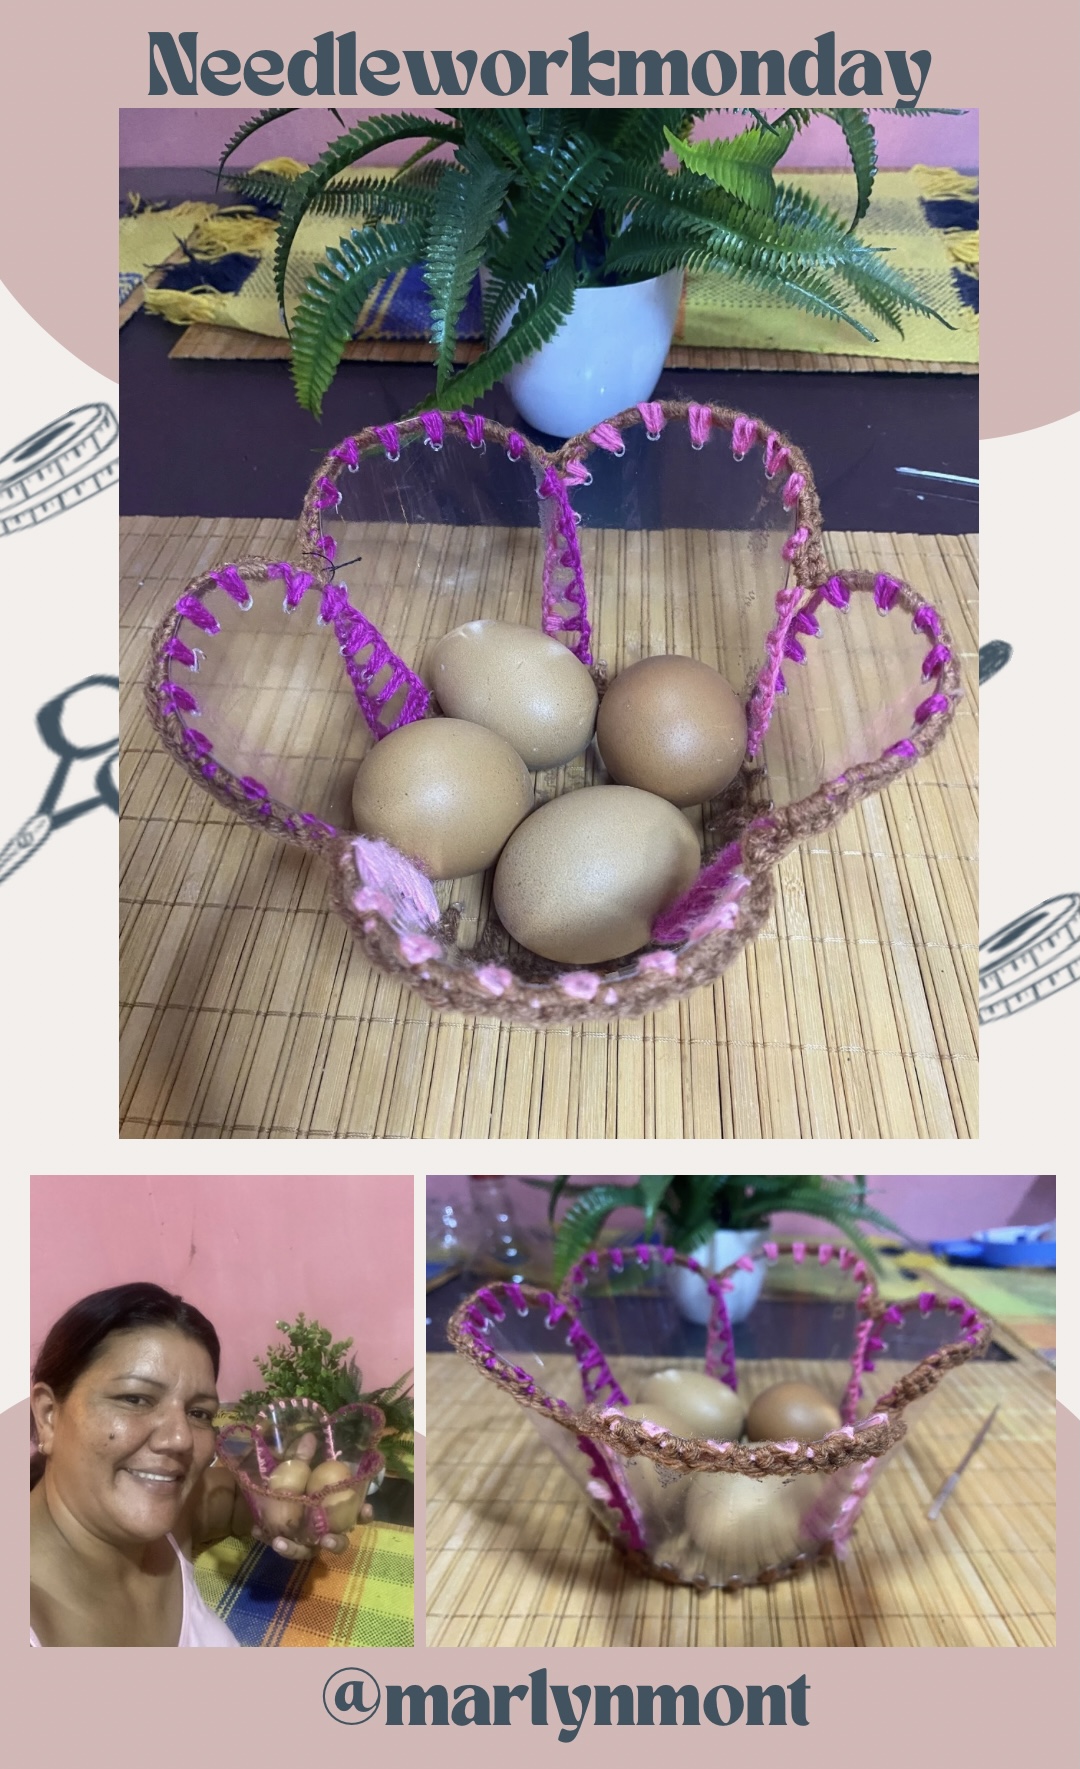
Y así ya estará lista nuestra linda canasta hecha con material de reciclaje , especial para colocar los huevoso lo que desees y tener una linda decoración para nuestra cocina 🧑🍳🧺🥚🐓
Es increíble como podemos crear cosas nuevas con algo que pensábamos que íbamos a tirar a la basura, me encanta reciclar y crear cosas hermosas, espero les haya gustado 😊, nos leemos en otra oportunidad les deseo muchos éxitos y bendiciones para todos hasta otra oportunidad 🥰
And so our beautiful basket made with recycling material will be ready, special to place the eggs or whatever you want and have a nice decoration for our kitchen 🧑🍳🧺🥚🐓
It's incredible how we can create new things with something that we thought we were going to throw away, I love recycling and creating beautiful things, I hope you liked it 😊, we'll see you another time I wish you much success and blessings for everyone until another time 🥰
🐓-🐓-🧺-🥚-🧺-🐓-🐓
Todas las fotos me pertenecen, fueron tomadas con mi teléfono iPhone 11 y las ediciones fueron realizadas en Canva
Wow, this is really a very useful invention turning wasteful material into something beautiful and useful in the home.
I love this so much well done dear.
Thank you friend 😊
Me parece una idea genial y además luce muy bonita la canasta. De vez en cuando hay que hacer otras actividades creativas para inspirarnos y volver con más fuerza a las actividades habituales.
Asi es amiga, la maquina de coser últimamente me ha dado dolores de cabeza así que decidí darle un descanso y hacer algo diferente, gracias por comentar, saludos🥰
This is so pretty and I definitely will make one
I love how you made use of the plastics just like that.
Welldone with this work
Thank you friend 🥰
You’re welcome