Como están mi estimada familia costurera?? Espero que muy bien.. Hoy la mañana está muy linda para saludarlos, desearles que Dios derrame gracia y muchas bendiciones en sus vidas, también para darles una vez más la bienvenida a mi blog y mostrarles una creativa tarea de costura reciclando retazos de tela.
How are you my dear seamstress family?? I hope very well.. Today the morning is very nice to greet you, to wish you that God pours grace and many blessings in your lives, also to welcome you once again to my blog and show you a creative sewing task recycling scraps of fabric.
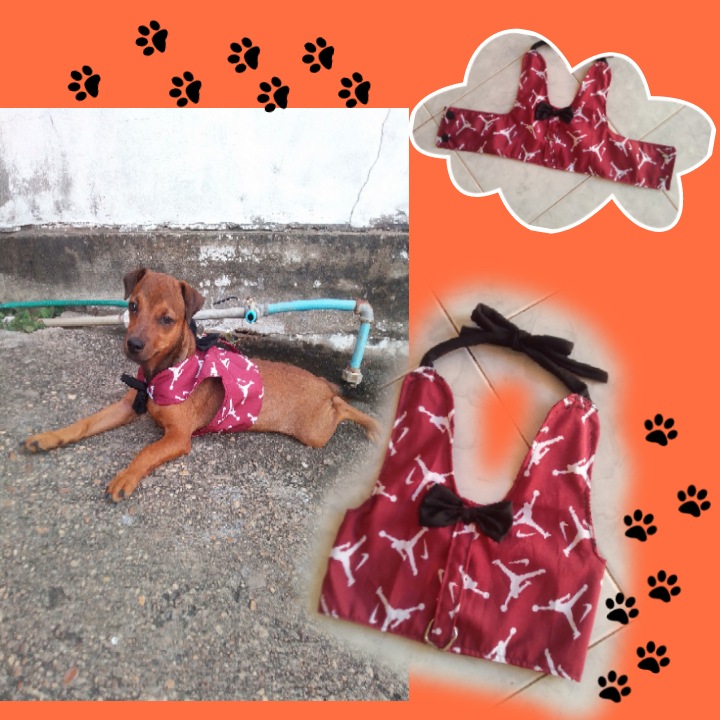
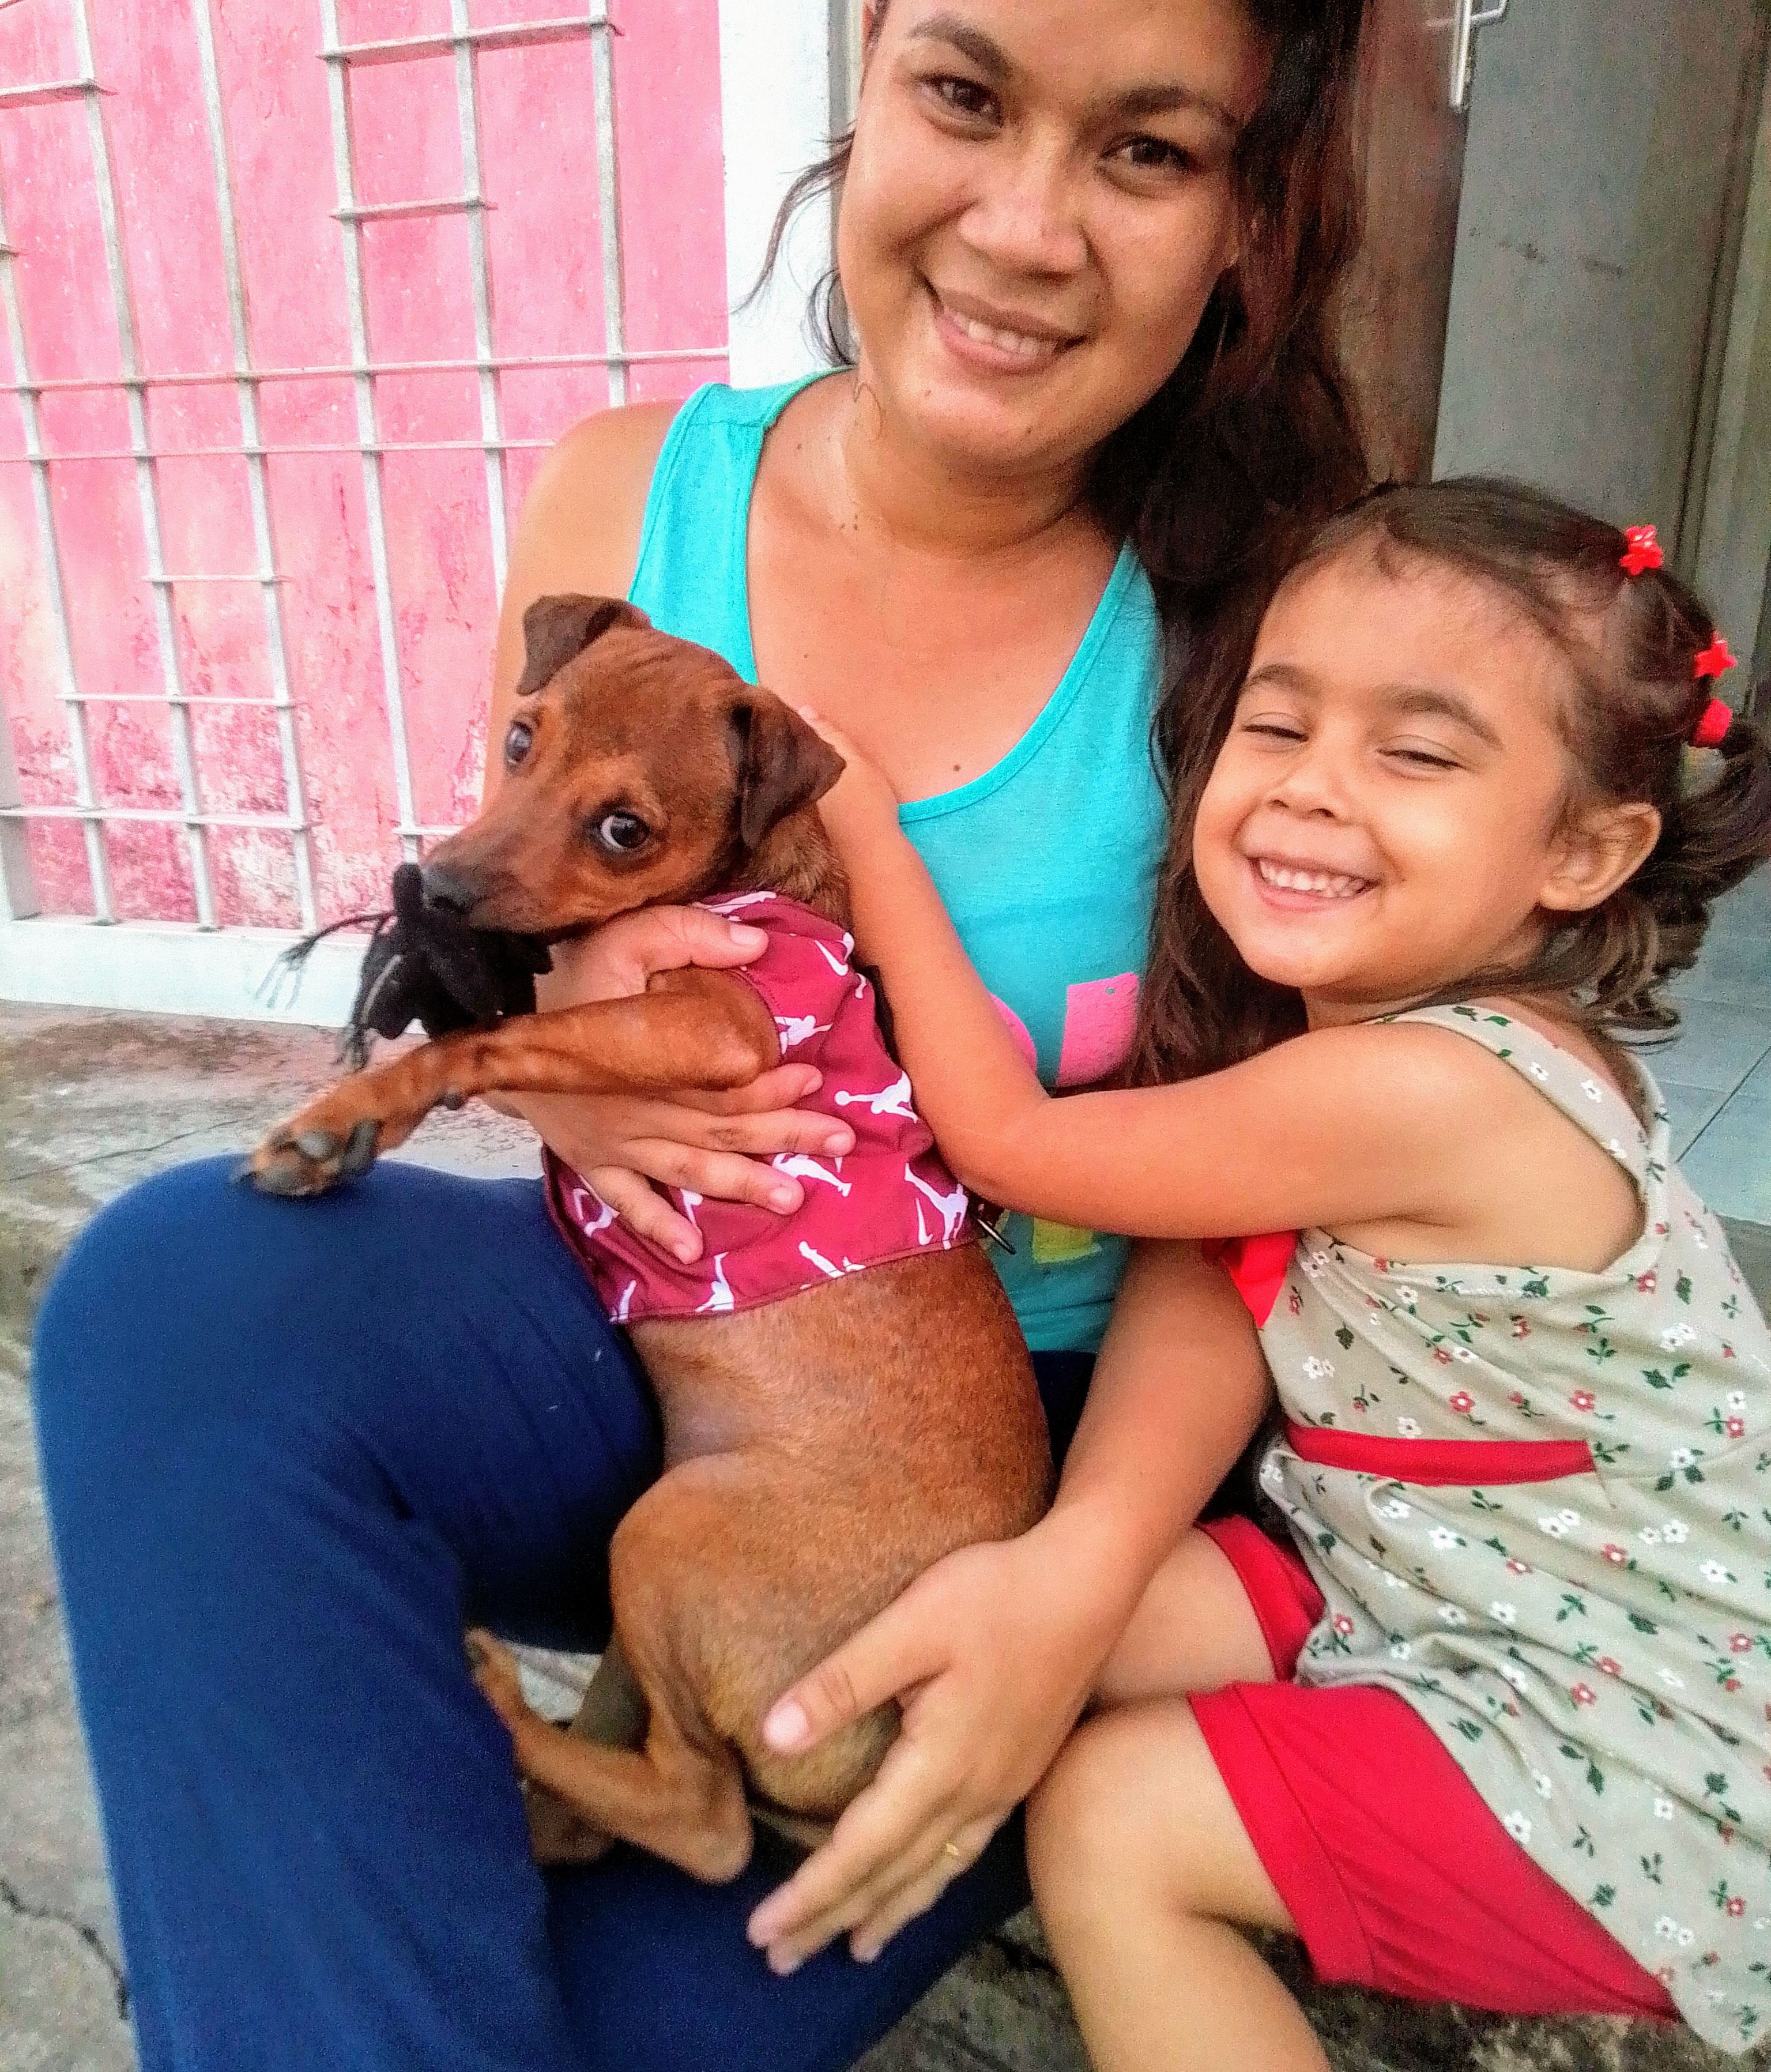
Hoy es viernes y mi perrito lo sabe 😅!! Espero recuerden a Doboll, la mascotita de mi hija, a crecido un poco y está extremadamente travieso, tanto, que ya se me hace un poco dificil controlarlo .. Hace poco presenté un proyecto que hice para él en un concurso y quiero aprovechar la oportunidad para reiterar mis agradecimientos por todo el apoyo y cariño que recibo en esta comunidad...La tarde de hoy tendremos una salida, y aunque me gusta que la moscotita camine de forma libre, como les dije, esta muy inquieto y definitivamente ya no podemos cargarlo así, por temor a las calles y otros perros, asi qué, el dia de ayer me tomé el tiempo para seguir reciclando mis retazos de tela y hacerle un bonito arnes que me permita mantenerlo seguro en las calles.. Acompáñame a mirar en este pequeño tutorial como puedes hacer un patronaje facil y rapido además que como confeccionarlo.✍️✂️
Today is Friday and my dog knows it 😅!! I hope you remember Doboll, my daughter's pet, he has grown a little and is extremely naughty, so much so that it is already a little difficult for me to control him. I recently presented a project that I did for him in a contest and I want to take advantage of the opportunity to reiterate my thanks for all the support and affection that I receive in this community...Today afternoon we will have an outing, and although I like that the pet walks freely, as I told you, he is very restless and we definitely can't anymore carry him like this, for fear of the streets and other dogs, so yesterday I took the time to continue recycling my scraps of fabric and make him a nice harness that allows me to keep him safe on the streets.. Come with me to look at this small tutorial how you can make a quick and easy pattern as well as how to make it.✍️✂️
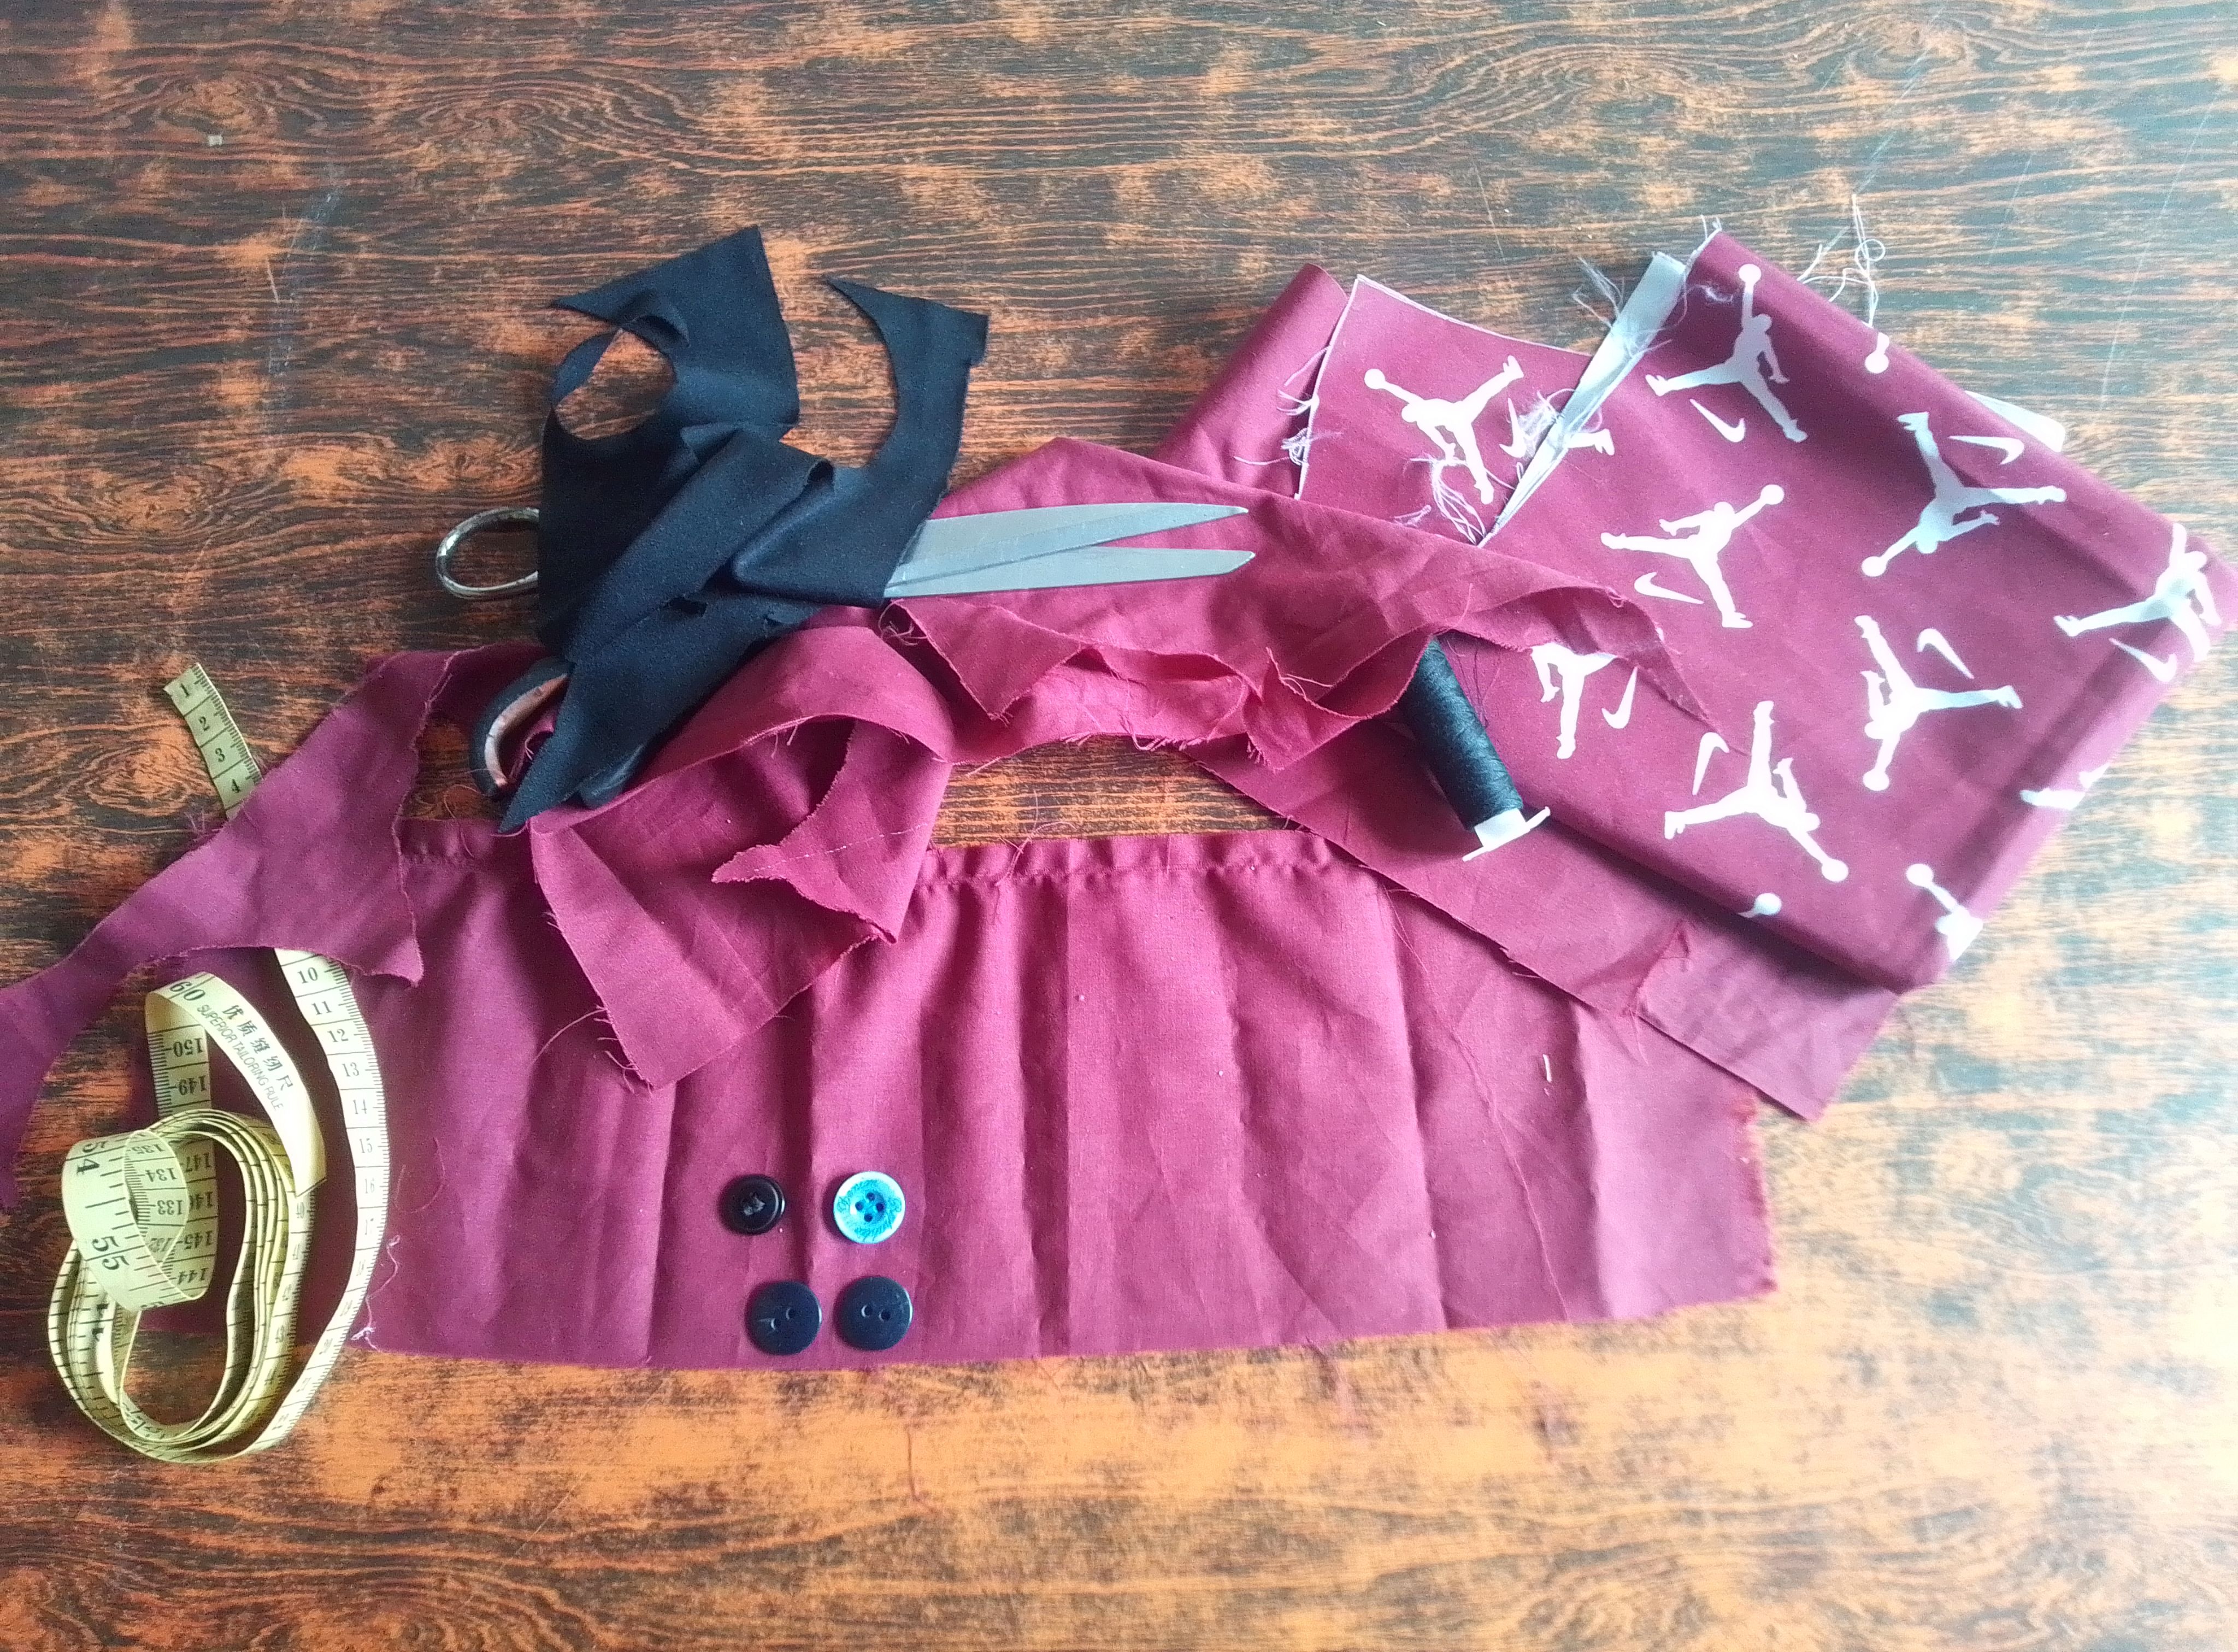
Materiales que necesitas:
- Retazos de tela.
- Tijeras.
- Hilo y aguja.
- Alfileres.
- Máquina de coser.
- Aro d la metal pequeño.
- Botones.
Materials you need:
- Pieces of cloth.
- Scissors.
- Thread and needle.
- Pins.
- Sewing machine.
- Small metal ring.
- Buttons.
(PROCEDIMIENTO)
Paso 01
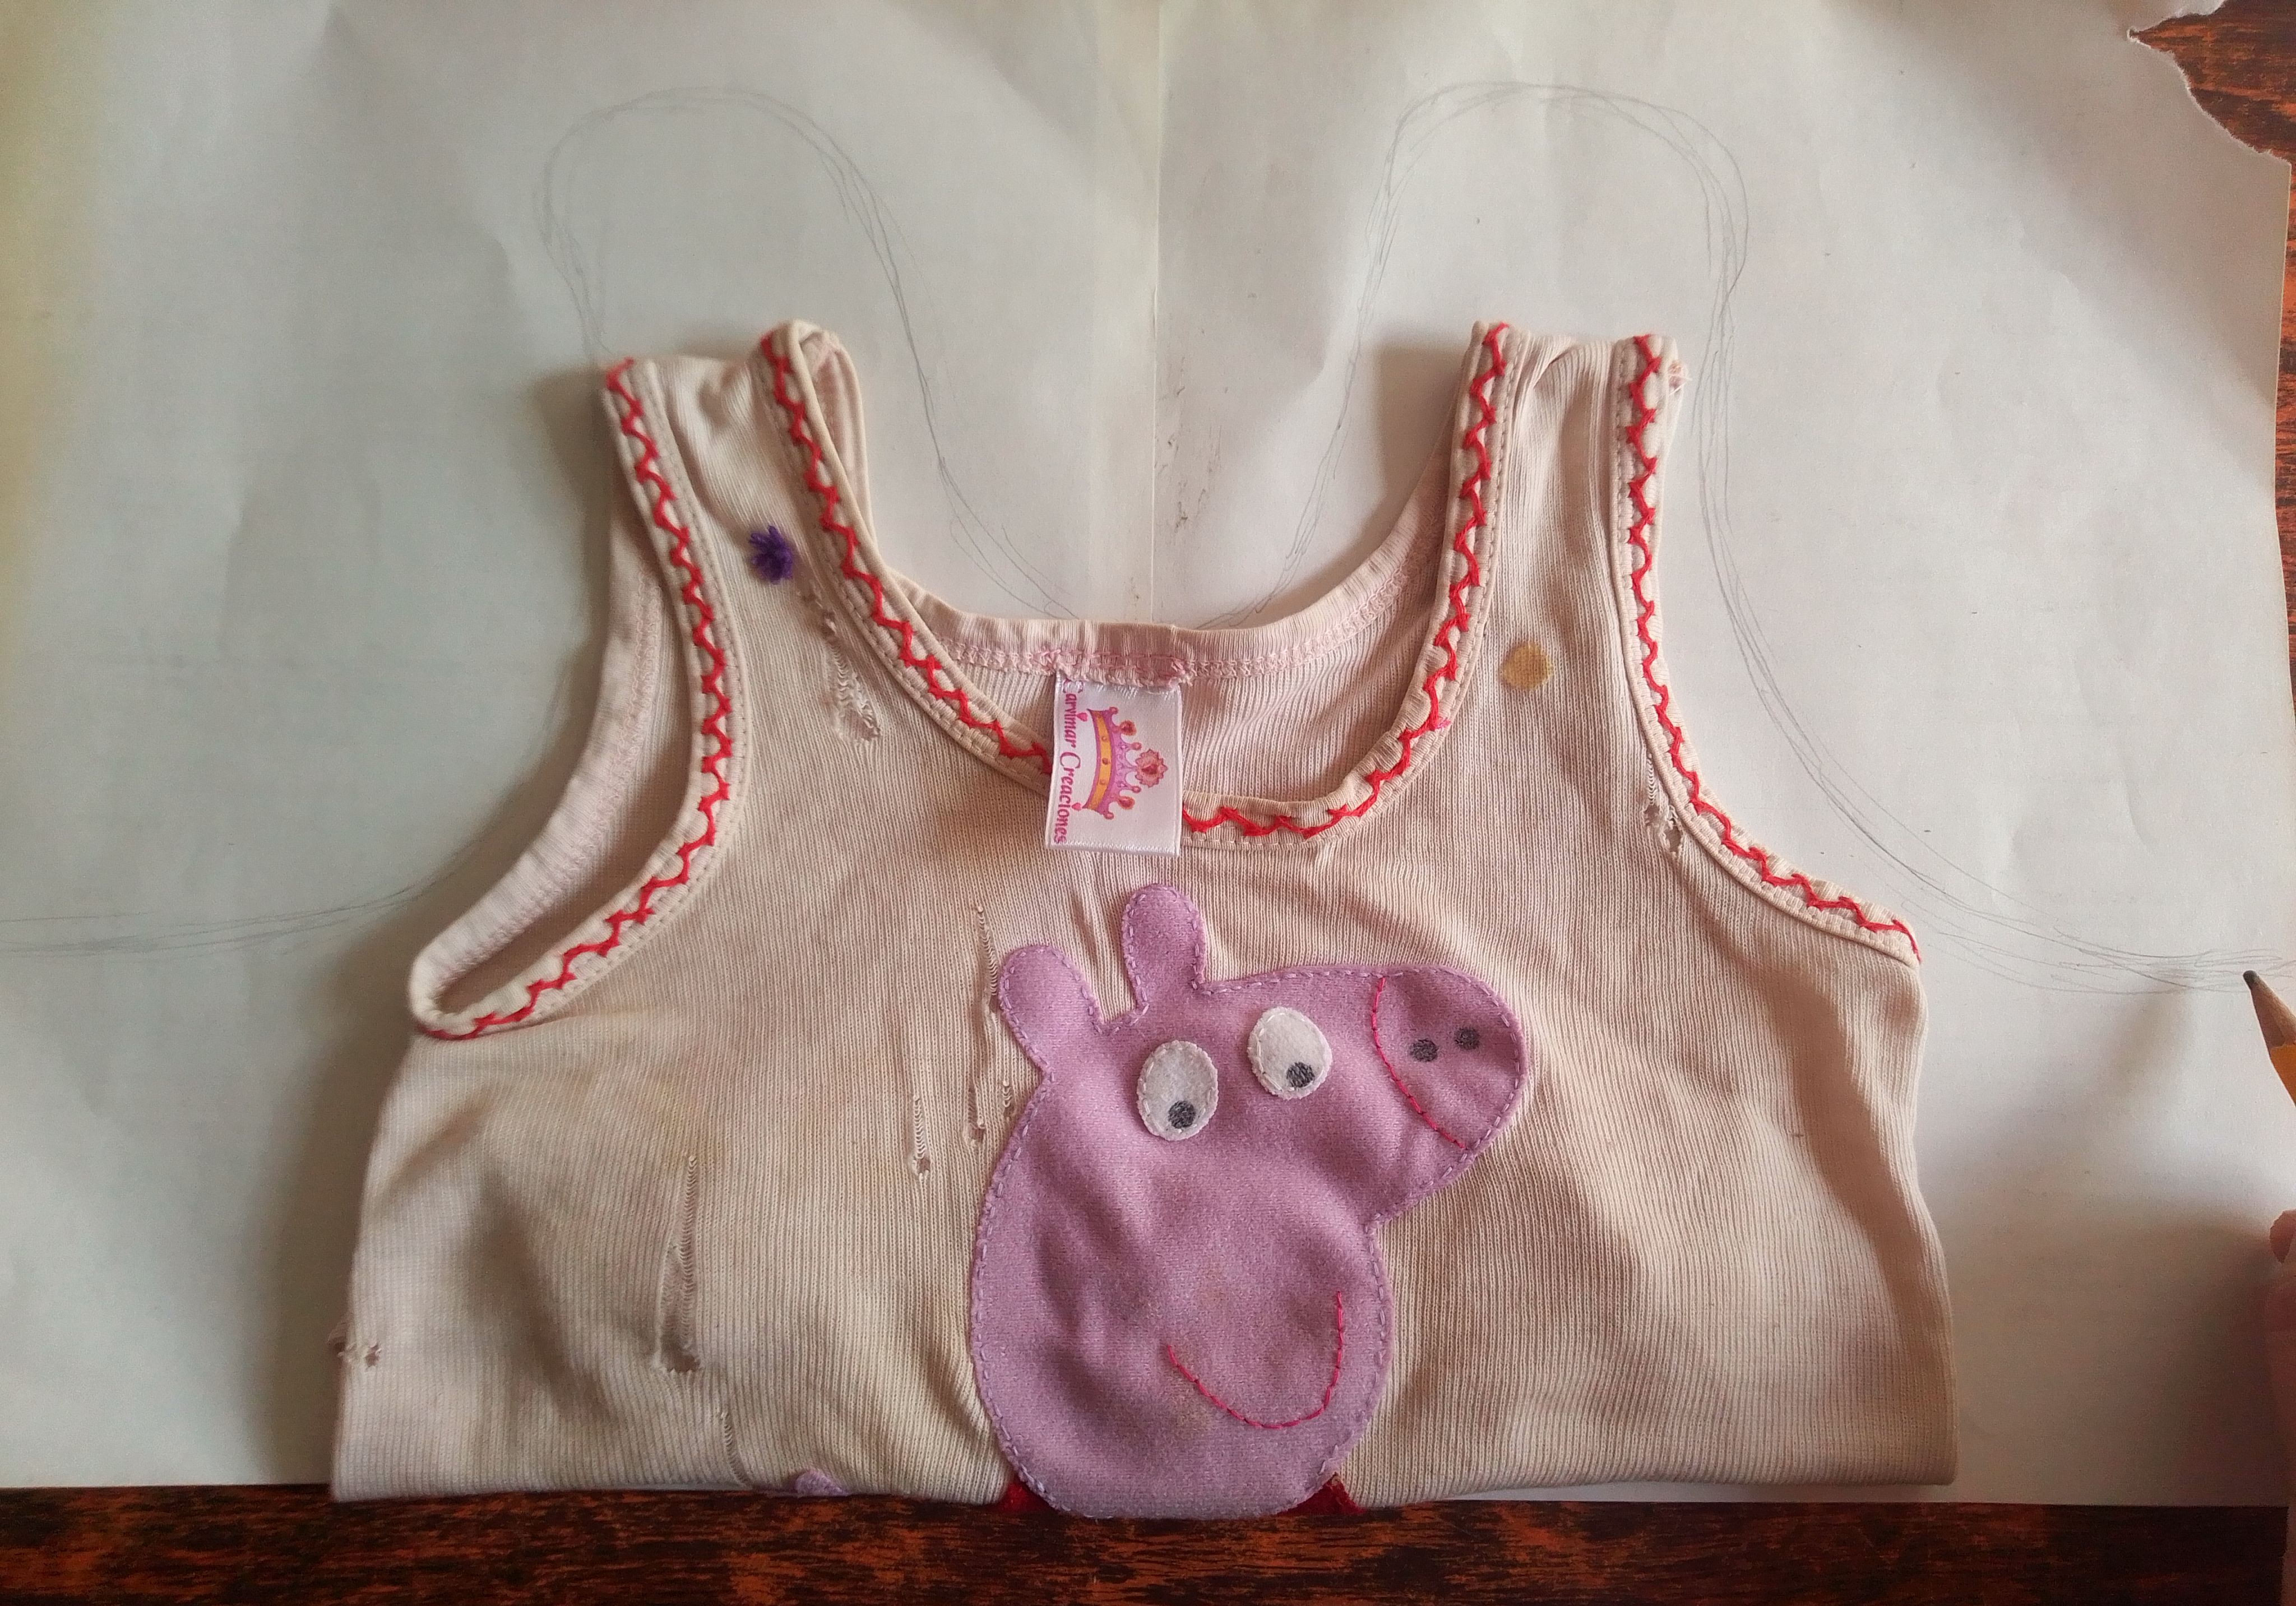
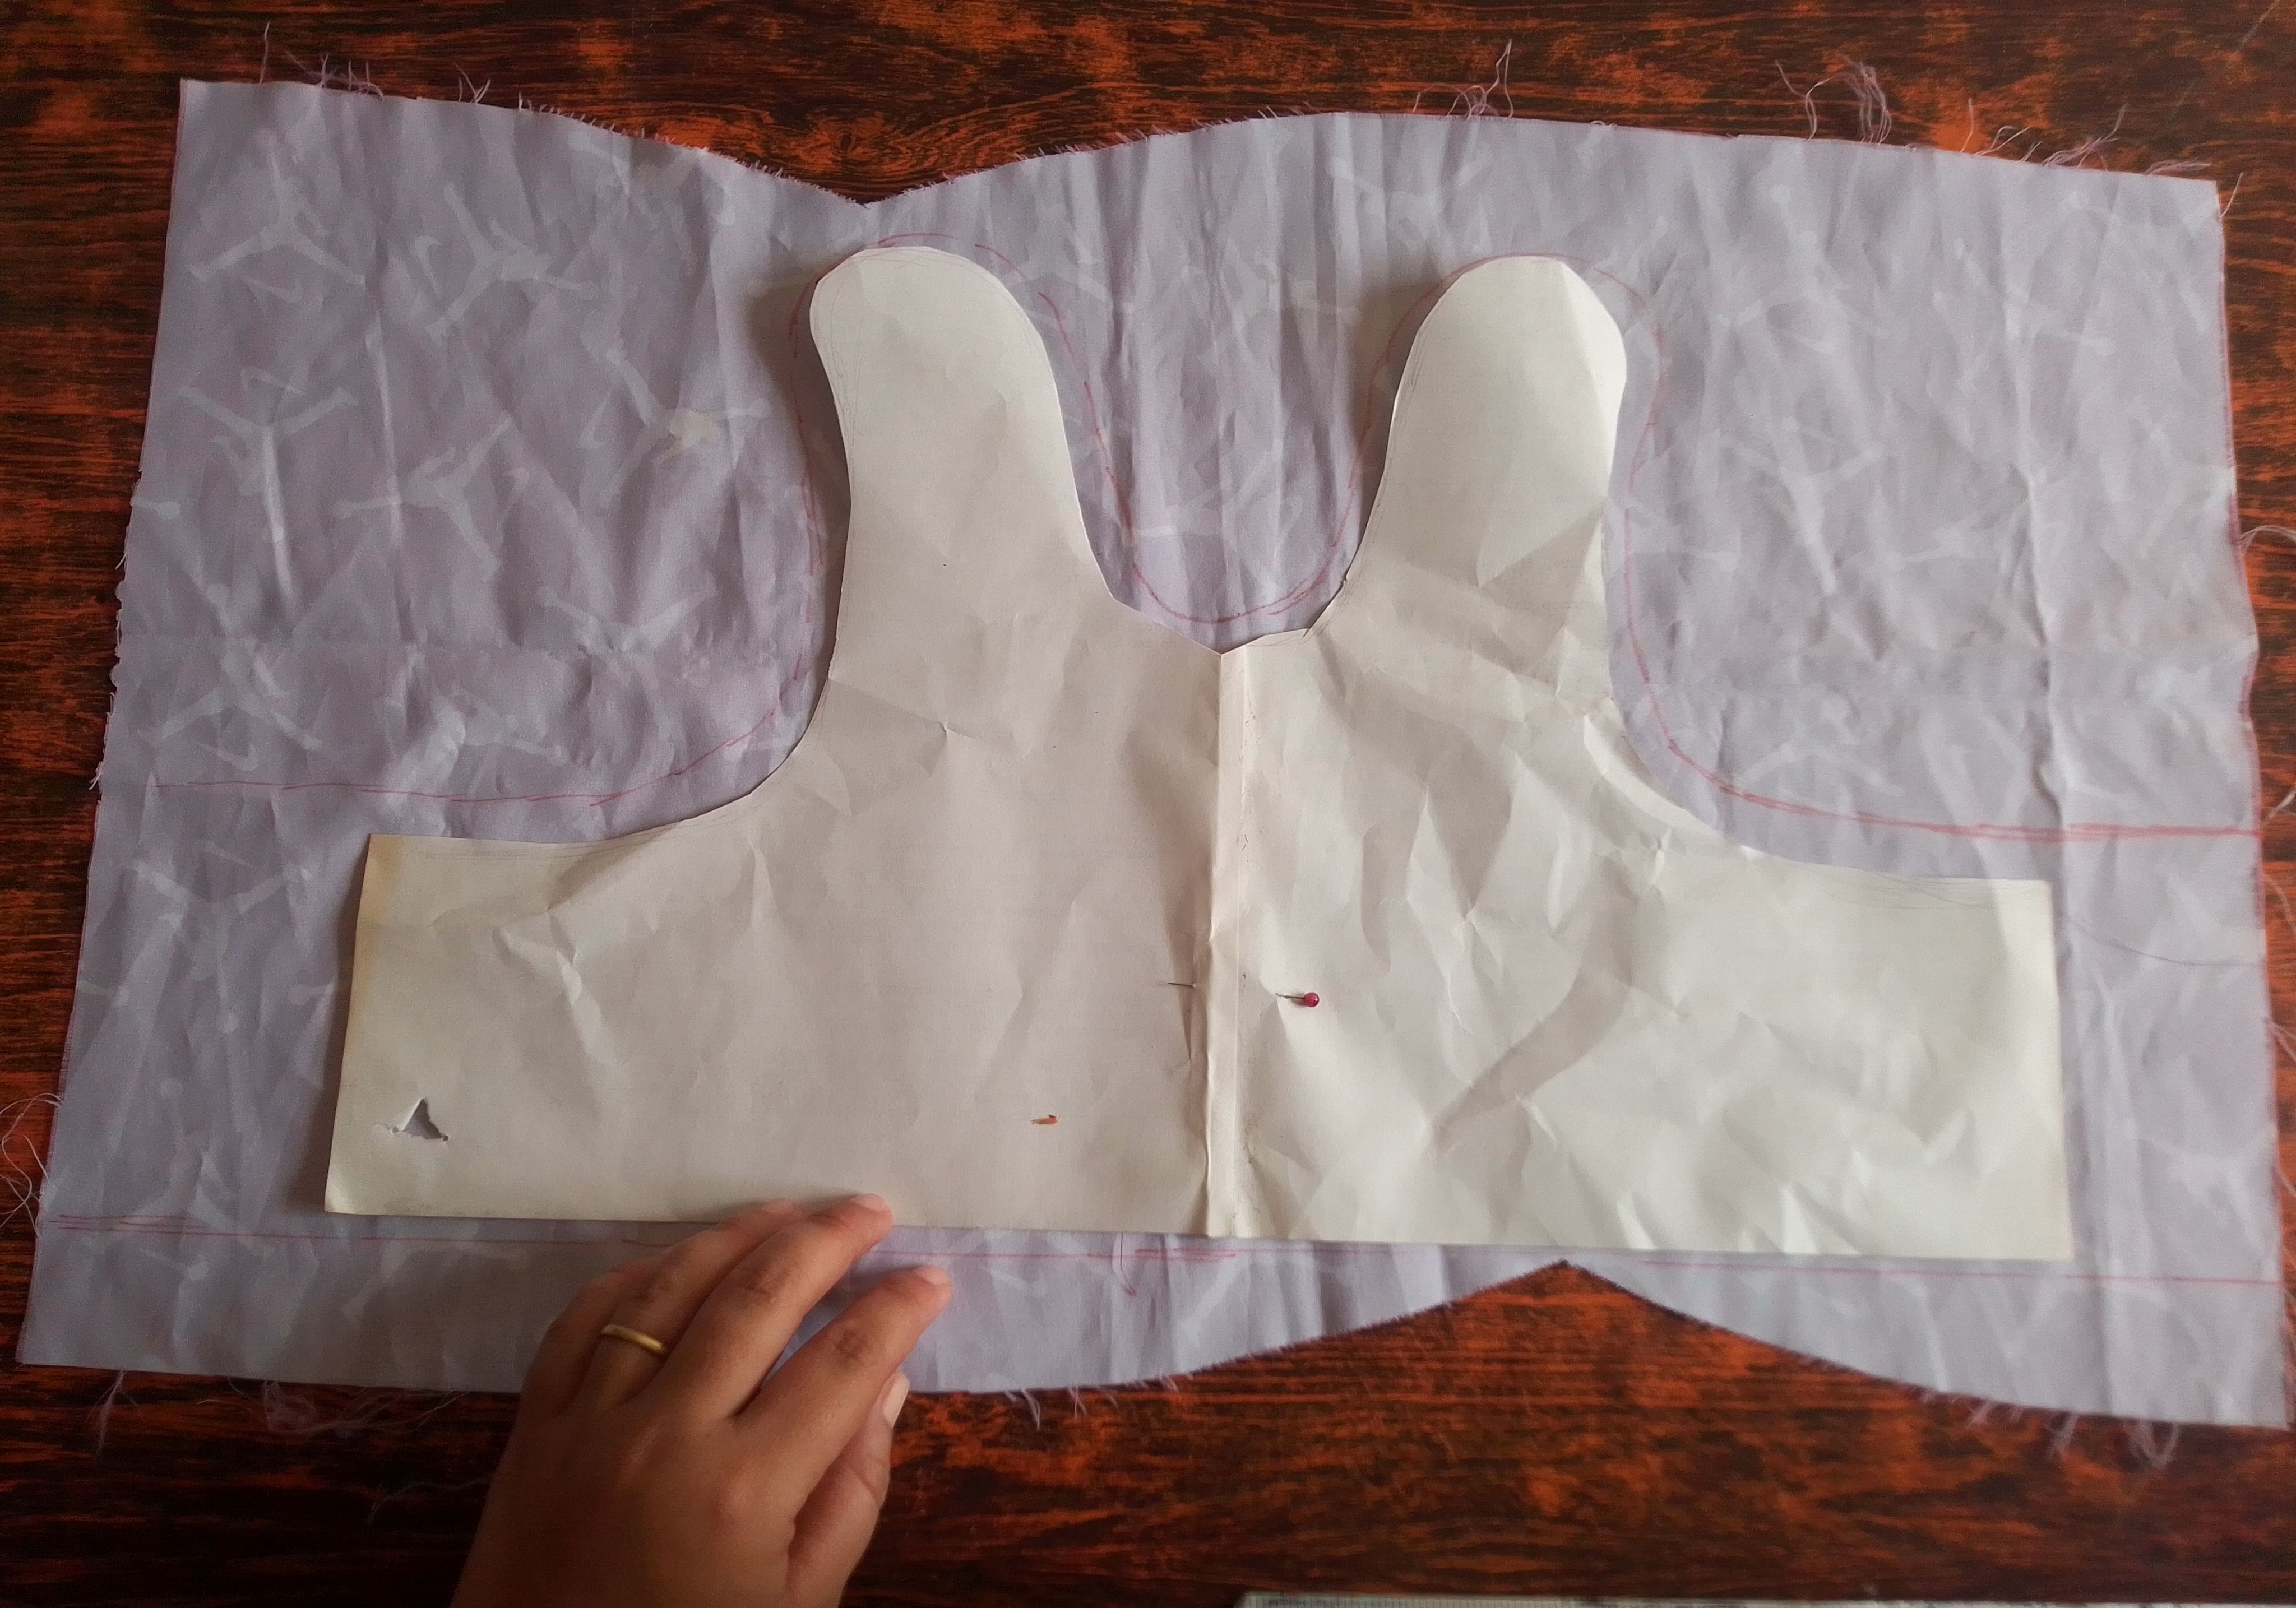
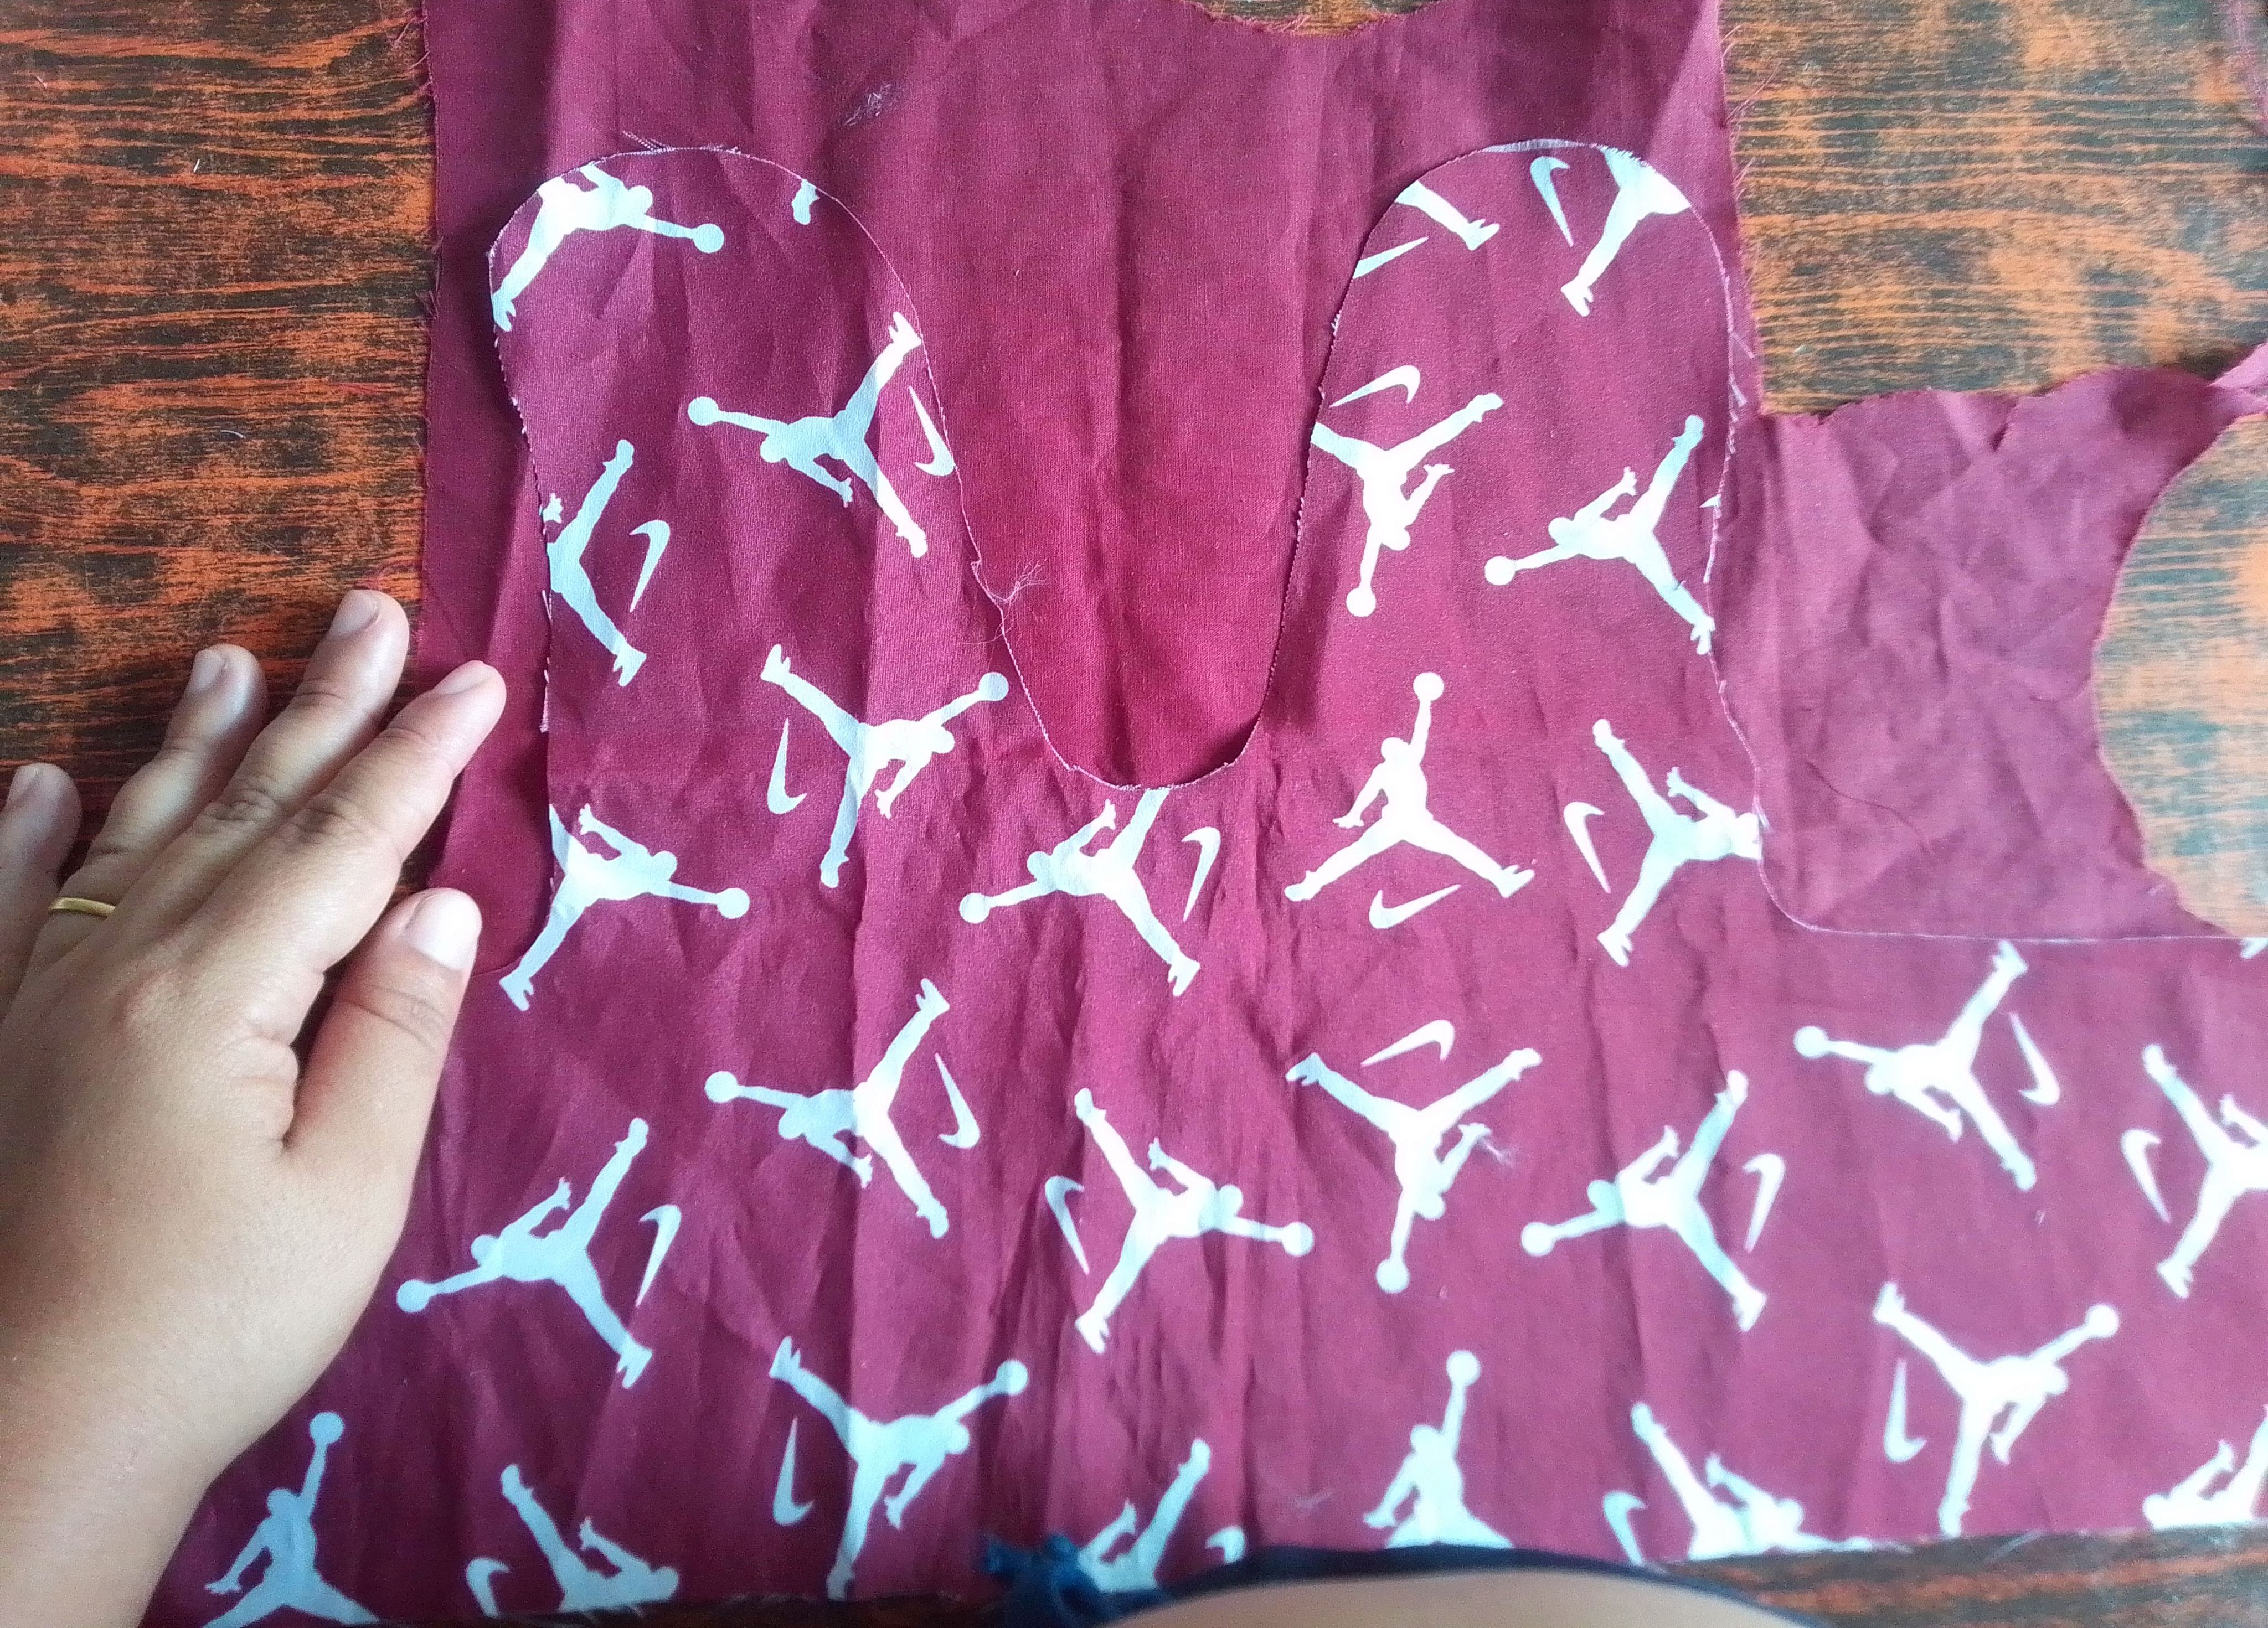
Como primer paso haremos el patronaje guiandonos por la forma base de una camisa sin mangas pequeñas para tener una referencia de lo que vamos a hacer , yo como de costumbre la ropita de mi hija siempre serán una buena opción para muchas creaciones. 🤭 Tomo está prenda y la coloco sobre una hoja de papel y de esta manera dibujar su forma unos centímetros más allá del contorno. Este molde lo transfiero a dos trozos tela.
Step 01
As a first step we will do the pattern making guided by the base shape of a small sleeveless shirt to have a reference of what we are going to do. As usual, my daughter's clothes will always be a good option for many creations. 🤭 I take this garment and place it on a sheet of paper and in this way draw its shape a few centimeters beyond the outline. I transfer this mold to two pieces of fabric.---
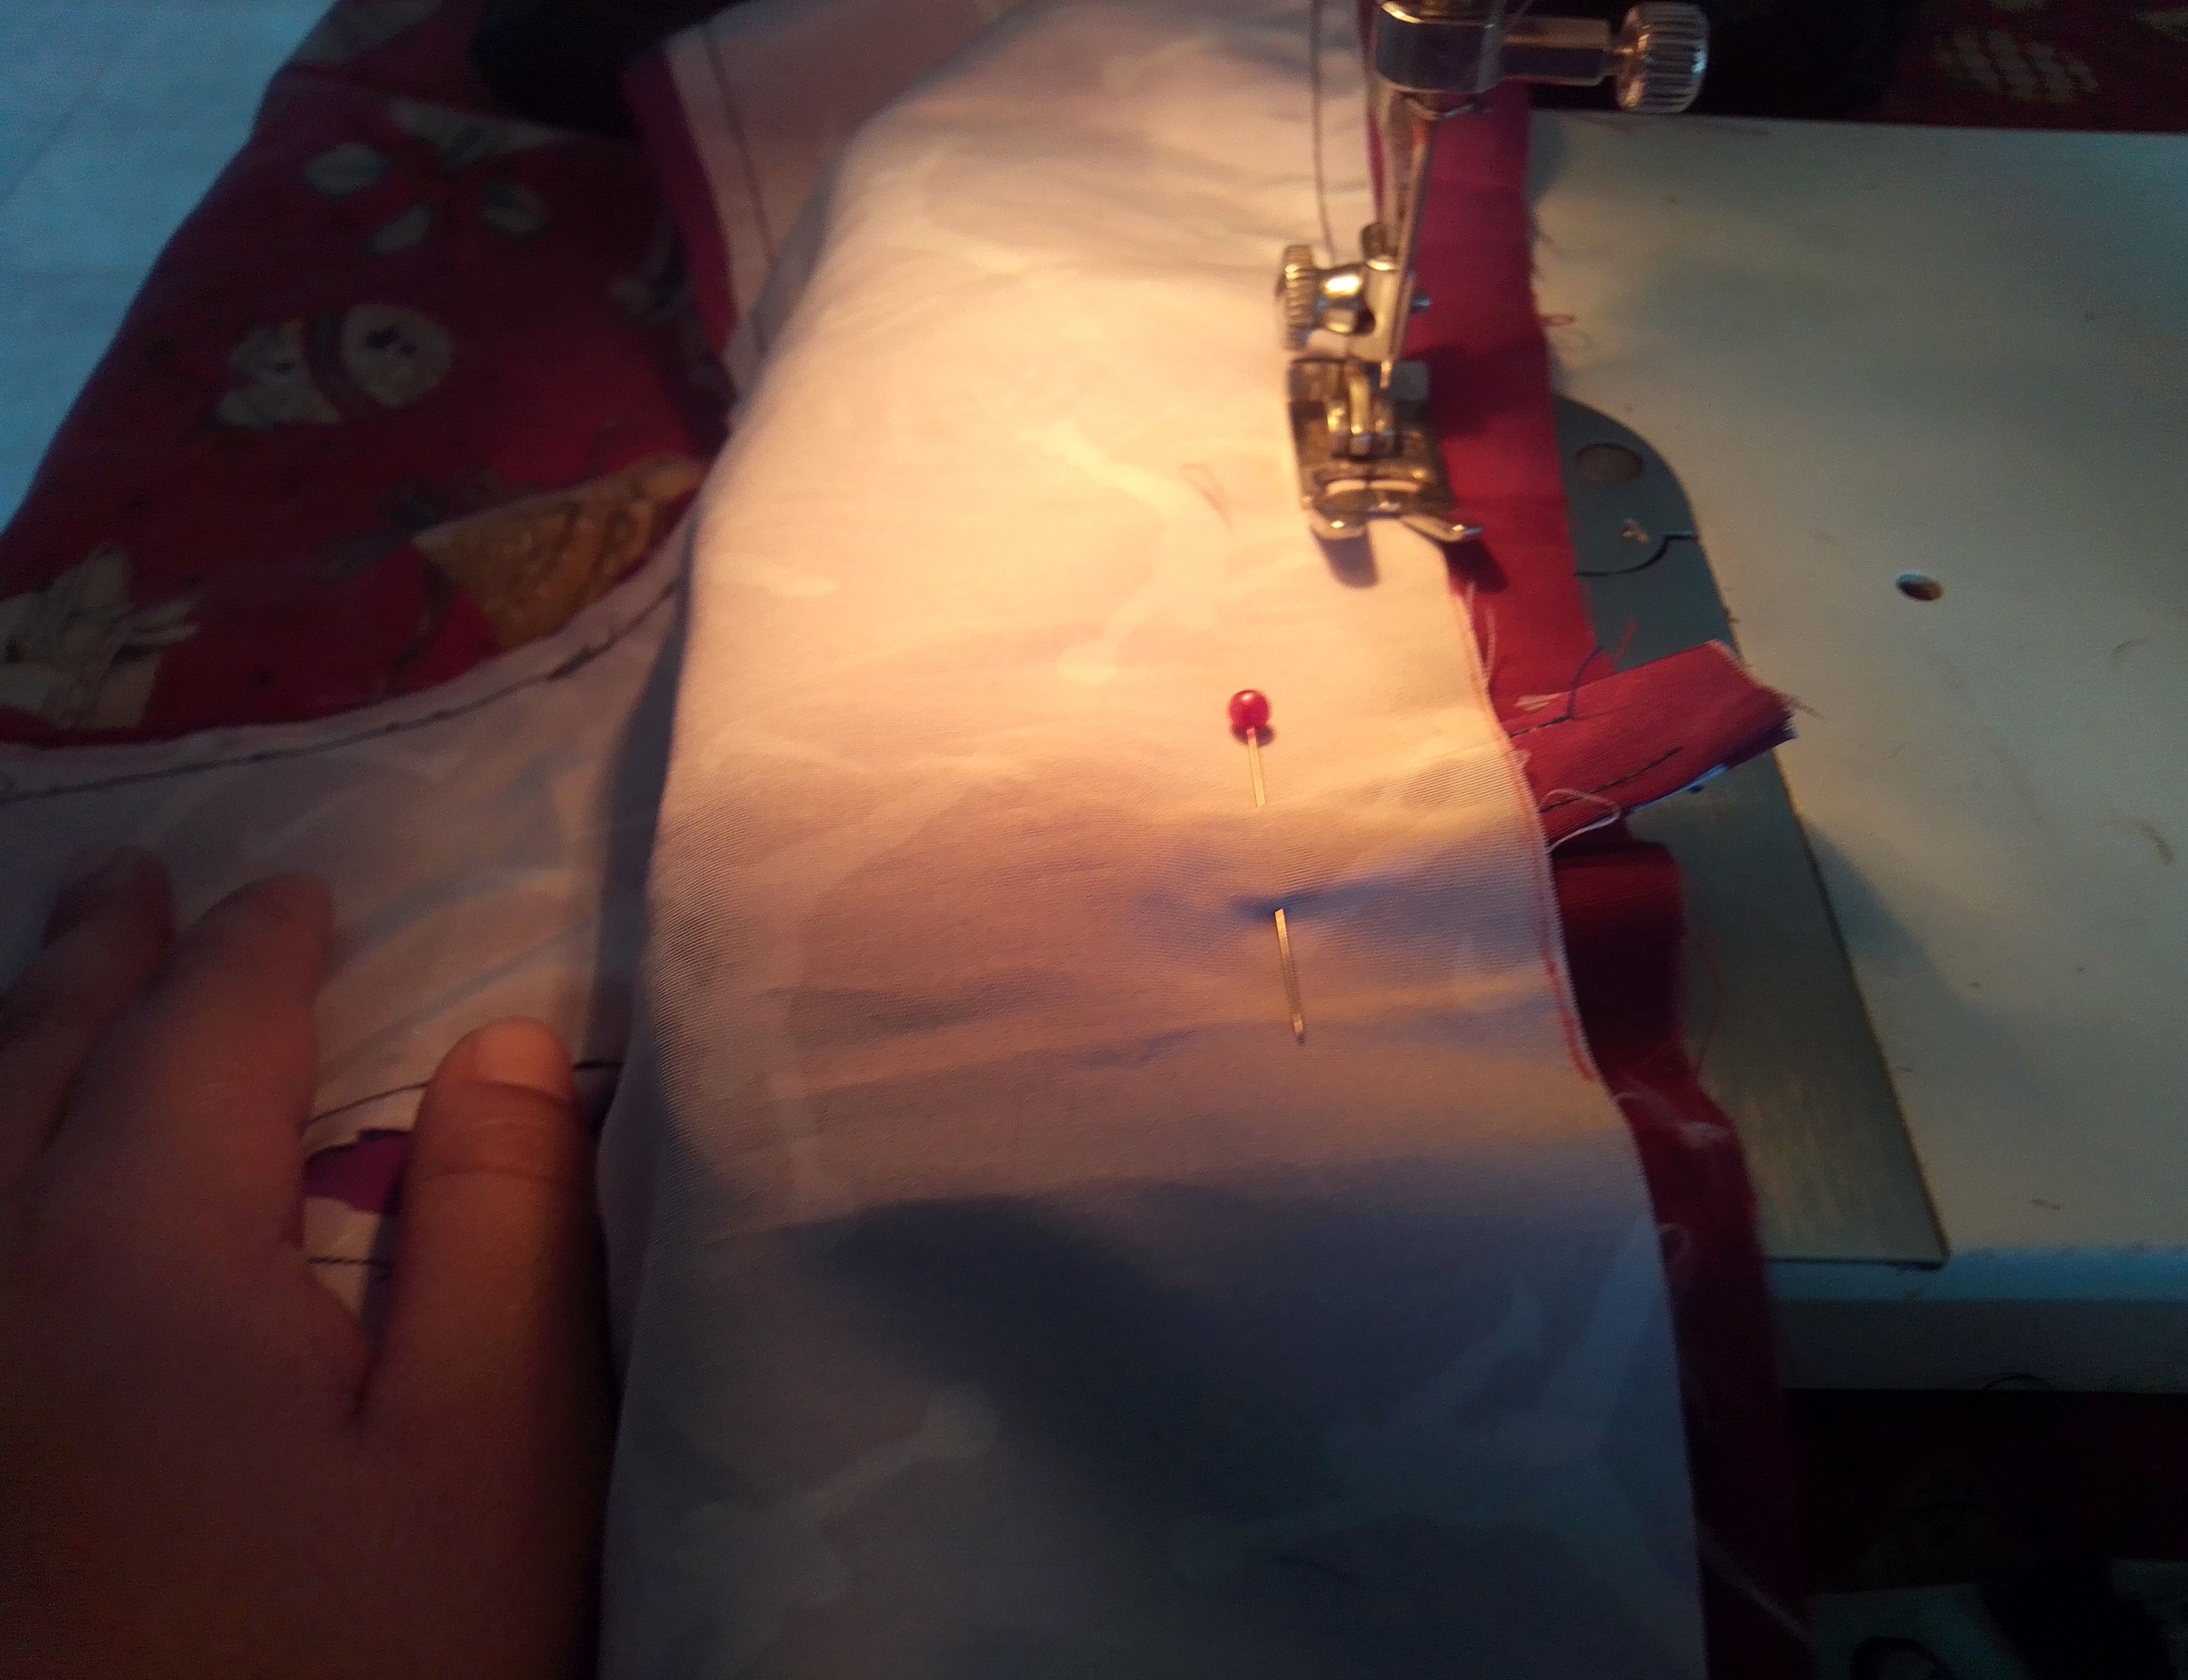
Paso 02
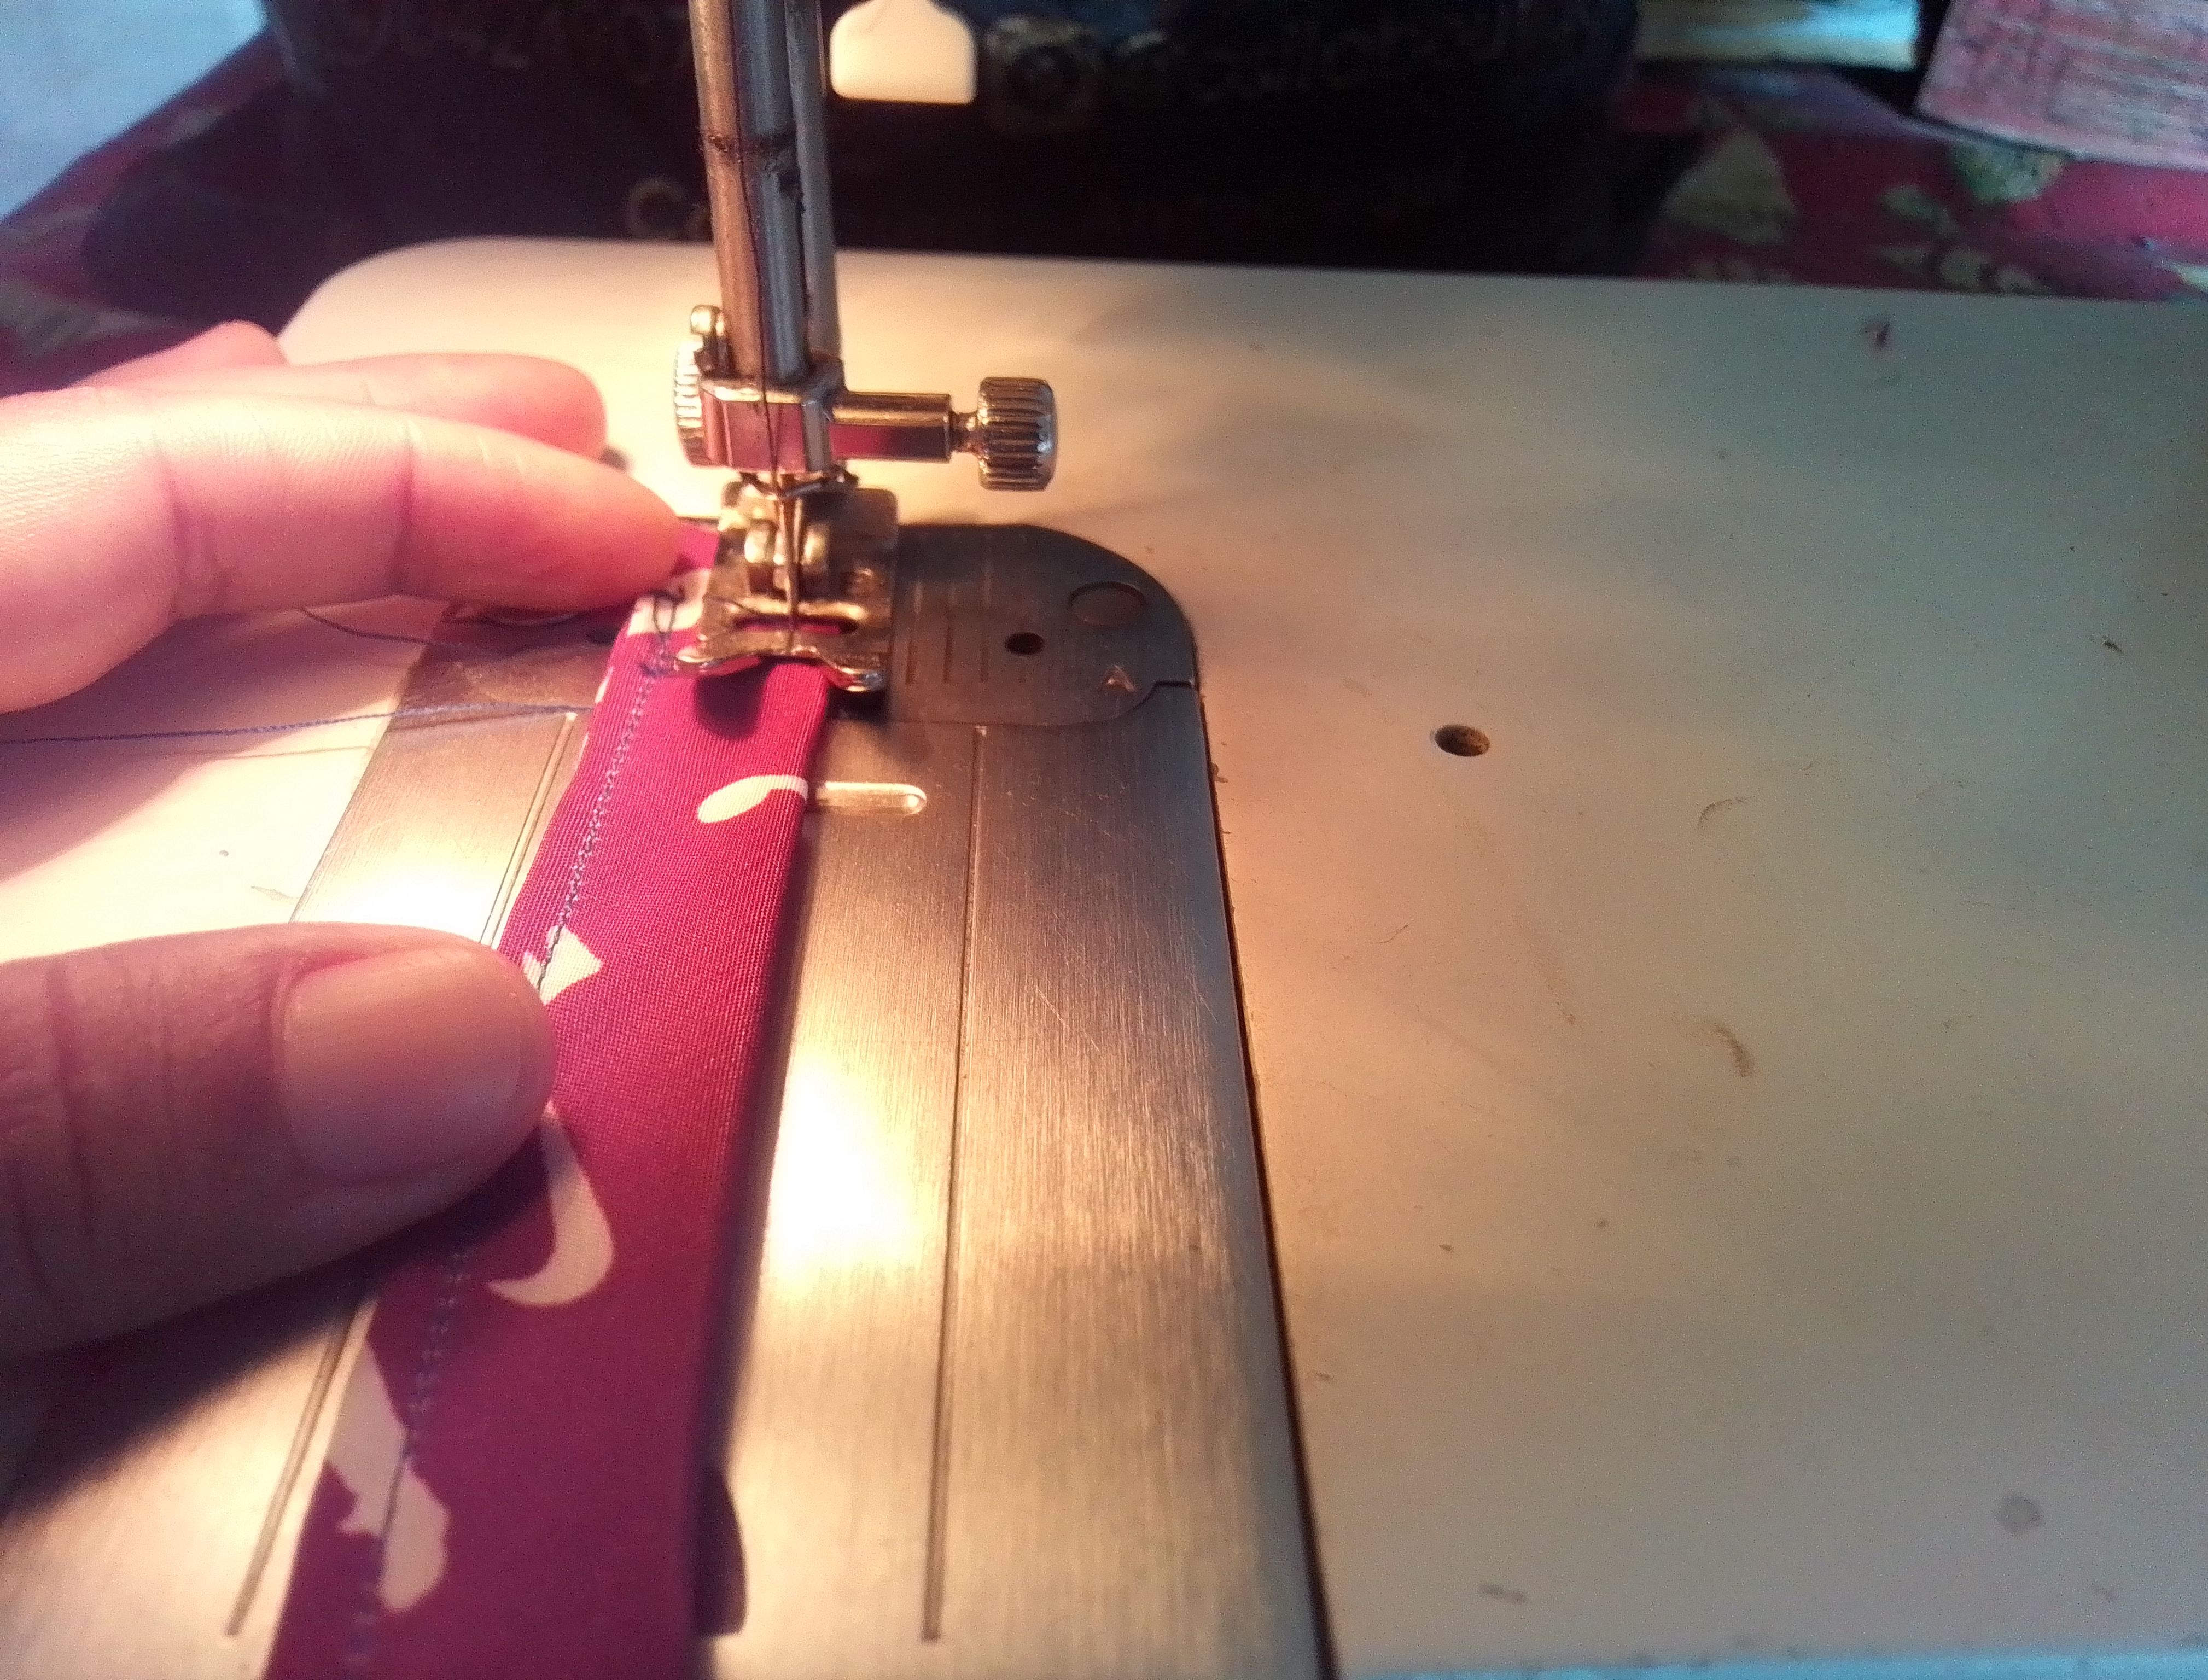
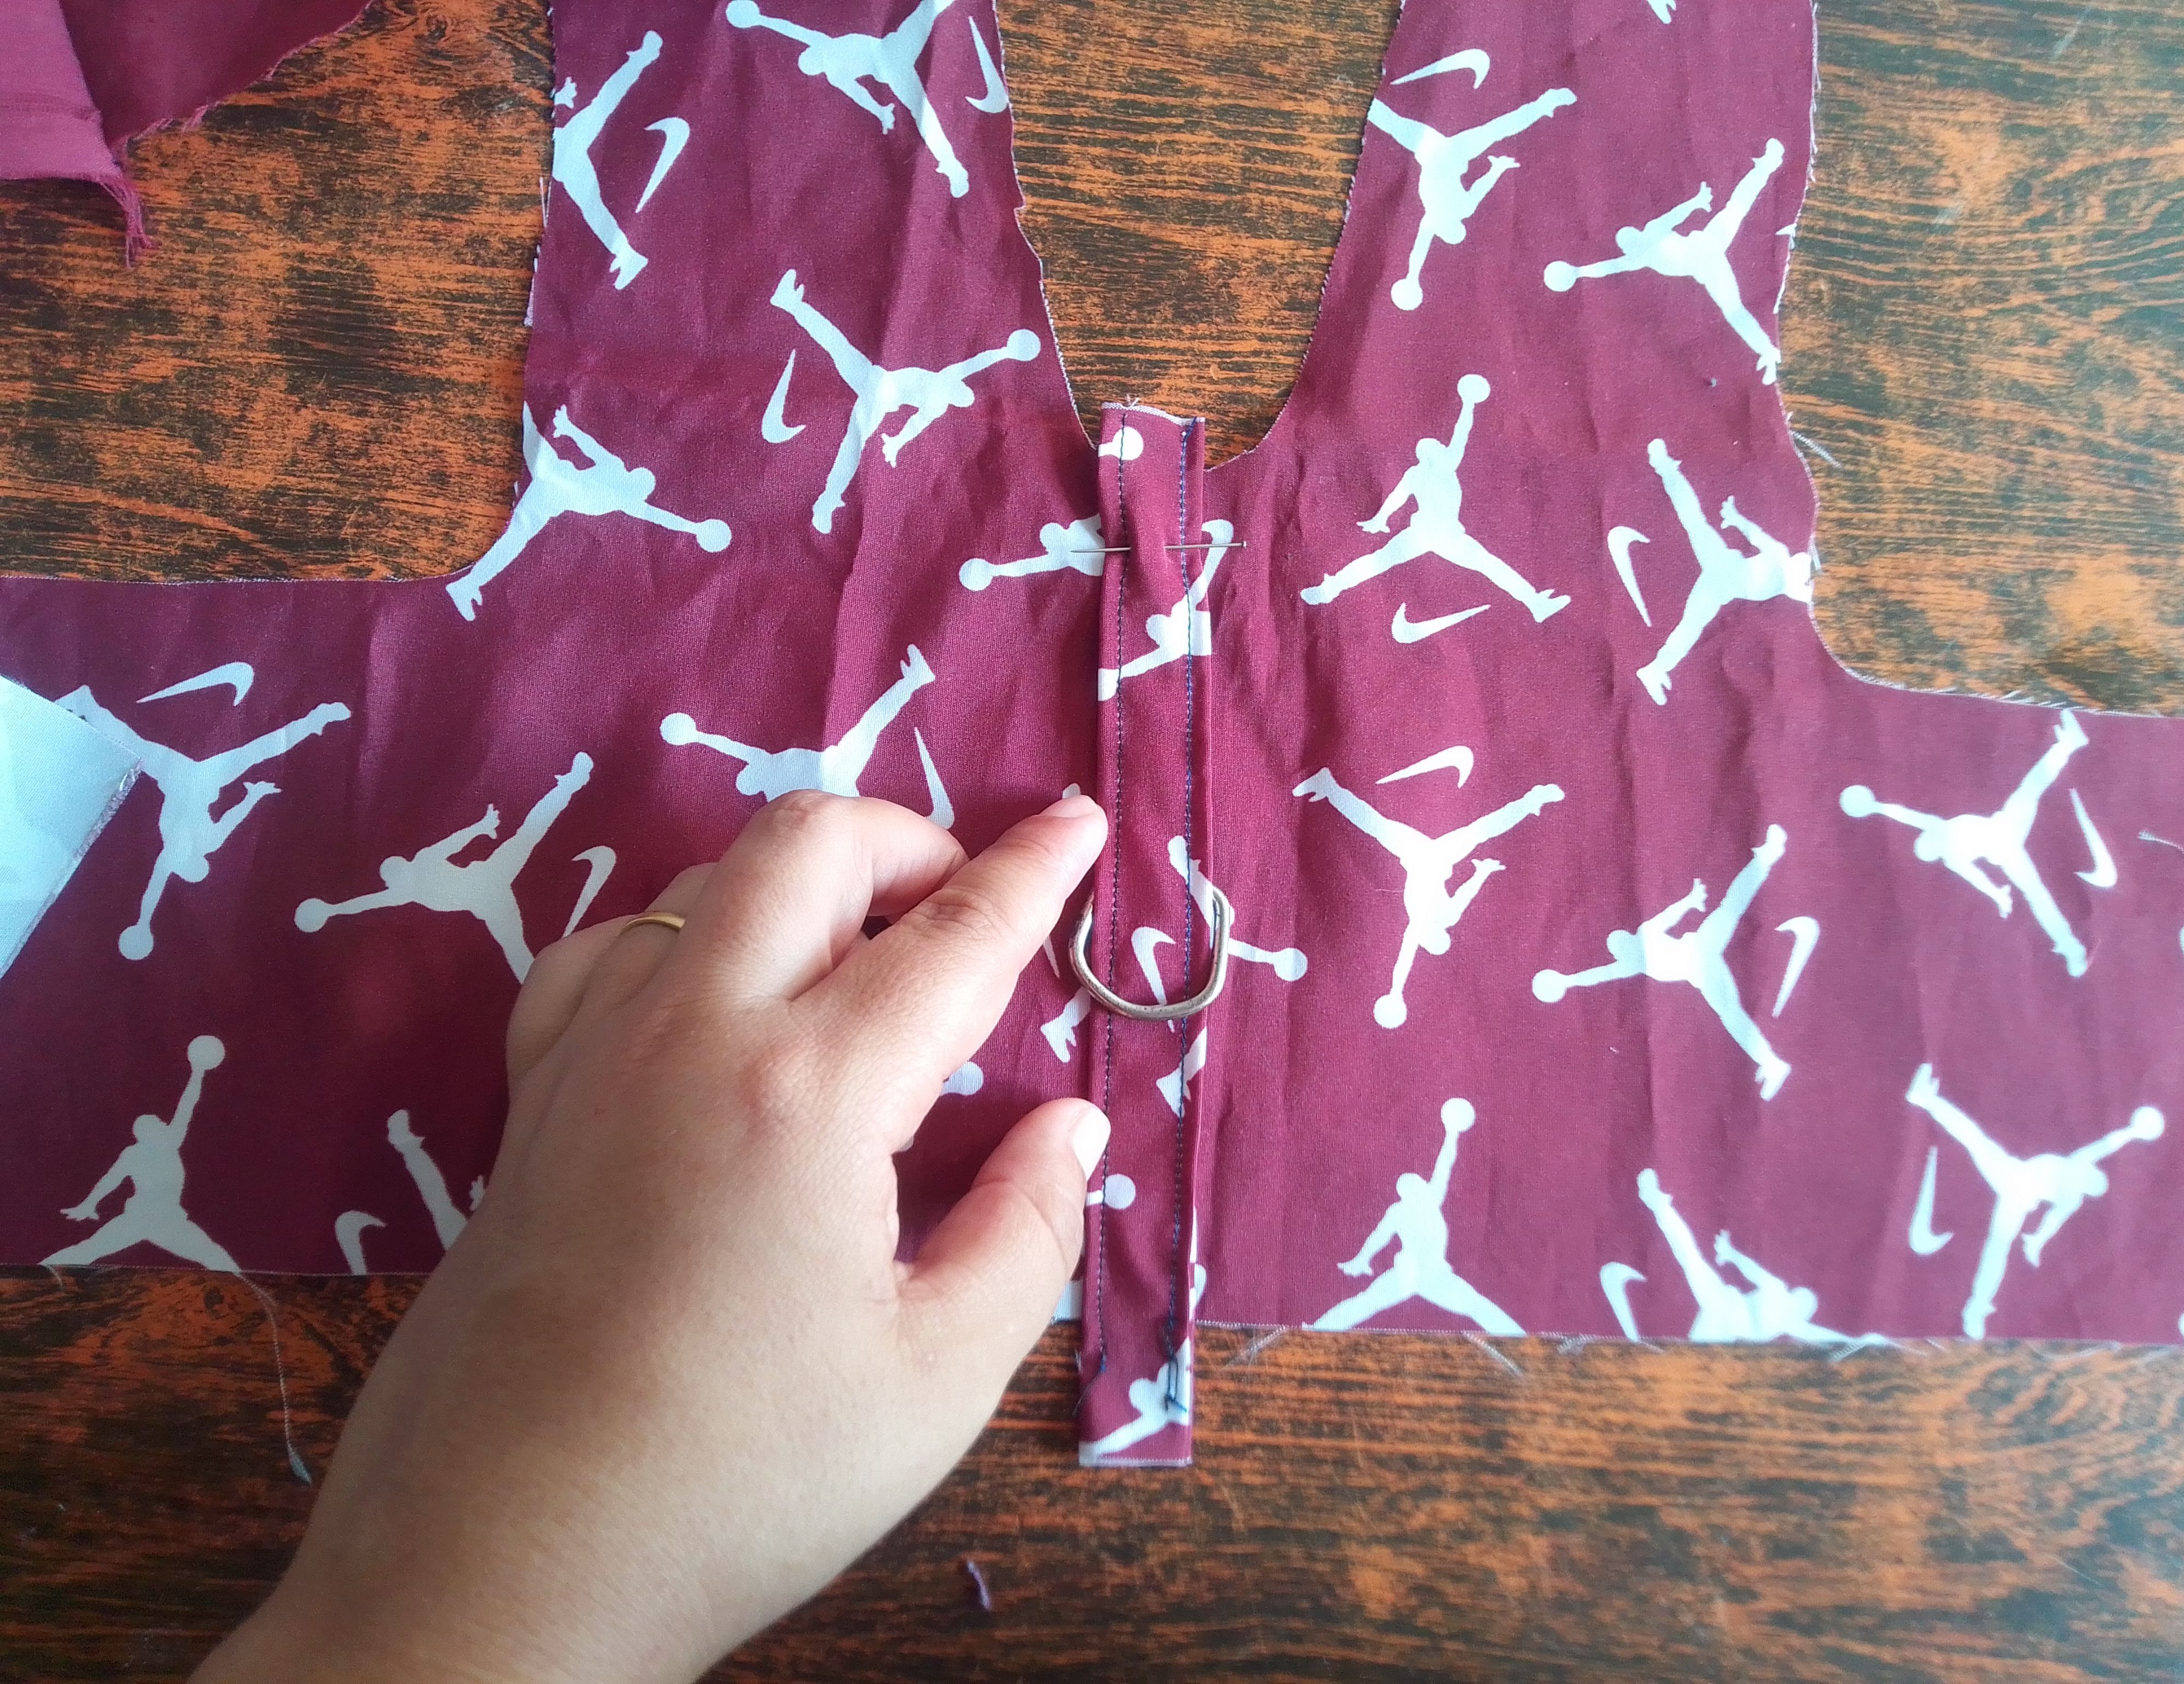
Paso a realizar una trabilla con una tira de tela, realizando dos costuras rectas superficiales. En esta pieza introduzco el aro metálico y la sujeto con alfileres en el centro de la parte frontal del arnés. Enfrentamos los derechos de la tela de ambas partes y hacemos una costura recta en toda la orilla de ambas piezas dejando un pequeño orificio para luego voltearlas.
Step 02
I proceed to make a loop with a strip of fabric, making two superficial straight seams. In this piece I introduce the metal ring and secure it with pins in the center of the front part of the harness. We face the right sides of the fabric of both parts and make a straight seam along the entire edge of both pieces, leaving a small hole to then turn them over.
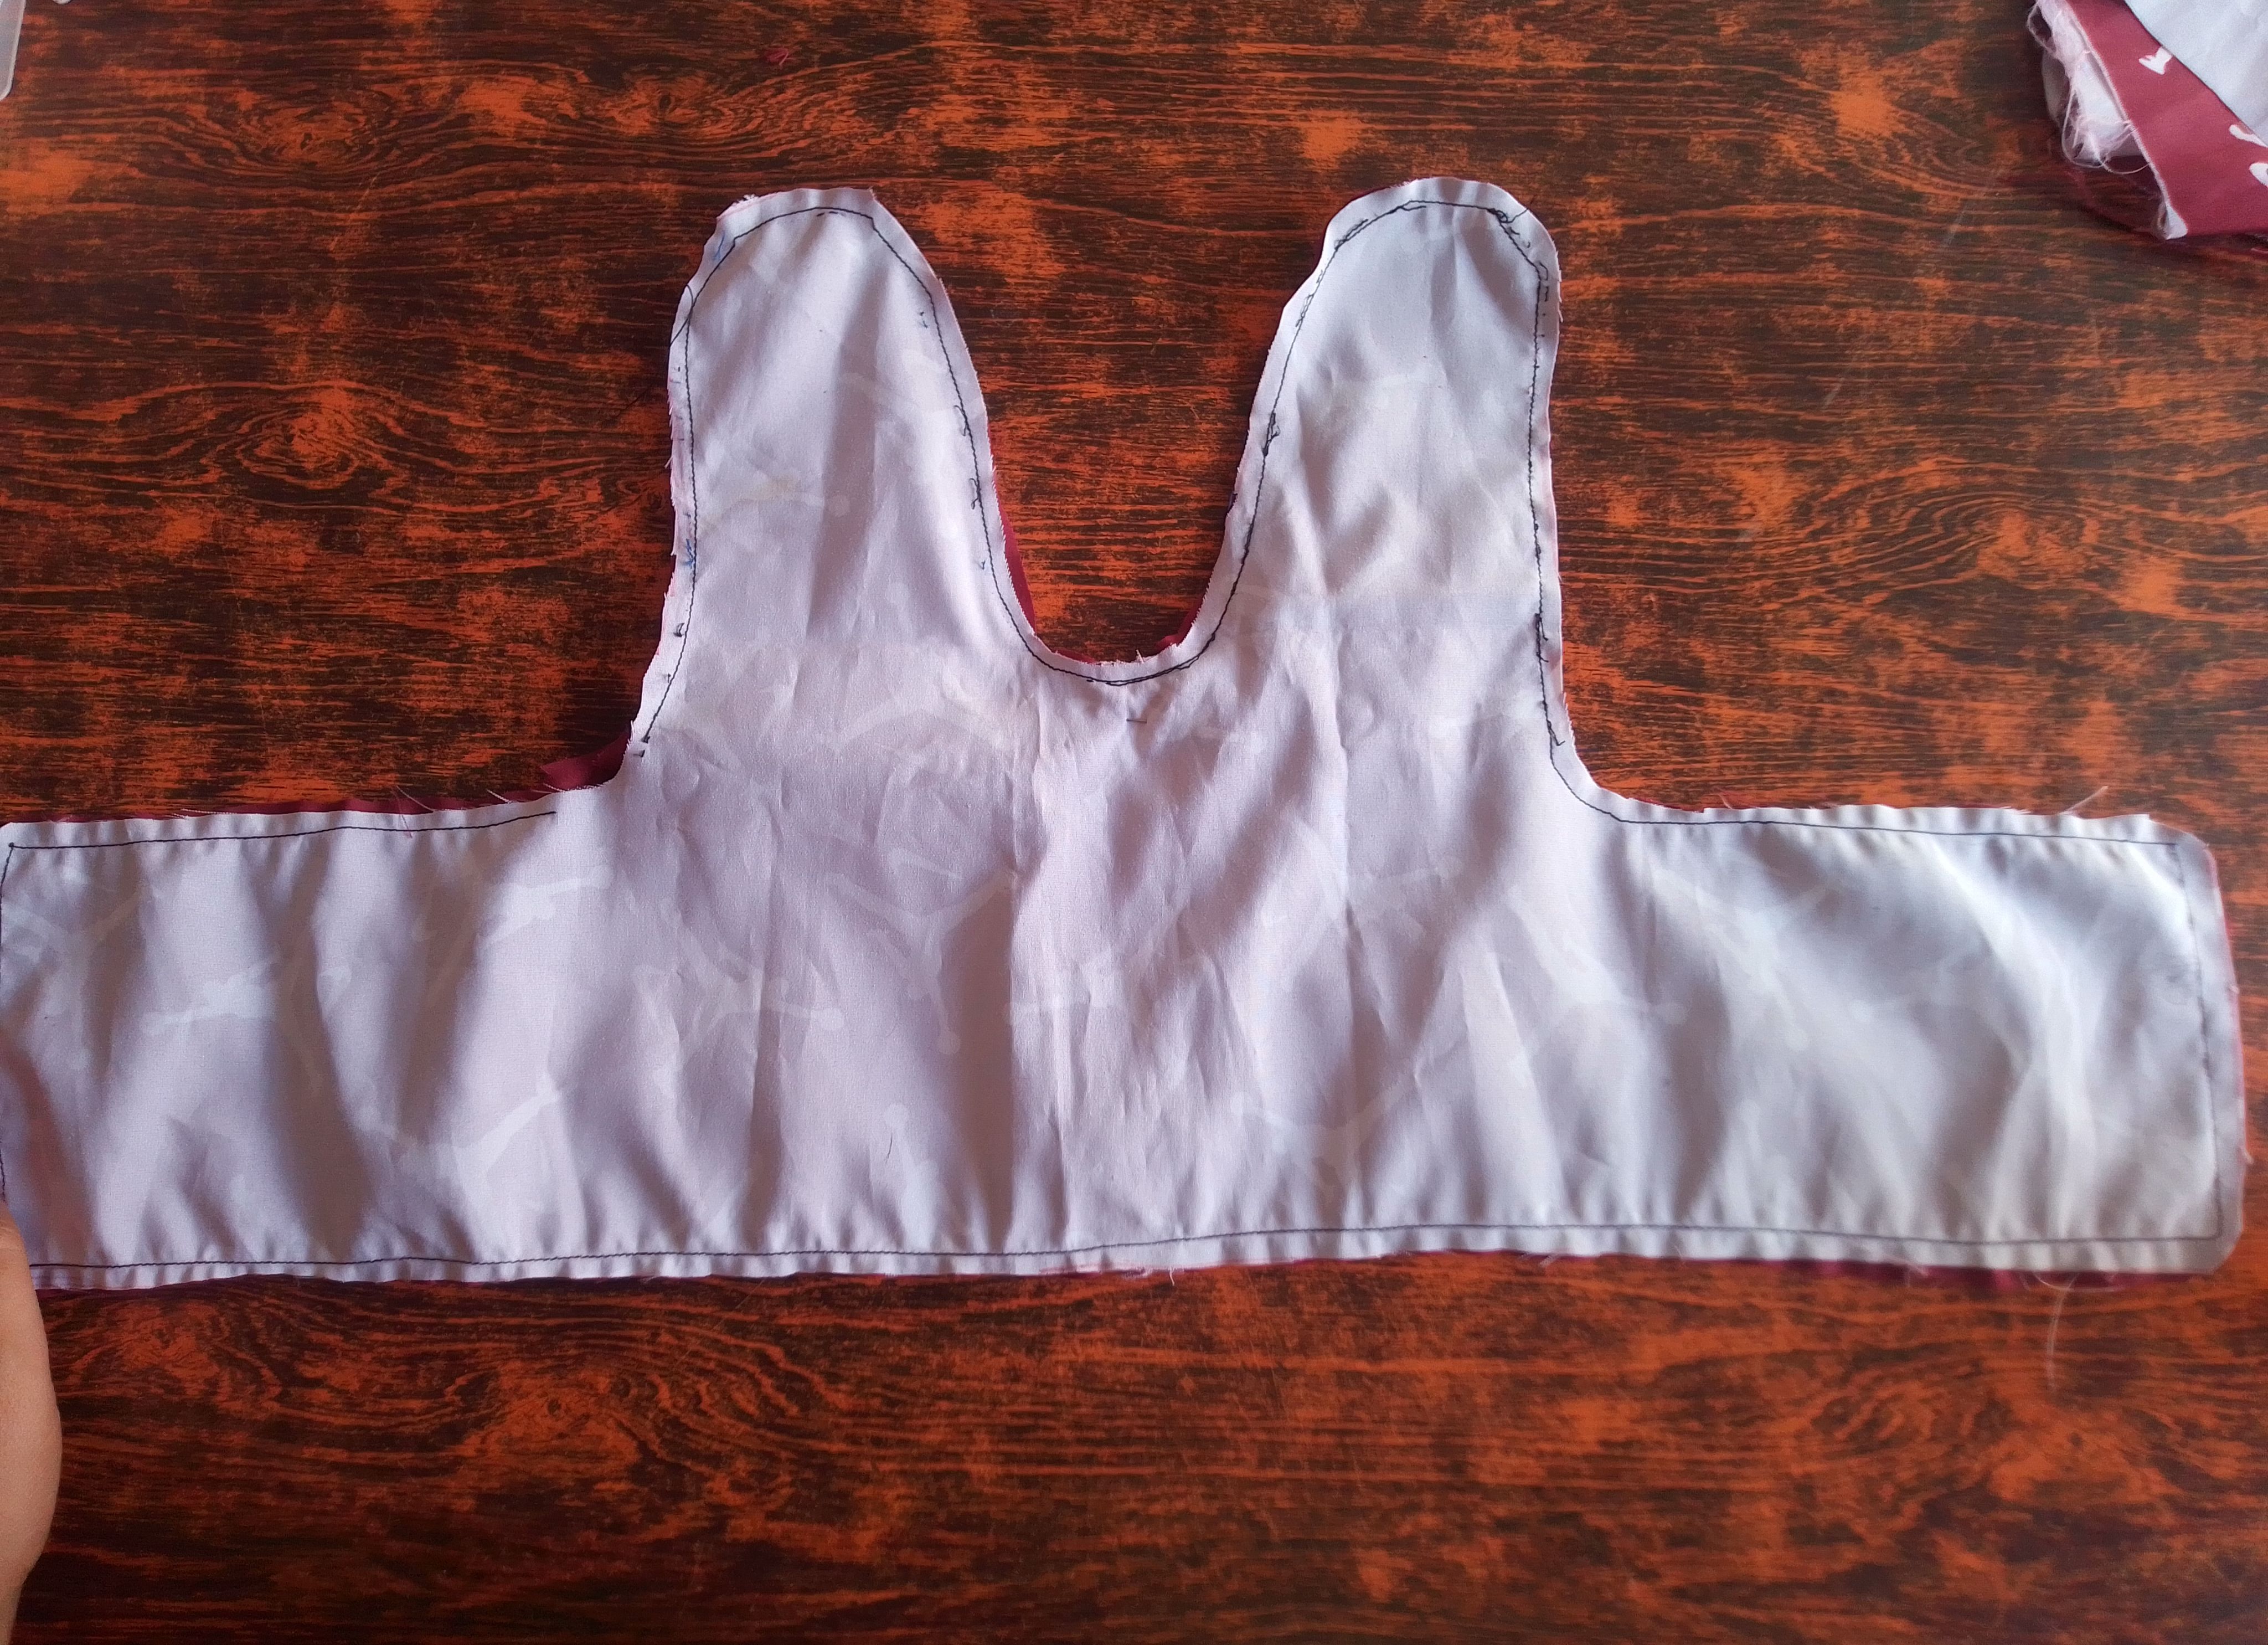
Paso 03
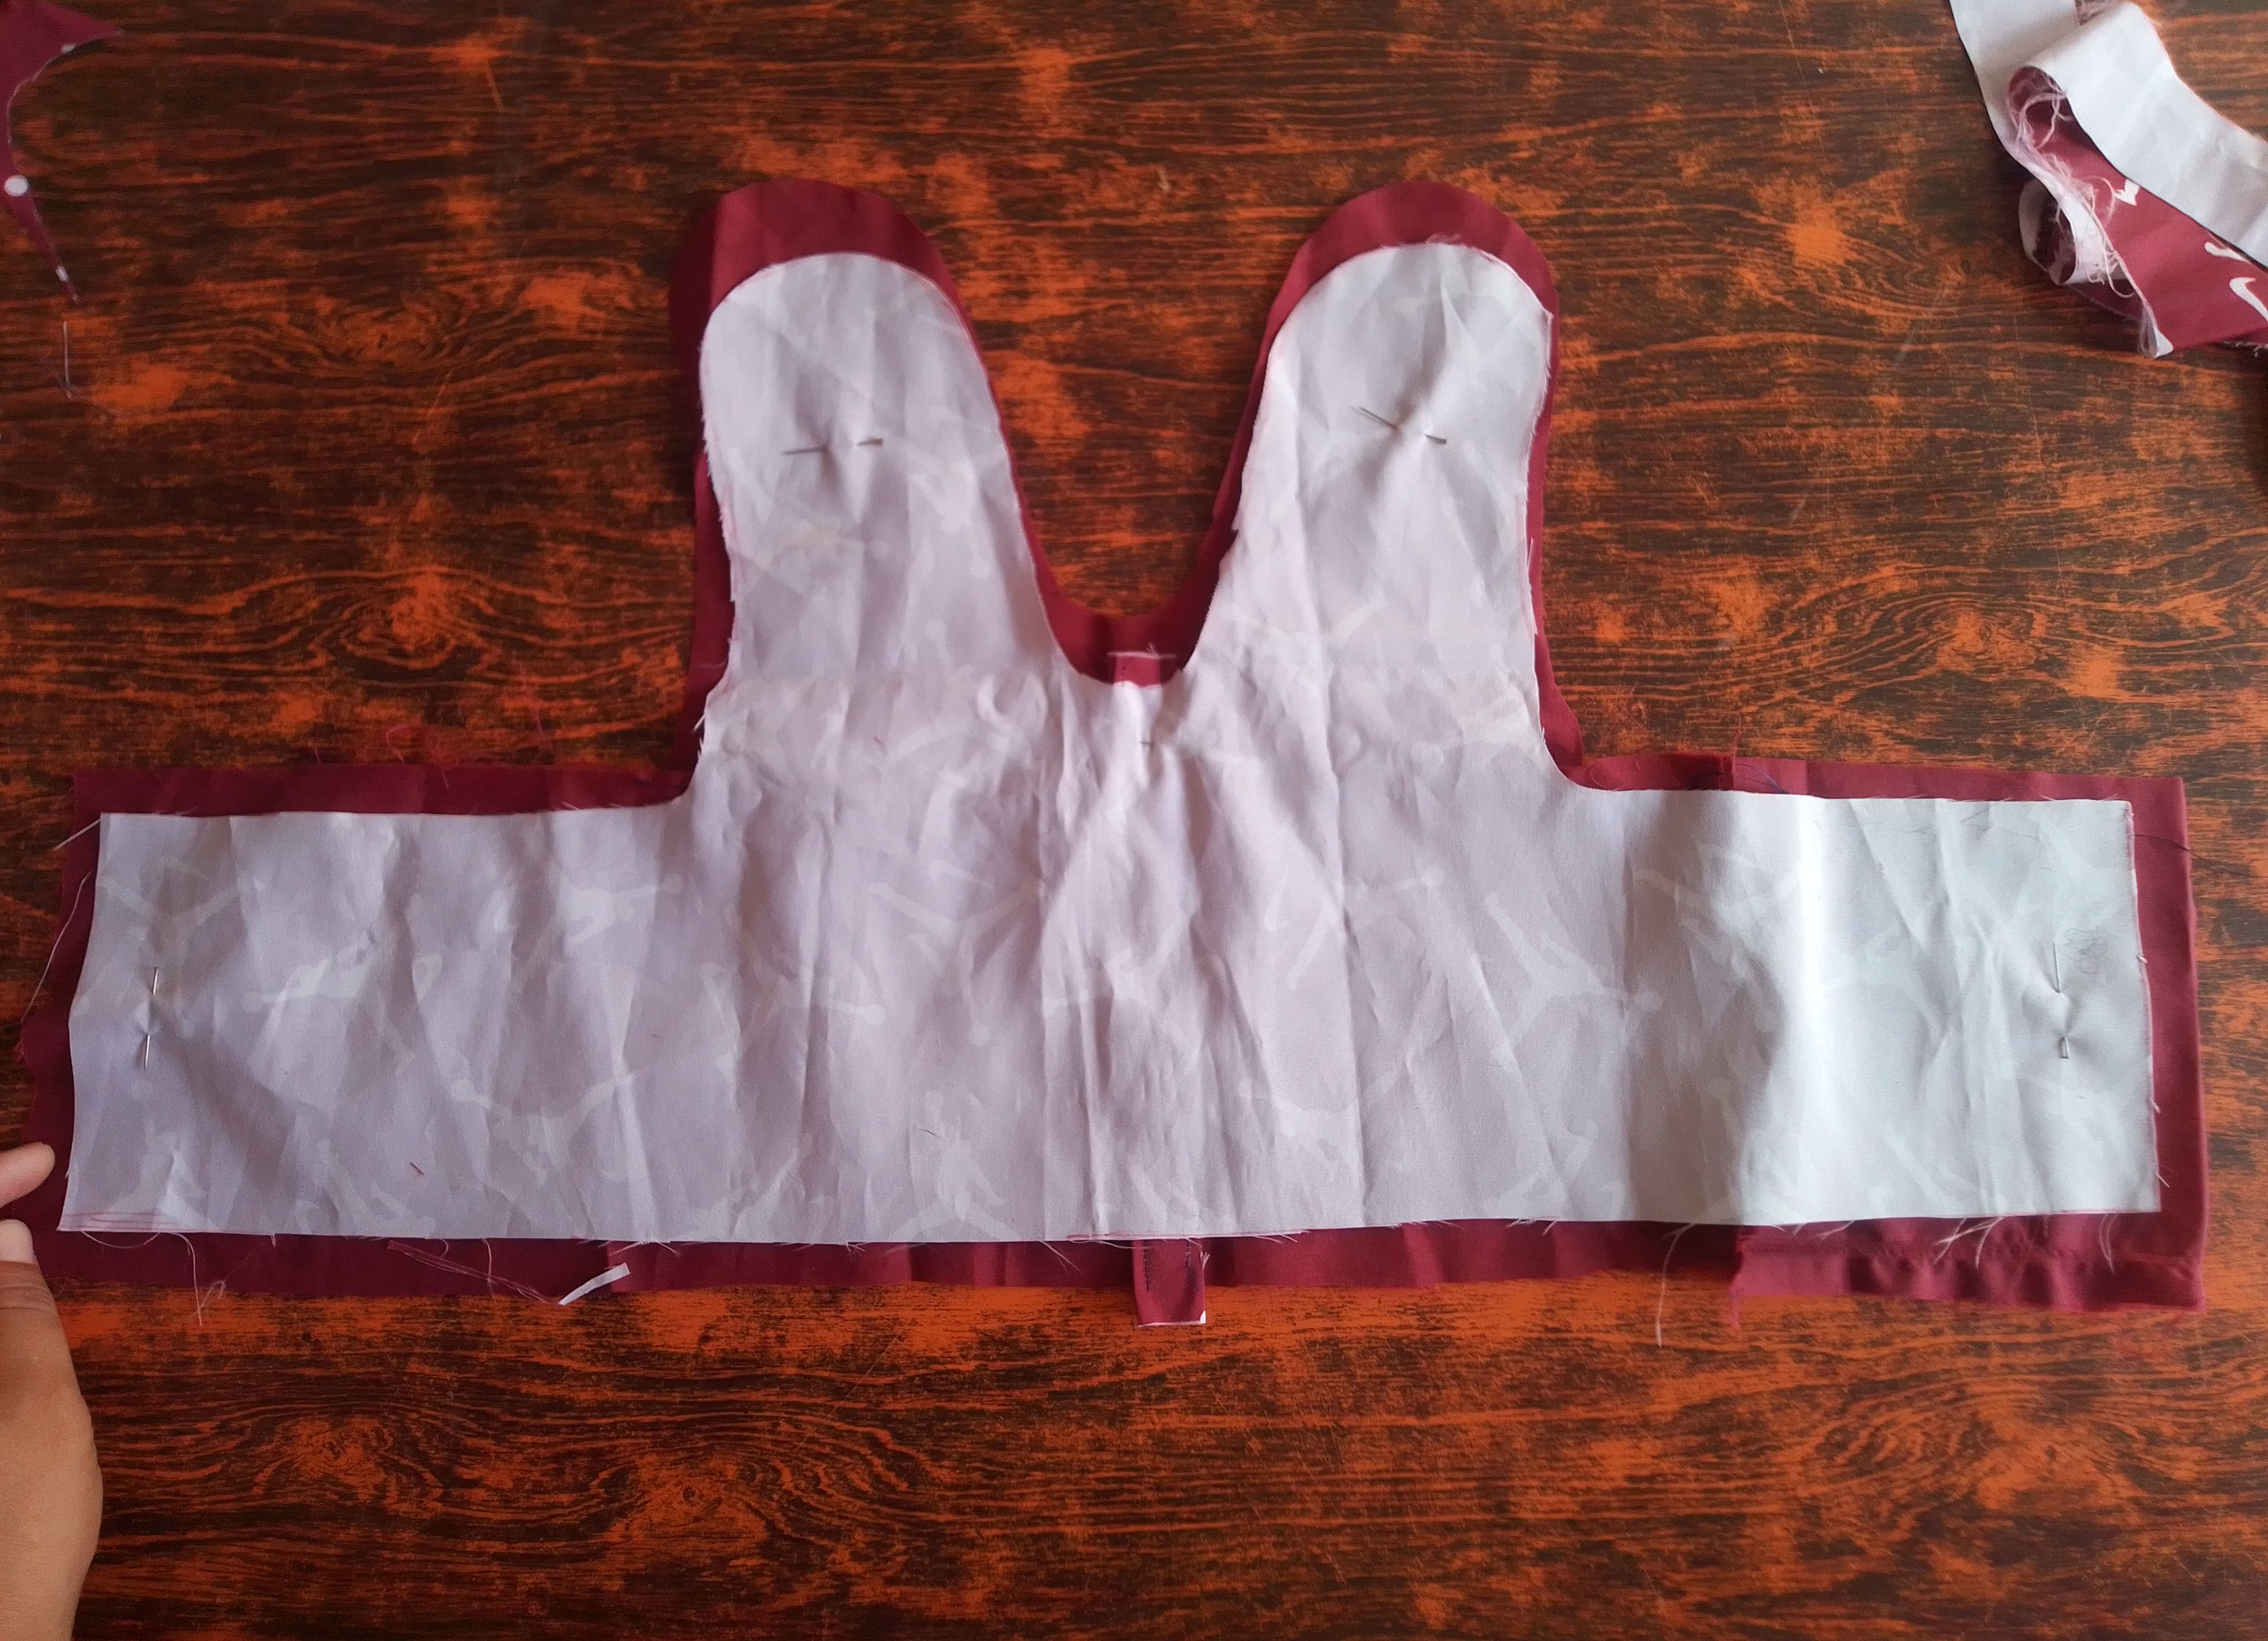
En este caso no es necesario hacer remaches pues la vamos a voltear, lo que si debemos hacer cortar todo el exceso de tela de los bordes. Giramos y planchamos para darle forma. Continuamos realizando un pespunte con costura recta, sellando el orificio anterior y asegurando aún más la tira del centro, pues por esta zona irá sujetado el perro.
Step 03
In this case it is not necessary to make rivets since we are going to turn it over, but we must cut all the excess fabric from the edges. We twist and iron to shape it. We continue making a superficial straight seam, sealing the previous hole and further securing the center strip, since the dog will be held in this area.
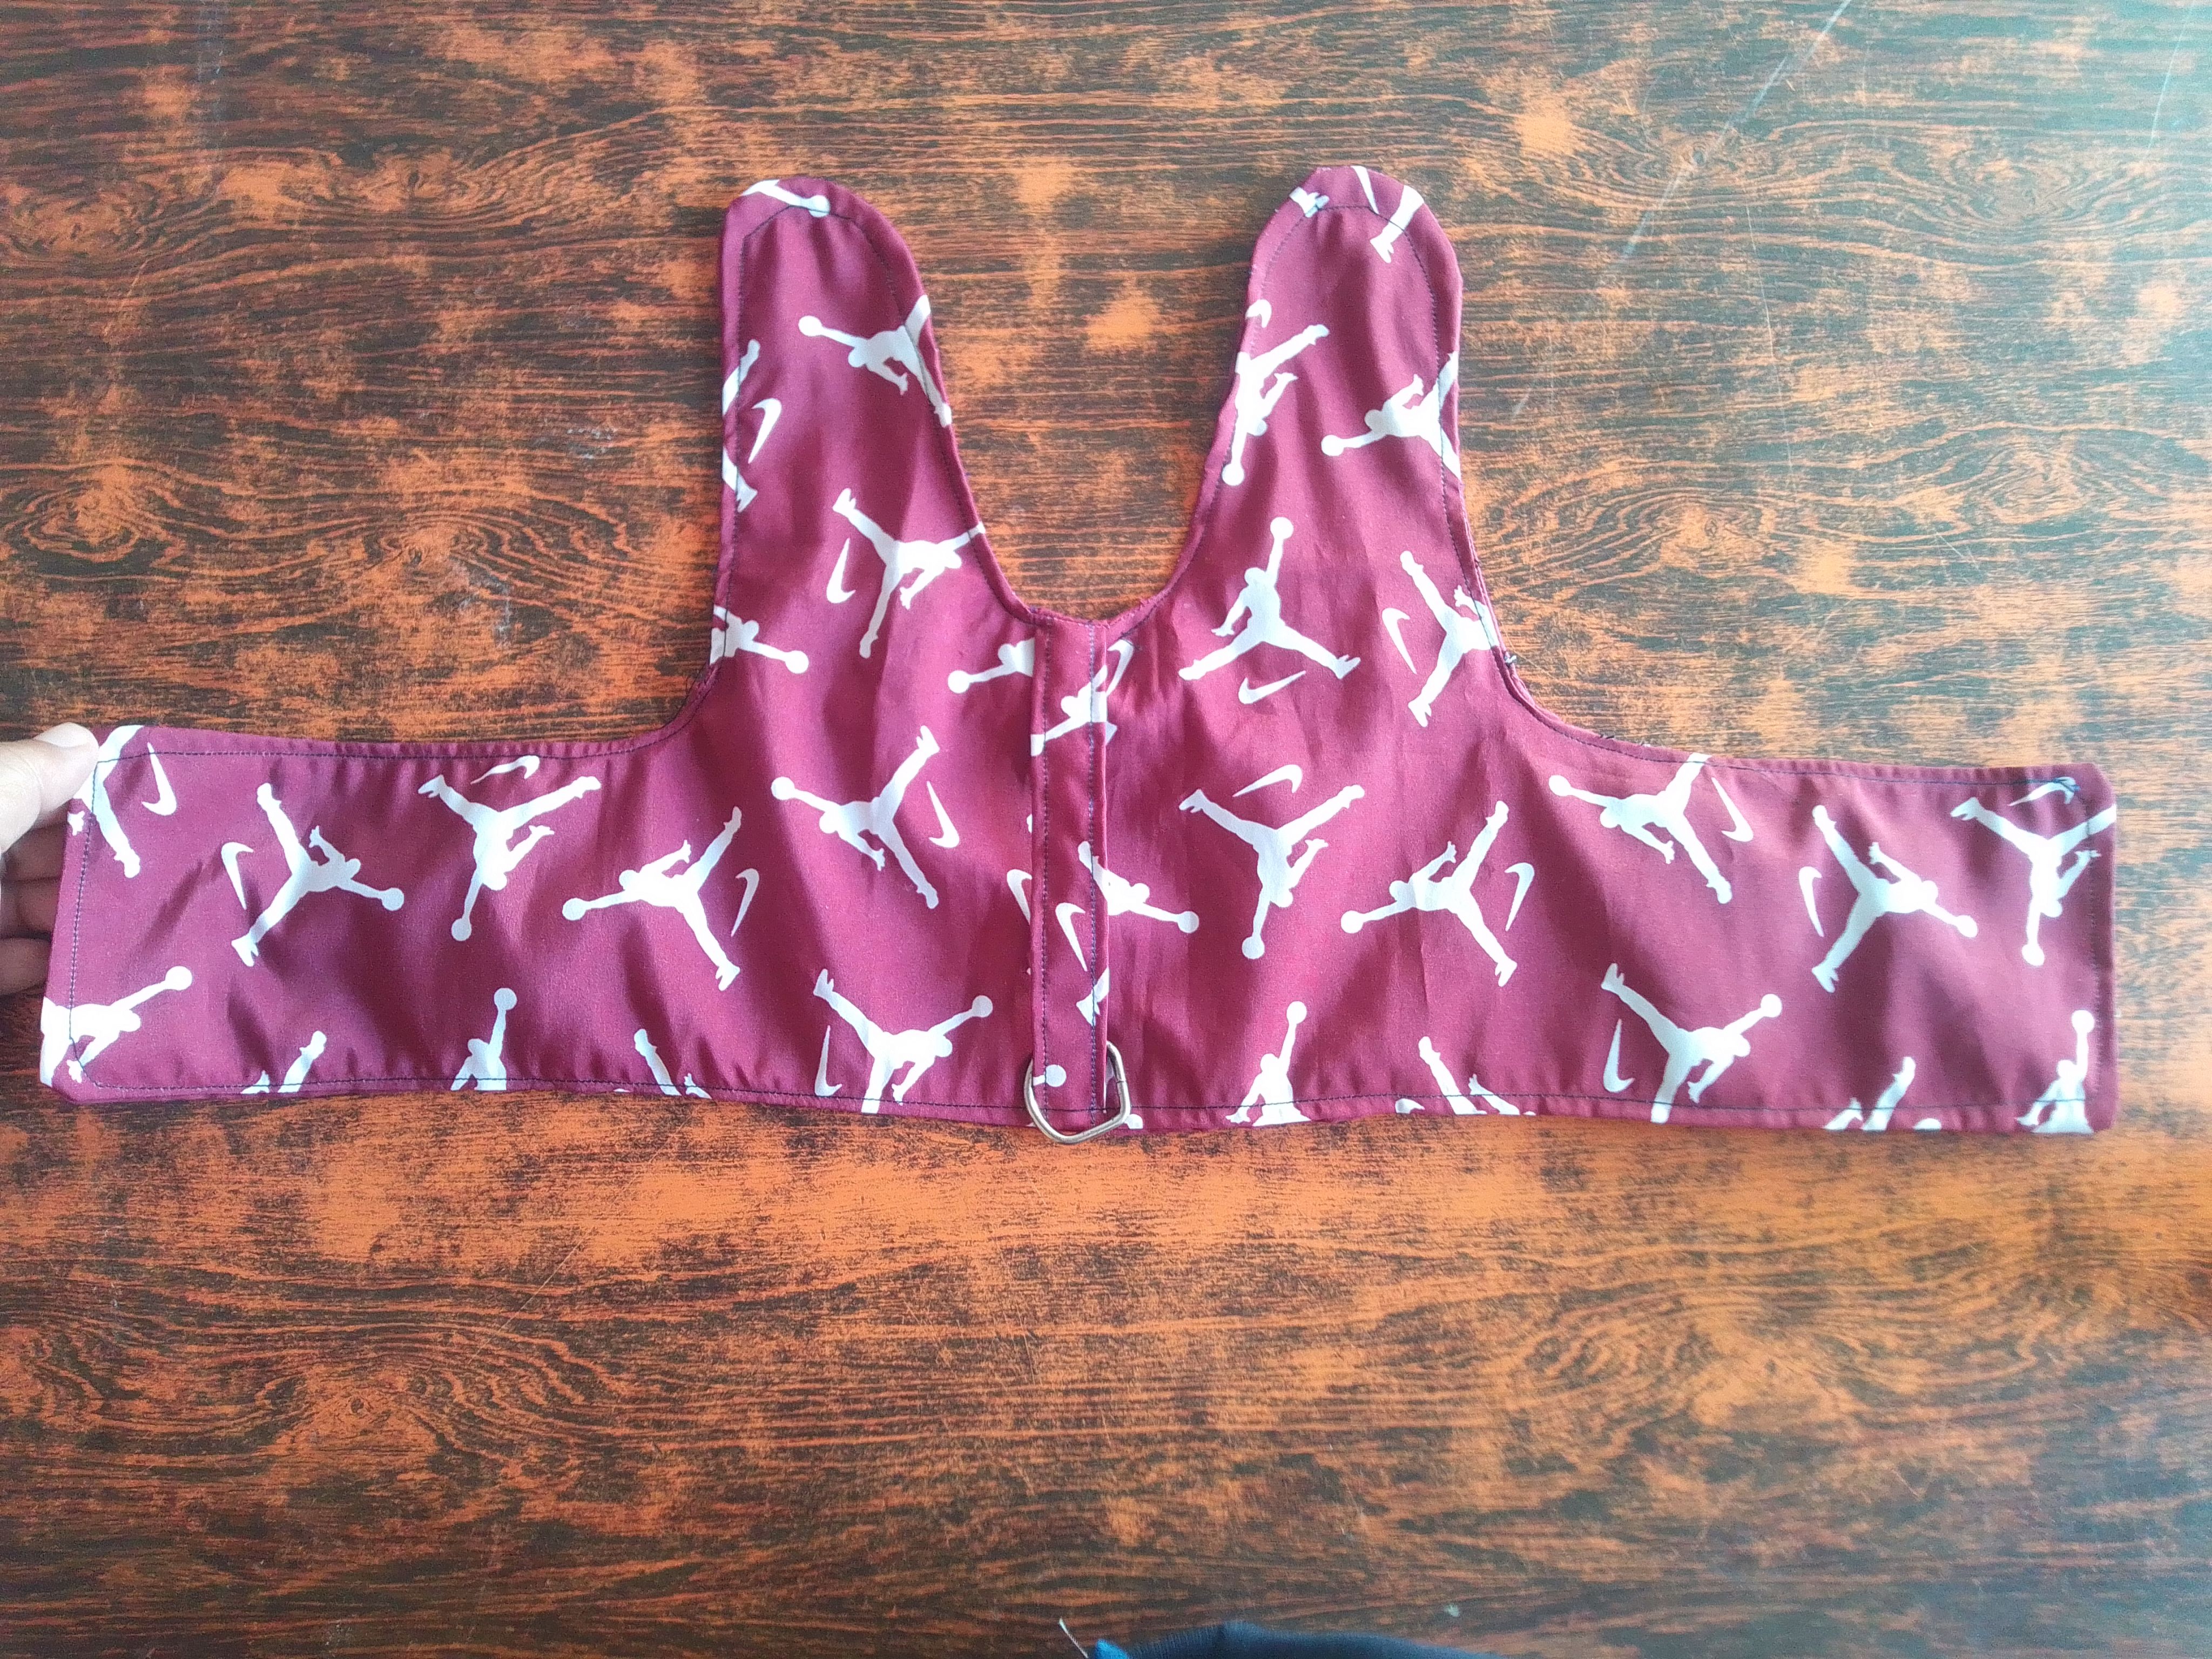

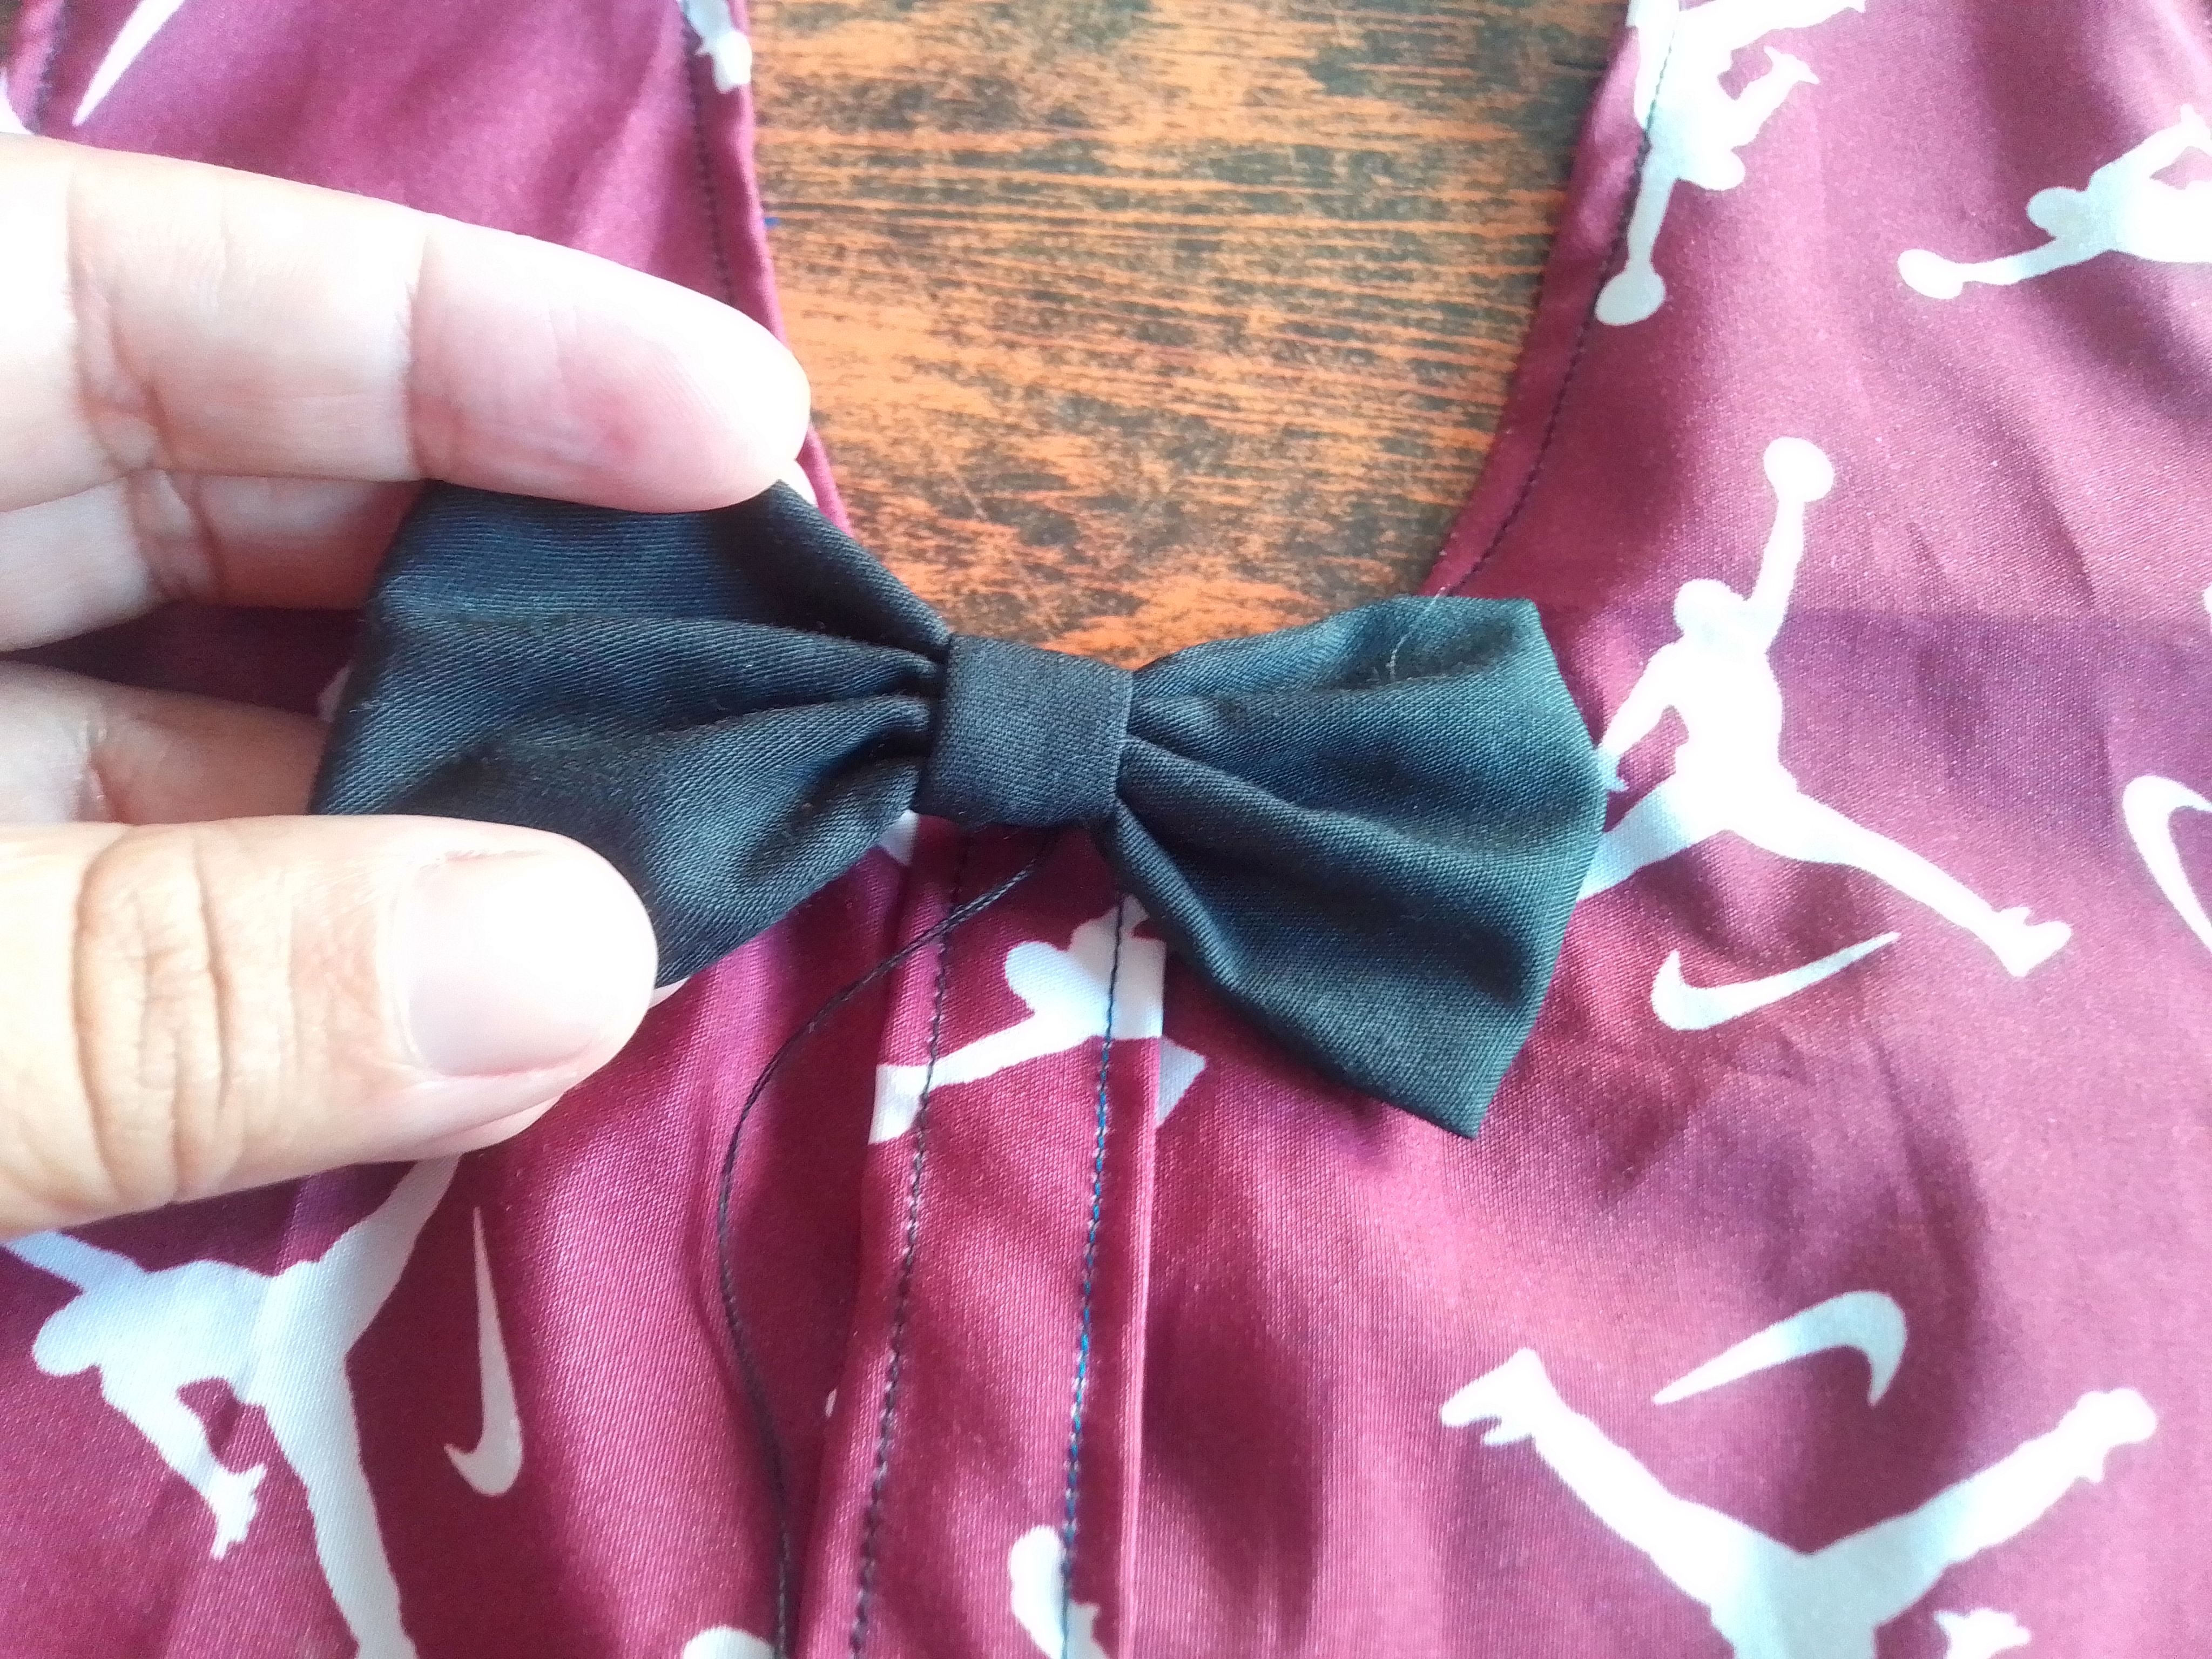
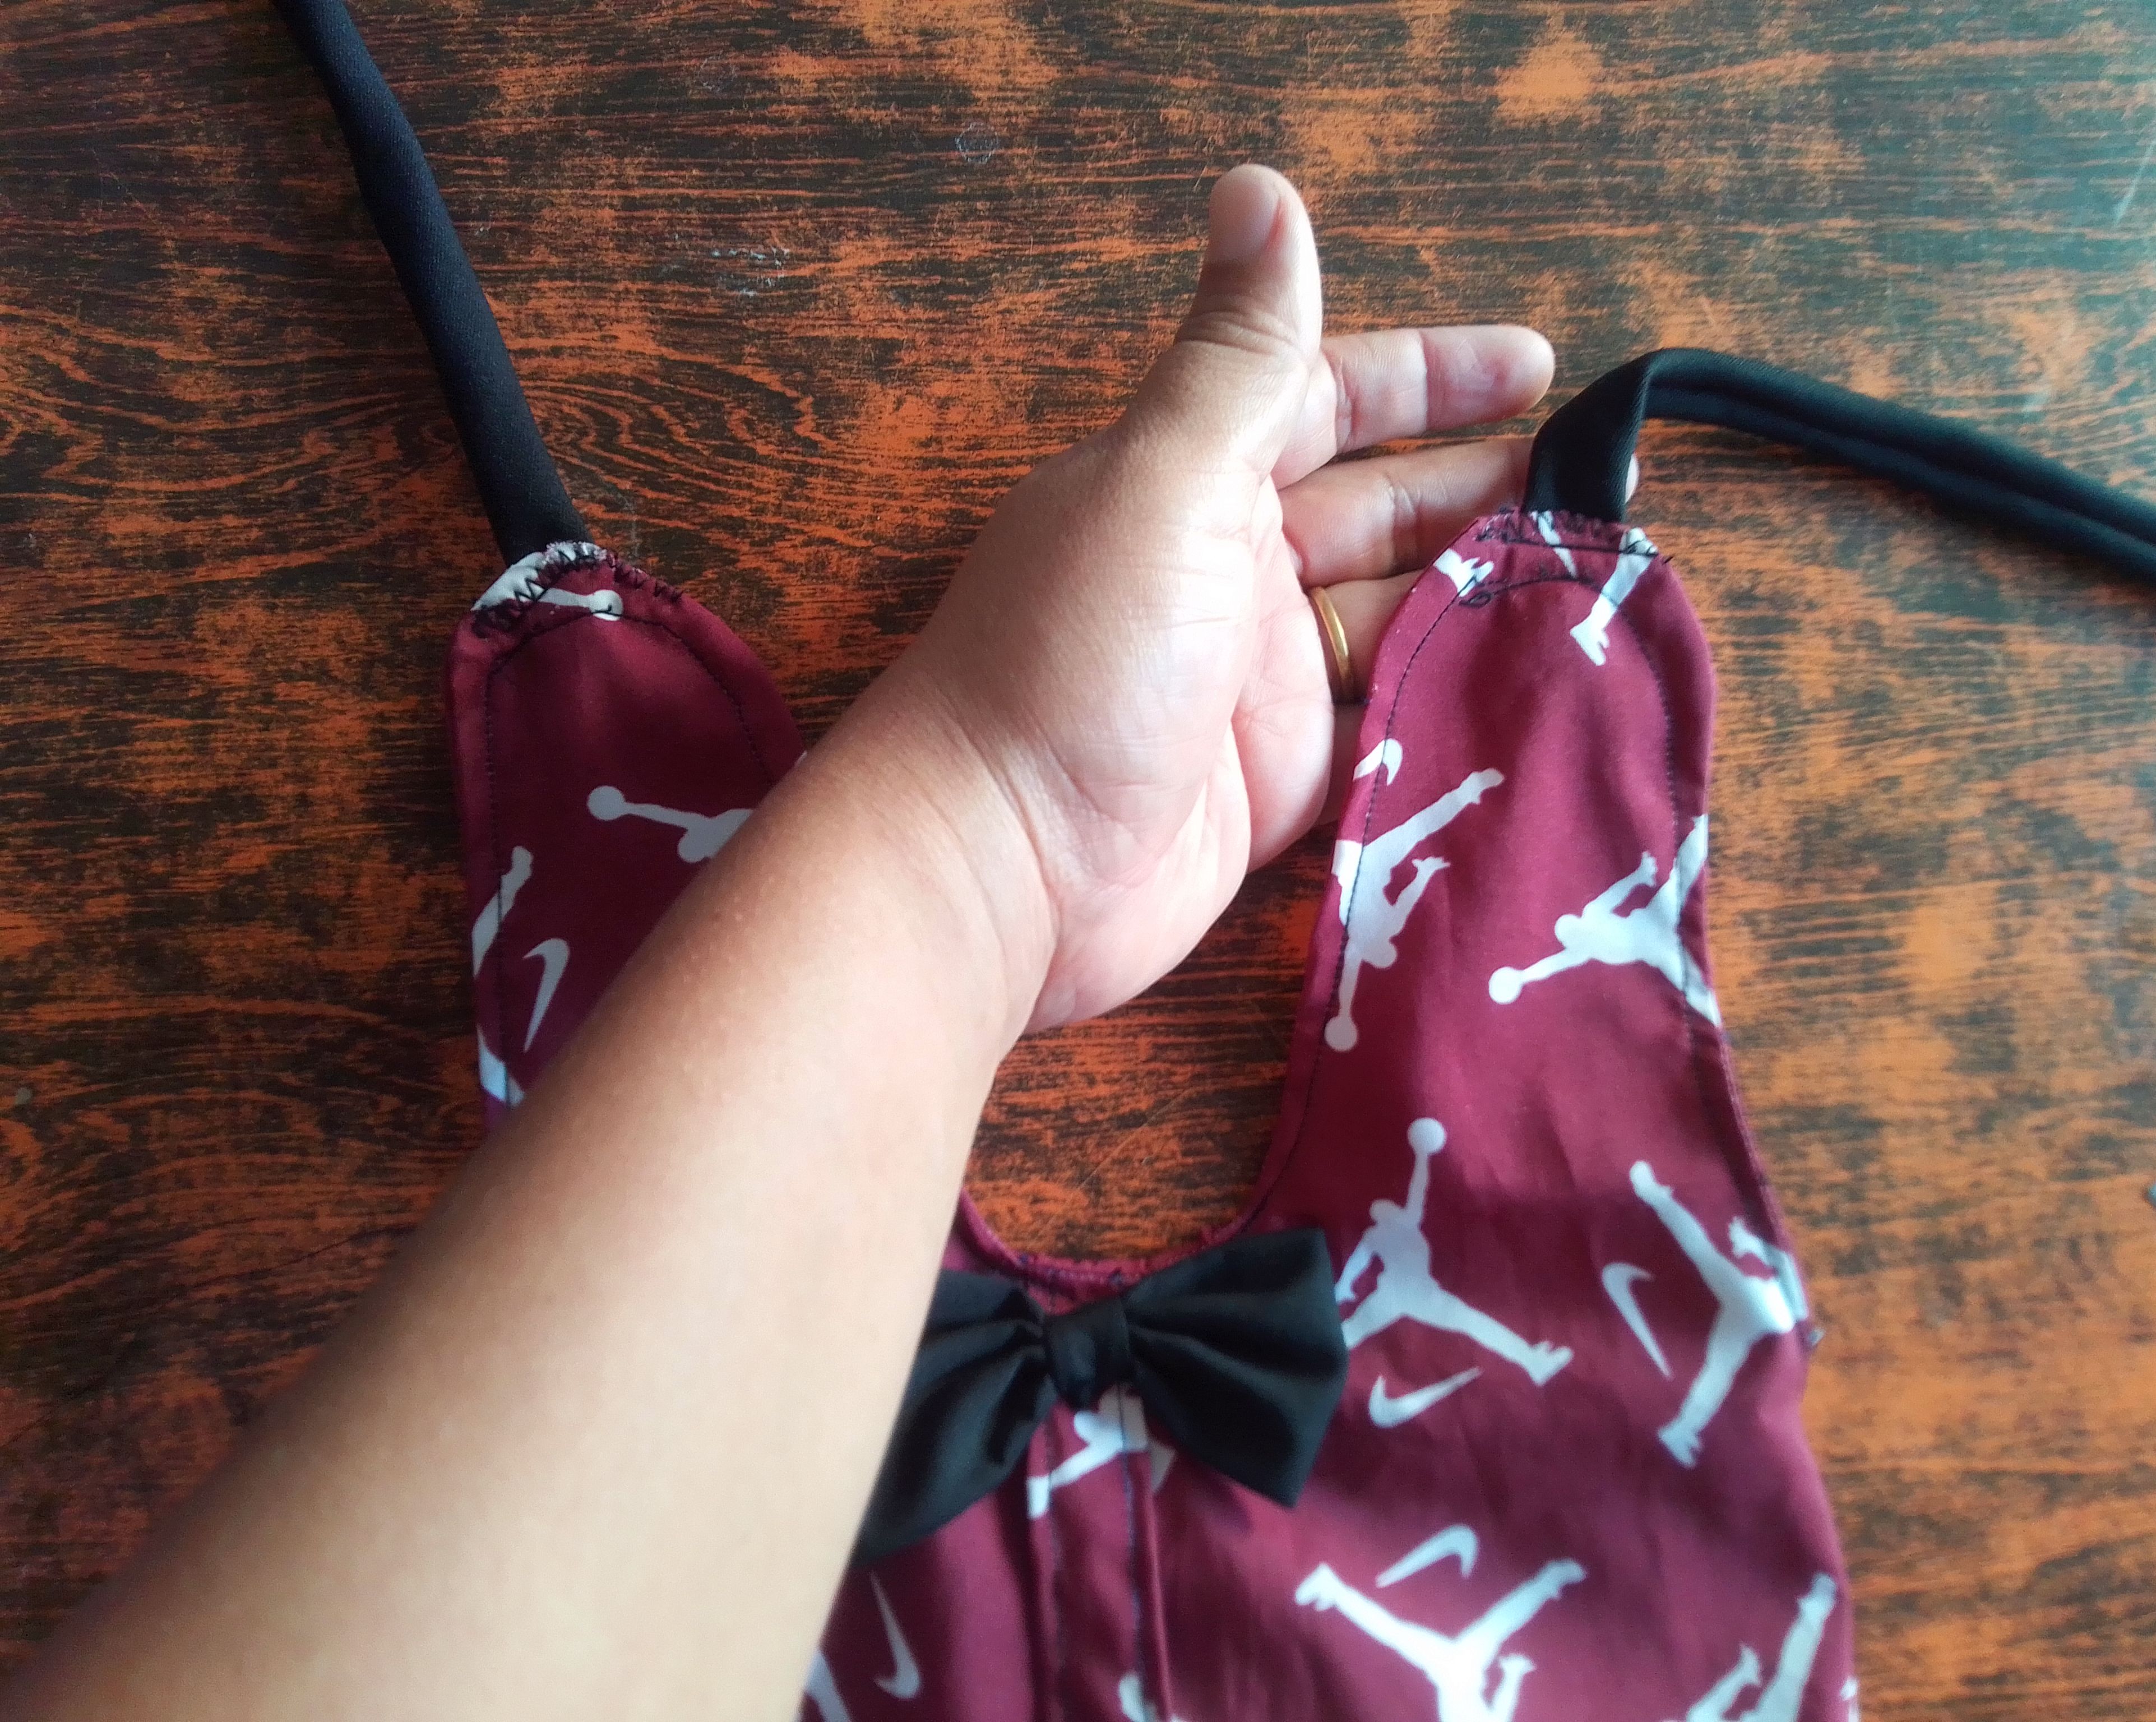
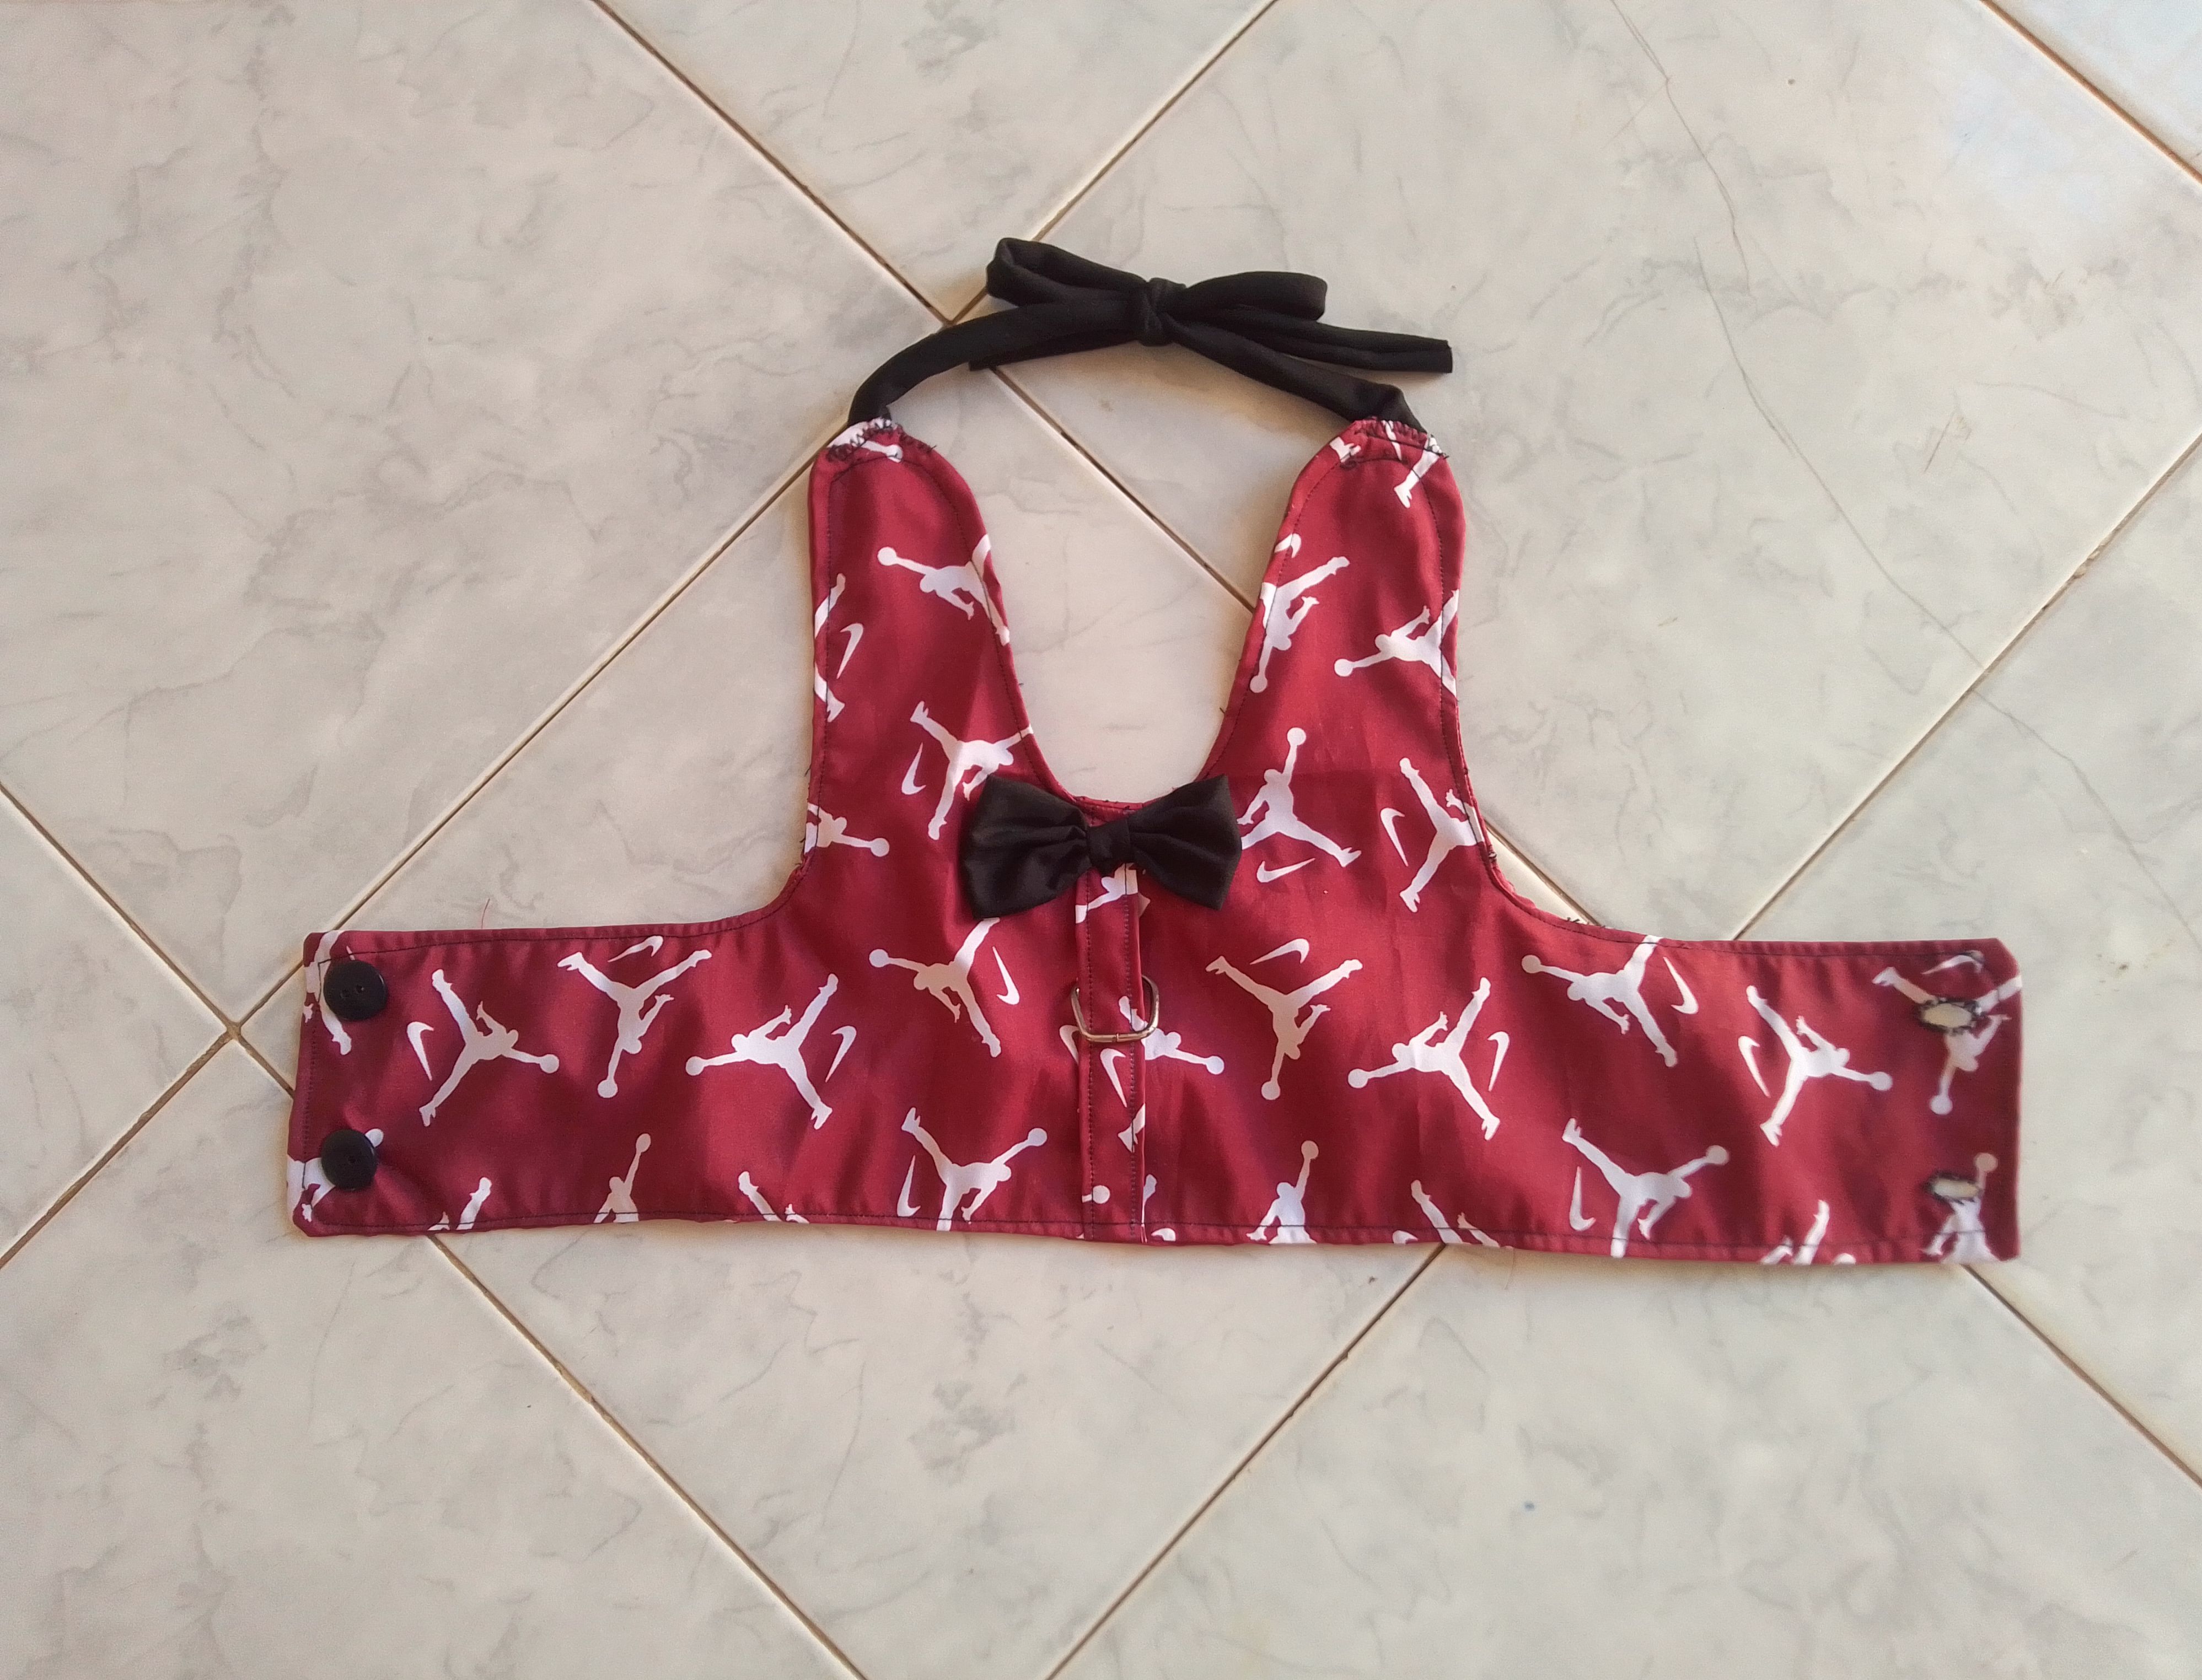
Paso 04
Voy a coser dos botones grandes en uno de los laterales d la perchera con su respectivos ojales en el otro extremo. También con un cuadrito de tela formo un lazo como aplique y lo coso en el medio. Podemos colocar un tercer botón en la parte superior o podemos coser dos tiras.. Me gustaron más la tiras así que cosi una en cada extremidad del cuello.
Step 04
I am going to sew two large buttons on one of the sides of the coat hanger with their respective buttonholes on the other end. Also with a small square of fabric I form a bow as an appliqué and sew it in the middle.We can place a third button at the top or we can sew two strips. I liked the strips better so I sewed one at each end of the neck.
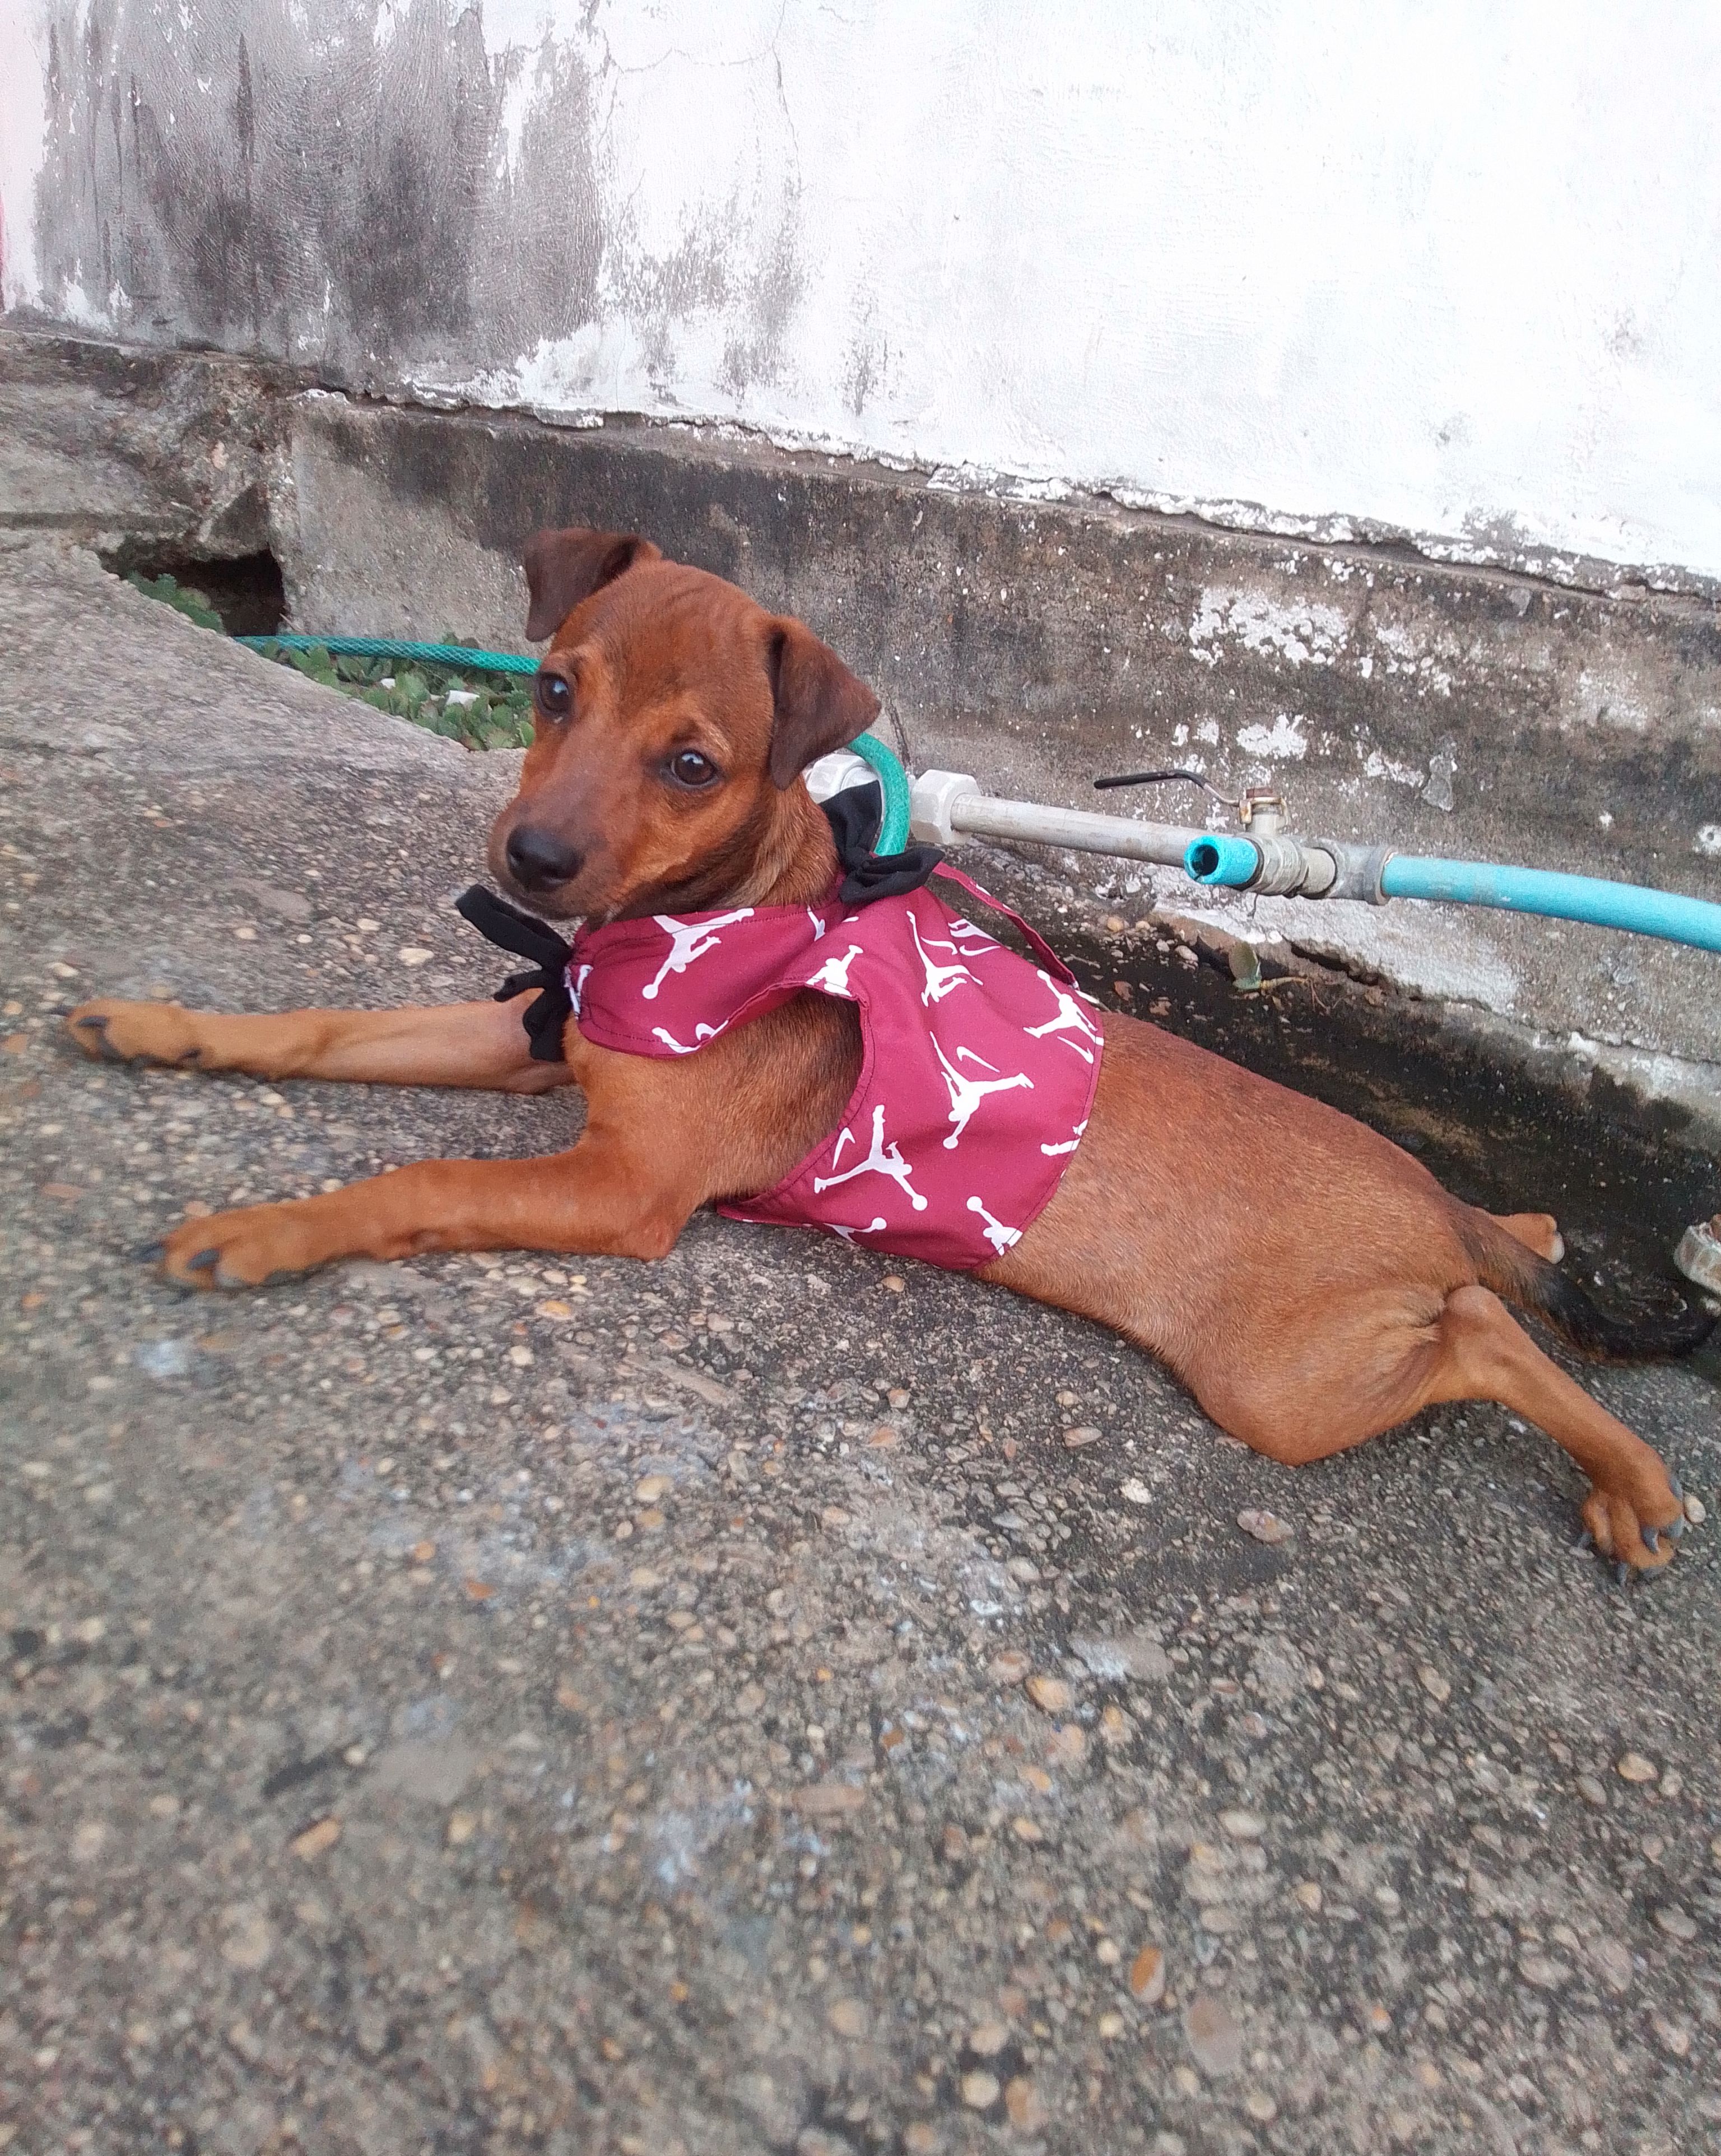
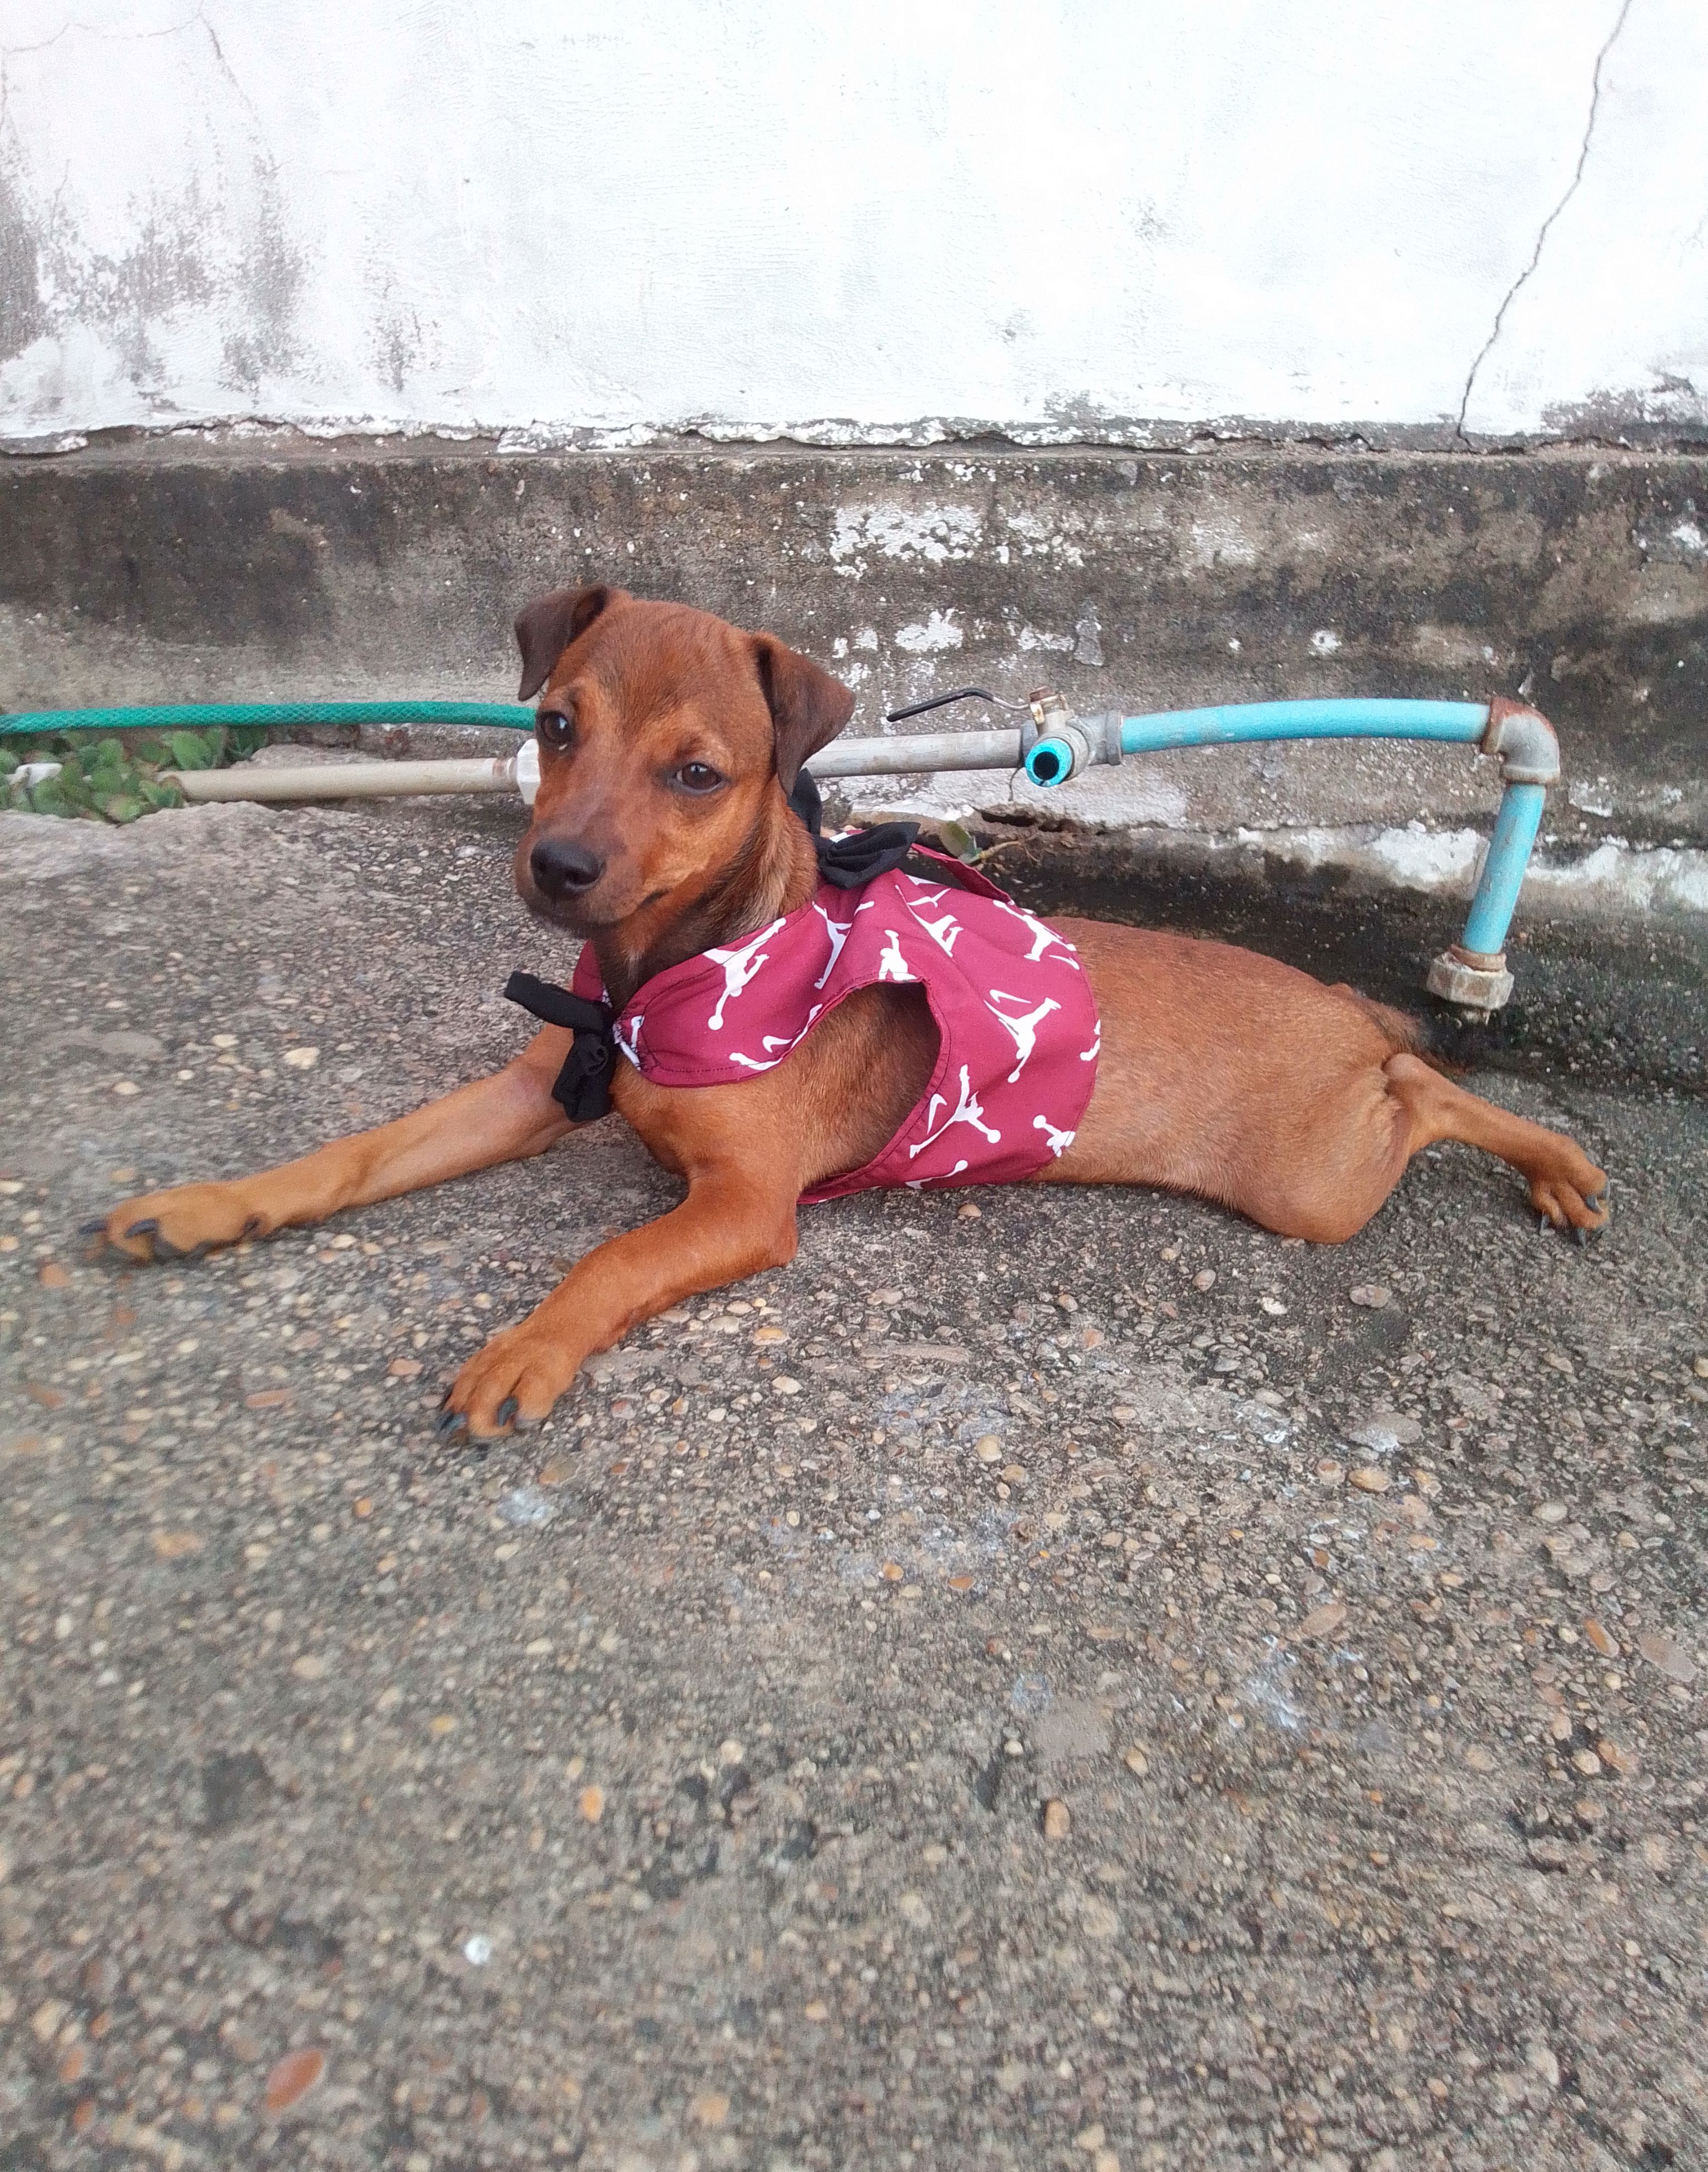
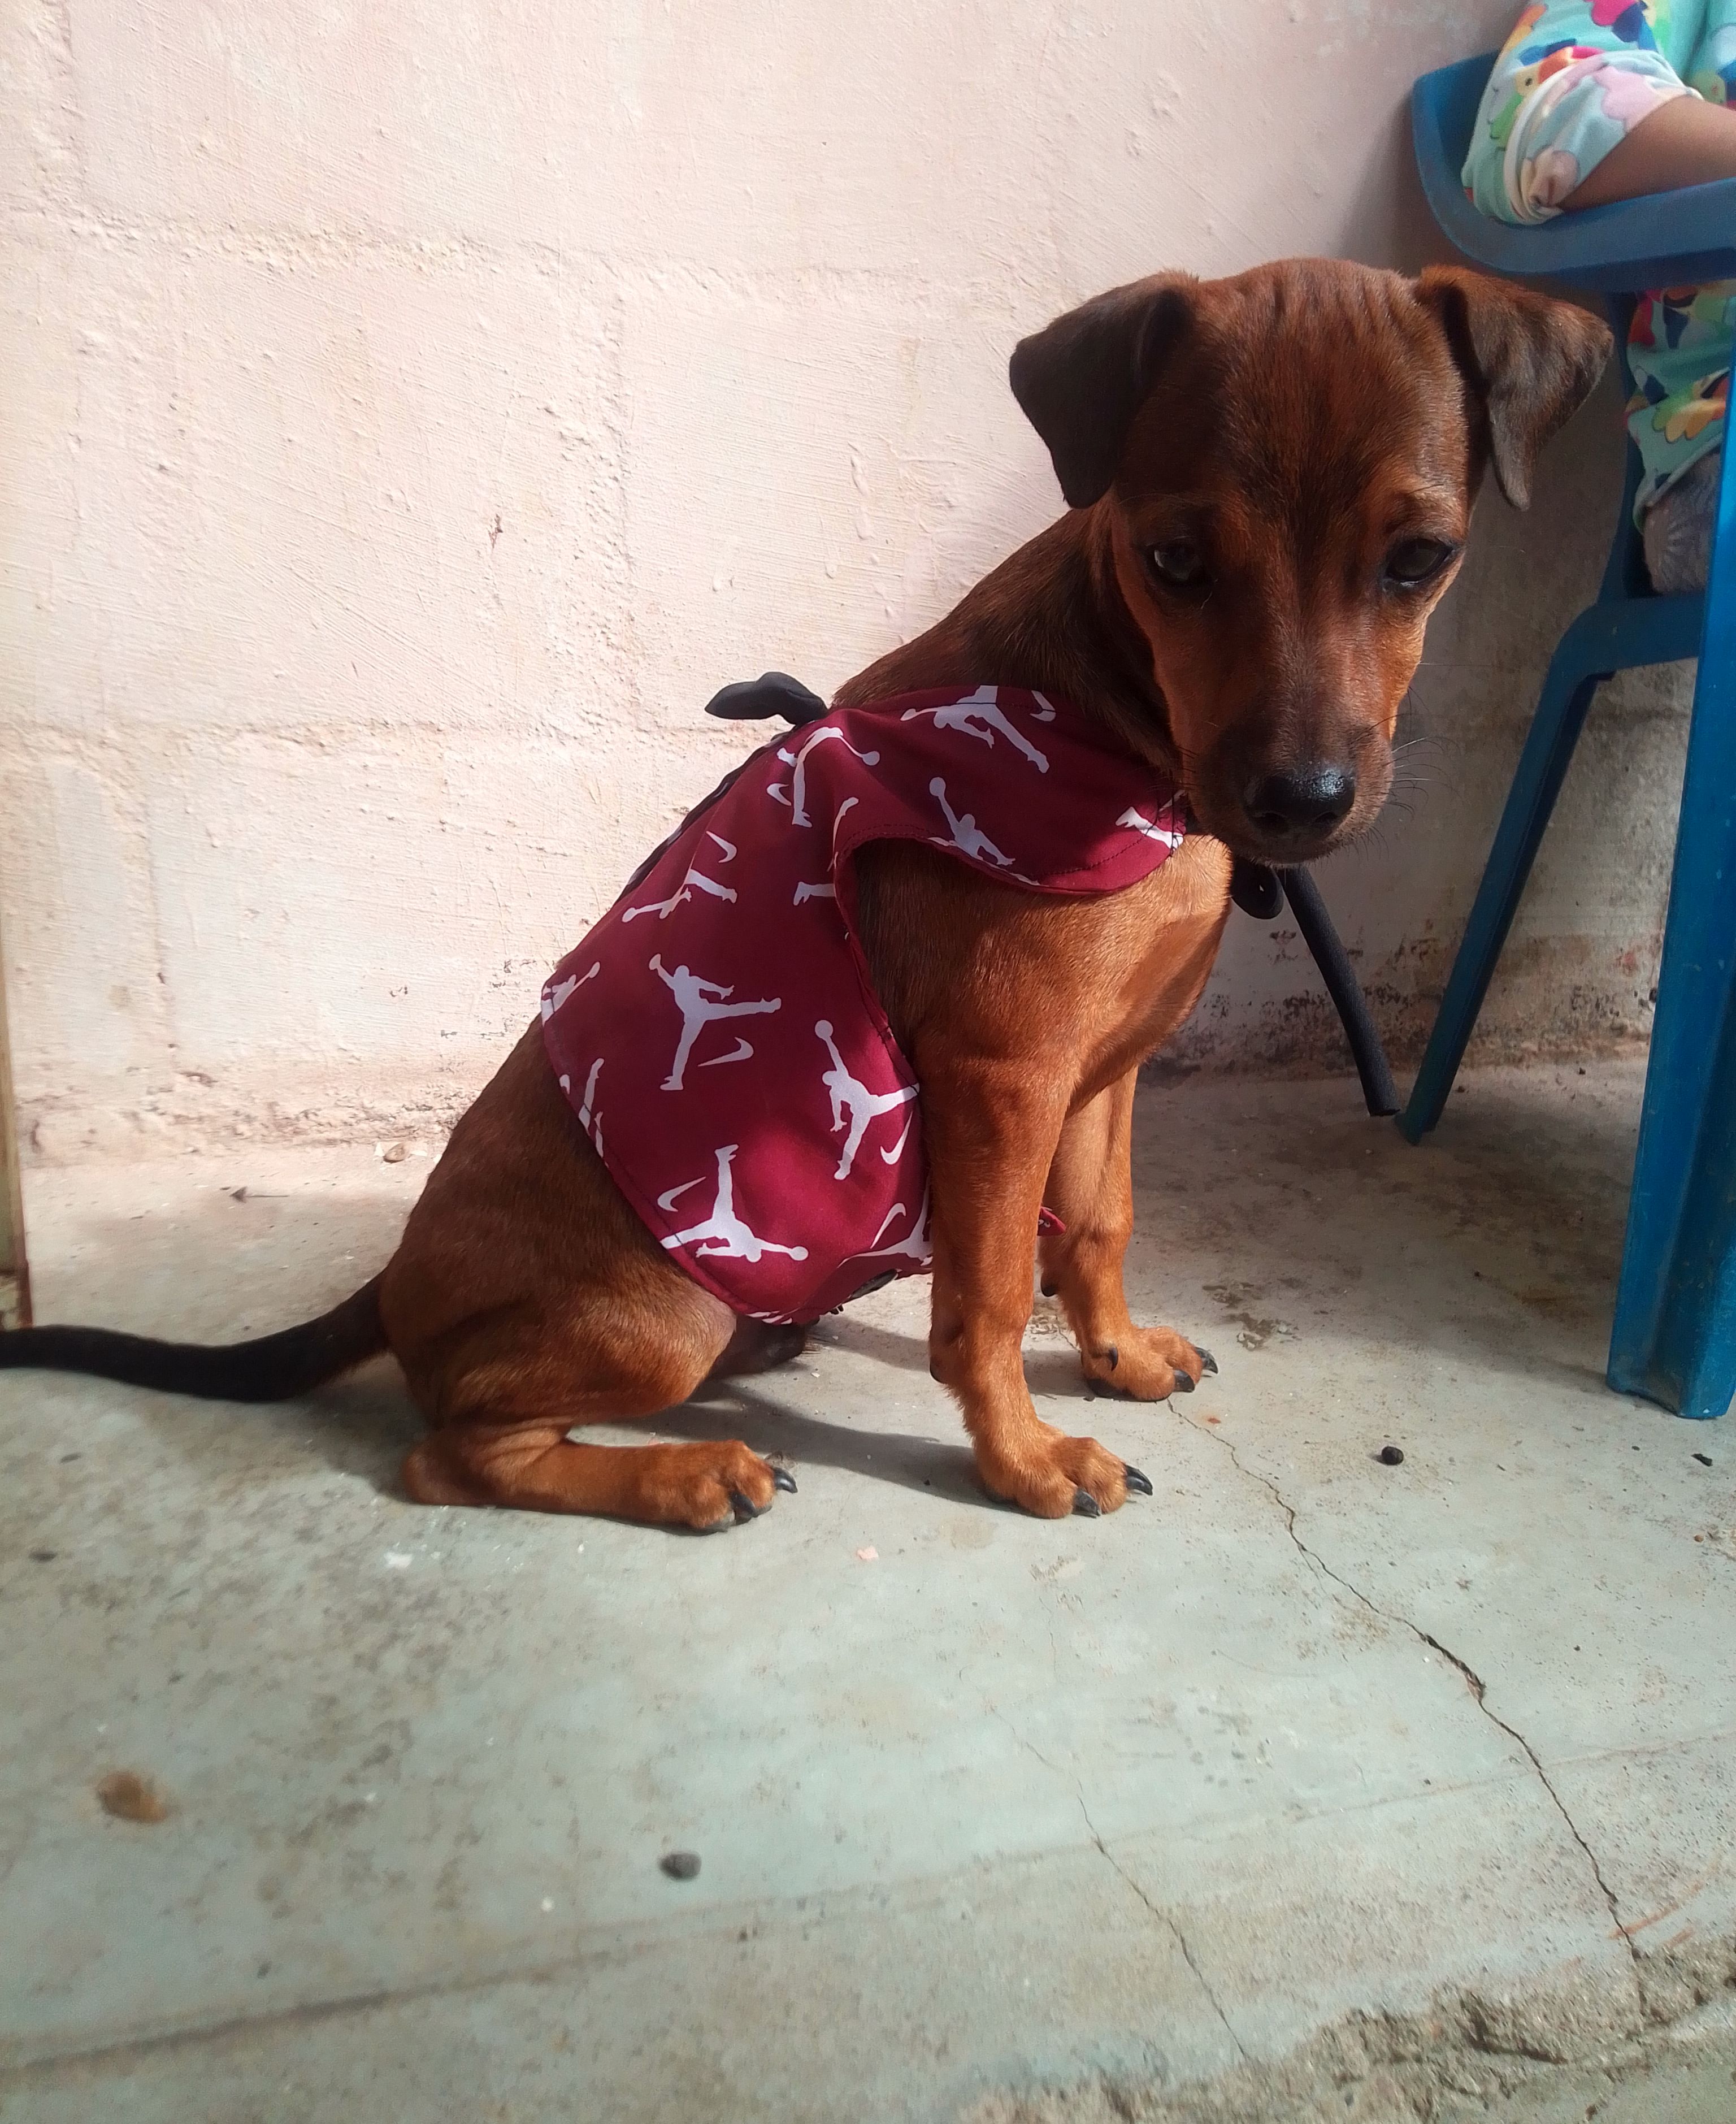
🐾Resultado!
Este accesorio me encantó mucho, además de verse como una prenda de vestir para el perrito, me permitirá ahora controlarlo mas en su paseos. La verdad fue un proyecto que realicé bastante rápido y Doboll parece estar muy cómodo con el puesto. 🤭
I loved this accessory a lot, in addition to looking like a piece of clothing for the dog, it will now allow me to control him more on his walks. The truth is that it was a project that I completed quite quickly and Doboll seems to be very comfortable with the position. 🤭

Agradezco mucho tu visita a mi blog, fue un placer compartir este trabajo de costura con ustedes, espero les guste. Feliz día, hasta pronto amigos!
I really appreciate your visit to my blog, it was a pleasure to share this sewing work with you, I hope you like it. Happy day, see you soon friends!
Your content has been voted as a part of Encouragement program. Keep up the good work!
Use Ecency daily to boost your growth on platform!
Support Ecency
Vote for new Proposal
Delegate HP and earn more
There is 'thank you' written all over doboll.
He is very happy! 🤭🤭🤭🤭 thanks for the support!
He is very happy! 🤭🤭🤭🤭 thanks for the support!
Que hermoso quedó, y la explicación me encantó. Saludos 🤗
How beautiful it turned out, and I loved the explanation. Greetings 🤗
HolAa.. me alegra mucho que le guste... Bendiciones..
This is simply and difficult to make. This dress is really beautiful for yor dog. I love it weldone
Greetings.. with the tutorial you can do it easily.. I'm glad you like it.. Blessings..