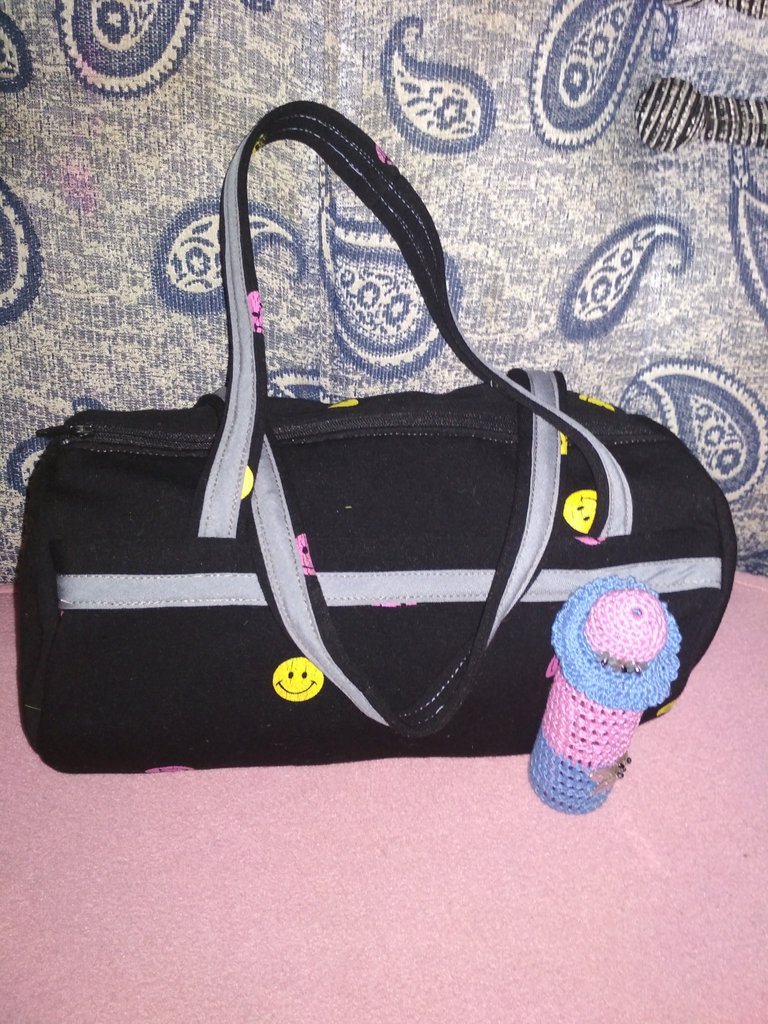
(Photo: Finished product with crocheted hand sanitizer pouch)
Hello my dear needleworkers! Today I will show you my DIY cylinder bag from out of Antonia's outgrown pajamas! She was arranging her things and segregating those that no longer fits her. Actually, she has already given a lot to her cousin every year. Last Christmas, it was a big package from her for the less fortunate and she was happy about it. Now that she has entered into puberty at the age of 11, she has grown fast, especially during the lockdown period that she has to do a massive cleanup of her cabinet when she came home. Well, It means that I have more projects in a row out of her outgrown outfits.
Then she chose her smiley pair of pajamas to be converted into a cute pillow case, but it was all forgotten in one corner when she got busy with her digital drawing. I told her that I will convert it into a small cylinder bag.
How to start with your project:
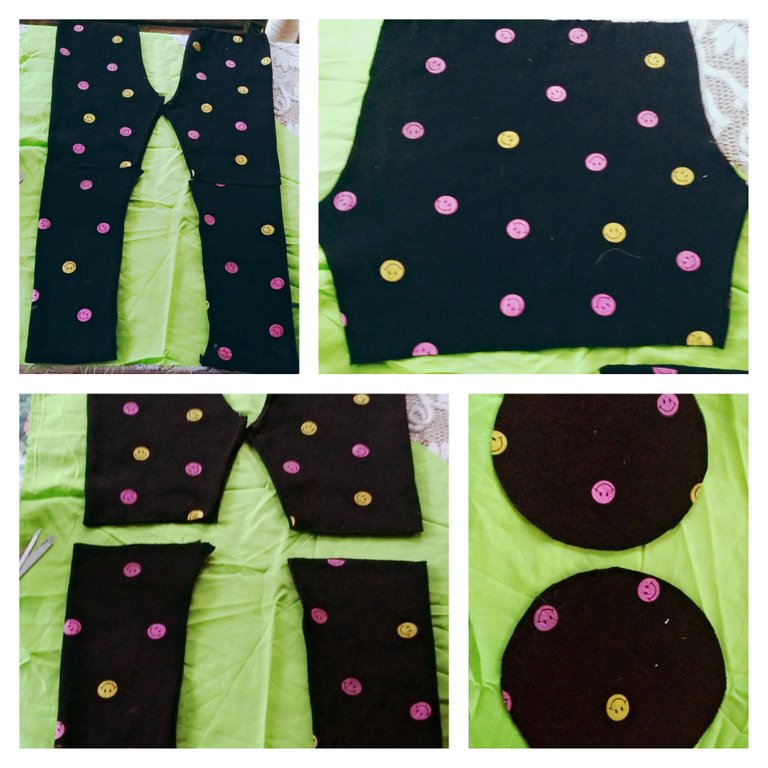
First, you need to consider the size of the fabric that you are going to convert. I trimmed the waistline below the garter first. I intended not to cut the garter because it will make a cute headband. The width is about 11 inches. Therefore, it will start from there. The lower part will be used for the handles and for the circular pad.
I need the following materials to start with:
- 16-inch Zipper
- Lining
- Bias tape
- Thread and Needle for sewing
It will be a lot easier if you know the short cut procedure:
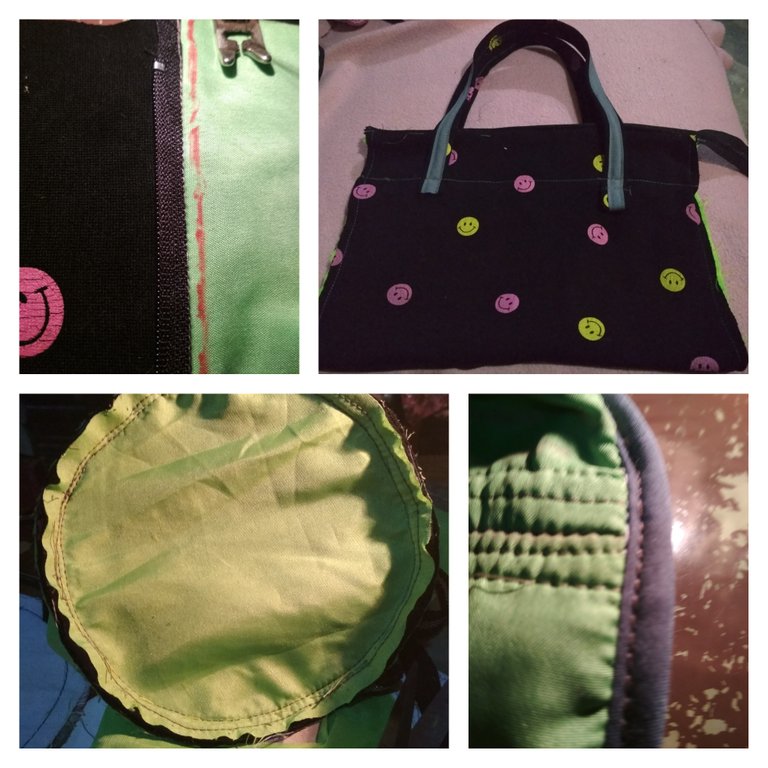
- First, attach the zipper and the lining on the opposite side. This will make a clean finish as you can see on the above photo.
- Next, prepare your handle. Since the I only have small scrap left from my cut-outs, I used a bias tape in order to cover both ends.
- Then attach the handles, followed by bias tape to make it trendy.
- Make a pattern for the side patch. I see to it that the measurement will be enough for the bag. The pattern I made measured 25 inches in diameter and 6 inches radius. I see to it that the outcome will not be out of proportion.
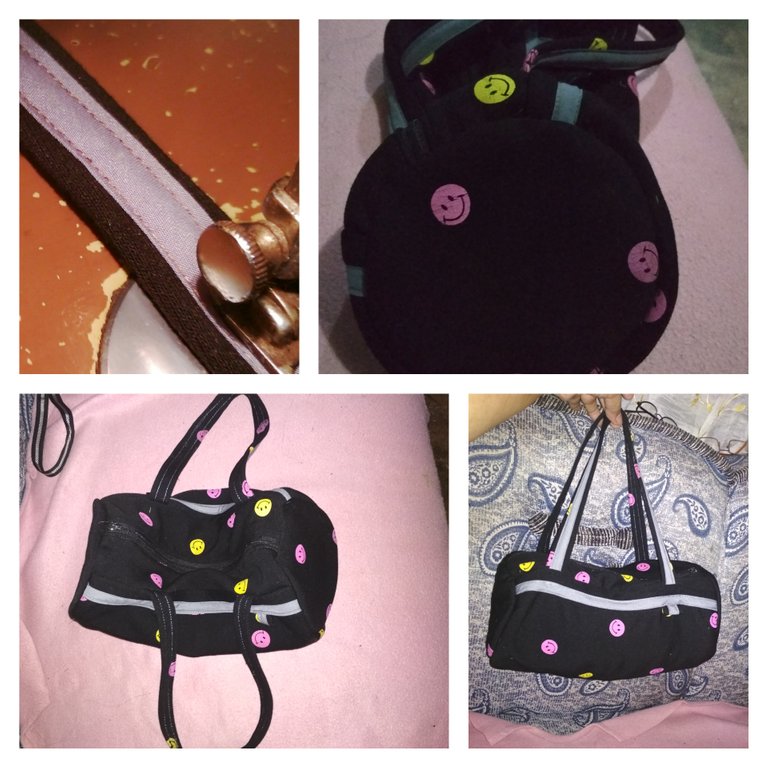
The last to be attached is the side patch. You need to baste it first to avoid miscalculation. The side patch plays a very important role in shaping the bag. Finally, you need to cover the edging with bias tape or equivalent, for a cleaner look in the interior.
This is all for now, I hope you will now look for trendy outgrown stuffs in your cabinets and follow my sample!
Thanking @crosheille, @shanibeer, @melinda and @marblely for this awesome community!
Keep safe everyone!
Till then,
Hang ganda! Iba talaga marunong manahi!
Yes dear, Ang tuwa ni Antonia nong makita nya. It is my way of showing to her how to make use of pretty little things into beautiful handcrafts!
This is a wonderful upcycling project. Some of our best projects come from looking at something old in a new way.
I agree much to that.
Thank you. Indeed, you're right. It's making new things out of old stocks!
Thank you for sharing this amazing post on HIVE!
Your content got selected by our fellow curator @tibfox & you just received a little thank you via an upvote from our non-profit curation initiative!
You will be featured in one of our recurring curation compilations and on our pinterest boards! Both are aiming to offer you a stage to widen your audience within and outside of the DIY scene of hive.
Join the official DIYHub community on HIVE and show us more of your amazing work and feel free to connect with us and other DIYers via our discord server: https://discord.io/diyhub!
If you want to support our goal to motivate other DIY/art/music/homesteading/... creators just delegate to us and earn 100% of your curation rewards!
Stay creative & hive on!
Thank you so much. Am greatly honored! It's nice having such awesome community where all our efforts are recognized. It made me more inspired to do better. Thank you!
Well, upcycling clothes is a must to me! But since some years ago, I was fabric holic, I had bought basting material, when I sew bags, about 8 meters (!) and I use it for situations like this...! But once, I was in my sister's and I didn't have that, so I used for the in-between part (between inner and outer) double denim fabric and it was perfect! Nice job here!!
Same here. It's like a challenge, right? I also have the habit of hoarding old stuffs for future use, all of which are stored in boxes so when I need some materials for school affairs like costumes, I only need to dig on them! Thanks for dropping by friend!
Would you please give it to me? You are so creative sister. Keep it up.
Yong mga scrap na brocades na tela jan sister maganda gawin bags and pouches.
Hi, nice idea...I love recycling projects, the spectacular pajama fabric, with that happy face motif, so when you look at your bag, that emoticon will make someone smile. What you share with us is a great idea to make bags and donate to those who don't have any, those bags are very practical. Thanks for sharing.
Thanks dear. I had lots of used bags from my two ladies when they were in college, all of which were in good condition yet. I gave them all to my previous helpers with kids. The good thing with bag making is that they're all made with TLC!
Excellent way to recycle. This idea is very good to take advantage of those disused garments with cute prints. 😍
You're right! And I have more out of Antonia's outgrown clothing's. We have already shared a lot last Christmas for our outreach project in our church. And there's a lot more for my needlework Monday!
Cool! ❤️