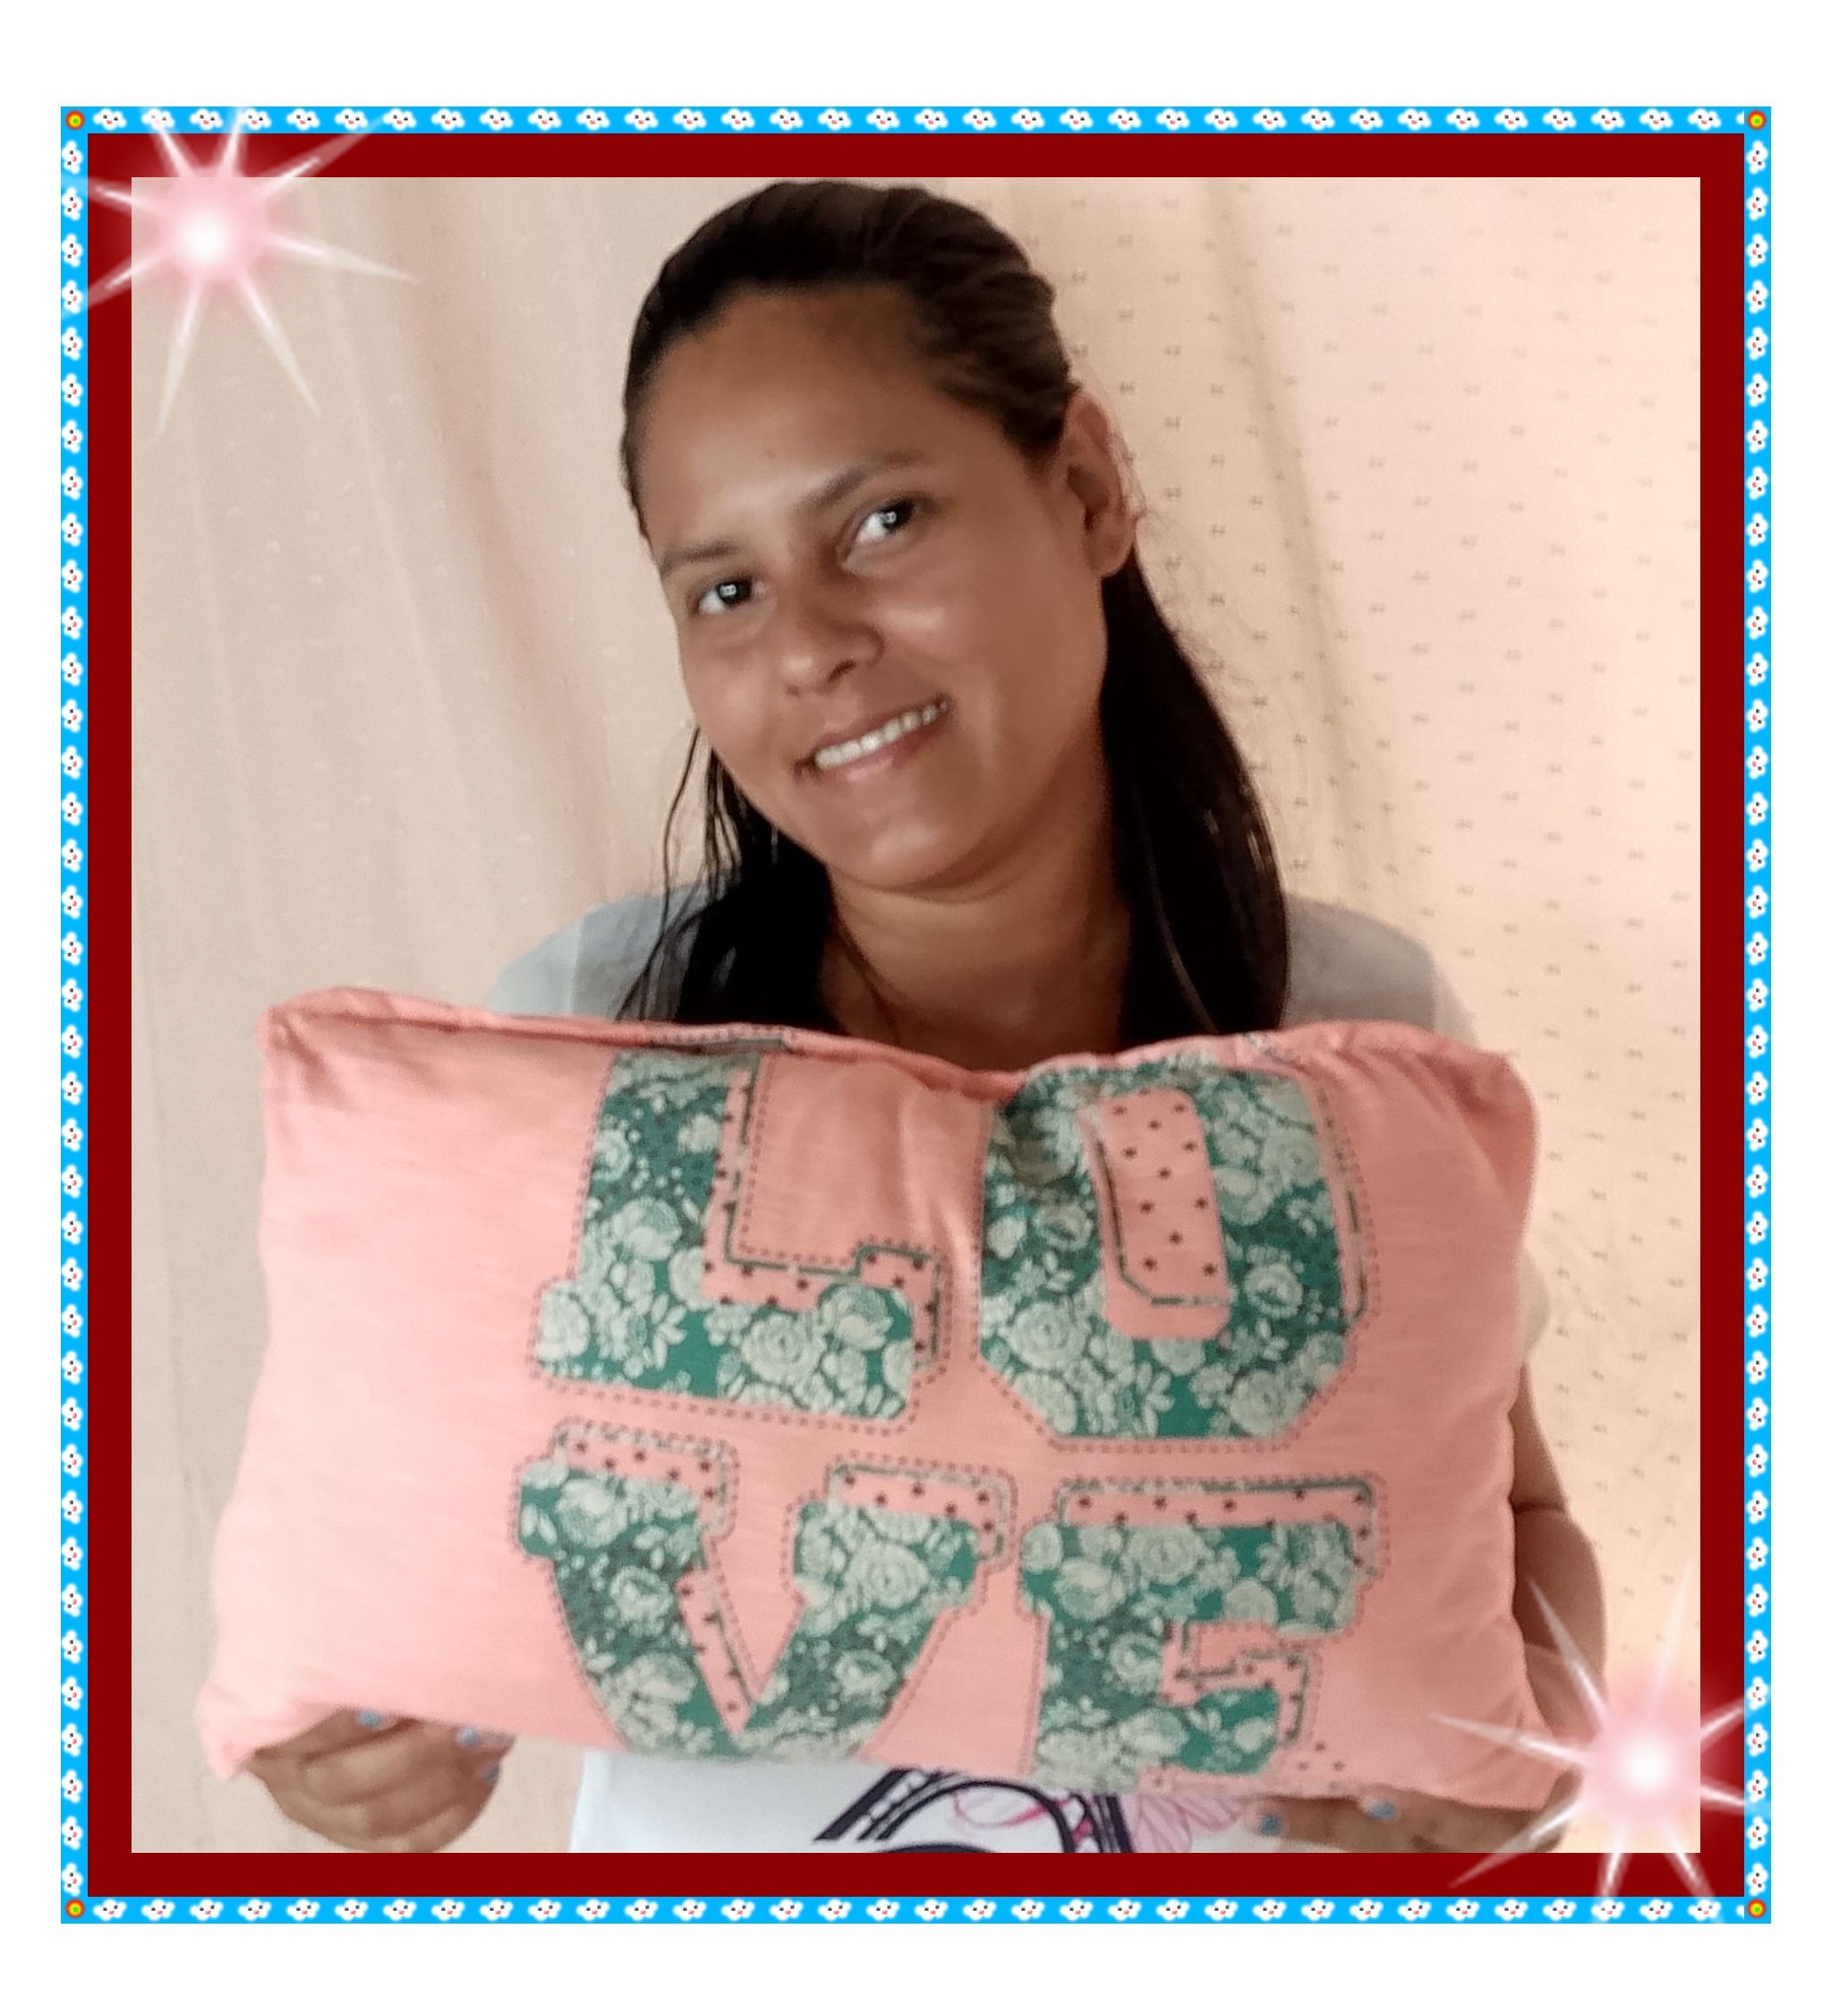


Buenas noches, mi gente hermosa, espero que estén bien. En esta ocasión les mostraré mis instrucciones paso a paso para hacer un cojín sencillo pero hermoso para decorar cualquier espacio de su hogar. Lo mejor es que necesitarán muy pocos materiales. De hecho, para hacerlo reutilicé una camisa que tenía guardada. Jeje, me encantó el resultado. Es ideal para colocar sobre muebles, sobre la cama o donde prefieran... Sin más preámbulos, los invito a disfrutar de este proceso.
Good night my beautnightsiful people, I hope you are well. This time I will show you my step-by-step instructions for making a simple but beautiful cushion to decorate any space in your home. The best part is that you will need very few materials. In fact, to make it I reused a shirt that I had stored away. Hehe, I particularly loved the result. It is ideal to place on furniture, on the bed, or wherever you prefer... Without further ado, I invite you to enjoy this process.
Para ello necesitaras :
- Esponja.
- Tijera.
- Tela.
- Aguja e hilo.
For this you will need:
- Sponge.
- Scissors.
- Fabric.
- Needle and thread.

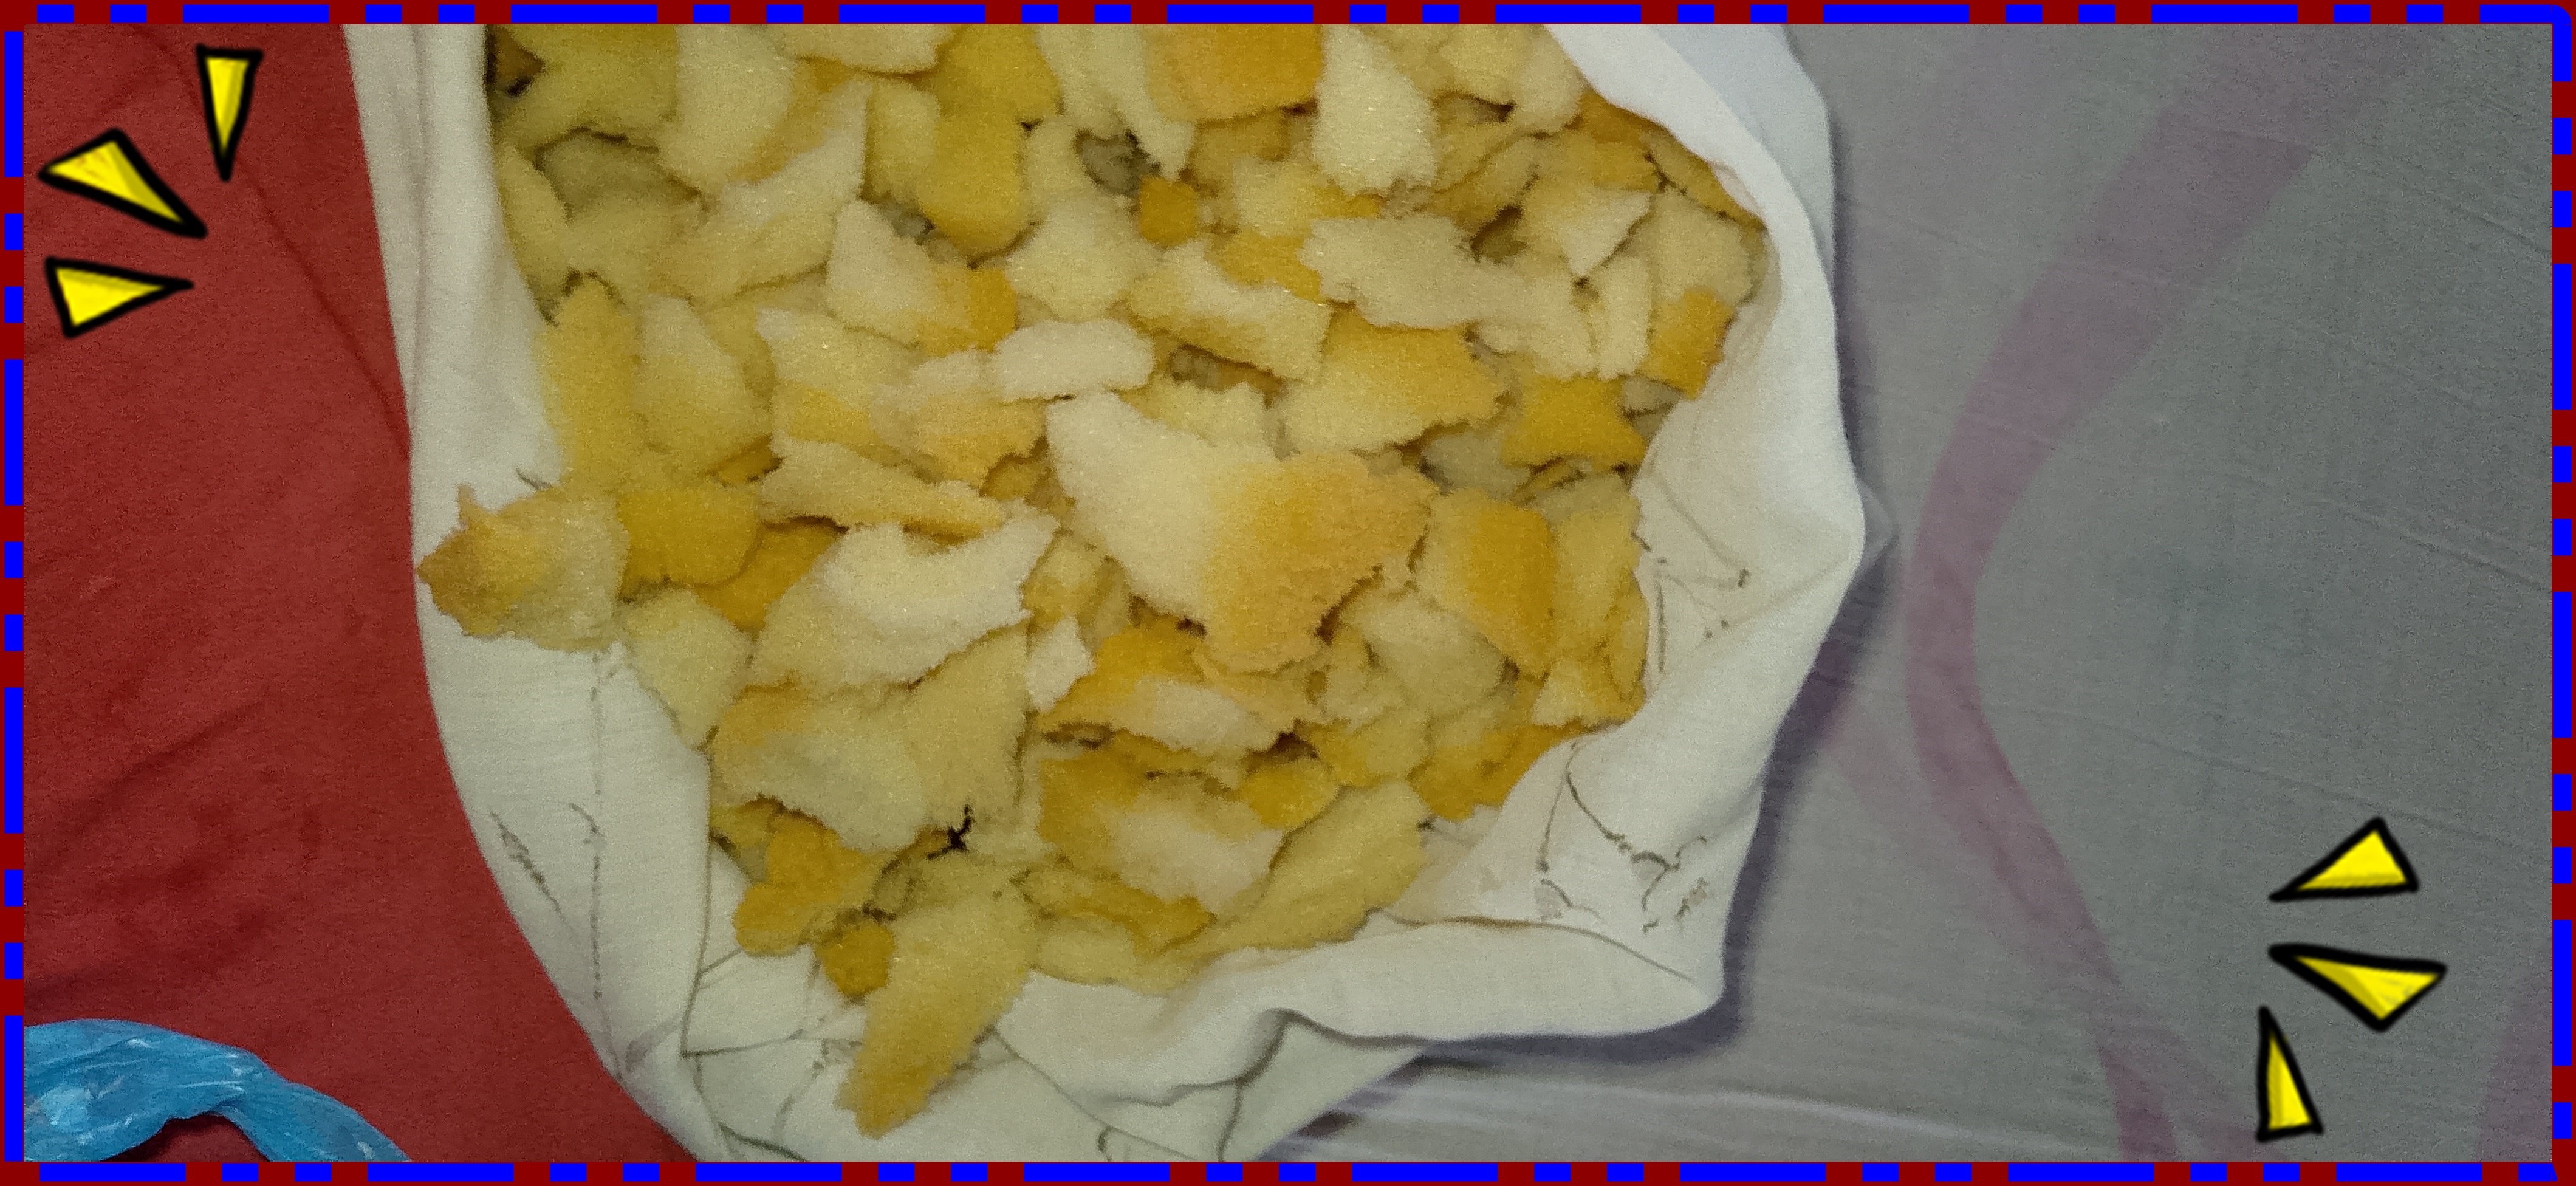
Lo primero que haraz sera cortar la esponja en pedazos pequeños esto facilitara la manipulacion de esta ya que suelen ser un poco duras.
The first thing you will do is cut the sponge into small pieces. This will make it easier to handle since they tend to be a little hard.

Ahora, corta y cose un trozo de tela para formar la funda. Coloca la esponja dentro de la funda que acabas de hacer. Después, cose el borde sobrante.
Now proceed to cut and sew a piece of fabric, thus making the cover and begin to place the sponge inside the cover that you just made. After this, sew the excess edge.


Para este paso puedes utilizar la tela del modelo y color de tu preferencia , en este caso yo utilice una camisa a esta se le cortara la parte de arriba y la parte de abajo, observa la imagen.
For this step you can use the fabric of the model and color of your preference, in this case I used a shirt, the top and bottom will be cut, see the image.


Por último procede a coser la parte inferior, luego introduce el cojín en su interior y cose la parte superior de esta manera.
Finally, proceed to sew the bottom part after this, insert the cushion inside and sew the top part in this way.
Espero que hayas disfrutado este trabajo, gracias por tu visita y por leer mi post hasta el final, hasta la próxima.
I hope you enjoyed this work, thank you for your visit and for reading my post until the end, until next time.
Que buena idea, es una forma muy genial de dar un nuevo uso a una franela. Buena idea.
Congratulations @sergimarmartinez! You have completed the following achievement on the Hive blockchain And have been rewarded with New badge(s)
Your next target is to reach 15000 upvotes.
You can view your badges on your board and compare yourself to others in the Ranking
If you no longer want to receive notifications, reply to this comment with the word
STOPCheck out our last posts:
This can be so useful at home
You did a great job
Quedó hermoso, me encanta la idea de darle una segunda oportunidad a nuestras prendas como lo hiciste con esa blusa, jeje
Genial amiga, eres muy creativa, hiciste un hermoso cojín, me gustó mucho todo el proceso y el giro que le diste a esa blusa.
¡Saludos y abrazos!