ENGLISH
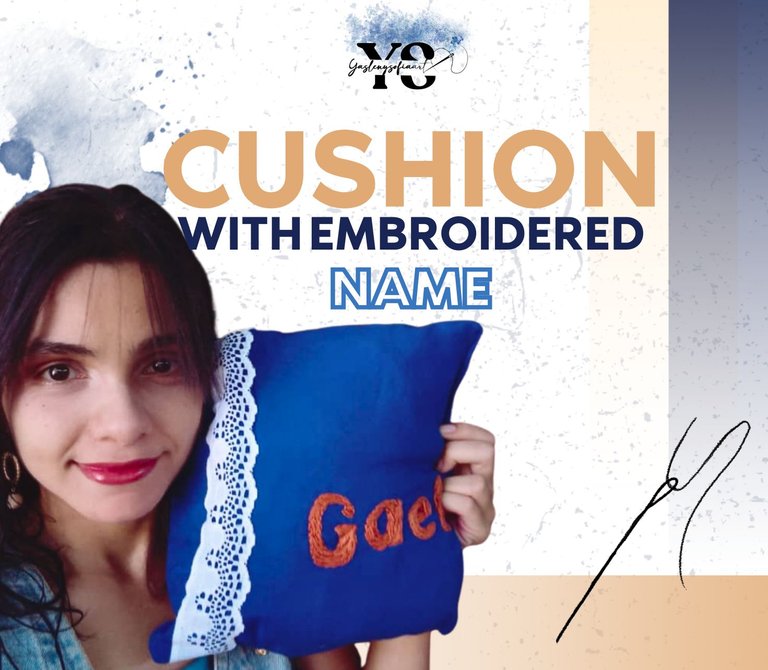
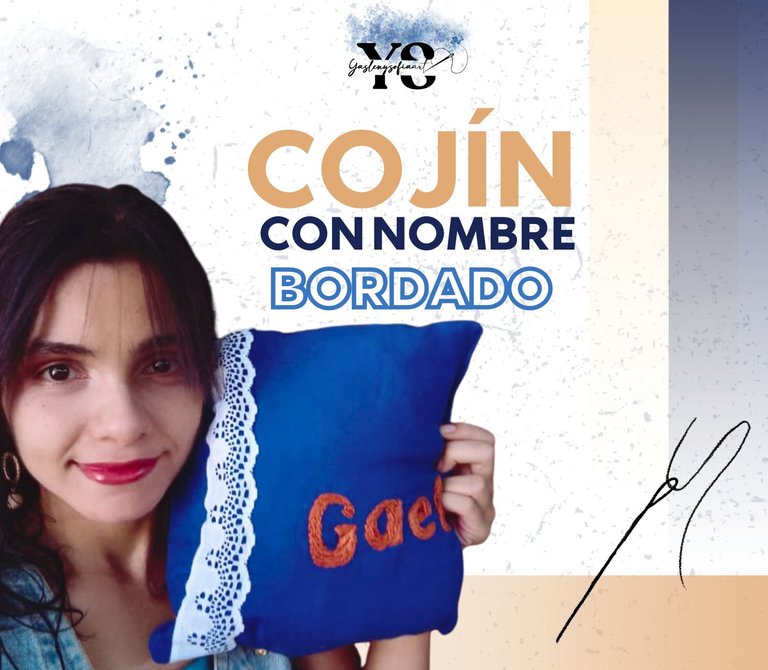
Greetings @needleworkmonday community, this week I want to share with you a cushion that was actually intended to be a small pillow, but due to technical problems, it ended up being a cushion; I made it as a gift for a little cousin who arrived from Peru. Here is the whole process that it took me to make it.

-Dark blue muslin fabric.
- Lining fabric.
- White and navy blue sewing thread (preferably one that resembles the color of the fabric to be used for the cushion).
- Medium orange embroidery thread (or a color that contrasts with the cushion fabric).
- Stuffing or wadding.
- Sewing machine needle.
- Embroidery needle.
- Sewing machine.
- Scissors.
- Embroidery hoop.
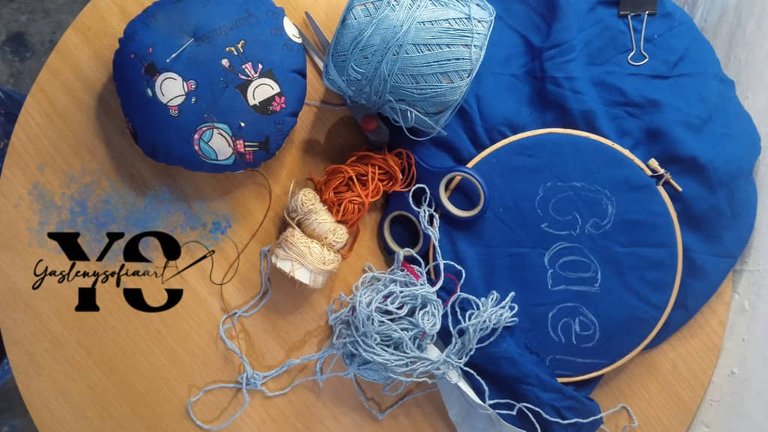

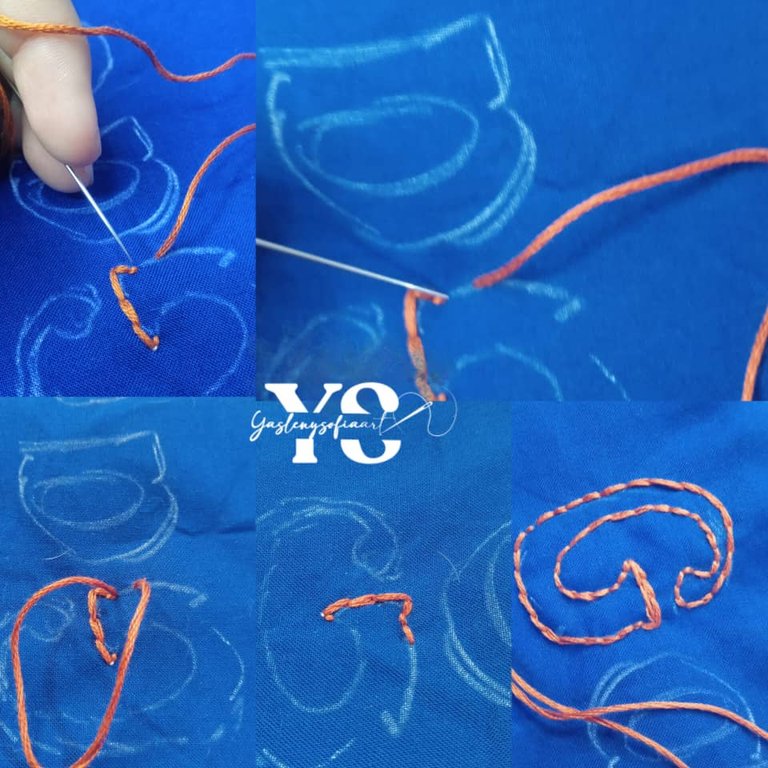
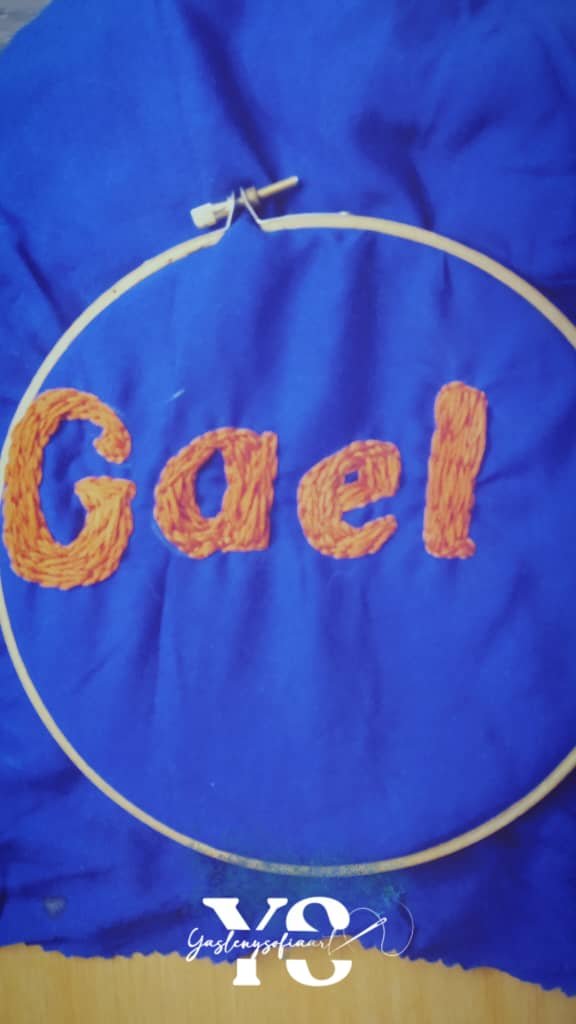
First I must point out, that you can appreciate in the previous picture, several colors embroidery threads, however, after visualizing it better, I decided to make the name of a single color, which was that orange medium tone and that, the fabric that I actually used for the cushion, I do not know if it is muslin, it seemed to me that yes, it is half transparent and soft, if someone can confirm or refute this, I would appreciate it very much.
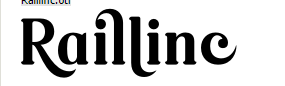
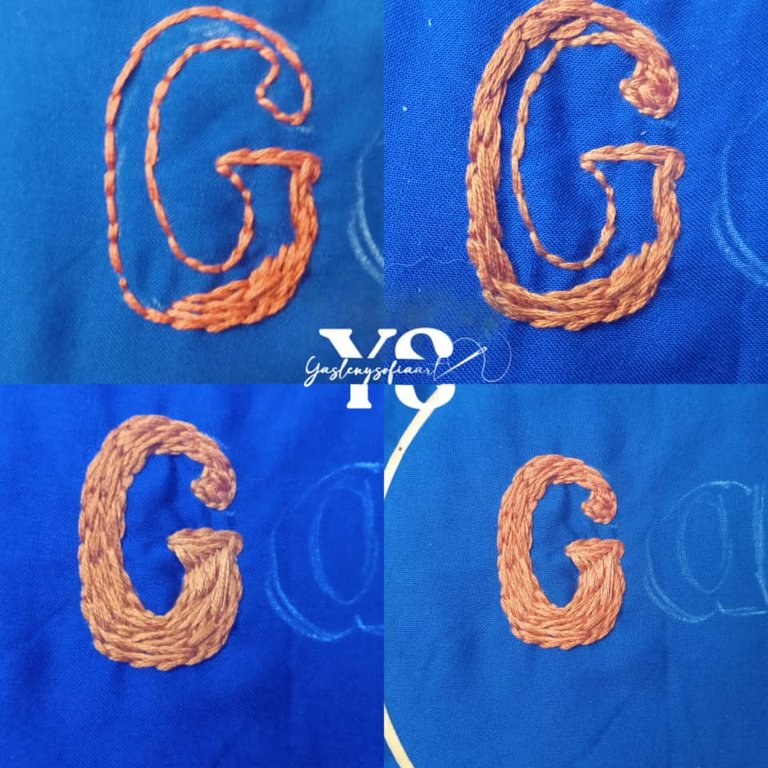
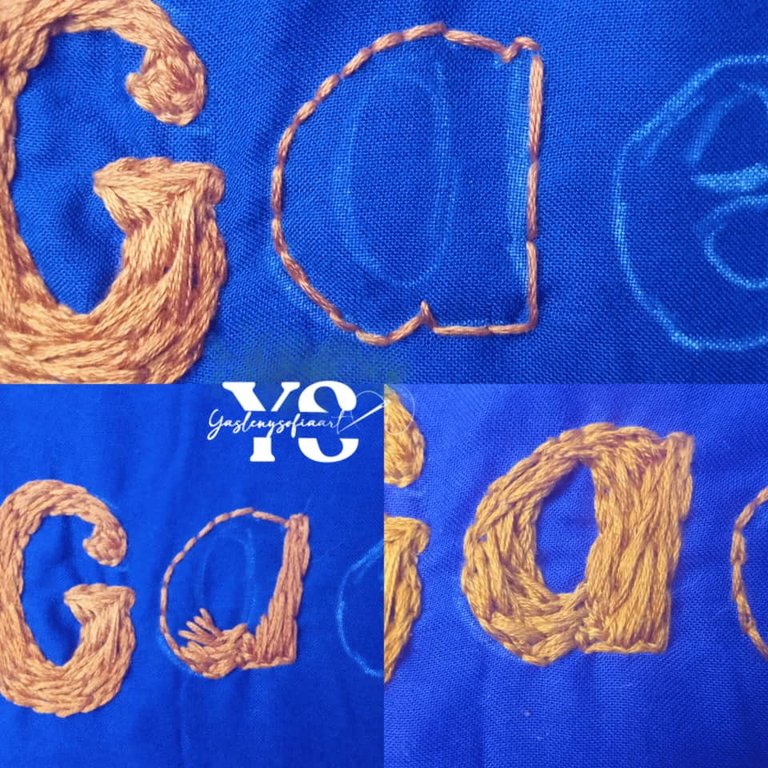
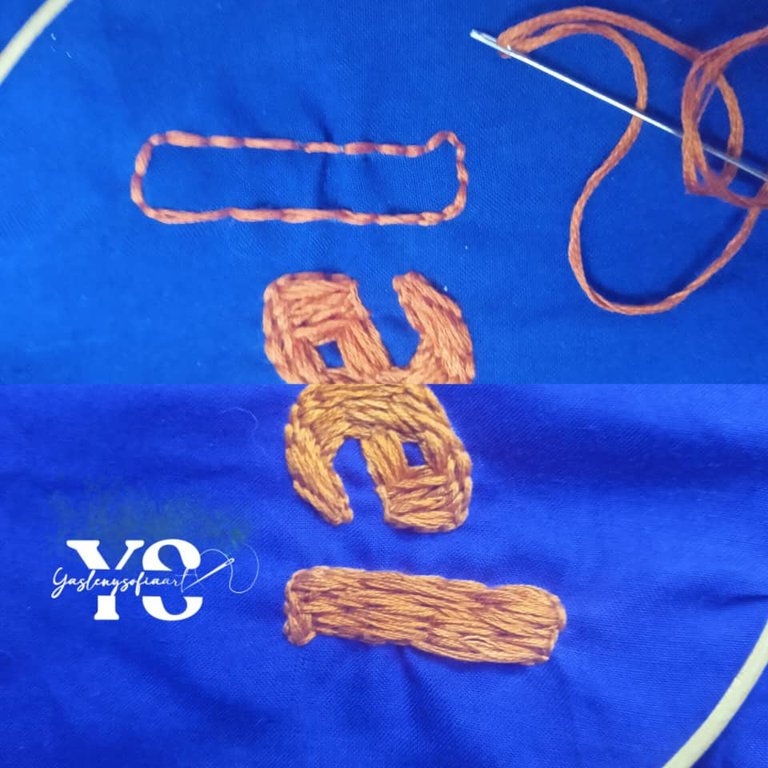
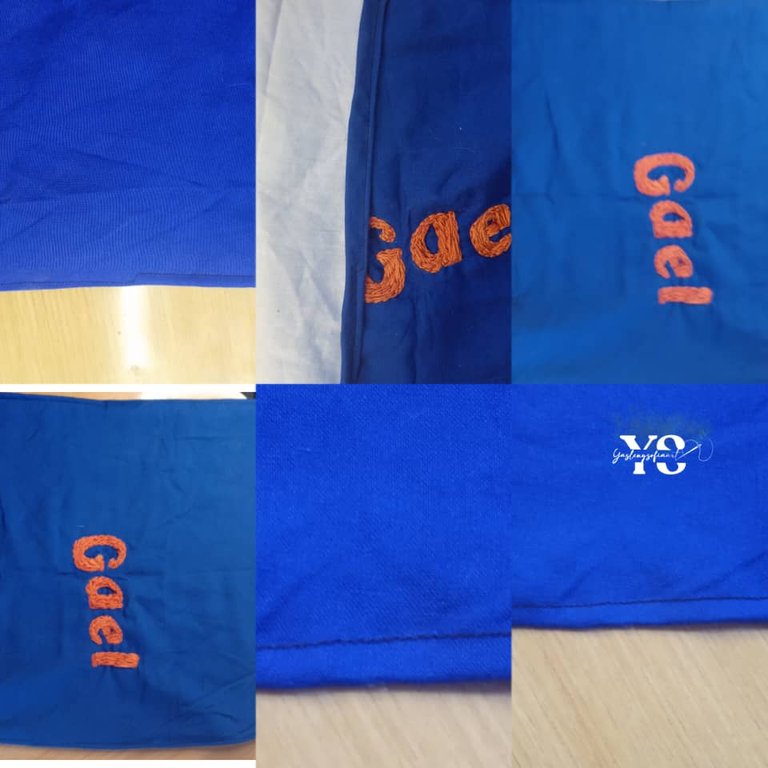
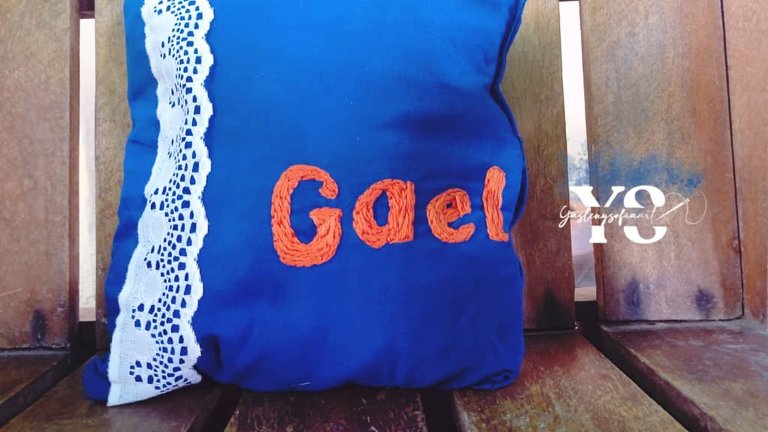
Anyway, after having clear the fabric for the cushion and the color of the thread with which I would embroider the name of "Gael", I decided to look for a serif typeface, which I ended up selecting "Raillinc", it is very beautiful and elegant. After copying on paper and the fabric which measured approximately 30 x 45 cm, I only used a folder as a mold; I took two pieces of that size and one of light blue fabric, for the one where the embroidered name would go, it was supposed to be a lining, but I grabbed one that fulfilled the same functionality; this with the motive that the embroidery would be tighter and the dark fabric would not be damaged in the process.
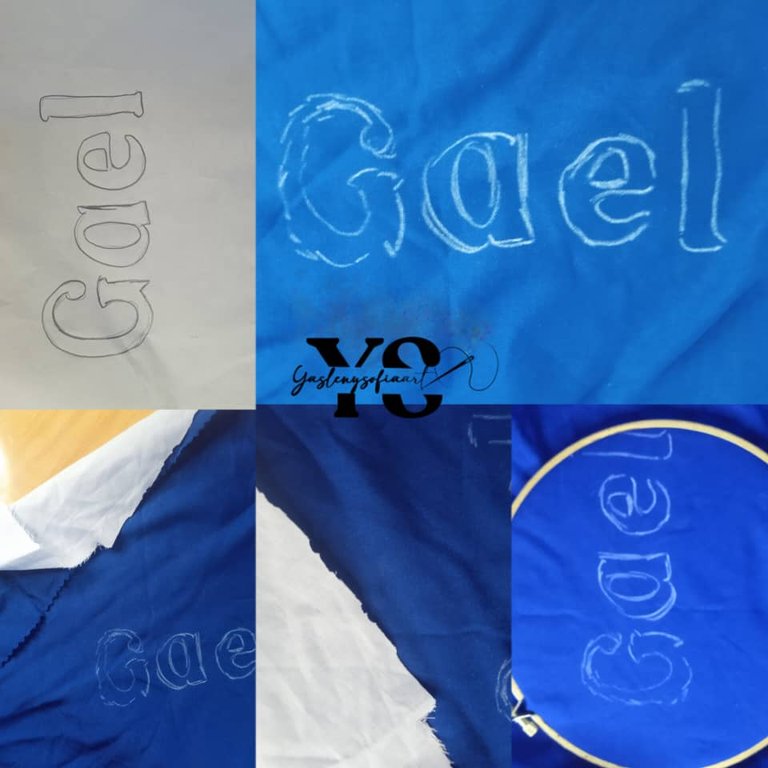
After that, I put the embroidery hoops, to press the fabric and then I could start with the step by step technique, which was to first outline each letter, and then fill them completely, I love this technique because it generates a very nice texture in them. This time, I did the embroidery directly on the fabric, not elsewhere, because I wanted another model, contrary to the one I did before.
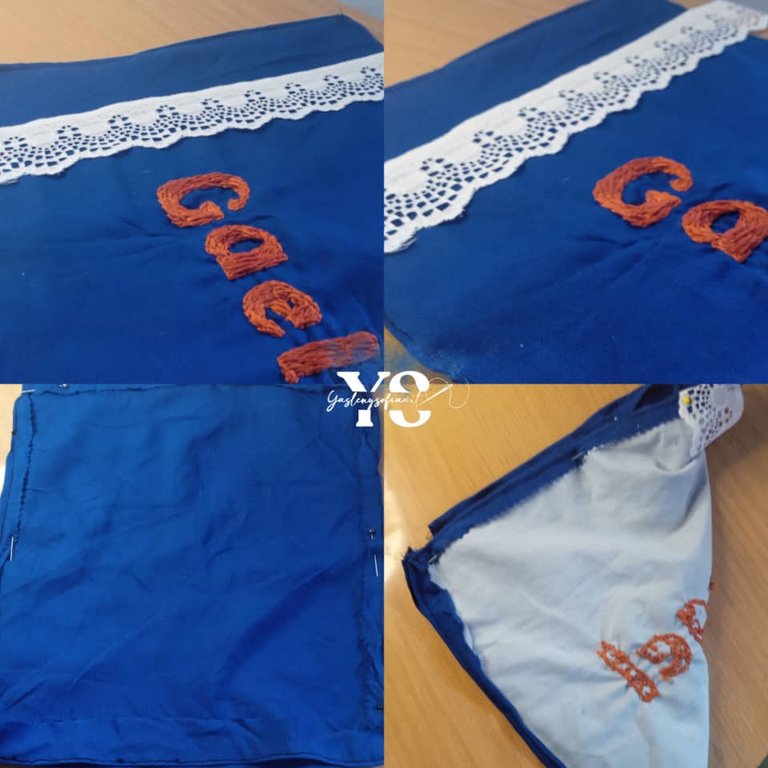
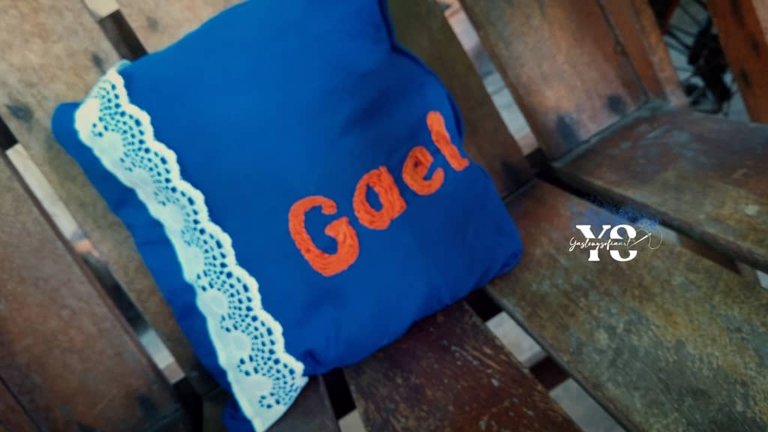
After having the name embroidered, I sewed all the edges of both pieces of fabric in my sewing machine, so that it would be cleaner; in this case I used a dark blue thread. Also, on that seam, I sewed a piece of lace vertically.

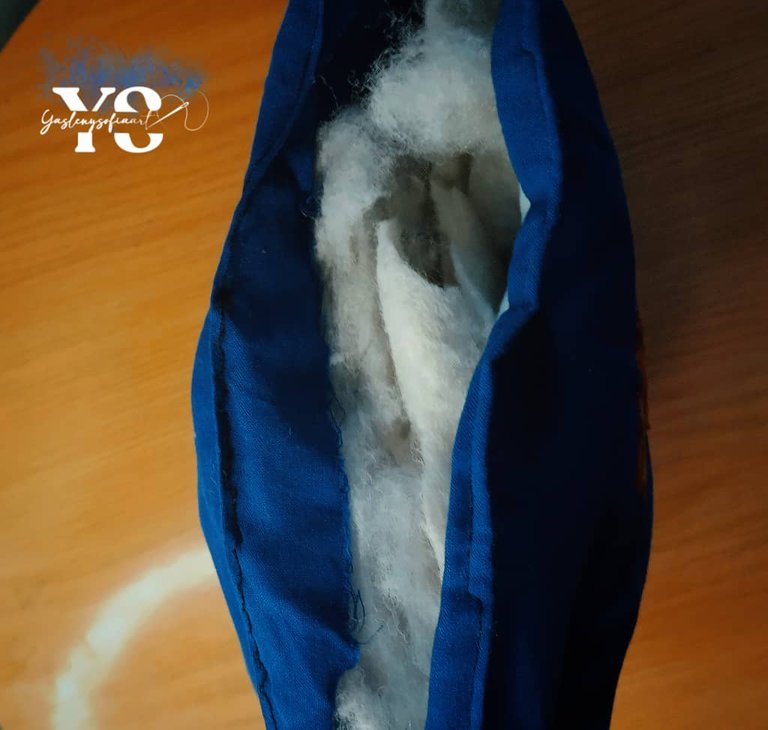
So, I joined both sides of the fabric to the back of the fabric, only on 3 sides. I then flipped it over and washed it, before stuffing it. Once it was dry, I added some stuffing that I had on hand, the best thing would be a wadding, but I didn't have the money to buy it at the moment.
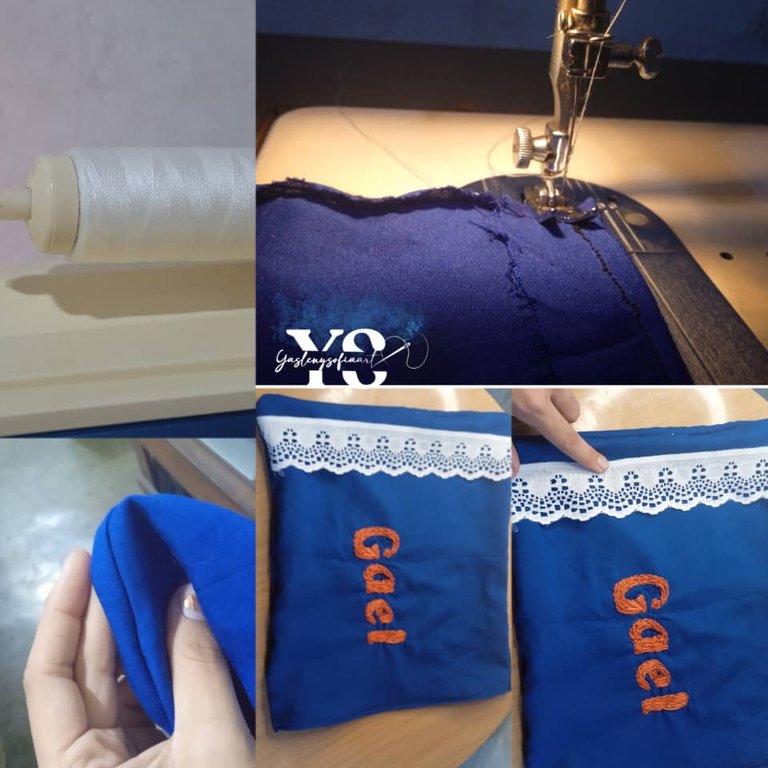
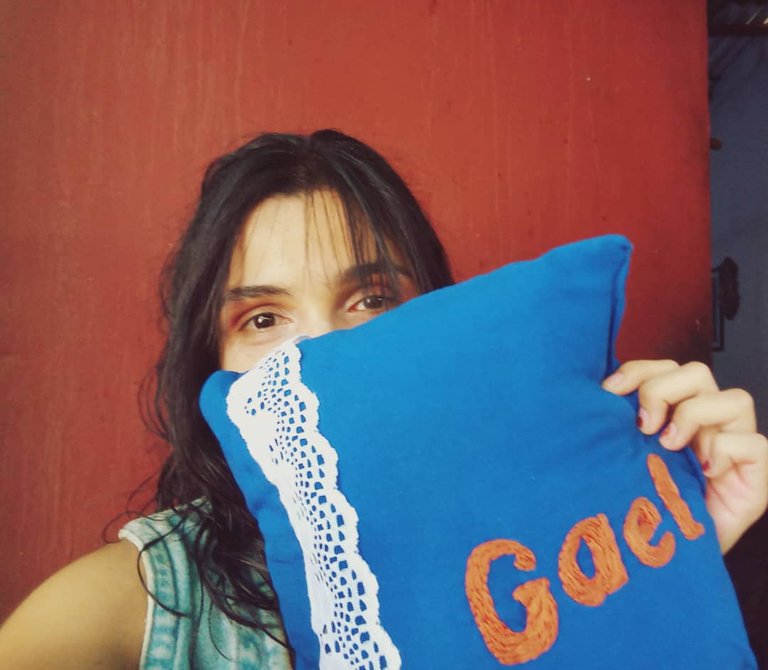
I ended up sewing the missing side, but an accident happened and I had to cut a little of that end 😅, which in the end ended up taking the shape of a cushion, I'm not angry about that fact, but the result seems very nice to me. I already gave it to my cousin and she loved it.

Thank you for reading my post. I hope you liked it. I will be attentive to answer your comments. You can visit my blog, follow my content and social networks.
FACEBOOK / INSTAGRAM / TWITTER
ESPAÑOL
Saludos comunidad de @needleworkmonday, esta semana les quiero compartir un cojín que, en realidad estaba destinado hacer una pequeña almohada, pero, por problemas técnicos, terminó siendo un cojín; mismo que realicé con el fin de regalarse a un primito que llego del Perú. Aquí les dejo todo el proceso que me llevo el elaborarlo.
-Tela muselina azul oscuro.
- Tela para forro.
- Hilo de costura blanco y azul marino (preferiblemente uno que se asemeje del color de la tela que se va a emplear para el cojín)
- Hilo de bordar naranja medio (o de un color que contraste con la tela para el cojín).
- Relleno o guata.
- Aguja para máquina de coser.
- Aguja para bordar.
- Máquina de coser.
- Tijera.
- Aro para bordar.
Primero debo acotar, que se pueden apreciar en la anterior fotografía, varios colores hilos de bordar, sin embargo, luego de visualizarlo mejor, decidí hacer el nombre de un solo color, que fue ese anaranjado de tono medio y que, la tela que realmente usé para el cojín, no sé si es la muselina, me pareció que sí, es medio transparente y suave, si alguien me puede confirmar o refutar esto, lo apreciaría mucho.
En fin, luego de tener claro la tela para el cojín y el color del hilo con que bordaría el nombre de “Gael”, me propuse a buscar una tipografía que fuese serifs, la cual terminé por seleccionar la de “Raillinc” es muy hermosa y elegante. Posterior a copiar en un papel y a la tela la cual tenía como medidas de 30 x 45 cm aproximadamente, solo use de molde una carpeta; saque dos piezas de ese tamaño y una de tela azul claro, para aquella donde iría el nombre bordado, se supone que era una de forro, pero agarre una que cumplió la misma funcionalidad; esta con el motivo de que el bordado saliera más ajustado y la tela oscura no se dañara en el proceso.
Luego de eso, le puse los aros de bordar, para prensar la tela y ahí poder iniciar con la técnica de paso a atrás, la cual fue contonear primero cada letra, para luego ir rellenándolas completamente, me encanta está técnica porque genera una textura muy bonita en las mismas. Esta vez, realicé el bordado directamente en la tela, no en otra parte, pues quería otro modelo, contrario al que ya hice con anterioridad.
Después de tener el nombre bordado, cosí todas las orillas de ambas piezas de tela en mi máquina de coser, para que este quedara más limpio; en este caso usé un hilo azul oscuro. También, en esa costura, le cosí un pedazo de encaje de forma vertical.
Así pues, uní ambas caras de tela al reverso de las mismas, solo en 3 de sus lados. Luego la voltee y la lave, antes de ponerle relleno. Ya secada, le agregue un relleno que tenia a la mano, lo mejor seria una guata, pero no tenia dinero para comprarla en el momento.
Le terminé cosiendo el lado que faltó, pero sucedió un accidente y tuve que cortarle un poco de ese extremo 😅, lo que al final terminó tomando forma de un cojín, no me enojo ese hecho, más el resultado me parece muy bonito. Ya le hice la entrega a mi prima y le encantó.
Gracias por leer mi post. Espero que les haya gustado. Estaré atenta a responder sus comentarios. Pueden visitar mi blog, seguir mis contenidos y redes sociales
FACEBOOK / INSTAGRAM / TWITTER
Esta hermosisimo el cojin, tengo un programa llamado "Conciendo Hivers" te gustaria participar?
!HUESO
Click on this banner, to be directed to the Virtual World Discord and learn more about the curation project.
!LOL
lolztoken.com
It was a case of age-related macaroni degeneration.
Credit: reddit
@misticogama, I sent you an $LOLZ on behalf of bot-bdbhueso
(3/8)
Muchas gracias! Si, ya me invistaste, incluso ya publicaste el video 😅
Asi cierto, sorry, anda despistado 😅
Creo que esto se daria para un reecuentro UwU, es una señal jeje
I’m not surprised that your cousin likes it because it’s really nice
I also love it
It’s so nice how you took your time to make the embroidery
Thank you very much, I appreciate your words🤗
Muchas gracias, aprecio tus palabras 🤗
You’re welcome
Beautiful
Thank you! 🤗