¡Hola comunidad de Hive Blog!♥
Hello Hive Blog community!♥
Hola Hivers y amantes de la costura espero estén teniendo un muy lindo y productivo día. La semana pasado no pude publicar pero esta semana vengo recargada, hoy les traigo un paso a paso de un lindo lazo para niñas así que ve por tu hilo y aguja.
Hello Hivers and sewing lovers I hope you are having a very nice and productive day. Last week I couldn't post but this week I come recharged, today I bring you a step by step of a cute bow for girls so go get your thread and needle.
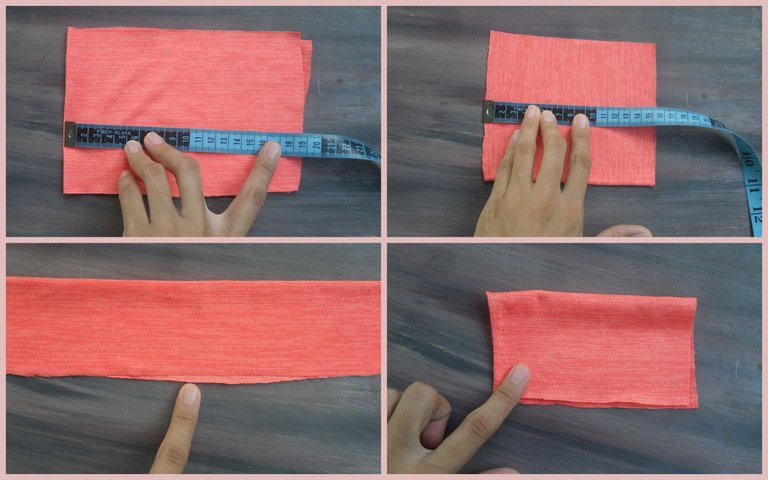
Lo primero que hice fue cortar un rectángulo uno de 39cm de largo y 17cm de ancho, y un cuadrado de 15 de ancho y 15 de alto, para el rectángulo solo necesitamos pesar una costura sencilla enfrentando su derecho y dejando los laterales sin coser para luego por allí con la ayuda de las tijeras o un palillos voltear, para el cuadrado doblamos a la mitad y cosemos cerrándolo todo.
The first thing I did was to cut a rectangle one of 39cm long and 17cm wide, and a square of 15 wide and 15 high, for the rectangle we only need to weigh a simple seam facing its right and leaving the sides without sewing and then over there with the help of scissors or a toothpick flip, for the square we fold in half and sew closing it all.
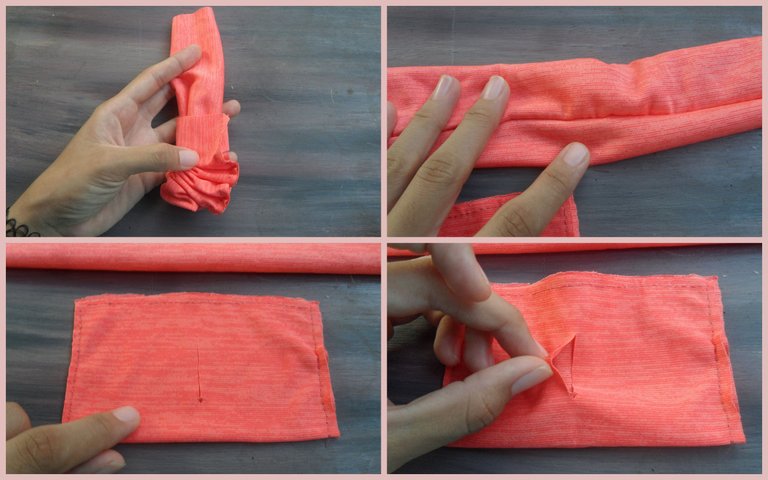
Volteamos el rectángulo cosido para que la costura quede en la parte interna y no se note y al cuadro ya cosido le hacemos un corte en el medio como lo muestro en la imagen.
We flip the sewn rectangle over so that the seam is on the inside and is not noticeable, and we make a cut in the middle of the sewn square as shown in the image.

El siguiente paso es cortar una esponja con la medida de nuestro cuadrado ya cosido, pues esta va por dentro para darle forma al lazo, la introduje en la abertura que le hicimos justo en el medio, la cerramos y por allí mismo fruncimos y cosemos y tendríamos el lazo listo.. Unimos nuestra base del cintillo con una costura sencilla y fruncimos el empate. Unimos las dos piezas y colocamos un detalle para tapar la unión, yo le hice un nudo al lazo, tu puedes colocar lo que mas te guste.
The next step is to cut a sponge with the size of our square already sewn, because this goes inside to shape the bow, I introduced it into the opening that we made right in the middle, we close it and through there we gather and sew and we would have the bow ready.... We join our headband base with a simple seam and gather the tie. We join the two pieces and place a detail to cover the union, I made a knot to the bow, you can place whatever you like.
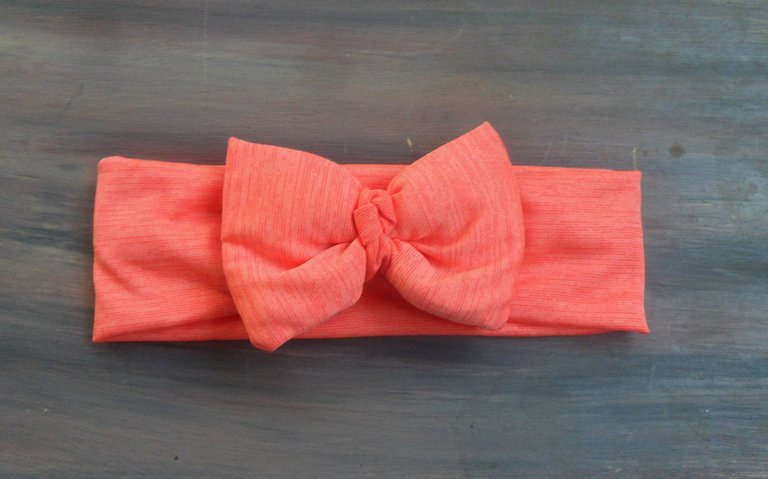
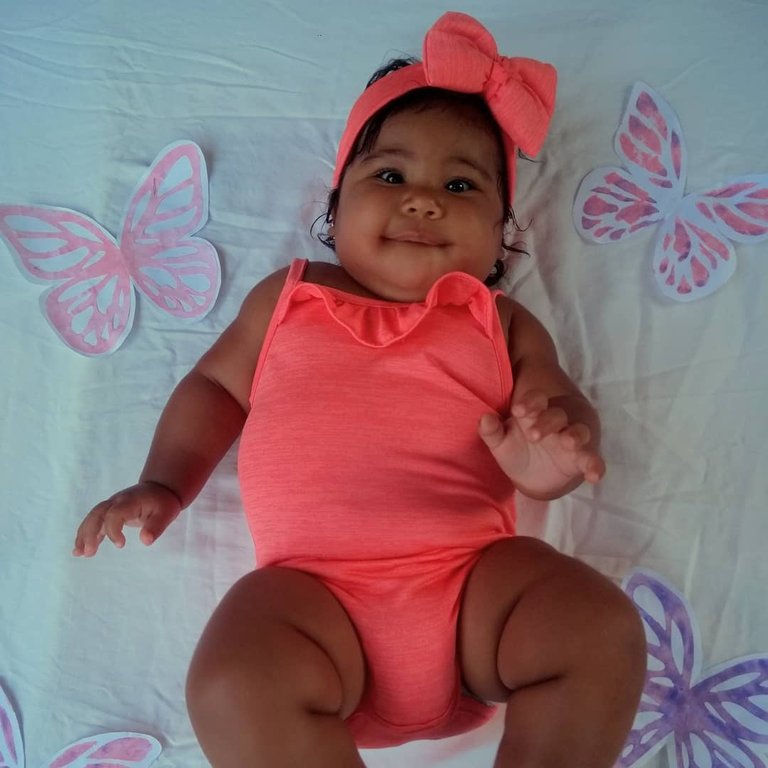
Resultado final. Mi linda bebé Sheyla con su lazo.
Final result. My cute baby Sheyla with her bow.
Todas las fotografías son de mi autoría.
Si llegaste hasta aquí, gracias por leer mi post nos vemos el la próxima.
All the pictures are of my authorship.
If you made it this far, thanks for reading my post, see you next time.
Traducción hecha en DeepL
Translation made in DeepL
Cute baby wearing a pretty bow headband. Congrats!
thank you very much!