☽¡Hola comunidad de hive!☾
☽Hello hive community!☾
Hola Hivers y amantes de la costura, espero estén teniendo un lindo y productivo día. Hace unos días revisando mi baúl de telas me encontré con unas mangas de de unas camisa que arregle hace un tiempo, no se ustedes pero yo soy de esas personas que les gusta guardar retazos, siempre pienso algún día le voy a dar uso y hoy fue así tome mi patrón y comencé a cortar.
Hello Hivers and sewing lovers, I hope you are having a nice and productive day. A few days ago going through my fabric trunk I found some sleeves of a shirt that I fixed some time ago, I don't know about you but I'm one of those people who like to save scraps, I always think someday I'll use them and today I took my pattern and started to cut.
¡Acompáñame!
Come with me!
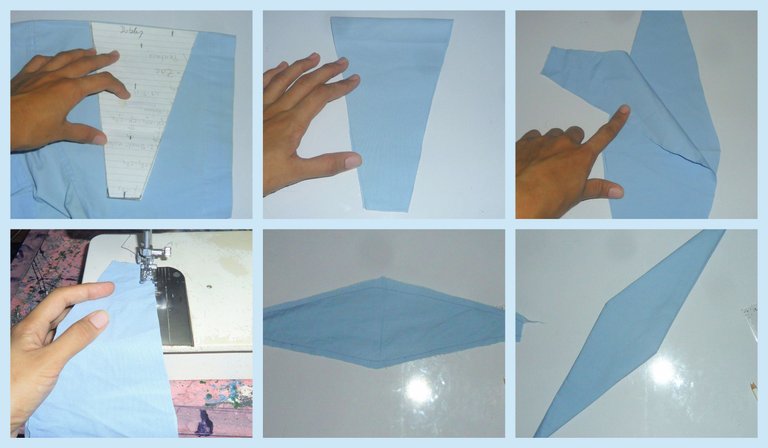
Lo primero que hice fue sacar mi patrón con 17,5cm de largo y 10cm de ancho en los extremos de cada lado marcamos 3cm y listo. Marque en mi manga dejando un doblez en la parte superior, de esta sacamos dos. Enfrentamos derecho con derecho y con una costura sencilla la llevamos por todo el borde dejando 05,cm de margen, con la ayuda de un palillo voltee y planche la tela para un mejor acabado.
The first thing I did was to draw my pattern with 17.5cm long and 10cm wide at the ends of each side we marked 3cm and that was it. I marked on my sleeve leaving a fold at the top, from this we took out two. We faced right to right and with a simple seam we took it around the edge leaving 05,cm of margin, with the help of a toothpick I turned and ironed the fabric for a better finish.
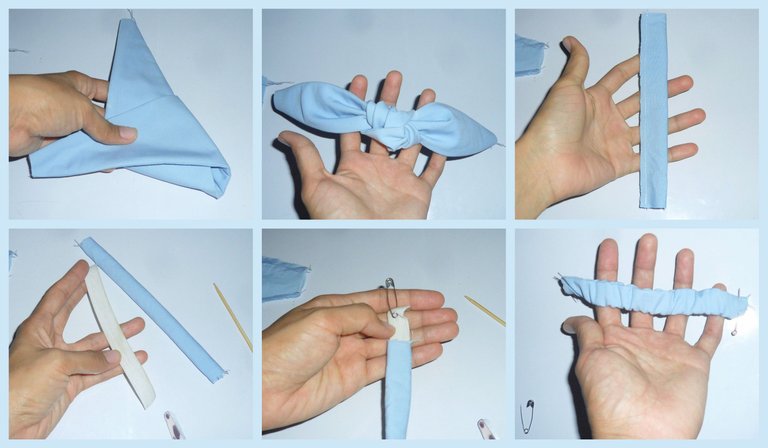
El nudo lo hice gusto en el centro buscando el mejor lado, corte una tira de 15cm de largo y 6cm de ancho, cosí y voltee para luego pasar por dentro de ella 10cm de elástica de 2,5cm de ancho, con la ayuda de una alfiler pase la elástica y sujete los extremos para coserla y así poder trabajar mejor a la hora de juntar las piezas.
I made the knot in the center looking for the best side, cut a strip of 15cm long and 6cm wide, sew and turn it over and then pass inside it 10cm of elastic 2.5cm wide, with the help of a pin pass the elastic and hold the ends to sew it and thus be able to work better at the time of joining the pieces.
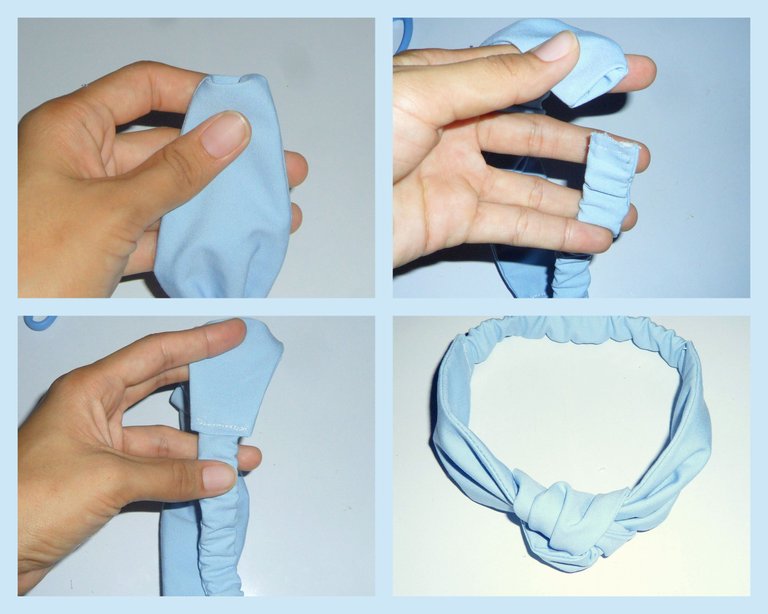
En los extremos de mi primera pieza voy a doblar hacia dentro y voy a intoducirle la tira ya antes cosida, la sujeto con un alfiler y voy a coser, rematando con una costura sencilla ya tendríamos por terminado nuestro cintillo.
At the ends of my first piece I will fold inwards and I will insert the previously sewn strip, pin it and sew, finishing it with a simple seam and we would have finished our headband.
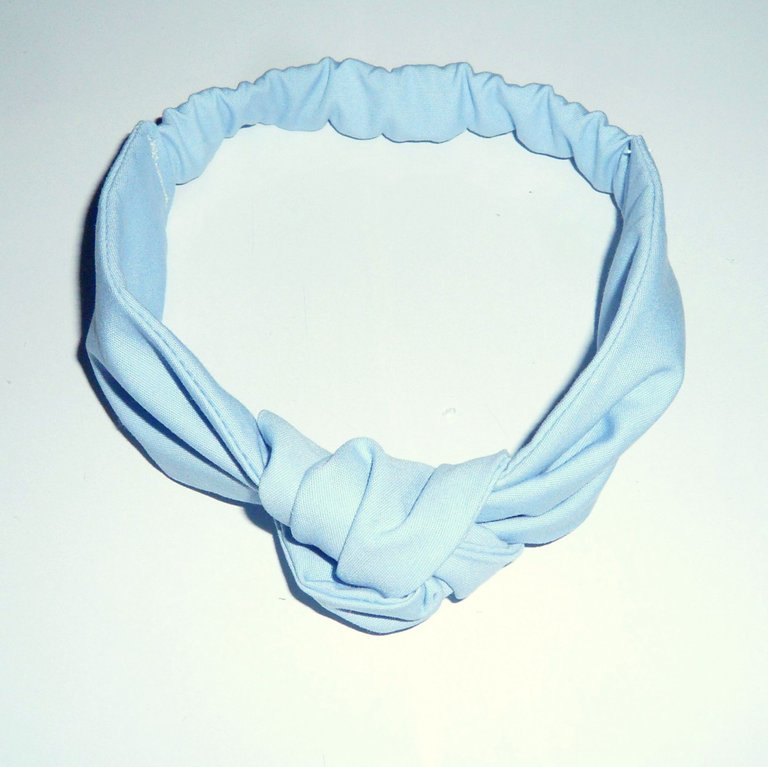
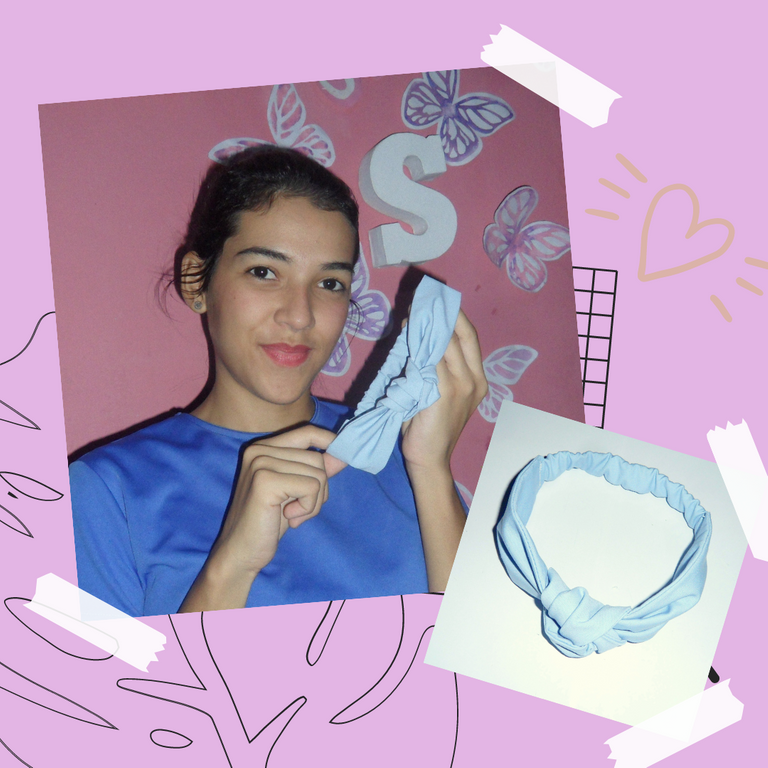
Resultado final.
Final result.
Todas las fotografias son de mi autoría.
Edicion en CANVA
All photographs are my authorship.
Edition in CANVA
Gracias por leerme.
Thank you for reading me.
Congratulations @yulilemus02! You have completed the following achievement on the Hive blockchain and have been rewarded with new badge(s) :
Your next target is to reach 200 upvotes.
Your next target is to reach 700 upvotes.
You can view your badges on your board and compare yourself to others in the Ranking
If you no longer want to receive notifications, reply to this comment with the word
STOPCheck out the last post from @hivebuzz: