¡Hiver, creativo! Hoy quiero compartirte un DIY súper fácil y adorable. Pero antes te contaré como tuve la idea de hacerlo. Anoche mi pareja y yo decidimos pedir unas hamburguesas a domicilio y el negocio nos envió salsa de ajo en un envase pequeñito, lo cual me pareció un bonito detalle. Esta mañana cuando estaba organizando la cocina, tome el envase y me pregunte “¿Qué puedo hacer con esto?”…
Hiver, creative! Today I want to share with you a super easy and adorable DIY. But first I'll tell you how I got the idea to do it. Last night my partner and I decided to order some hamburgers and the store sent us garlic sauce in a teeny tiny container, which I thought was a nice touch. This morning when I was organizing the kitchen, I picked up the container and asked myself "What can I do with this?"...
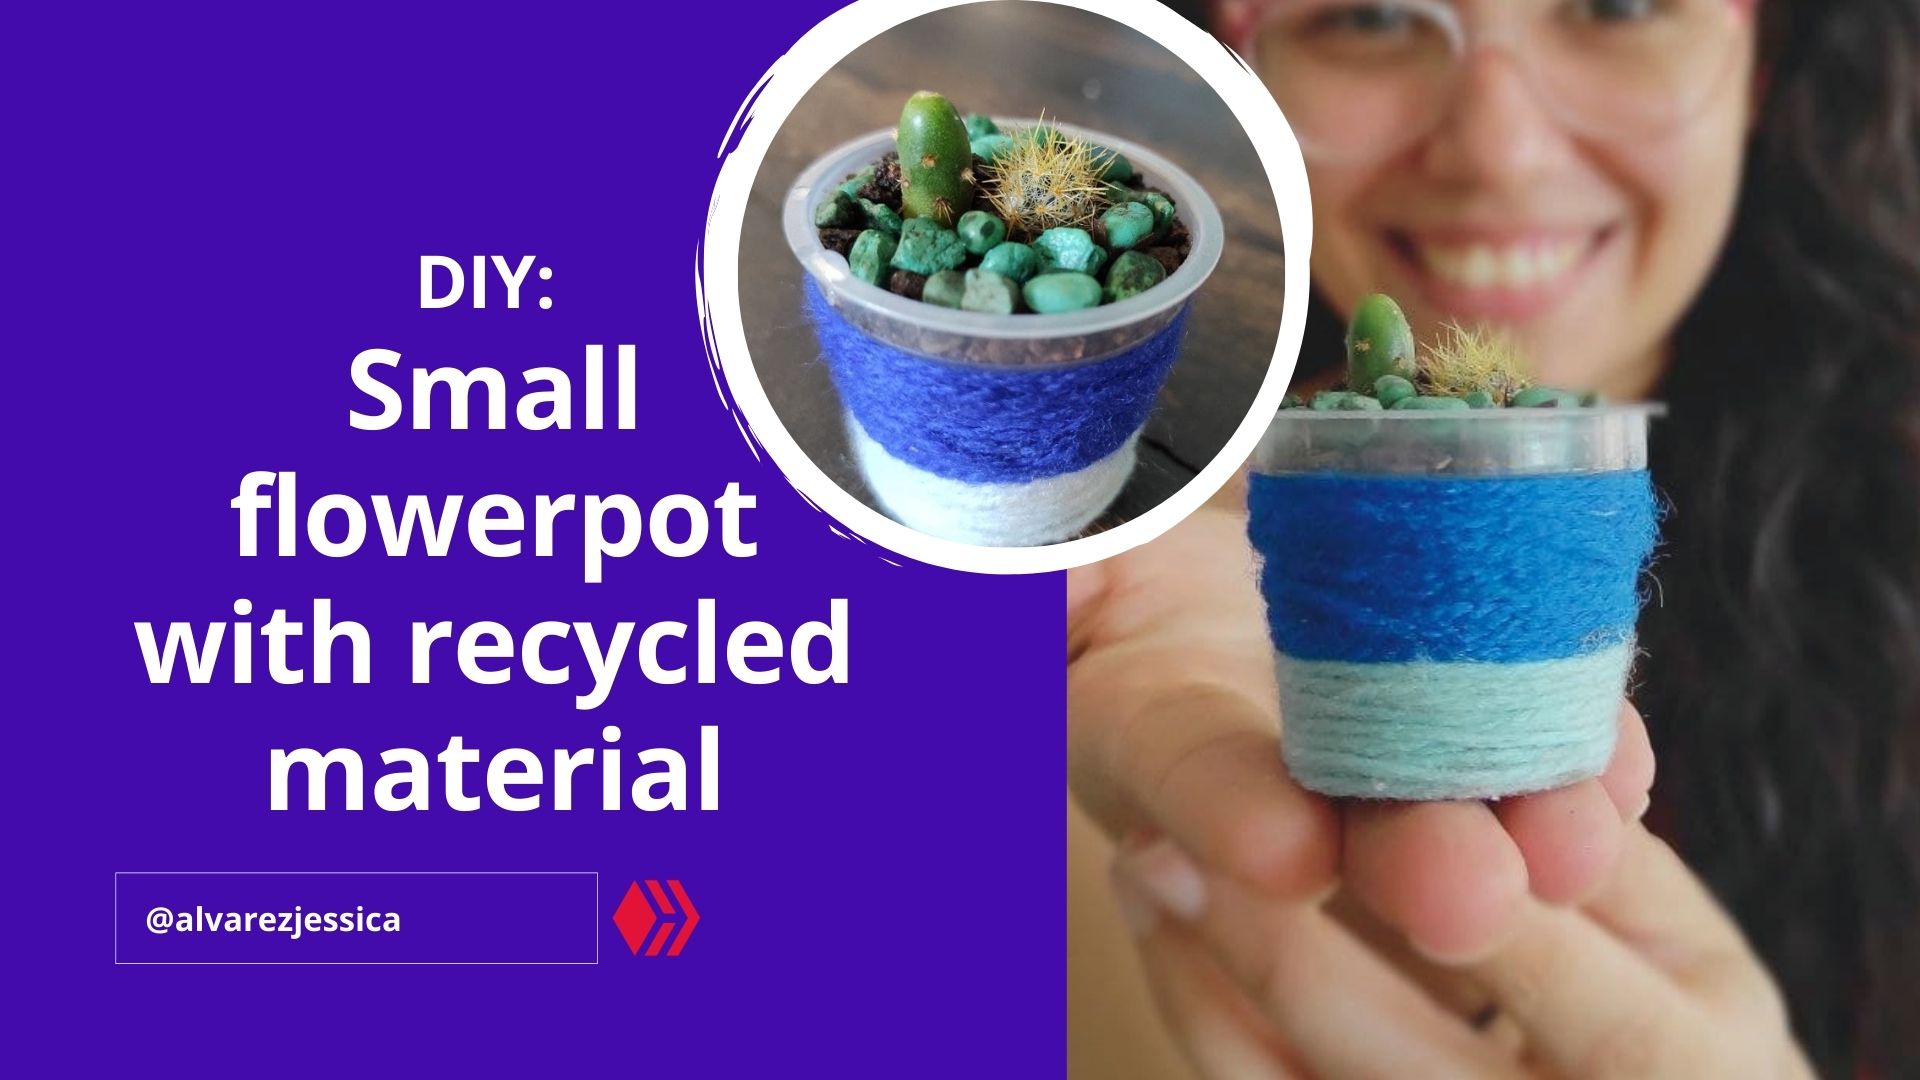
Lo pensé un rato porque no me gusta botar envases de plástico, ya que la mayoría termina contaminando la calle, además de que soy como Tinkerbell y todo lo que pueda me gusta reciclarlo y transformarlo en algo útil. Después de unos minutos pensando, se me ocurrió que podía convertirlo en una adorable y pequeña maceta. Y bueno, está demás decir que me encantó el resultado.
I thought about it for a while because I don't like to throw away plastic containers, since most of them end up polluting the street, plus I'm like Tinkerbell and I like to recycle everything I can and transform it into something useful. After a few minutes of thinking, it occurred to me that I could turn it into an adorable little flower pot. And well, needless to say, I loved the result.
¡Estoy tan contenta de haber hecho esta maceta! y la razón es múltiple: Por un lado porque soy muy creativa y me encanta hacer manualidades, y por el otro, porque soy una Crazy Plant Lady y cualquier oportunidad para hacer algo por mis plantas, me hace feliz.
I'm so glad I made this planter! And the reason is multiple: On the one hand because I'm very creative and I love to make crafts, and on the other hand, because I'm a Crazy Plant Lady and any opportunity to do something for my plants, makes me happy.

Si te identificas con mis cualidades y también quieres hacer esta adorable maceta, estos son los materiales que necesitas:
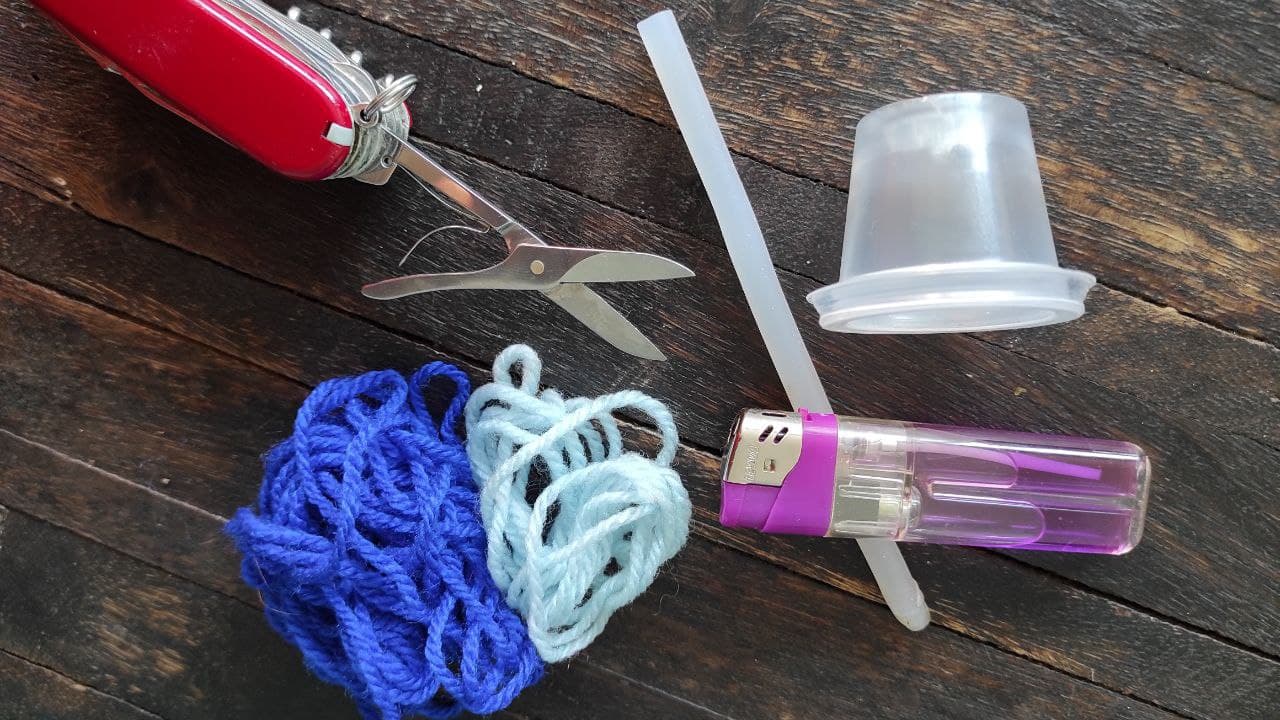
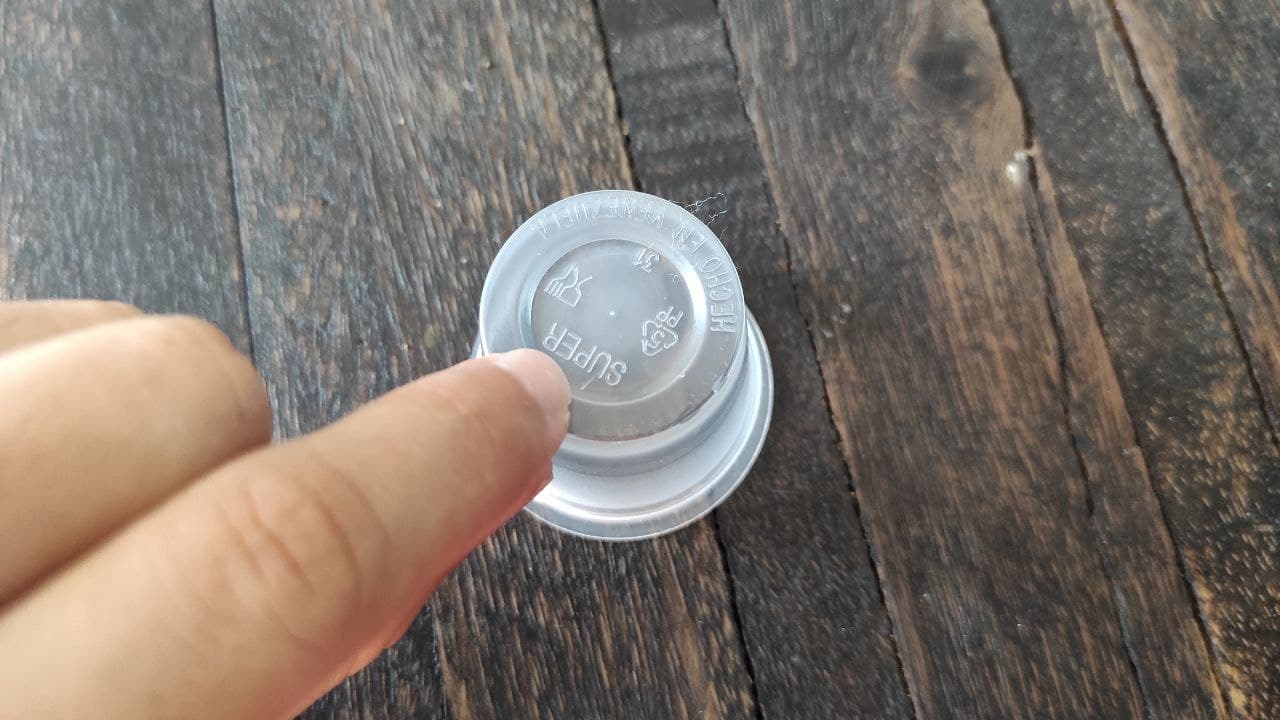
- Envase de plástico.
- Tijera.
- Estambre.
- Barra de silicón.
- Encendedor.
If you identify with my qualities and also want to make this adorable planter, these are the materials you need:
- Plastic container.
- Scissors.
- Straw.
- Silicone stick.
- Lighter.
Y como no sería útil una maceta vacía, también necesitas:
- Cactus u otra planta.
- Tierra.
And as an empty pot would not be useful, you also need:
- Cactus or other plant.
- Soil.
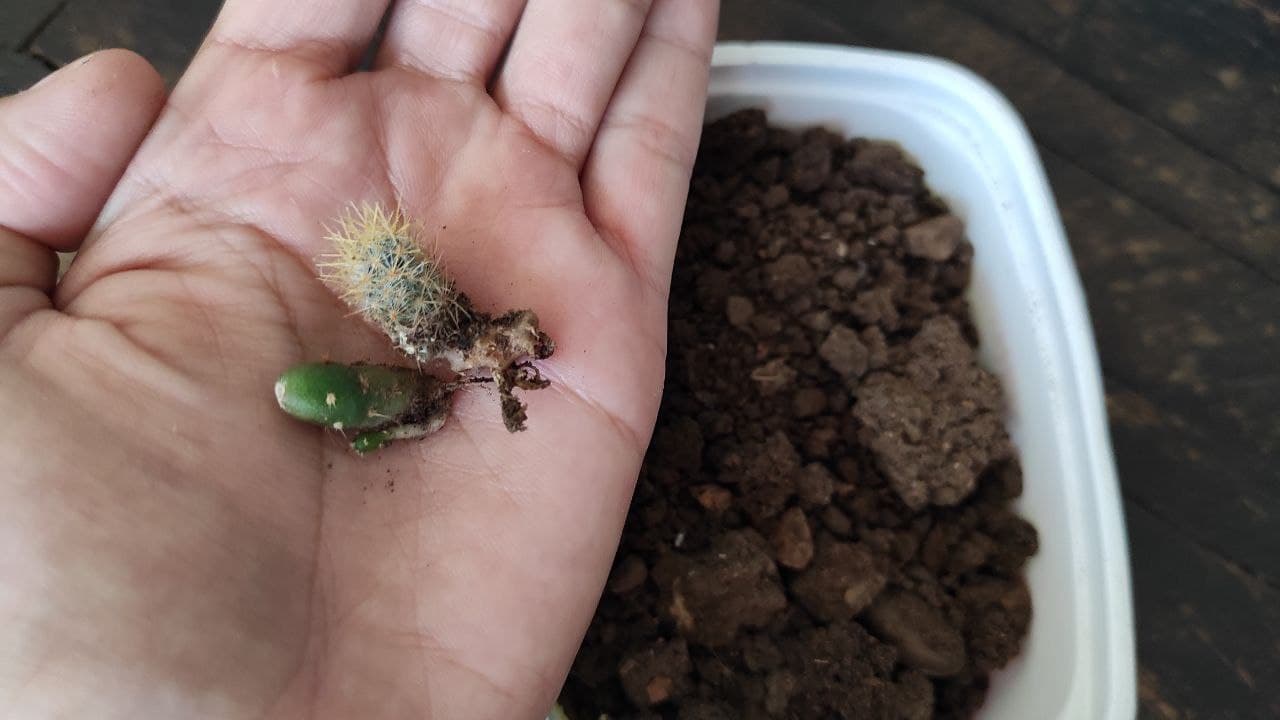
Yo tomé unos hijos de dos de mis cactus más grandes. Si tú no tienes cactus, también puedes usar una suculenta o una planta pequeña. Pero debes asegurarte que sea una planta cuyas raíces no sean extensas, porque el envase no tendría suficiente espacio para ella.
I took some offspring from two of my cacti. If you don't have a cactus, you can also use a succulent or a small plant. But you must make sure it is a plant whose roots are not extensive, because the container would not have enough room for it.
Paso a paso / Step by Step:
Lo primero que debes hacer es abrirle unos pequeños agujeros a la parte de abajo del envase, para que exista un espacio por el cual la tierra pueda drenar el excedente de agua.
The first thing to do is to open a few small holes in the bottom of the container, so that there is a space for the soil to drain excess water.
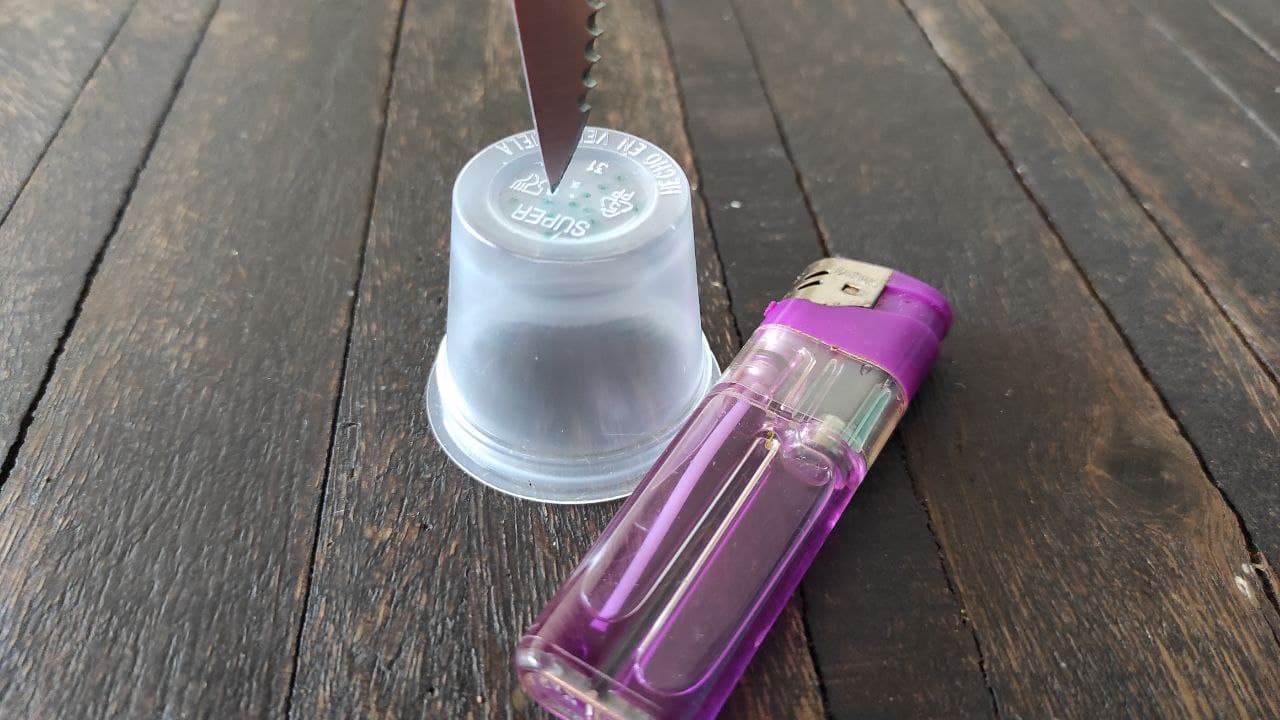
Yo utilicé un cuchillo, y con la ayuda del encendedor, calenté la punta del cuchillo para que fuera más fácil hacer los agujeros. Si tú tienes otra técnica, por supuesto que puedes hacerlo a tu manera.
I used a knife, and with the help of the lighter, I heated the tip of the knife to make it easier to make the holes. If you have another technique, of course you can do it your way.
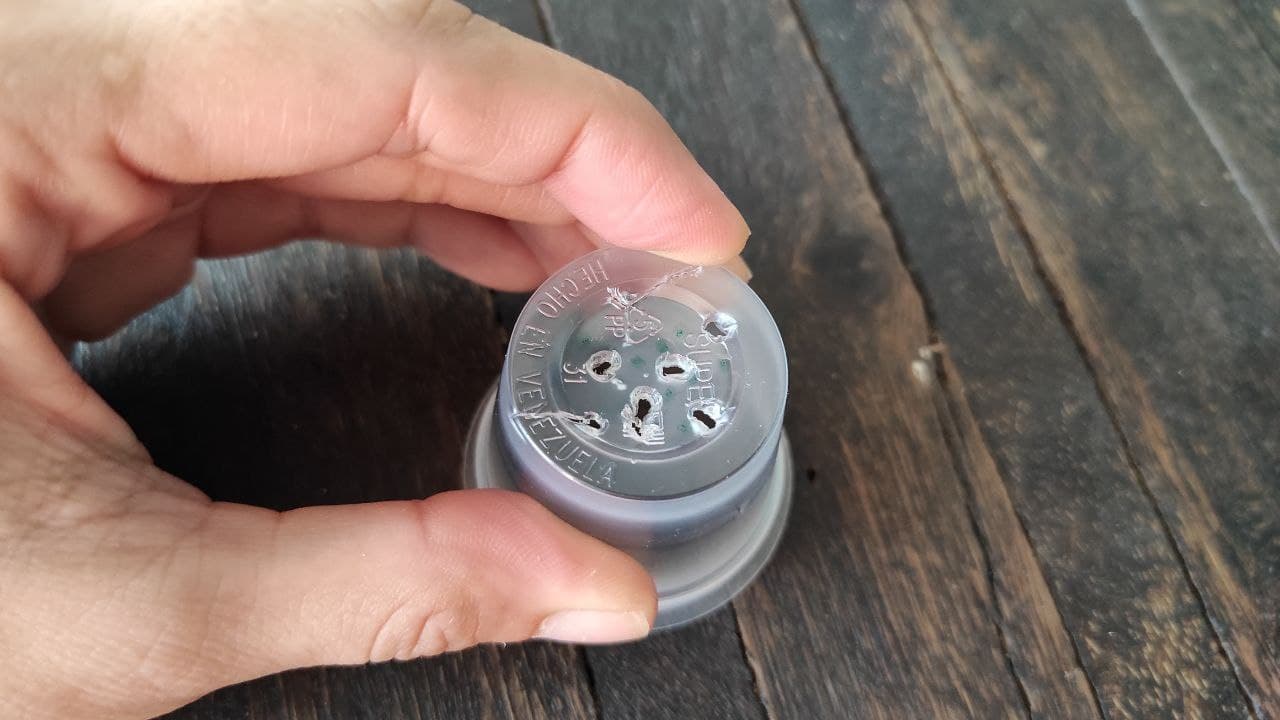
Los agujeros no me quedaron muy bonitos jajajaja, pero lo importante es que van a cumplir su misión. Una vez que los agujeros estén listos, procede a decorar el envase.
The holes were not very pretty hahaha, but the important thing is that they will fulfill their mission. Once the holes are ready, proceed to decorate the container.

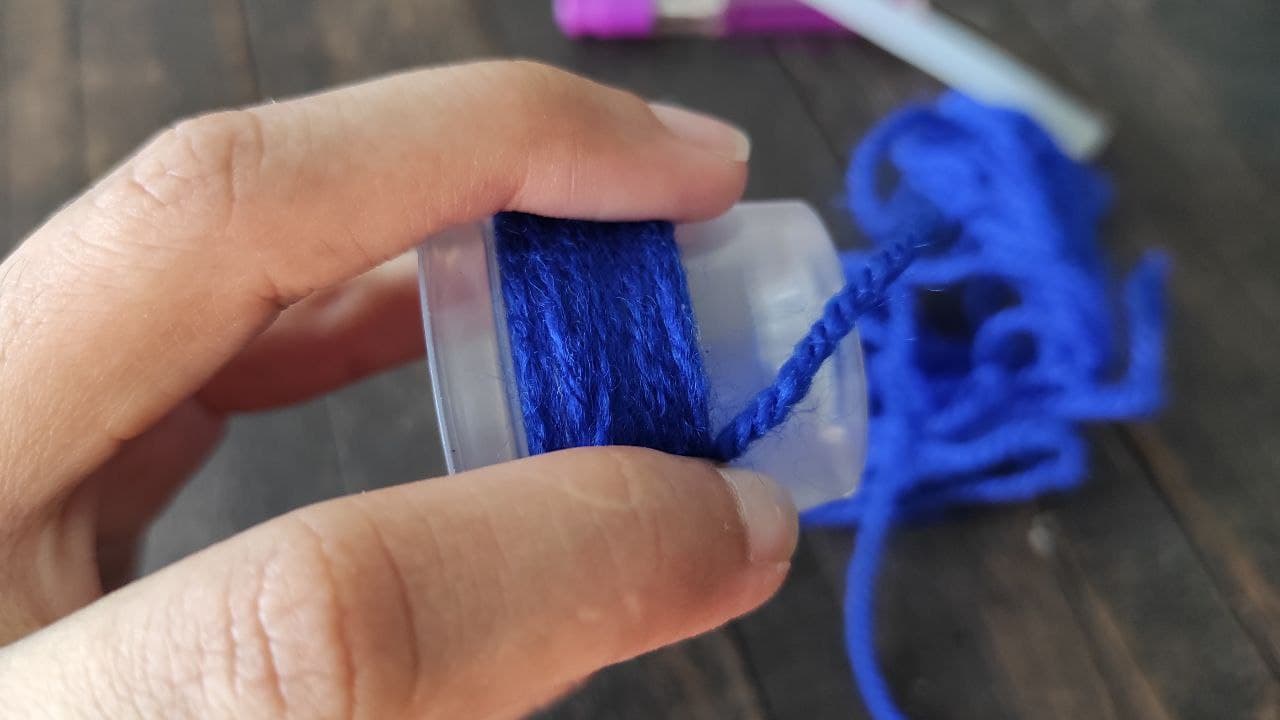
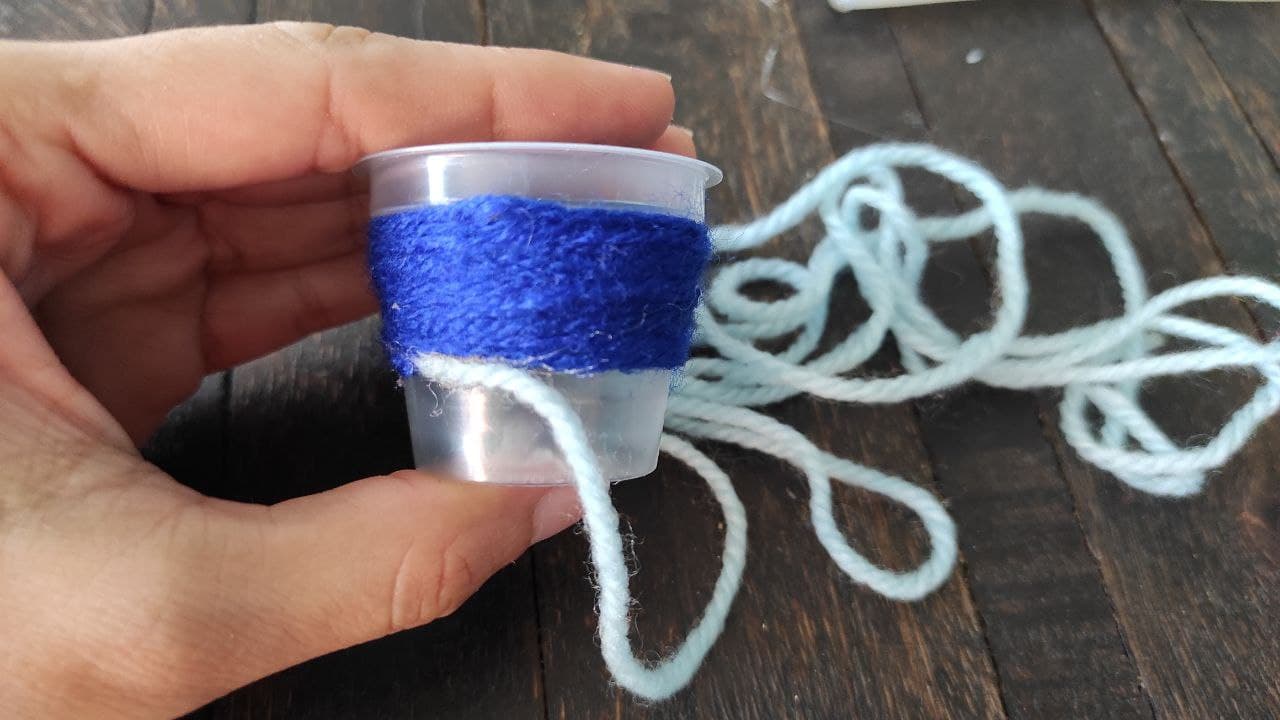
Para eso, utiliza estambre. Yo use dos colores diferentes porque me gusta mucho el azul y me pareció que se vería muy bonito combinar ambos tonos. Tú puedes utilizar un solo color o si quieres, puedes utilizar más de dos. Deja volar la imaginación y diviértete.
Yo no tengo pistola de silicón, así que utilicé el encendedor para derretir la barra de silicón y colocar un poquito en el envase, a partir de allí, comienza a colocar el estambre alrededor de todo el envase. Asegúrate de sujetarlo bien y aplica presión para que quede firme.
For that, use yarn. I used two different colors because I like blue a lot and I thought it would look very nice to combine both shades. You can use just one color or if you want, you can use more than two. Let your imagination run wild and have fun.
I don't have a silicone gun, so I used the lighter to melt the silicone stick and put a little bit in the container, from there, start placing the yarn around the entire container. Make sure to hold it tight and apply pressure to make it firm.
Si vas a utilizar estambre de dos colores, cuando hayas llegado hasta la mitad del envase, detente y coloca un poquito de silicón para pegar el extremo.
If you are going to use two-color yarn, when you have reached the middle of the container, stop and put a little bit of silicone to glue the end.
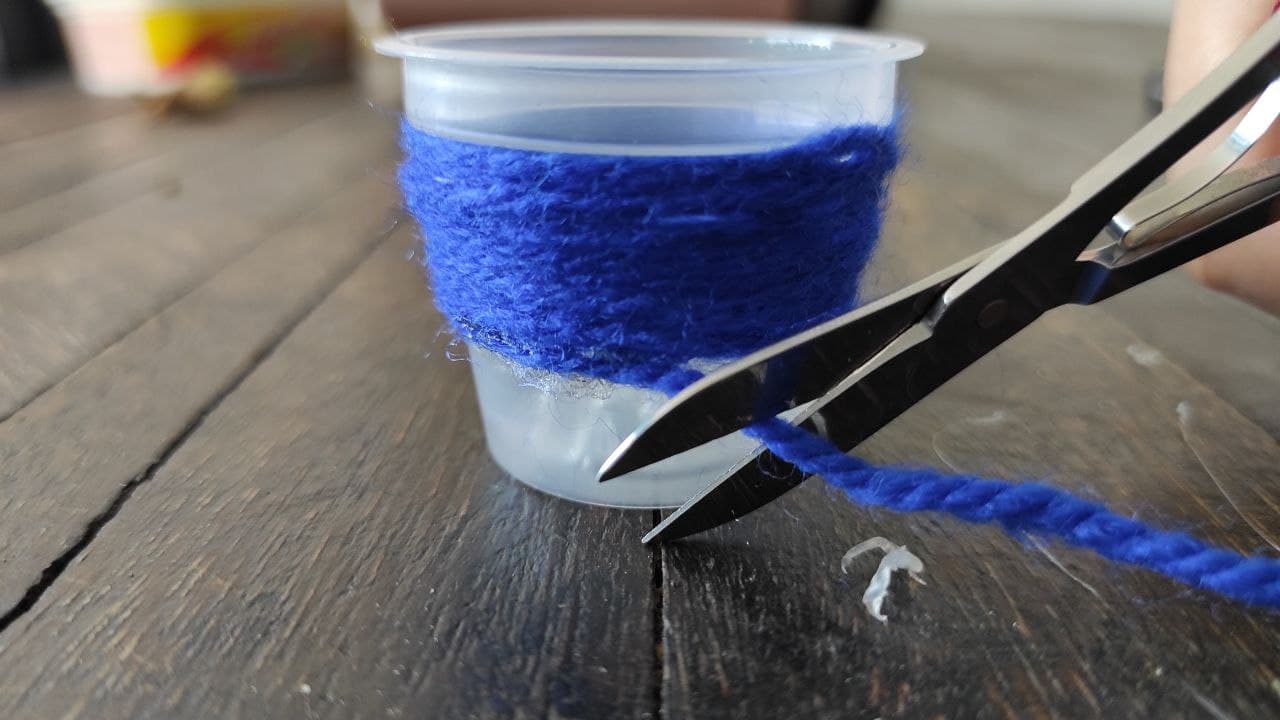
Corta lo que sobra. Ahora, justo donde termina el primer color, pega con silicón el siguiente color y repite el procedimiento de pegar el estambre alrededor del envase.
Cut off the excess. Now, right where the first color ends, glue with silicone the next color and repeat the procedure of gluing the yarn around the container.
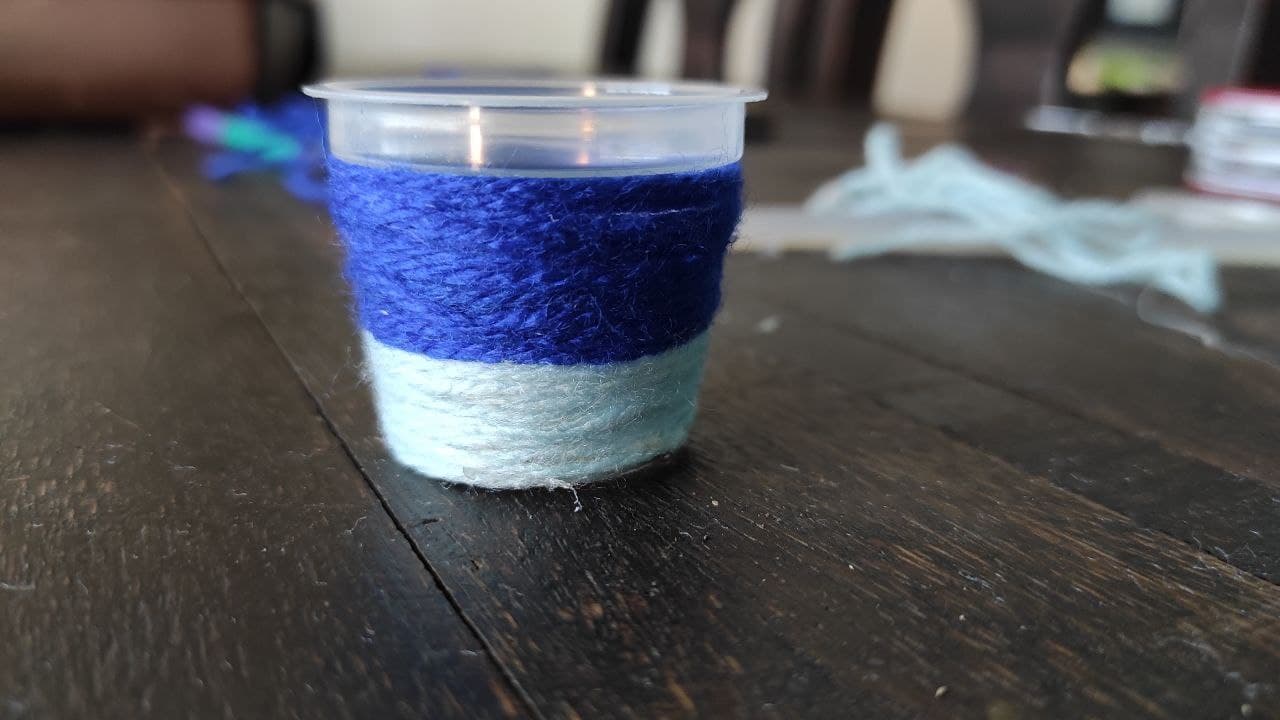
¡Listo! Como decimos en Venezuela, con las 3 “B” Bueno, Bonito y Barato. Ahora, es momento de darle utilidad a la pequeña maceta.
That's it! Now, it's time to put the little pot to good use.
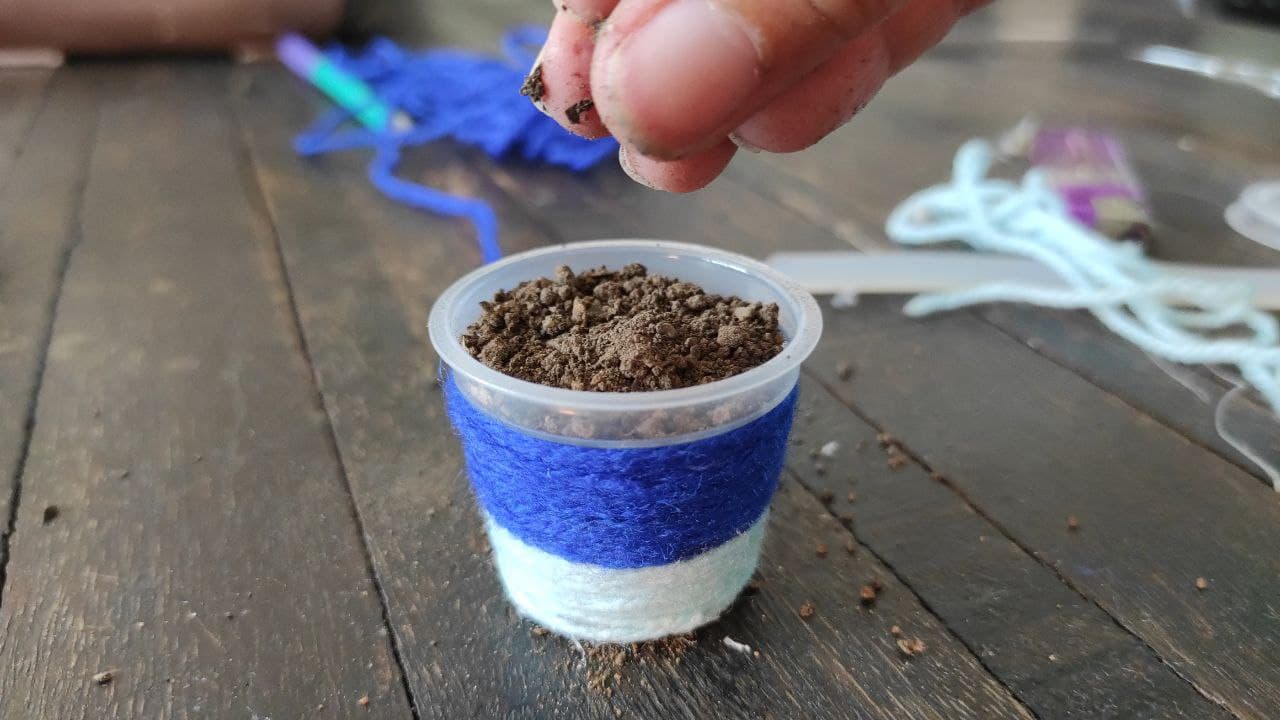
Coloca en su interior la cantidad de tierra suficiente.
Place a sufficient amount of soil inside.

Abres un agujero en la tierra y coloca los cactus en la posición que más te guste.
Open a hole in the ground and place the cactus in the position you like best.
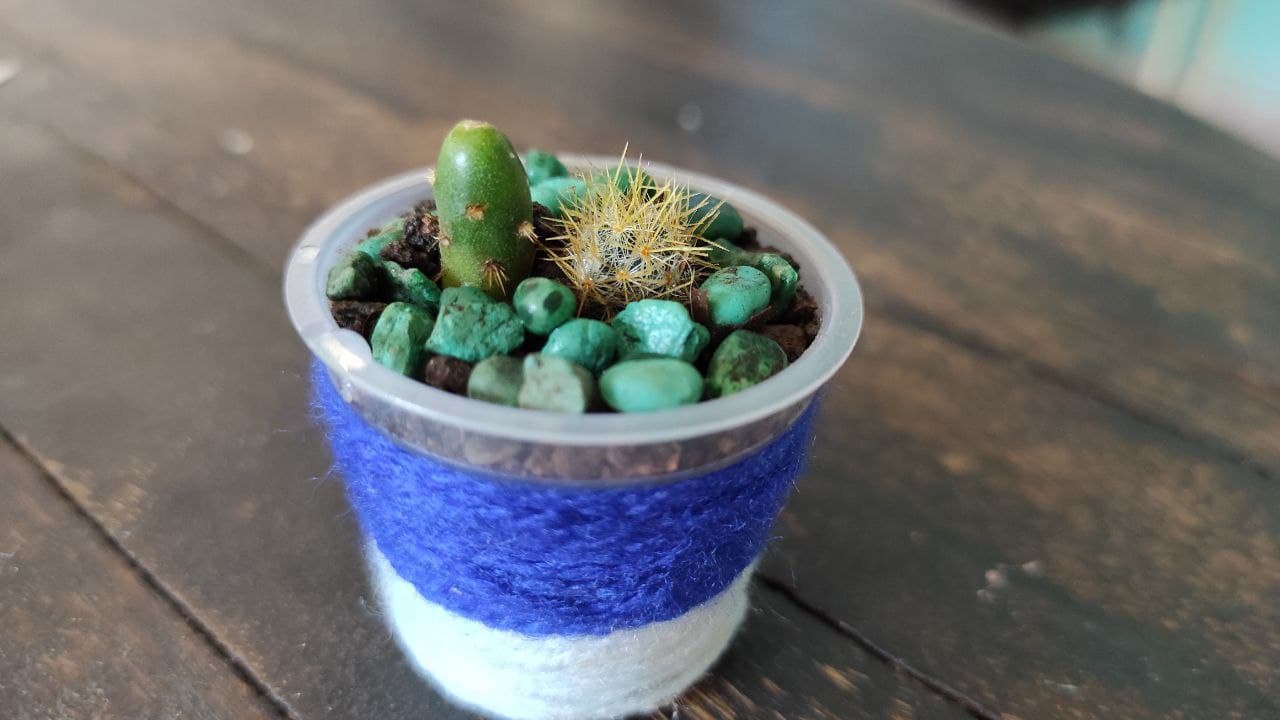
Al final, yo lo decoré con unas piedras de colores, ¡dime si no quedó adorable!
In the end, I decorated it with some colored stones, tell me if it doesn't look adorable!
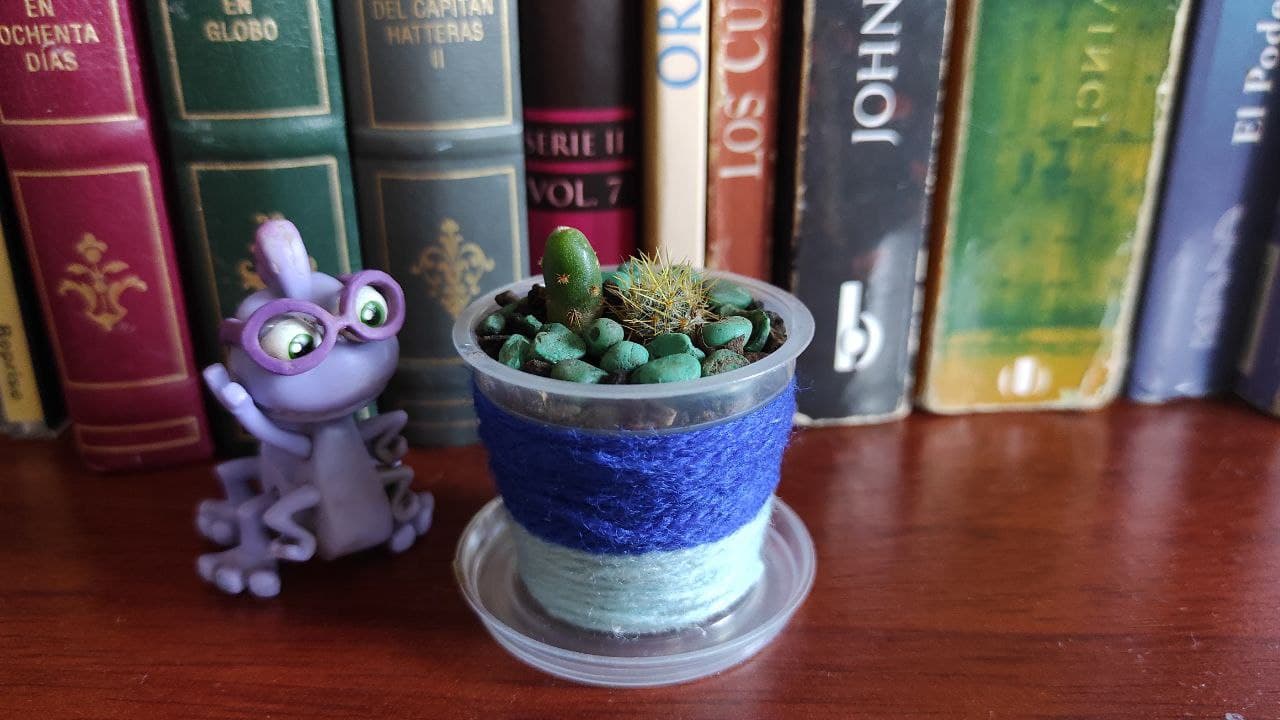
Y lo coloqué en mi biblioteca junto con mi figurita del bebé Randall de Monster Inc University. Definitivamente quedé enamorada. Me encantan las cosas tiernas y minimalistas. Espero que te haya gustado este DIY y que si tienes la oportunidad, lo hagas. Te mando un abrazo y las mejores vibras, muchas gracias por leerme.
And I placed it on my bookshelf along with my baby Randall figurine from Monster Inc University. I was definitely in love. I love cute and minimalistic things. I hope you liked this DIY and if you have the opportunity, do it. I send you a hug and the best vibes, thank you very much for reading me.
All the pictures belong to me. The design and dividers were made in Canva. The English translation is from the translator DeepL.
Te quedó muy linda Jessi 🎈🌿