Hello friends!!
Hola Amigos!!
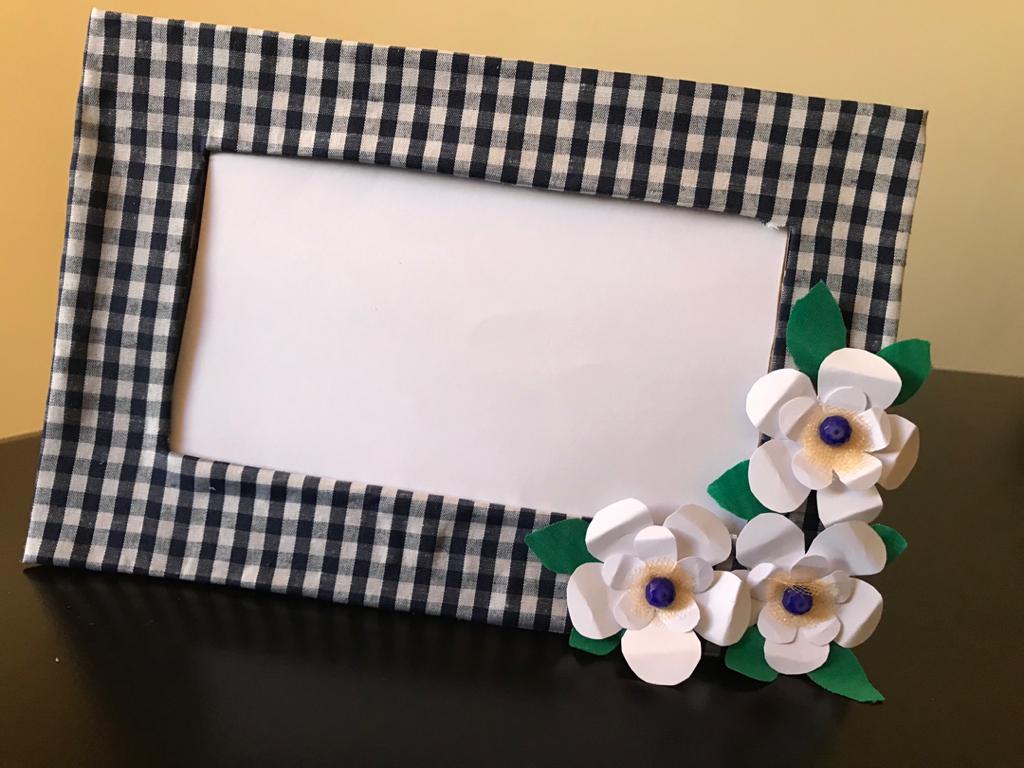
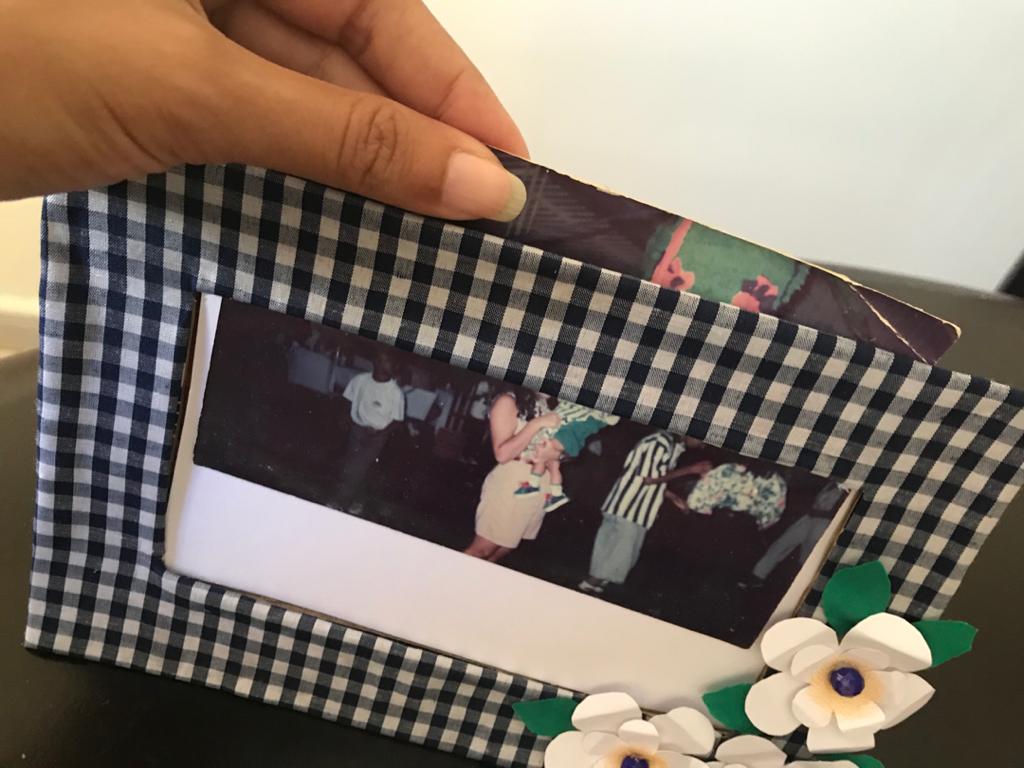
Today I want us to do it at home with few and simple materials; a beautiful, inexpensive portrait holder; with cardboard flowers. Decorative detail; where we will have those photos that will make us remember beautiful and joyful moments that we have lived with our loved ones.
Hoy quiero que realicemos en casa con pocos y sencillos materiales; un bello,y económico portaretratos; con flores de cartulina. Detalle decorativo; donde tendremos esas fotos que nos harán recordar hermosos y alegres momentos que hemos vivido con nuestros seres queridos.

They will need:
Necesitaran:
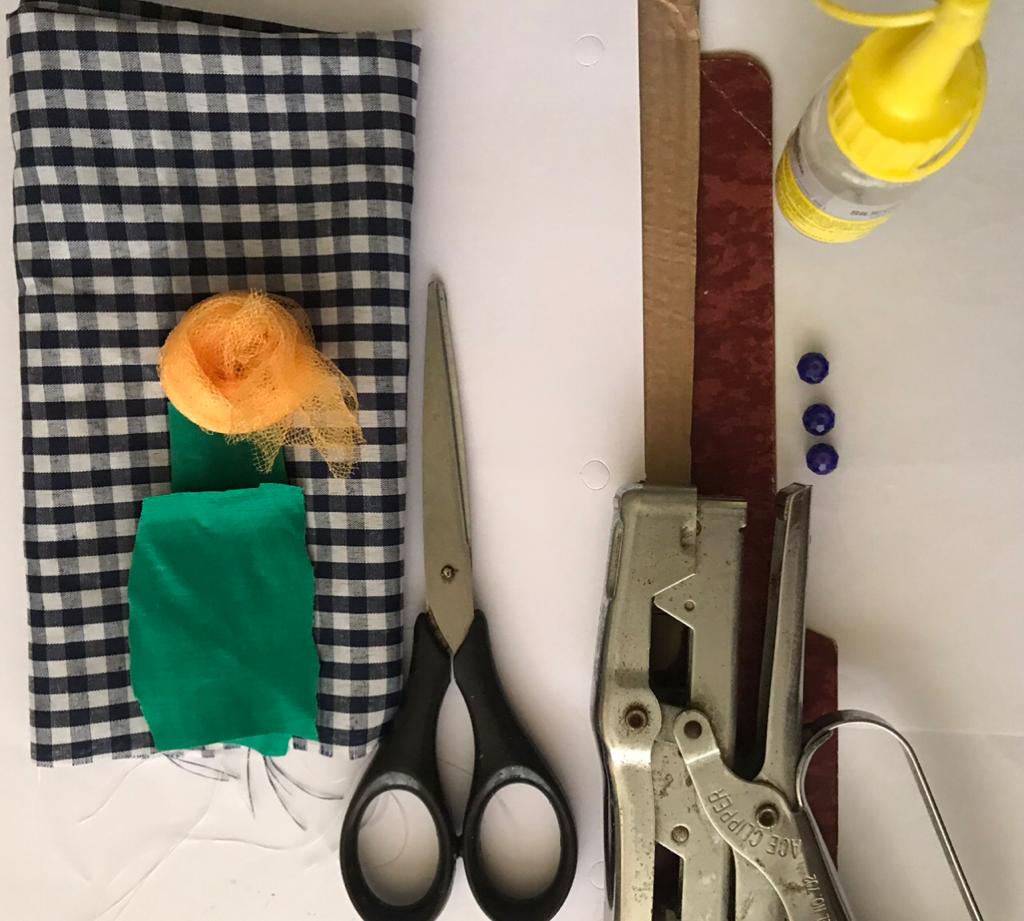
•Paperboard.
•Cardboard.
• Scraps of thick cardboard.
• Plaid or printed fabric (the color of your choice).
• Yellow tulle.
• Scraps of green fabric.
• 3 blue jewelery beads.
•Glue.
•Measuring tape.
• Stapler (optional).
•Cartón.
•Cartulina.
•Retazos de cartón grueso.
•Tela estampada a cuadros o (del color de su preferencia).
•Tul amarillo.
•Retazos de tela verde.
•3 cuentas de bisutería azules.
•Pegamento.
•Cinta métrica.
•Grapadora (opcional).
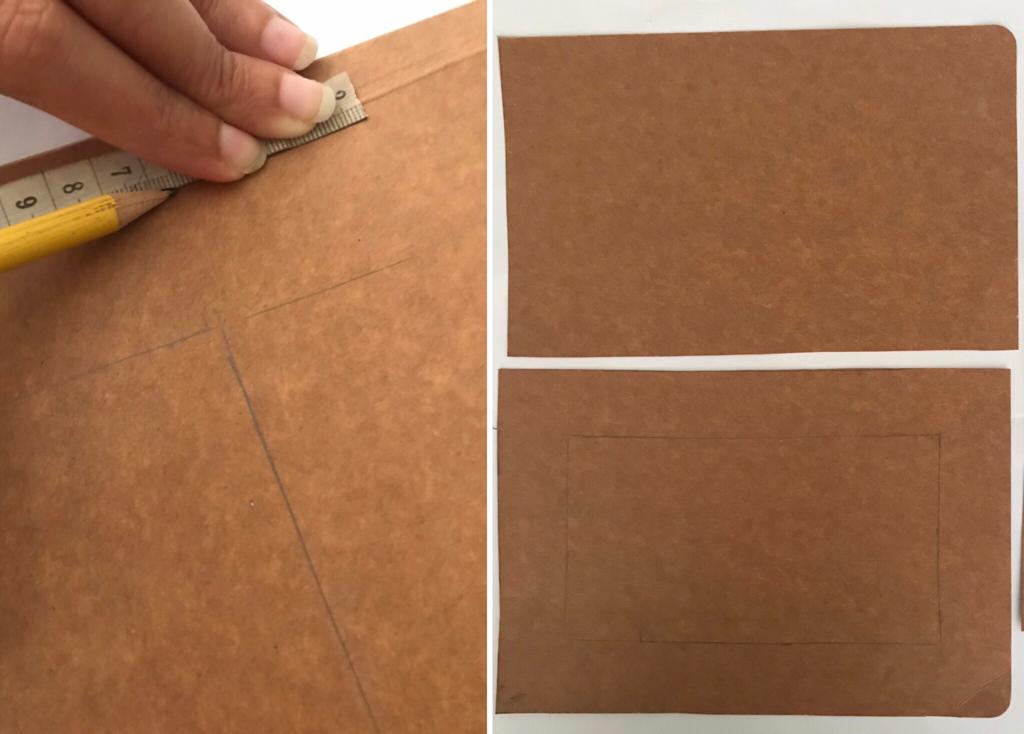
We begin by measuring the structure of the portrait holder on the cardboard; for this we will need two rectangles, one for the front cover that measures 22 centimeters wide and 16 centimeters long; Inside, measure 3 centimeters from the outside in on each of its sides and draw a rectangle in the center. The other rectangle on the back cover is 21 centimeters wide and 15 centimeters long.
Iniciamos midiendo en el cartón la estructura del portaretratos; para ello necesitaremos dos rectángulos uno para la tapa frontal que mide 22 centímetros de ancho y 16 de largo; en su interior medir en cada uno de sus lados 3 centímetros de afuera hacia dentro y trazamos en el centro un rectángulo. El otro rectángulo el de la tapa posterior mide 21 centímetros de ancho y 15 centímetros de largo.
.
Then with the tip of the scissors we open a small hole in the corner of the inner rectangle and carefully cut the inner rectangle along the edge (which we will later use to assemble the wedge to hold the frame). In the thick cardboard we cut 3 strips, 2 of 1.5 centimeters wide and 12 centimeters long and the other strip 1.5 centimeters wide and 16.5 centimeters long. We continue cutting a rectangle 28 cents wide and 20 centimeters long in the printed fabric.
Luego con la punta de la tijera abrimos un pequeño orificio el la esquina del rectángulo interior y con cuidado cortamos por el borde el rectángulo interior (que posterior mente usaremos para armar la cuña para sostener el portarretrato). En el cartón grueso cortamos 3 tiras, 2 de 1, 5 centímetros de ancho y 12 centímetros de largo y la otra tira 1,5 centímetros de ancho y 16,5 centímetros de largo. Continuamos cortando en la tela estampada un rectángulo de 28 céntimos de ancho y 20 centímetros de largo.
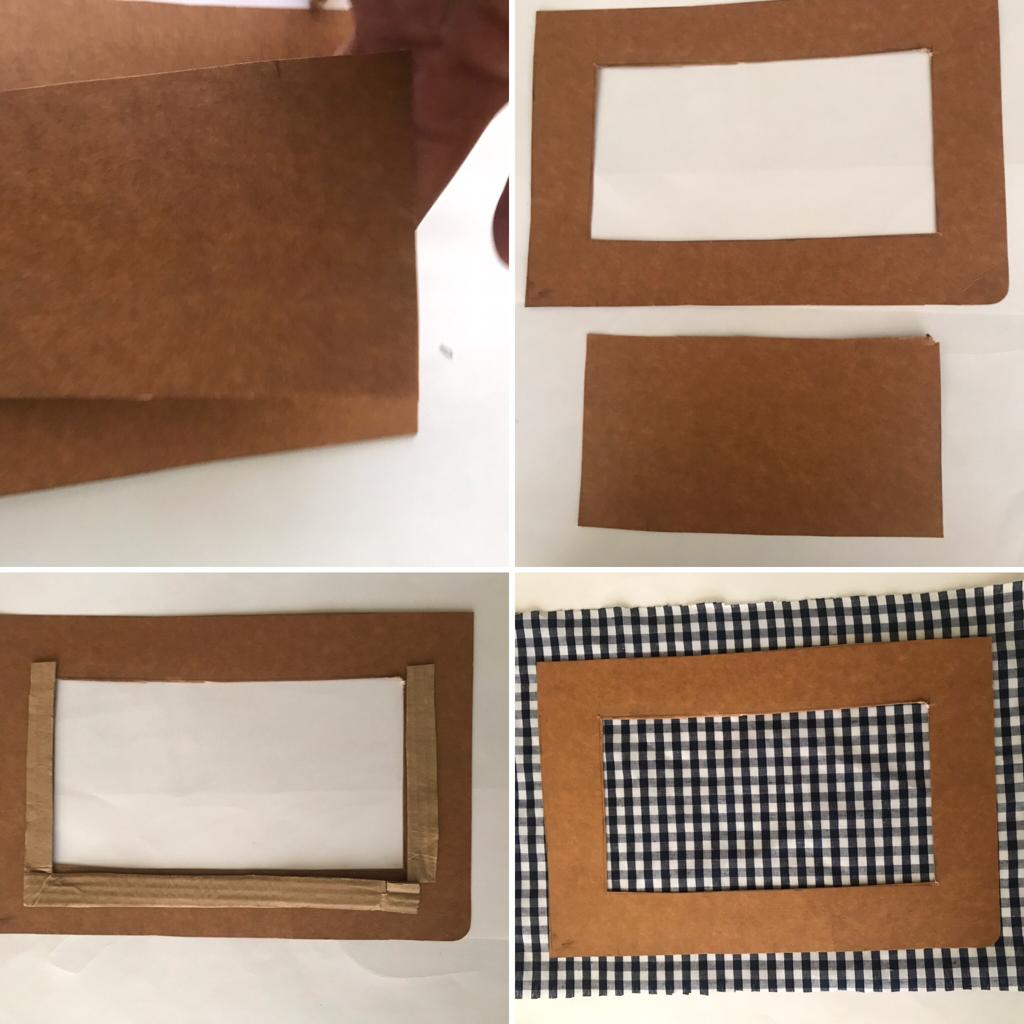
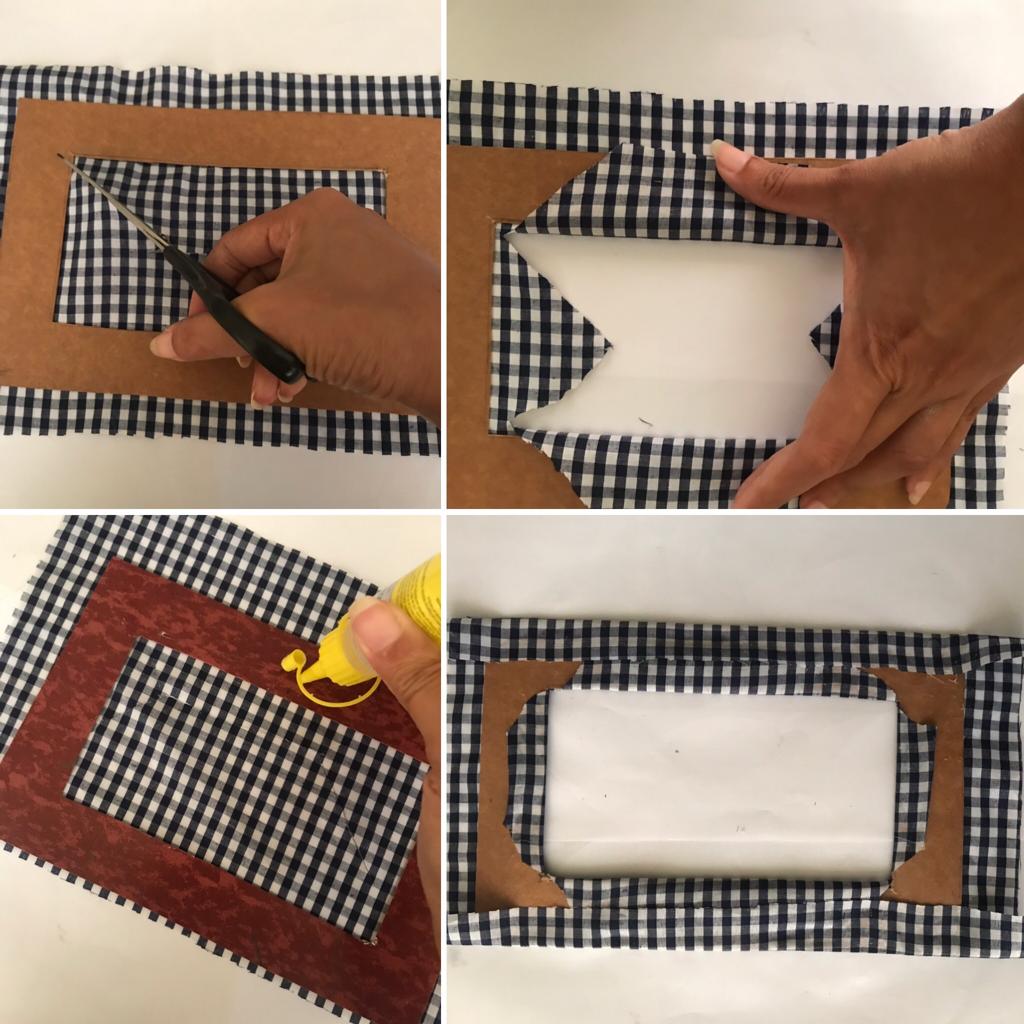
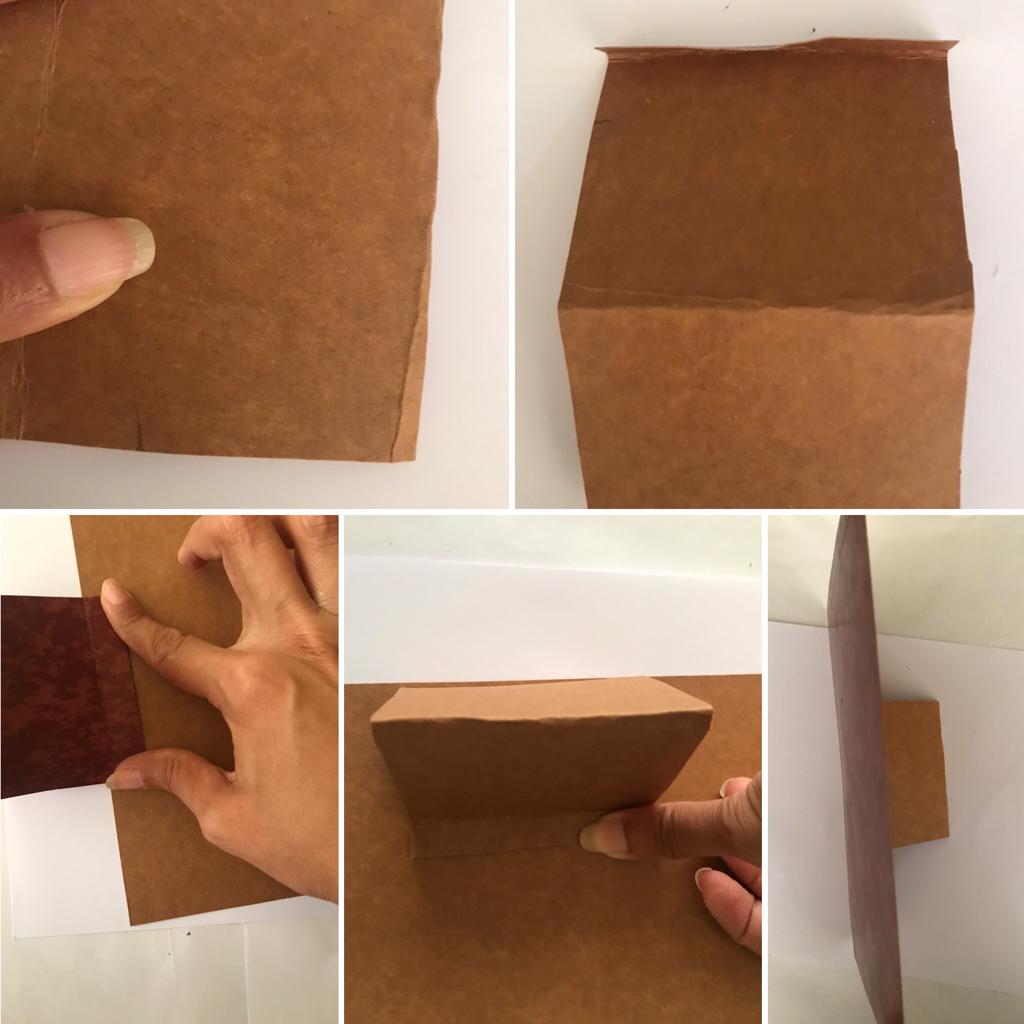
Later we make a cut in the center of the fabric rectangle and from there we make four cuts towards the ends of the inner picture frame rectangle, as seen in the figure, then we apply glue to the front cover and glue to the fabric, we continue weighing the four rear edges.
Posteriormente realizamos un corte en el centro del rectángulo de tela y de allí realizamos cuatro cortes hacia las puntas del rectángulo interior de portarretratos, tal como se observa en la figura, luego aplicamos pega a la tapa frontal y pegamos a la tela, continuamos pesando los cuatro bordes posteriores.
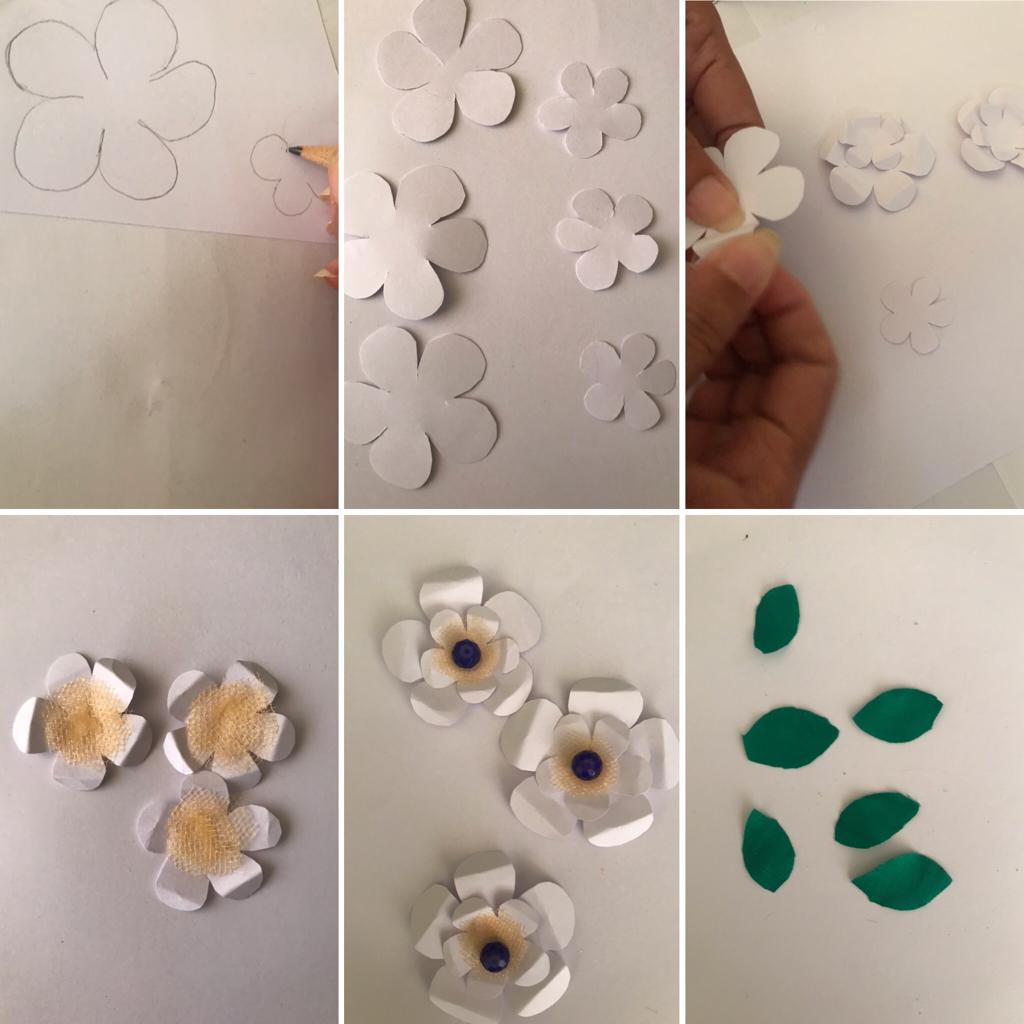
We draw 3 pairs of flowers on the cardboard (a medium and a smaller one) cut out, shape the petals with our hands in the center of the small flower, glue a circle of tulle and the jewelry bead, continue to glue the small flower to the center of the big one, (follow the procedure with the other flowers). We also cut small leaves on the green cloth.
Dibujamos 3 pares de flores en la cartulina (una mediana y otra mas pequeña) recortamos, damos forma a los pétalos con las manos en el centro de la flor pequeña pegamos un círculo de tul y la cuenta de bisutería, continuamos pegando la flor pequeña al centro de la grande, (seguir el procedimiento con las otras flores). Además cortamos en la,tela verde unas pequeñas hojas.
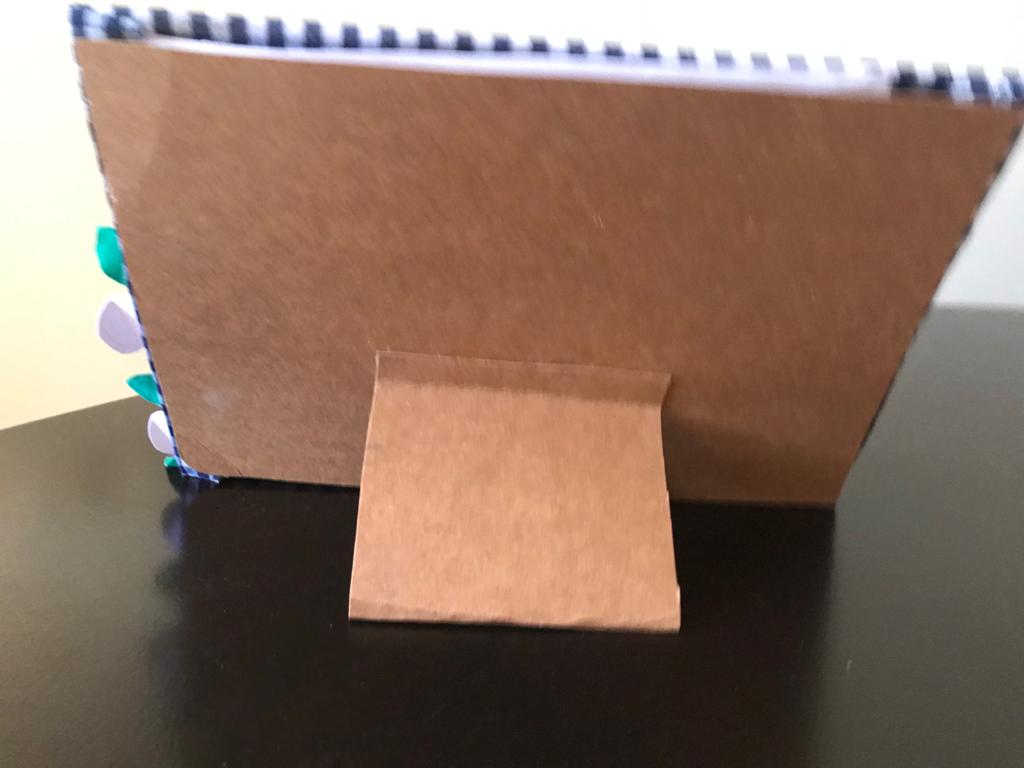
With the small rectangle that we cut out from the inside of the front cover, we fold it in half and at each end we fold two tabs, one at the top outwards and the other at the bottom end inwards. Then we glue the tabs to the rectangle on the back cover, forming an angle as shown in the figure (so we have the wedge that will hold the picture frame).
Con el pequeño rectángulo que recortamos del interior de la tapa frontal, doblamos a la mitad y a cada extremo doblamos dos pestañas una en el superior hacia fuera y otra en extremo inferior hacia dentro. Luego pegamos las pestañas al rectángulo de la tapa posterior, formando un ángulo tal como se observa en la figura ( así tenemos la cuña que sostendrá el portarretratos).
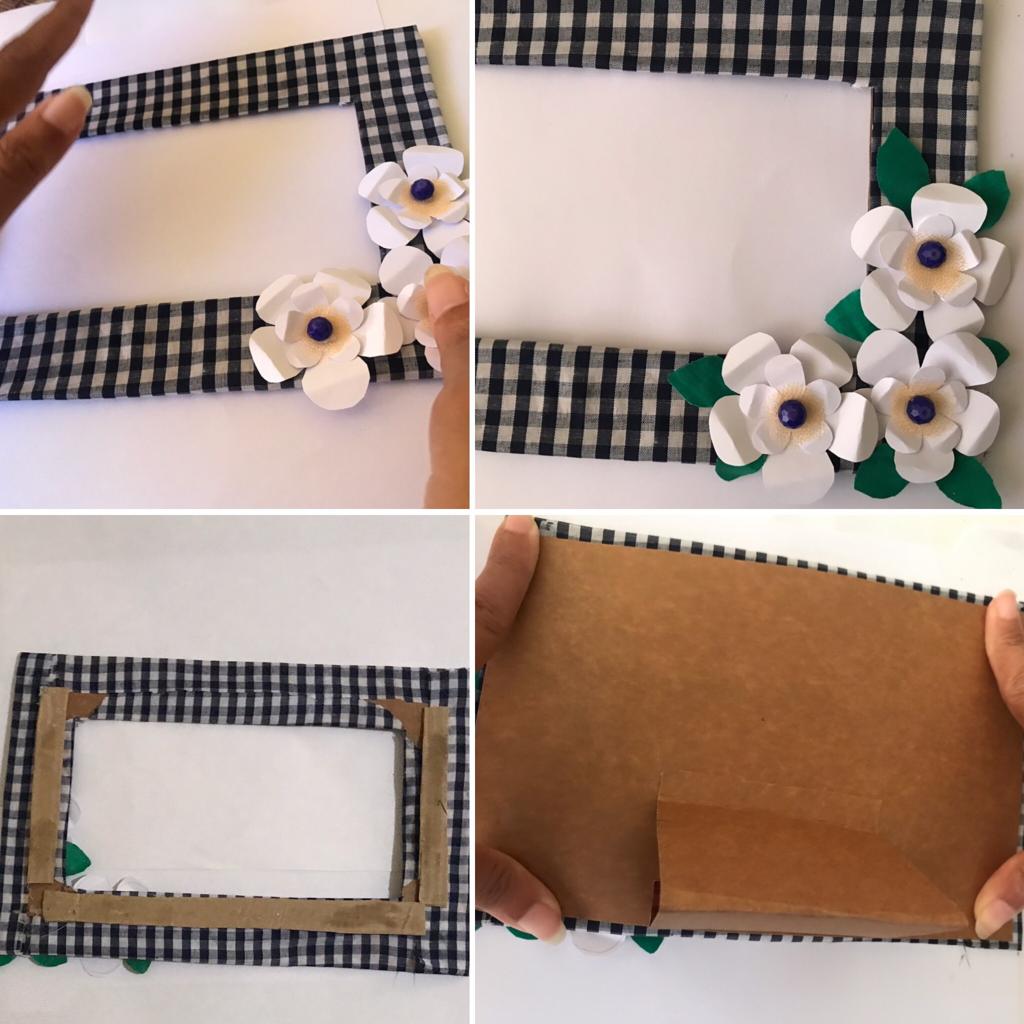
To finish, we glue the flowers and leaves to the front cover, we fix the three thick cardboard strips to the sides and at the bottom end (one centimeter later) of the rear edge of the front cover, as shown in the figure; we wait Let it dry and on top of them we apply glue to stick the back cover, that's how we are done.
Para finalizar pegamos las flores y las hojas a la tapa frontal, fijamos las tres tiras de cartón grueso a los lados y en el extremo inferior (un centímetro después) del borde posterior de la tapa frontal, tal como se observa en la figura ;esperamos que seque y encima de ellas aplicamos pegamento para pegar la tapa posterior, así hemos terminado.
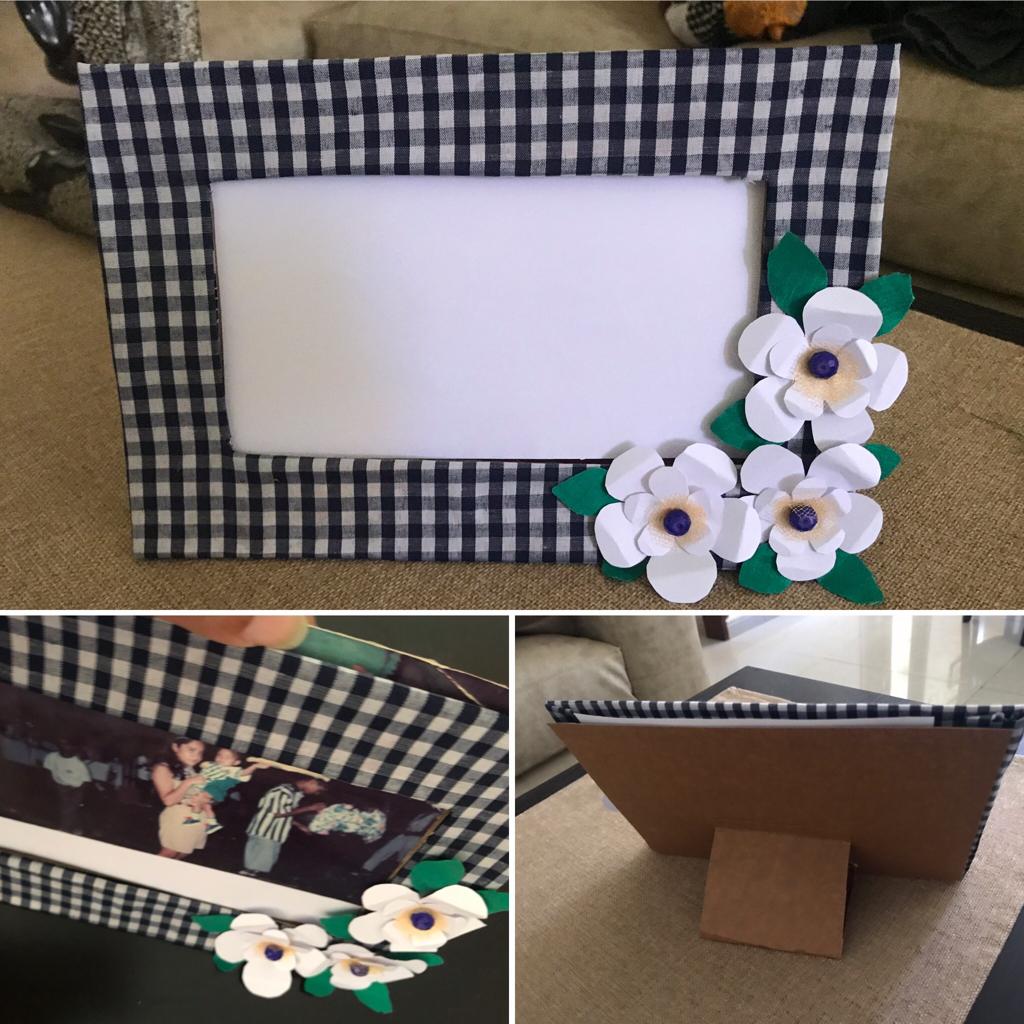
Friends, this beautiful and decorative portrait holder with cardboard flowers is a nice detail that will show those beautiful moments that we capture in a photo and we do not want to forget.
Amigos este hermoso y decorativo portaretratos con flores de cartulina es un lindo detalle que mostrará esos hermosos momentos que captamos en una foto y no queremos olvidar.
Until next time.
Hasta una próxima oportunidad.