Let's Build!
On today's agenda, I'll be demonstrating my DIY construction of a raised garden bed using prefabricated cement wall blocks.
See all the stages of construction photographed right here.
I'll even share some of the costs, challenges, and solutions I came up with along the way.
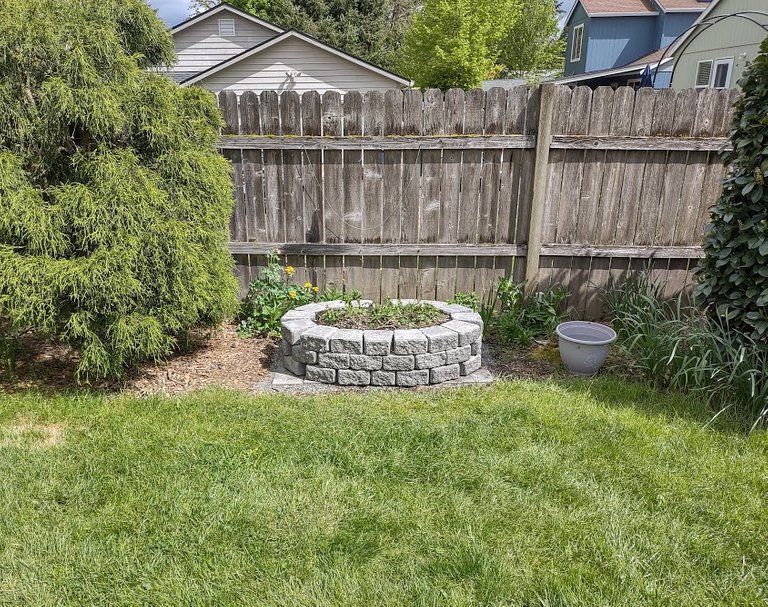
Table of Contents
- Goal
- Materials
- Foundation
- Wall Blocks
- Weed Barrier
- Drainage Layer
- Filling the Bed
Goal
My goal was to build a more permanent raised garden bed structure than what I have been currently using in past years.
Now that my family has been living on a piece of land we own, I have less fear of uprooting myself, and having to continue the path of perpetual container gardening. I am ready to sink my roots in and build a more permanent gardening hub to cultivate my passion for this gardening hobby I so enjoy.

August 18, 2020
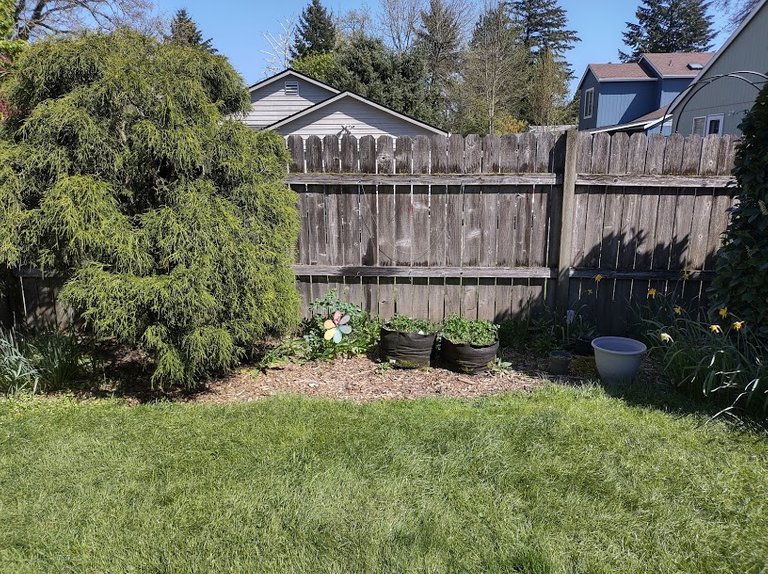
The grow bags I have been using in this area, although effective for raised bed gardening, they do present some problems for long term use. Number one, they are not very spacious, so overcrowding is a problem for gardeners like me who want to try out growing as many varieties as I can manage. And number two, they don't last much longer than 2 or 3 years before they start to sag or fall apart.
One year I tried replacing the soil and plants from an old grow bag to a new one, and it was a terrible mess I never wanted to repeat.
So I chose to build a permanent raised bed this year.
The new bed will be taller and more spacious, allowing for more varieties of vegetables to be planted.
Cement blocks should be sturdy and longer lasting than wood and steel frame style beds. It should be able to hold lots of weight. I would like to be able to sit on the ledge while tending the plants and soil.
Materials
- 16 Pavers, Rectangular
- 32 Roman Wall Blocks
- 16 Roman Wall Capstones
- 5 Gallons of Gravel (1/4 inch and smaller pieces)
- 1 Bag of Pea Gravel (35 lbs)
- Sand (1 gallon or so)
- Raised Bed Soil
Optional Recommended Materials:
- Binding Glue for Concrete Blocks
- Weed Barrier Cloth
- Window Screen Cloth
- DIY Raised Bed Soil Mixture: freshly dug earth, old potting soil and coconut coir, perlite, compost, sticks/logs/leaves (if you want to make a #hugelkultur), and pumice for drainage
Total Cost: $200 approx.
Having some materials from past projects keeps the cost down. I already had sand, soil, pumice, weed barrier, window screen, and 6 rectangular pavers. So in truth, I only spent about $180 as I recall.
And considering this will be a strong, permanent structure, I'll be saving time and money not having to repair rotten wood or rusted metal pieces used in cheaper raised bed projects.
The blocks are very heavy, so I made two separate trips to the Home Depot using my dad's van. It can really weigh down a vehicle, so do not try to do it all in one go unless you have help and a strong truck.
Here are the tools I recommend having available for this project.
Necessary Tools:
- Shovel or Spade
- Rake
- Leveling Tool
- Brush or Broom (for sweeping sand)
- Thick Work Gloves
- Caulk Gun (for gluing the capstones together)
- Tamping Tool (a thick 1 inch board is my cheap alternative)
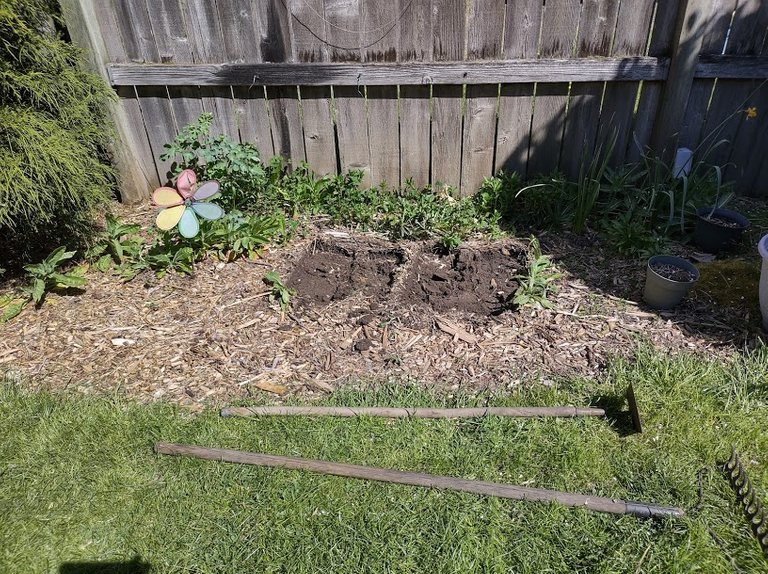
I also used a hoe to loosen the soil surface up, and it was working great at first, but mine broke in the first five minutes! Ugg! The old wooden pole just snapped inside the metal collar. Can I find somebody who can repair it? I prefer not buying a new one because I like using antique tools, usually made from better tool metal.
Below I'll talk about the foundation, and how I avoided wasting any money on a bulky and expensive tamping tool.
The tamping tool, I categorize it as one of those worthless tools that you use once, and then it collects dust, never to be used again, except for when you need it for an expensive landscaping project. This one too is almost the only thing that does the job right.
Foundation
With a design plan in mind, I was able to assemble this entire project without any nails, drilling, cutting, or even measuring.
The nice thing about these rectangular pavers is that the short side is one half the length of the longer side. Old pavers are close enough to the dimensions as brand new ones, so any old ones you might have can be used together in unison with new ones.
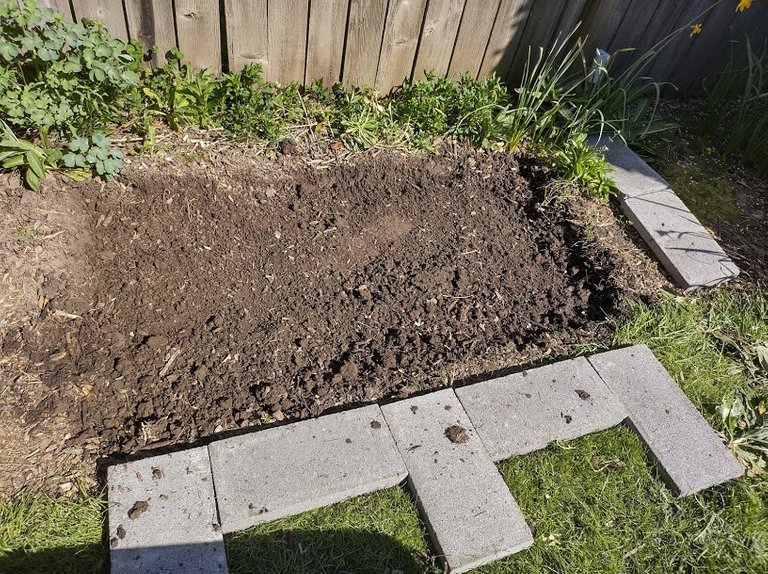
What I did was lay out the pavers around the outside of where I wanted the foundation to be, and I dug out an area of earth, attempting to make a flat, hard surface. Doing this on a hot day allowed for me to break through the soil without having to worry about it filling with water or becoming spongy.
Roughly four inches of depth seemed appropriate.
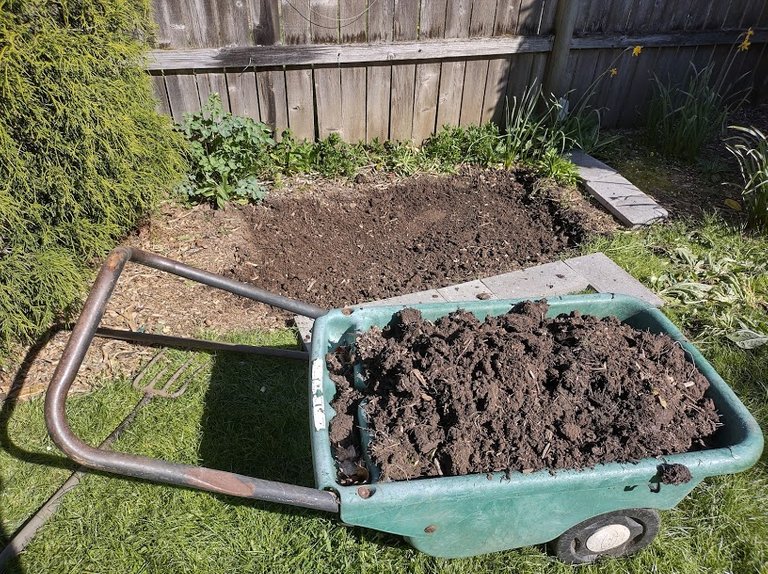
So I ended up with a wagon full of freshly dug soil. Some of this will be saved to fill the raised bed when I'm done, and some will go back on the ground to make a level surface.
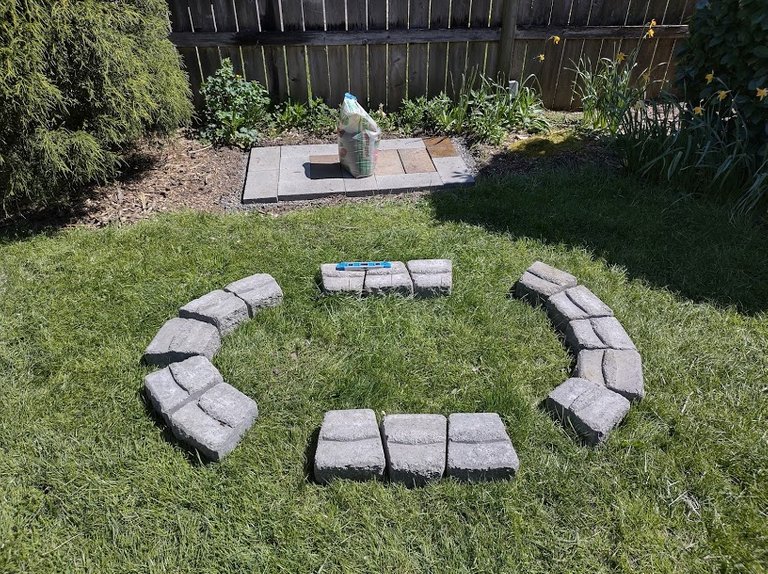
Before leveling the soil completely, what I do is test out laying the pavers out in place, and build the first level of blocks on top to find out how they will fit on the foundation.
First I make sure everything will fit on the area I dug up. Then I move the blocks and pavers nearby in the same arrangement. Visually this helps me identify where each block goes, and how many are remaining once construction begins.
To get the soil level, I did things the slow and steady way. Each paver placed directly on the soil was tested to see if it was level, and if it wasn't, I would add soil underneath any part that were sloping down.
Using a thick wooden board I would spank the soil hard to tamp it down, causing the loose soil to pat down into a flatter surface. If my soil didn't have so much clay content, this method might not work so well. Generally the soil flattened out, conforming to the flat shape of the tyrannical board I was slapping it silly with.
Eventually I got the soil flat enough where all the pavers could be placed directly on the dirt, and each piece tested as level and plumb. In total, this added about 1/2 inch to an inch of soil over the previous depth.
Next, I poured the paving gravel over the soil about a 1/2 inch to 1 inch thick, and I repeated the whole process again. Slow and steady. Pat everything down to make sure all parts are level.
Lastly, I added the remaining gravel from my bucket around the outside perimeter to frame the foundation. No need to pack it down, just hill up the same height as the cement, so it blends into the surrounding earth. This will become a drainage ditch to prevent water from pooling on top of the cement floor and surrounding soil.
By the time I was finished leveling out the pavers, I was beat tired and sunburnt in April (so unusual!), so I took the rest of the day off.
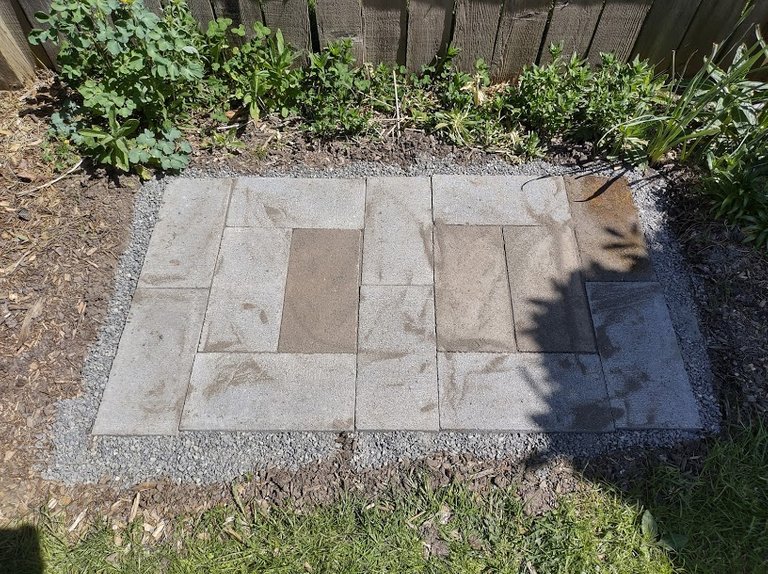
Notice the interlocking design. Soil will eventually erode away underneath the base. A strong long-wall edge pressed firmly against the connecting short-wall corners will prevent most tiles from sloping down into soil crevices.
The next day, the soil had likely compressed a bit more tightly from having the weight of the pavers settled on top for the past 24 hours. Patience and taking my time has always been my way. In this case, it means laying wall blocks on top should change the level of the foundation less drastically than if I had attempted to do this on freshly leveled soil.
Sand was brushed into the gaps between all the rectangular pavers. I know rain, ants, worms, moss, weeds will probably eventually wash away all the sand over time, but I still think this is a good material to use prior to building the wall, as it will cushion the paver blocks to prevent them from sliding around. When I was finished, walking on the foundation felt very stable, like a sidewalk.
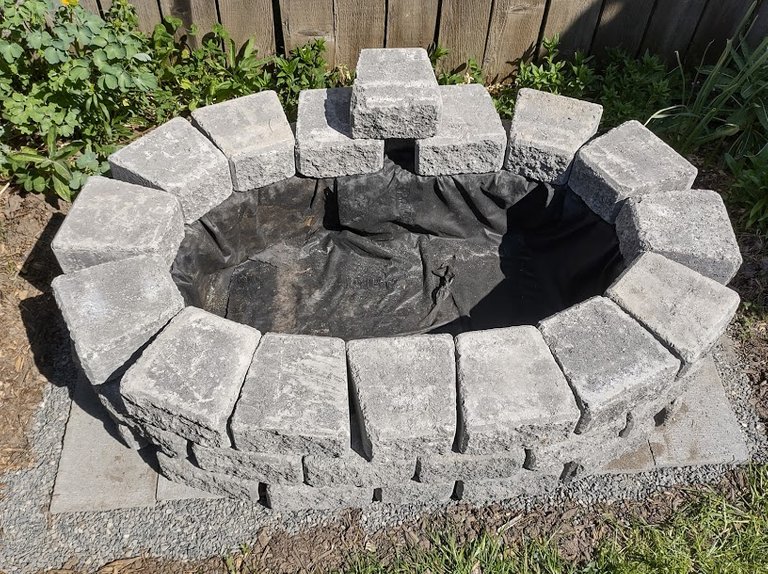
Wall Blocks
Building the actual wall, for me was the funnest part. Think legos, except each block is so heavy you need both arms to lift.
It's Minecraft, except in real life!
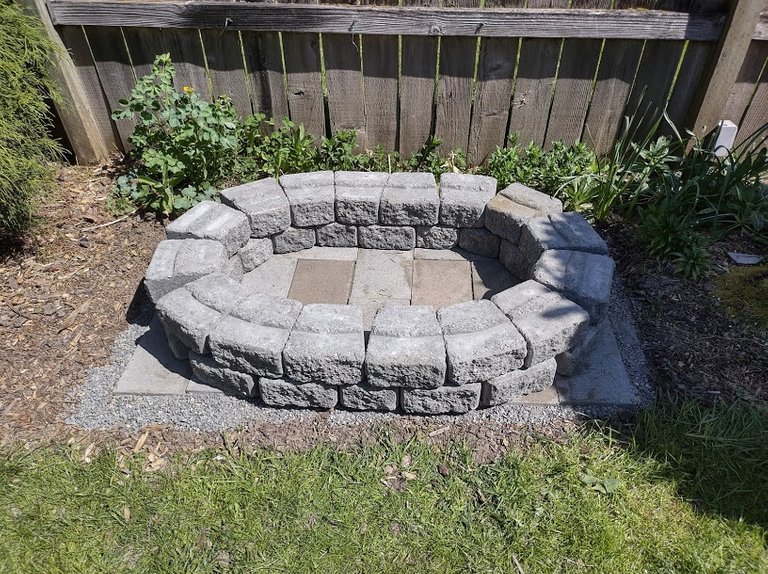
The Roman Wall blocks I chose for this project allow for a straight vertical wall and sharply arched sides. Even though I over-extended the arch beyond what the blocks are designed for, the dovetail grooves are angled in a way that allows for blocks to be rotated slightly off-center for the blocks above to have a little extra give if angled in either direction. Although this allowed for a lot of freedom when building the second level, I learned this freedom cost me when building up to the third level.
By the time I got to the third level, the blocks on top weren't fitting on around the arch so easily. The arch was too angled at some points, forcing blocks above to either be unlevel (can't have that!), or rotated off position in a such a way that there is less room for where the next block needed to fit. To get the full third level on, I discovered there wouldn't be enough room to fit that final block in. I'll have to leave a gap there for now, and think of a way to fill it in later on (maybe use a brick or stones, or find someone who can cut my block).
Hindsight is 20/20. Looking back, I should have built a bigger foundation or spread out the base tiles slightly. This would have allowed for me to build less of a sharp arch, following the natural arch shape of the bricks. Allowing some gaps between bricks on lower levels would have allowed for that last upper block to have some room to fit more easily.
Weed Barrier
This is an optional step, but I chose to add a weed barrier cloth because I know how invasive nearby tree and weed roots from the earth below can become. I spend a lot of labor clearing out tree roots from my other garden plots every year, and I don't want them getting into my nicer raised garden bed at all.
To install the weed barrier, it takes some origami folding skills.
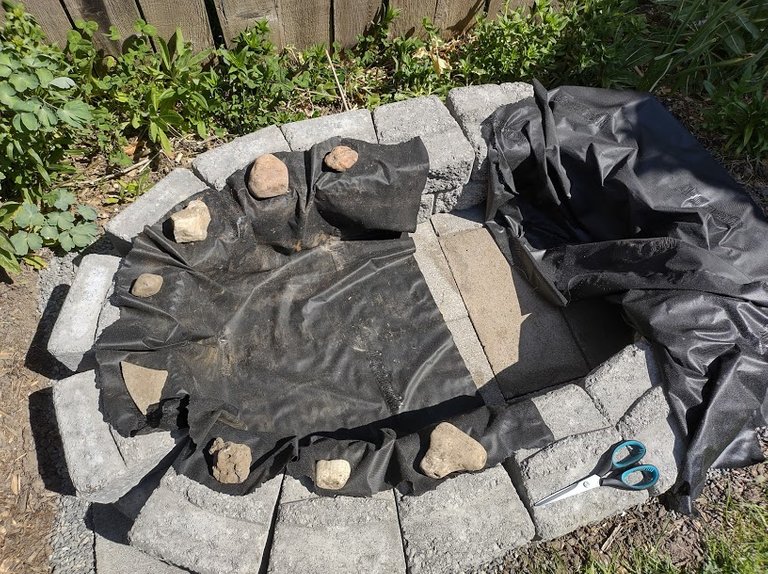
Use a rock to hold the edges up along one section of the wall, and press the cloth in folds along the next section of wall until it is flat, and then proceed around until its fully tight along the inside. Cut off the excess cloth. Do the same process to conform another piece of cloth over the opposite side of the wall.
Once the third layer of capstones are placed on top, it will make the weed barrier invisible from the outside.
Lastly I glued the capstones down. This will help prevent the top from wobbling a little bit. The top is most susceptible to be knocked over, because it only has its own weight holding it in place, whereas the blocks below have more force against all sides holding them solidly in place. I glued the capstones directly onto the weed barrier cloth edge, as well as any other cement surface the underside might touch. A wet rag is used to clean up any excess glue.
Drainage Layer
Even though the weed barrier from the previous step should allow plenty of good drainage, I chose to take it a step further and build an additional layer to maximize drainage. So this is an optional step.
In my climate region, it rains so much, soil tends to become perpetually soggy and heavy with clay deposited by minerals in the rain.
Since I'm going to be reusing some of the soil I dug up, it is very heavy with clay, and I will need all the drainage assistance I can get. Good drainage will also help the cement blocks dry out in Winter, so they don't crack when it gets icy.
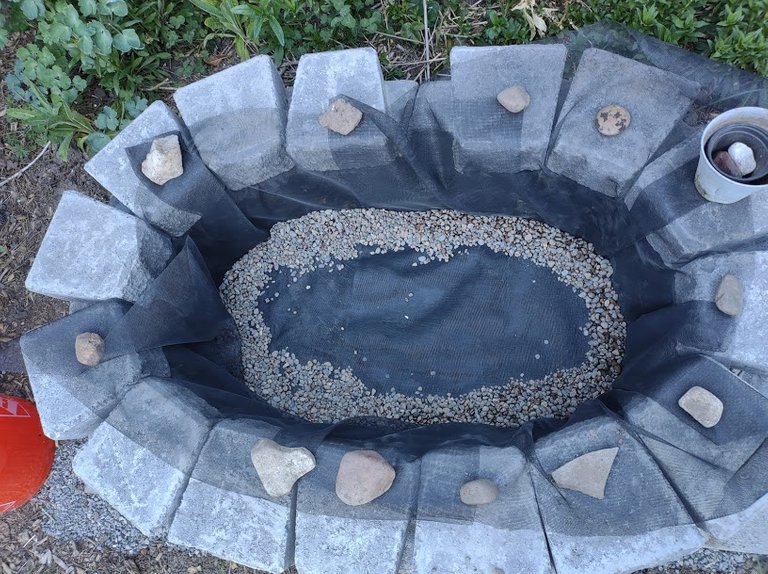
Window screen cloth was folded around the inside walls, and I used pea gravel to help hold the floor layer flat. Screen cloth doesn't bend as easily because there is flexible wire inside coated in an elastic plastic. The pea gravel will help press the screen into the deep bottom corners inside and mold it into shape.
Fold the cloth around the edges as best as possible to follow the vertical wall edge up over the top. I took me two pieces of screen material to fill all the inside of the bed.
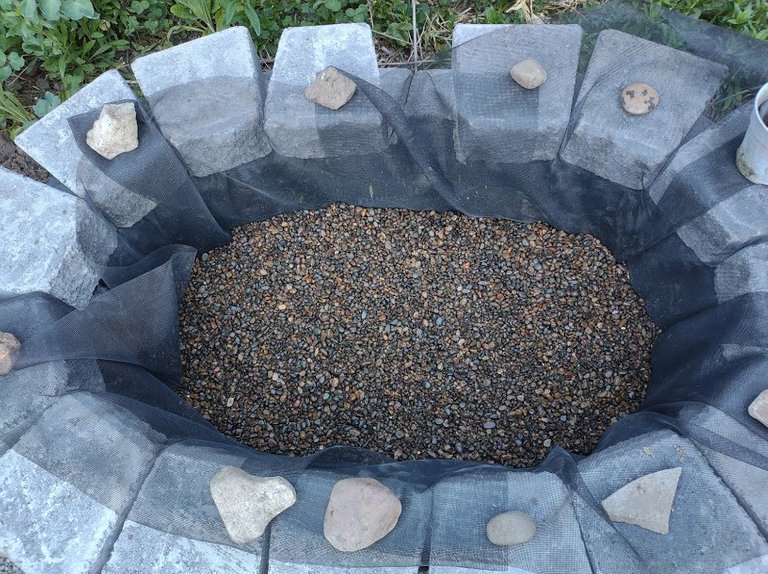
I ended up dumping the entire bag of pea gravel to fill the entire base of the bed. This became approximately an Inch-and-a-Half of pea gravel.
Pea gravel is ideal for allowing water to wash through quickly. Since pea gravel tends to retain more air than moisture, it should prevent tender vegetable roots from boring down deeply through the screen and and weed barrier.
The nice thing about a layer of smooth rocks is that even with the muddy, damp soil piled on top, and heavy clays sealing up the air pockets, nothing in the soil can ever wash out the rocks, which will continue to function as intended to assist in draining water and allow the cement blocks and soil to dry.

Using some leftover branches I cut up from the previous ice storm we had, I laid them in the center. Even though these branches are not super thick logs, it will still remain as a somewhat temporary #hugelkultur, promoting beneficial fungus, microbial life, acidic ph, and an additional screening layer of drainage for the heavier soil to sit on.
As more and more parts of the hügelkultur breaks down into compost, it will provide additional organic fertilizer resources for the healthiest vegetables, adapted with the deepest taproots to take advantage of.
Filling the Bed
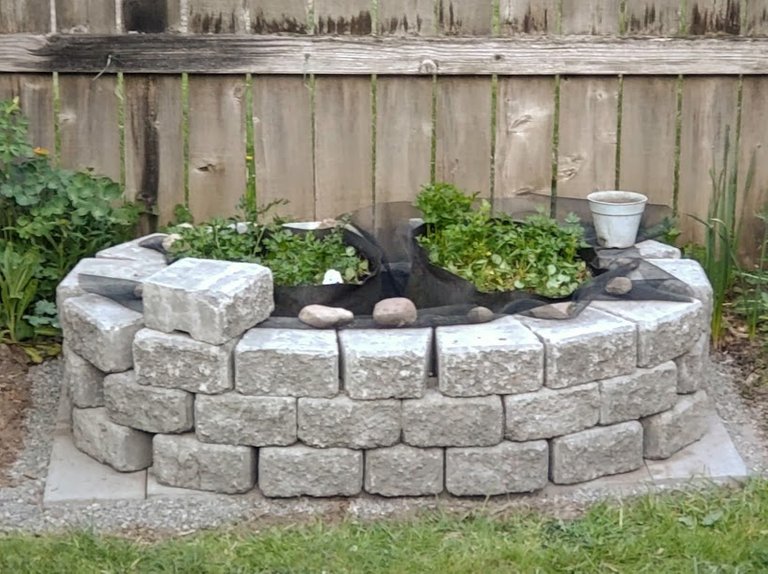
One convenience about transitioning from grow bags to a grow bed is that
I was able to keep all the plants and soil in tact, as if performing a normal transplant. All the soil inside the bags gets to be reused inside the new bed.
By placing the two grow bags inside, it was fairly obvious how much remaining soil I would need.
I had another 5 gallon bucket mostly full of pumice, so I used a garden trowel to pile the pumice stone around the perimeter wall inside. Yeah, another layer of drainage.
Unlike pea gravel though, pumice also retains the perfect amount of moisture and air to help prevent plant roots from rotting, suffocating, or drying out. Pumice is my favorite soil additive, as it corrects any imbalance between the air and water in the soil when severe weather and temperature changes occur.
Pumice and perlite are both volcanic rocks, but pumice is heavier and doesn't tend to float away in the rain.
With a wagon half full of natural clay dirt I dug up under the foundation, I mixed in a medium sized bag of perlite, and that helped to lighten the density of the soil mixture quite a bit.
I peeled the entire contents of the grow bags out, with little mess, keeping each as a single root ball. So I fit them into the grow bed, and filled in the gaps with the perlite and earth mix.
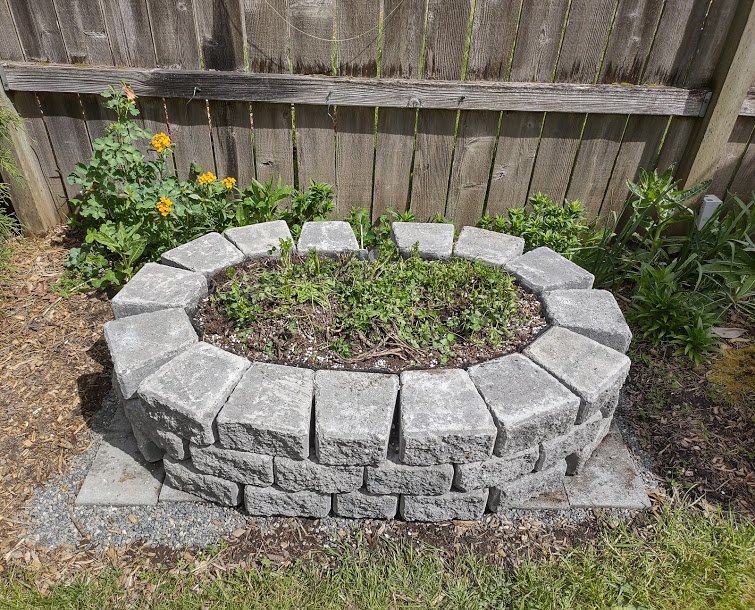
As soon as the bed is full of soil to the desired height, I trimmed off the excess screen material to the same height as the soil. This makes the screen practically invisible. I'll be able to dig into this soil as much as I want without any worry of accidentally cutting through the weed barrier or screen.
Mostly the only things growing right now are green cover crops leftover from winter: parsley, arugula, and lots of clover. I have been chopping the greens aggressively over the past weeks, and the deep roots are quickly adapting to the new soil eager to push out new greens. The leaf droppings are helping to mulch and cultivate the disturbed soil.
With Spring temperatures quickly warming into more Summer-like extremes, the plants currently in the bed are already acclimating themselves to rebuild and adapt into a growth mode. By May, I hope this bed will be healthy enough to welcome in some of my fully hardened off transplants of healthy tomatoes and peppers.
Thank you all for viewing my article about building a raised garden bed.
It has been a while since I have posted or shared anything. It is a blessing to have you here with me.
Follow me if you haven't already, and you won't miss out on anything I post in my blog. I often post helpful articles documenting my learned wisdom by taking exciting risks and making human mistakes in gardening and training young bonsai trees.
Post Beneficiaries:
- 1% @mendezand
- 1% @cryptopie
This is my way of thanking each of you for your friendship and support. By sharing my talents on Hive, I can also share to help with your needs.
Let my success also grant you some happiness too.
#planter #soil #garden #garden-ideas #cement #cement-blocks

Looks really neat, may have to pinch this idea for my garden in future! Was playing with the idea of a fake well ornament but this gives the same shape and effect while still being a useful planter 😄
Stone would certainly make for a more attractive design. With less concern for costs, a poured slab with a brick wall and faux stone exterior would be super sleek, and stand forever as a gorgeous monumental success.
I have a hard time justifying to myself any expensive projects that don't eventually pay me back with higher rewards or savings. Building a $1000 planter just to grow $1 tomatoes feels like a waste to me.
Good luck! I hope you choose something that brings happiness.
It's a whole process of construction for the garden, it's not a simple job, the well looks very nice, you can plant a few herbs in there.
This is the second comment that my planter looks like a well. Maybe I should add a trellis with a hanging water bucket to embrace the concept.
Maybe it's just me that has this idea in my head, I'm really sorry!
No worries. I love the reading different people's creative perceptions. Thank you.
What an excellent tutorial on how you did this! It came out really well!
I love it!
This is a complete process of gardening.
Nice job!! This was a lot of work -- but a labor of love. How big is it? Looks like it will accommodate quite a few plants. Also, the design of the pavers turned out very attractive. That would make a beautiful little "patio' for a bistro table and chairs tucked into a peaceful area of the yard.
Brick, cement, stone, and tile have always fascinated me in the various geometric surface designs, textures, and structures they can be formed into. Wood and steel always looks more industrial to me, because there is really only one way to build with it correctly, making all design far less unique.
The buried roof clay tiles at the Portland Japanese Gardens are among my favorite creative designs for making an interlocking ground surface. Even when a tile snaps. You would never know, and it would not lose strength, because 99% of the tile, except the side edge wall is sandwiched tightly in the subterranean earth layers.
Beautiful 😍