Español
English

Hola mi gente linda de Hive, hoy les traigo una manualidad muy especial para mi, porque es algo que estoy creando para el cumpleaños de mi hija que será dentro de poco tiempo, y es algo que estoy segura que les va a gustar mucho, aunque realmente lleva bastante tiempo para hacerlo, pero el resultado es bellísimo.
Hello my beautiful people of Hive, today I bring you a very special craft for me, because it is something I am creating for my daughter's birthday that will be soon, and it is something that I am sure you will like a lot, although it really takes a lot of time to do it, but the result is beautiful.
MATERIALES
MATERIALES
MATERIALS
MATERIALS
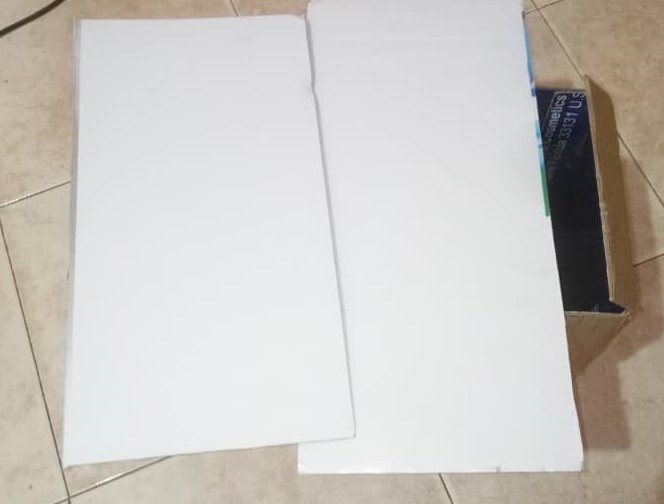
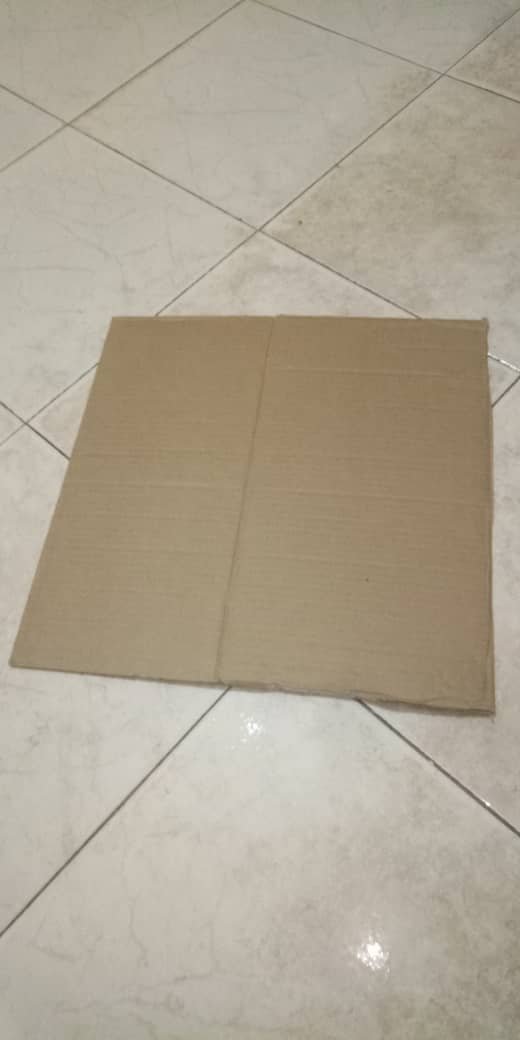
- Cajas de cartón
- Tijeras
- Exacto
- Pega
- Lápiz
- Regla
- Pintura al frio de diferentes colores
- Cartulina de colores y metalizada.
- Engrapadora
- Ganchos de ropa
* Cardboard boxes
* Scissors
* Scissors
* Glue
* Pencil
* Ruler
* Cold paint of different colors
* Colored and metallic cardboard.
* Stapler
* Clothes hooks
Pasos para hacer la base del mostrador
Pasos para hacer la base del mostrador
Steps to make the counter base
Steps to make the counter base
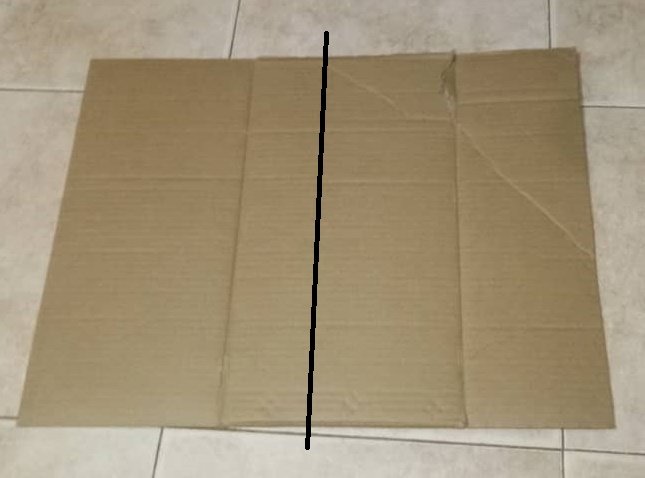
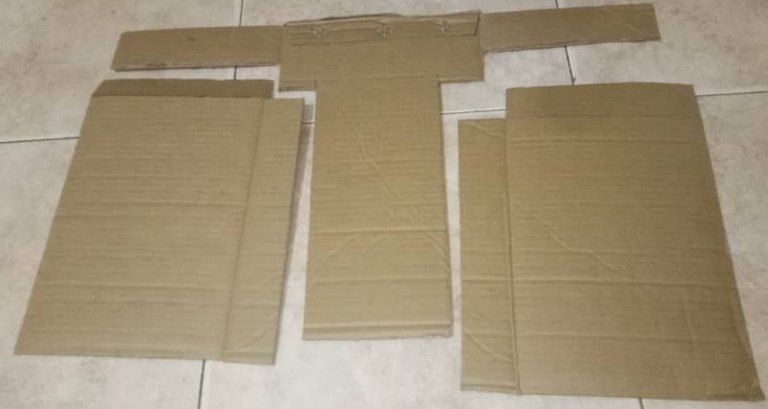
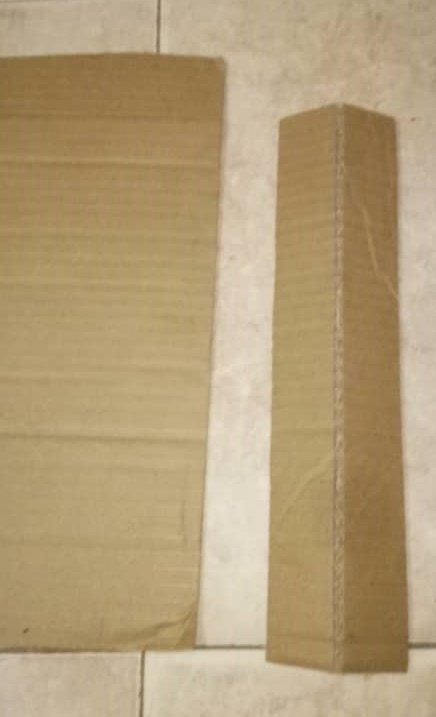
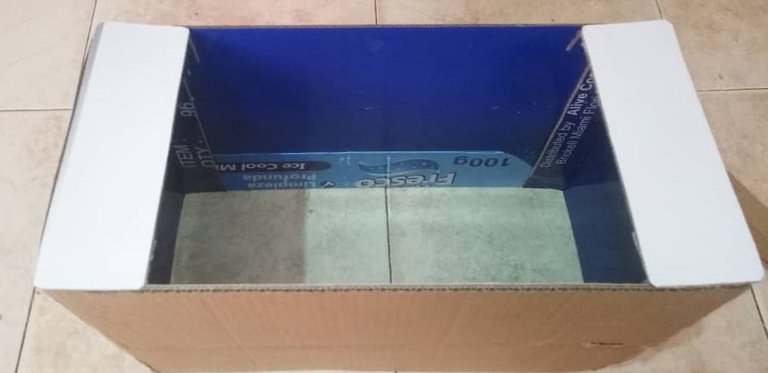
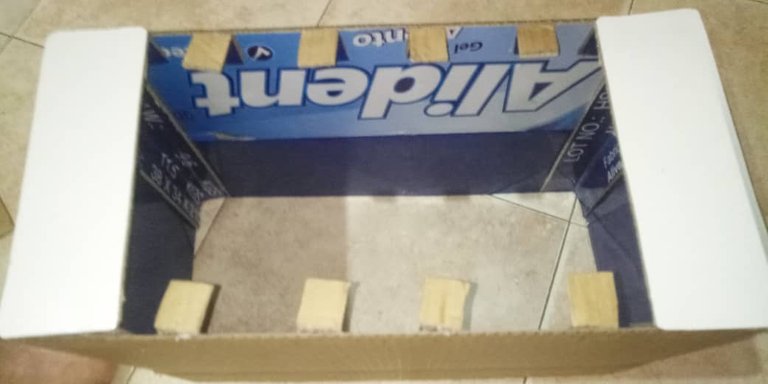
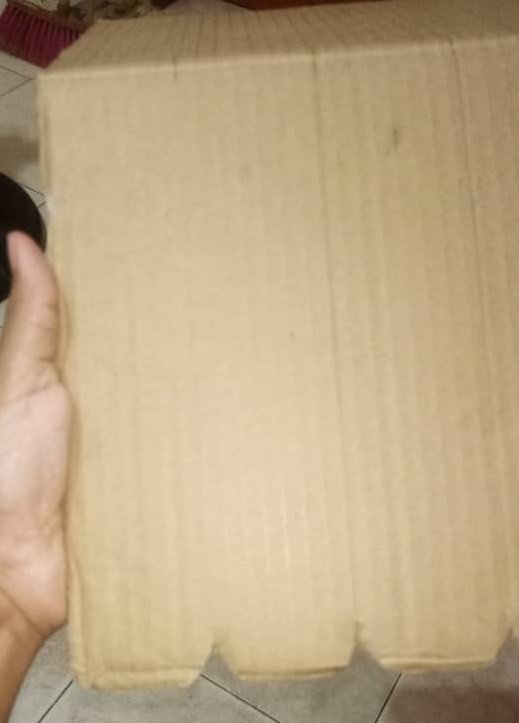
Paso 1: Lo primero que hago es recortar 4 piezas de cartón para formar la base, primero las dos tapas de arriba y la de abajo, tienen medidas de 25 cm de alto por 38.5cm de ancho.
Step 1: The first thing I do is to cut out 4 pieces of cardboard to form the base, first the two tops and the bottom, measuring 25 cm high by 38.5cm wide.
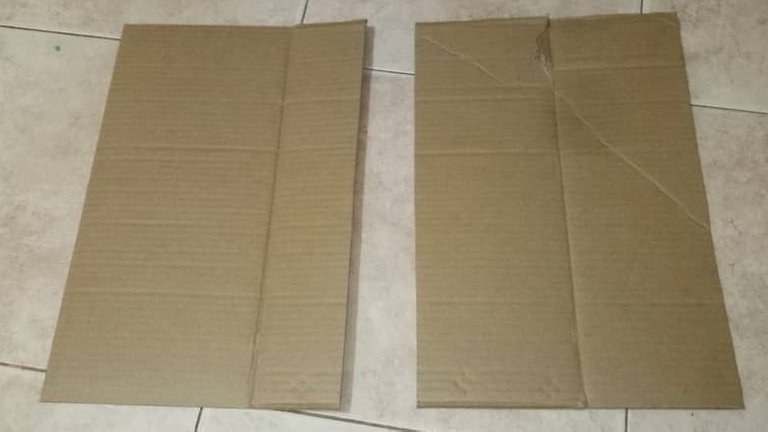
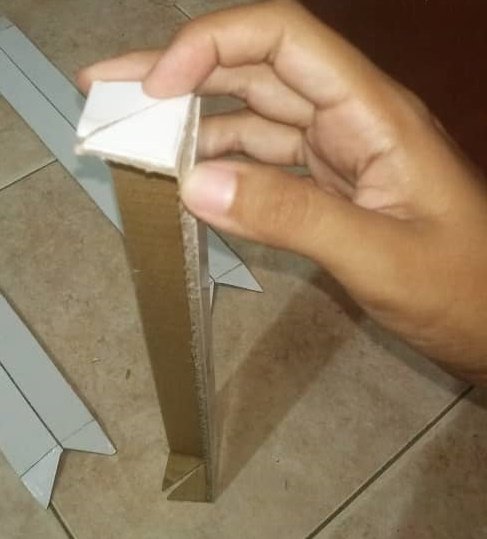
Paso 2: El segundo paso es recortar las dos tapas de los laterales, cada una tiene de alto 17 cm y de ancho 24 cm, a estas les deje dos pestañas, que marque con unas líneas negras, pero por error me faltaron dos pestañas, que más adelante te explico como la hice.
Step 2: The second step is to cut out the two side covers, each one has a height of 17 cm and a width of 24 cm, I left two tabs, which I marked with black lines, but by mistake I missed two tabs, which I will explain later how I did it.
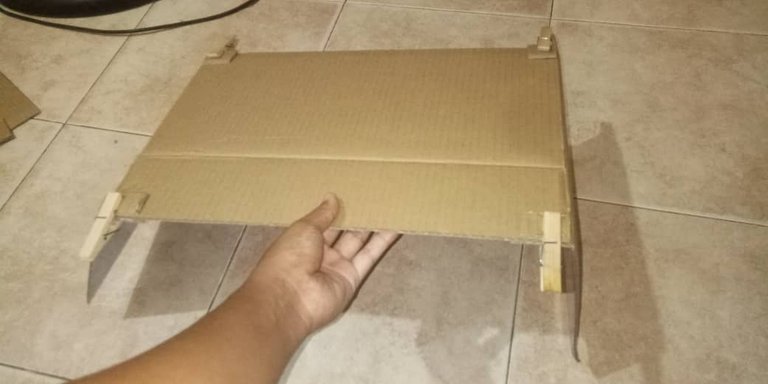
Paso 3: El tercer paso es pegar las 4 piezas, yo lo que hice fue colocar pegar y aguantar las uniones con ganchos de ropa, para que se pegara más rápido.
Step 3: The third step is to glue the 4 pieces together, what I did was to glue and hold the joints with clothespins, so that it would stick faster.
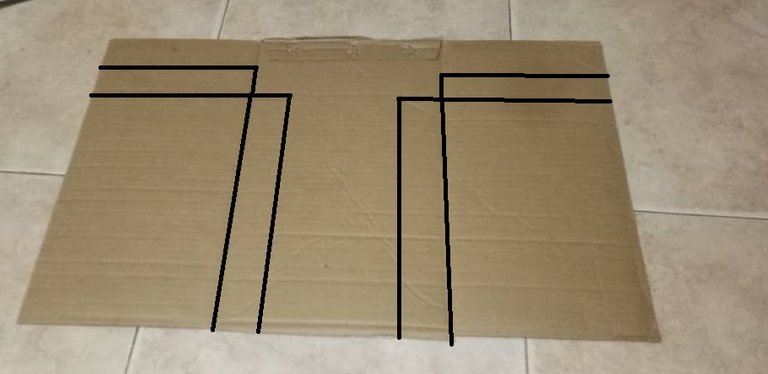
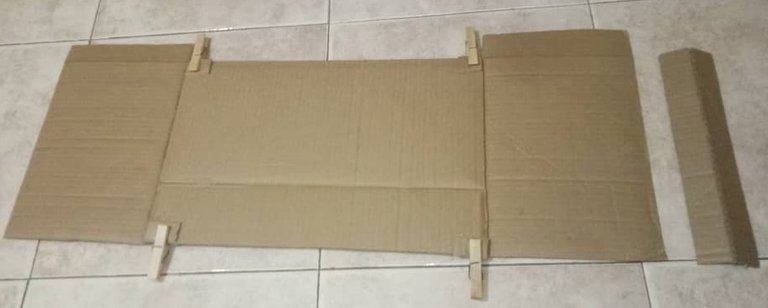
Paso 4: Luego de pegar las 3 primeras piezas, hice dos pestañas adicionales y tiene por medidas 8 cm de ancho por 25 cm, lo que haces es remarcarla por la mitad con el exacto o la tijera para que puedan doblarla, es mucho más fácil.
Step 4: After gluing the first 3 pieces, I made two additional tabs and it measures 8 cm wide by 25 cm, what you do is to mark it in half with the exacto or the scissors so they can fold it, it is much easier.
Paso 5: Luego por ultimo pegas esas dos pestañas a la ultima tapa, para terminar de completar la base, te va a quedar un rectángulo, y lo vas aguantar con los ganchos para que se peguen más rápido.
Step 5: Then finally glue those two tabs to the last lid, to complete the base, you will have a rectangle, and you will hold it with the hooks so that they stick faster.

Haciendo las tablas
Haciendo las tablas
Making the tables
Making the tables
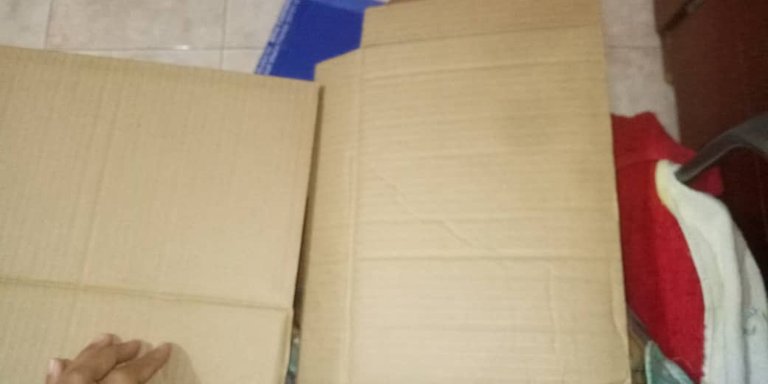
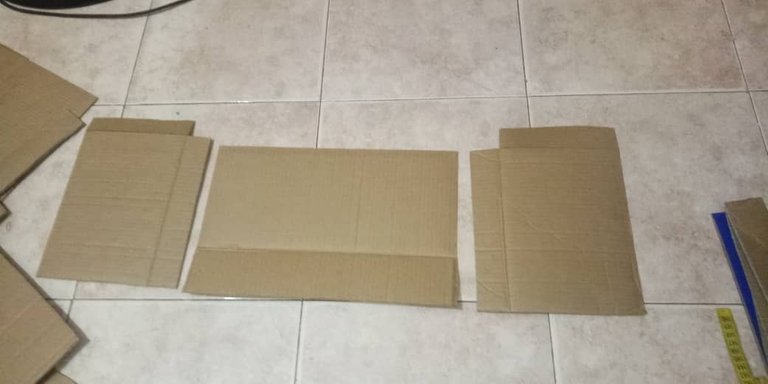
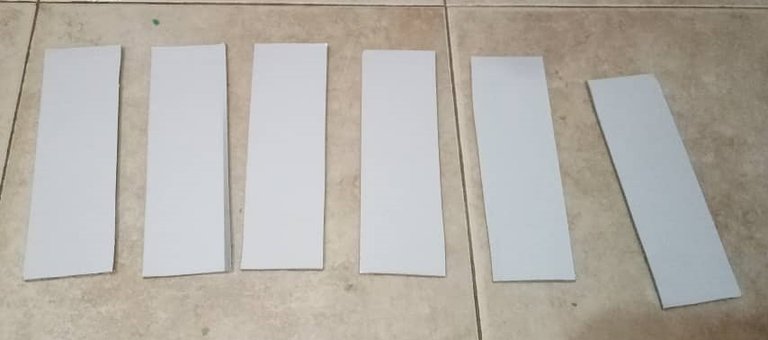
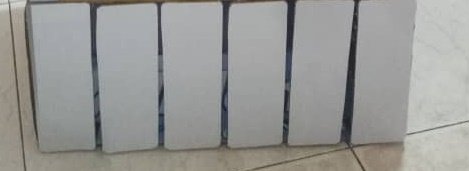
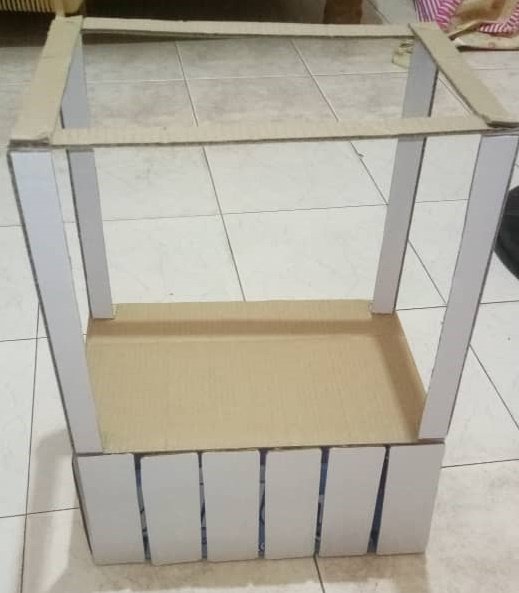
Paso 1: Una de las cajas d cartón que mi mamá encontró venia de color blanco, así que fue buenísimo, porque me ahorraba la pintada. Lo que hice fue recortar 6 tablitas que irían en la parte del frente del mostrador, las puedes colocar en forma horizontal o vertical, como mejor te guste.
Step 1: One of the cardboard boxes my mom found came in white, so it was great, because it saved me the painting. What I did was to cut out 6 small boards that would go on the front of the counter, you can place them horizontally or vertically, as you like.
Paso 2: Recorte 6 tiras de 4,5cm cada una por 19 cm de alto.
Step 2: Cut 6 strips of 4.5 cm each by 19 cm high.
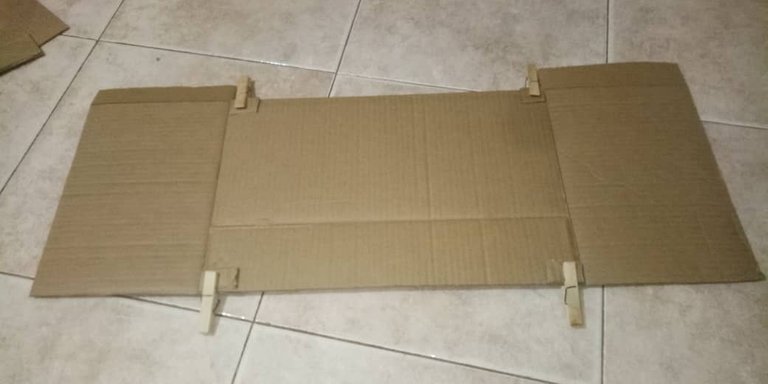
Paso 3: Luego comencé a pegarlas, primero pegue los dos de la esquina, y para poder pegar el resto, tuve que pegar pequeños soportes, porque las tablas me quedaron muy justas y no alcanzaban a pegar bien de las orillas.
Step 3: Then I started to glue them, first I glued the two corner ones, and in order to glue the rest, I had to glue small supports, because the boards were too tight and I couldn't glue them well from the edges.
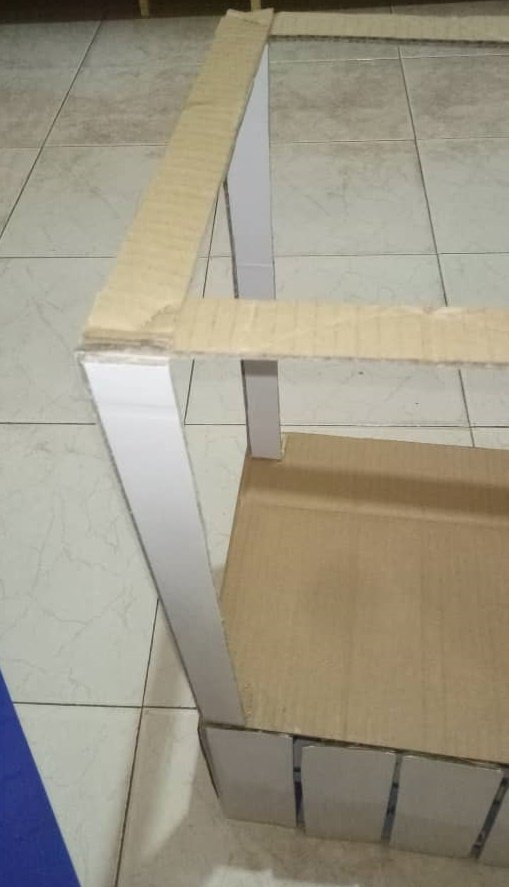
Paso 4: Los soporte los coloque con los ganchos de ropa, coloque cuatro arriba y 4 abajo, las medidas era de 1,5 cm de ancho y de 5 cm de alto, y las doble a la mitad para pegarlas con la pega.
Step 4: I placed the supports with the clothes hooks, I placed four above and four below, the measures were 1.5 cm wide and 5 cm high, and I folded them in half to glue them with the glue.
Paso 5: Luego espere que secaran y comencé a pegar las tablitas.
Step 5: Then I waited for them to dry and started gluing the boards.

Haciendo los soportes del techo
Haciendo los soportes del techo
Making the roof supports
Making the roof supports
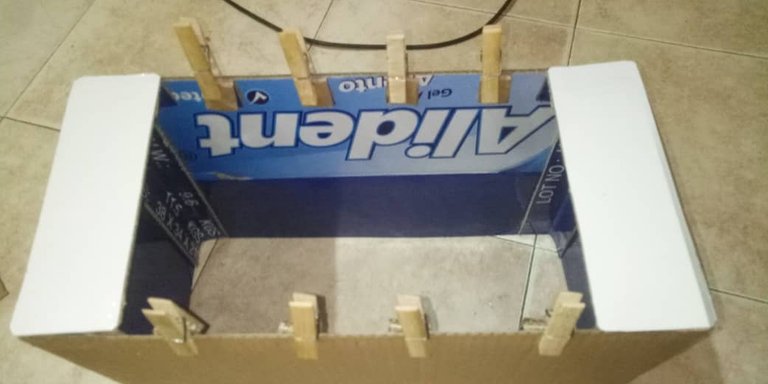
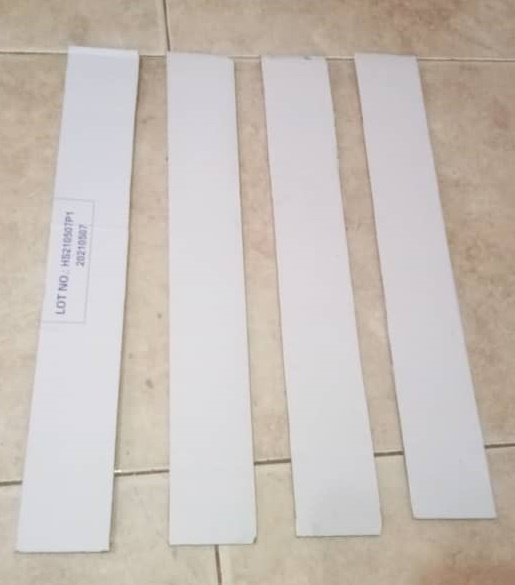
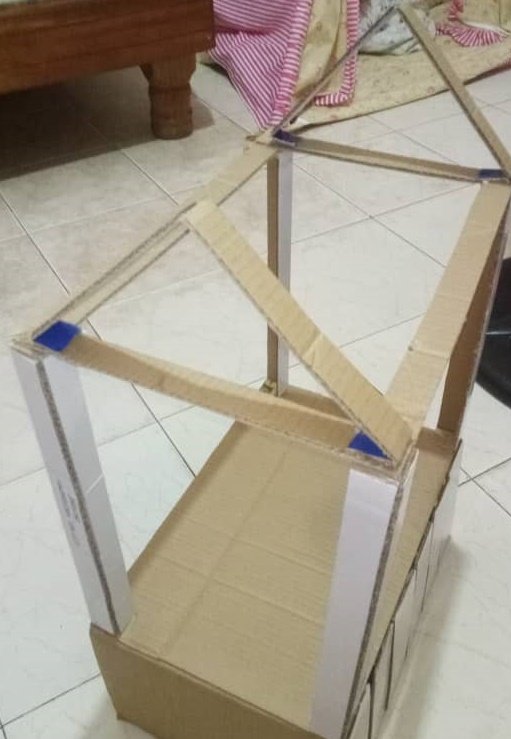
Paso 1: Lo primero que hice fue utilizar el mismo cartón blanco y recorte 4 tiras, para el soporte del techo, cada tira media 6 cm de ancho por 39 cm de alto, y luego la doble a la mitad cada una, remarcando con el exacto, pero sin cortarlas por completo.
Step 1: The first thing I did was to use the same white cardboard and cut out 4 strips, for the ceiling support, each strip was 6 cm wide by 39 cm high, and then folded in half each one, marking with the exact, but without cutting them completely.
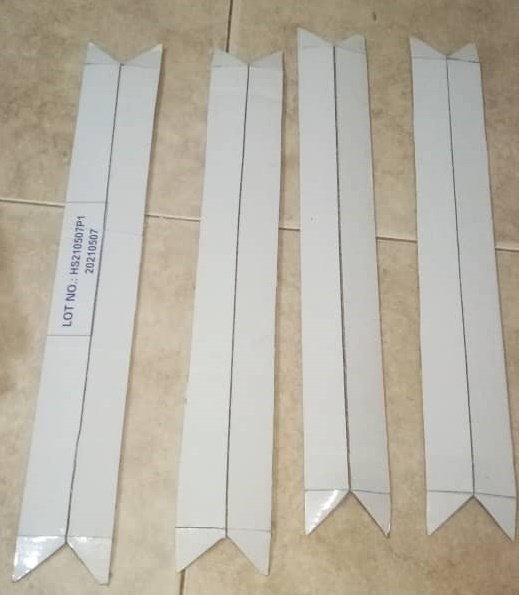
Paso 2: Luego lo que hice fue marcar 3 cm de cada punta, para luego recortarla en la mitad en forma de triangulo, para poder doblar la tira.
Step 2: Then what I did was to mark 3 cm from each end, and then cut it in half in the shape of a triangle, to be able to fold the strip.
Paso 3: Luego lo que hice fue engrapar todas las puntas, las uní como se ven en la imagen y las engrape y luego las pegue en cada esquina de nuestra base de cartón del mostrador, además de colocarle pega también las engrape, para que fuera más fácil de pegar y para mayor soporte. Solo pude engrapar dos de ellas, las otras dos se pegaron solo con pega.
Step 3: Then what I did was to staple all the ends together, I joined them as shown in the picture and stapled them and then glued them on each corner of our cardboard base of the counter, in addition to placing glue I also stapled them, to make it easier to glue and for better support. I was only able to staple two of them, the other two were glued with glue only.
Paso 4. Para el paso 4 lo que hice fue recortar 4 tiras de 3 cm de ancho, para unir estos soportes, y lo que hice fue graparlas, fue mucho más fácil. Y lo ultimo fue usar dos tiras de 3 cm de ancho para hacer una especie de triangulo, donde vamos a colocar el techo. Solo doble a la mitad cada tira y le deje dos pestañas para pegar de cada base.
Step 4. For step 4 what I did was to cut 4 strips of 3 cm wide, to join these supports, and what I did was to staple them, it was much easier. And the last thing was to use two 3 cm wide strips to make a kind of triangle, where we are going to place the roof. I just folded each strip in half and left two tabs to glue from each base.
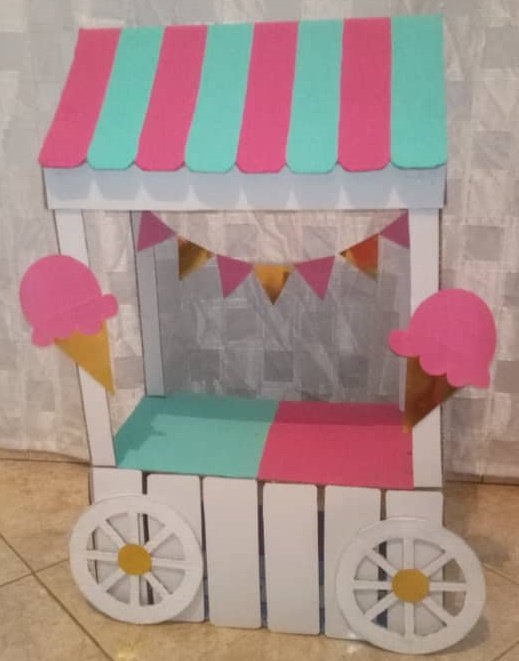
Armando el techo, las ruedas, y pintando.
Armando el techo, las ruedas, y pintando.
Assembling the roof, wheels, and painting.
Assembling the roof, wheels, and painting.
Paso 1: Lo primero que hice fue utilizar una de las tapas de la caja que quedaron suelta, sus medidas eran de ancho 38,5 cm y de alto 39 cm.
Step 1: The first thing I did was to use one of the box lids that was loose, its measurements were 38.5 cm wide and 39 cm high.
Paso 2: Luego lo que hice fue colocar las divisiones del techo, haciendo una especie de borde en forma de media luna, cada división tenia 4.5 cm, en total fueron 8 barras, que luego íbamos a pintar en dos colores.
Step 2: Then what I did was to place the divisions of the roof, making a kind of crescent-shaped border, each division was 4.5 cm, in total there were 8 bars, which then we were going to paint in two colors.
Paso 3: Luego lo que hcie fue pegar el techo a la base triangular que ya habíamos hecho, lo que hice fue graparla en las puntas y listo.
Step 3: Then what I did was to glue the roof to the triangular base that we had already made, what I did was to staple it at the ends and that was it.
Paso 4: Luego le termine colocando el color para darle más vida al mostrador.
Step 4: Then finish by adding color to add life to the countertop.
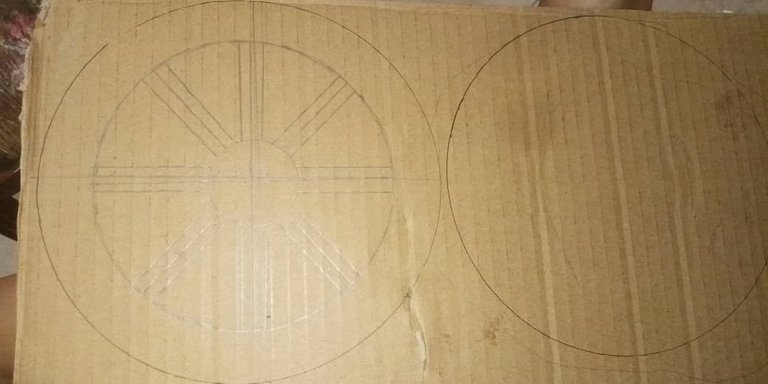
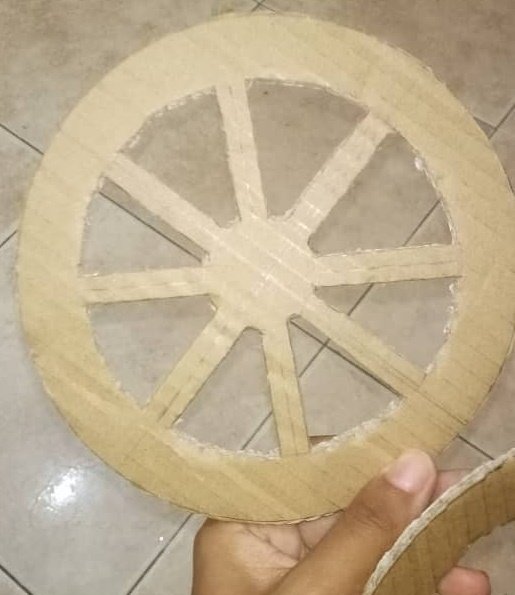
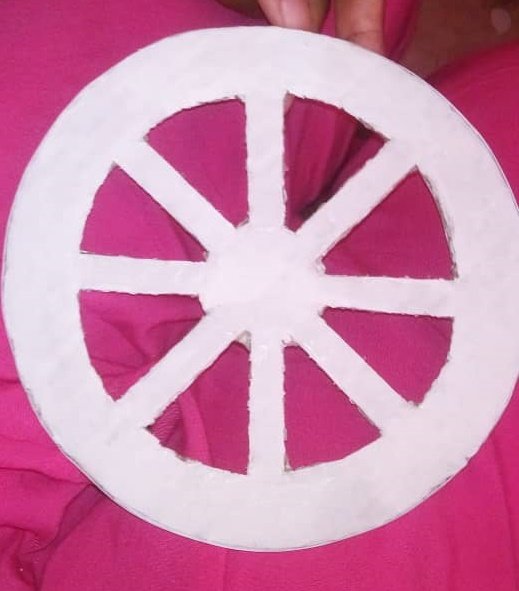
Paso 5: Para agregar más detalle, hice unas ruedas, lo que hice fue agarrar una taza redonda y marcarla con lápiz y darle la forma de rueda, con sus espacios. Todo lo hice con el exacto, fue un poco difícil, pero lo logre. Por ultimo las pinte de color blanco y les coloque un circulo dorado en el medio de la rueda.
Step 5: To add more detail, I made some wheels, what I did was to take a round cup and mark it with a pencil and give it the shape of a wheel, with its spaces. I did it all with the exact one, it was a little difficult, but I did it. Finally I painted them white and placed a golden circle in the middle of the wheel.
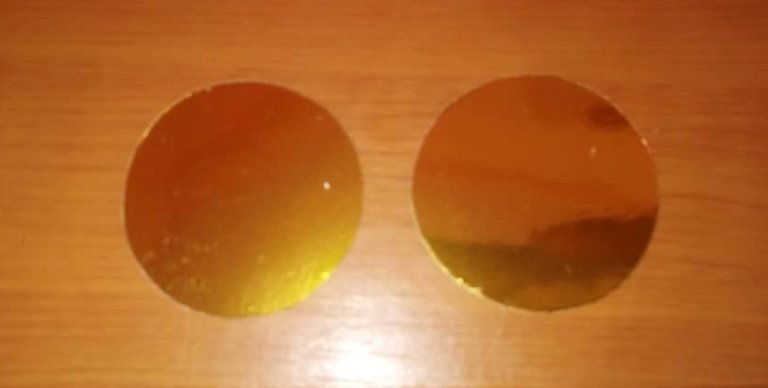
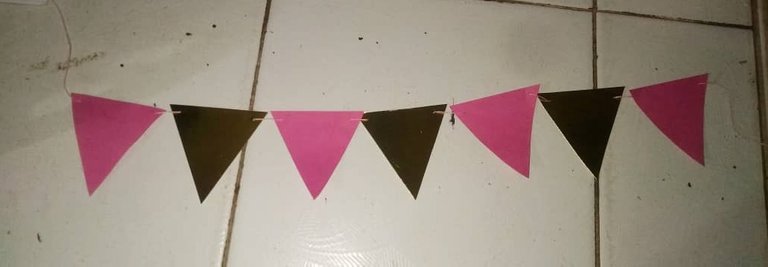
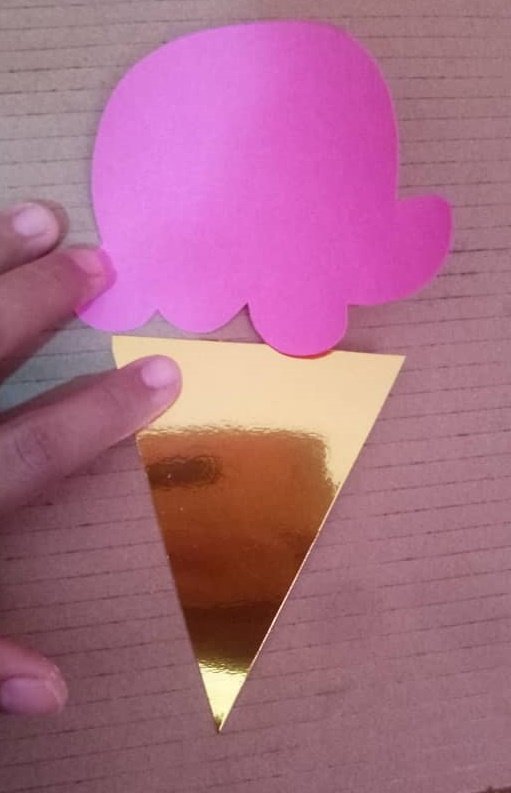
Paso 6: También hice unos banderines muy pequeños de 5 cm de alto, use cartón rosado y dorado para hacerlo, también hice dos pequeños helados, para el cono utilice el cartón dorado y para la bola de helado use el cartón rosado. Los helados los puse adelante del mostrador en las barras de al frente y los banderines los puse en las barras de atrás del mostrador.
Step 6: I also made some very small pennants of 5 cm high, I used pink and gold cardboard to make them, I also made two small ice cream cones, for the cone I used the gold cardboard and for the ice cream ball I used the pink cardboard. I put the ice cream in front of the counter on the front bars and the pennants on the back bars of the counter.
Por ultimo coloque un soporte extra en las barras de atrás, porque parecía que se iba de lado por el peso del techo, así que agarre una tira blanca de 3 cm de ancho y la engrape en la parte de atrás. El resto del mostrador lo puede pintar de blanco.
Finally I put an extra support on the back bars, because it looked like it was going sideways because of the weight of the roof, so I grabbed a 3 cm wide white strip and stapled it to the back. The rest of the counter can be painted white.
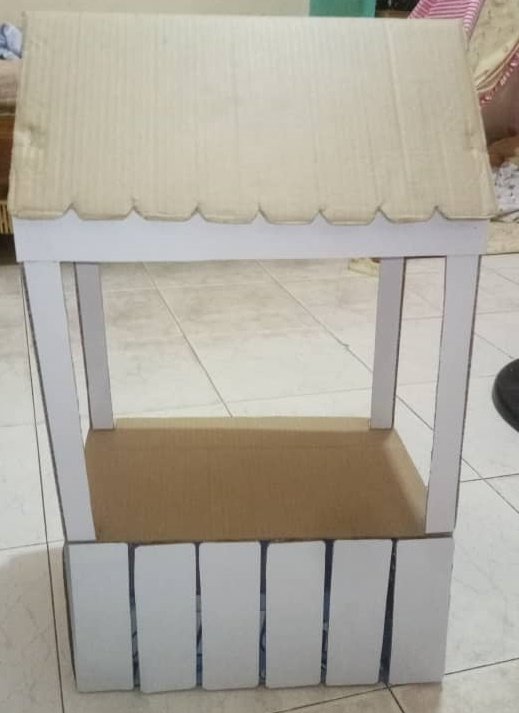
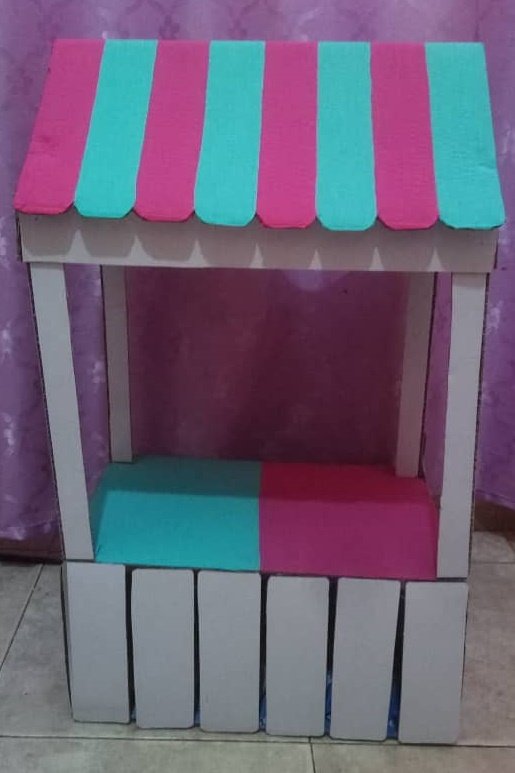

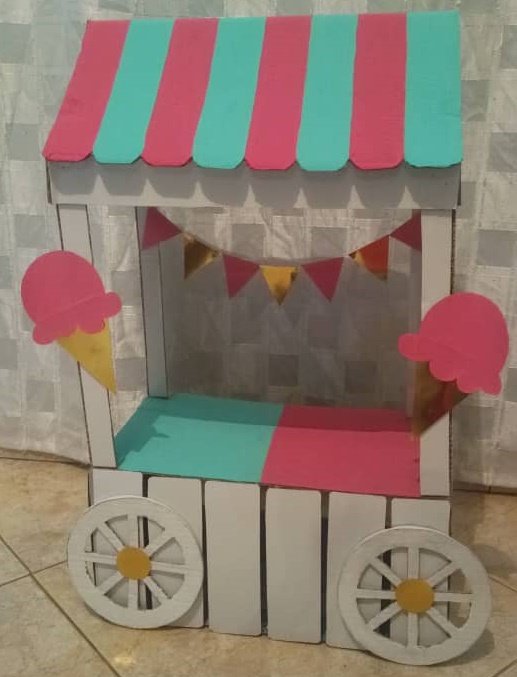
Y así quedo nuestro mostrador, para colocar ponquecitos, recuerdos o lo que ustedes quieran.
Y así quedo nuestro mostrador, para colocar ponquecitos, recuerdos o lo que ustedes quieran.
And that's how our counter was left, to place little cakes, souvenirs or whatever you want.
And that's how our counter was left, to place little cakes, souvenirs or whatever you want.

** Los separadores y cintillo son de mi autoria, para uso exclusivo de Hive.
** Para la traducción utilice https://www.deepl.com/
** Todas las fotografías son de mi autoria, tomadas por mi desde mi celular un MEIZU.
Te quedó precioso!! muy ingenioso como lo armastes y se ve muy resistente a pesar de ser carton.
Muy feliz cumpleaños a tu hijita <3
Muchas gracias amiga @lina86 si, el resultado a pesar de no ser perfecto me encanto como quedo y ha mi hija también, me alegro que te haya gustado, muchas gracias por tu apoyo y visita amiga lo aprecio mucho, gracias por tu felicitaciones, bendiciones
Hola, me encantó este diseño. Es muy bonito y además útil para regalar a niños. Con un par de peluches y listo jaja.... Me gusta mucho las manualidades y aprovechar cualquier material como el cantón y reutilizarlo es una bonita manera de trabajar. Saludos y bendiciones. ☺️
Muchas gracias amiga @pavanjr la verdad que las manualidades son geniales, podemos desestresarnos y crear cosas maravillosas, a mi desde niña siempre me han encantado, solo que con las ocupaciones del día a día las tenia muy abandonada, espero poder retomarlo nuevamente, muchas gracias por tu visita y apoyo amiga, aprecio tu mensaje. Saludos y bendiciones a ti también.
Has sido votado por
PROYECTO ENLACE
'Conectando Ideas y Comunidades'
PROYECTO ENLACE es un proyecto de curación de habla hispana enfocado en recompensar contenido de calidad y apoyar autores en su proceso de crecimiento en HIVE.
Creemos y apostamos por el futuro de esta gran plataforma, y estamos muy emocionados de poder hacerla crecer junto a esta comunidad. Así que te invitamos a usar nuestra etiqueta ENLACE y estar atento a todas las actividades que tenemos preparadas y que estaremos publicando en breve.
¿QUIERES AUTOMATIZAR TUS GANANCIAS DE CURACIÓN? SE PARTE DEL PROYECTO ENLACE APOYANDO A NUESTRO TRAIL EN HIVE.VOTE INGRESA AQUÍ PARA CONCOCER LOS DETALLES.
¿QUIERES INVERTIR ENLACE? DESCUBRE COMO HACERLO Y GENERAR INGRESOS DE FORMA SEMANAL MEDIANTE TU DELEGACIÓN DE HP AQUÍ TE EXPLICAMOS COMO.
Te invitamos a participar en nuestro servidor de Discord: https://discord.gg/3S9y7BbWfS
Atentamente
EQUIPO ENLACE 2021