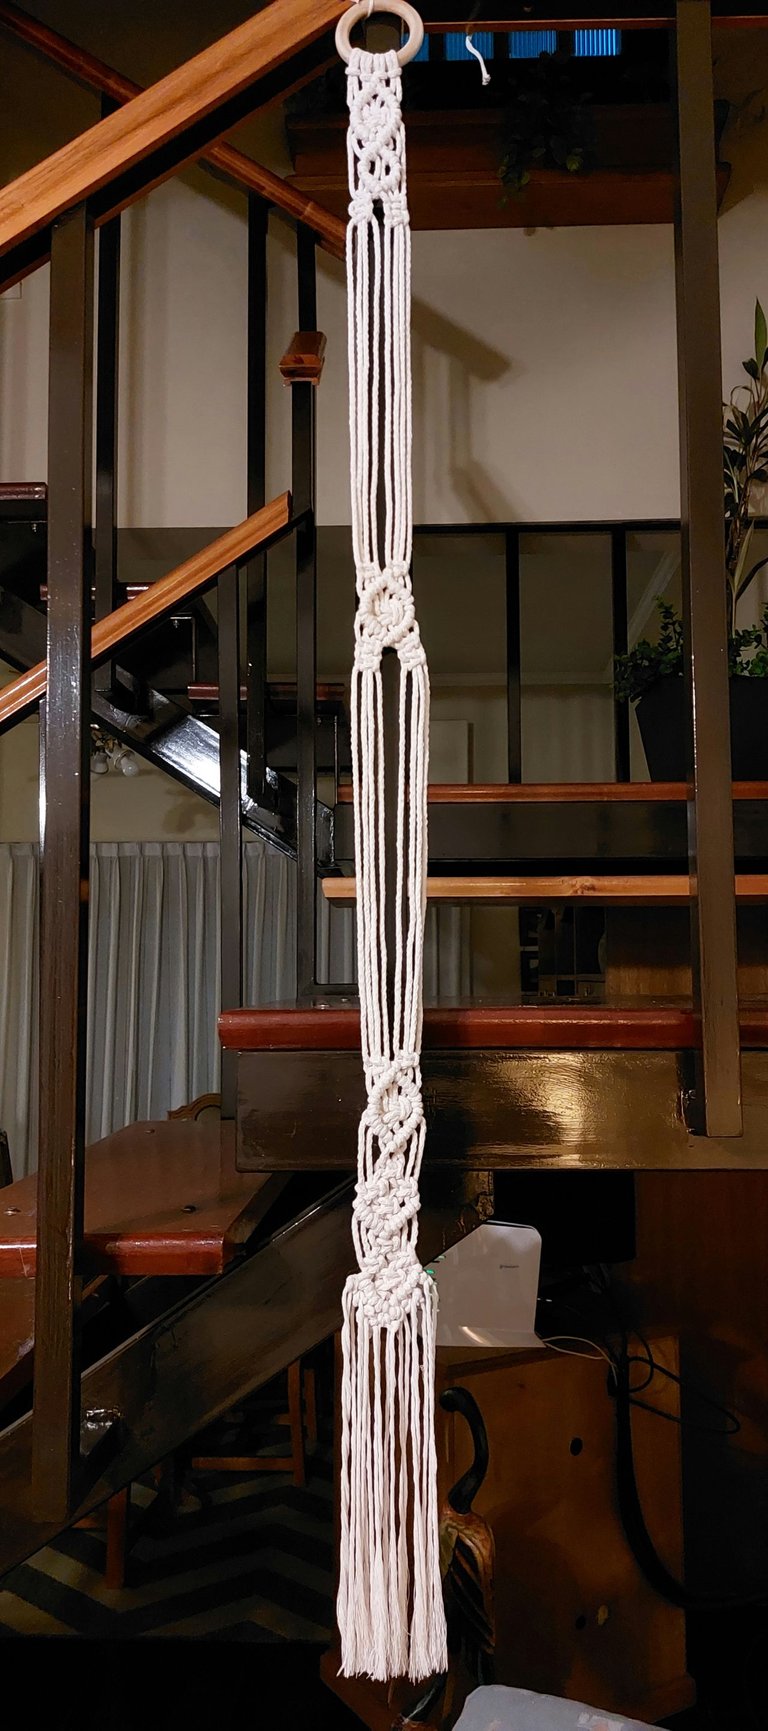
Very good day to all the community, today I show you how to make this hat holder woven with the macramé technique, but I understand that it can be done in crochet or even with fabric cutouts ... to use the imagination! I found it a very nice and useful decorative element so that they do not go around the hats out there.
Muy buen día a tola la comunidad, hoy les muestro como hacer este porta sombreros tejido con la técnica de macramé, pero entiendo que se puede hacer en crochet o incluso con recortes de tela… ¡a usar la imaginación! Me pareció un elemento decorativo muy lindo y útil para que no anden dando vueltas los sombreros por ahí.

Materials:
1 ring of wood or metal, to taste
4 strips of 7 m each of cotton yarn 4 mm thick
Materiales:
• 1 argolla de madera o metal, a gusto
• 4 tiras de 7 m c/u de hilo de algodón de 4 mm de espesor
Knots used: Lark, festoon and flat knot or square knot (see explanation of how each is done in my previous posts or consult me).
Nudos utilizados: Alondra, festón y nudo plano o nudo cuadrado (ver explicación de como se hace cada en mis post anteriores o consultarme).
Procedure:
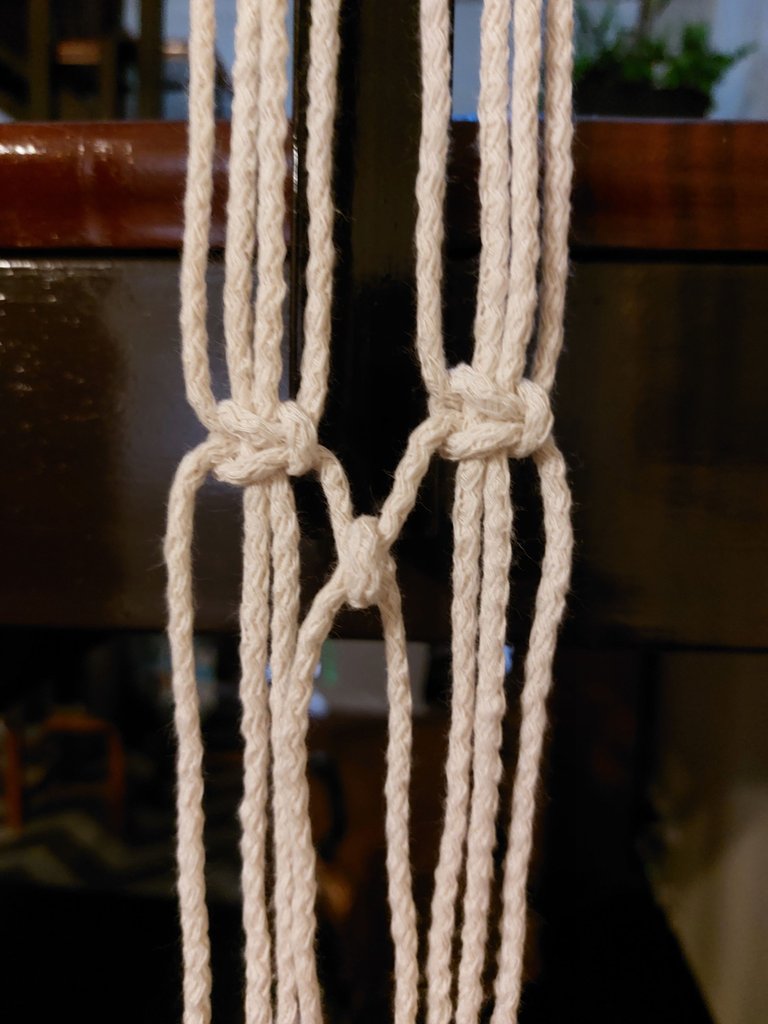
Fold each strip in half and fasten to the ring using LARK KNOT.
Procedimiento:
- Doblamos a la mitad cada tira y sujetamos a la argolla usando NUDO ALONDRA.
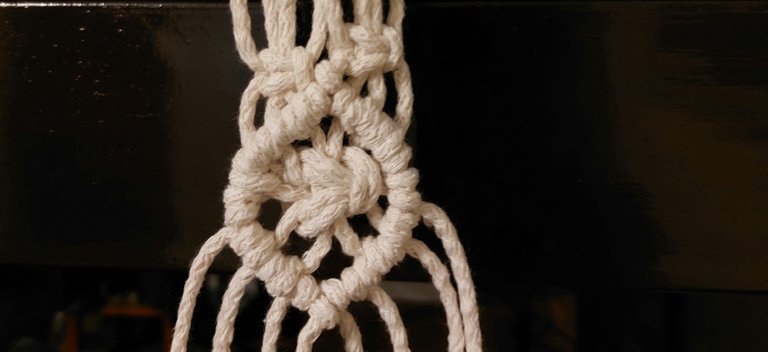
We make a FLAT KNOT taking 4 strips from the end, there should be 2 knots. Then we start by weaving with NUDO FESTON an oval or circle (whatever you prefer) but before closing it, with 4 strips of the middle of the circle we make 1 FLAT KNOT, so that it is more plump. At the end of the circle, we make 2 FLAT KNOTS on each side and repeat once again to separate the strips that will hold the hat.
- Hacemos un NUDO PLANO tomando 4 tiras desde el extremo, deben quedar 2 nudos. Luego comenzamos tejiendo con NUDO FESTON un óvalo o círculo (lo que prefieran) pero antes de cerrarlo, con 4 tiras del medio del círculo hacemos 1 NUDO PLANO, para que quede mas rellenito. Al terminar el círculo, hacemos 2 NUDOS PLANOS de cada lado y repetimos una vez mas para separar las tiras que van a sujetar el sombrero.
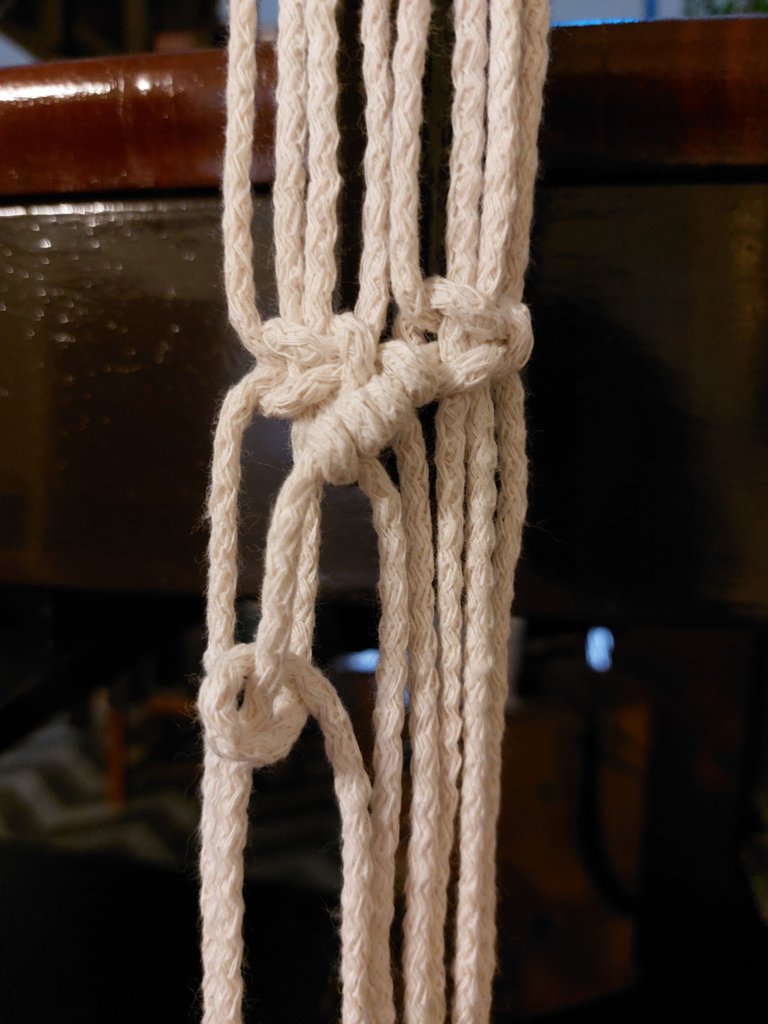

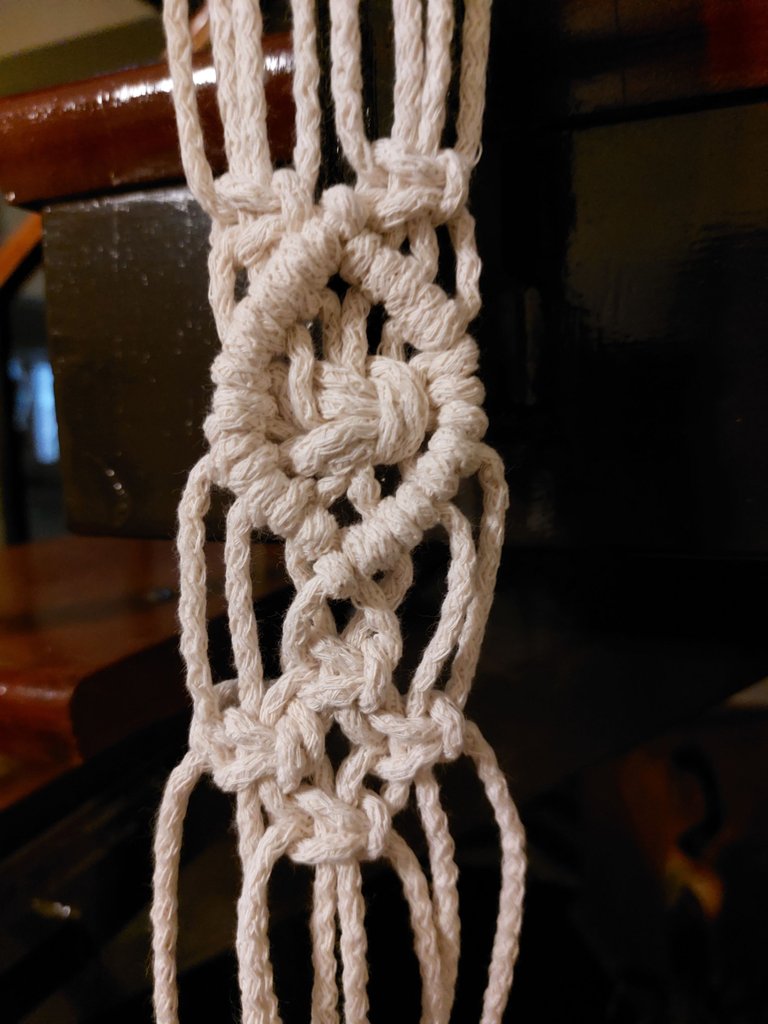
We leave 40 cm of strips without weaving and repeat the procedure of step 2.
- Dejamos 40 cm de tiras sin tejer y repetimos el procedimiento del paso 2.
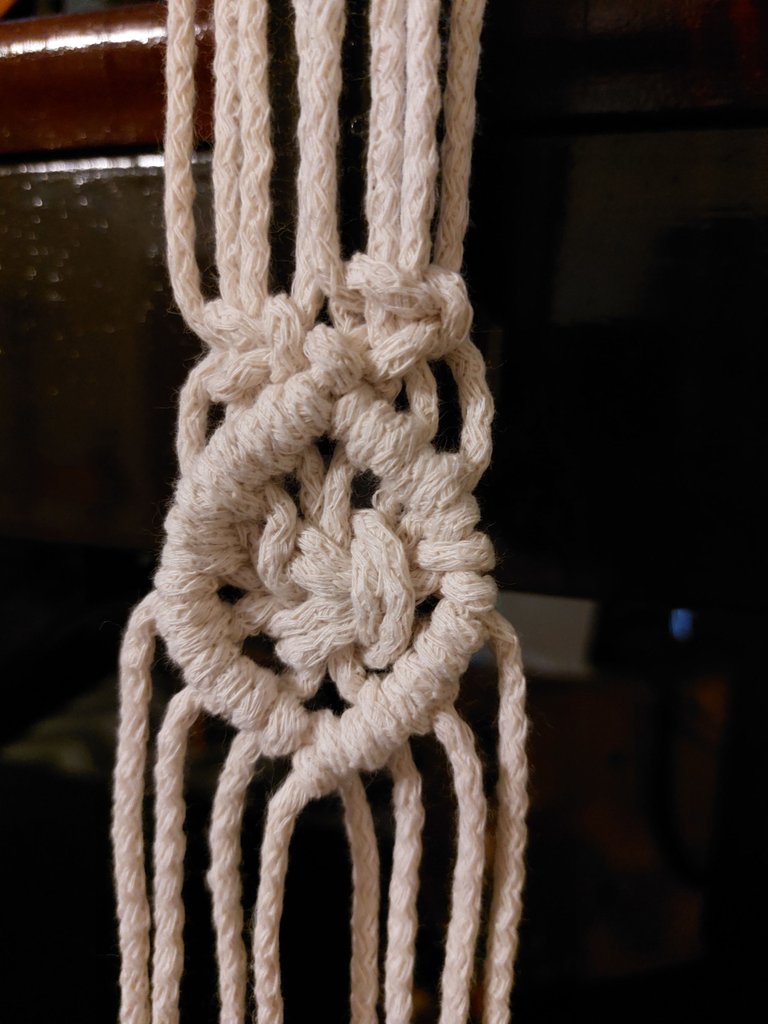
We leave again 40 cm of strips without weaving, we repeat the procedure of step 2 but only until closing the oval. After that, on the 4 central strips of the fabric, we make a FLAT KNOT, in the next row of fabric, leaving free 2 strips of the middle, 1 FLAT KNOT on each side, and in the next row, we return to make 1 FLAT KNOT in the 4 central ones. With this we form a cross of knots.
4) Dejamos nuevamente 40 cm de tiras sin tejer, repetimos el procedimiento del paso 2 pero solo hasta cerrar el óvalo. Luego de eso, sobre las 4 tiras centrales del tejido, hacemos un NUDO PLANO, en la siguiente fila de tejido, dejando libres 2 tiras del medio, 1 NUDO PLANO a cada costado, y en la siguiente fila, volvemos a hacer 1 NUDO PLANO en las 4 centrales. Con esto formamos una cruz de nudos.
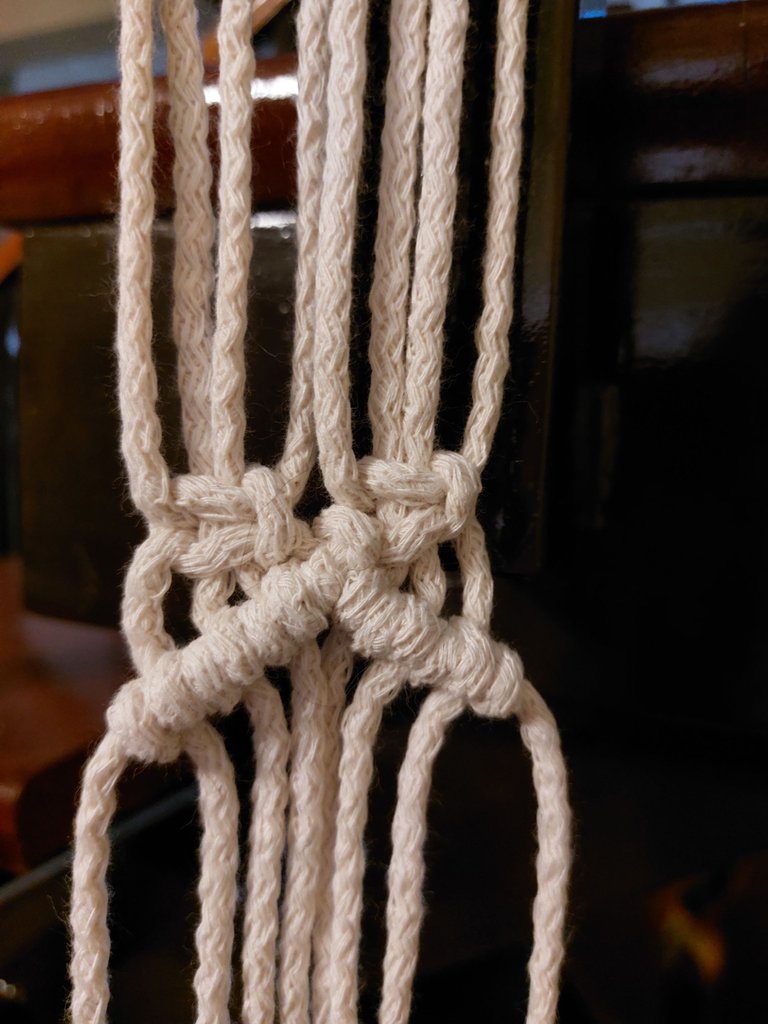
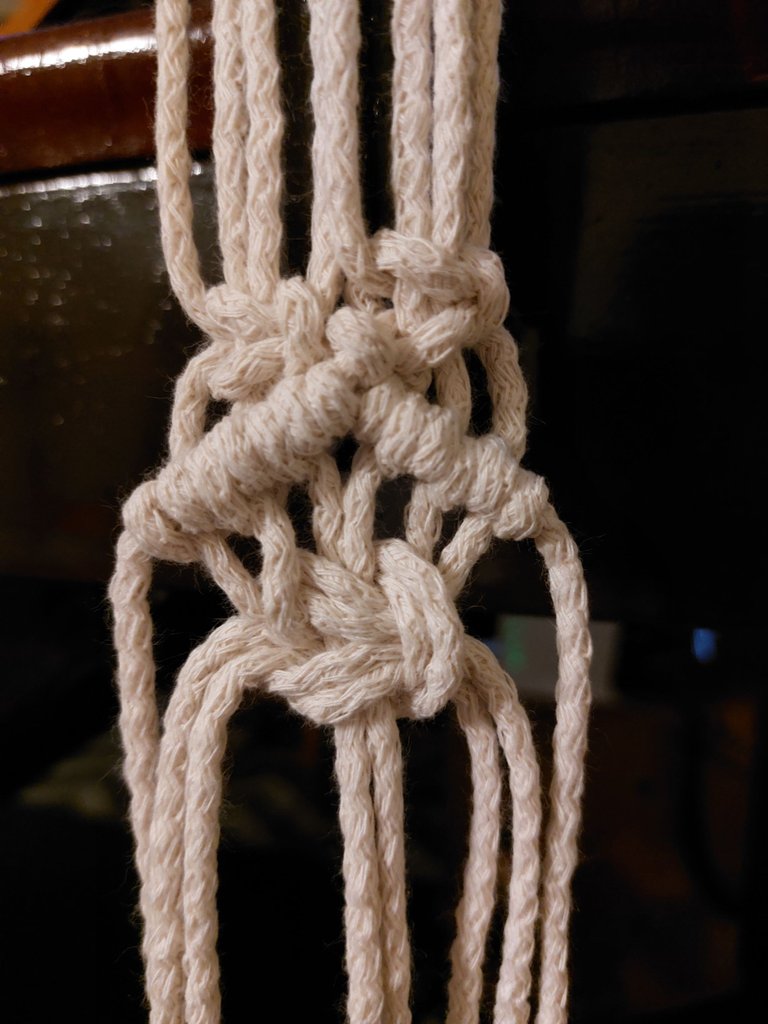
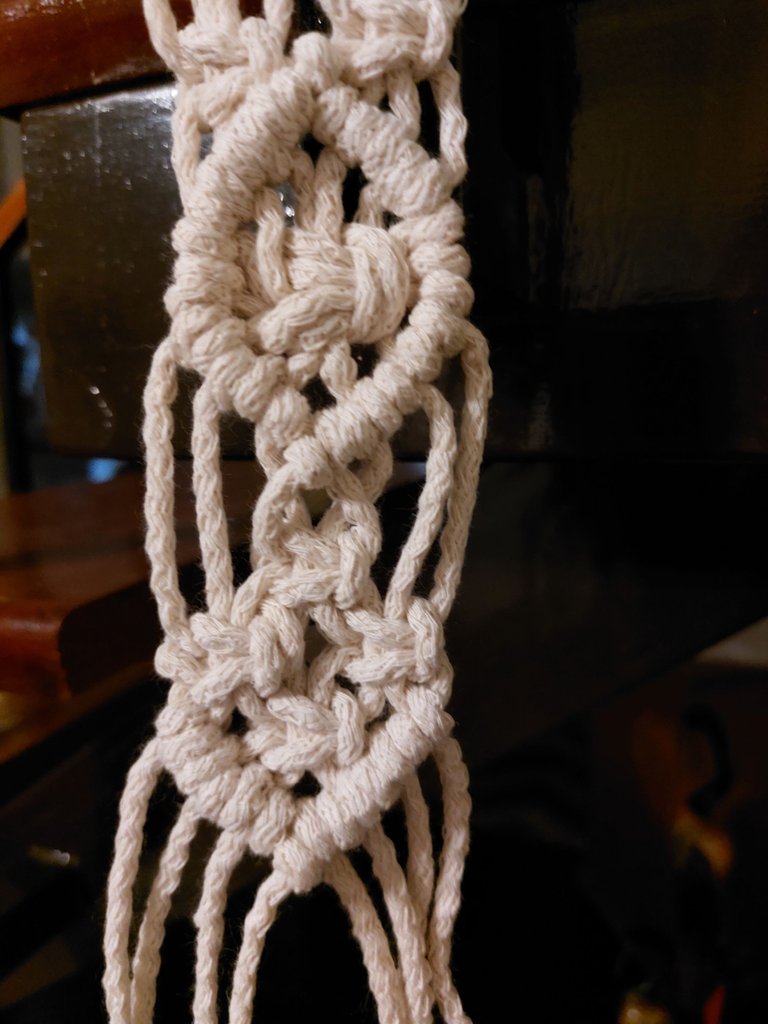
We take the strips of the guide ends and make NUDO FESTON forming an edge on the cross.
5) Tomamos las tiras de los extremos de guía y hacemos NUDO FESTON formando un borde en la cruz.
Cut the strips that remain to the desired length and deflecamos if the thread allows it.
- Cortamos las tiras que quedan al largo deseado y desflecamos si el hilo lo permite.
Of course the points used can be modified by others that they like more, but I think it is a very good decorative and practical idea at the same time.
Desde ya los puntos usados pueden modificarse por otros que les guste mas, pero me parece una muy buena idea decorativa y práctica a la vez.
I hope you put it into practice and thank you for reading this post!.
Espero que lo pongan en práctica y gracias por leer este post!.
Thank you for sharing this amazing post on HIVE!
Your content got selected by our fellow curator @kaerpediem & you just received a little thank you via an upvote from our non-profit curation initiative!
You will be featured in one of our recurring curation compilations and on our pinterest boards! Both are aiming to offer you a stage to widen your audience within and outside of the DIY scene of hive.
Join the official DIYHub community on HIVE and show us more of your amazing work and feel free to connect with us and other DIYers via our discord server: https://discord.gg/mY5uCfQ !
If you want to support our goal to motivate other DIY/art/music/homesteading/... creators just delegate to us and earn 100% of your curation rewards!
Stay creative & hive on!
Hi, thanks a lot!
What a great idea. I had to look twice but i love the IDEA
Thank you for sharing this original hat solution
I'm glad you like it, cheers!