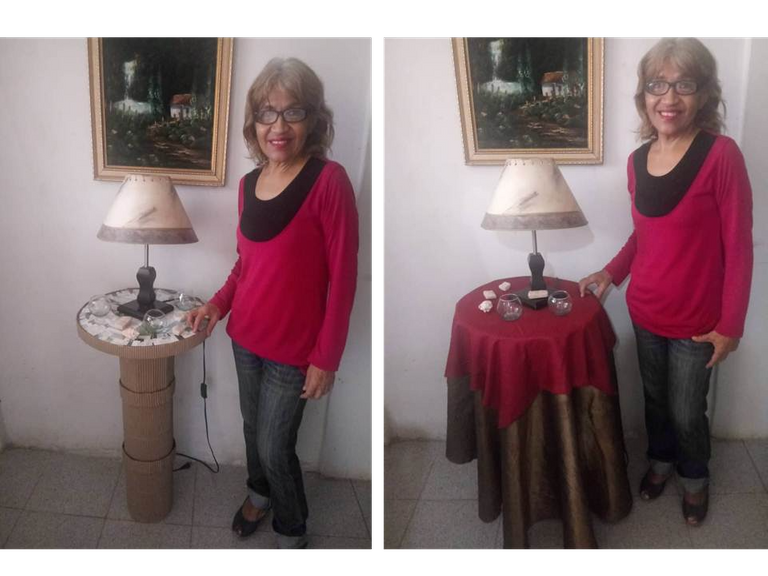
Mesa Redonda y Maceta de Reciclaje
Si tienes un lugar en tu casa y quieres redecorarlo pero no sabes cómo; acá te muestro como elaborar tu propia mesa pequeña redonda, que también podrás usar como maceta. Será muy útil en tu hogar, y lucirá espléndida en tu sala o habitación, además en su elaboración aprenderás a obtener cartón corrugado de una caja; con el cual puedes hacer muchas manualidades, igualmente aprenderás a elaborar un copas para trazar círculos grandes. Anímate y deja que tu imaginación y tu creatividad fluyan!!
If you have a place in your home and you want to redecorate it but you don't know how; here I show you how to make your own small round table, which you can also use as a flower pot. It will be very useful in your home, and will look splendid in your living room or bedroom, also in its elaboration you will learn how to obtain corrugated cardboard from a box; with which you can make many crafts, you will also learn how to make a cup to draw large circles. Cheer up and let your imagination and your creativity flow!
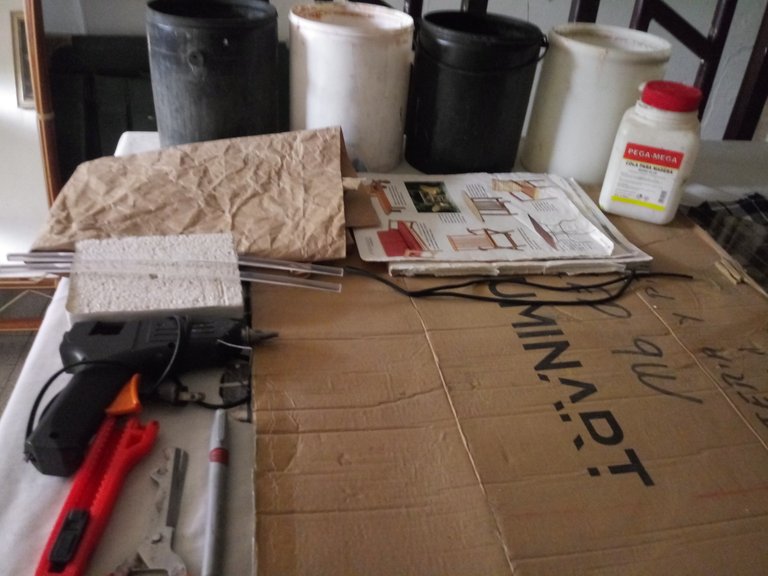
Materiales
- Caja de cartón
- Revistas o periódico
- 4 Recipientes vacíos de pintura
- Pega (Goma blanca)
- Lápiz o Marcador
- Una aguja de inyectadora
- Tijera o exacto
- Silicón en barra
- Anime
- Un cordón
- Regla o cinta métrica
Materials
- Cardboard box
- Magazines or newspaper
- 4 Empty paint containers
- Glue (white glue)
- Pencil or marker
- An injector needle
- Scissors or exacto
- Silicone stick
- Anime
- A string
- Ruler or tape measure
Elaboración Paso a Paso
Para la base o paral de la mesa.
**1. **Para obtener el cartón corrugado, debes humedecer con un pañito el cartón de la caja hasta que se desprenda con facilidad el cartón mojado. Luego deja secar un poco para poder usarlo más adelante.
For the base of the table.
1. To obtain the corrugated cardboard, you should wet the cardboard of the box with a tissue until the wet cardboard comes off easily. Then let it dry a little so you can use it later.

2. Pega los recipientes de pintura con silicón y empapela con pequeños trozos de revista y pega con agua (coloca al menos tres o cuatro capas), entre cada capa deja secar antes de colocar la otra. Debes asegurarte de que este bien seco para poder continuar. (El tiempo de secado varía en dependencia del clima en donde vivas).
2. Glue the paint containers with silicone and soak with small pieces of magazine and glue with water (place at least three or four layers), between each layer let dry before placing the other. You must make sure it is dry before you can continue. (Drying time varies depending on the climate where you live).
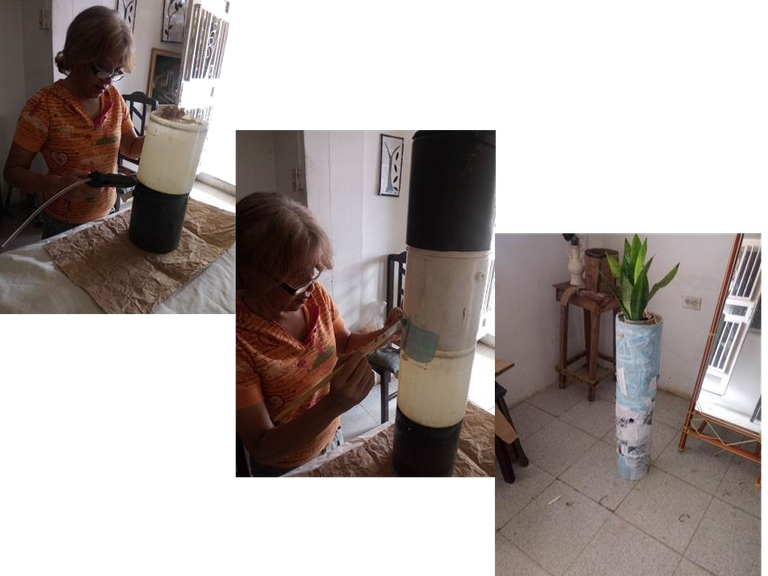
3. Forra los recipientes con el cartón corrugado humedecido, se debe hacer con el cartón humedecido porque es más fácil que tome la forma de los recipientes, aunque los bordes de unión deberán estar secos (Esto es muy importante para el momento de pegarlos).
3. Line the containers with the moistened corrugated cardboard, this should be done with the moistened cardboard because it is easier for it to take the shape of the containers, although the joining edges should be dry (this is very important for the moment of gluing them).

Pasos para el tope de la mesa:
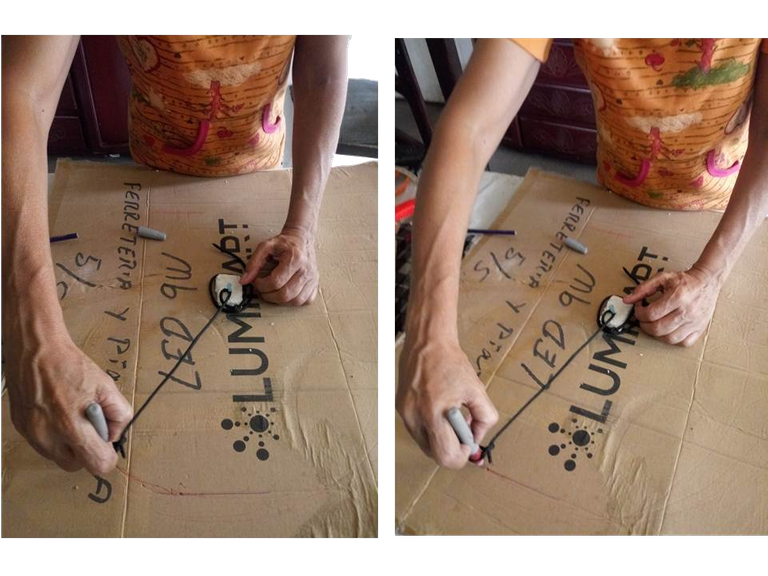
1. Para la construcción de un compás casero: Toma un cordón y átalo a un lápiz, luego desde el nudo mide 22cm, y allí introduce una aguja, coloca en el cartón un trozo pequeño de anime e introduce allí la aguja con el cordón y lápiz atado, toma el lápiz y estira el cordón, hazlo girar alrededor del cartón para trazar un círculo, traza dos círculos y recórtalos.
Steps for the table top:
1. For the construction of a homemade compass: take a string and tie it to a pencil, then from the knot measure 22cm, and there insert a needle, place on the cardboard a small piece of anime and insert the needle there with the string and pencil tied, take the pencil and stretch the string, twist it around the cardboard to trace a circle, trace two circles and cut them out.
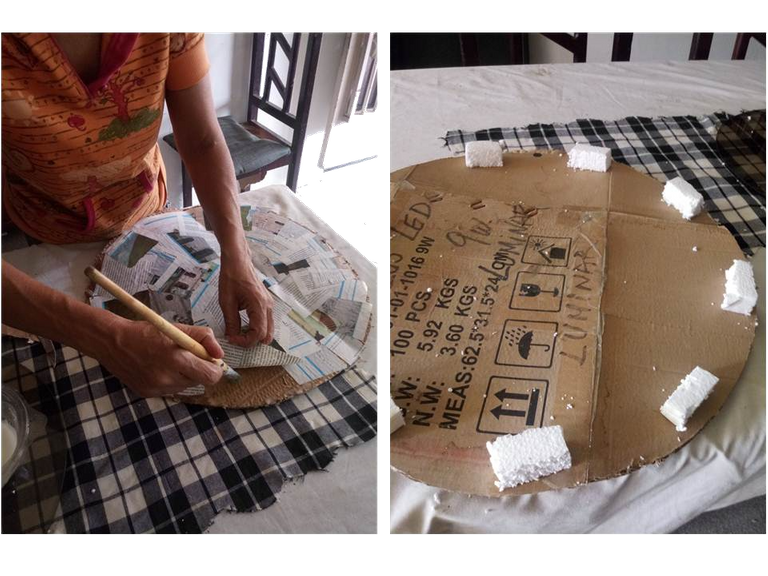
2. Con pega mezclada con un poco de agua empapela ambos círculos con trozos pequeños de papel de revista, deja secar y repite la operación 4 veces, cada capa que coloques debes dejar secar antes colocar la otra. (Las capas le darán textura fuerte a los cartones). Posteriormente a eso, pega en uno de los cartones, trozos pequeños de anime alrededor de los bordes y al centro, todos los que pueda.
2. With glue mixed with a little water soak both circles with small pieces of magazine paper, let dry and repeat the operation 4 times, each layer you place you must let dry before placing the other. (The layers will give strong texture to the cardboard). After that, glue on one of the cartons, small pieces of anime around the edges and in the center, as many as you can.
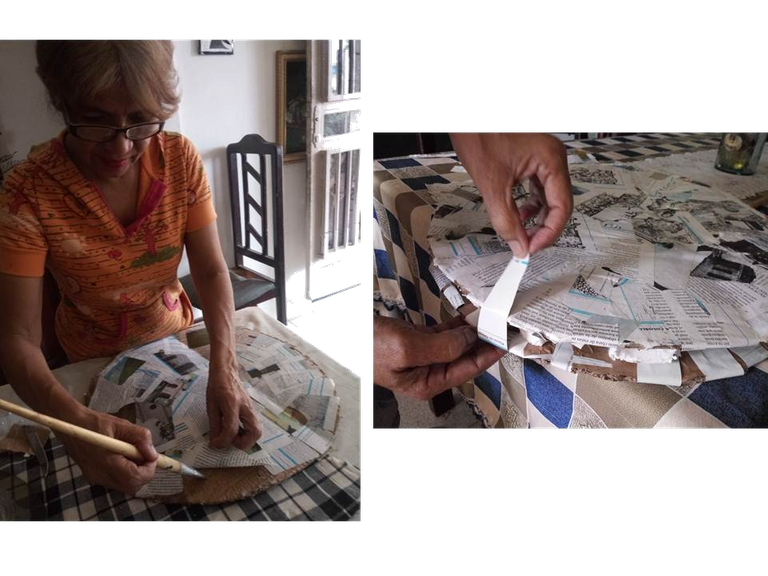
3. Coloca el otro círculo de cartón encima del cartón con los animes y une ambos con tiras de papel de revista. Coloca varias capas y deja secar entre capas.
3. Place the other cardboard circle on top of the cardboard with the anime and attach both with strips of magazine paper. Place several layers and let dry between layers.
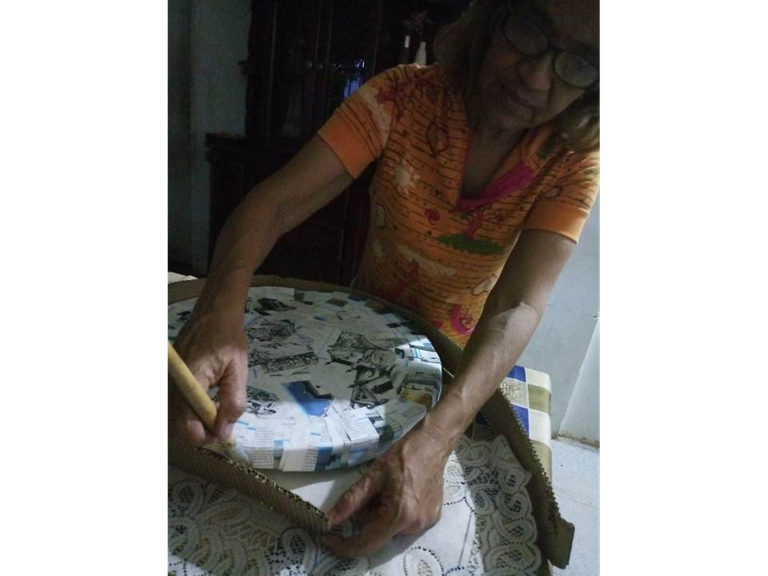
4.Recorta una tira de cartón corrugado y pega alrededor de la unión de los dos círculos de cartón.
4. Cut a strip of corrugated cardboard and glue around the junction of the two cardboard circles.
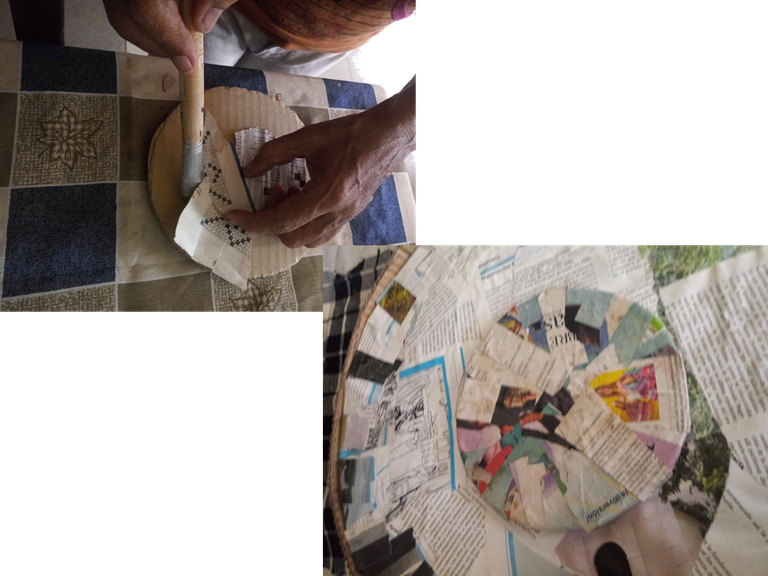
5. Ahora traza, recorta y empapela un círculo con medida de un recipiente de pintura, aunque debe ser más pequeño. Luego pega el círculo pequeño en el centro del tope de la mesa.
5. Now trace, cut out and paper a circle the size of a paint container, although it should be smaller. Then glue the small circle in the center of the table top.
6. Para culminar, pega el tope y la base de la mesa, el círculo pequeño debe ir dentro del recipiente de pintura para darle más firmeza. Pero si decides que lo vas usar como maceta y no como mesa, entonces no hace falta pegarlo, el círculo pequeño no permitirá que el tope se mueva.
6. To finish, glue the top and the base of the table, the small circle should go inside the paint container to give it more firmness. But if you decide that you are going to use it as a pot and not as a table, then there is no need to glue it, the small circle will not allow the top to move.
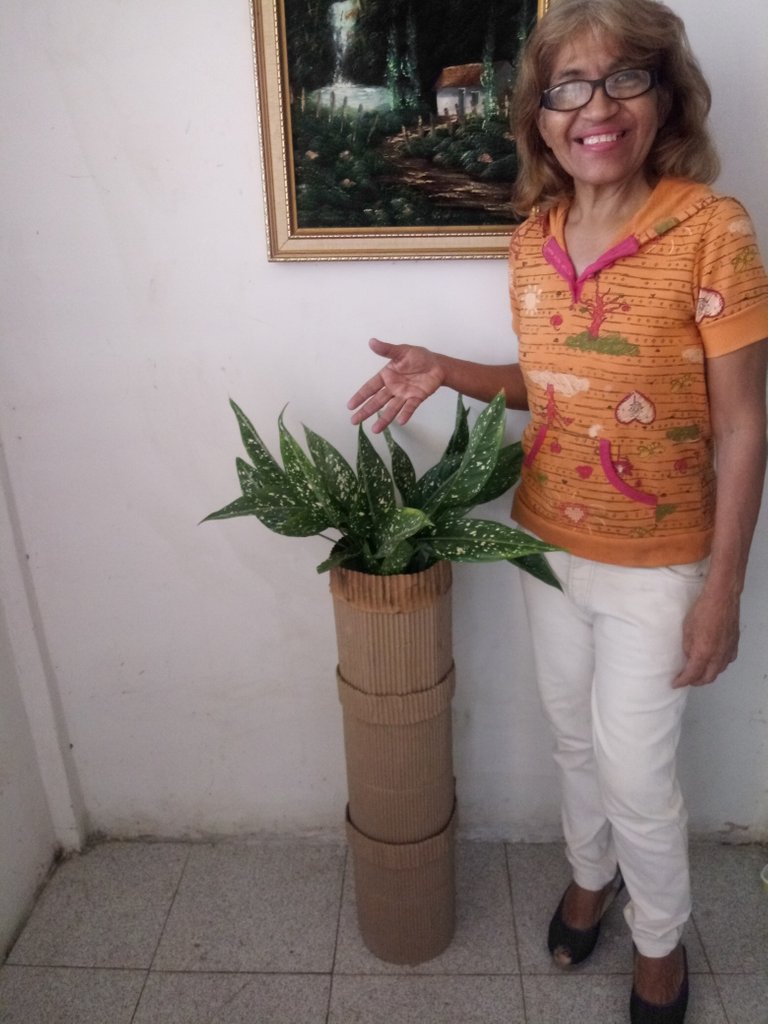
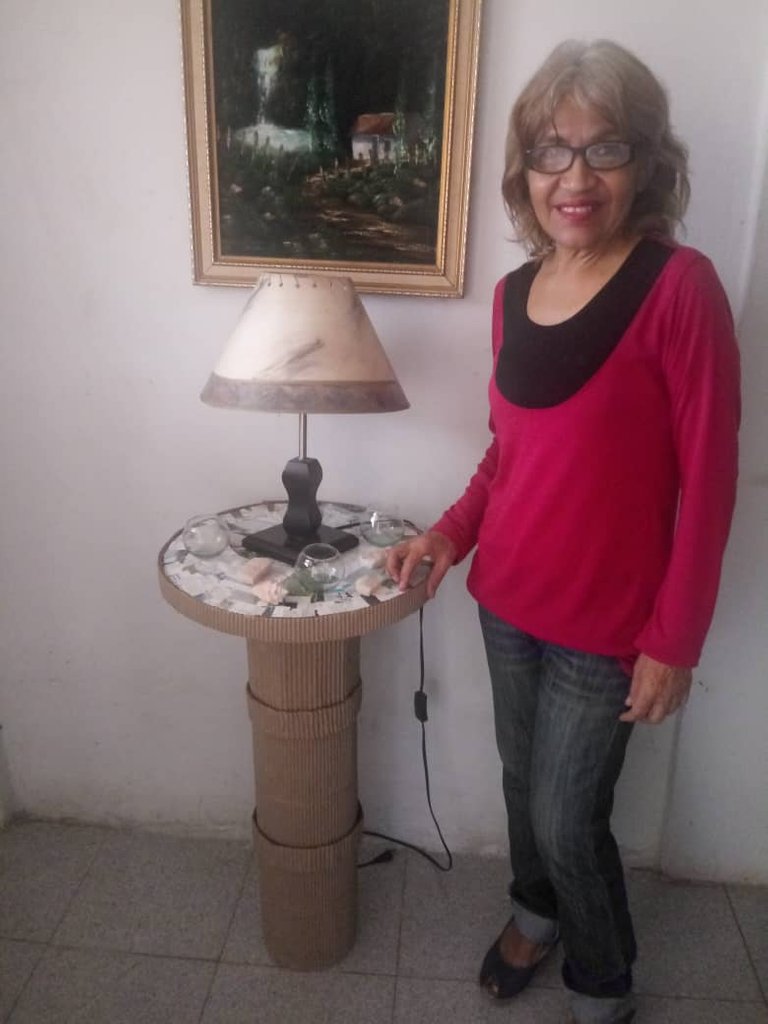
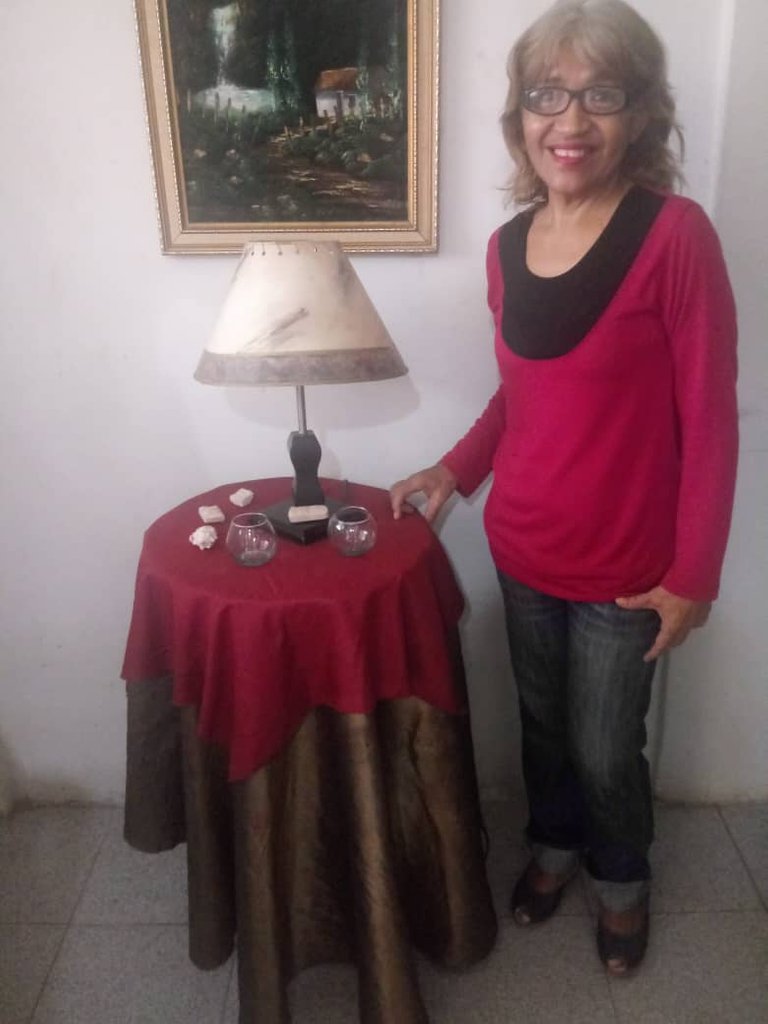
Esta mesa o maceta fue elaborada con materiales que están arrimados en algún lugar de nuestros hogares, y al ser reciclados puedes obtener este hermoso mobiliario que servirá para decorar tu lindo hogar. Anímate!! Puedes dejarme algunos comentarios. Será muy edificante saber cómo te ayudo esta idea. Bendiciones, ¡Nos vemos en mi próxima publicación!
This table or pot was made with materials that are lying somewhere in our homes, and being recycled you can get this beautiful furniture that will serve to decorate your beautiful home. Cheer up! You can leave me some comments. It will be very edifying to know how this idea helped you. Blessings, see you in my next post!
Que hermosa te quedó madre😍
Muchas gracias mi princesa!!
Congratulations @elsismmillano! You have completed the following achievement on the Hive blockchain and have been rewarded with new badge(s) :
Your next target is to reach 500 upvotes.
You can view your badges on your board and compare yourself to others in the Ranking
If you no longer want to receive notifications, reply to this comment with the word
STOPSupport the HiveBuzz project. Vote for our proposal!