A big greeting to this beautiful community and all the people who are part of it, I really enjoy sharing with you all my ideas and creations, I made a bracelet woven with braids, it is noteworthy that I implemented the Macrame weaving, and are bracelets that are very nice, with little budget we can make them, and we will wear a nice bracelets, uncommon, because almost no one uses this type of bracelet, which makes it special and unique, so let's see the step by apso to make this nice bracelet:

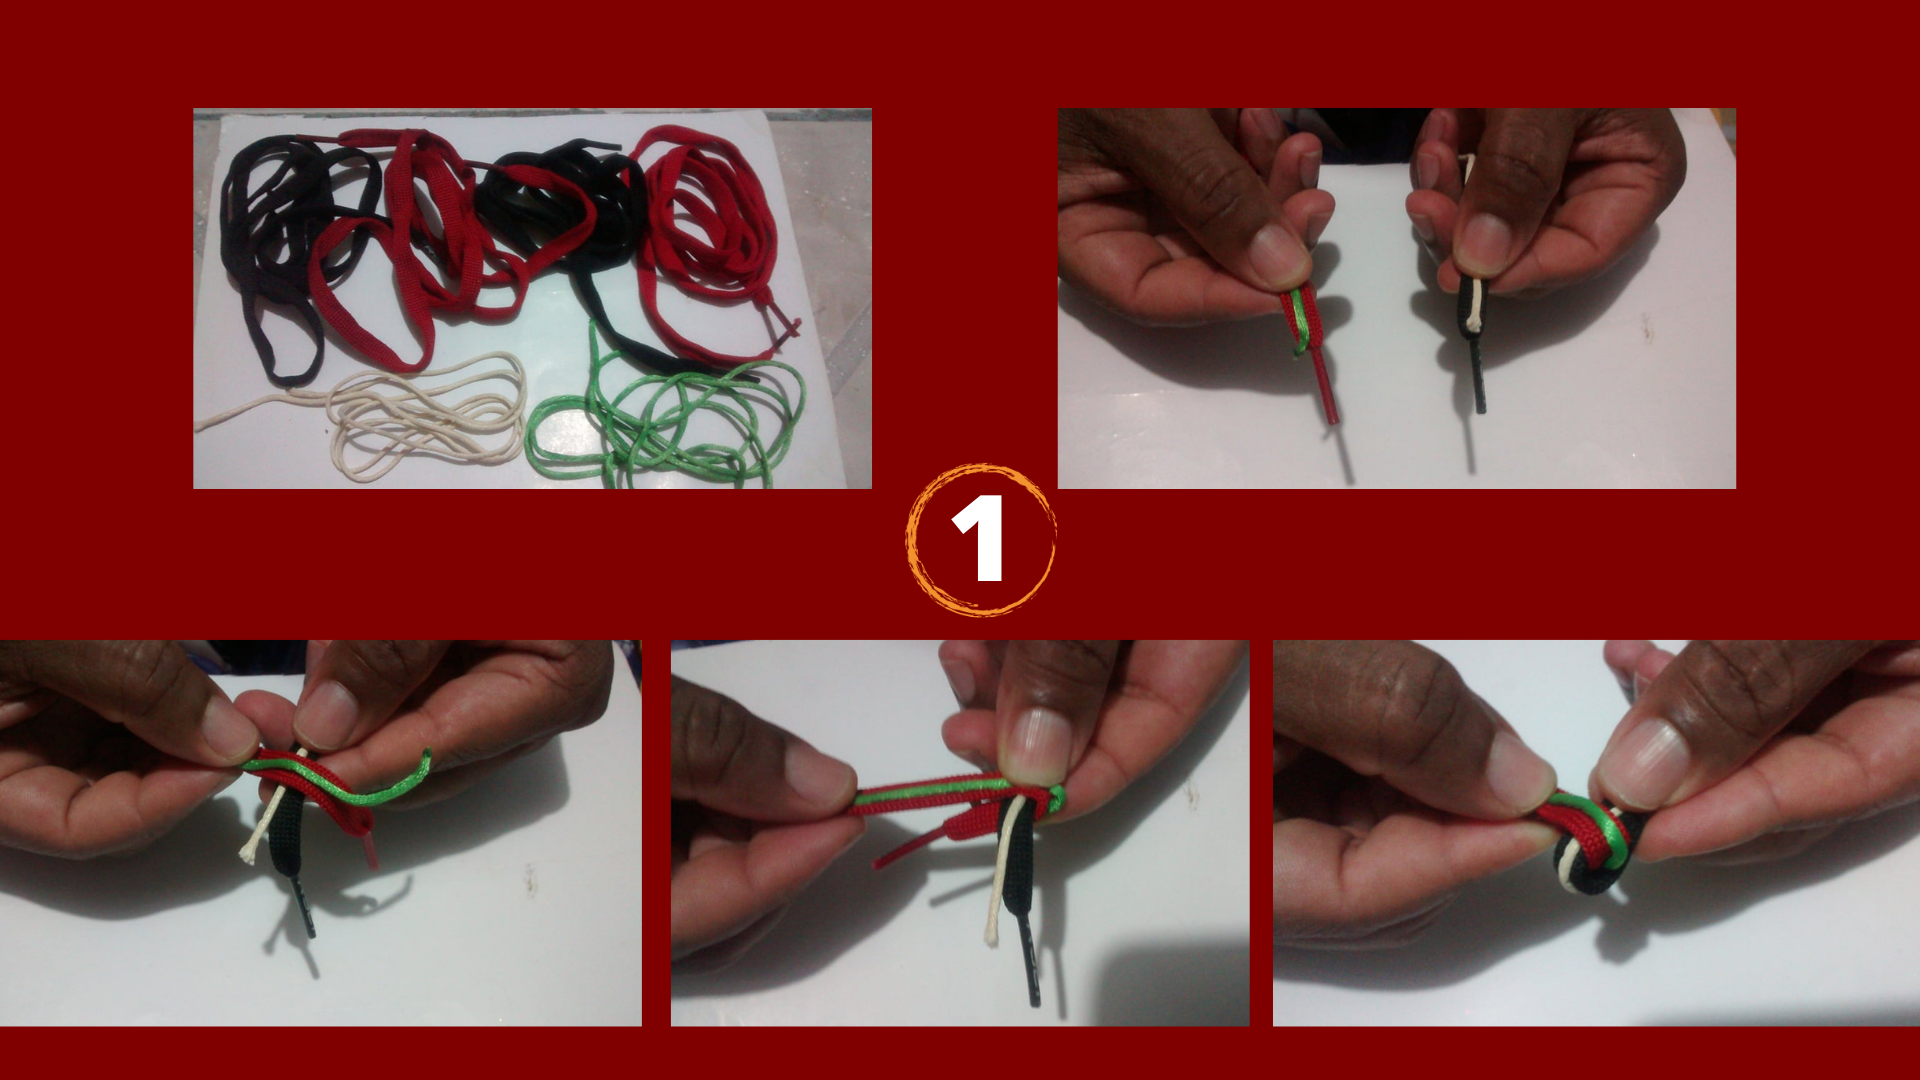
-Materiales:
-Trenzas de zapatos (Agujetas), colores deseados, 2 trenzas, cada una de un color diferente.
-Hilo rabo se ratón (Cola de rata), 1 hilos de distintos colores.
-Tijera.
-Paso 1: Colocamos cada hilo de rabo de ratón sobre cada agujeta, luego cruzamos, seguido de esto, pasamos la agujeta roja por debajo de la negra, y luego pasamos la agujeta negra por debajo de la agujeta roja.
-Materials:
-Braids of shoes (shoelaces), desired colors, 2 braids, each of a different color.
-Mouse tail thread (rat tail), 1 thread of different colors.
-Scissors.
-Step 1: We place each thread of mouse tail on each shoelace, then we cross, followed by passing the red shoelace under the black one, and then we pass the black shoelace under the red shoelace.
.png)
-Paso 2: Luego, la agujeta pasada por debajo de la roja, la introducimos en el orificio que deja la agujeta roja, así vamos tejiendo de manera ordenada y concisa. Solo se basa de que cada orificio que deje cada agujeta, sea introducida la agujeta contraria, y apretamos, así sucesivamente hasta obtener el tejido final, tejemos del tamaño de nuestra muñeca.
-Step 2: Then, the needle passed under the red one, we introduce it into the hole left by the red needle, so we are knitting in an orderly and concise manner. It is only necessary that each hole left by each needle, the opposite needle is introduced, and we tighten, and so on until we get the final fabric, we knit the size of our wrist.
This is my final result, you can almost noticed, when we flip the bracelet, its weaving shape change, it is as if the colors are reversed, it is a reversible bracelet, hope you liked it, thanks for reading me, blessings.
.png)
All photos are my own.