

Greetings dear friends, visitors, followers.
Today I share a new project that I hope you like.
Crafts relax us, keep our creativity at its best, giving a second chance to an object that you don't use or that was damaged is wonderful, because you contribute to the well-being of the planet by recycling.
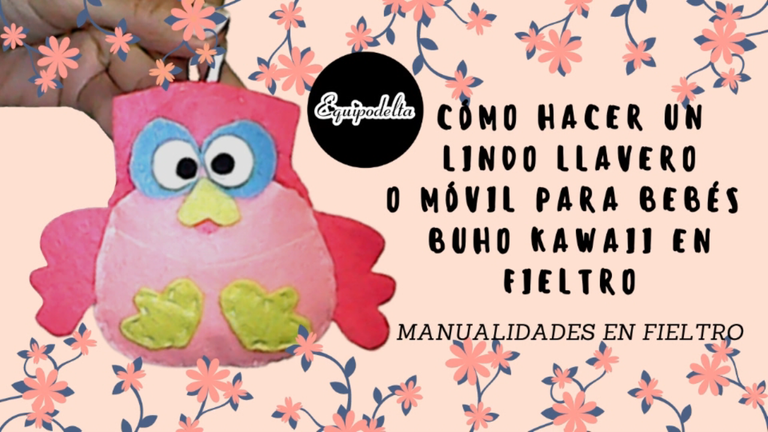
This cute Owl can be used as a key ring, a gift to someone, maybe you want to have ideas for a new venture, it can also serve as a toy for kittens, if you put mint leaves in the filling, they will become love handles, cats love mint. Another idea I can give you is that you can use it as an air freshener, while you fill it you can put inside some aromatic dry grass, you can use cinnamon sticks for example, among other ideas you can make several and make a nice baby mobile.
Be creative and enjoy, relax!
I leave you the structured step by step, if you have any doubt, I invite you to see my video at the end of the post.
I hope you like it.

Saludos queridos amigos, visitantes, seguidores.
Hoy comparto un nuevo proyecto que espero que te guste.
Las manualidades nos relajan, mantienen nuestra creatividad al máximo, darle una segunda oportunidad a un objeto que no uses o que se dañó es maravilloso, pues contribuyes con el bienestar del planeta al reciclar.
Este lindo Búho puede servirnos para llavero, obsequiar a alguien, quizá quieras tener ideas para un nuevo emprendimiento, puede servir también como juguete para gatitos, si le introduces en el relleno hojitas de menta, ellos se volverán loquitos de amor, a los gatos les encanta la menta. Otra idea que puedo darte es que puedas usarlo como ambientador, mientras lo rellenas puedes colocar dentro alguna hierba seca aromática, puedes usar palitos de canela por ejemplo, entre otras ideas puedes hacer varios y realizar un lindo móvil para bebés.
¡Sé creativo y disfruta, relájate!
Te dejo el paso a paso estructurado, si tienes alguna duda, te invito a ver mi vídeo al final del post.
Espero te guste.
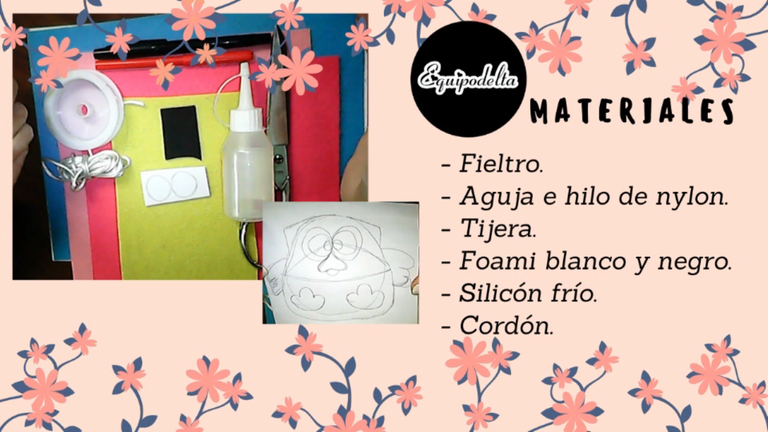
Materials:
- Felt.
- Scissors, silicone and sewing needle.
- Nylon thread.
- Lace.
- Black and white Foami.
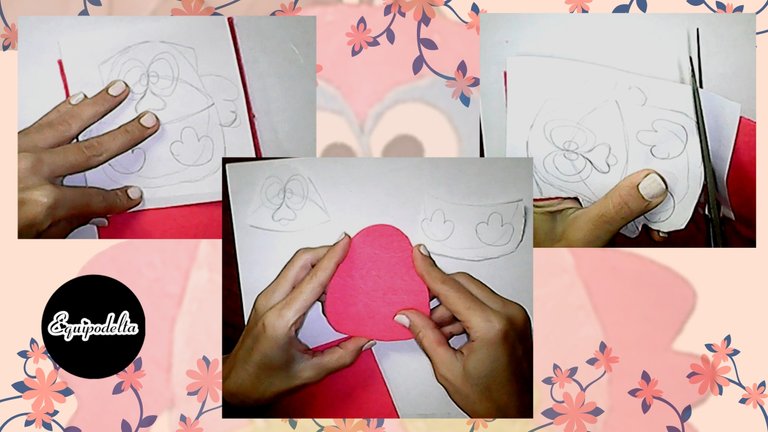
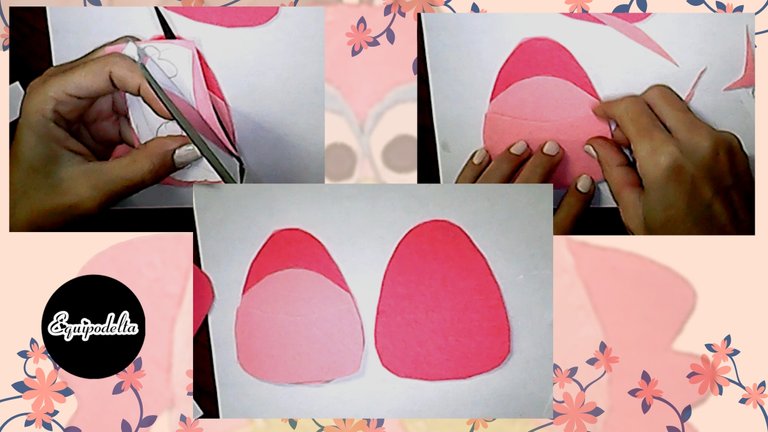
Step 1: We take the mold and cut out two pieces of the darker felt that will be in the shape of an egg.
Paso 1: Tomamos el molde y recortamos dos piezas del fieltro más oscuro que quedarán en forma de huevo.
Step 2: We cut an identical piece but with the lighter foami, then we cut the first section that indicates the mold. Look at the image.
Paso 2: Recortamos una pieza igual pero con el foami más claro, luego recortamos la primera sección que indica el molde. Observa la imagen.
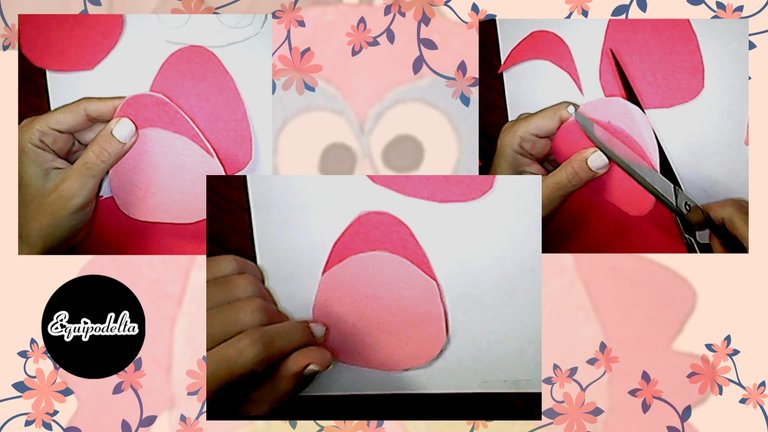
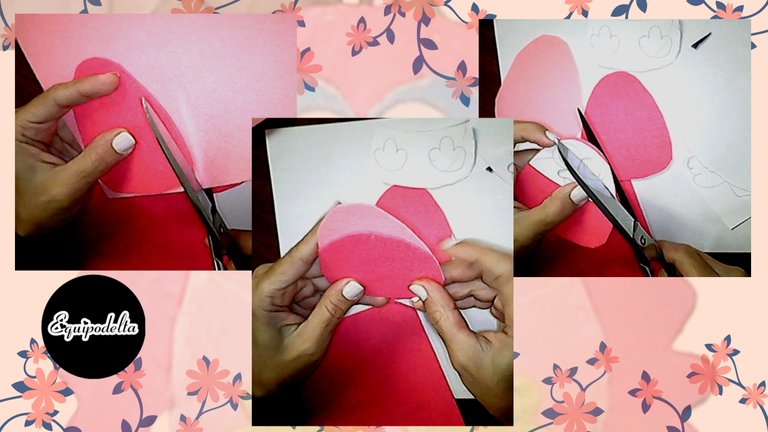
Step 3: From the pieces that we obtained after cutting, we will make a kind of puzzle, we need one of the lighter foami pieces that we cut, then the second one with the darker foami and we complete what is missing with the lighter color. In this way we work more orderly.
Paso 3: De las piezas que obtuvimos tras el corte, haremos un especie de rompecabezas, necesitamos una de las piezas de foami más claro que cortamos, luego la segunda con el foami más oscuro y completamos lo que falta con el color más claro. De esta forma trabajamos más ordenado.
Step 4: Let's cut out what will be the pocket. With the lighter foami we place the remaining section of our mold and cut out, then we place it over our pieces that we have ordered.
Paso 4: Recortemos lo que será el bolsillo. Con el foami más claro colocamos la sección que queda de nuestro molde y recortamos, luego lo colocamos sobre nuestras piezas que hemos ordenado.
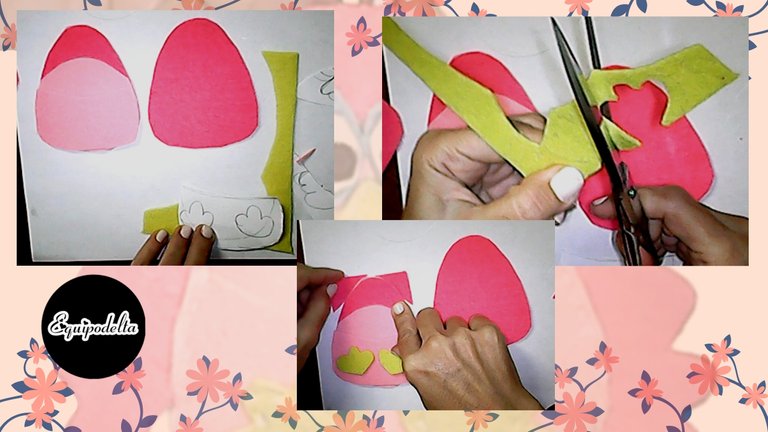
Step 5: Let's cut the legs. We can mark with the mold in the felt and then cut along the edge, we put it on our good that is taking form.
Paso 5: Recortemos las patitas. Podemos remarcar con el molde en el fieltro y luego recortamos por el borde, lo colocamos sobre nuestro bueno que va tomando forma.

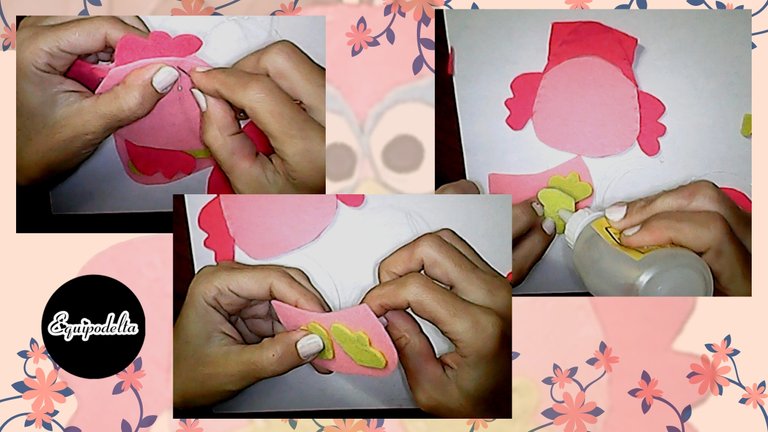
Step 6: We take a piece of white foami, we make some circles and cut out what will be the eye sockets, we repeat the procedure with the blue felt trying to make it a little bigger in size, for the pupil as it is so small you can help by cutting out the circle with a punch or opening holes. Place everything in an orderly fashion by assembling the owl.
Paso 6: Tomamos un trozo de foami blanco, hacemos unos círculos y recortamos lo que será las cuencas de los ojos, repetimos el procedimiento con el fieltro azul procurando que este sea un poco mayor en tamaño, para la pupila como es tan pequeña puedes ayudarte recortando el círculo con un perforador o abre huecos. Coloca todo de forma ordenada armando el búho.

Step 7: we cut out an inverted heart with yellow felt, this will be the owl's beak, then we cut out an oval that will be the tongue, and we cut out two triangles that will be the ears. We take advantage of gluing these pieces with the silicone: The eyes and the beak with the tongue. So that it dries.
Paso 7: recortamos un corazón invertido con el fieltro amarillo, esto será el pico del búho, luego recortamos un óvalo que será la lengua, recortamos dos triángulos que serán las orejas, aprovechamos en pegar estas piezas con el silicón: Los ojos y el pico con la lengua. Para que vaya secando.
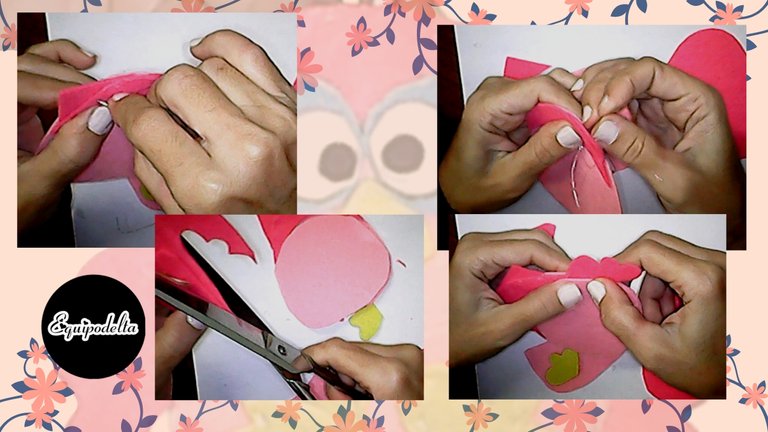
Step 8: We put together the three pieces that I call puzzle pieces, to sew the ears. We take the mold and cut out the wings with the darkest colored felt, we continue sewing all these pieces with a simple stitch. The puzzle, the ears and the wings.
Paso 8: Juntamos las tres piezas que llamo de rompecabezas, para coser las orejas. Tomamos el molde y recortamos las alas con el fieltro color más oscuro, continuamos cosiendo todas estas piezas con una puntada sencilla. El rompecabezas, las orejas y las alas.
Step 9: With the silicone we glue the legs to the pocket piece, let it dry and then sew with a simple stitch.
Paso 9: Con el silicón pegamos las patitas a la pieza del bolsillo, dejamos secar y luego cosemos con una puntada sencilla.
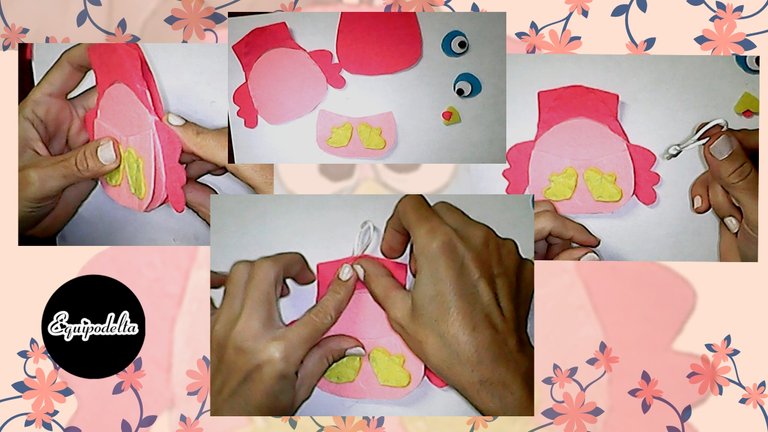
Step 10: We join all the pieces and proceed to sew with buttonhole stitch. We take a piece of cord and make a knot.
Paso 10: Unimos todas las piezas y procedemos a coser con punto de ojal. Tomamos un trozo de cordón y hacemos un nudo.

Paso 11: Procedemos a rellenar nuestro búho, para ello puedes usar polietileno, algodón yo usé trozos de goma espuma. Al culminar cerramos nuestra pieza.
Step 11: We proceed to fill our owl, for this you can use polyethylene, cotton I used pieces of foam rubber. At the end we close our piece.
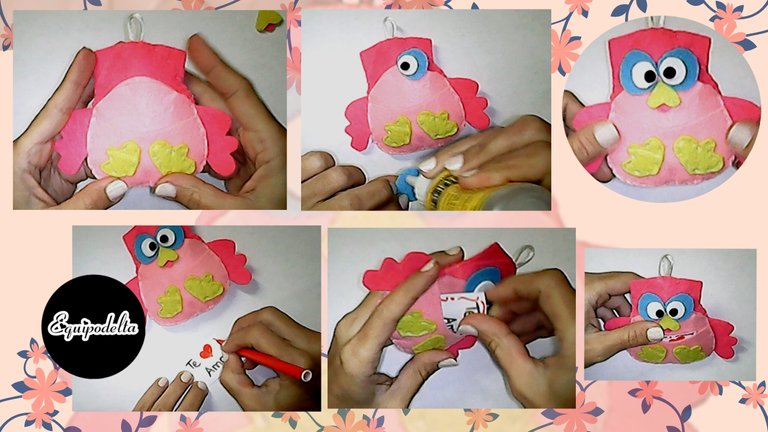
Paso 12: Para culminar, pegamos con el silicón las piezas de los ojos y el pico al búho.
Si quieres agregar un detalle para regalar, coloca un mensaje secreto escrito con marcadores en cartulina, y lo colocas dentro del bolsillo.
Espero te guste mi proyecto y te animes a realizarlo, yo me divertí mucho.
Step 12: To finish, we glue with the silicone the pieces of the eyes and the beak to the owl.
If you want to add a detail to give away, place a secret message written with markers on cardboard, and place it inside the pocket.
I hope you like my project and you dare to do it, I had a lot of fun.
Detalles Técnicos / Technical Details
Program: MediBang Paint Pro.
Graphics tablet: Huion (Usb Pen Tablet).
Pictures and vídeo of my own. Web Cam Omega.
Designs and images courtesy of Canva
Music Vídeo:
––––––––––––––––––––––––––––––
Talk To Me by Peyruis
Creative Commons — Attribution 3.0 Unported — CC BY 3.0
Music promoted by Audio Library
––––––––––––––––––––––––––––––
My Youtube Channel
![]() 👉
👉 ![]() 👉
👉 ![]() 👉
👉  👉
👉 ![]() 👉
👉 
@tipu curate 2
Siempre creas cositas que me matan de amor de lo tiernas que se ven. Me encanta este búho, es un animal que en la vida real es enigmático pero el tuyo es tan tierno que dan ganas de apapacharlo. Gracias por compartir bonitas creaciones. Eres una artista integral que dibuja y también hace bellas manualidades. Te abrazo y te dejo mi cariño, querida amiga. @equipodelta. 🤗😙😊
¡Felicidades! Esta publicación obtuvo upvote y fue compartido por @la-colmena, un proyecto de Curación Manual para la comunidad hispana de Hive que cuenta con el respaldo de @curie.
Si te gusta el trabajo que hacemos, te invitamos a darle tu voto a este comentario y a votar como testigo por Curie.
Si quieres saber más sobre nuestro proyecto, acompáñanos en Discord: La Colmena.
Magistralmente tierno... Muak
Congratulations, your post has been upvoted by @dsc-r2cornell, which is the curating account for @R2cornell's Discord Community.