Saludos a toda la gente creativa.
Greetings to all creative people.
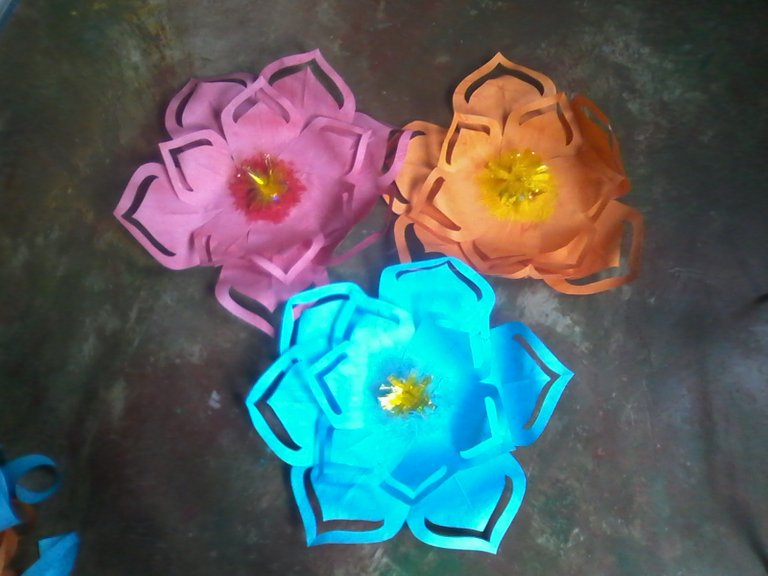
I want to show you a tutorial of some beautiful giant spider paper flowers that I make for a very special occasion that will take place in two weeks. For these flowers I followed the same steps but with different colors of paper.
I really like this type of crafts, since they are very simple and with a fantastic result, it also has multiple uses such as creating a wall mural or as an original background for photos.
If they have the possibility of doing them, it will become a very accessible and inexpensive resource to decorate spaces, celebrate events or give our loved ones a personal and creative touch that will always attract attention, I had the opportunity to check it when I finished them. that all who saw them were delighted.
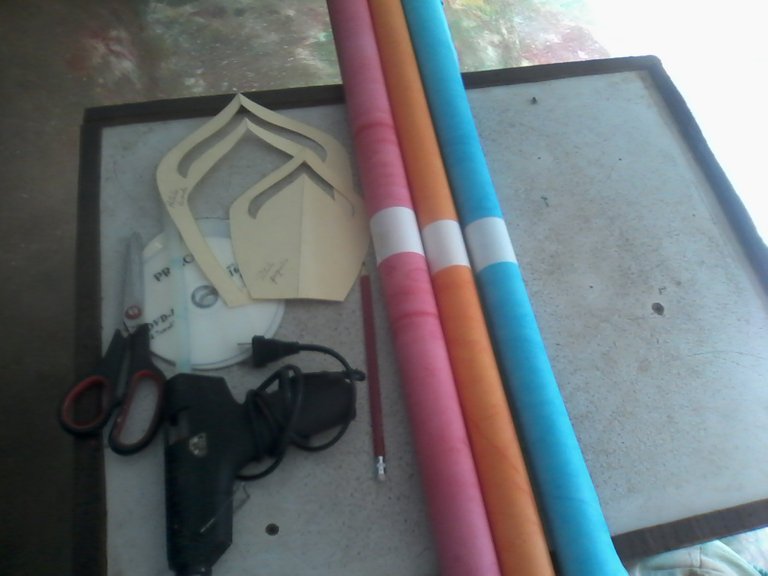
Materiales-Materials:
Papel araña (rojo, naranja y azul).
Silicón.
Tijera.
Molde CD reciclado
Papel celofán amarillo.
Pintura al frío (rojo, amarillo y azul).
Pincel.
Cartulina reciclada.
Regla.
Nailon.
Spider paper (red, orange and blue).
Silicone
Scissors.
Recycled CD mold
Yellow cellophane paper.
Cold paint (red, yellow and blue).
Brush.
Recycled cardboard.
Rule.
Nylon.
Procedimiento-Process:
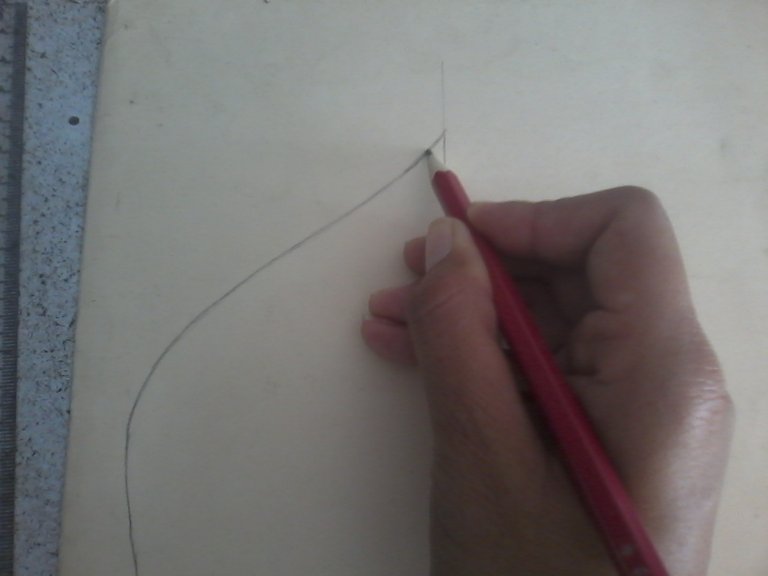
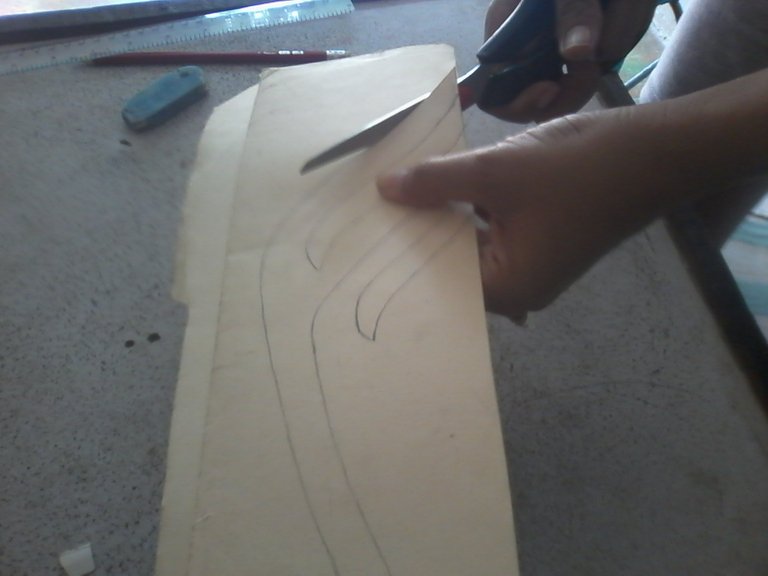
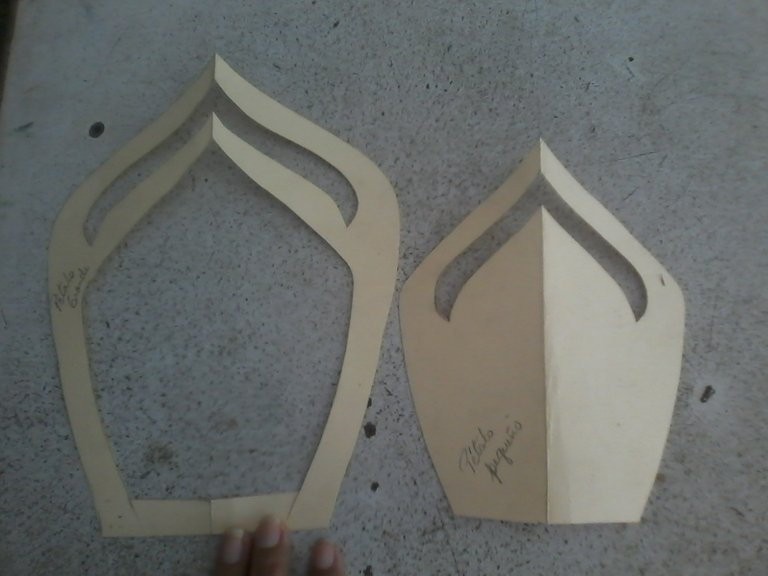
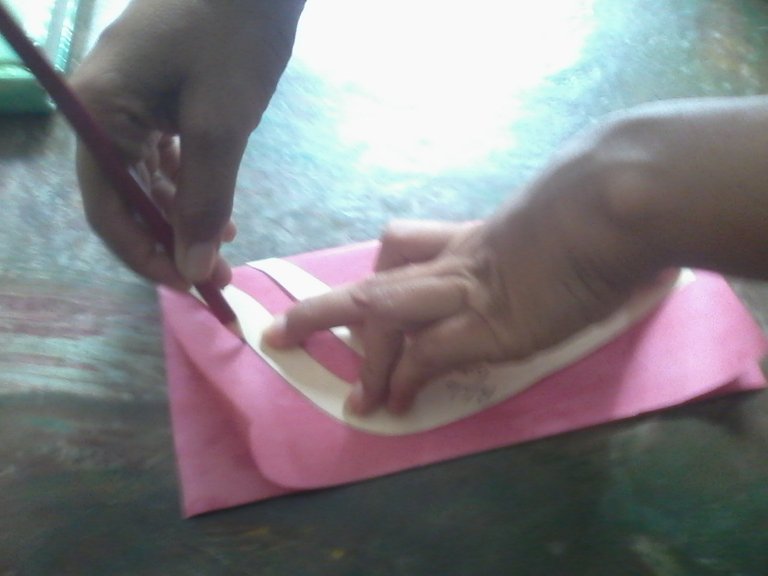
- Primero realizamos la plantilla en cartulina reciclada.
First we make the template in recycled cardboard.
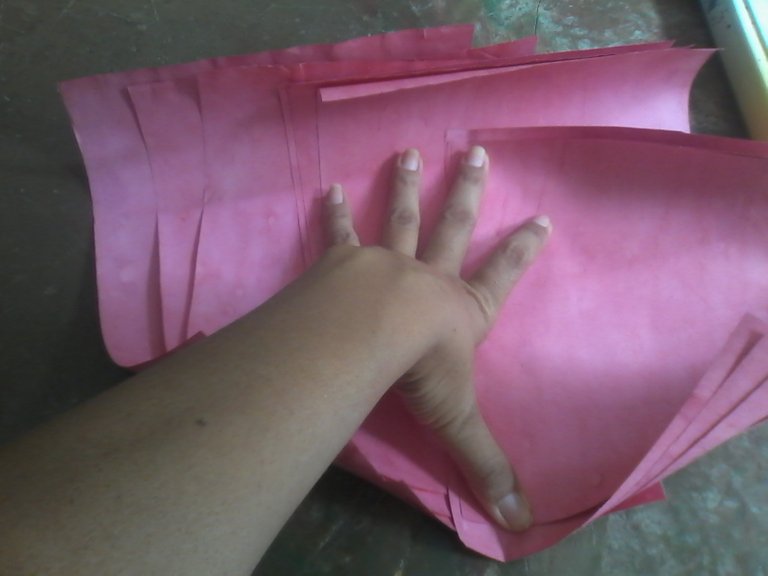
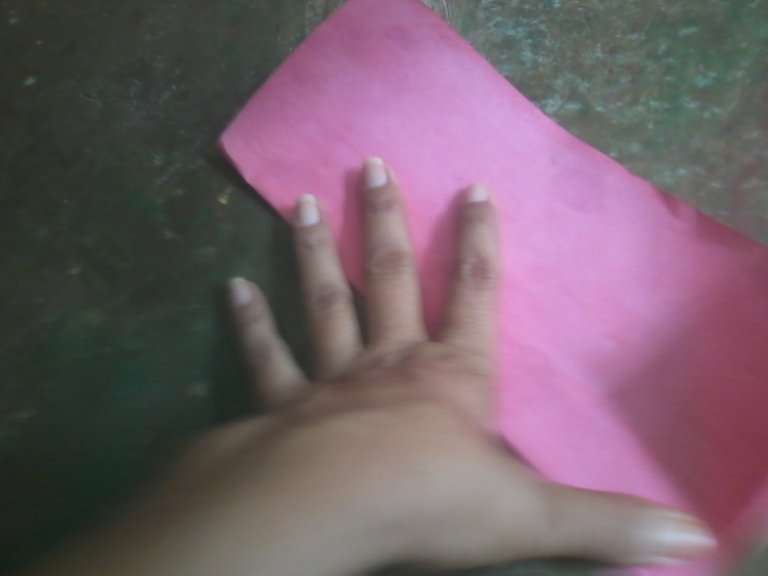
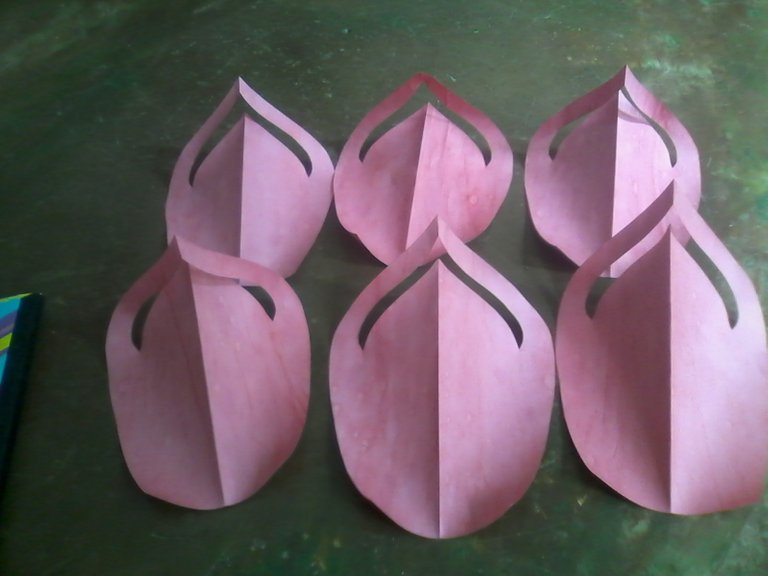
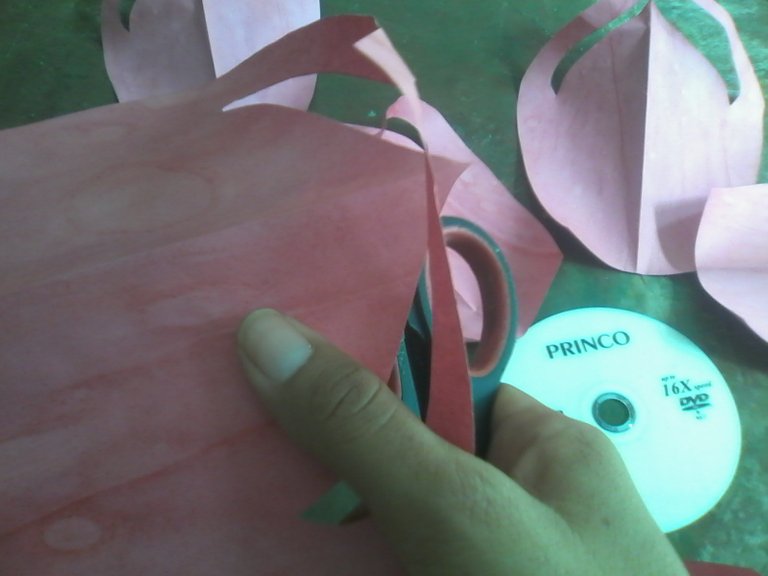
- Luego extendemos el papel araña para realizar nuestros rectángulos de 20 cm de ancho por 24cm de largo para los pétalos grandes y 16 cm de ancho por 19 cm de largo para los pétalos pequeños (necesitamos 6 de cada uno).
Then we spread the spider paper to make our rectangles 20 cm wide by 24 cm long for the large petals and 16 cm wide by 19 cm long for the small petals (we need 6 of each).
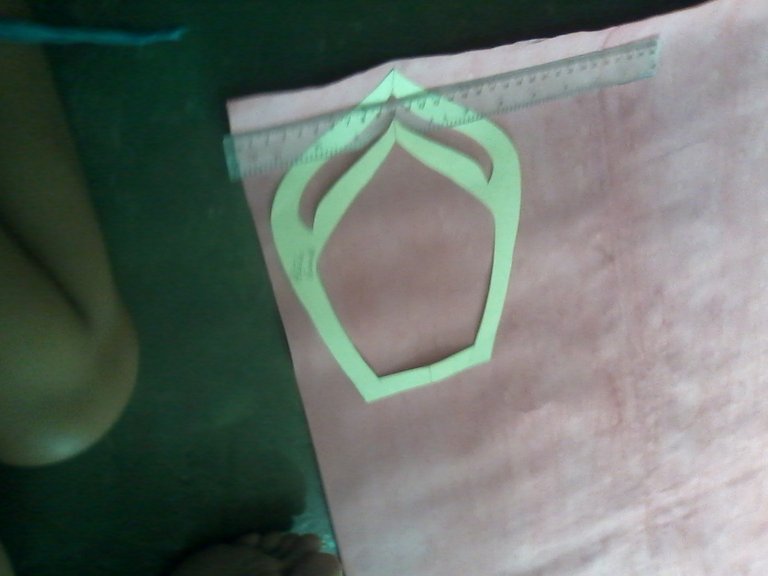
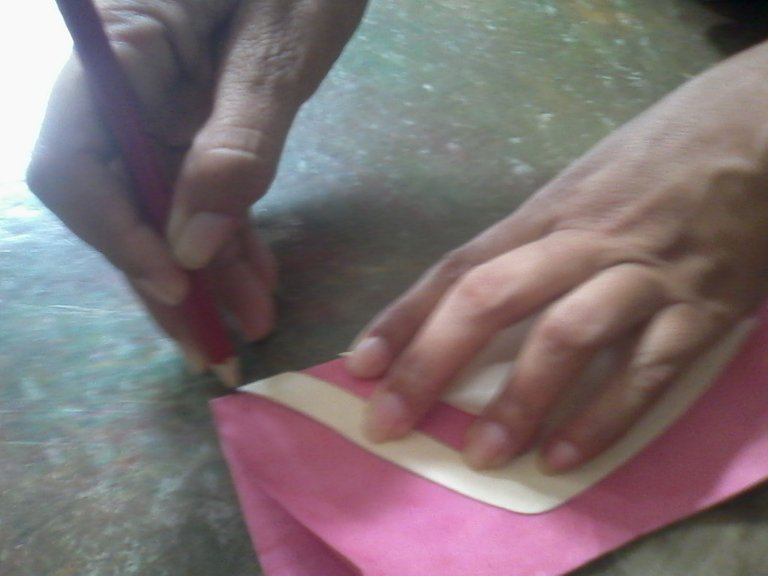
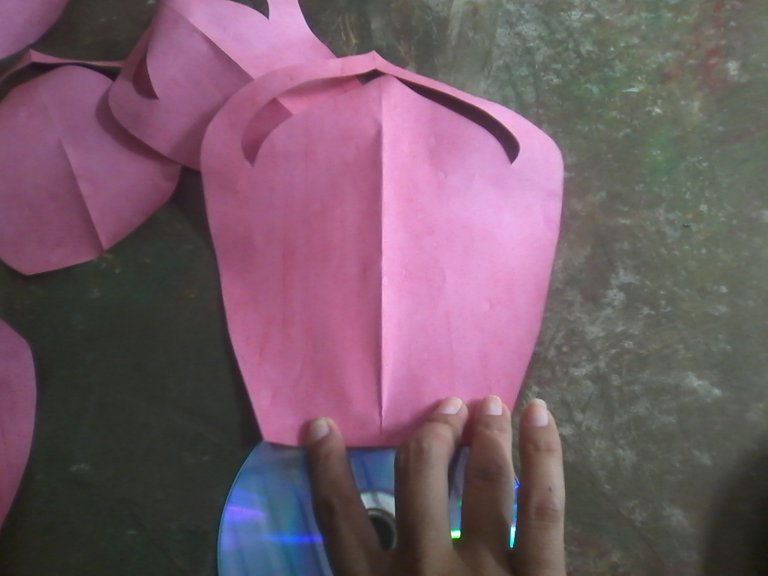
- Ahora doblamos a la mitad el rectángulo y con ayuda del molde comenzamos a realizar los pétalos.
Now we fold the rectangle in half and with the help of the mold we begin to make the petals.
- De esta manera obtendremos los pétalos grandes y pequeños.
In this way we will obtain the large and small petals.
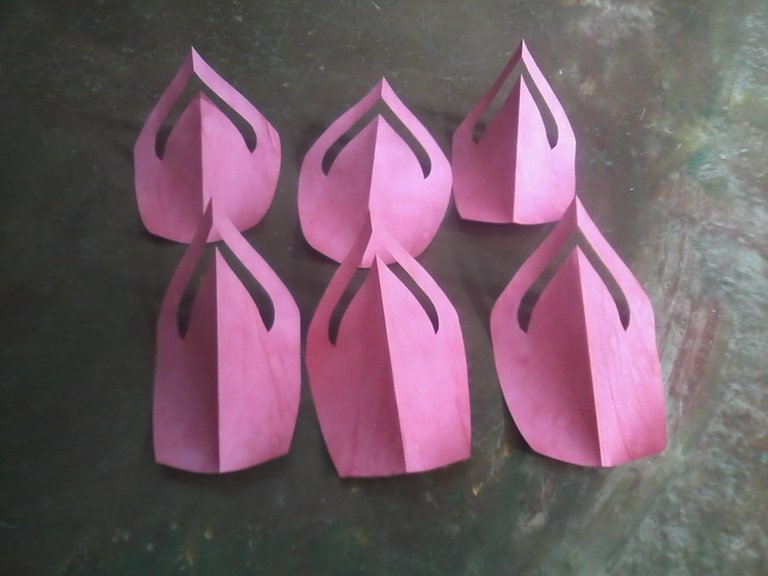
- Tomar la tijera y enrollar suavemente la parte superior del pétalo para darle forma.
Take the scissors and gently roll the upper part of the petal to shape it.
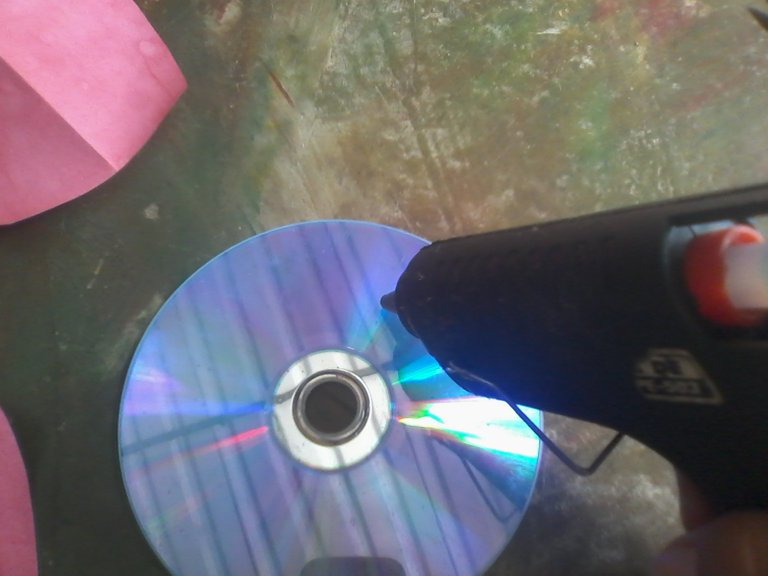
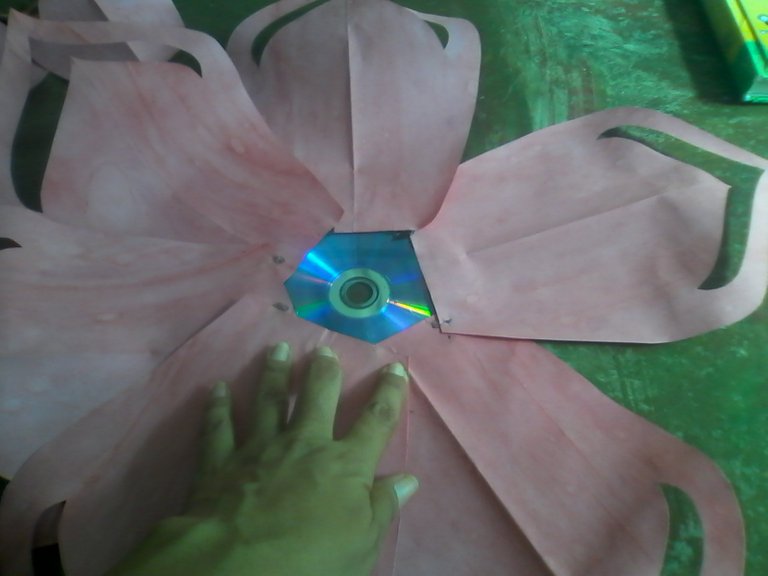
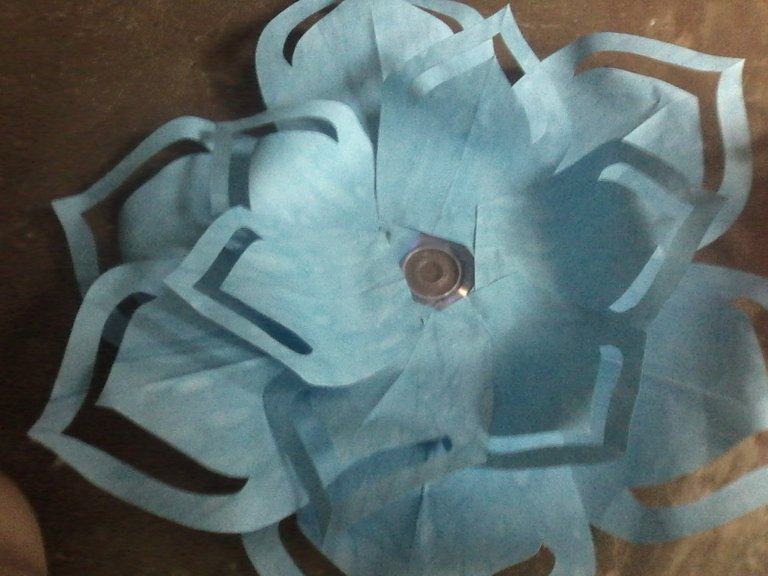
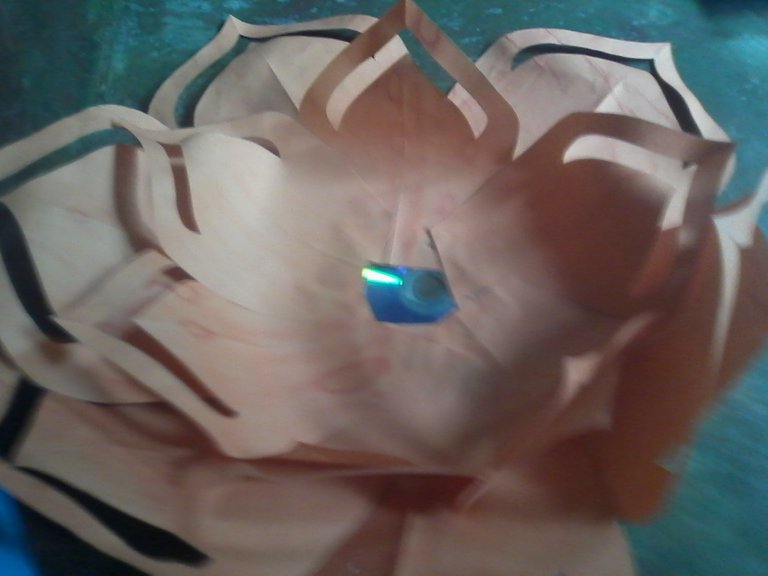
- Pegar los pétalos grandes sobre el CD reciclado y luego los más pequeños.
Stick the large petals on the recycled CD and then the smaller ones.
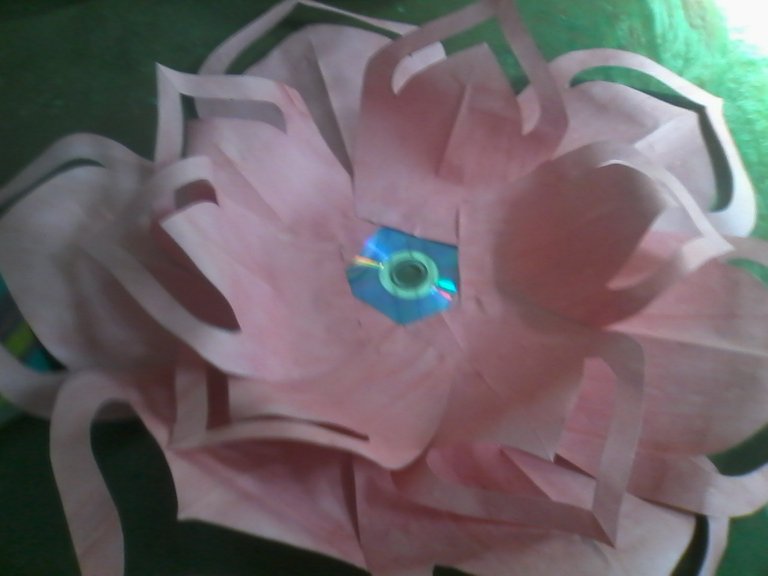
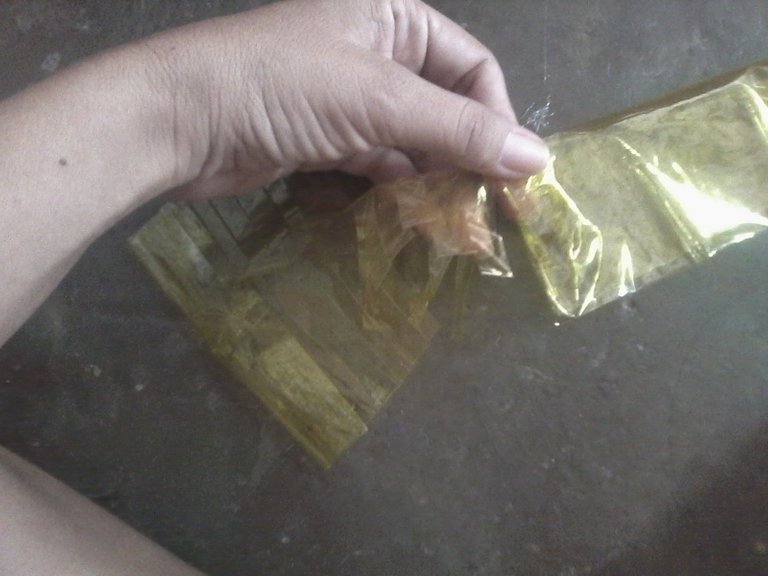
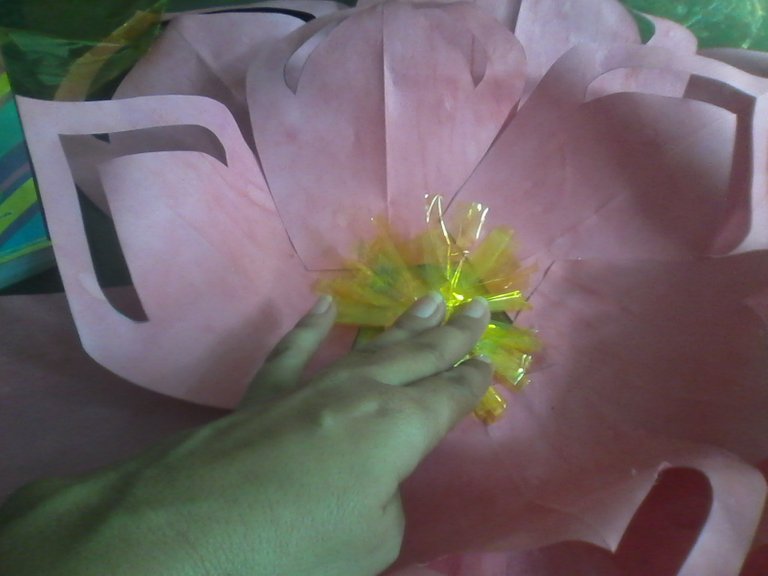
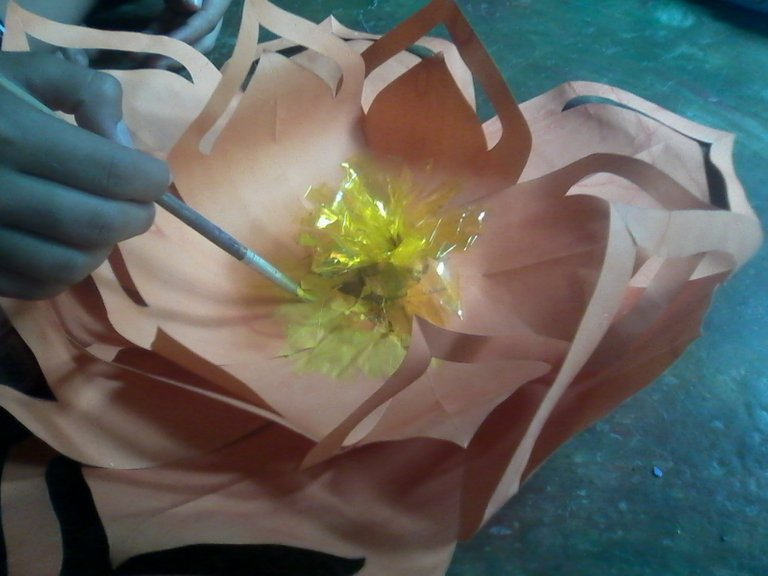
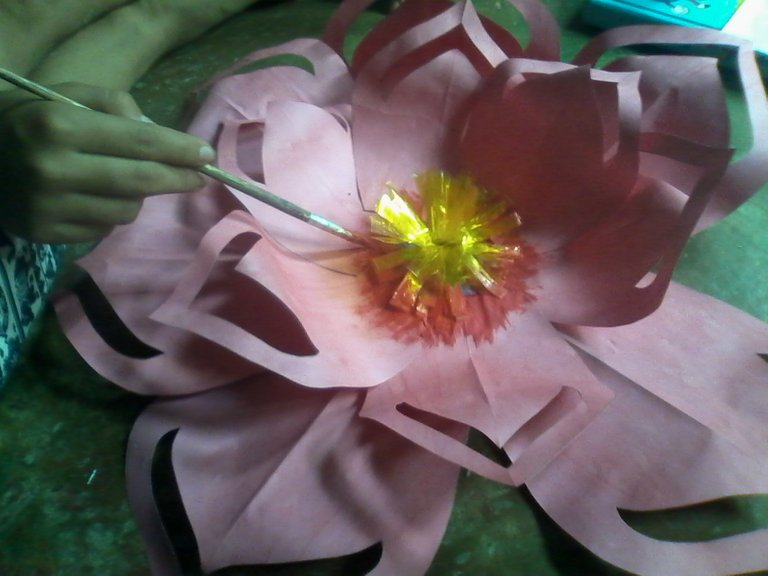
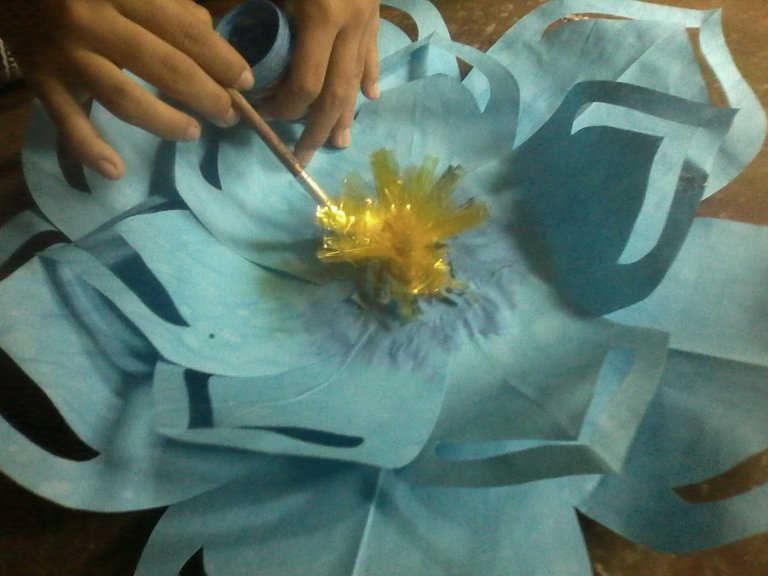
- Para hacer los pistilos centrales, doblamos un pedazo de papel celofán amarillo en dos y cortamos flecos, los cuales enrollamos sobre sí mismos y pegamos en el centro de la flor.
To make the central pistils, we fold a piece of yellow cellophane in two and cut fringes, which we roll up on themselves and glue in the center of the flower.
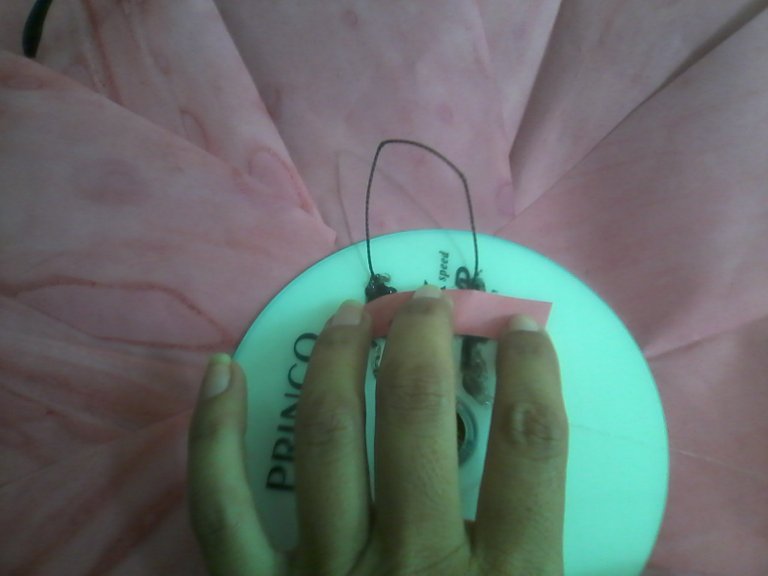
- Luego pegamos un pedazo de nailon en la parte trasera del CD, que nos servirá para guindar la flor.
Then we stick a piece of nylon on the back of the CD, which will help us to hang the flower.
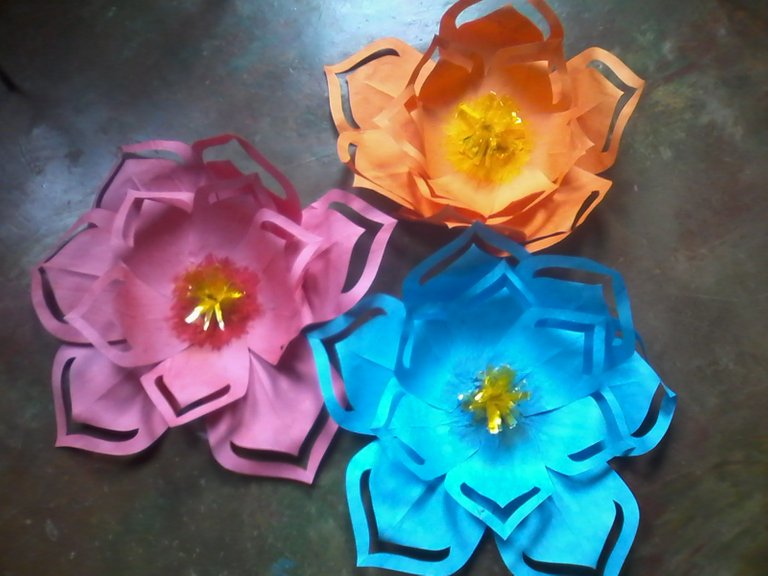
- Repetimos todo el procedimiento para realizar las flores azul y naranja.
We repeat the whole procedure to make the blue and orange flowers.
- Pintamos el centro de nuestras flores con colores similares a cada una.
We paint the center of our flowers with colors similar to each one.
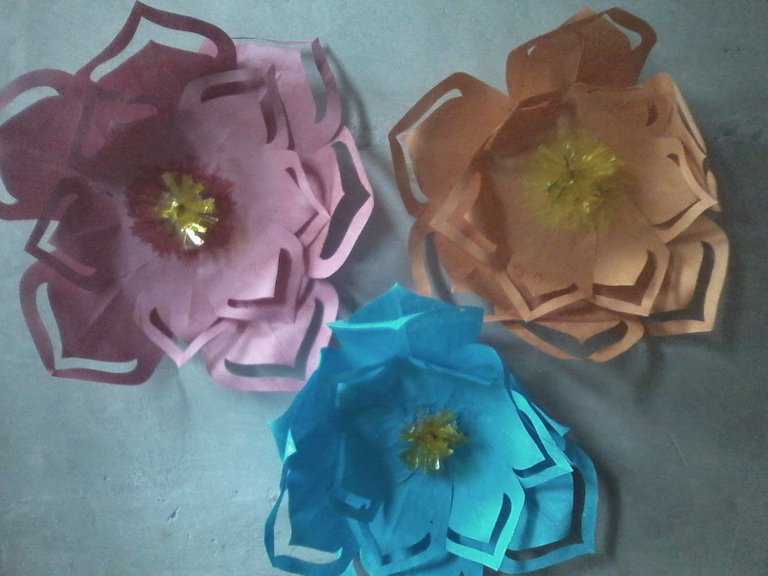
- Y así tenemos listas nuestras bellas flores gigantes.
And so we have our beautiful giant flowers ready.
¡Millones de gracias por ver mi tutorial!
Thanks a million for watching my tutorial!
¡Felicidades! Esta publicación obtuvo upvote y fue compartido por @la-colmena, un proyecto de Curación Manual para la comunidad hispana de Hive que cuenta con el respaldo de @curie.
Si te gusta el trabajo que hacemos, te invitamos a darle tu voto a este comentario y a votar como testigo por Curie.
Si quieres saber más sobre nuestro proyecto, acompáñanos en Discord: La Colmena.