
Buenas comunidad build-it de hive, vengo por aquí haciendo mi primer post sobre una manualidad asombrosa y fácil para dar un plus a un regalo o detalle, sea una madre (como fue mi caso), un familiar o alguien especial. Cabe destacar que con materiales que tenemos en casa diferentes a los mencionados podremos encontrar el mismo resultado, simplemente aplicando las técnicas con diferentes materiales para así dar un lindo detalle a esa persona.
Good hive build-it community, I come here making my first post about an amazing and easy craft to give a plus to a gift or detail, be it a mother (as it was my case), a family member or someone special. It should be noted that with materials that we have at home different from those mentioned above we can find the same result, simply by applying the techniques with different materials to give a nice detail to that person.
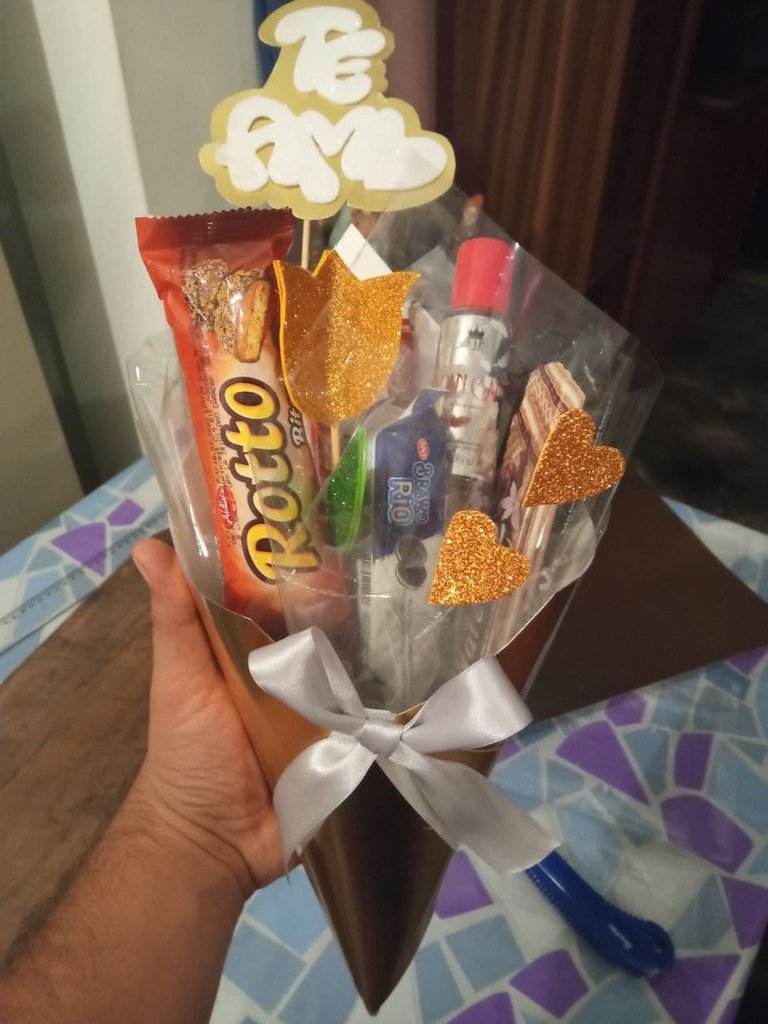
Lo que vamos a realizar hoy será un “Bouquet”, mayormente son utilizados para llevar lindas rosas o flores, pero en este caso, los utilizaremos para pequeños detalles que queramos obsequiar a alguien y así darle un toque más lindo y presentable a cualquier cosa (hasta comida o dulces) o simplemente podría llevar las rosas de tulipán 3D que aprenderemos hacer también en este post.
What we are going to make today will be a "Bouquet", mostly they are used to carry pretty roses or flowers, but in this case, we will use them for small details that we want to give to someone and thus give a nicer and presentable touch to anything (even food or candy) or simply could carry the 3D tulip roses that we will also learn to make in this post.
Los materiales que vamos a utilizar son:
The materials we are going to use are:
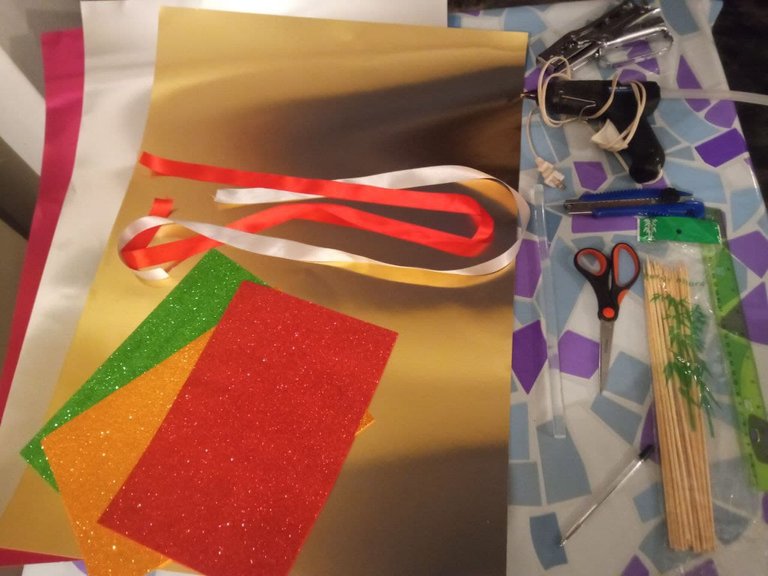
• Cartulina metalizada (en este caso pliegos 100cm x 50cm)
• Cintas de colores en combinación con la cartulina
• Foamy o Goma EVA metalizado
• Palillos de altura
• Tijeras
• Pistola de silicona caliente o silicona fría
• Cúter o exacto para cortar
• Engrapadora
- Metallic cardboard (in this case sheets 100cm x 50cm)
- Colored ribbons in combination with cardboard
- Foamy or metallized EVA rubber
- Sticks of height
- Scissors
- Hot silicone or cold silicone gun
- Cutter or exacto cutter
- Stapler
Para el bouquet / For the bouquet:
Nota: recomiendo hacer una plantilla o moldes antes de iniciar con la manualidad (en un papel periódico o algún pliego grande de papel), ya que si no se dispone de mucho material, podríamos correr el riesgo de perderlo; si eres bastante experimentado con el uso de medidas, el cúter y tijeras podrías ignorar esta nota.
Note: I recommend making a template or molds before starting the craft (on a piece of newspaper or a large sheet of paper), because if you don't have a lot of material, you could run the risk of losing it; if you are quite experienced with the use of measurements, the cutter and scissors, you could ignore this note.
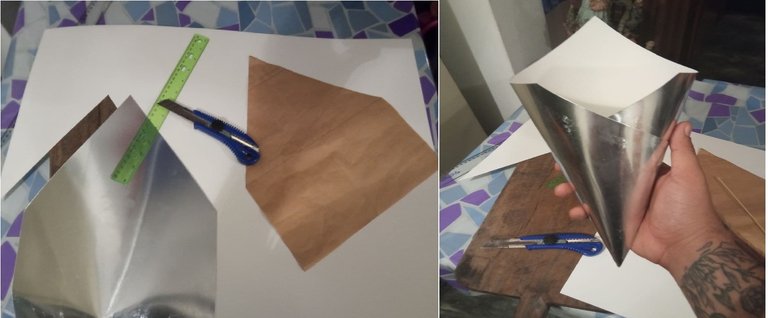
Para comenzar, debemos cortar una forma como la que se muestra en la imagen, con medidas que van de la siguiente manera:
To begin, we must cut a shape like the one shown in the image, with measurements going as follows:
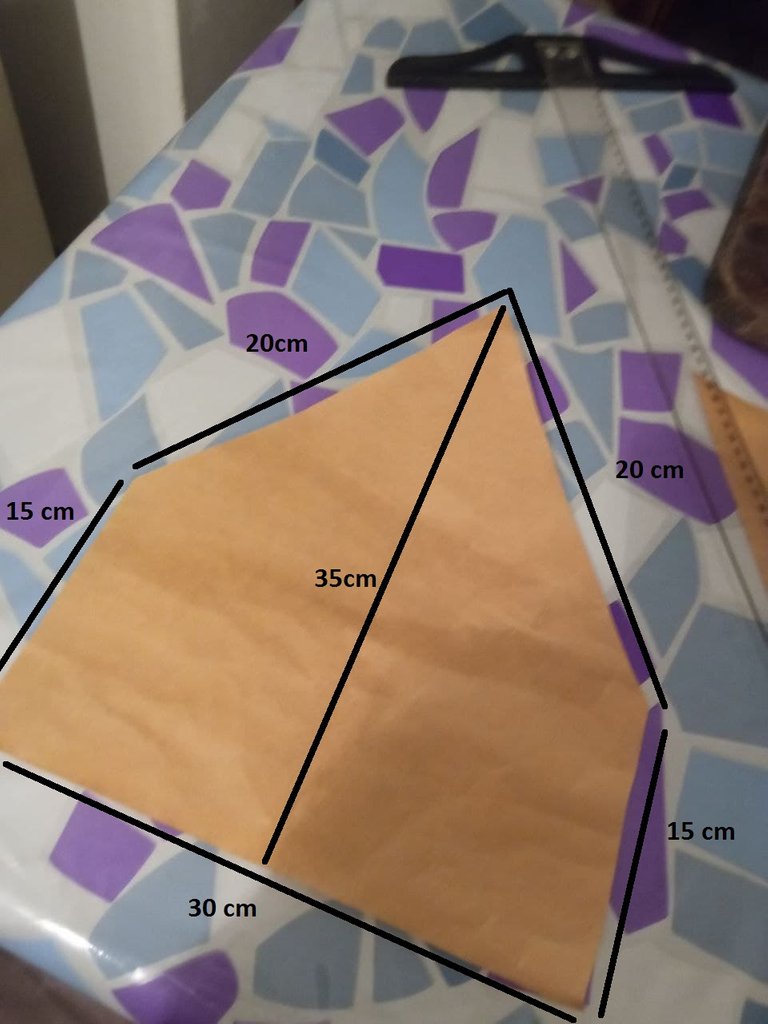
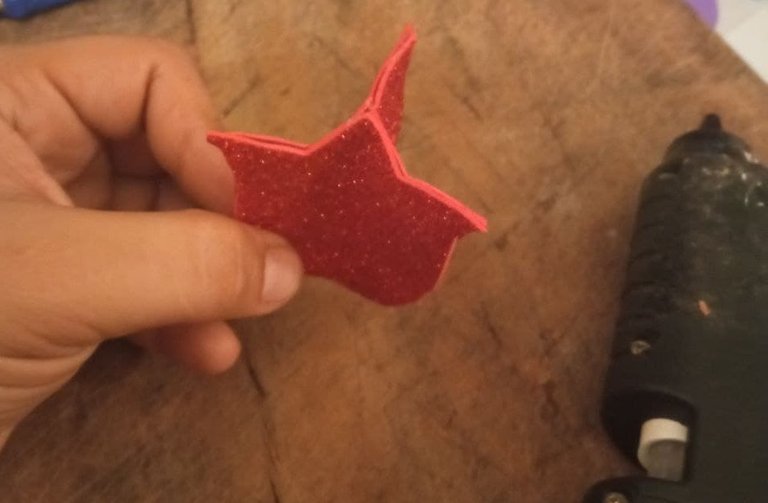
Para así conseguir un resultado de forma puntiaguda que nos ayude a que quede como la imagen numero 2:
In order to get a result of a pointed shape that will help us to make it look like the image number 2:
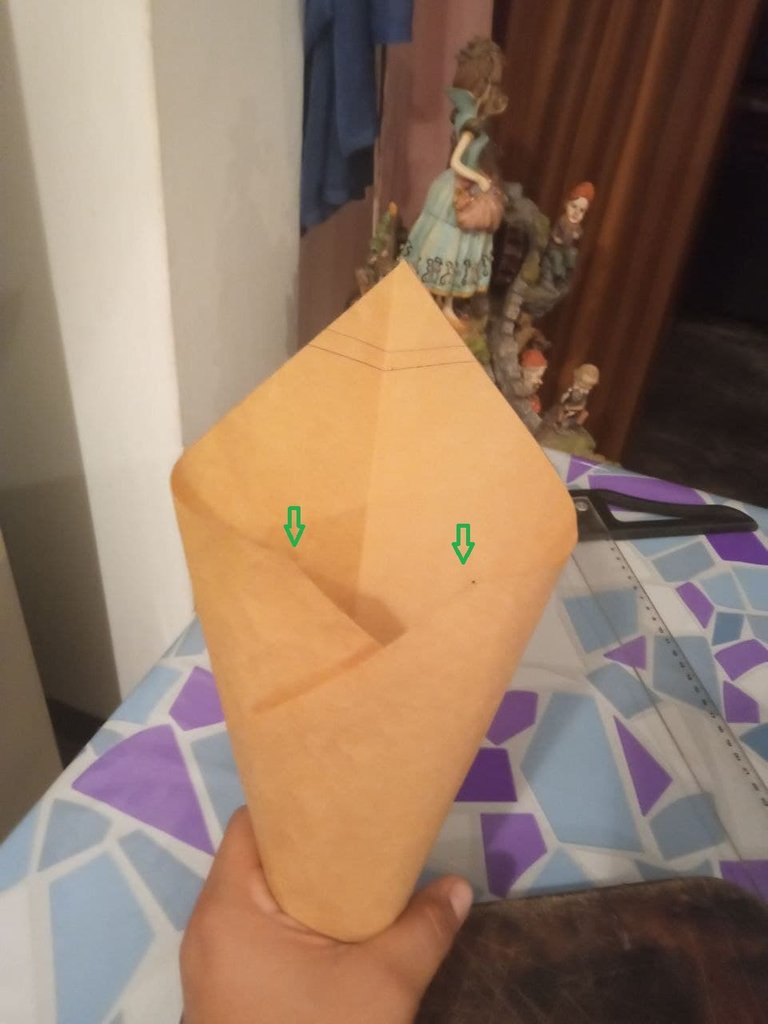
Nota: es importante al momento de dar la forma al bouquet y pegar, debemos conseguir que las dos esquinas señaladas lleguen a estar lo más alineadas posibles, ya que estas le darán toda la forma al mismo y también harán que tenga un perfecto cierre por la parte inferior.
Note: it is important at the moment of shaping the bouquet and gluing, we must make sure that the two marked corners are as aligned as possible, since they will give the bouquet its shape and will also make it have a perfect closure at the bottom.
Luego de tener hecho el molde, estamos listos para plasmarlo en la cartulina, foamy o cualquier tipo de material que vayamos a utilizar para realizar el bouquet.
After having made the mold, we are ready to shape it on the cardboard, foamy or any type of material that we are going to use to make the bouquet.
Nota: es importante que si material que vayamos a trabajar, su diseño es solo de una cara, calcar la figura a recortar por la parte trasera.
Note: it is important that if the material we are going to work with is only one-sided, trace the figure to be cut out on the back side.
Para las rosas o tulipanes. / For roses or tulips.
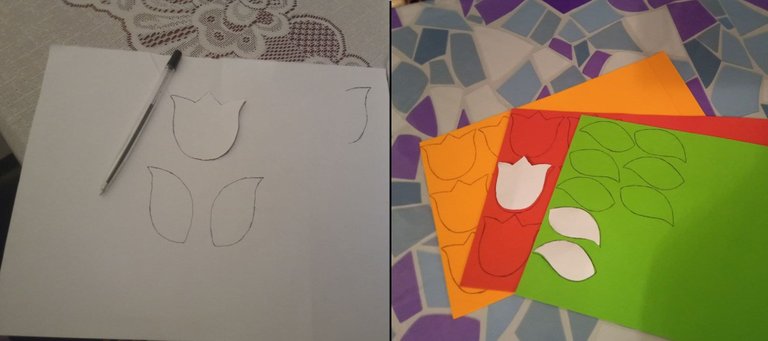
Como antes, es importante seguir utilizando algún tipo de moldes para no gastar material de forma innecesaria; para esto realizaremos en otro lugar la forma de las flores de tulipán que queremos, y realizamos una forma para luego plasmar en el material a trabajar (foamy escarchado en este caso)
As before, it is important to continue using some kind of molds to avoid wasting material unnecessarily; for this we will make in another place the shape of the tulip flowers that we want, and then we will make a shape to be molded in the material to be worked (frosted foamy in this case).
Nota: es importante recordar que si material que vayamos a trabajar, su diseño es solo de una cara, calcar la figura a recortar por la parte trasera.
Note: it is important to remember that if the material we are going to work with is only one-sided, trace the figure to be cut out on the back side.
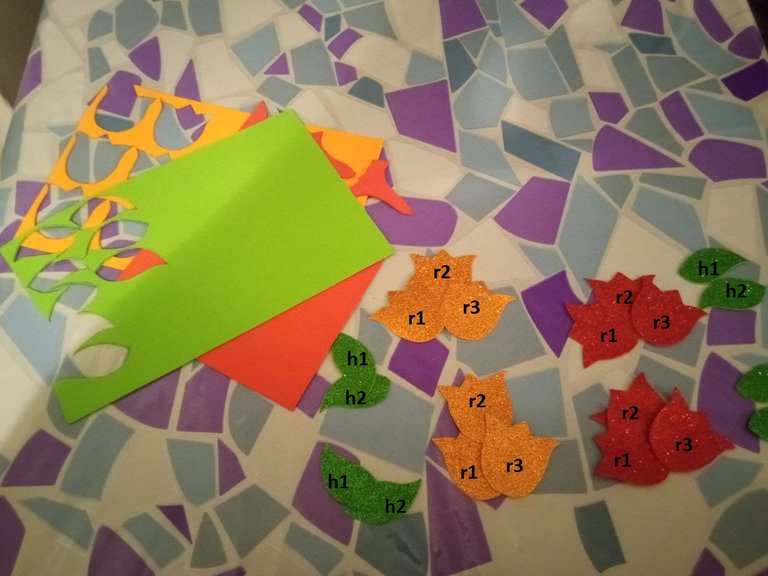
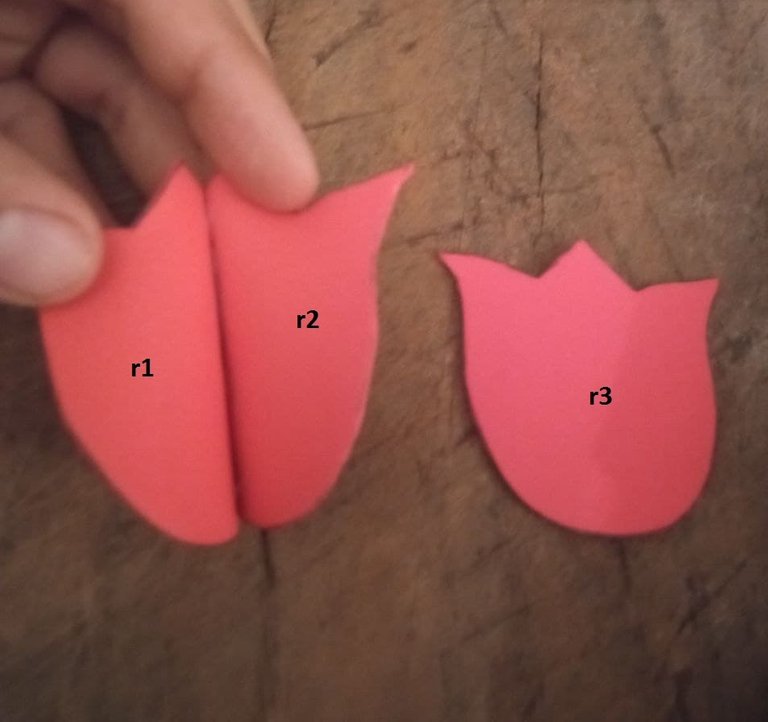
Luego continuamos recortando todas las piezas; para realizar cada rosa completa necesitaremos un total de tres (reflejado en la imagen como r1, r2, r3) piezas de su silueta, y dos de la hoja de cada lado (reflejado en la imagen como h1, h2).
Then we continue cutting out all the pieces; to make each complete rose we will need a total of three (reflected in the image as r1, r2, r3) pieces of its silhouette, and two of the leaf on each side (reflected in the image as h1, h2).
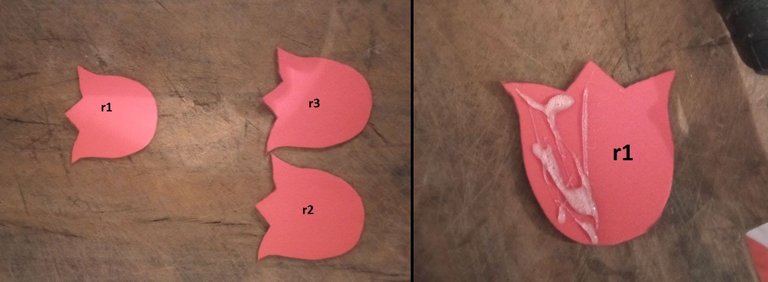
Para realizar la rosa, utilizaremos silicona caliente mi caso para que el proceso de secado sea más rápido, sin embargo usted podría utilizar el que desee y que disponga en casa.
To make the rose, we will use hot silicone my case so that the drying process is faster, however you could use the one you want and that you have at home.
Comenzaremos con dos pétalos (reflejados en la imagen como r1, r2), colocando el pegante en la mitad de uno de ellos, para así conseguir una figura semejante a la segunda imagen y luego unir el tercer pétalo (reflejados en la imagen como r3) utilizando el pegante en ambos lados y que quede una imagen de rosa en 3d.
We will start with two petals (reflected in the image as r1, r2), placing the glue in the middle of one of them, in order to get a figure similar to the second image and then join the third petal (reflected in the image as r3) using the glue on both sides to get a 3d rose image.
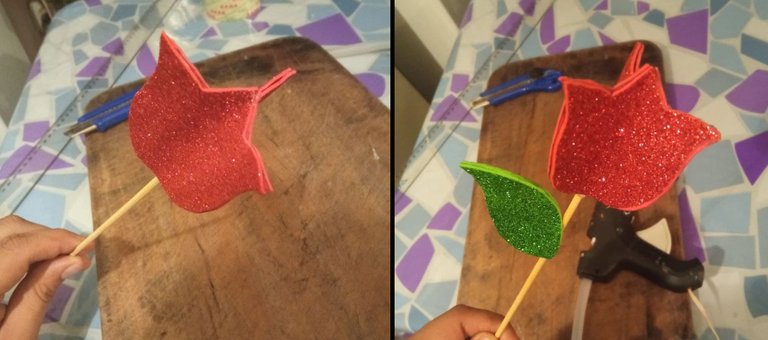
Ya luego nos quedara un pequeño espacio que con los palillos de altura debemos utilizar para montar nuestra rosa, pegar las dos partes de la hoja y quedara un lindo tulipán para decorar esta o alguna otra manualidad.
Then we will be left with a small space that with the toothpicks we should use to assemble our rose, glue the two parts of the leaf and we will have a nice tulip to decorate this or any other craft.
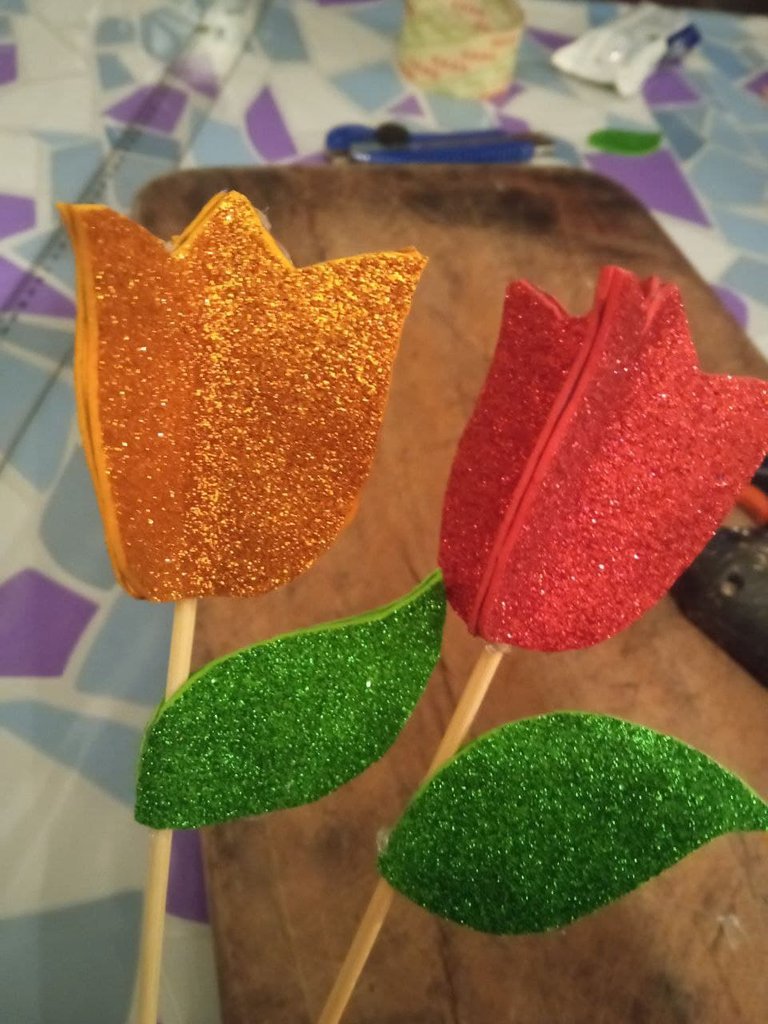
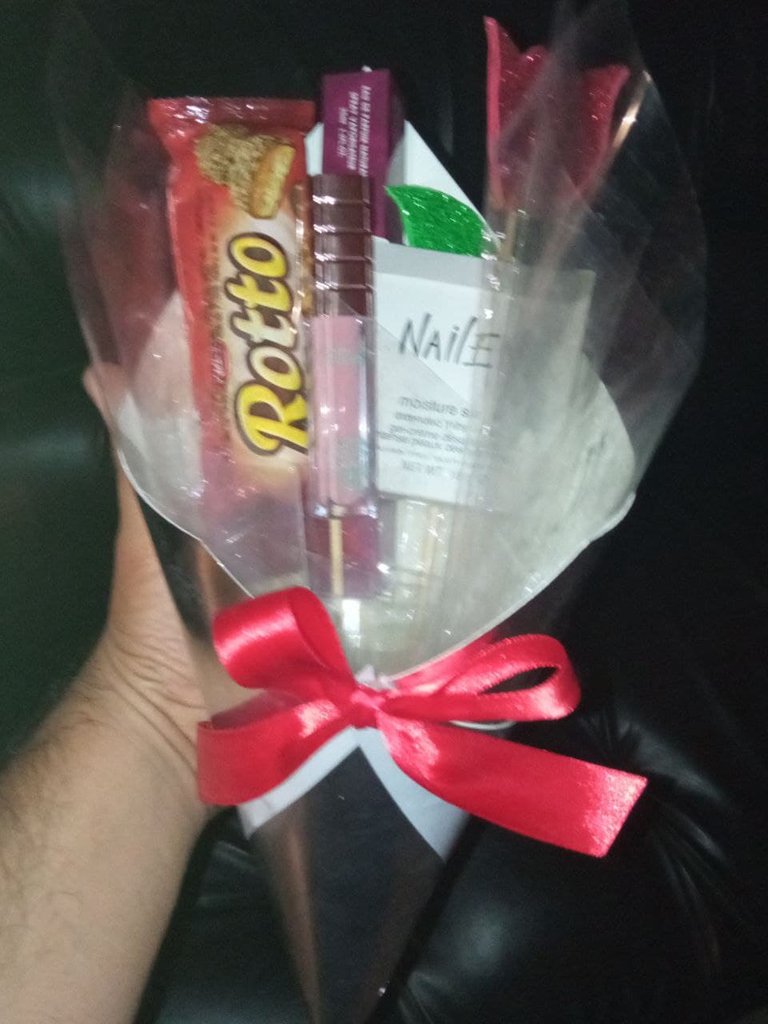
Ya luego con estos dos arreglos, podemos comenzar a decorar o introducirle obsequios a nuestro bouquet.
Then with these two arrangements, we can begin to decorate or introduce gifts to our bouquet.
Nota: si nuestros dulces o cualquier objeto que queramos añadir al bouquet no es de gran tamaño o se ve opacado entre otras cosas, utilizar los palillos de altura para hacerlos ver mejor.
Note: if our candies or any object we want to add to the bouquet is not large in size or is overshadowed among other things, use the height sticks to make them look better.
Ya solo queda de nuestra creatividad y gustos añadir nuevos accesorios para que vayan acorde con la ocasión o persona a la que se vaya a dar el obsequio, este obsequio fue realizado para las madres de mi casa este año y al principio del post pueden encontrar algunos modelos de como quedarían añadiéndole sencillas cosas que podremos realizar o encontrar sin mucho esfuerzo, que la creatividad los domine.
It only remains for our creativity and tastes to add new accessories to go according to the occasion or person to whom the gift will be given, this gift was made for the mothers of my house this year and at the beginning of the post you can find some models of how they would be adding simple things that we can make or find without much effort, that creativity dominates them.
Muchas gracias por tomarte el tiempo de leer mi post, y encantado de hacer mi primera publicación en esta comunidad, nos vemos pronto en un nuevo post.
Thank you very much for taking the time to read my post, and glad to make my first post in this community, see you soon in a new post.
Congratulations @itsnesto! You have completed the following achievement on the Hive blockchain and have been rewarded with new badge(s) :
Your next target is to reach 50 upvotes.
You can view your badges on your board and compare yourself to others in the Ranking
If you no longer want to receive notifications, reply to this comment with the word
STOPSupport the HiveBuzz project. Vote for our proposal!