BIENVENIDOS A MI BLOG 💖
WELCOME TO MY BLOG 💖


Hoy realizaremos y aprenderemos como hacer unos palos chinos para el cabello.
Today we will make and learn how to make Chinese hair sticks.
Quedaras encantada (o) con el resultado de este trabajo. No solo se ve bello sino la gran utilidad del mismo.
You will be delighted with the result of this work. It not only looks beautiful but the great utility it has.
Lo mejor de este trabajo es que son muy pocos los materiales que debemos usar.
The best thing about this work is that there are very few materials that we must use.
Sin más que decir acompáñame a hacer este paso a paso.
Without more to say join me to do this step by step.

1.- Lana.
1.- Wool.
2.- Brochetas.
2.- Skewers.
3.- Tijeras.
3.- Scissors .
4.- Regla.
4.- Ruler.
5.- Lima o pael de lija.
5.-. File or sandpaper.
6.- Pepitas para decorar.
6.- Nuggest to decorate.
7.- Pinza.
7.- Pliers.

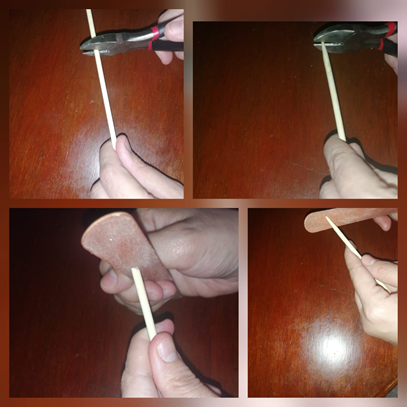
FIRST STEP: We take the skewers and with some tweezers we cut them to the desired size, I left them 21.5 cm long. Then with a file or sandpaper we must clean any spindles to avoid damage to our head, also cut the tips of my height sticks since they are very sharp and leave them with a blunt tip for safet.
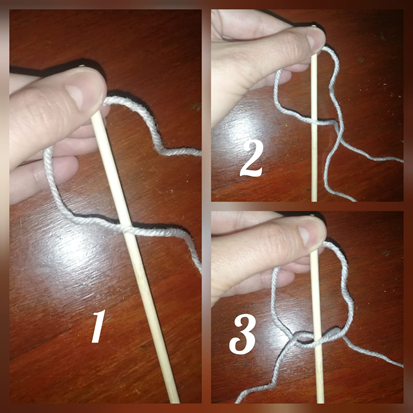
STEP TWO: This step is very careful to understand it, it is not difficult but it can be confusing. Once our skewers are prepared with the wool we proceed to the weaving. We take 40 cm of wool, we hold it in half to the skewer with our fingers, the left part of the wool is placed above the skewer, then the right part is placed above the left wool and then passed under the stick and remove it from above the left woolagain and so on we repeat the mechanism. Please take a good look at the image.
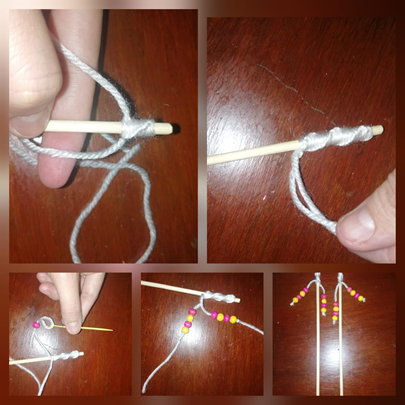
THIRD STEP: Here we are seeing how the fabric is becoming like a spiral. Once we reach the desired amount we make a knot so that it remains firm and our work does not come loose. Then with a blunt knitting needle we start to place the seeds. Regarding the decoration, it is up to your creativity and you can use the colors that you like the most.
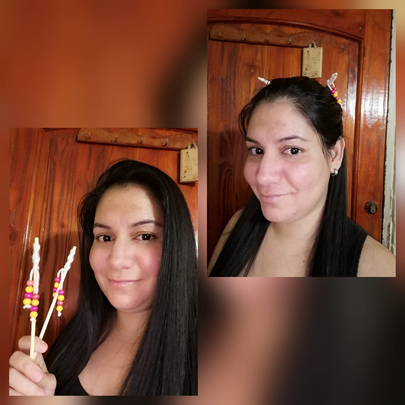
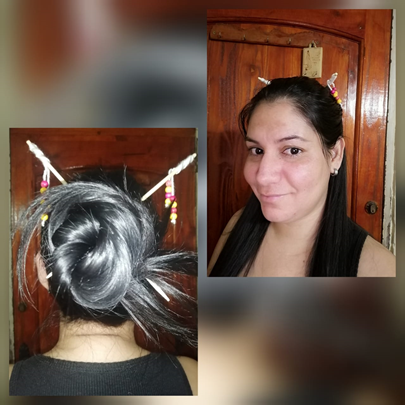
Es un procedimiento bastante fácil de hacer y el acabado queda maravilloso, aquí les muestro lo bien que sujetan mi cabello.
It is a fairly easy procedure to do and the finish is wonderful, here I show you how well they hold my hair.
Todas las fotos son de mi autoria/ All photos are my authorship
Nos vemos en un próximo post, me despido con amor 😍 @jayoxaju.
See you in a next post, I say goodbye with love 😍 @jayoxaju.
Te quedaron bonitos y resistentes esos palos chinos para el cabello. Sigue asi ;)