BIENVENIDOS A MI BLOG 💖
WELCOME TO MY BLOG 💖


Hola mis queridos amigos de Hive.blog espero siempre se encuentren bien.
Hello my dear friends from Hive.blog I hope you are always well.
En esta oportunidad me he unido al reto de "RECICLAJE CREATIVO" propuesto por la amiga @Jennyzer, si quieres ser parte de este reto y de paso eres amante a las manualidades con material de provecho te invito a que te unas. Si quieres saber mas sobre el desafió aquí te dejo el ENLACE.
This time I have joined the challenge of "CREATIVE RECYCLING" proposed by the friend @Jennyzer, if you want to be part of this challenge and by the way you are a lover of crafts with useful material, I invite you to join. If you want to know more about the challenge, here is her LINK.
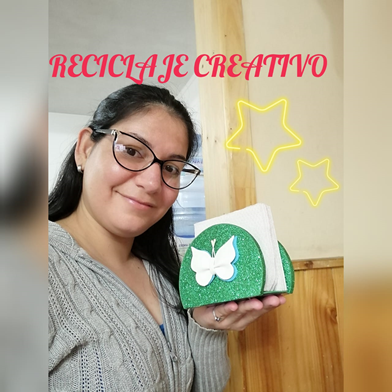
Sin mas preámbulos hoy les traigo un hermoso servilletero muy sencillo de hacer y se ve sumamente bonito.
Without further ado today I bring you a beautiful napkin holder that is very simple to make and it looks extremely beautiful.
Lo mejor de este trabajo es que son muy pocos los materiales que debemos usar.
The best thing about this work is that there are very few materials that we must use.
Sin mas que decir acompáñame a hacer este paso a paso.
Without more to say join me to do this step by step.

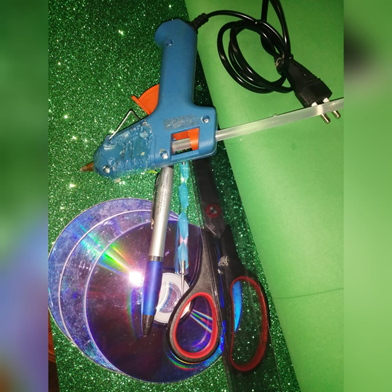
1.- 3 CD.
1.- 3 CD.
2.- Pistola y barra de silicón.
2.- Gun and silicone stick.
3.- Goma eva.
3.- Eva rubber.
4.- Tijeras.
4.- Scissors .
5.- Regla.
5.- Ruler.
6.- Lapiz.
6.- Pencil.
7.- Puntero (opcional).
7.- Pointer (optional).

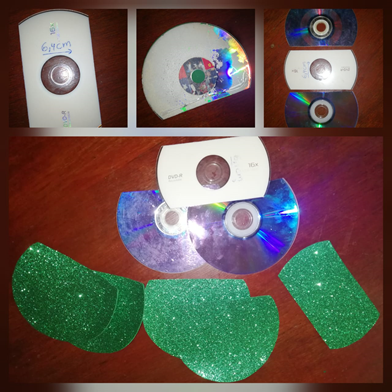
Como primer paso tomamos uno de los CD y lo cortamos como un rectángulo, la diferencia es que quedara redondeada dos partes y las otras dos rectas, debe quedar con una medida de 6,4 cm de ancho. Luego los otros dos CD solo se le quitara una parte para dejarlo recto. Favor observar la imagen.
As a first step we take one of the CDs and cut it as a rectangle, the difference is that two parts will be rounded and the other two straight, it should be 6.4 cm wide. Then the other two CDs will only be removed a part to make it straight. Please observe the image.
Una vez lista las piezas en CD calcamos estas figuras en la goma eva y recortamos.
Once the pieces are ready on CD, we trace these figures on the eva rubber and cut them out.
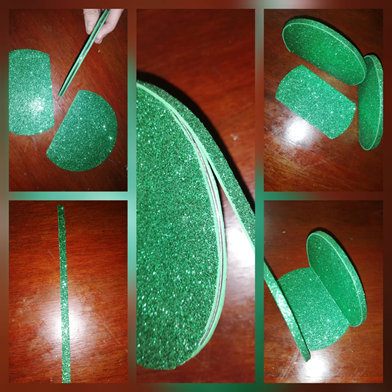
Como segundo paso, tomamos cada pieza y les pegamos la goma eva cubriendo cada figura. Luego recortamos 2 tiras de la misma goma eva de 5 mm y la pegaremos en todo el borde de los CD, dejando así un mejor acabado.
As a second step, we take each piece and glue the rubber foam covering each figure. Then we cut 2 strips of the same 5 mm eva rubber and we will glue it around the edge of the CDs, thus leaving a better finish.
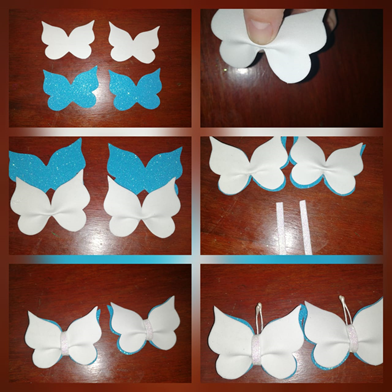
Como tercer paso realizaremos unas mariposas para decorar la servilletera.
As a third step we will make some butterflies to decorate the napkin.
Debemos realizar dos piezas de cada color, luego las blancas en el centro las doblamos y le aplicamos un punto de silicona, por la parte de atrás hacemos el mismo procedimiento para queden de esta forma.
We must make two pieces of each color, then we fold the white ones in the center and apply a point of silicone, on the back we do the same procedure to make them look like this.
Una vez lista las blancas tomamos la de color celeste y recortamos un poco mas en los centros haciendo que se vea un corte en V. Estas serian la base y le pegamos arriba las blancas. Recortamos una tira de goma eva con escarcha de 5 mm y la pegamos por todo el centro de la mariposa.
Once the white ones are ready, we take the light blue one and cut a little more in the centers making it look like a V cut. These would be the base and we hit the white ones on top. We cut out a 5 mm strip of eva foam with frosting and glue it all over the center of the butterfly.
Por ultimo le coloqué unas antenas que yo tenia de perleria en forma de gota. Tu puedes usar lo que tengas en casa. Quedando asi las mariposas 😍
Finally I put some antennas that I had of pearl drop-shaped. You can use what you have at home. Thus leaving the butterflies 😍
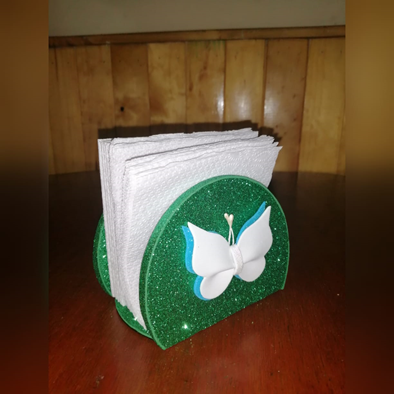
Como ultimo paso, pegamos cada mariposa por ambos lados del servilletero. Aquí el trabajo terminado, espero quedes tan fascinada (o) como quede yo.
As a last step, we glue each butterfly on both sides of the napkin holder. Here the finished work, I hope you are as fascinated (or) as I am.
Todas las fotos son de mi autoria/ All photos are my authorship
Nos vemos en un próximo post, me despido con amor 😍 @jayoxaju.
See you in a next post, I say goodbye with love 😍 @jayoxaju.
Hi @jayoxaju! Thank you for posting through our Hive Community Page This article will be passed to other curation projects for more votes support. Keep up the good works!
Siempre gracias por el apoyo💖.
Quedó muy hermoso, camuflaste increíblemente el material que usaste. Gran trabajo, gracias por participar.
Hola @jennyzer, esa es la idea camuflar el material reciclaje, sacarle provecho y obtener un trabajo hermoso. Feliz de ser parte del reto.
Te quedaron muy hermoso muy buen acabado @jayoxaju
Hola @egarysv, gracias bella.
Me alegra que te haya gustado.