Hola a todos esos usuarios de esta gran comunidad.
En esta ocasión vengo con una creación muy increíble y que me llevó mucho tiempo en terminarla.
Quiero aclarar que todo fue hecho por mi persona.
Hello to all those users of this great community.
This time I come with a very incredible creation that took me a long time to finish.
I want to clarify that everything was done by me.
It is a nice and curious:
Se trata de un bonito y curioso ...
It is a nice and curious ...
Tanque de guerra hecho con material reciclabe/DIY War tank made with recyclable material

sin más preámbulos,Empezamos.
without further ado, let's get started.
Materiales y herramientas que usé.
Materials and tools that I used.
- Materiales/Materials
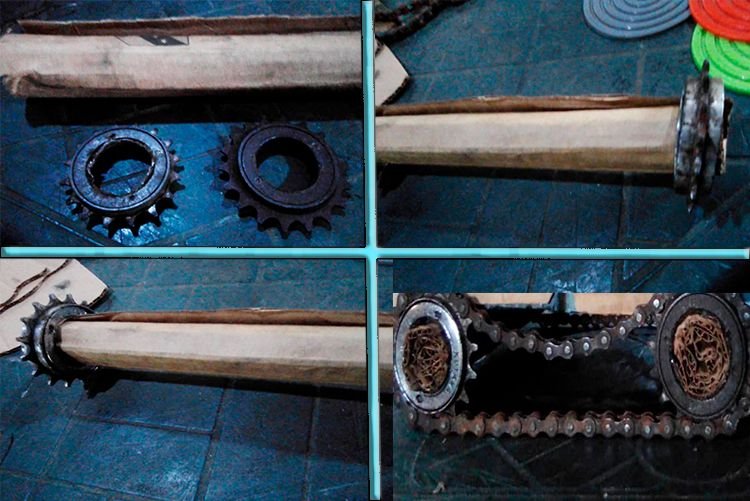
4 Engranaje de Bicicleta.
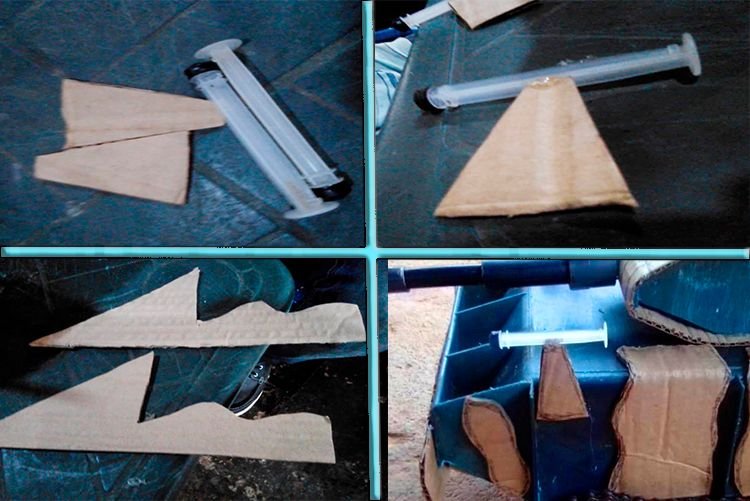
1 Émbolo de Jeringa
1 Cadena de bicicleta.
2 Marcadores desgastado.
1 Encendedor
1 Pinzas o Alicate
1 Destornillador.
1 Barra de silicón.
1 Caja de Herramienta inservible.
1 papel
1 Alicate o Pinzas.
1 Tubo
4 Bicycle Gear.
1 Bicycle chain.
2 worn markers.
1 lighter
1 Tweezers or Pliers
1 screwdriver.
1 silicone stick.
1 Unusable Tool Box.
1 Tube
1 paper
1 Pliers or Tweezers.
Principalmente empezaremos cortando el cartón en forma rectangular.
Luego cortaremos la caja de herramienta y uniremos las dos partes cortadas.
y luego el tubo lo colocamos adentro para que nos quede listo nuestro cañón
We will mainly start by cutting the cardboard into a rectangular shape.
Then we will cut the tool box and join the two cut parts.
and then we place the tube inside so that our cannon is ready
El siguiente paso: cortar otro pedazo de cartón y hacer casi lo anterior para crear la cabina de nuestro tanque.Una vez terminado eso vamos a tomar los marcadores desgastado y lo pegaremos con silicón a los lados de nuestra cabina.
Se van a ver como los misiles de nuestro tanque.
The next step: cut another piece of cardboard and do almost the above to create the cabin of our tank.Once finished that we are going to take the worn markers and we will glue it with silicone on the sides of our cabin.
They will look like the missiles in our tank.
Ahora vamos a agregar la tracción de orugas a nuestro tanque.(por ni sabes que es tracción de oruga,son las ruedas).
Doblamos un cartón en forma de cilindro y colocamos nuestras piñas,Luego con nuestro la pegamos abajo de nuestro Carro de combate.
Now we are going to add crawler traction to our tank (you don't even know it's crawler traction, it's the wheels).
We fold a cardboard in the shape of a cylinder and place our pinecones, then with our glue it under our battle tank.
Ya listas nuestras increíbles ruedas.
Continuaremos creando las metralletas a nuestro a carro de combate.
Cortaremos de nuevo cartón para hacerle soporte a las misma
Ahora pegaremos a los costados el émbolo de las jeringa para que nuestro carro tenga ya esas metralletas.
Our incredible wheels are ready.
We will continue to create the submachine guns for our battle tank.
We will cut cardboard again to make support for it
Now we will glue the syringe plunger to the sides so that our car already has those submachine guns.
y ahora el siguiente paso es ponerles unas tapitas a nuestra ruedas.
A mi criterio creo que se ve mas fabuloso nuestro tanque (Aunque no es necesario).
Nuevamente cortaremos cartón para obtener 4 piezas en forma redonda.
Después pegaremos a nuestra rueditas.
And now the next step is to put some caps on our wheels.
In my opinion I think our tank looks more fabulous (Although it is not necessary).
Again we will cut cardboard to obtain 4 pieces in a round shape.
Then we will hit our wheels.
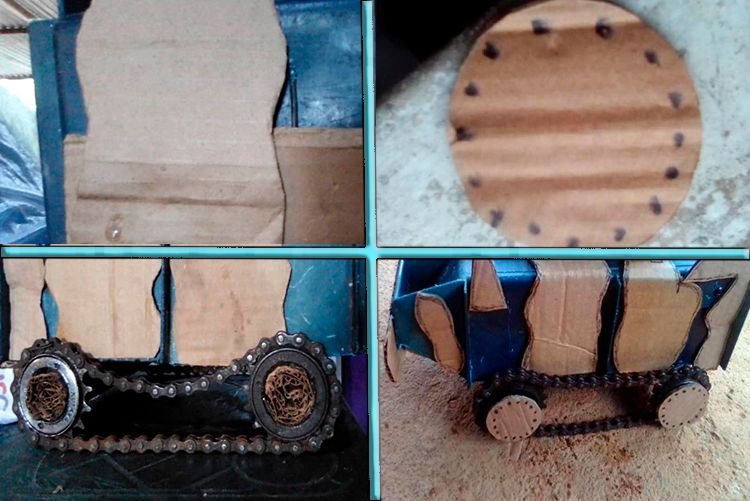
Y así es como quedó por los momento
And this is how it turned out
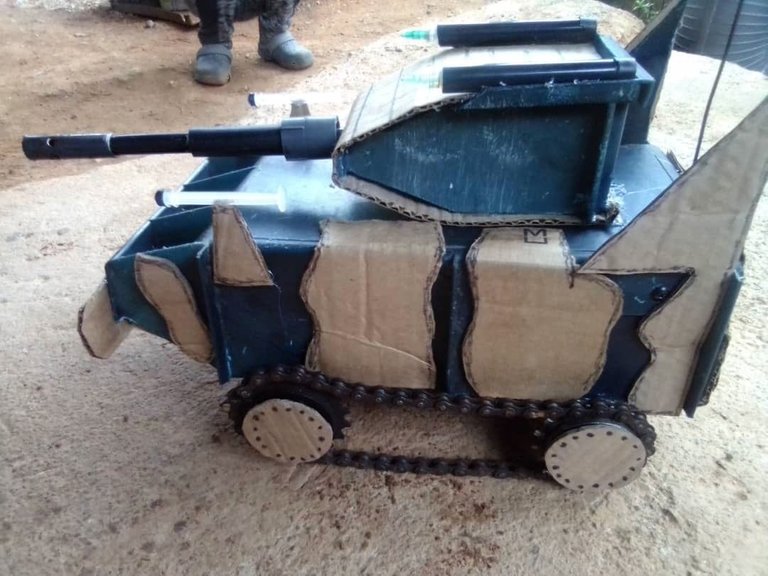
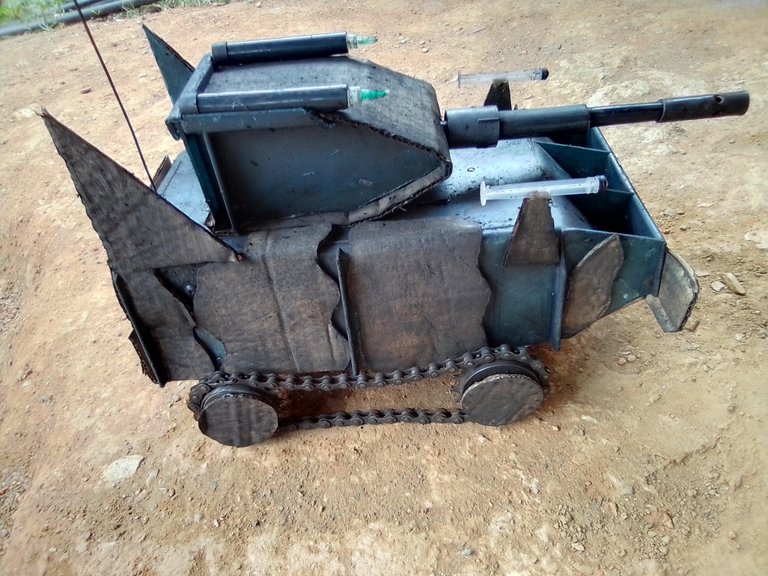
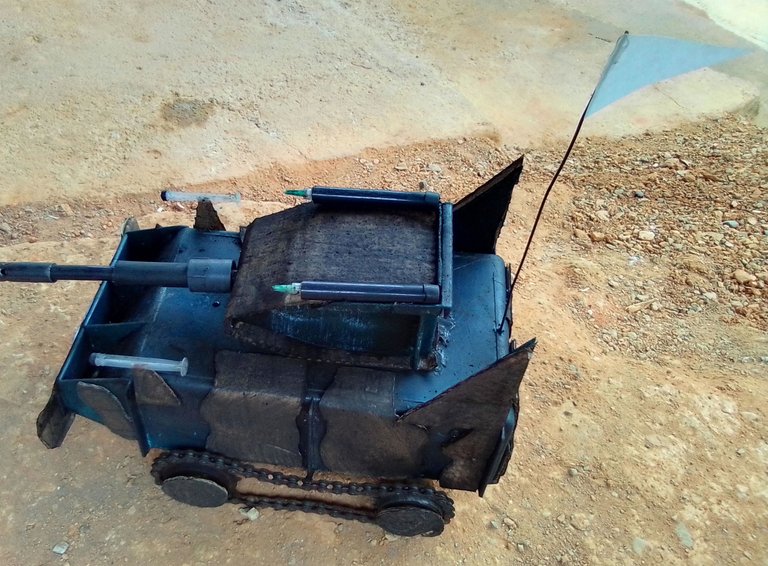
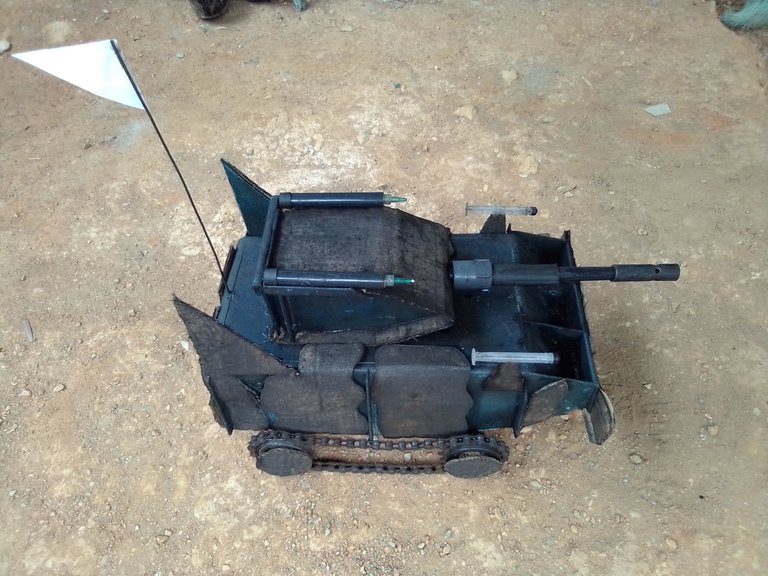
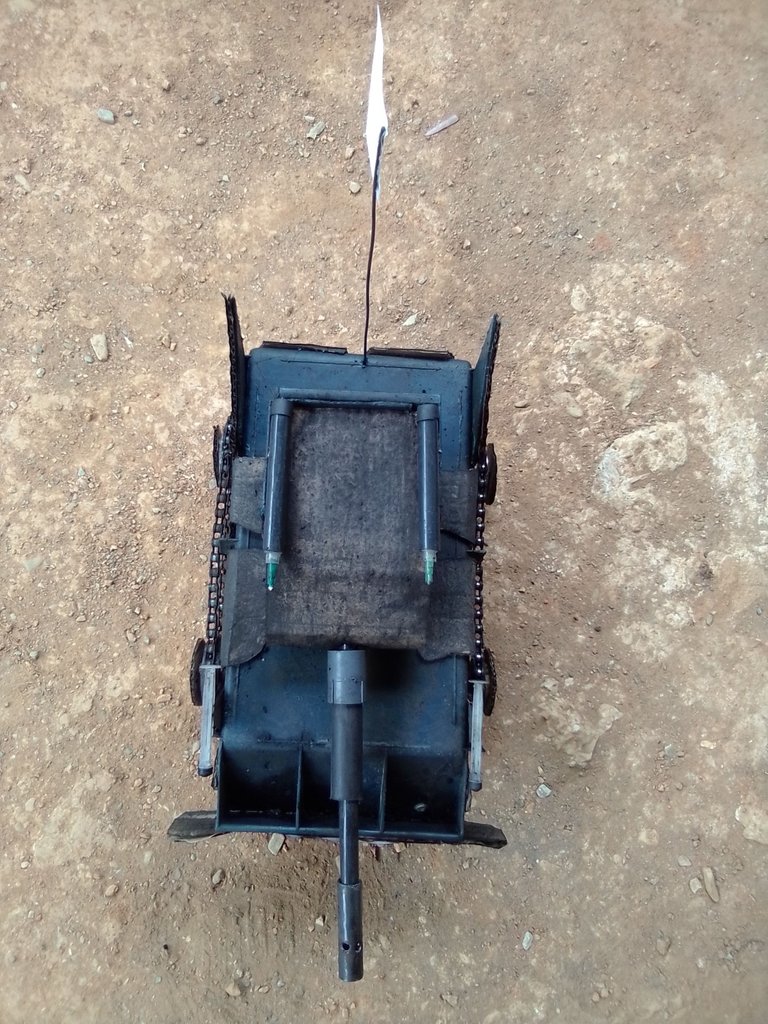
Y Este es el resultado final después de agregarle pintura.
And this is the final result after adding paint to it.
Gracias por llegar hasta el final de mis post,saludos y buenos días
Thanks for reaching the end of my post, greetings and good morning
Hola @jesusramirez11, increíble trabajo, me imagino toda la paciencia que debiste emplear para crear éste tanque militar. Te felicito por crear contenido que agregué valor a la plataforma. Una sugerencia: tratar de configurar tu foto de perfil que sale en blanco. Saludos
Hola @emiliocabrera. Sí, mucha paciencia, pero al mismo tiempo muy divertido. Gracias por la sugerencia.
🙋👍