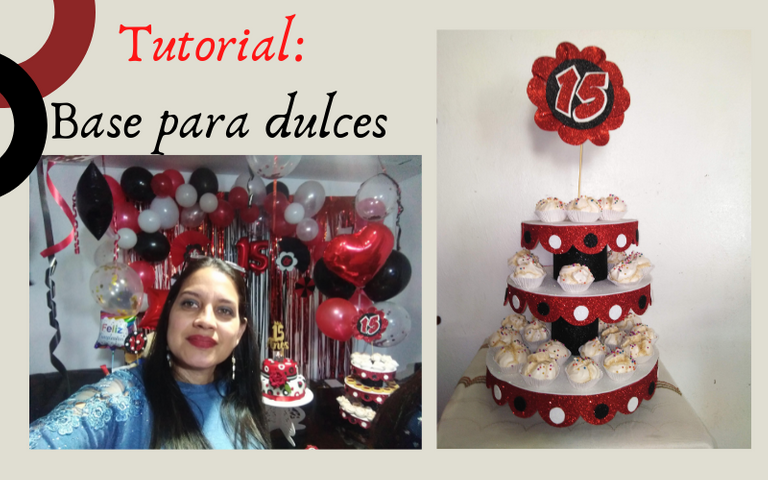

Estoy emocionada al elaborar este proyecto porque tiene un significado muy especial para mi. Se trata de una base para cupcakes y dulces de las que se colocan para decorar la mesa en los cumpleaños.
En esta oportunidad es para el cumpleaños número 15 de mi querida sobrina, y me produce mucha emoción colaborar con la decoración de la pequeña e intima fiesta para celebrar una ocasión tan especial.
Hello my dear creative friends. Today I am happy to come and share with you my new crafting and recycling project.
I am excited to make this project because it has a very special meaning for me. It is a base for cupcakes and candies of those that are placed to decorate the table on birthdays.
This time it is for my dear niece's 15th birthday, and I am very excited to collaborate with the decoration of the small and intimate party to celebrate such a special occasion.

- Cartones de cajas
- Foami escarchado en los colores negro, blanco y rojo.
- Tijeras
- Cutter
- Silicon liquido
- Silicon en barra
- Cinta adhesiva
- Box cartons
- Frosted Foami in the colors black, white and red.
- Scissors
- Cutter
- Liquid silicon
- Silicon stick
- Adhesive tape

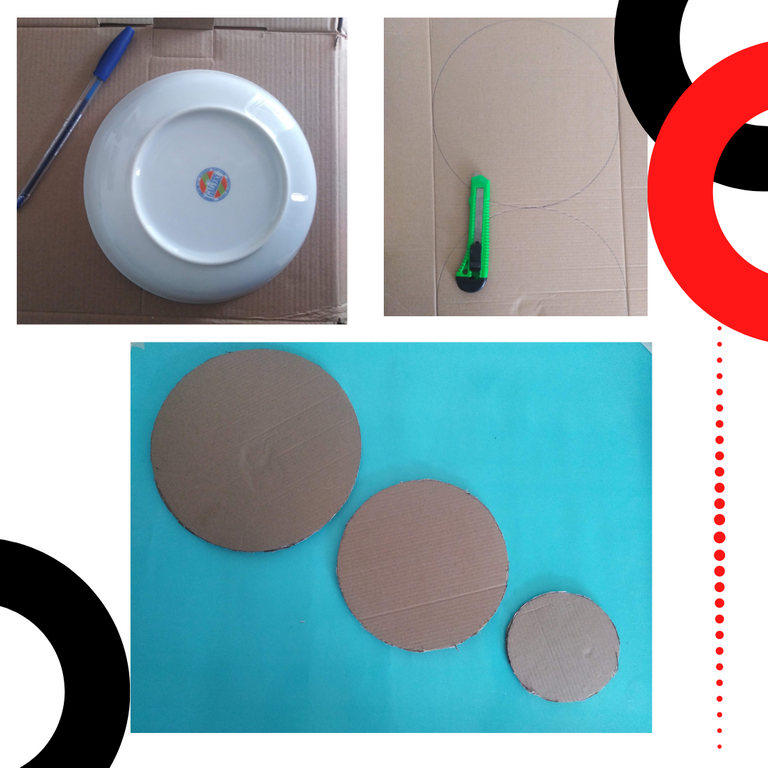
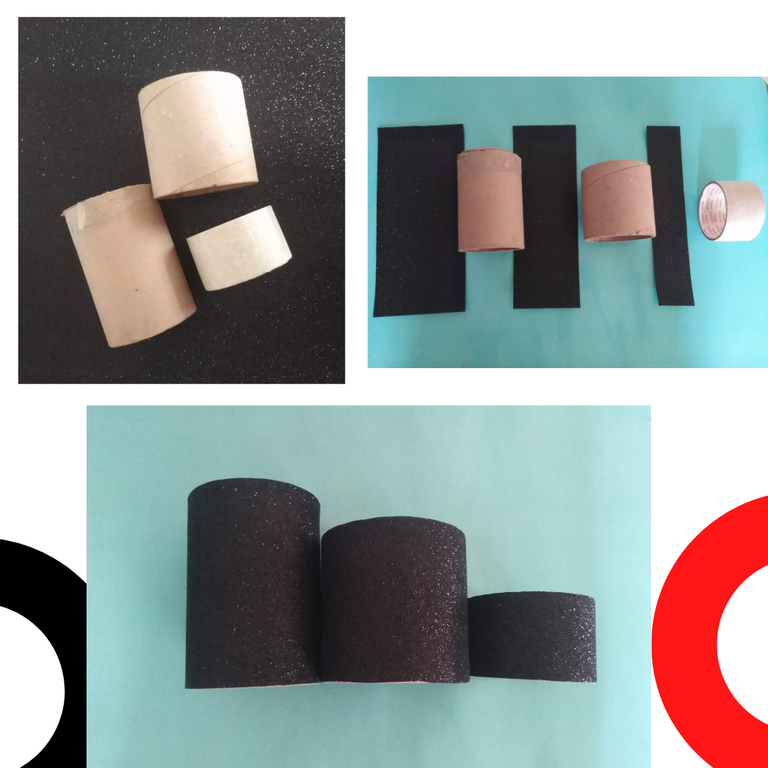
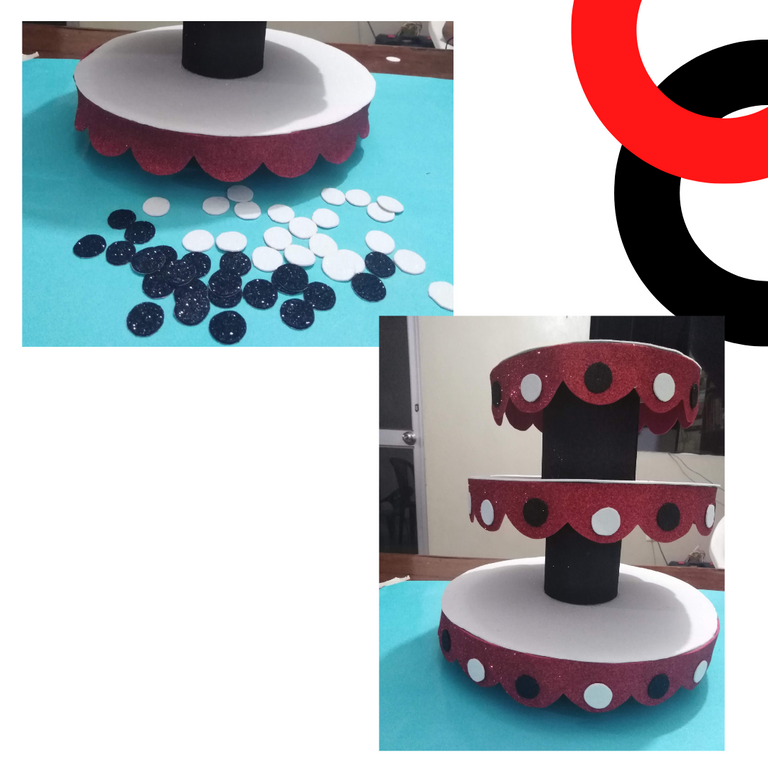
Since I am going to make a circular base with three levels, I must mark on the cardboard three circles of different sizes, and then cut them out with the cutter. Since the cardboard I used is not that thick, I cut out two pieces of each size.
Then, I joined the two pieces of the same size, gluing them together with liquid silicone. Then I put tape all around the edge of the cardboard discs, so that they would be more secure and easier to work with the foami.
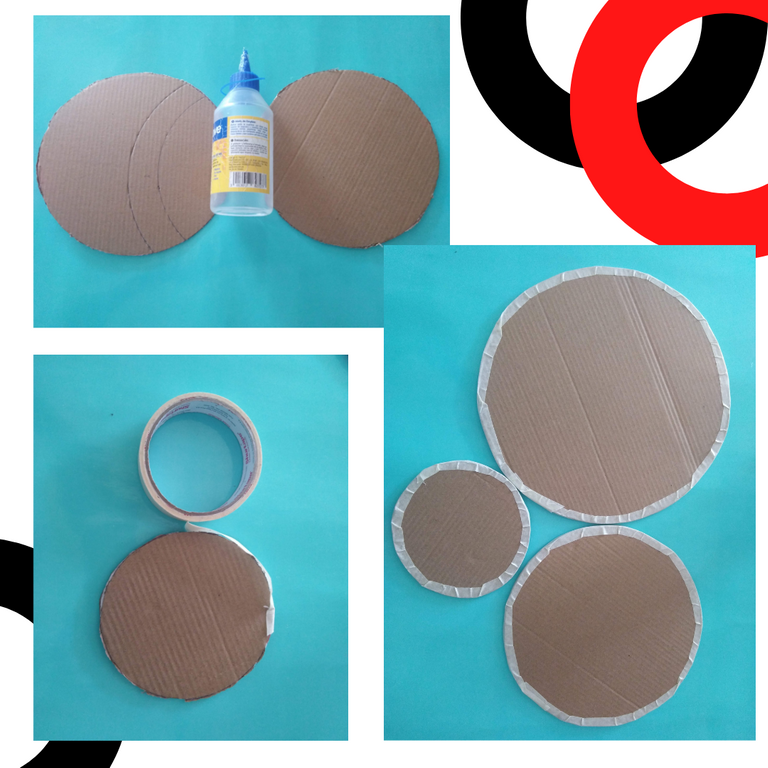
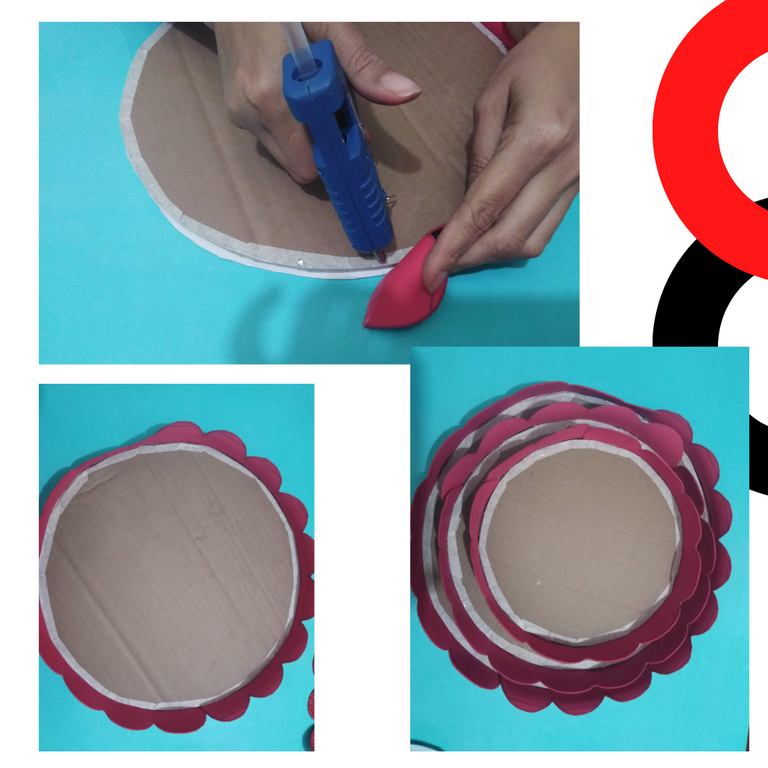
Then I lined the cardboard discs with white frosted foami.
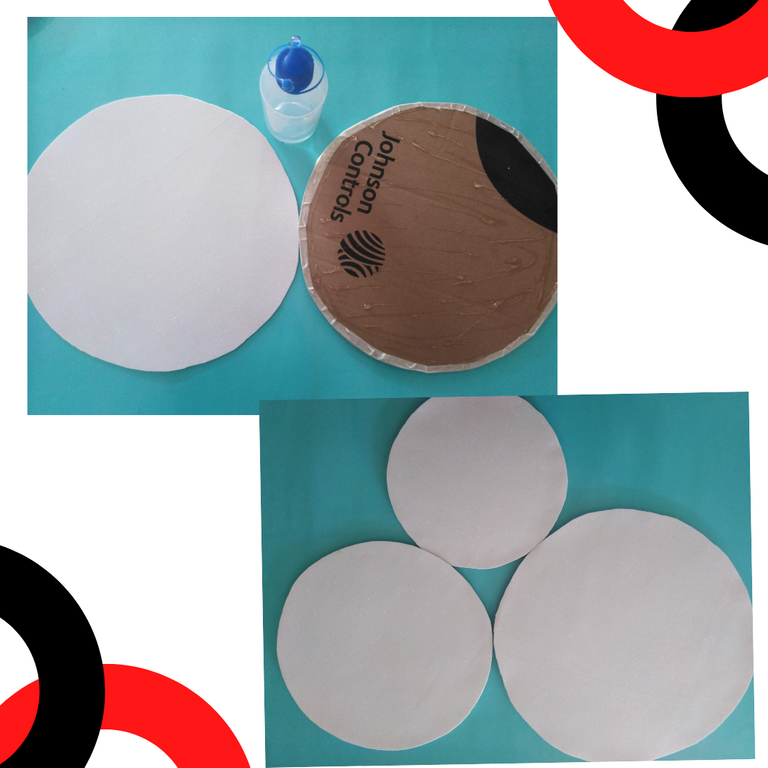
For the center of the base, I used three very thick and resistant cardboard cylinders. I lined these cylinders with black frosted foami.
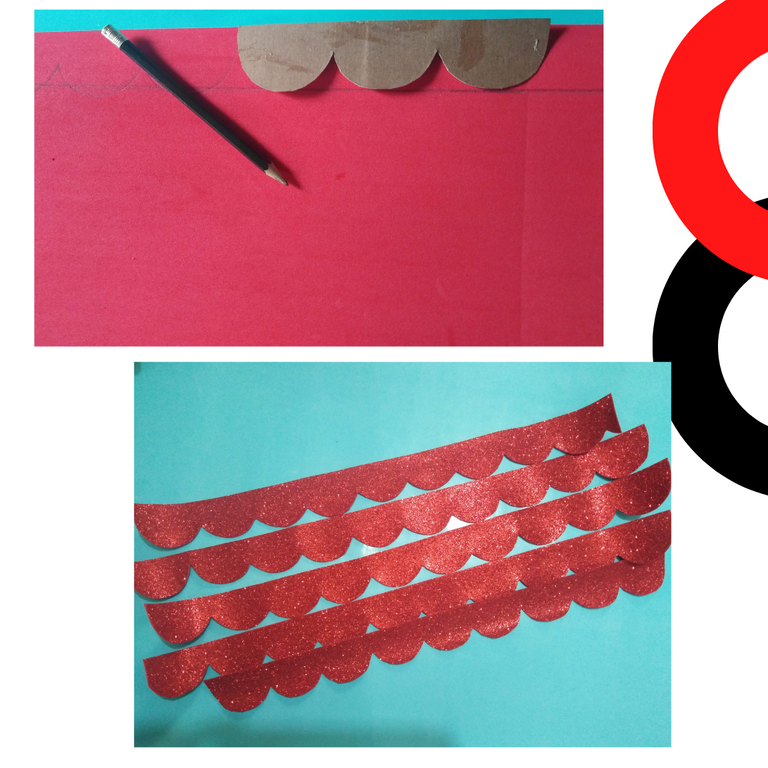
To decorate the discs, I marked and cut out several strips of red foami with semi-circular waves.
Then I glued the red foami strips on the edge of the three circles. For this I used the silicone gun, as it dries much faster than liquid silicone.
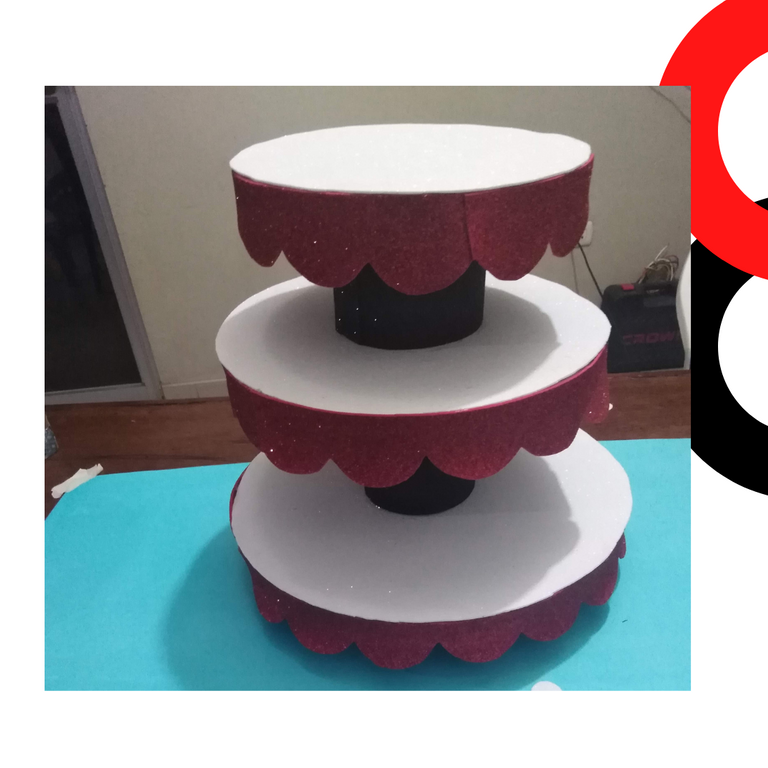
With everything ready, I assembled the three-tiered base. I placed pieces of cardboard on the cylinders to attach them to the disks and thus make them more resistant.
I then cut out several small black and white circles and glued them to the red border.
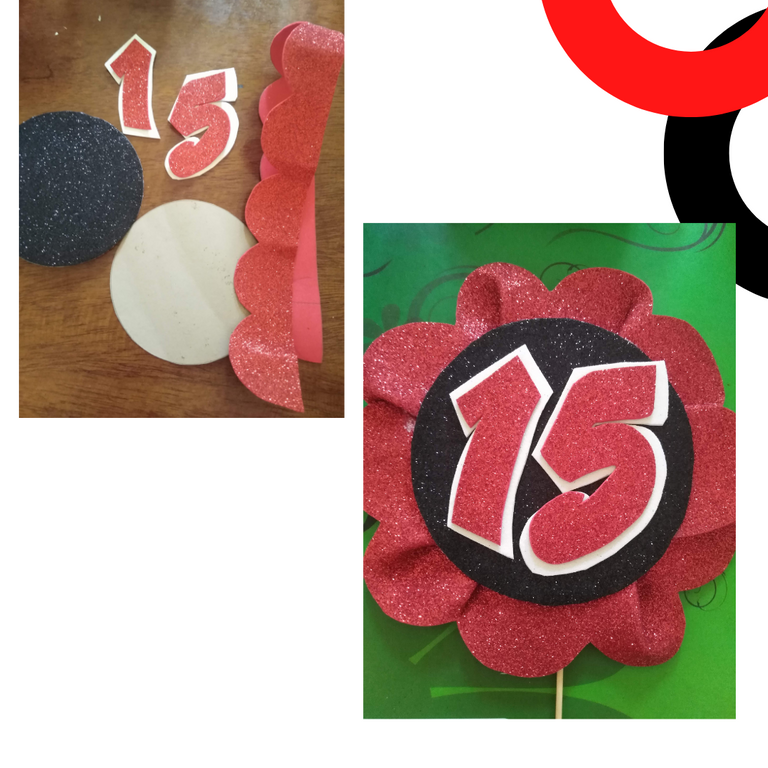
Lo siguiente fue decorar con un borde rojo y darle aspecto de flor.
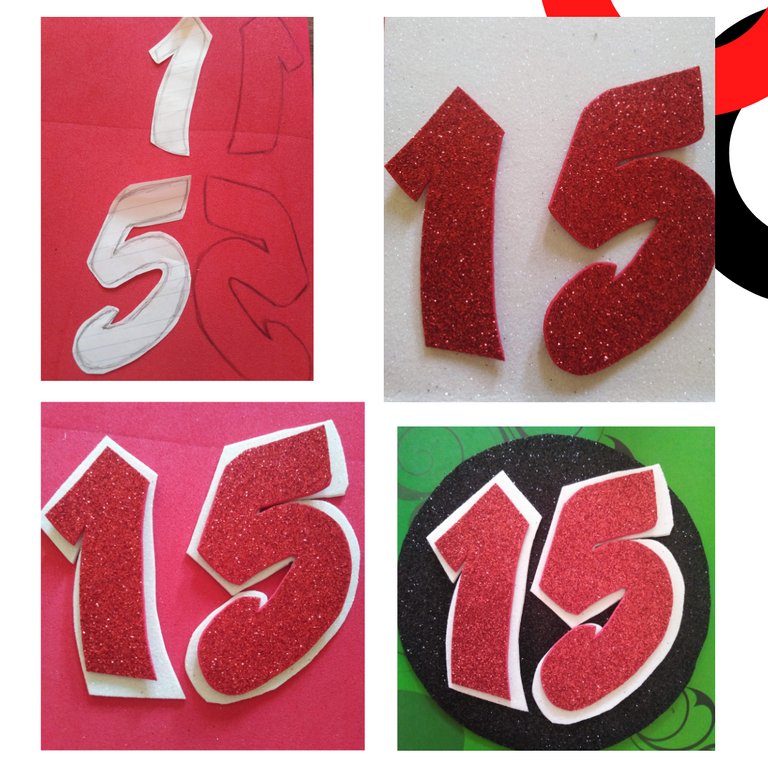
Then I started the elaboration of the number 15 that will be placed as a central ornament on the candy base. To do this, I marked the numbers on the red foami and then marked them in a larger size on the white foami. After cutting them out, I placed them on a circle of black foami.
The next thing was to decorate with a red border and make it look like a flower.
Así queda terminada esta sencilla pero bonita base para dulces,
Espero les haya gustado el tutorial. Gracias por leer, saludos y bendiciones.
Finally, I glued the number on a wooden stick and placed it in the center of the base.
This is how this simple but beautiful candy base is finished,
I hope you liked the tutorial. Thanks for reading, greetings and blessings.
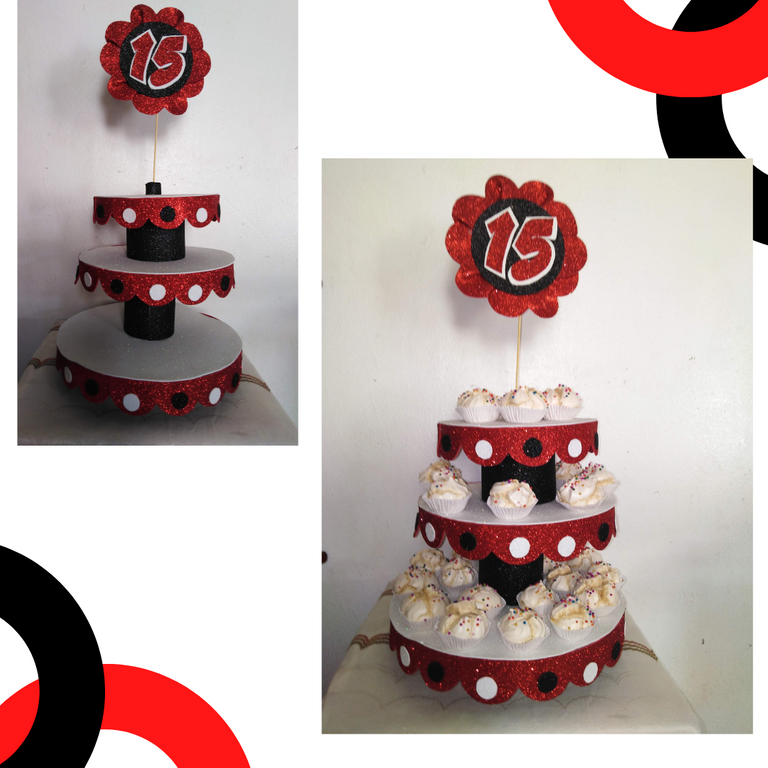
Imagen de portada y los separadores de texto son diseñados con Canva.com
Uso traductor Deepl

Congratulations @kattycrochet! You have completed the following achievement on the Hive blockchain and have been rewarded with new badge(s) :
Your next target is to reach 24000 upvotes.
You can view your badges on your board and compare yourself to others in the Ranking
If you no longer want to receive notifications, reply to this comment with the word
STOPCheck out the last post from @hivebuzz:
Support the HiveBuzz project. Vote for our proposal!
Qué hermoso trabajo amiga!
Gracias por tu amable comentario, me alegra que te guste. Saludos!
Te felicito Katty, te quedo mega hermoso, tienes muchos detalles que resaltan y hacen una pieza única.
Hola @carolinacardoza muchas gracias por ese hermoso comentario, disfrute mucho la elaboración de este proyecto y me alegra que te guste.
Que hermosa base, impresionado con el talento que tienes, para dar esos acabados con materiales reciclables, saludos!
Gracias por tu amable comentario, me alegra que te parezca bonito mi proyecto. Saludos!
Congratulations, your post has been upvoted by @dsc-r2cornell, which is the curating account for @R2cornell's Discord Community.
Enhorabuena, su "post" ha sido "up-voted" por @dsc-r2cornell, que es la "cuenta curating" de la Comunidad de la Discordia de @R2cornell.
Buen día! Está muy linda tu base!
Siempre es grato ver y hacer trabajos con materiales reciclados.
Saludos y bendiciones.
Gracias por tu apreciación y tu amable comentario.