Español
Hola Amigos en Hive… gusto en saludarles nuevamente, en especial a la comunidad creadora de @Build-It.
Como ya imaginan por varias de mis publicaciones anteriores, soy una persona que adora los cumpleaños, me parecen es el día mas sagrado que toda persona tiene durante el año y por eso me gusta crear decoraciones para los pasteles de cumpleaños.. Me gusta ser parte de esa magia que envuelve los cumpleaños y de toda la buena vibra que siempre se crea al rededor del pastel.
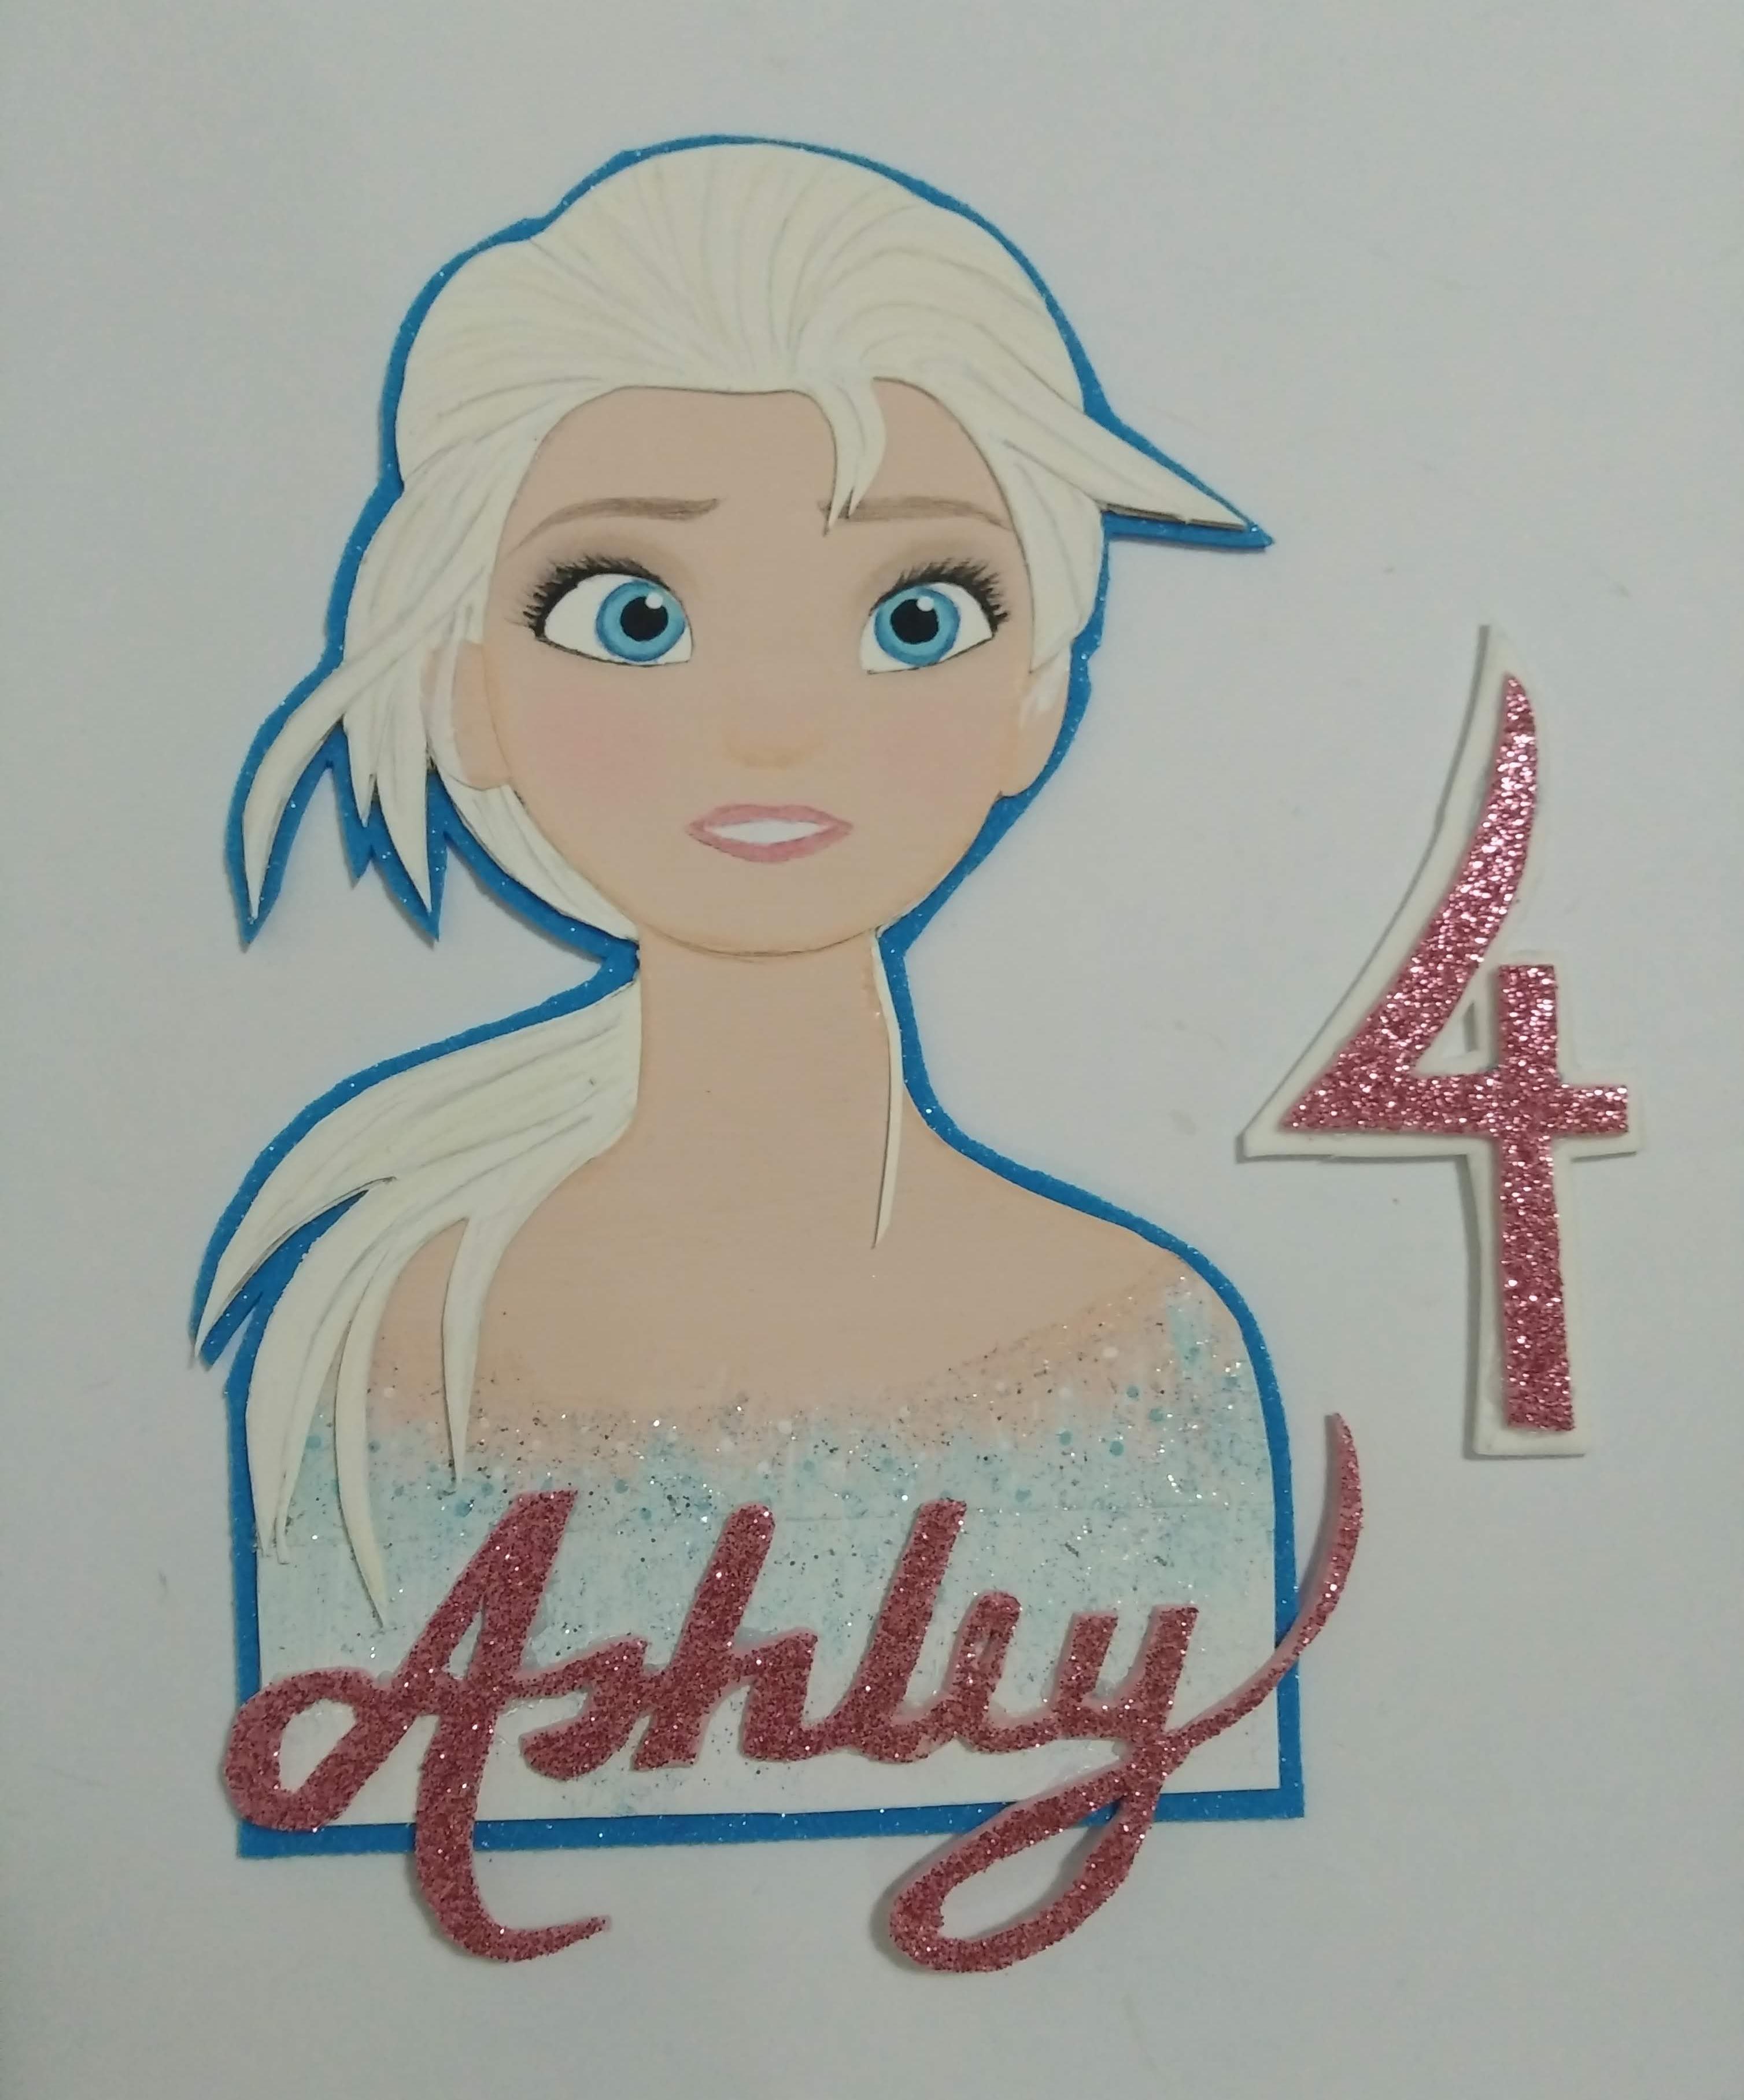
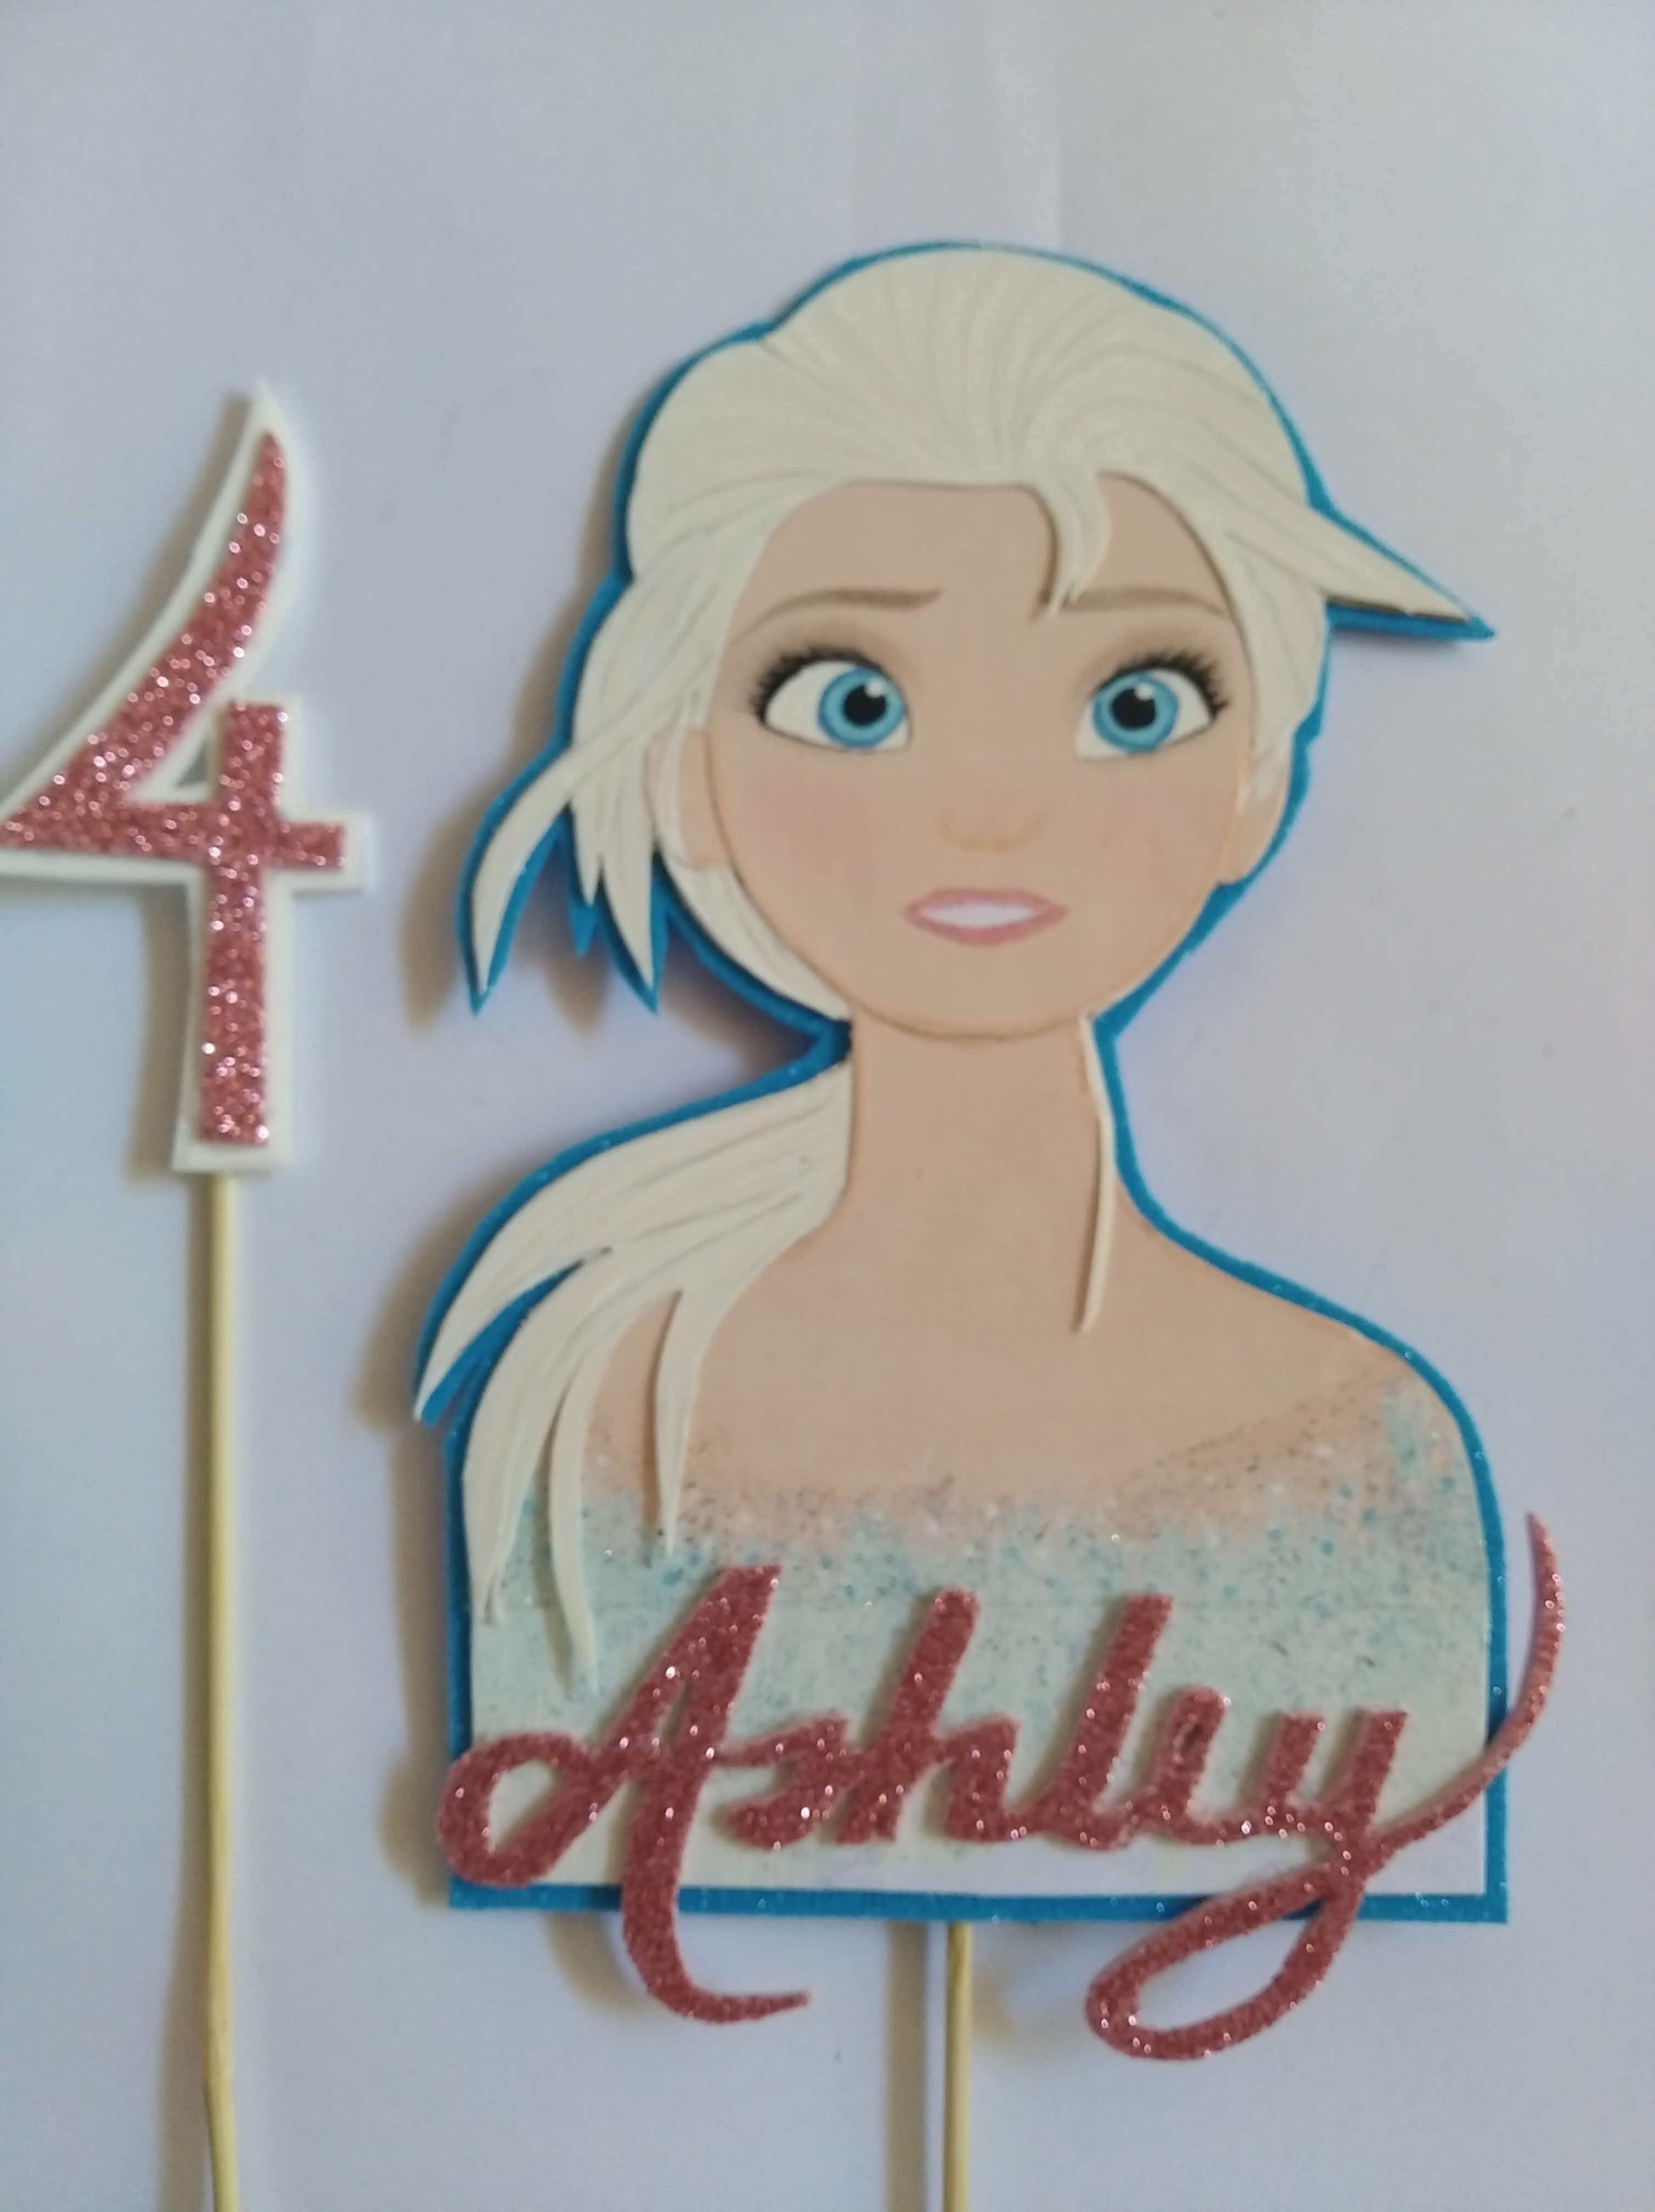
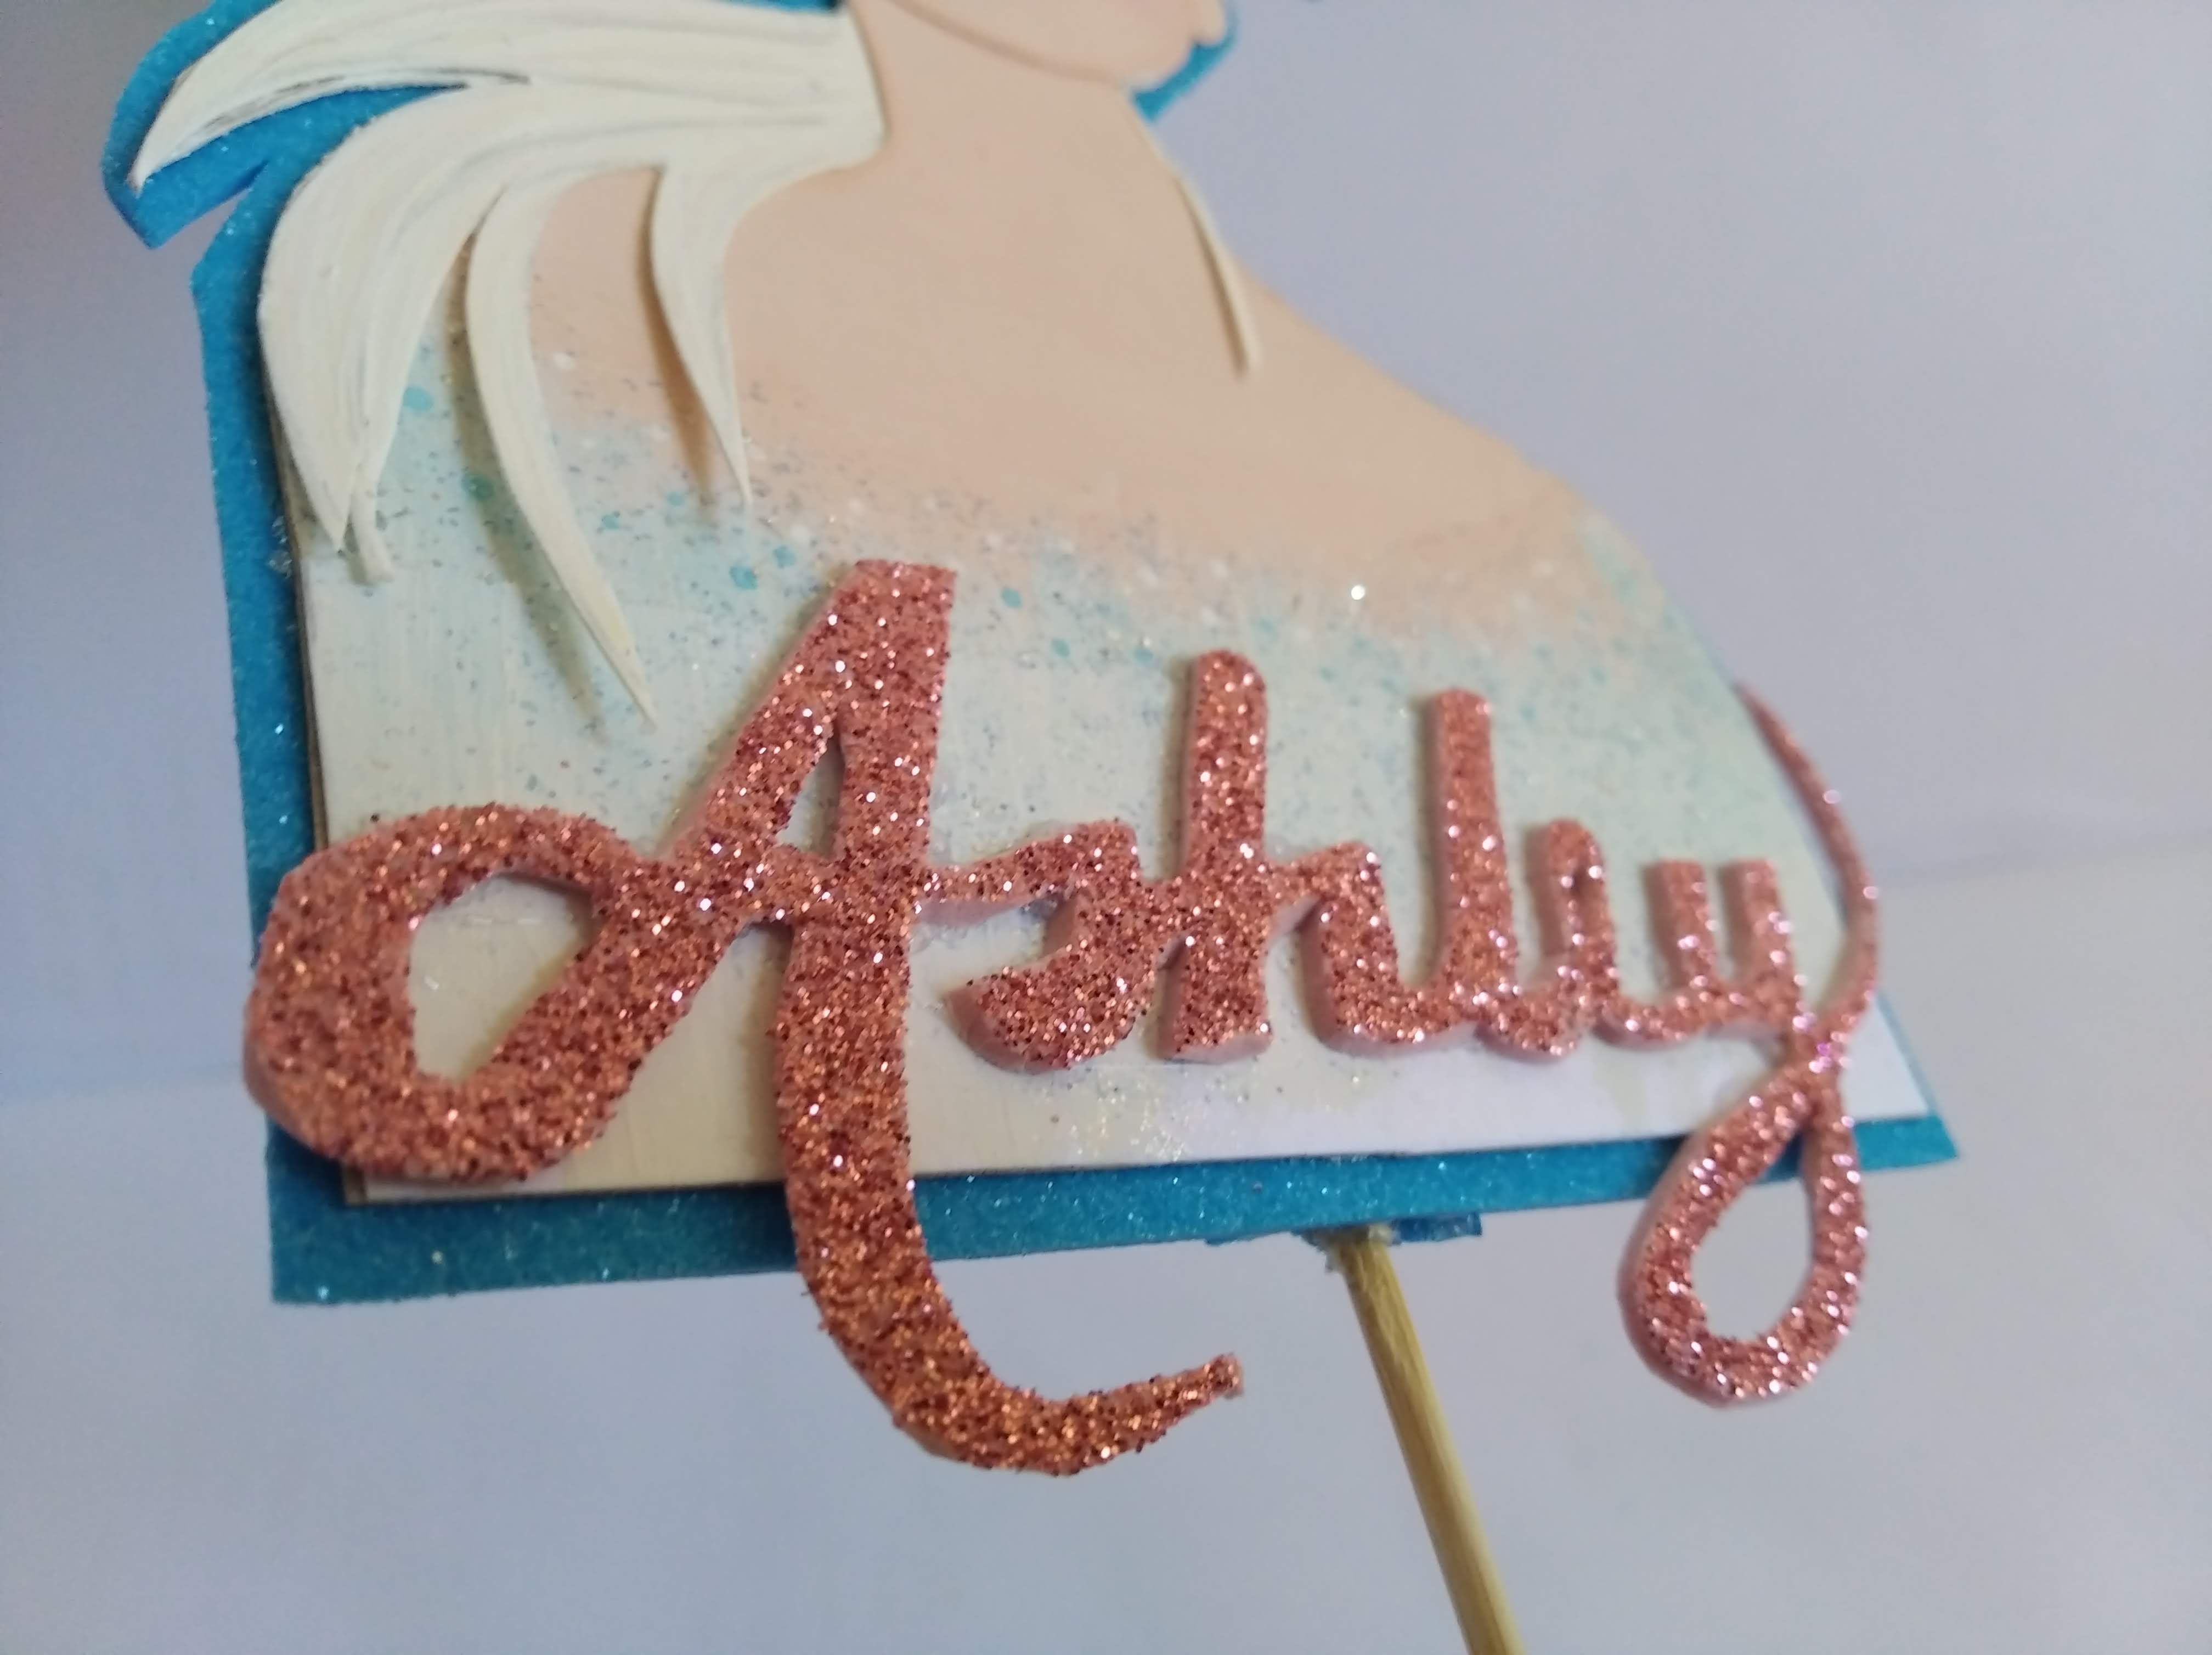
Frozen es una película animada que cautivó el corazón de muchos niños y adultos, ésta versión, la numero 2, cautivó a mi sobrina Ashley y quise ofrecerle un obsequio especial que decorara su pastel y que luego le pudiera servir de decoración para lo que ella quisiera.
Espero puedan revisar completo y aprecien la magia de hacer todo con amor.. les invito a que se animen a realizar algo parecido para que ofrezcan exclusividad a sus seres queridos y amig@s…
Acá les dejo los materiales utilizados, el proceso y las imágenes del trabajo.
- Diseño de Elsa
- 2 Cartulinas Blancas
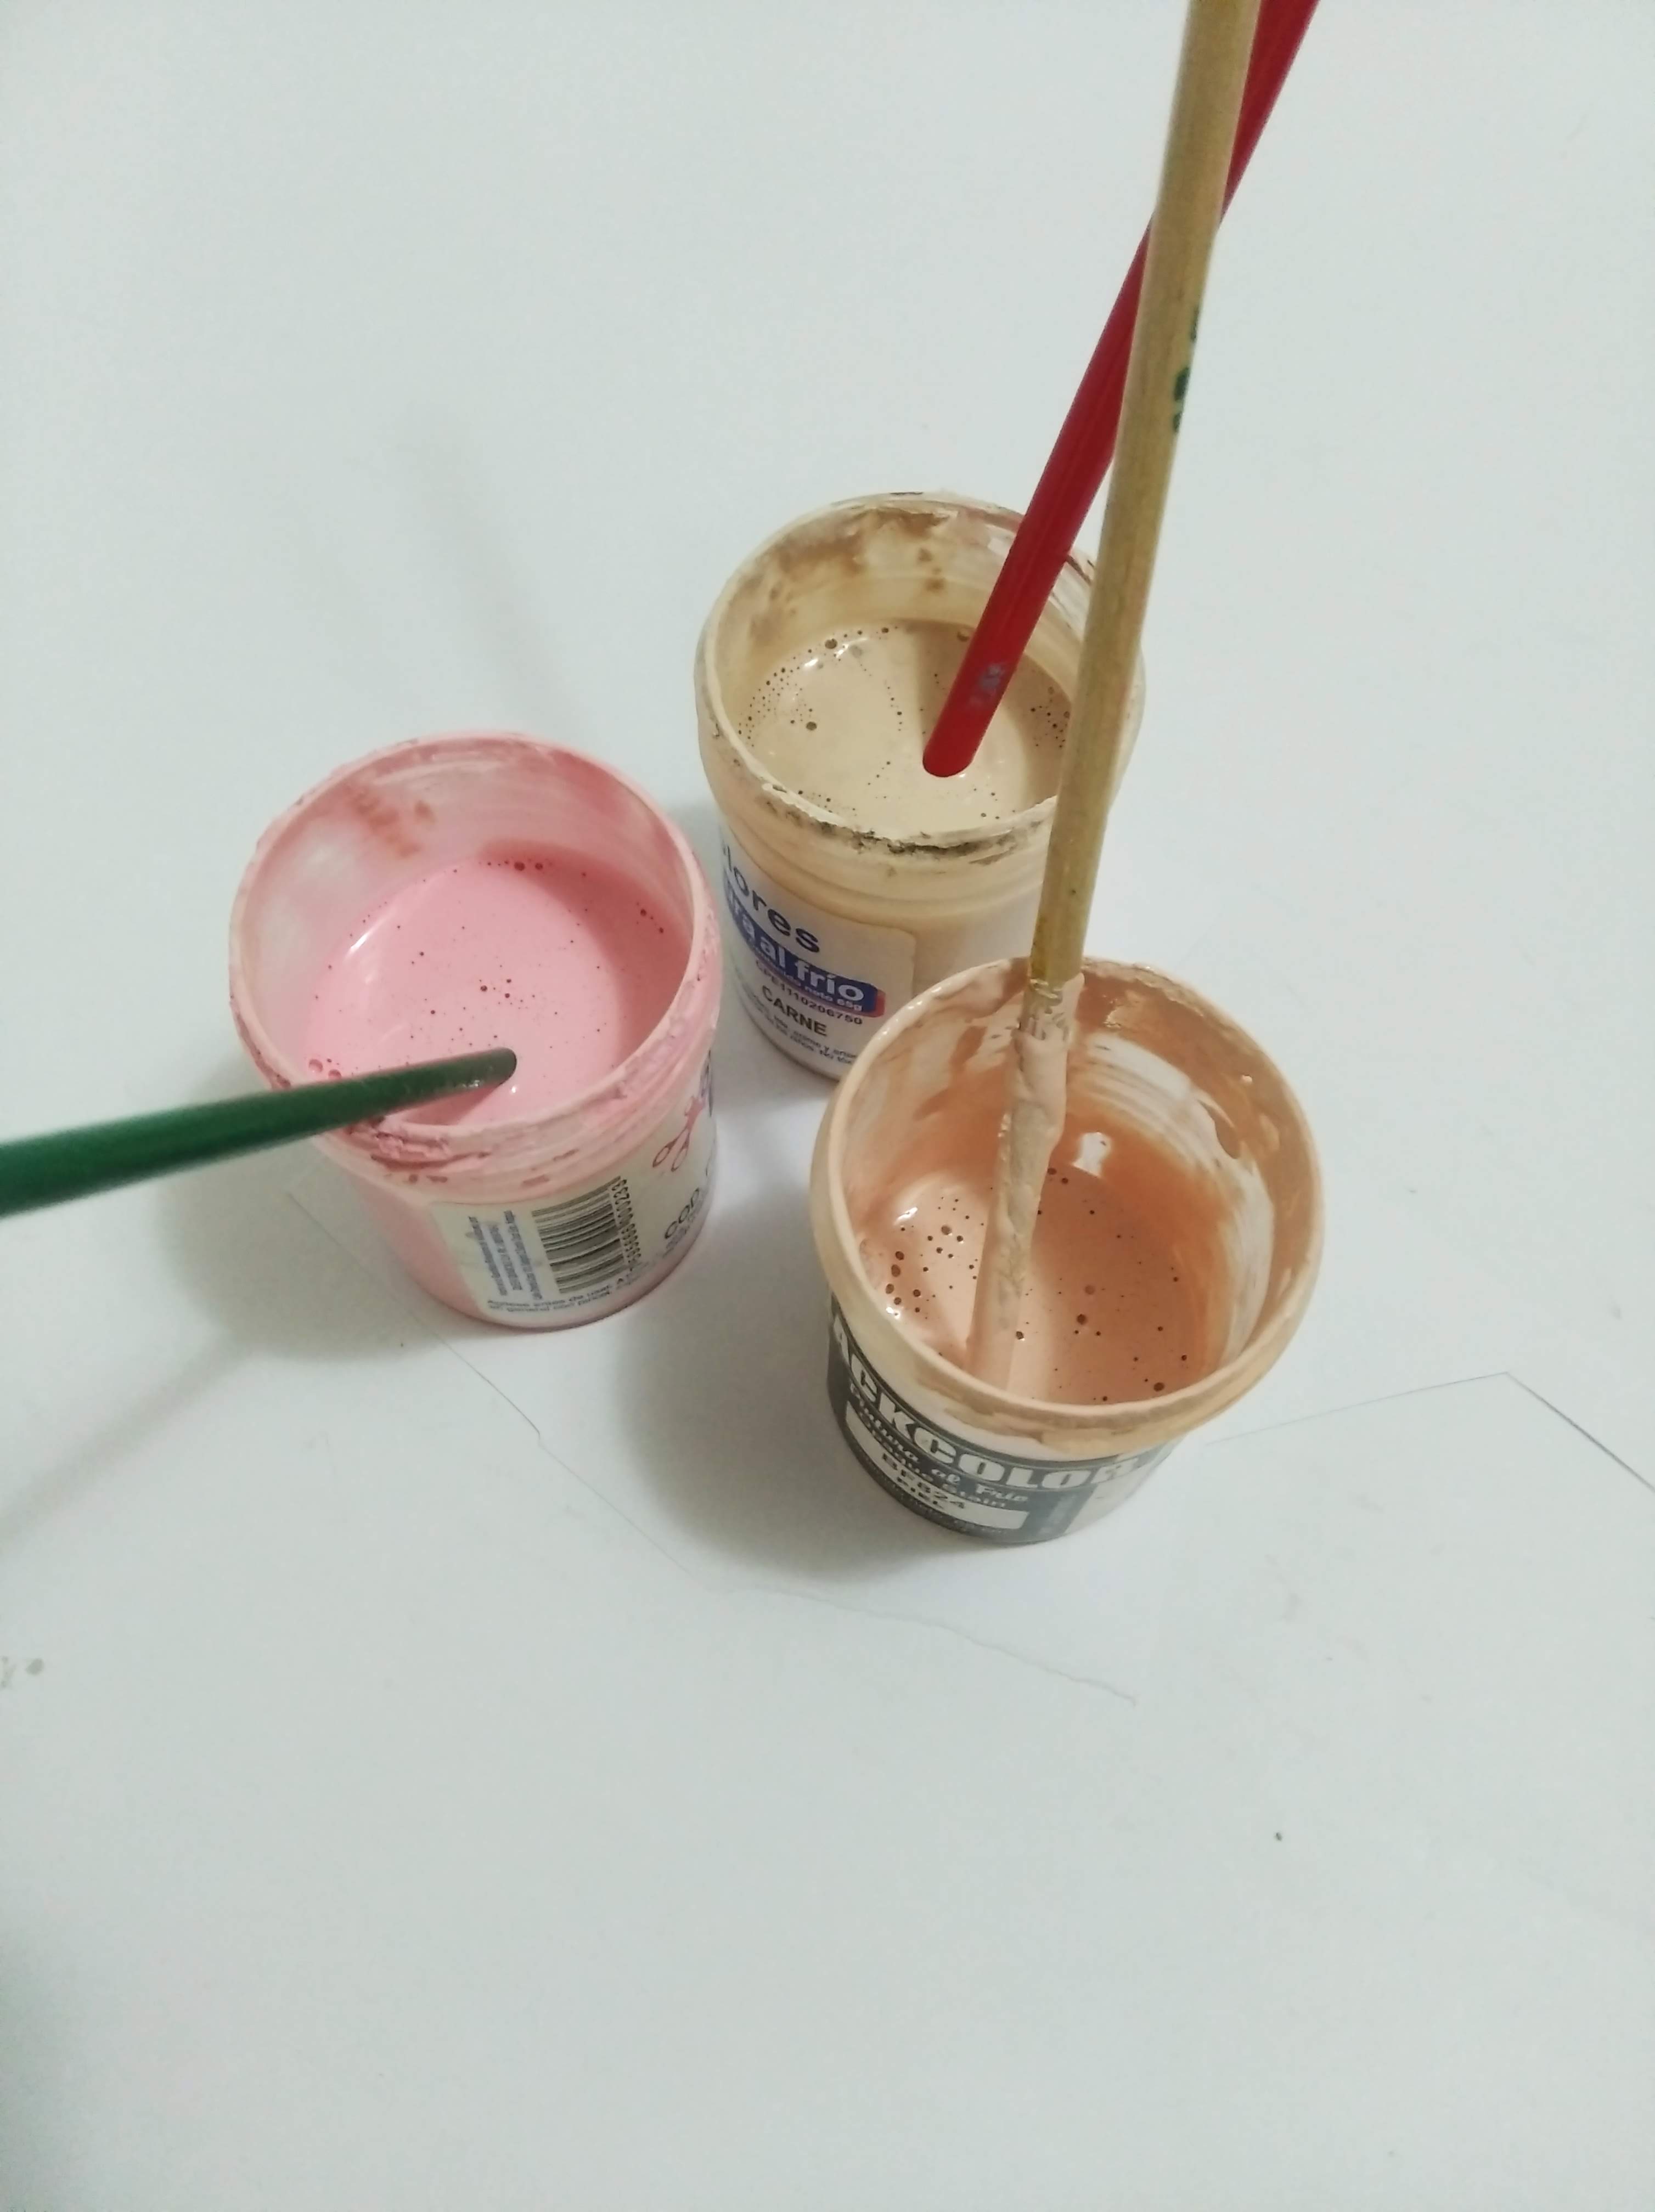
- Pinturas al frio de colores: carne y rosado (para lograr el color de piel según diseño)
- Pinturas al frio de colores: blanco, negro y azul (para los ojos)
- Pintura al Frio Nacarada (para pintar parte del vestido)
- Colores de madera (para agregar color y detalles al rostro)
- Foami Azul semi-escarchado (para el fondo)
- Foami Rosado suave escachado (para el nombre y la edad)
- lápiz
- Tijera
- Cortador (cutter)
- Silicón Frio
- Silicón caliente
- 2 palitos de Altura (madera)
- y Mucho amor…
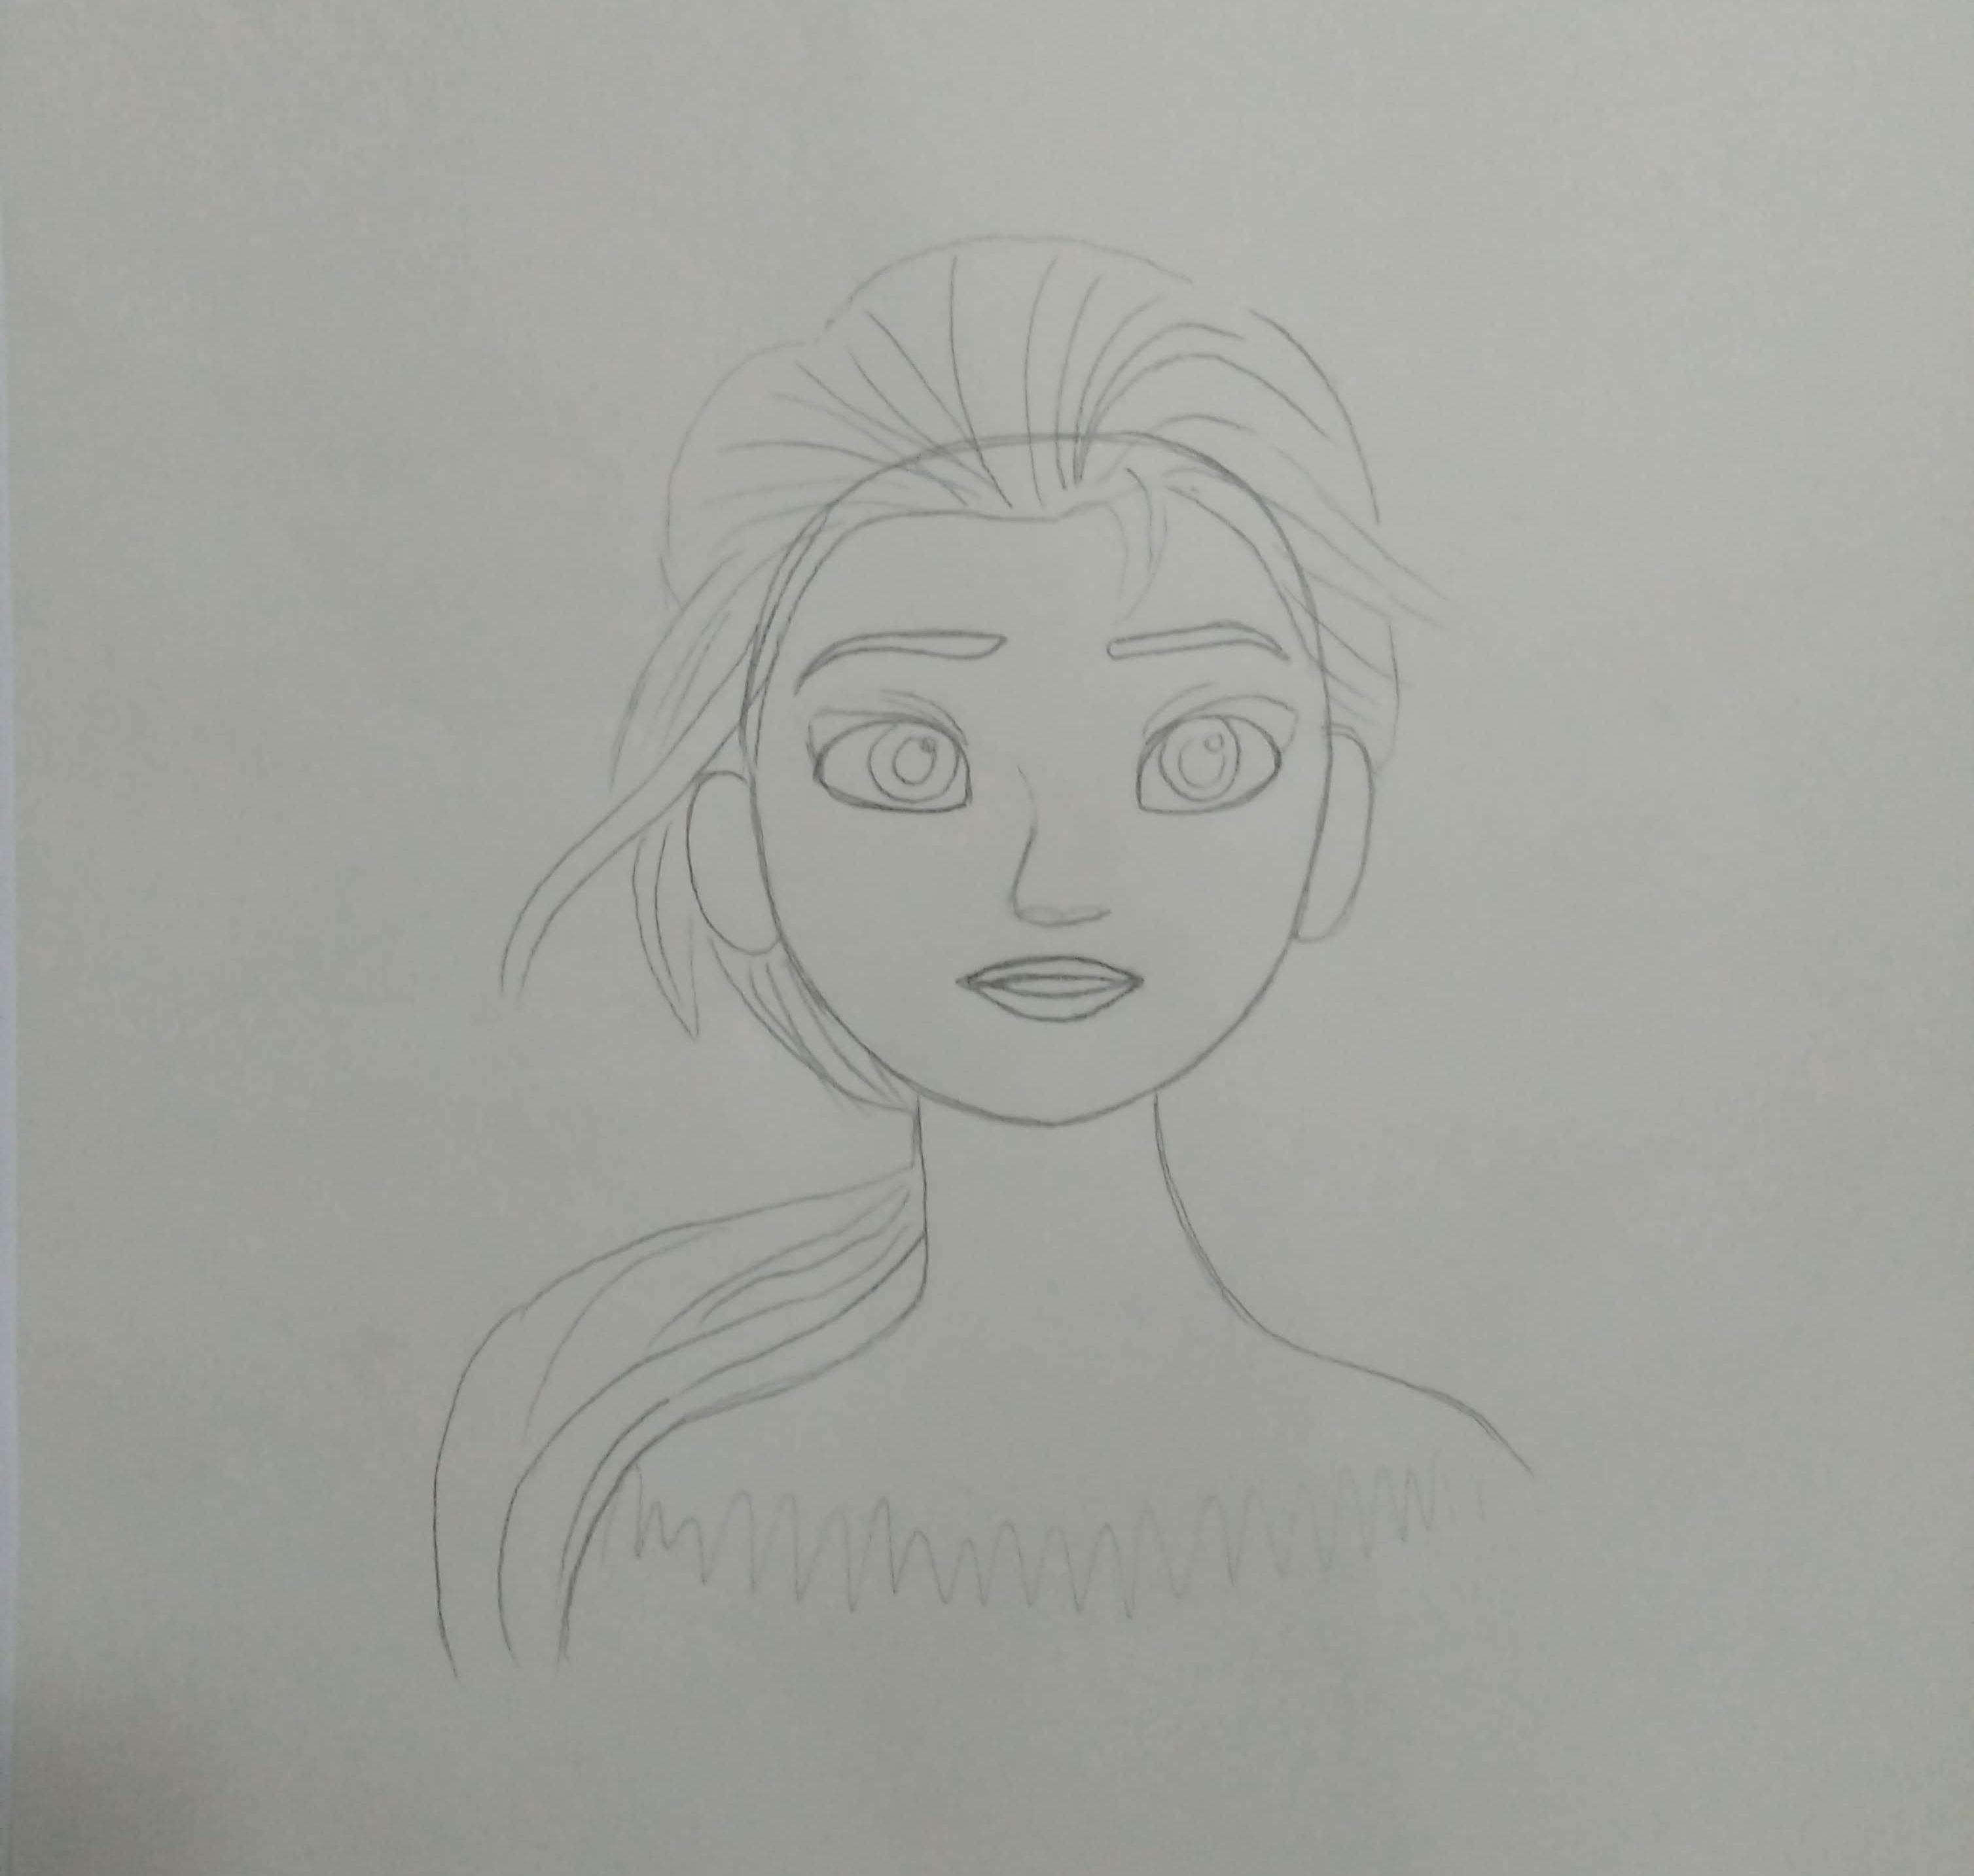
- Dibujar el diseño de Elsa
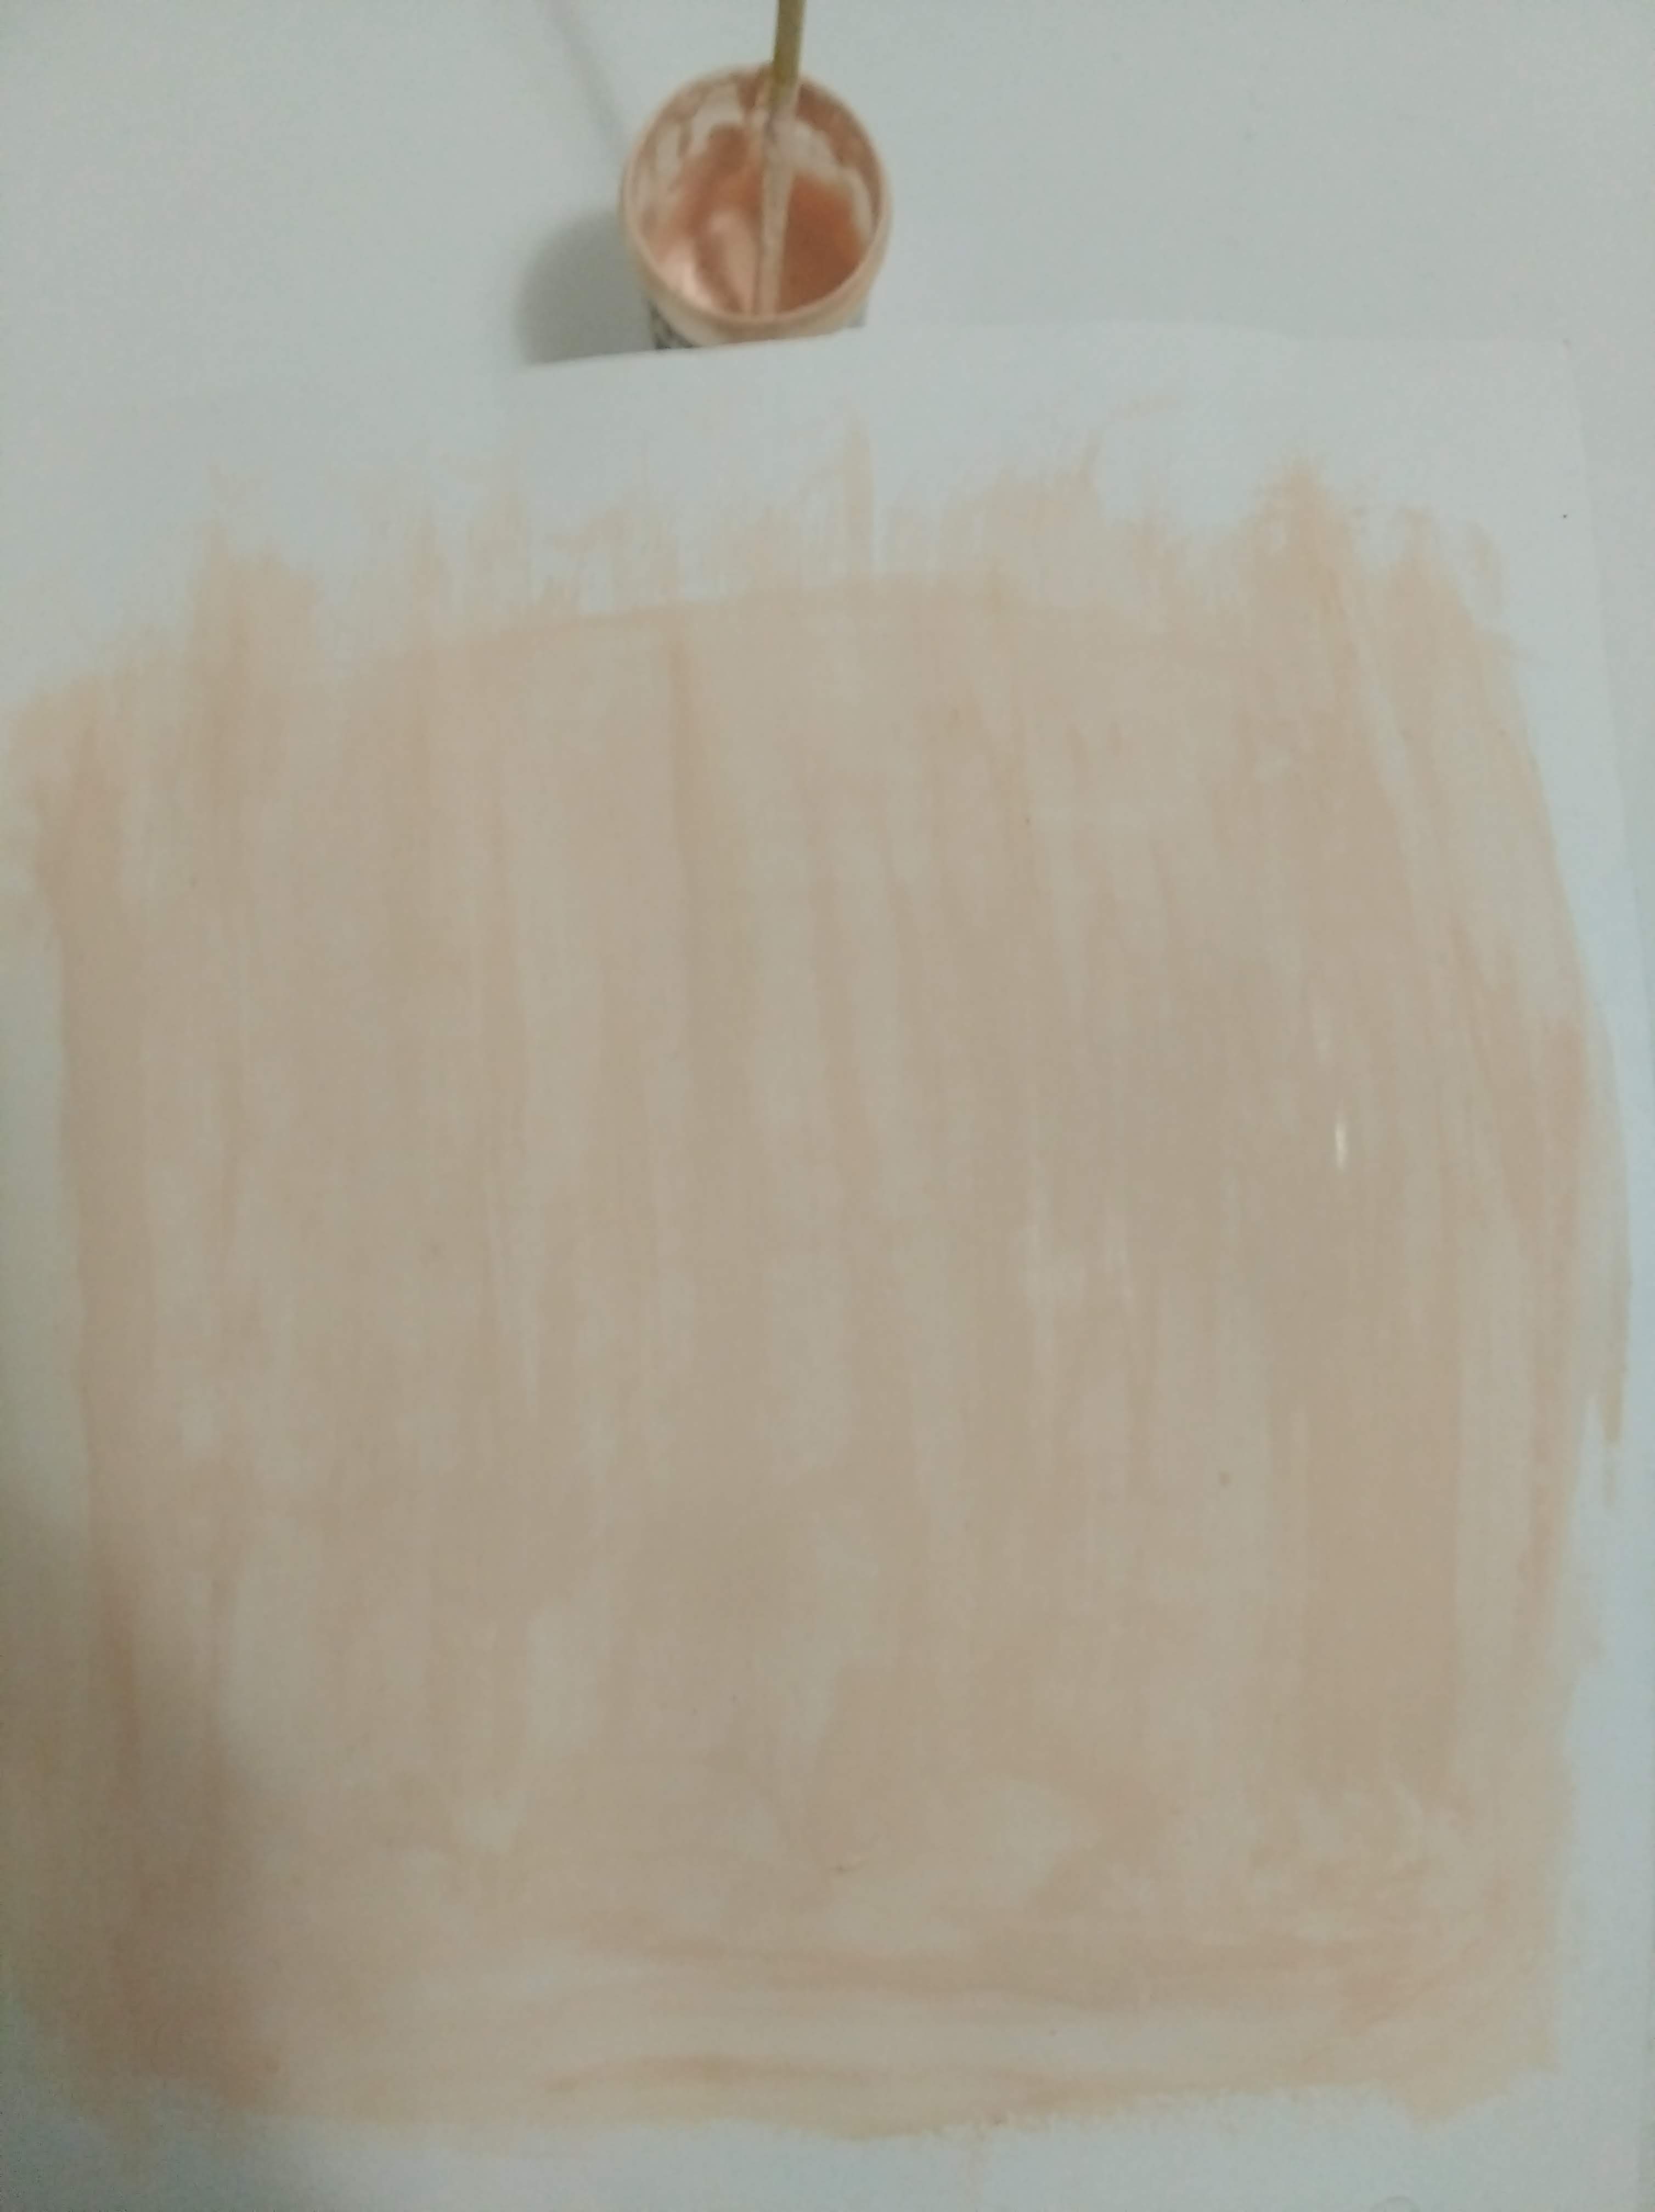
- Mezclar las pinturas color carne y rosada hasta obtener el color parecido al color del personaje.
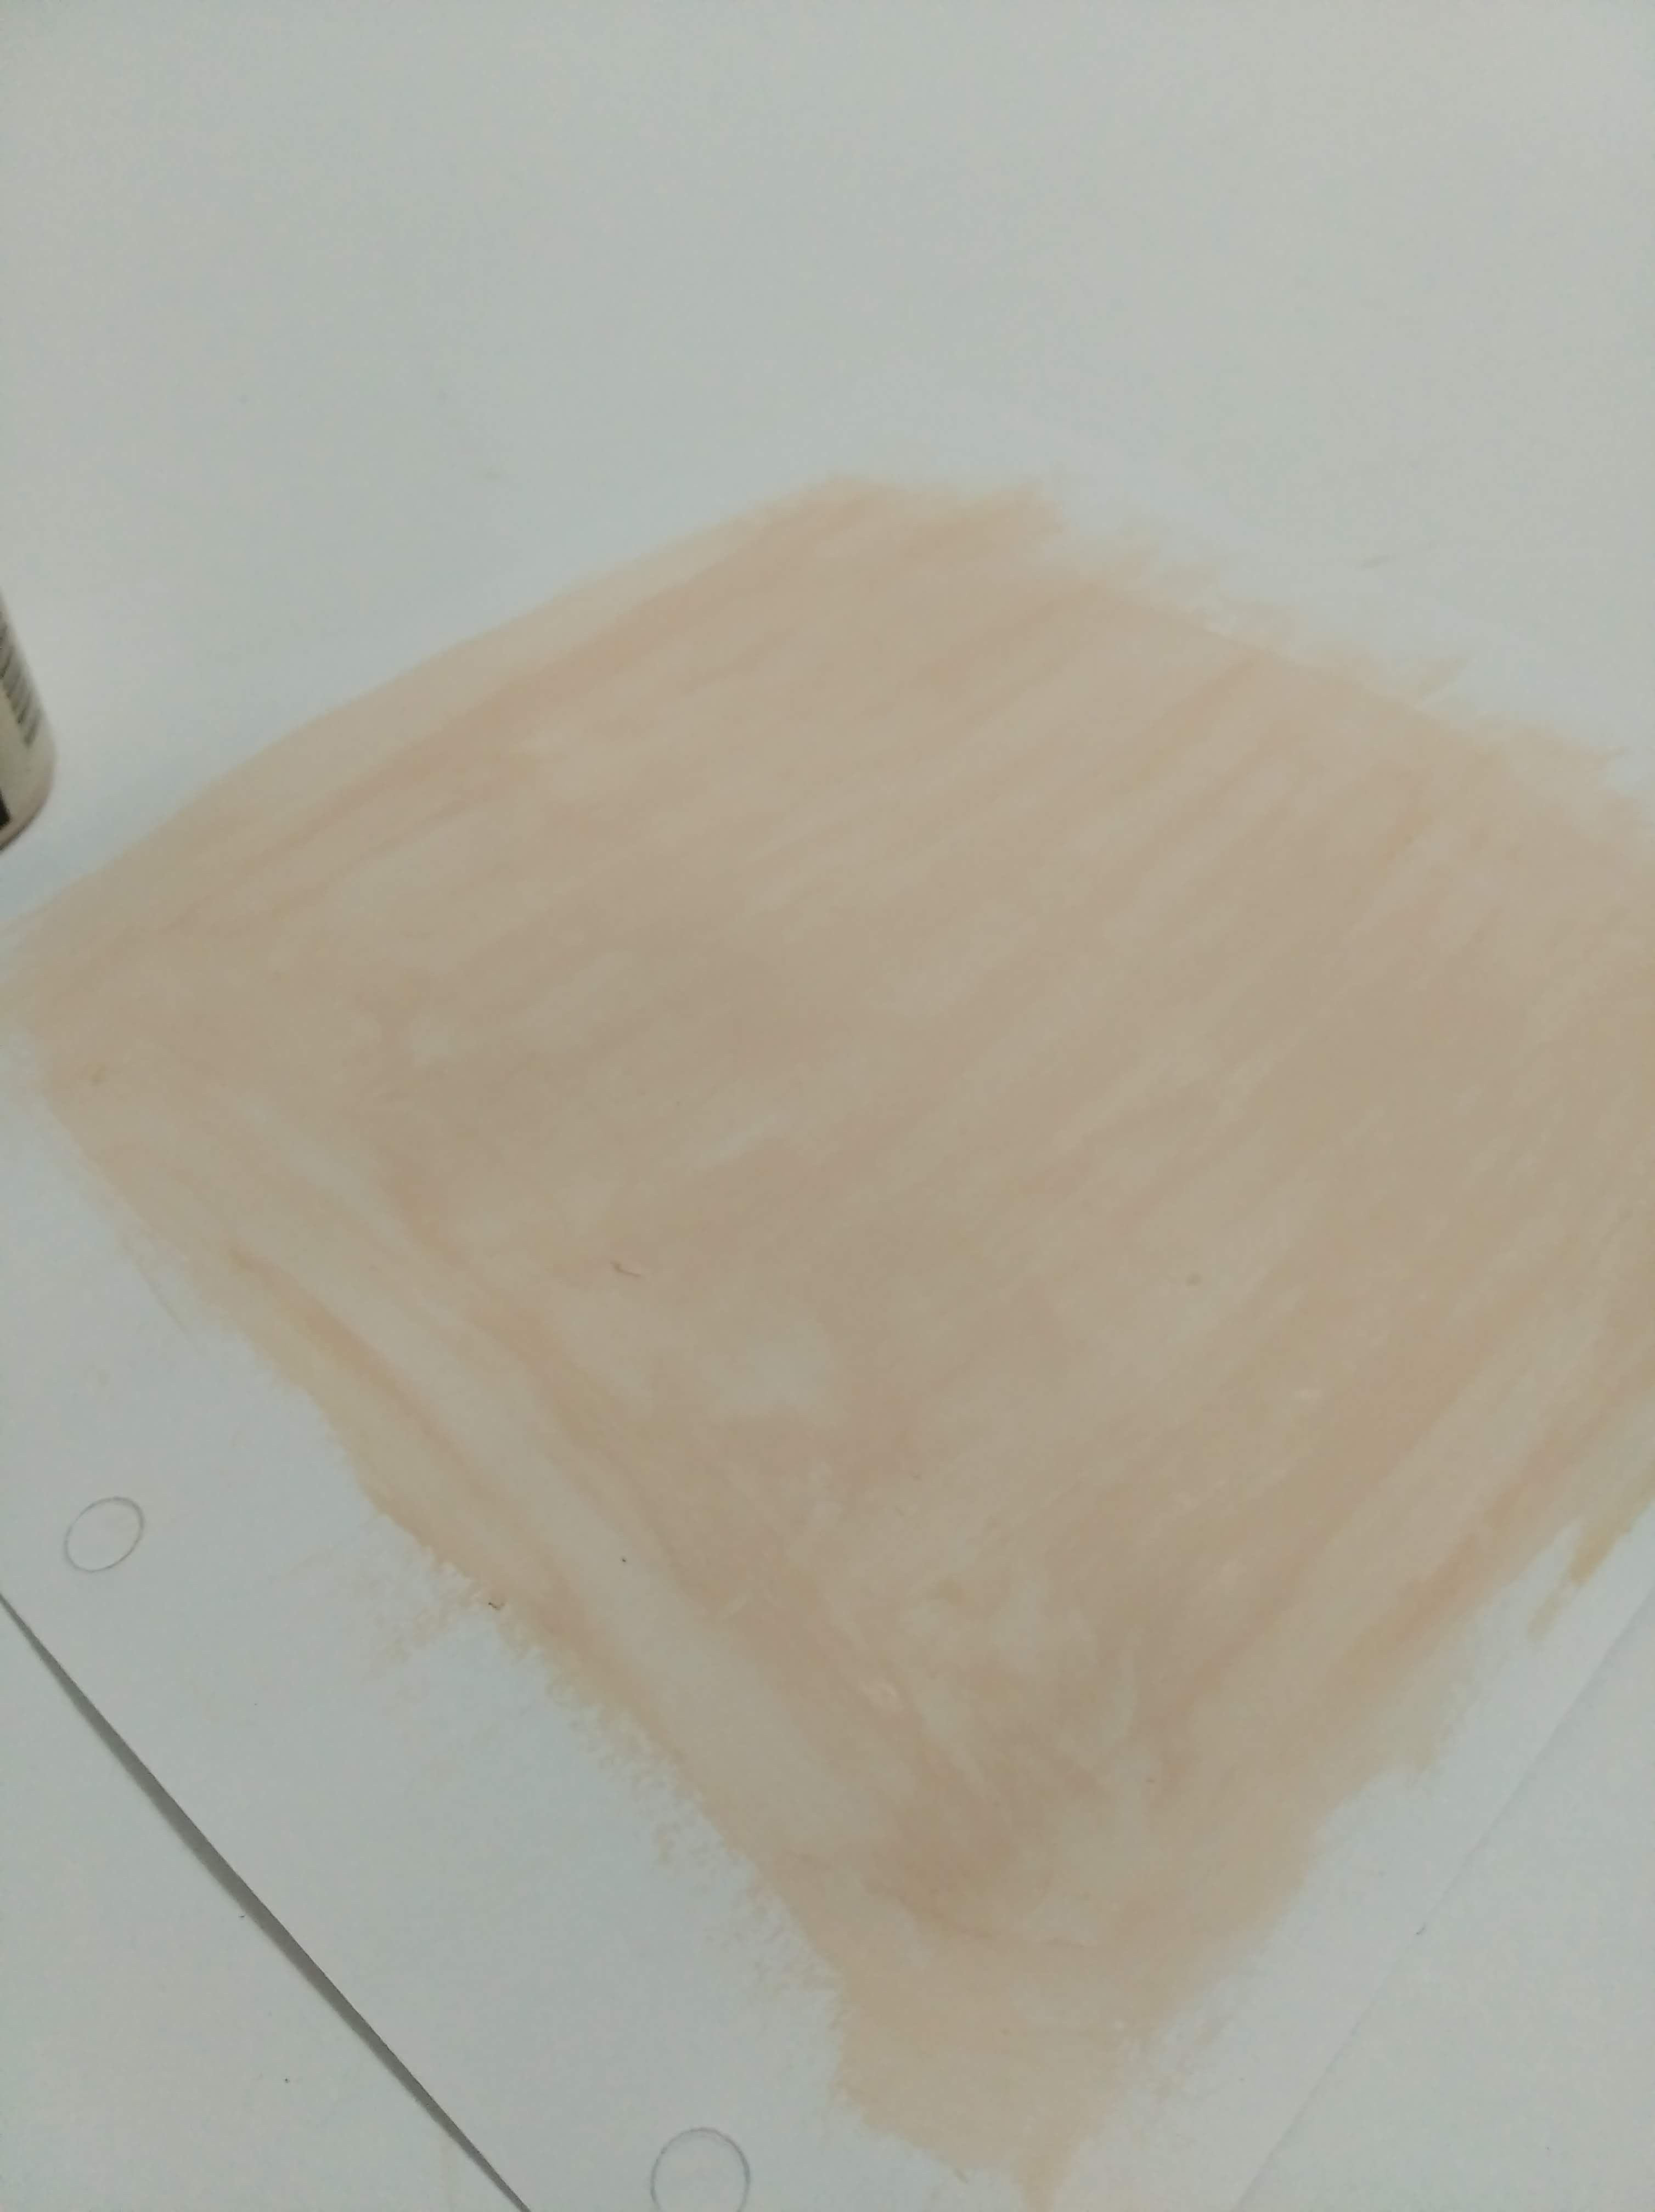
- Con la mezcla anterior pintar una de las cartulinas blancas, dejar secar muy bien y luego meter en un libro para que la cartulina queda sin arrugas ni dobles…
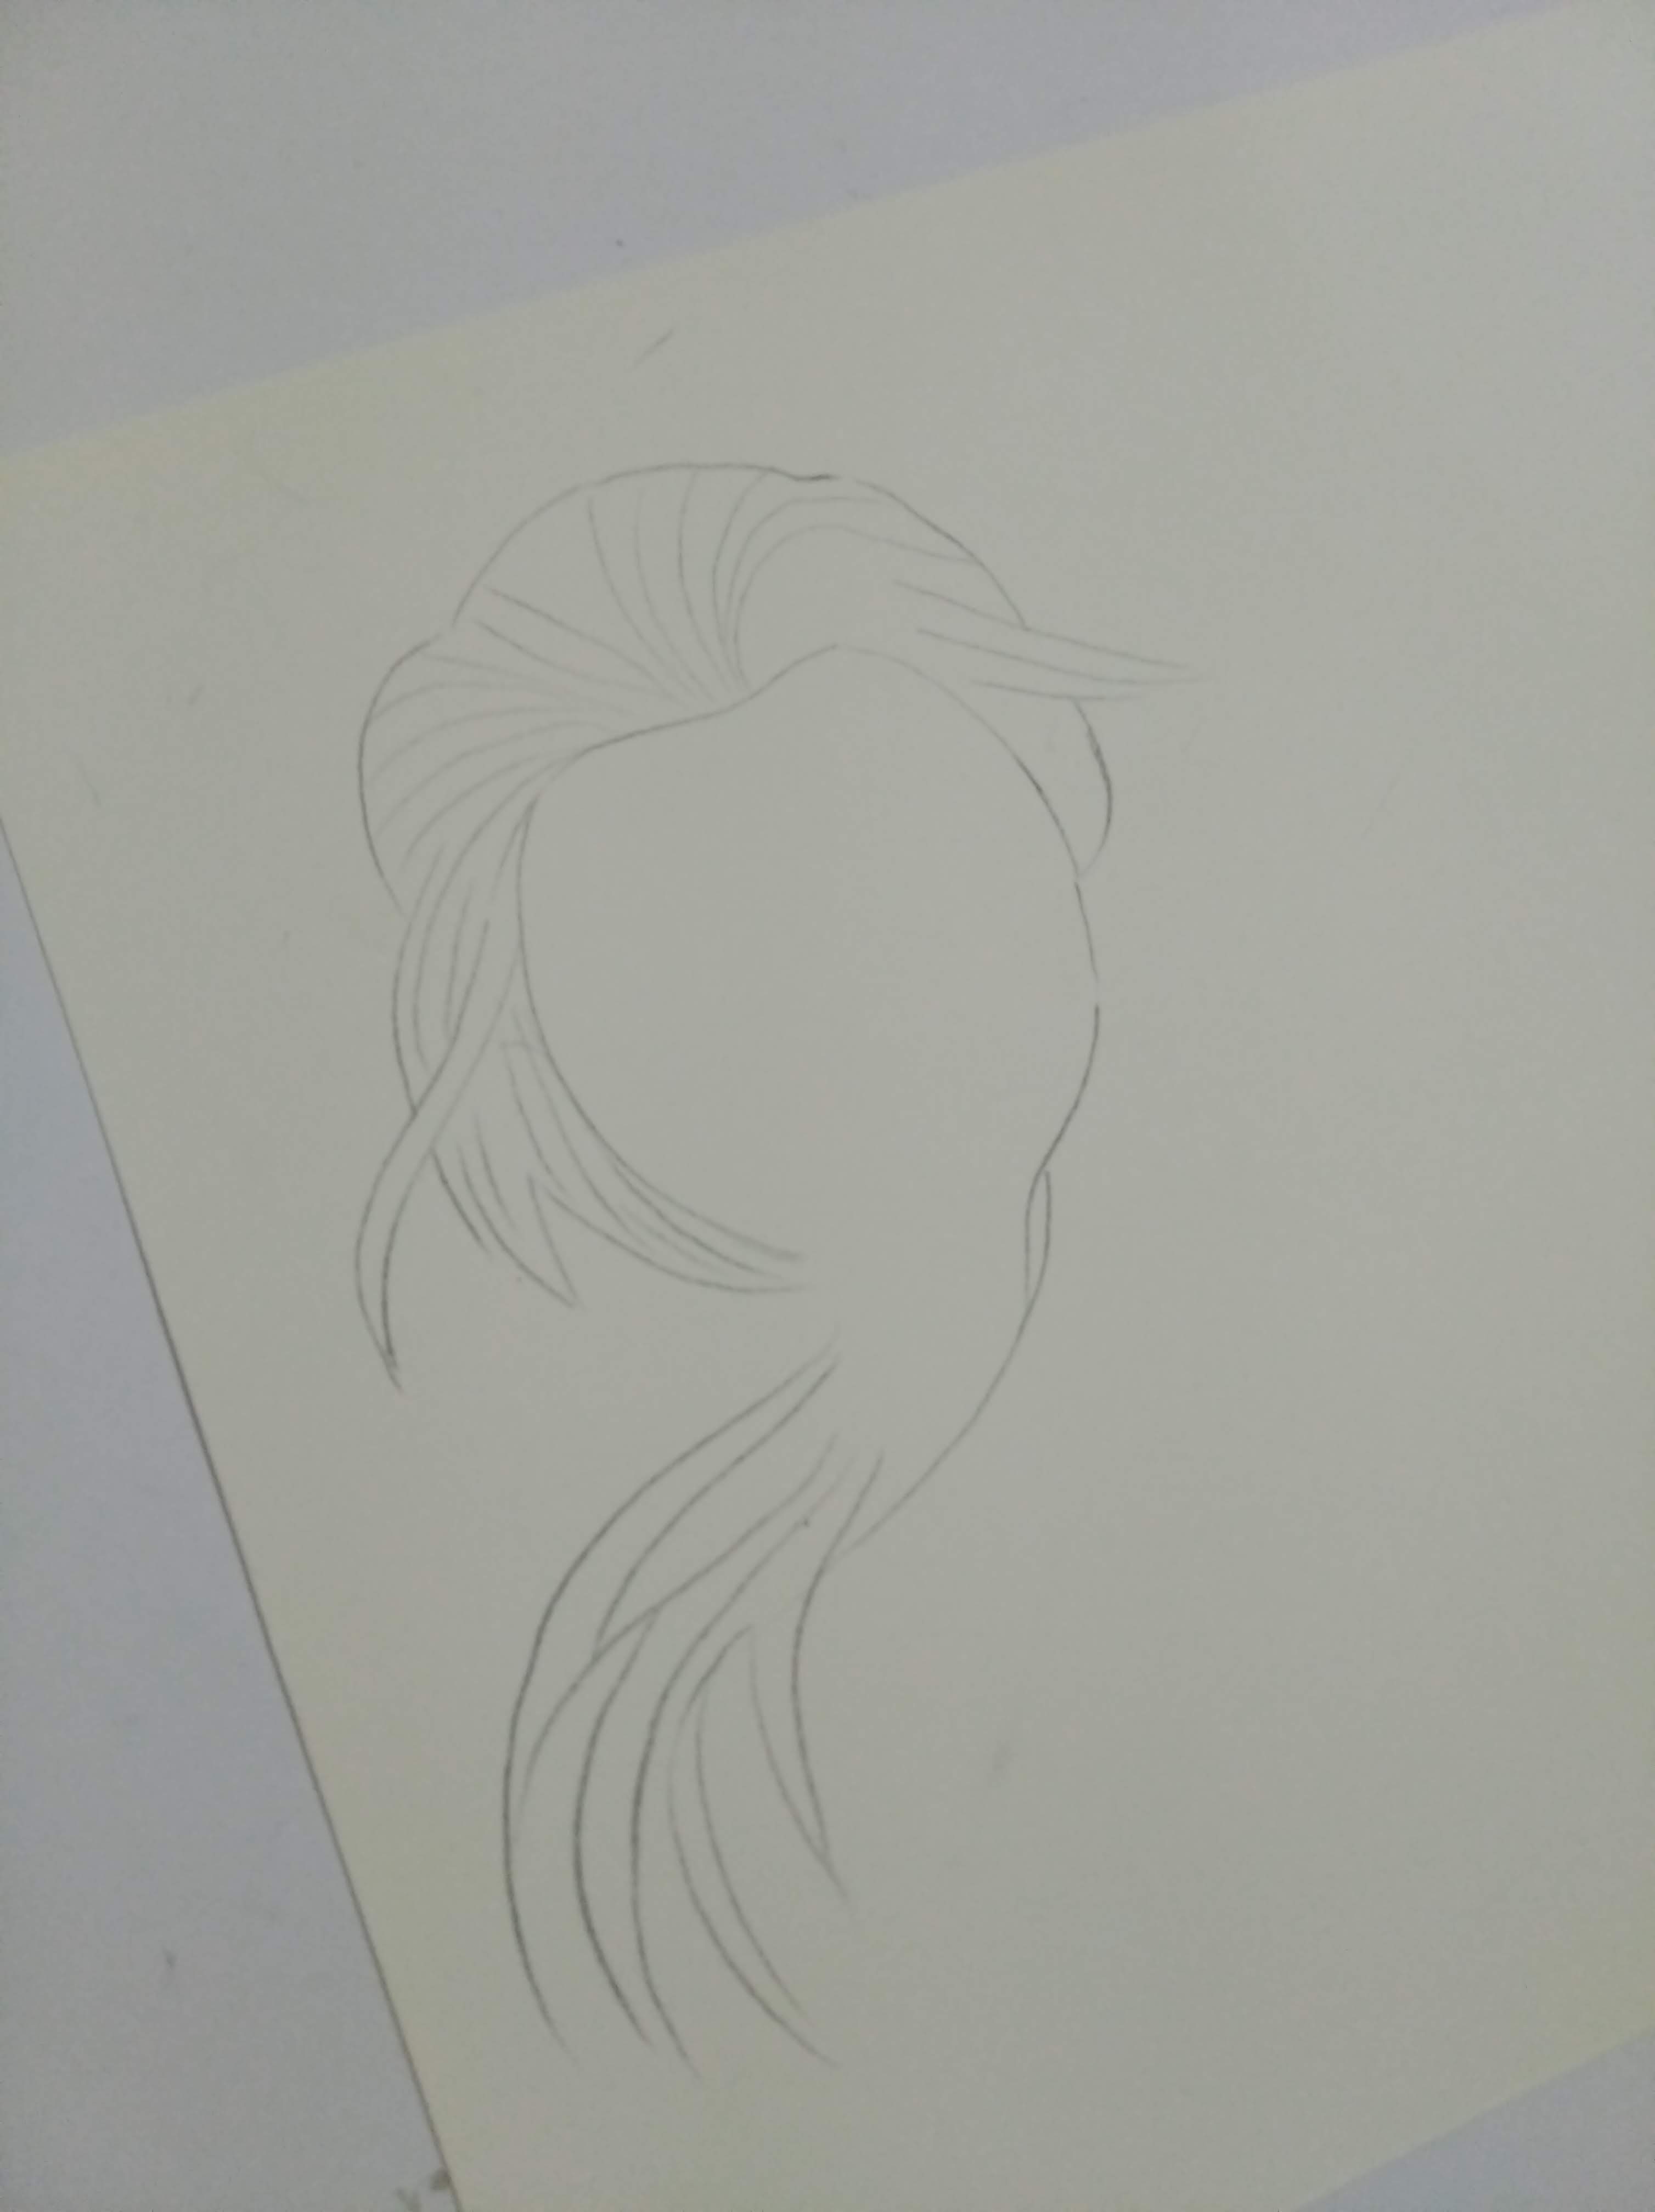
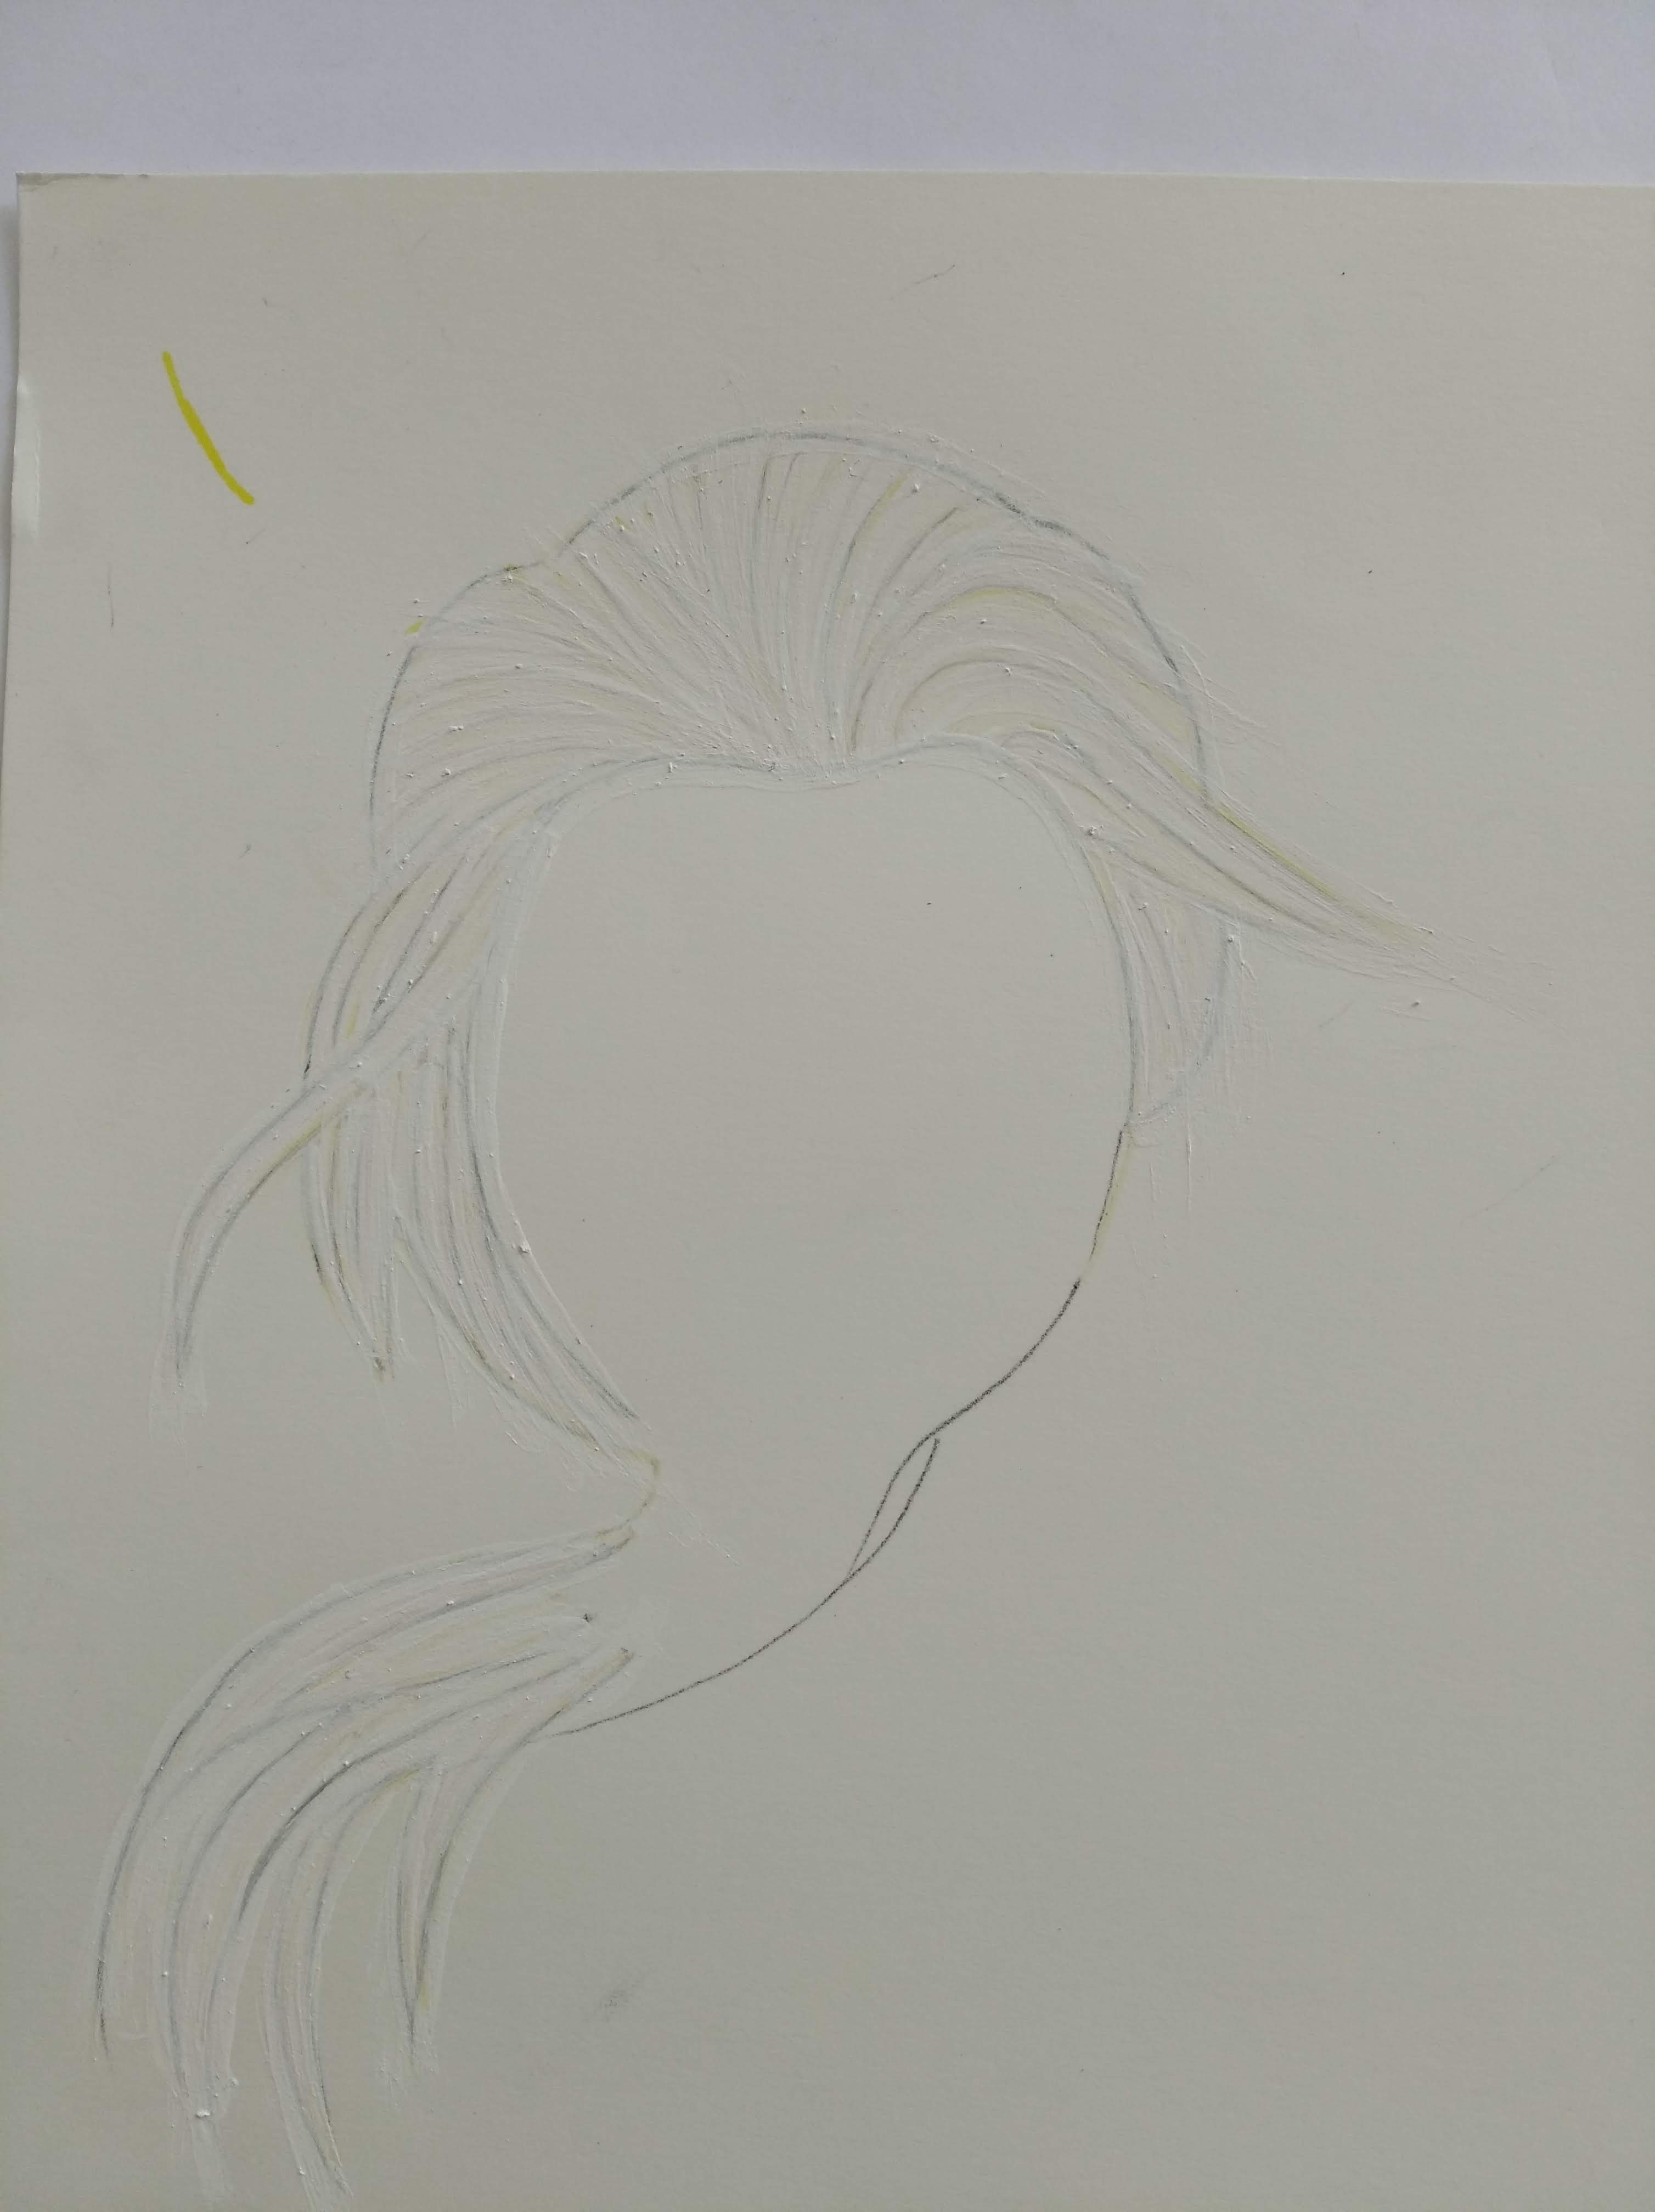
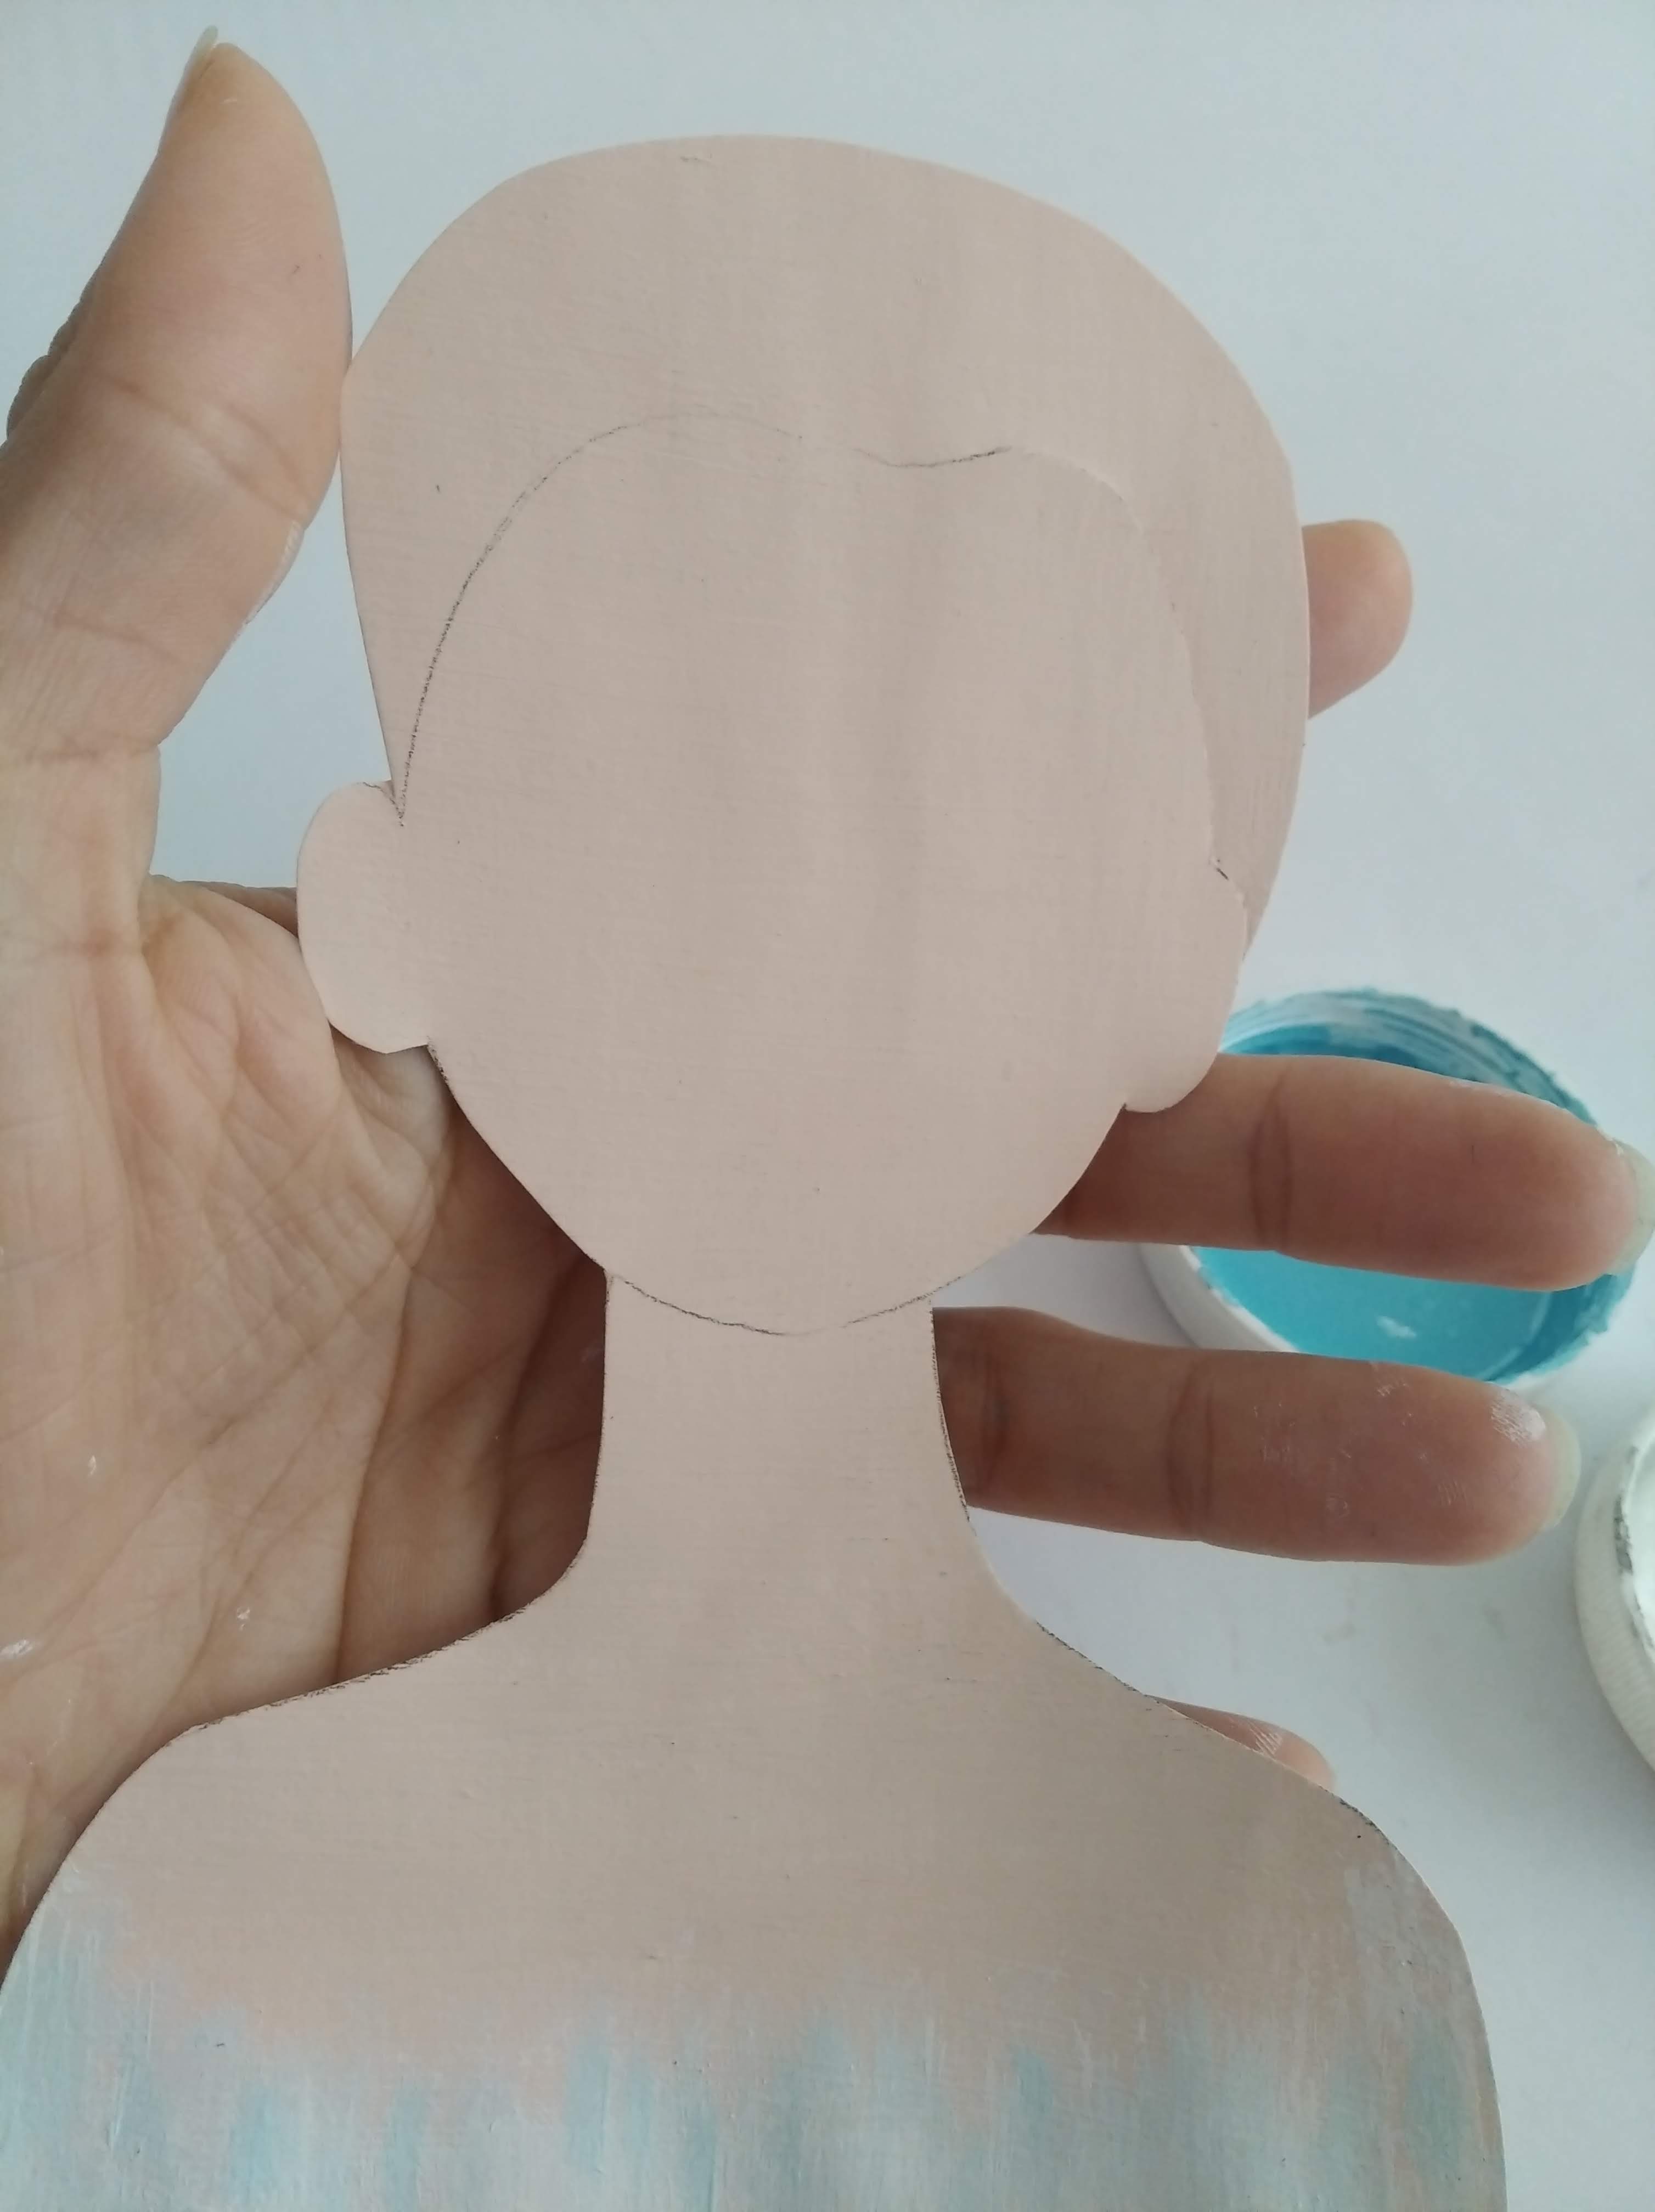
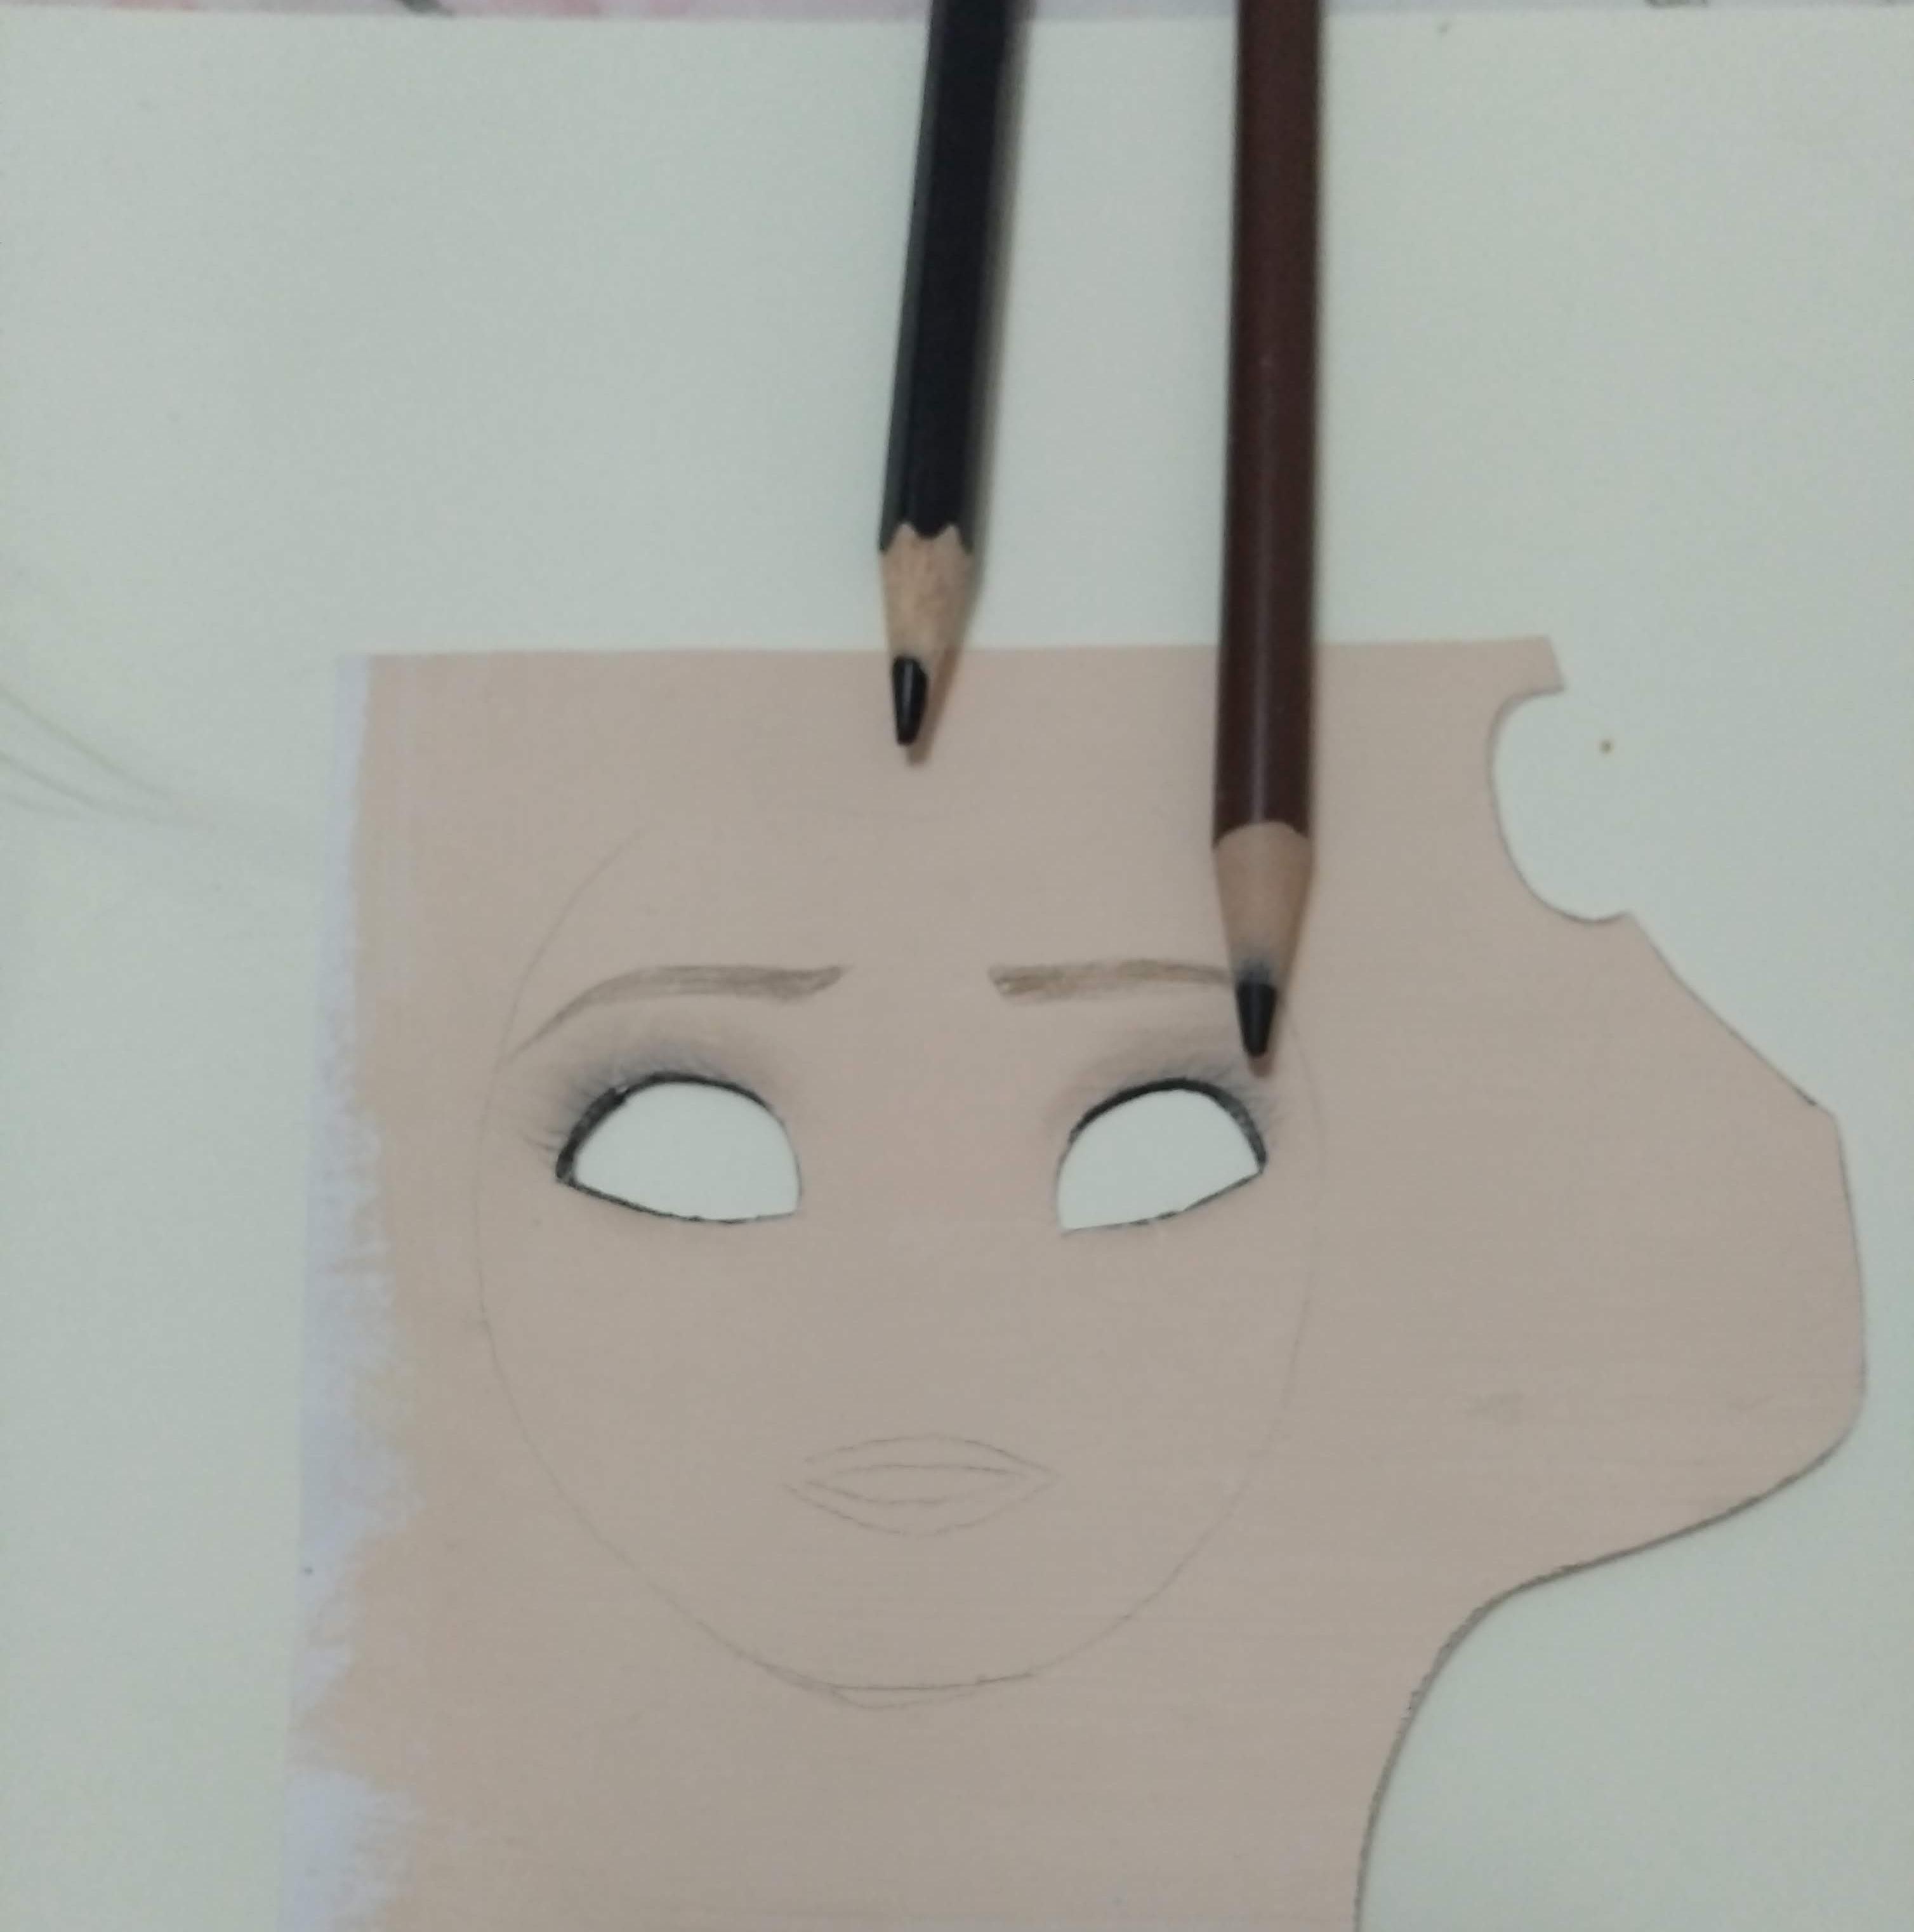
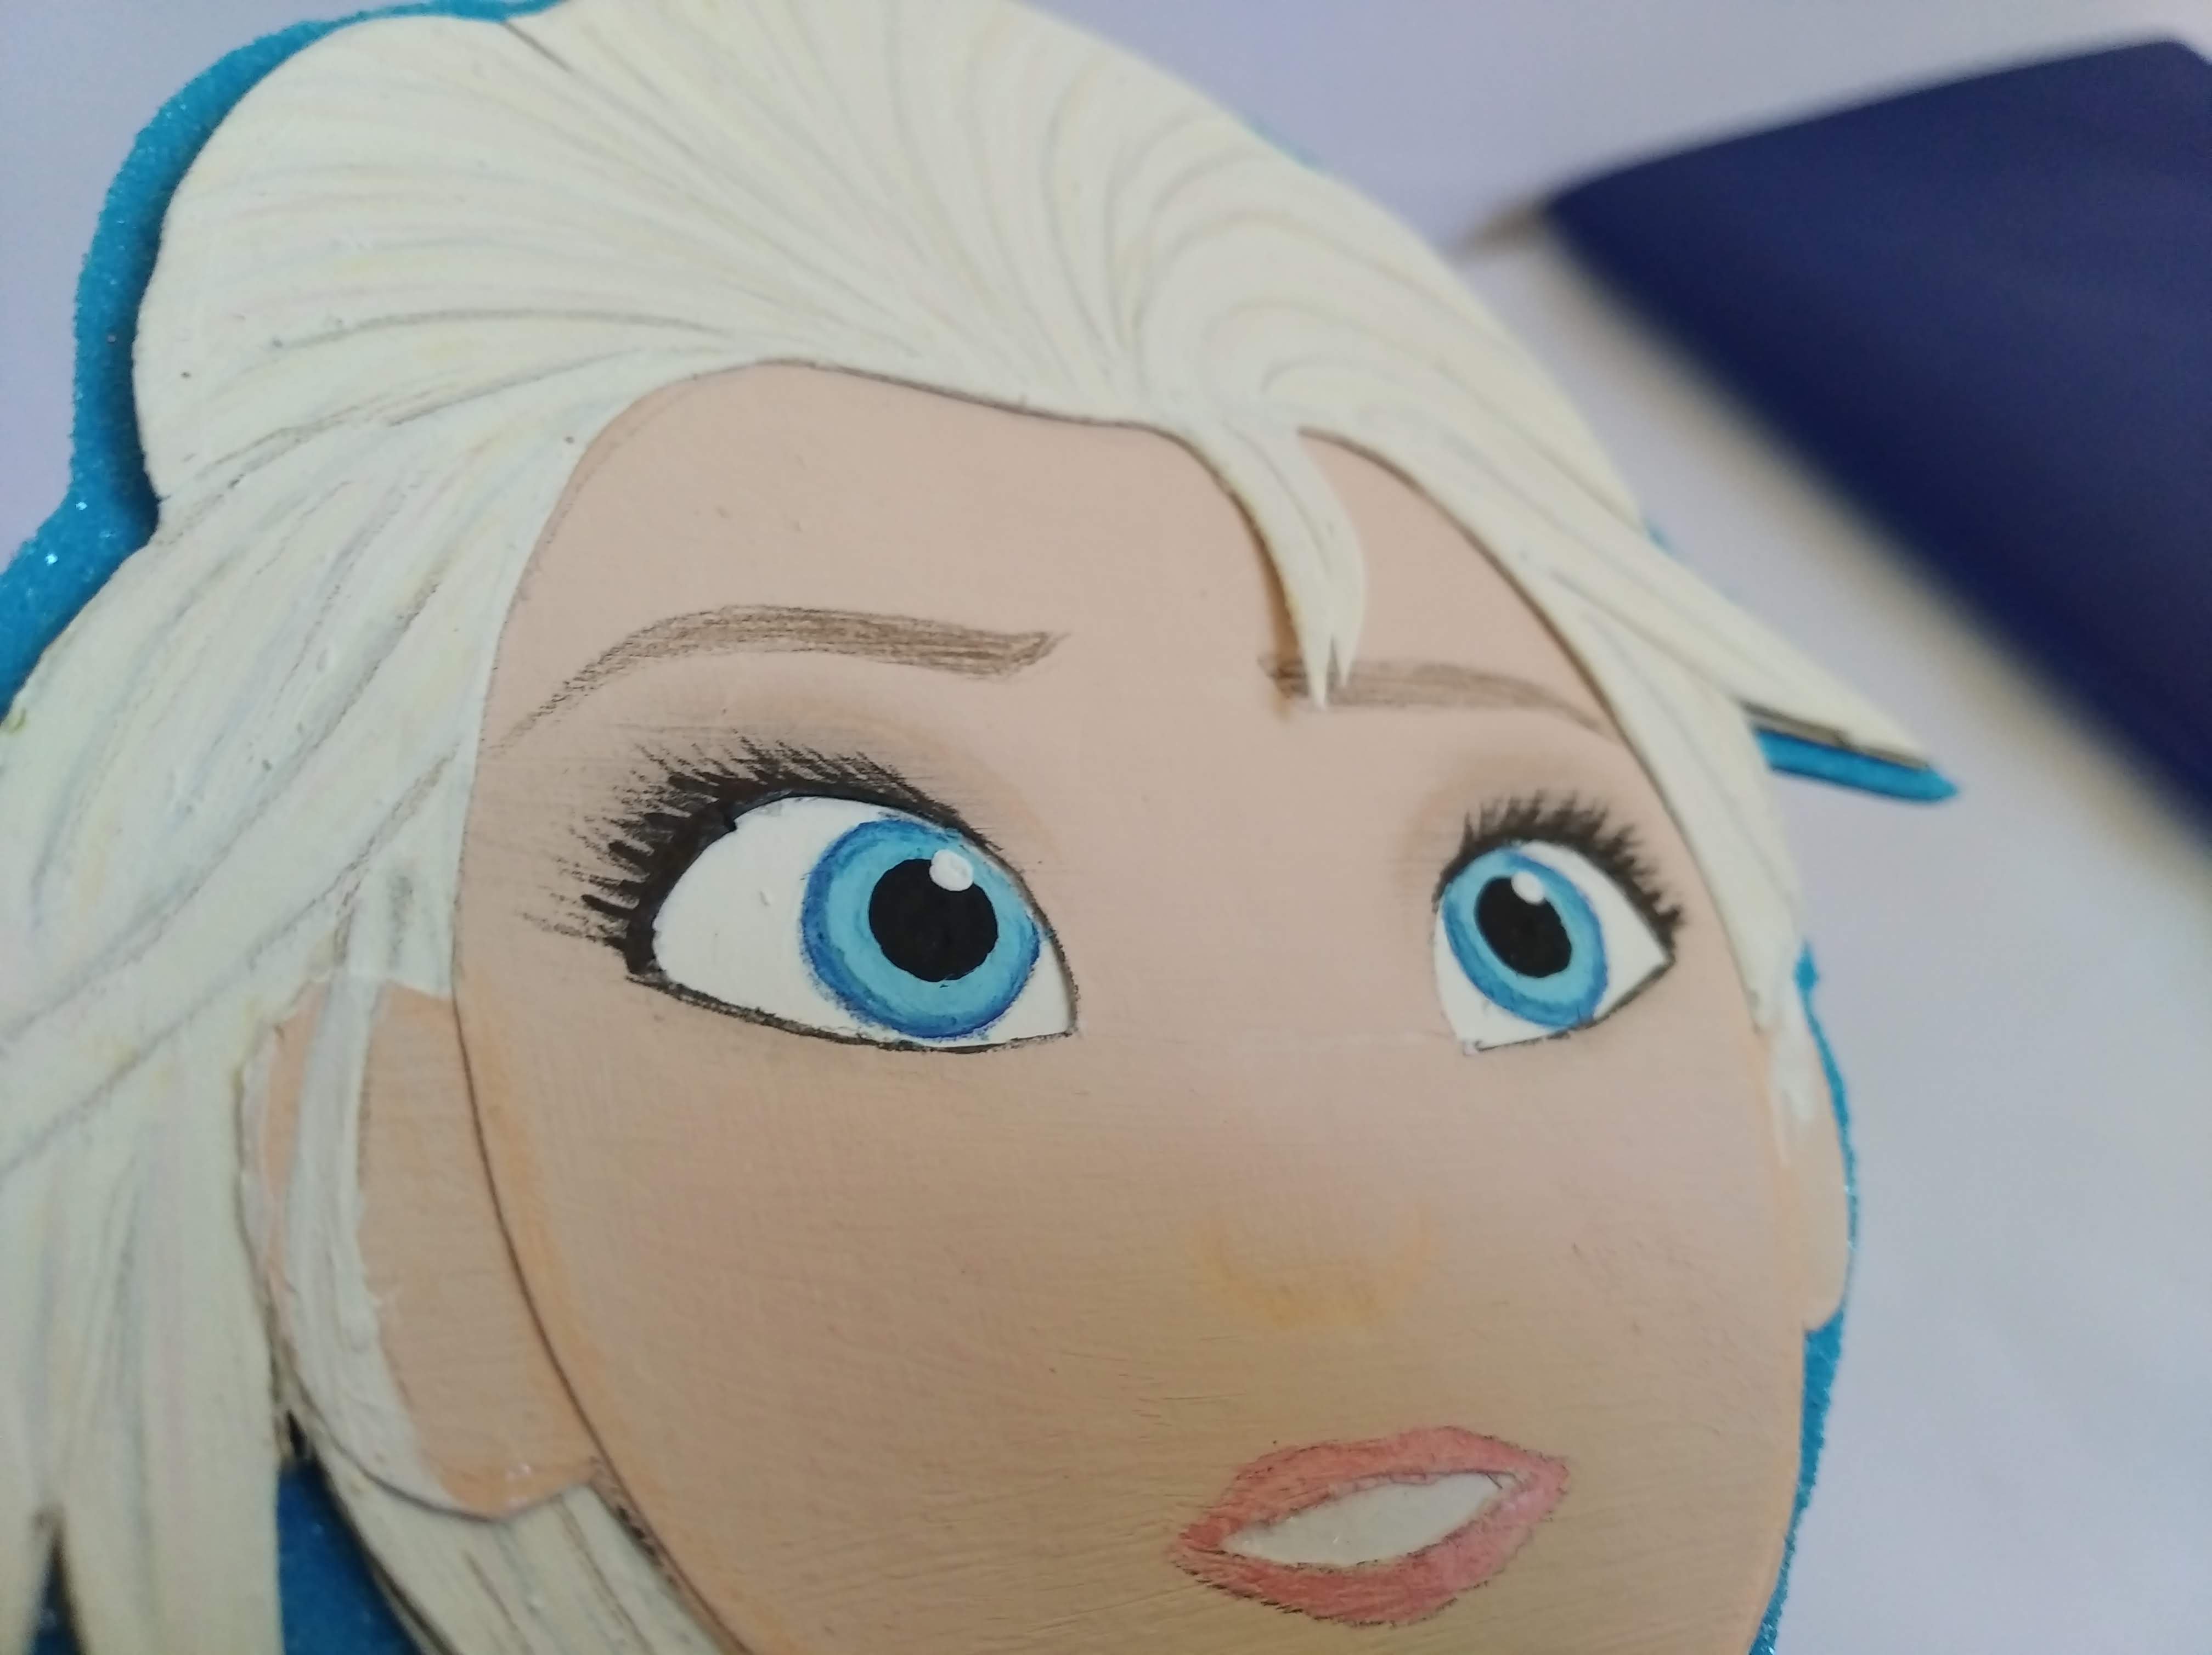
- En la otra cartulina blanca, sacar el diseño que corresponde al cabello, marcar las lineas con creyones marrón suave y negro y luego aplicar pintura blanca encima para atenuar las líneas.
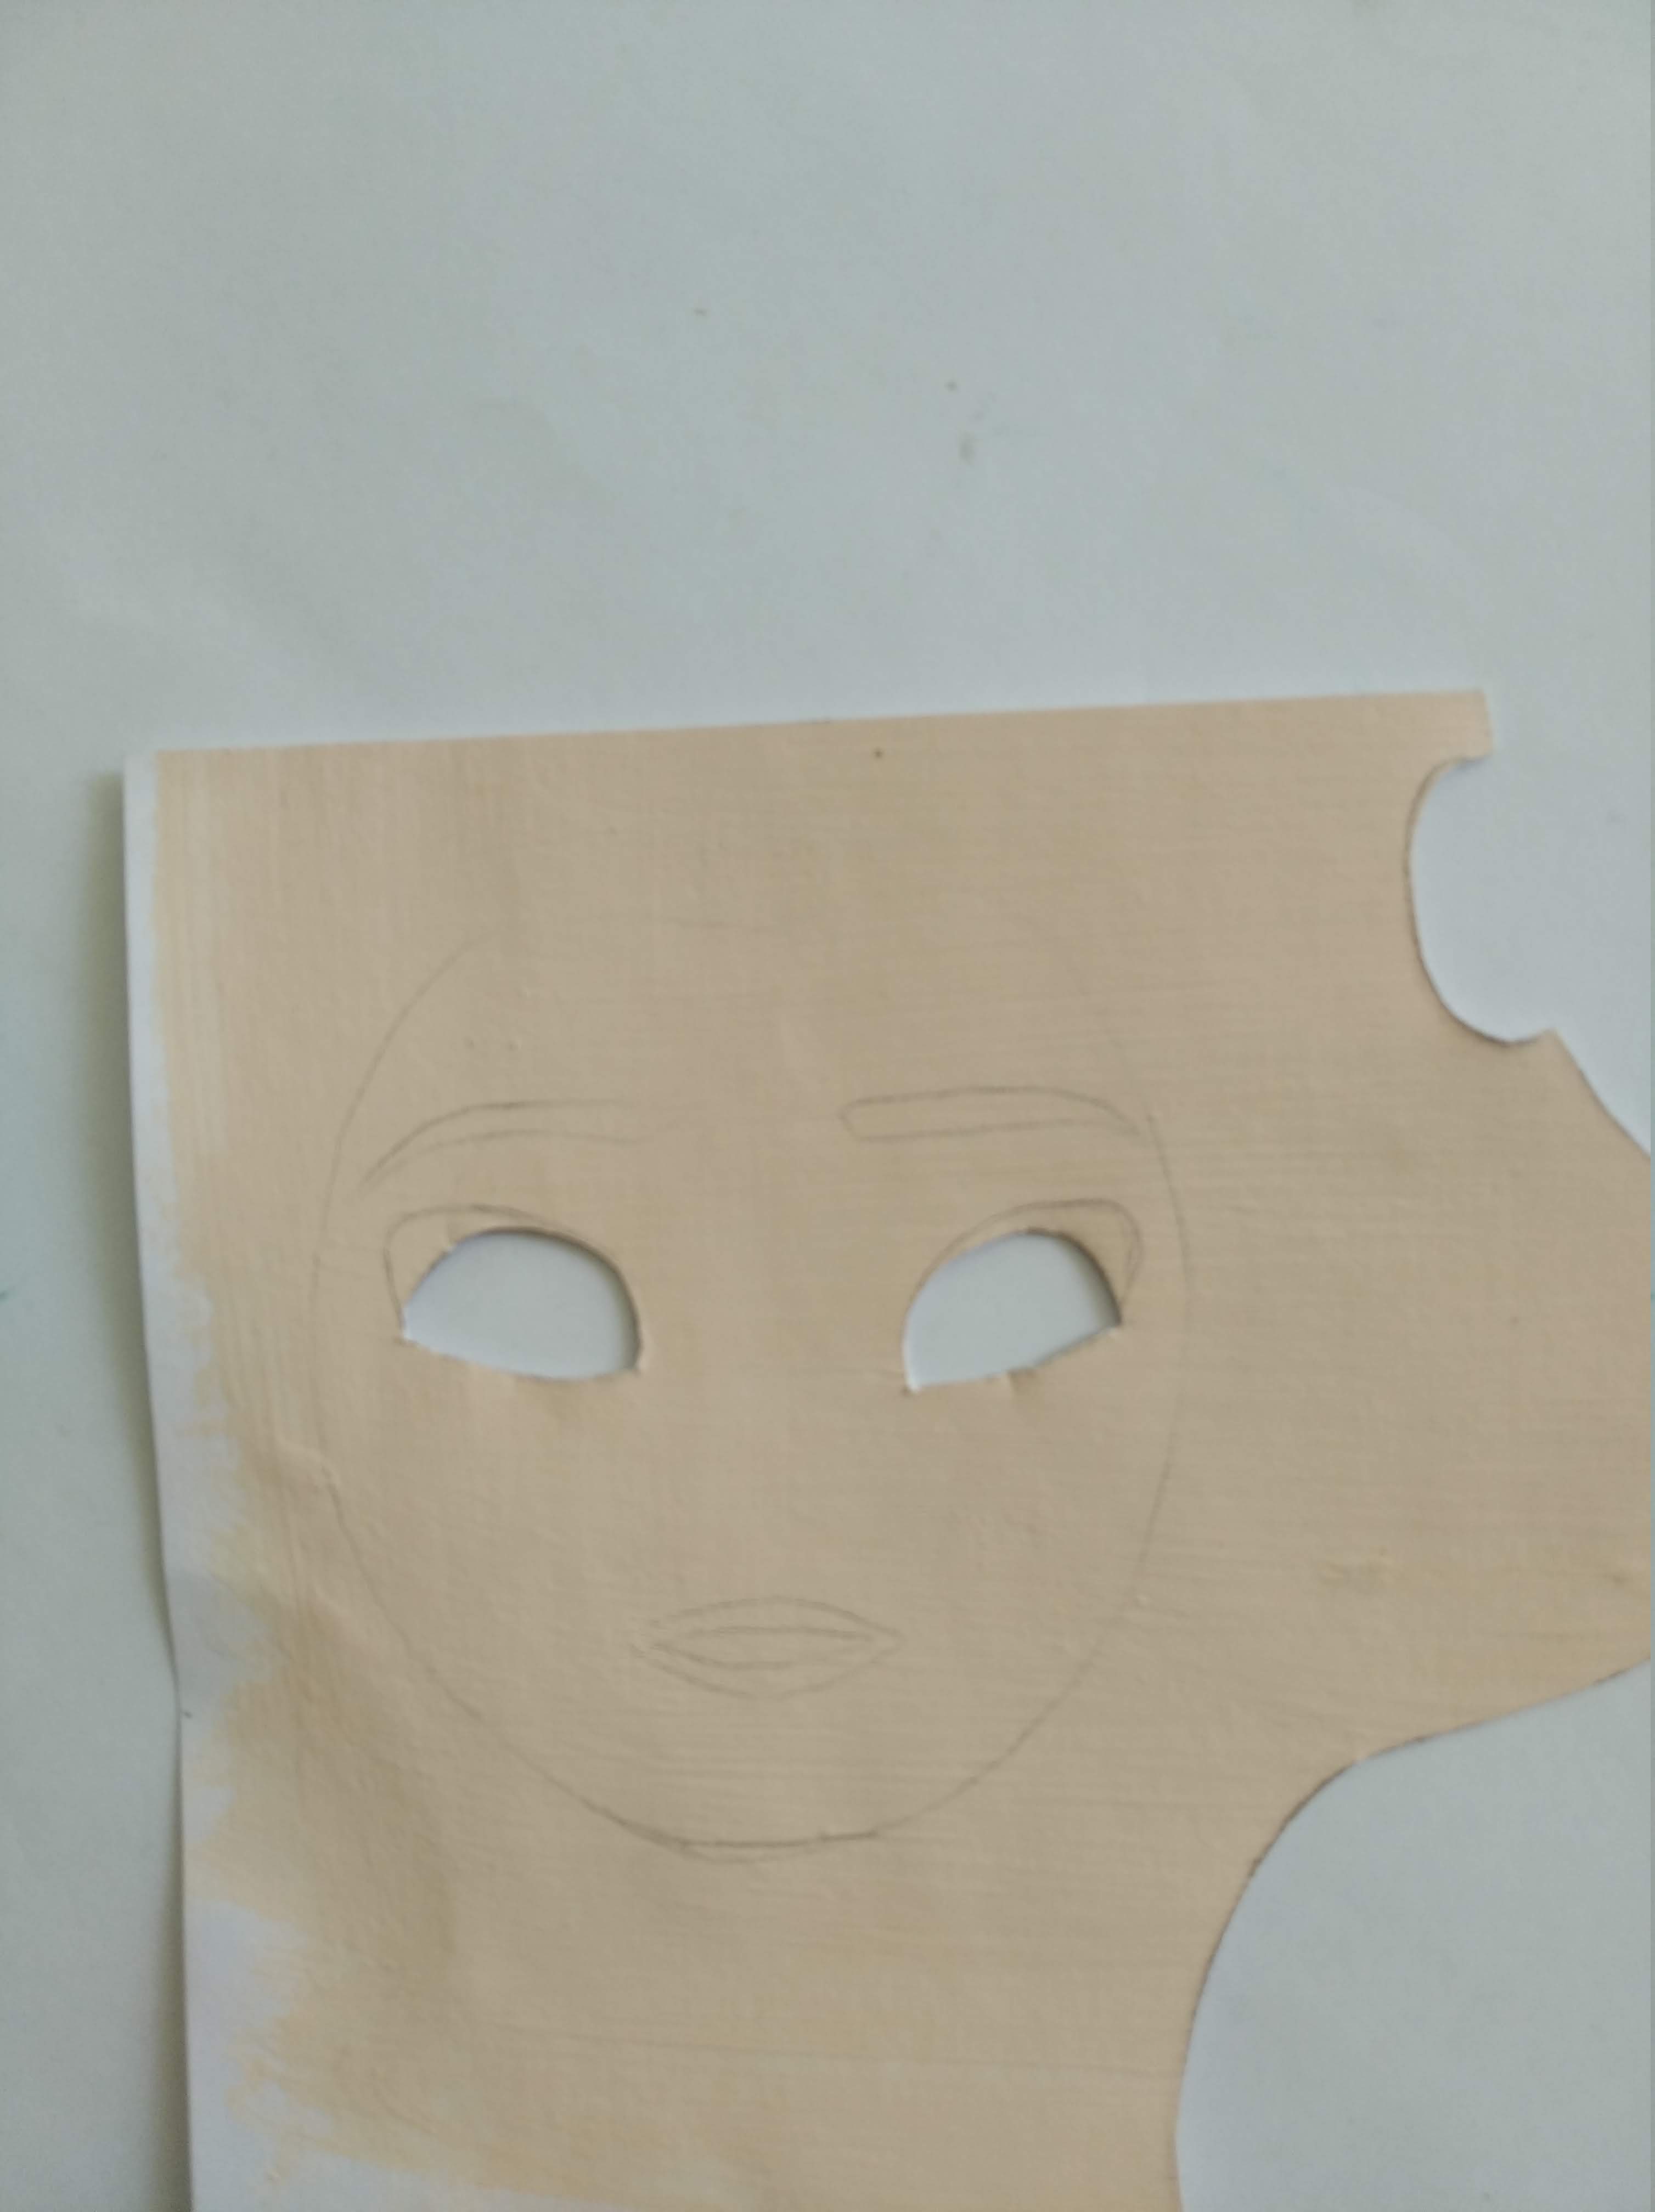
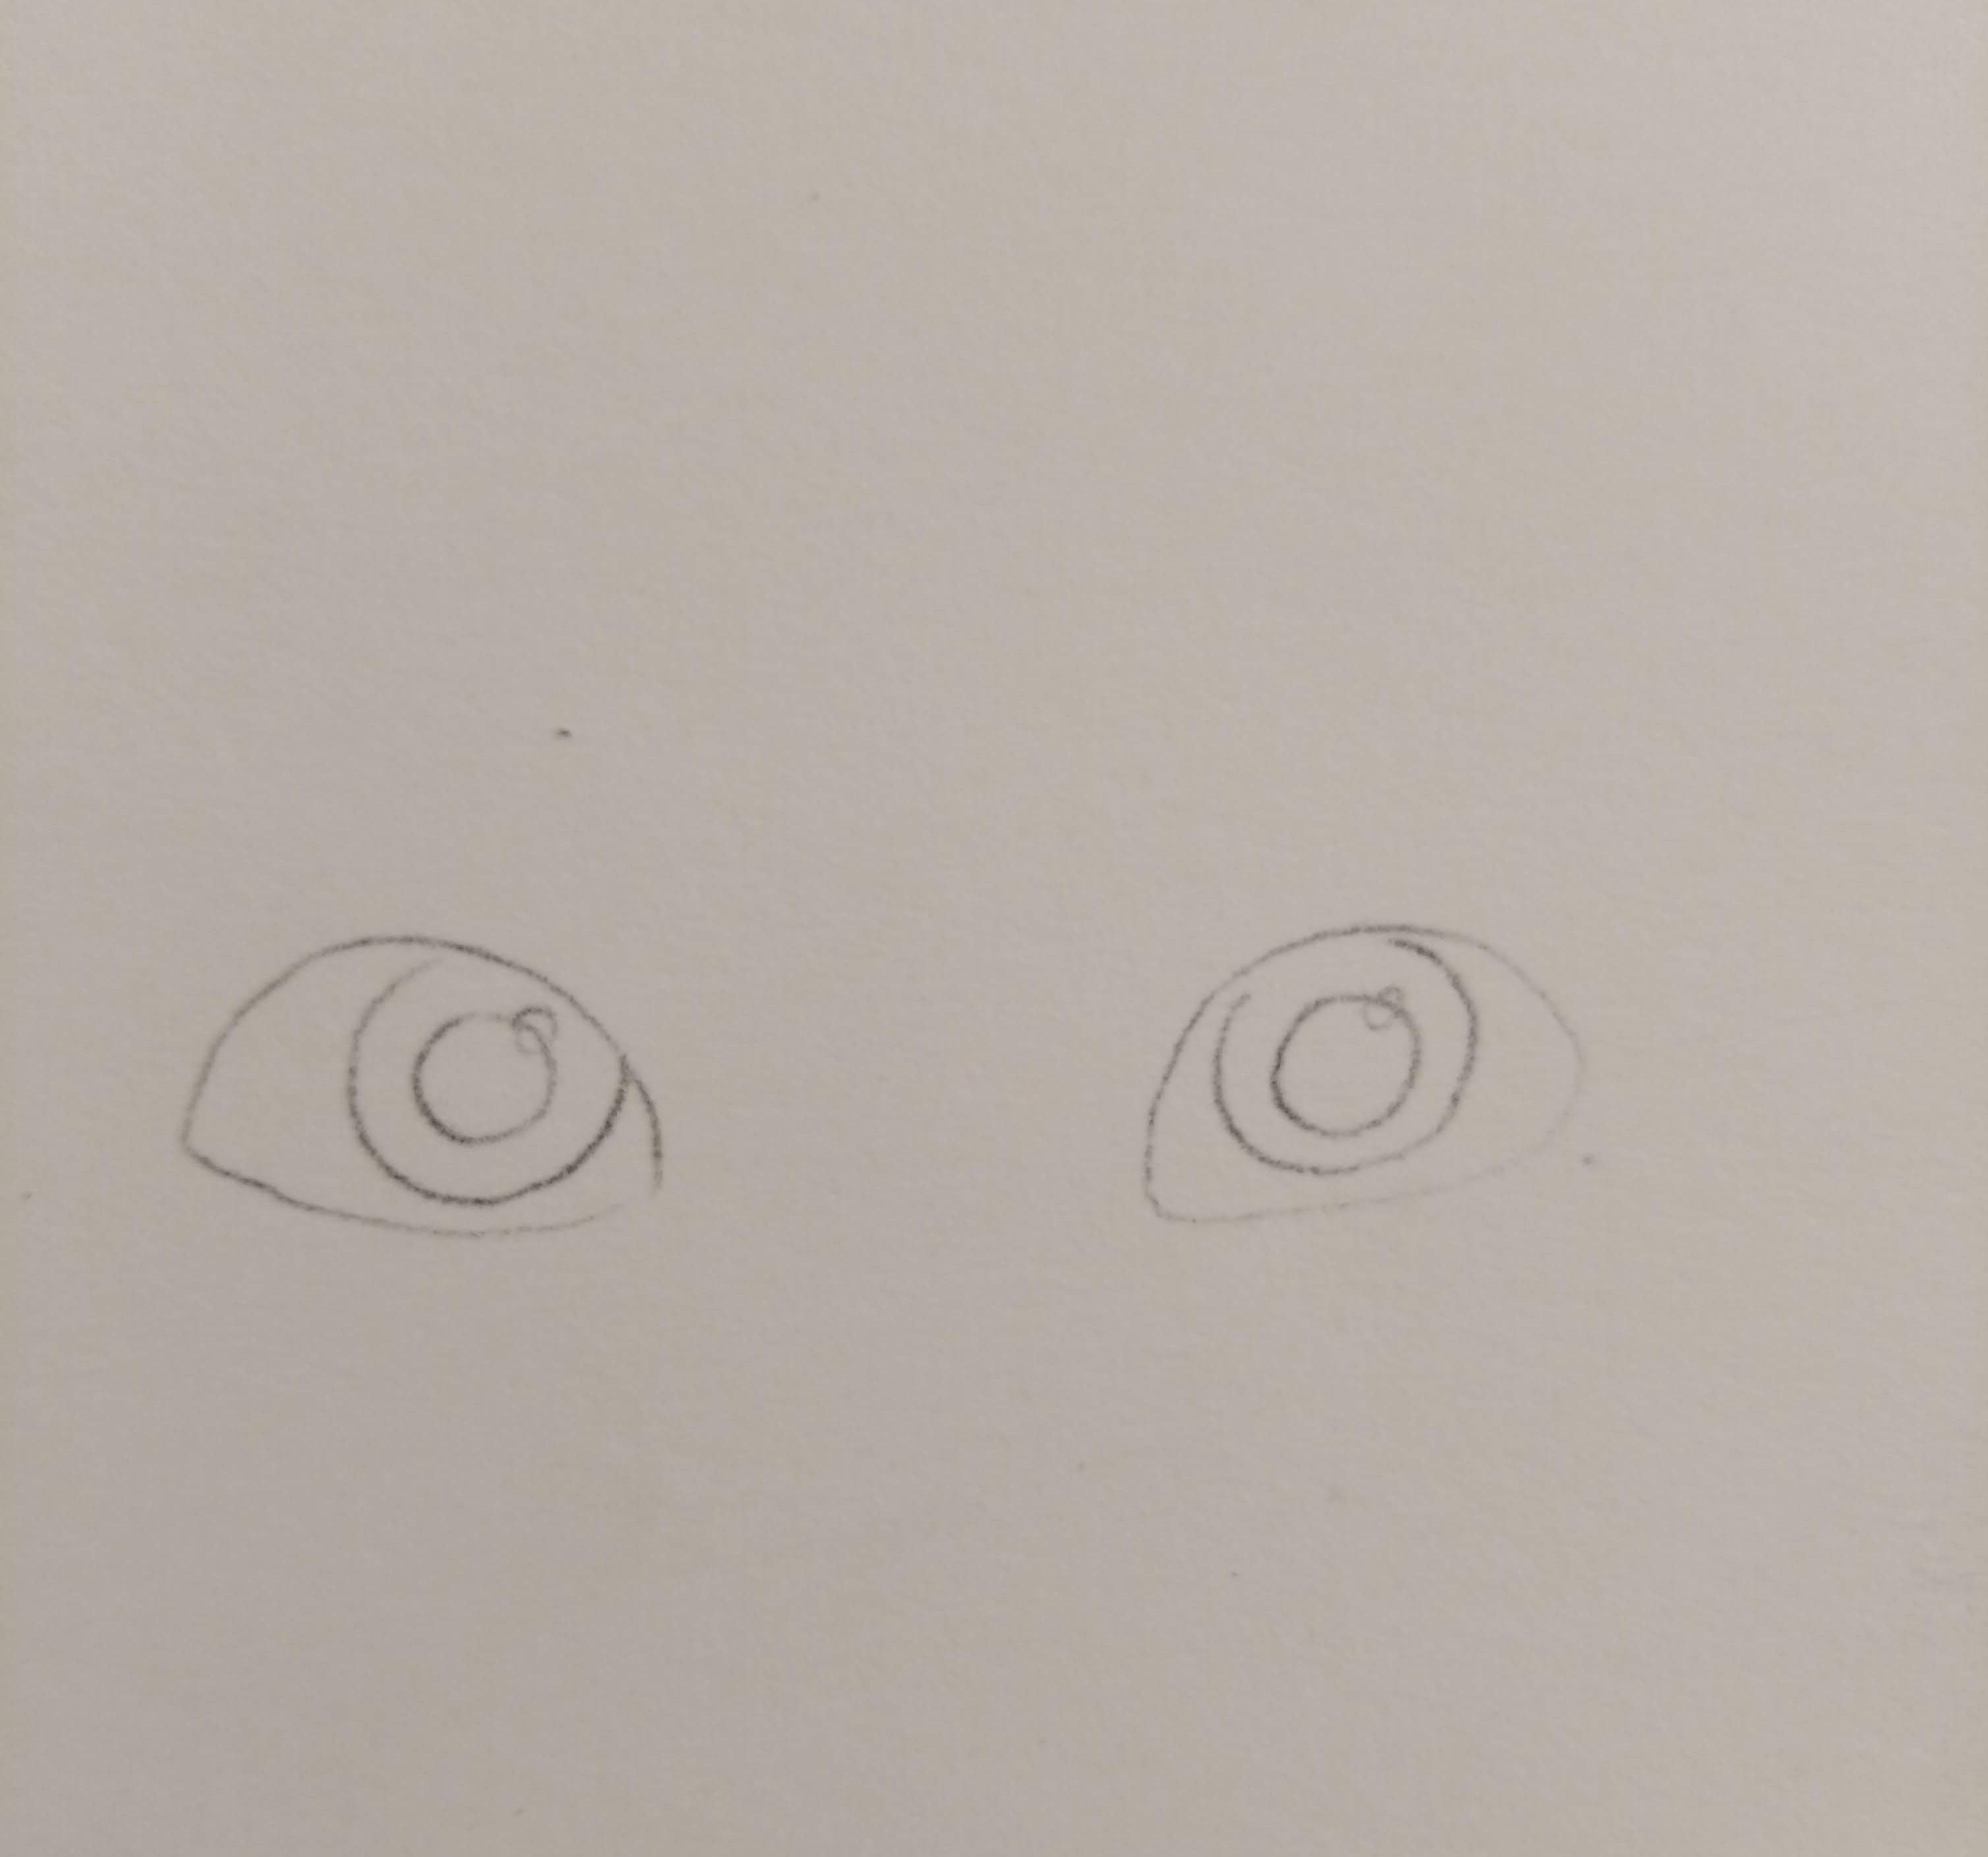
- Cuando la cartulina del rostro esté lista, marcar suavemente en la pintura lo que seria el rostro y el área correspondiente a los ojos cortar con el cutter.
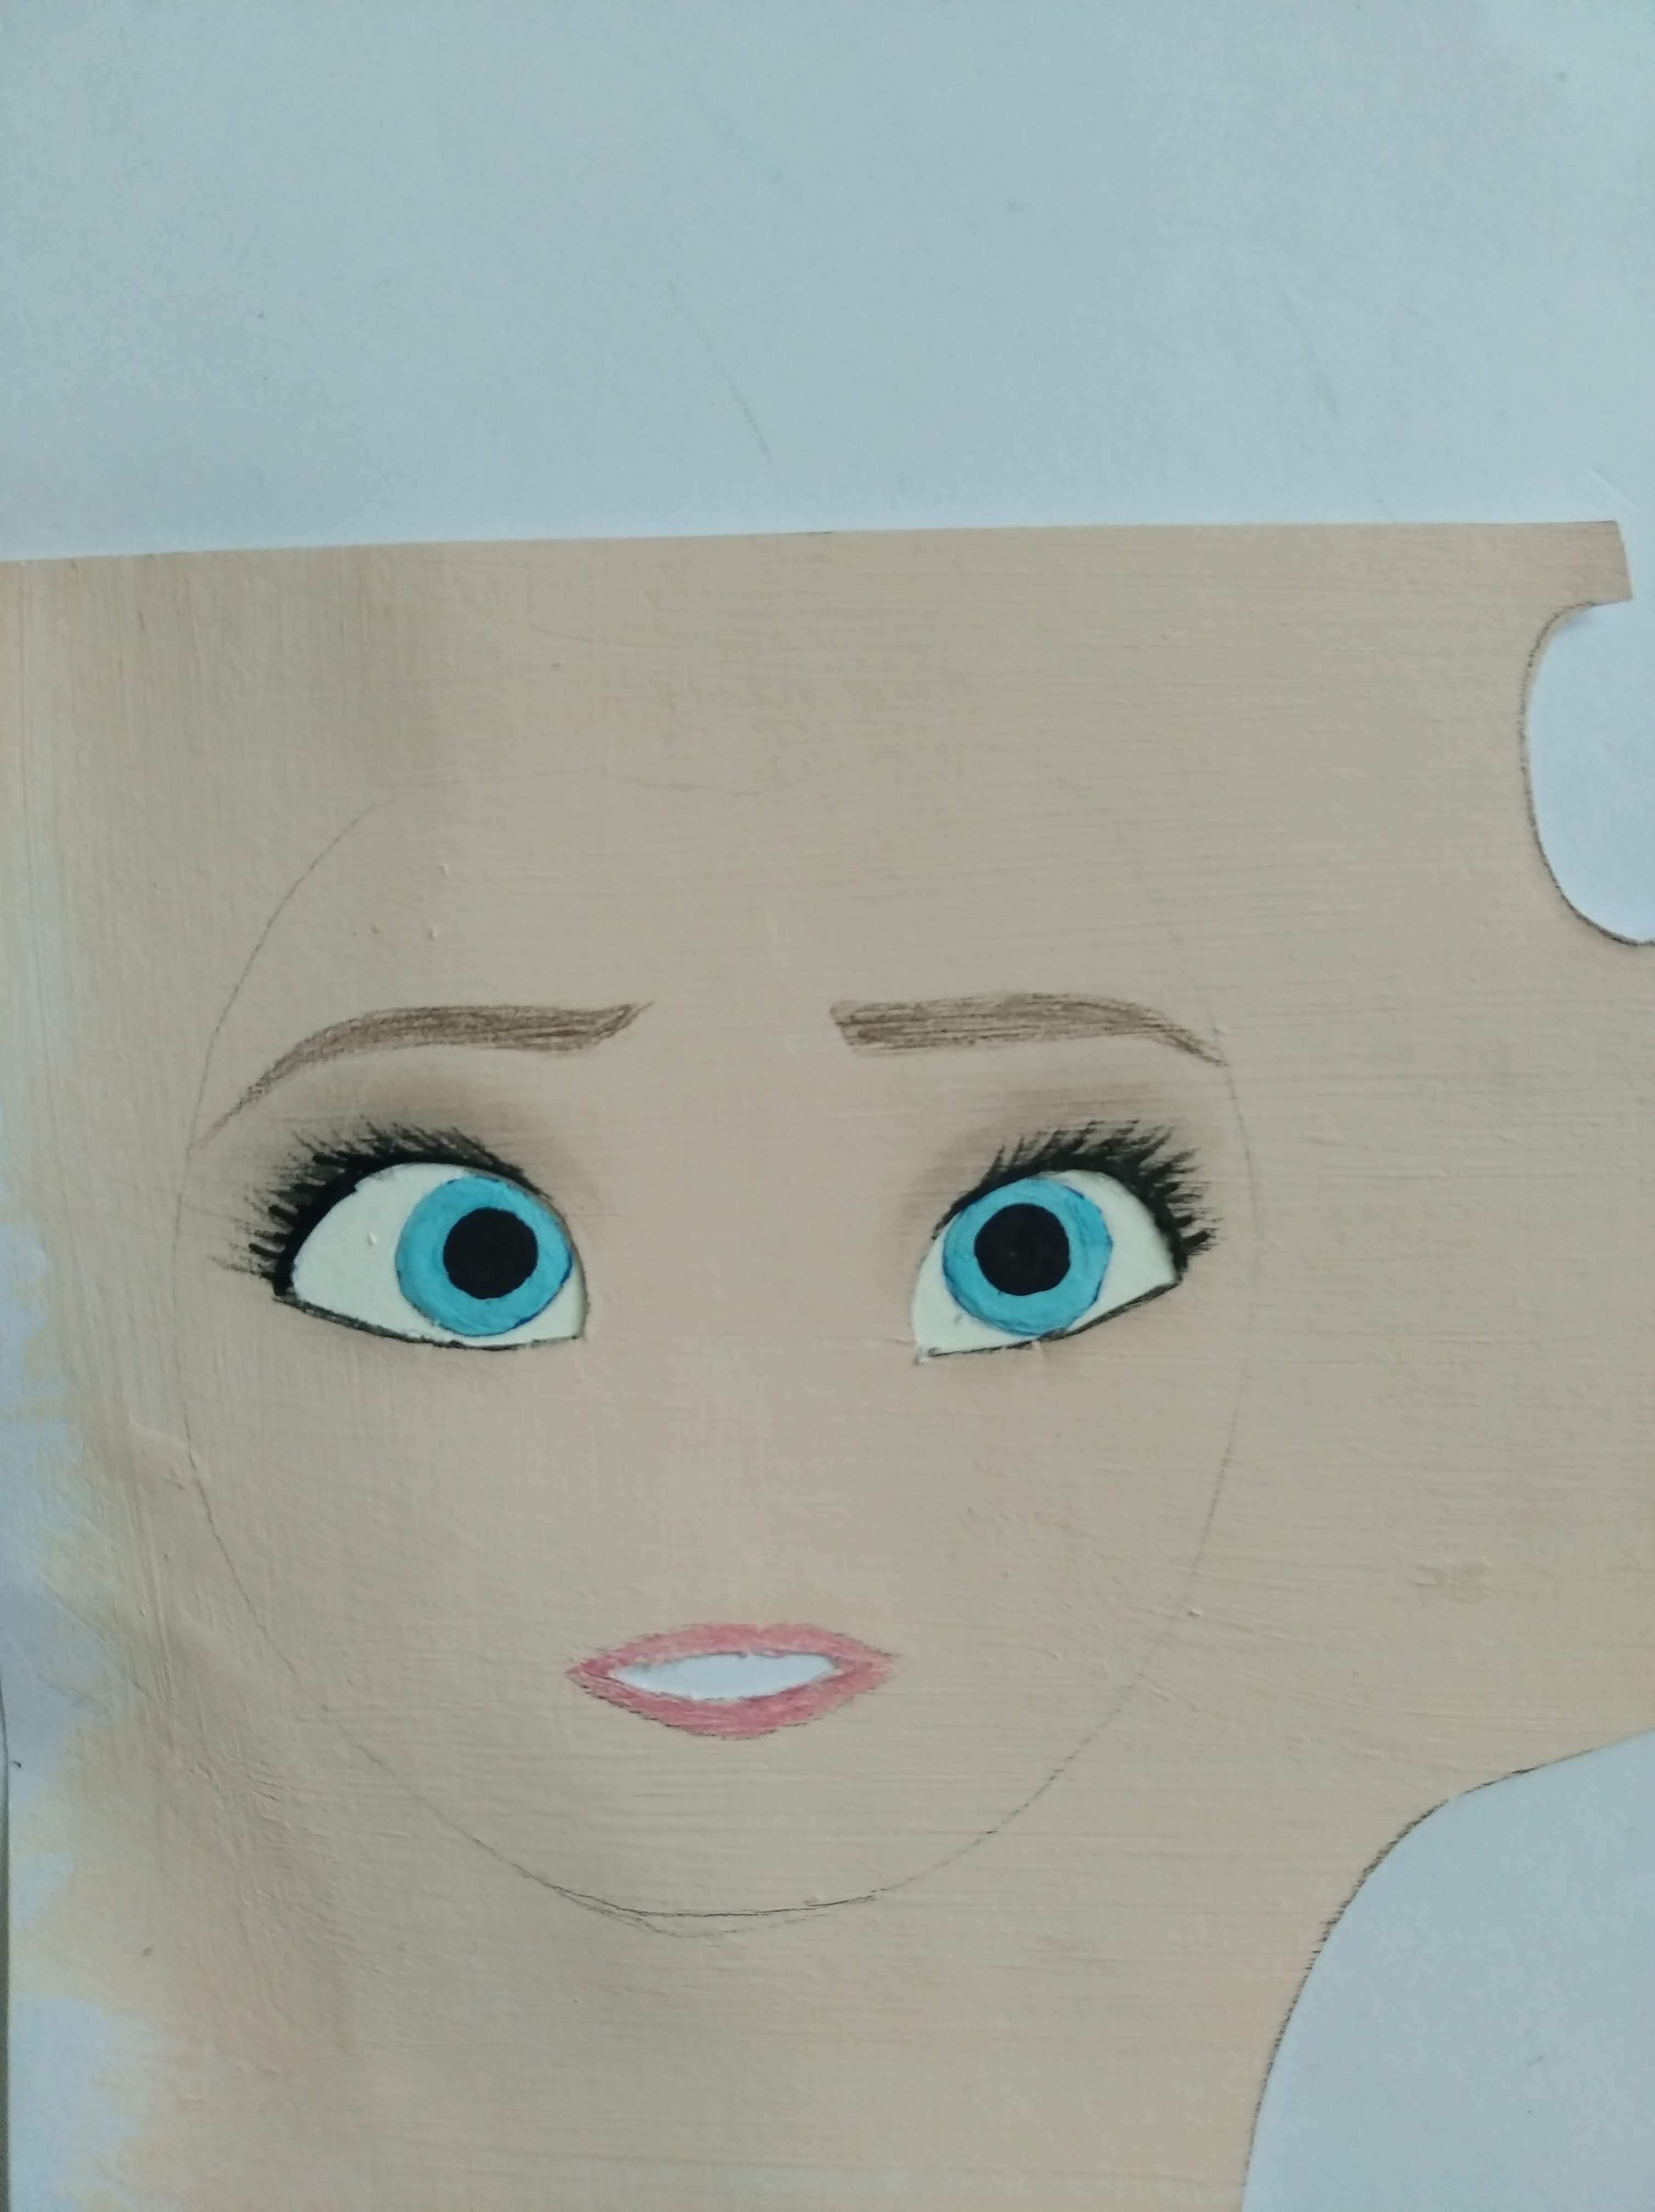
- En un pedacito de cartulina blanca demarcar los ojos y pintar con las pinturas al frio correspondientes.
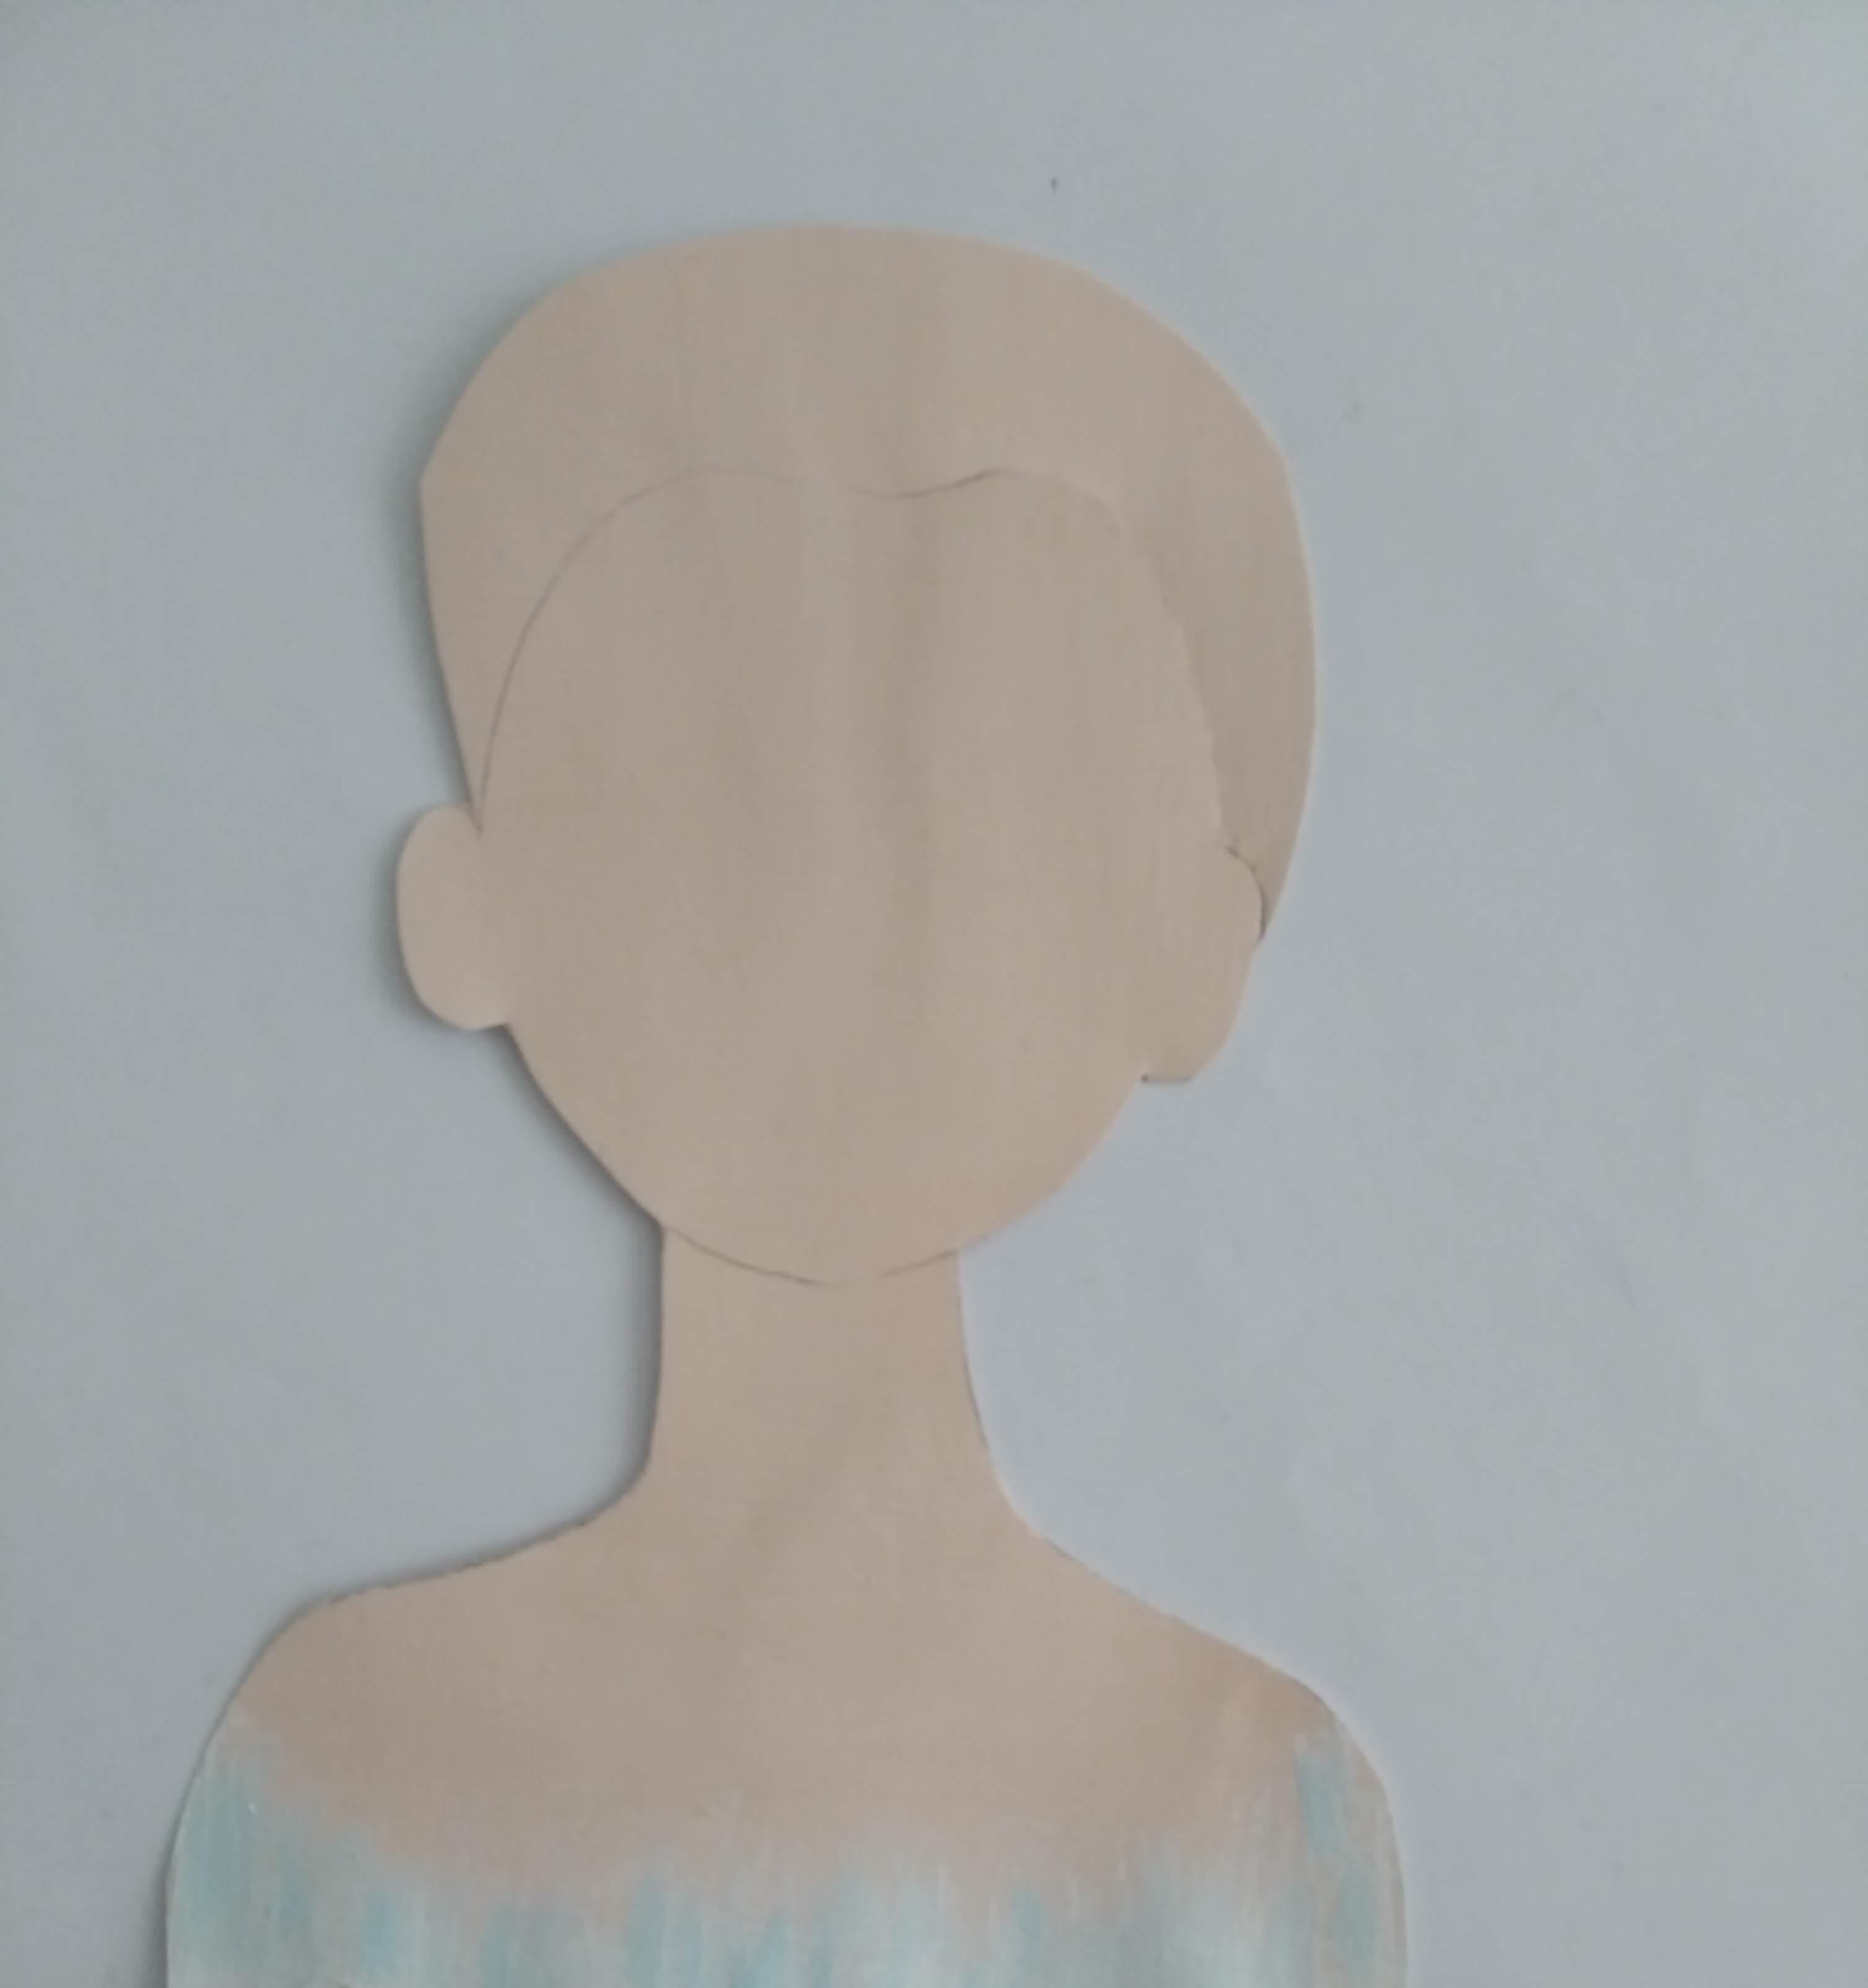
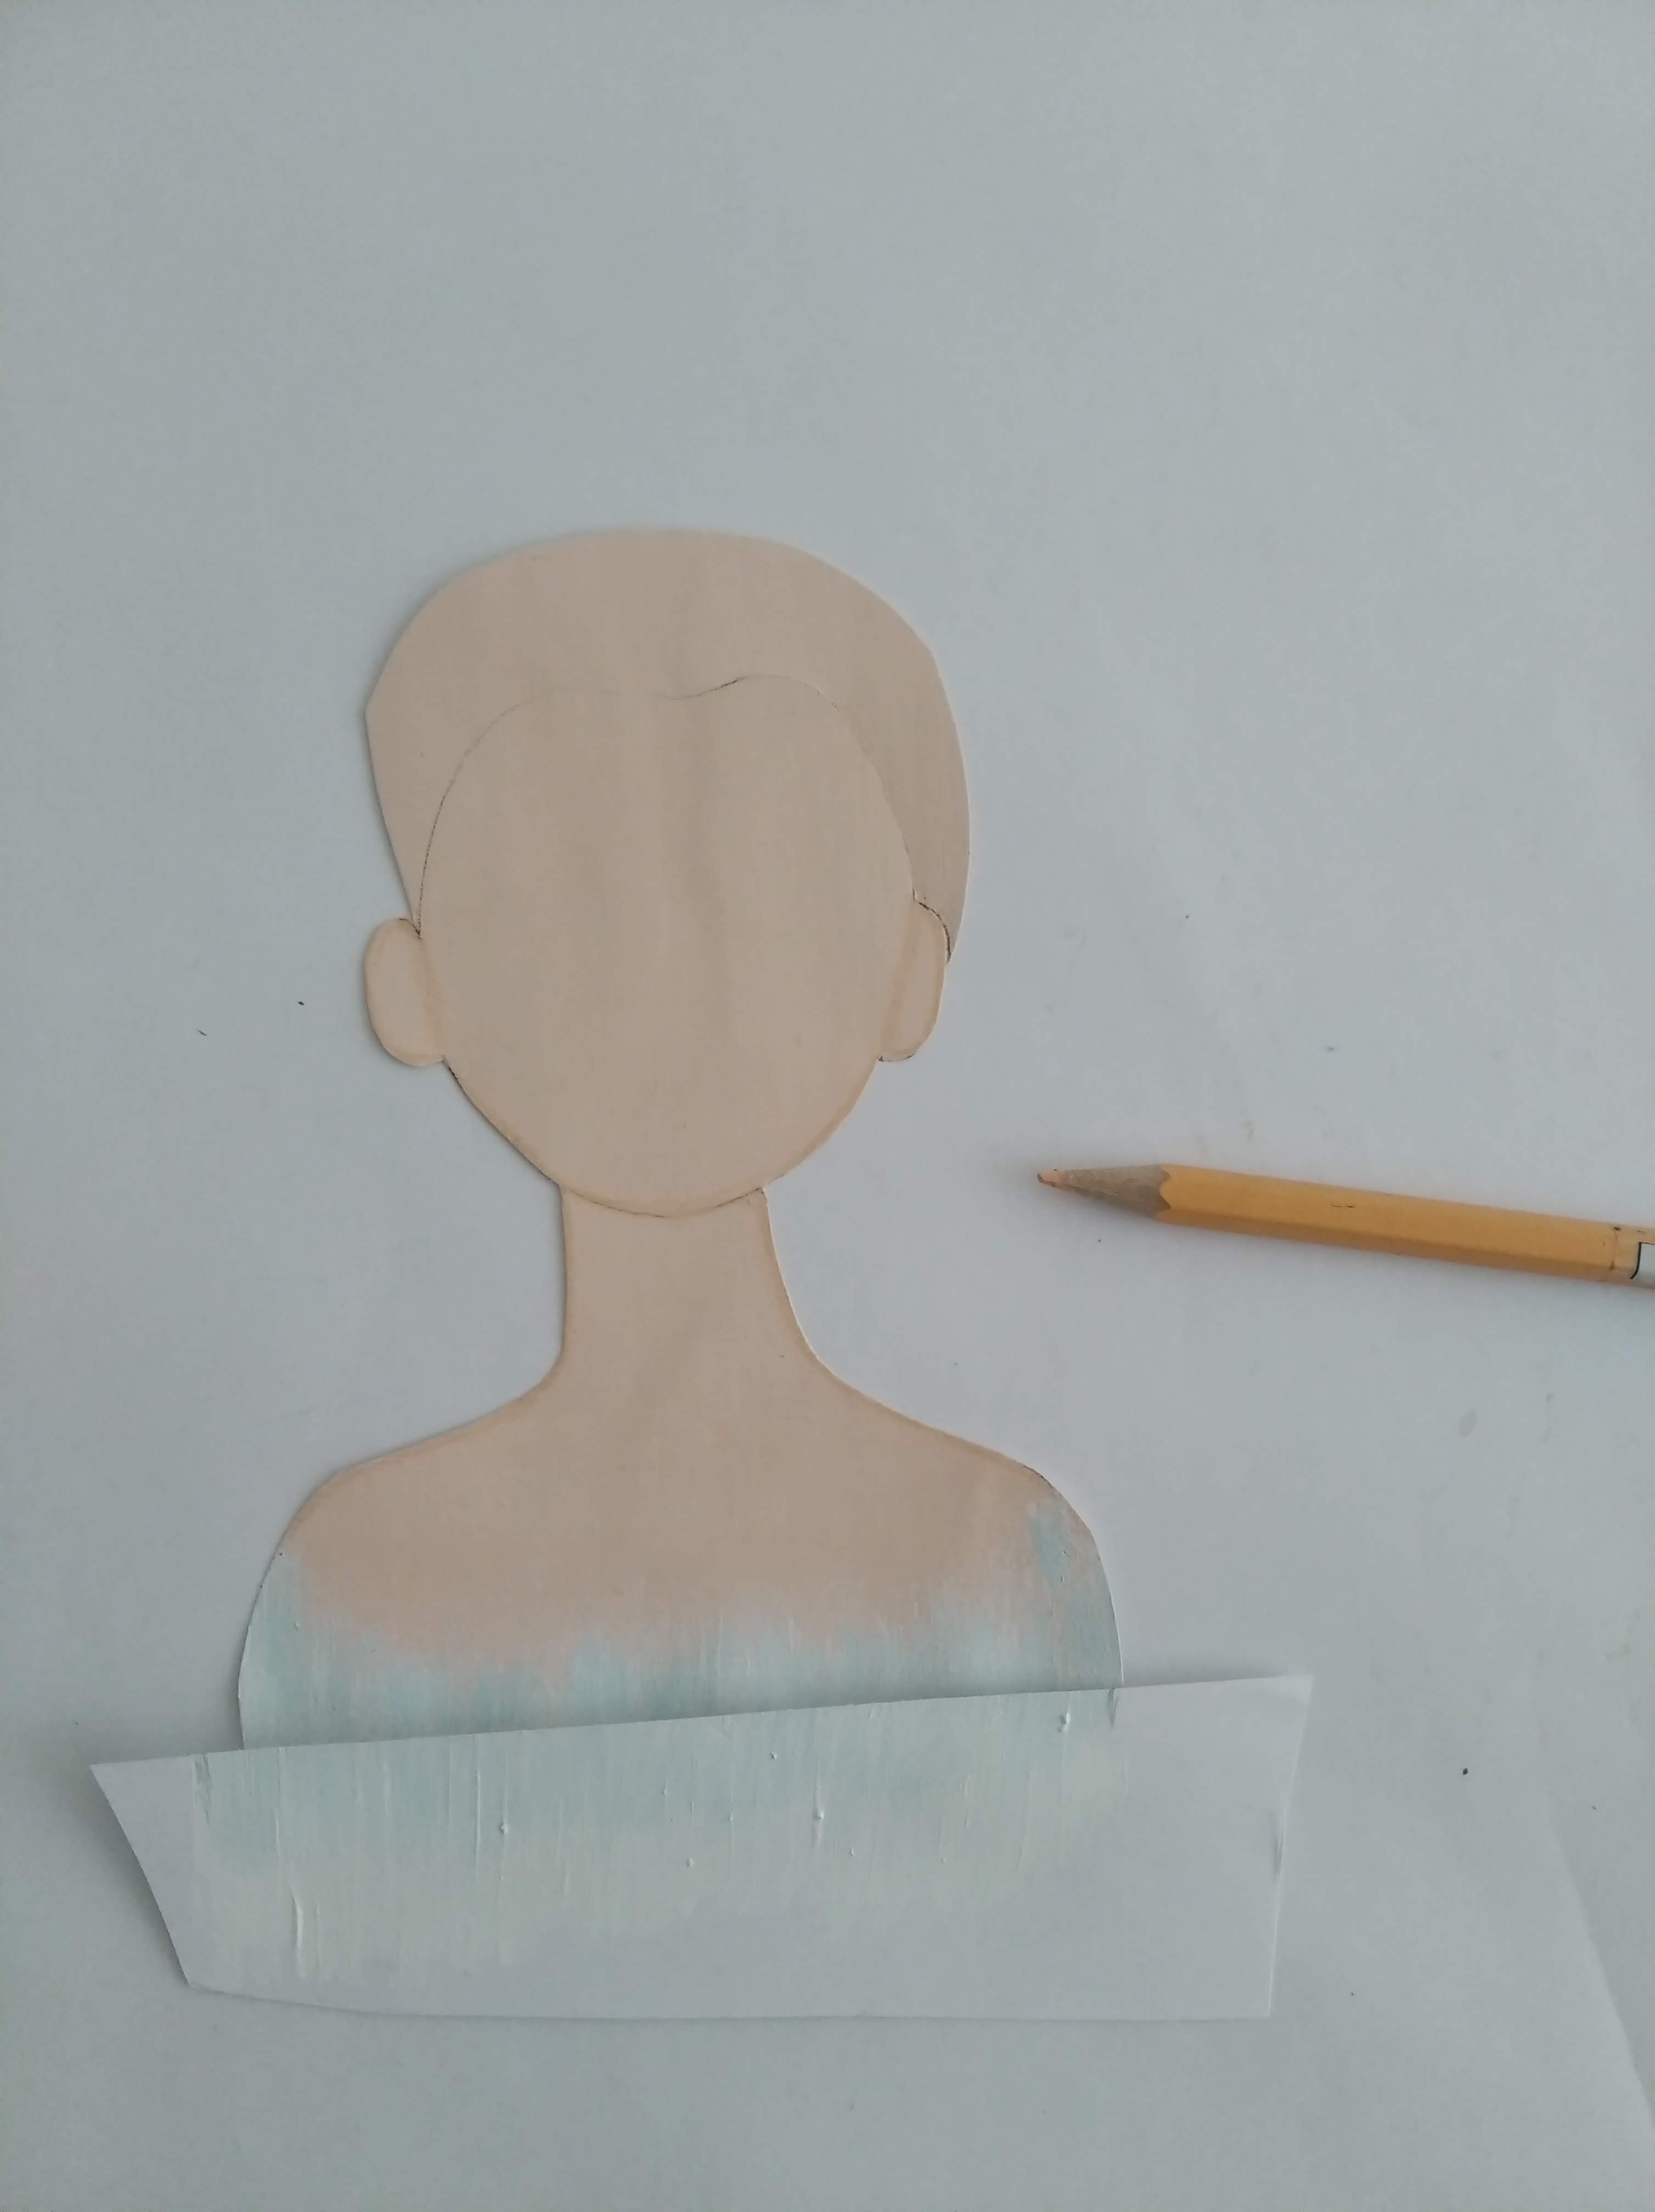
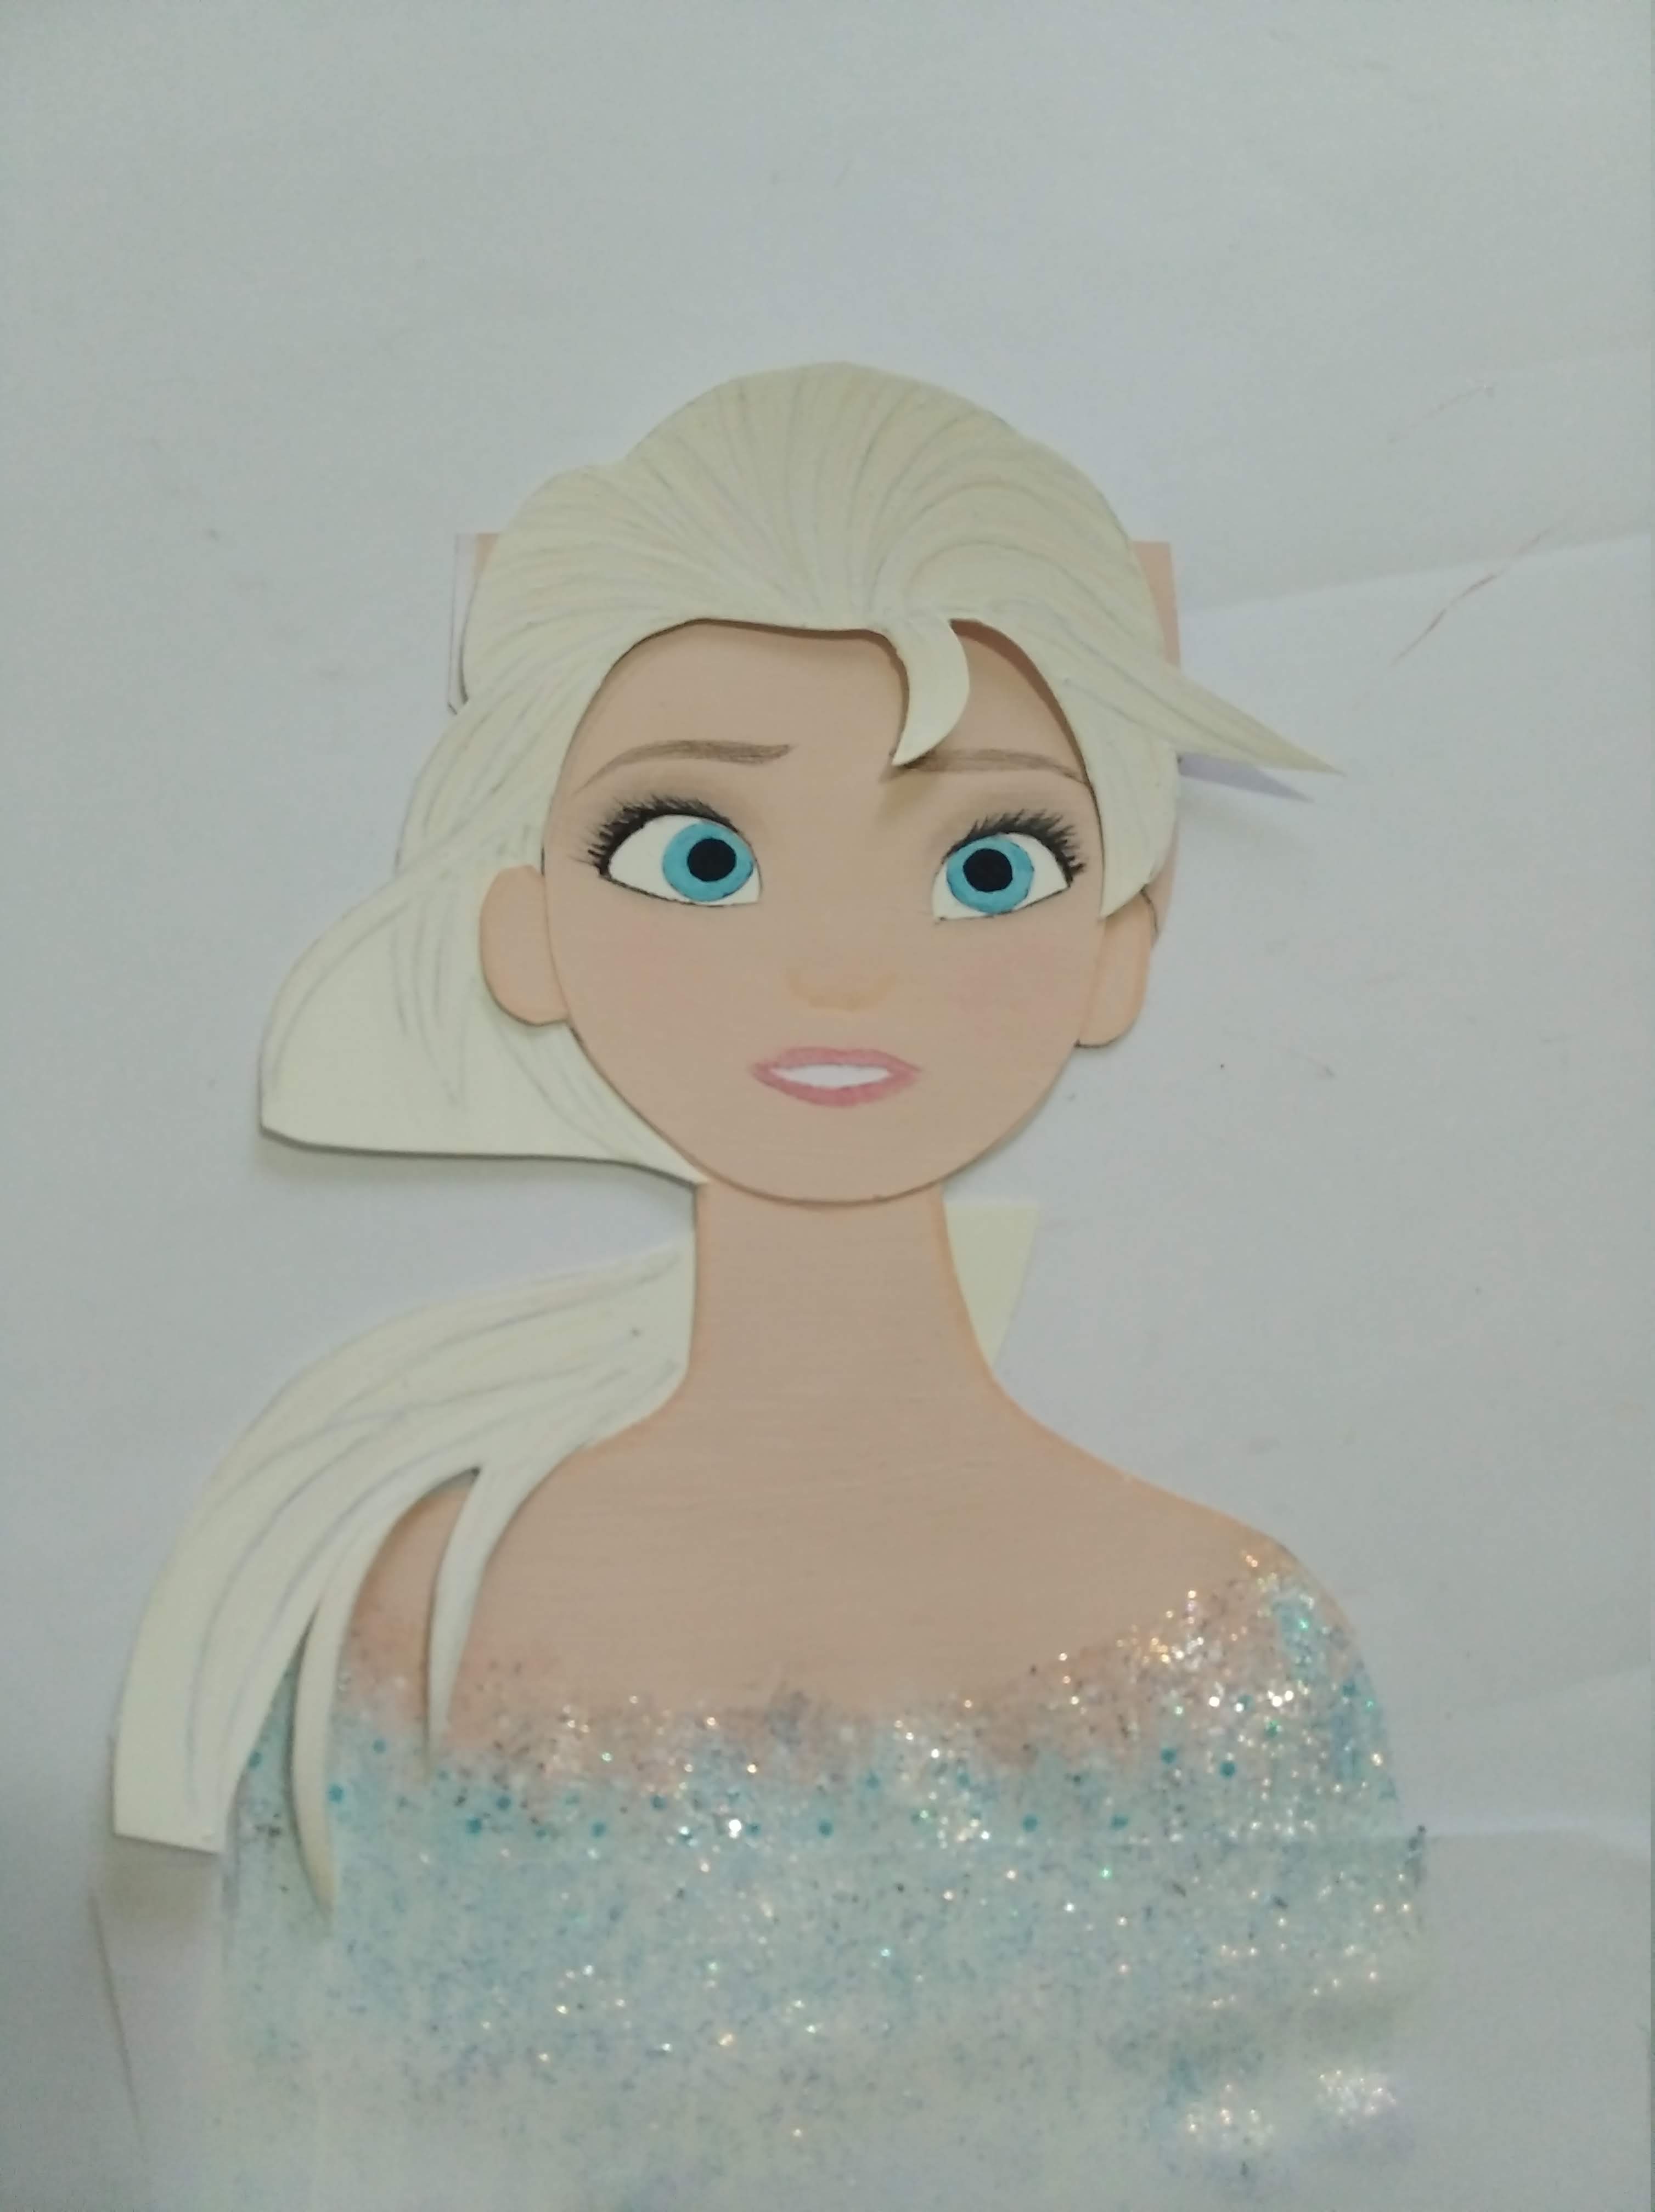
- Una vez se tengan estas tres piezas listas por separado, ensamblar pegando con el silicón Frio.
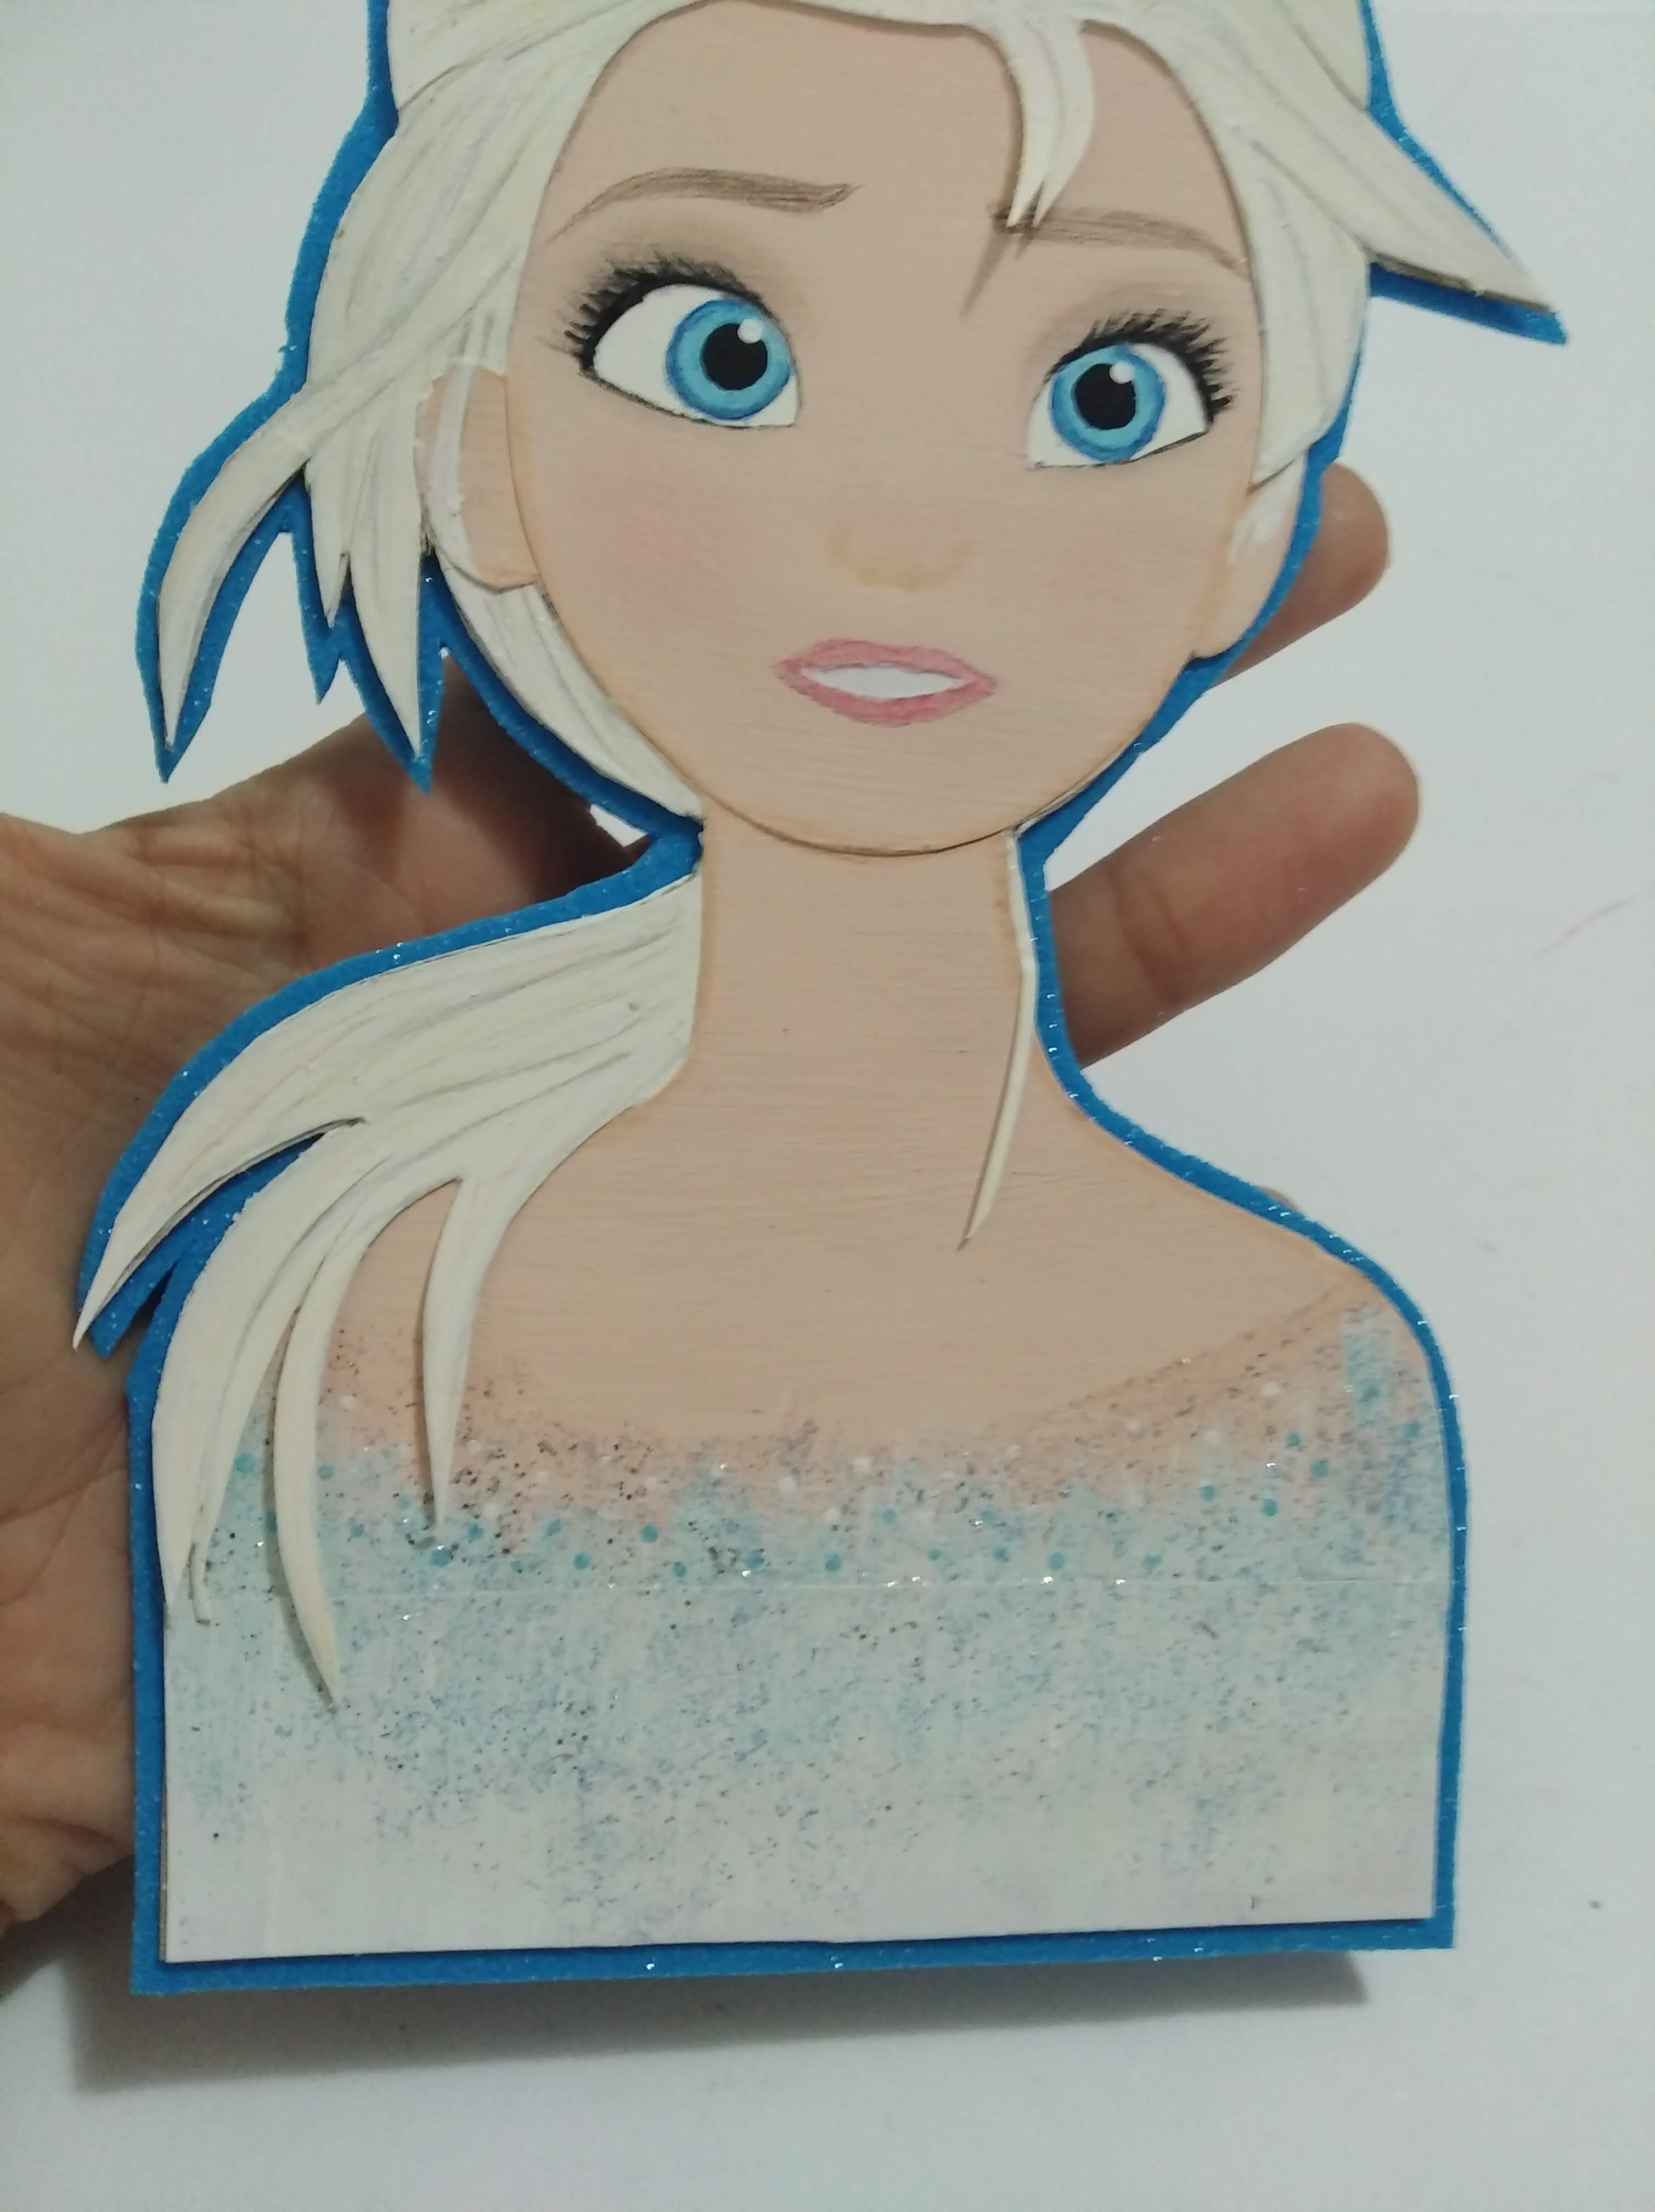
- Los detalles del rostro como boca, cejas, sobra, pestañas y rubor realizarlos con colores suaves.
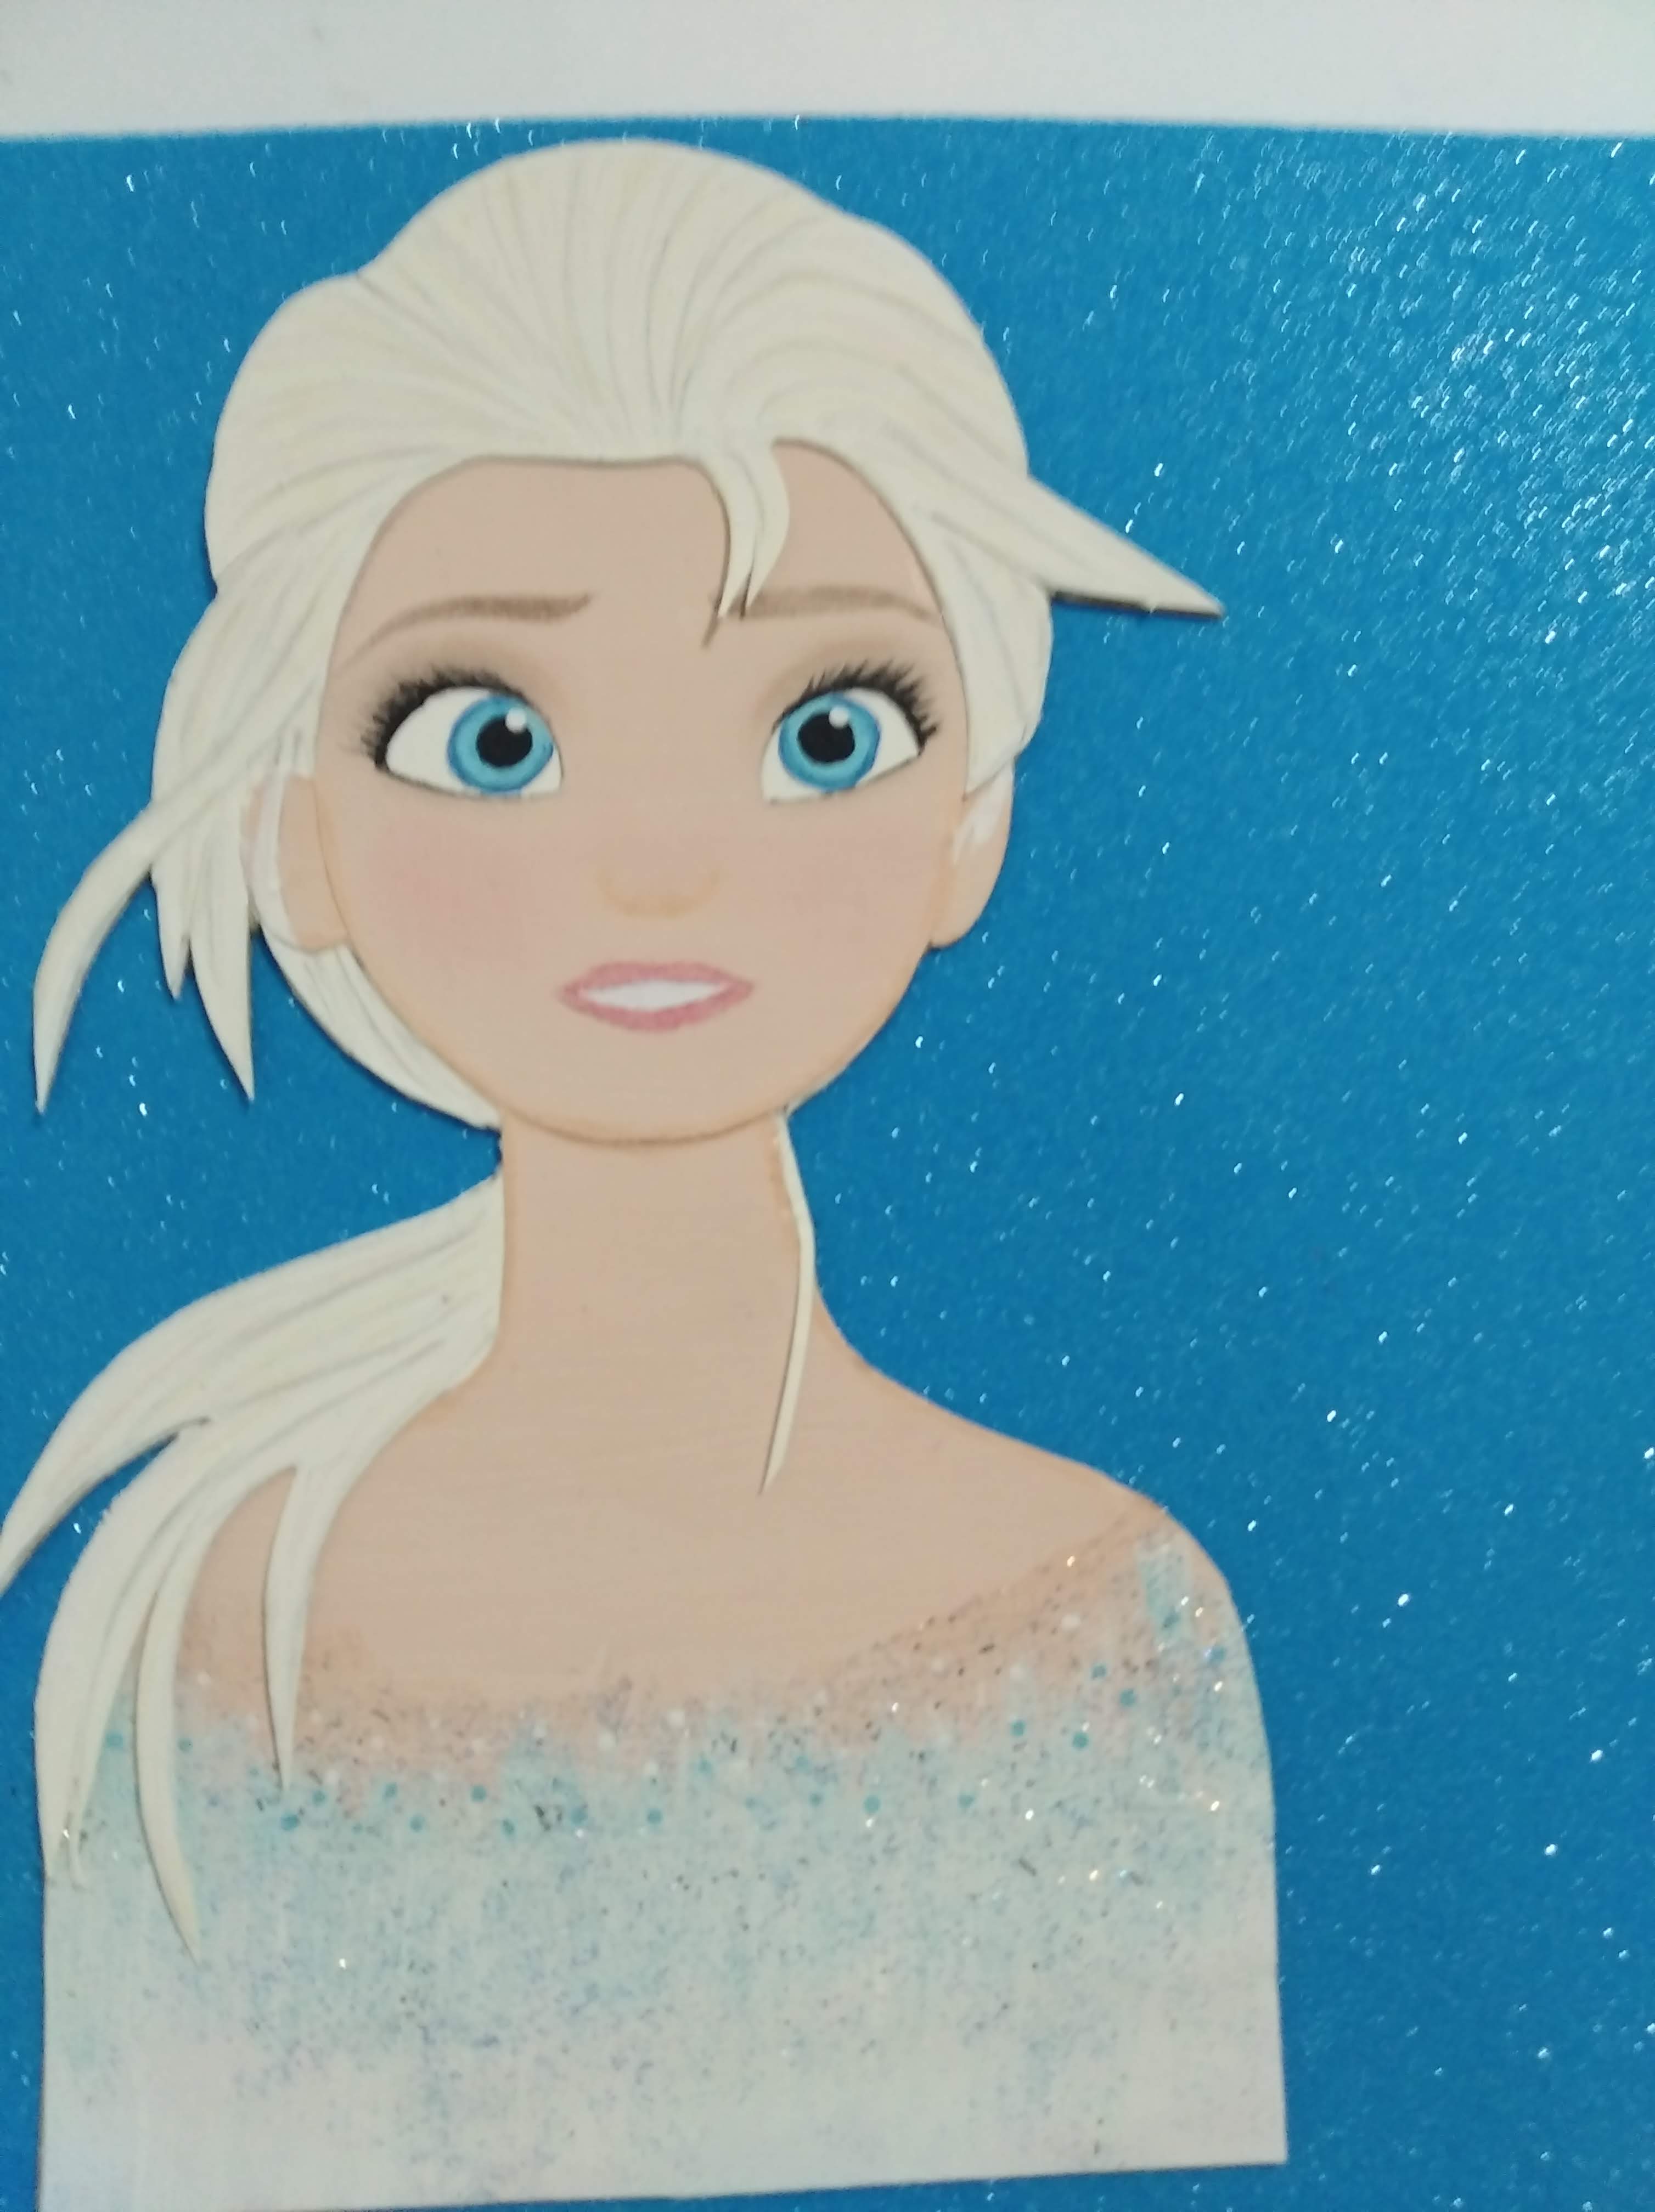
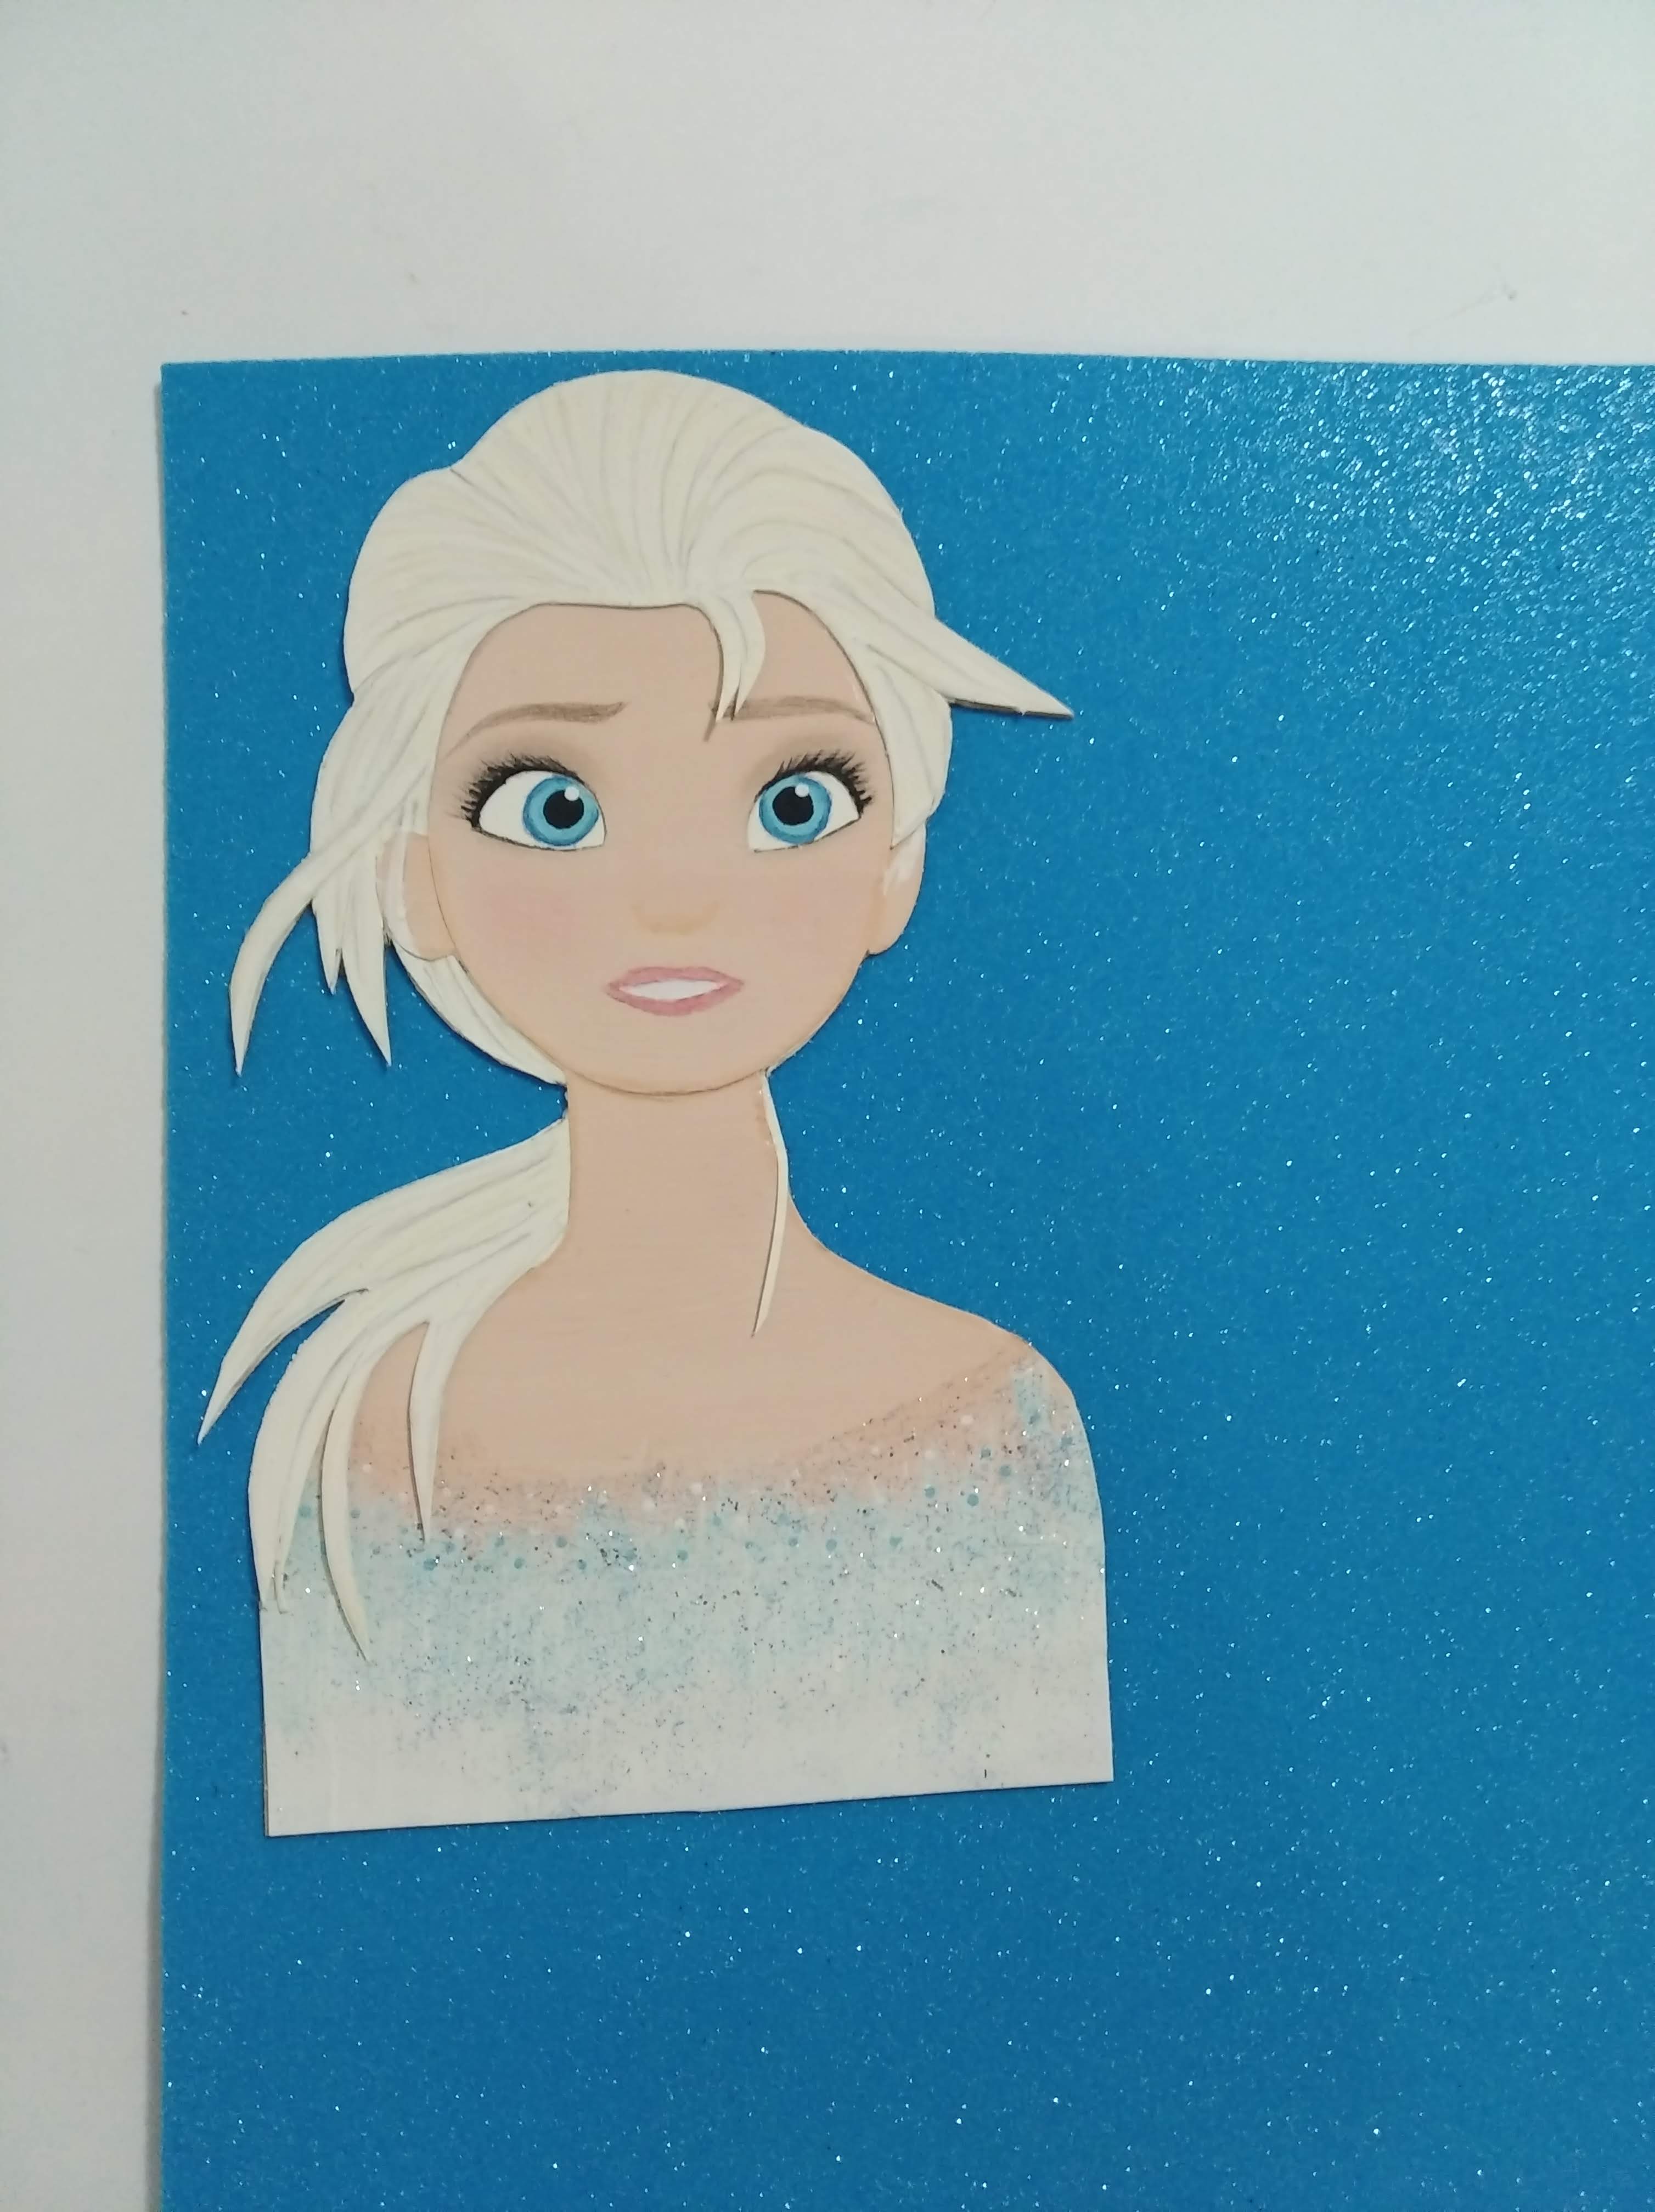
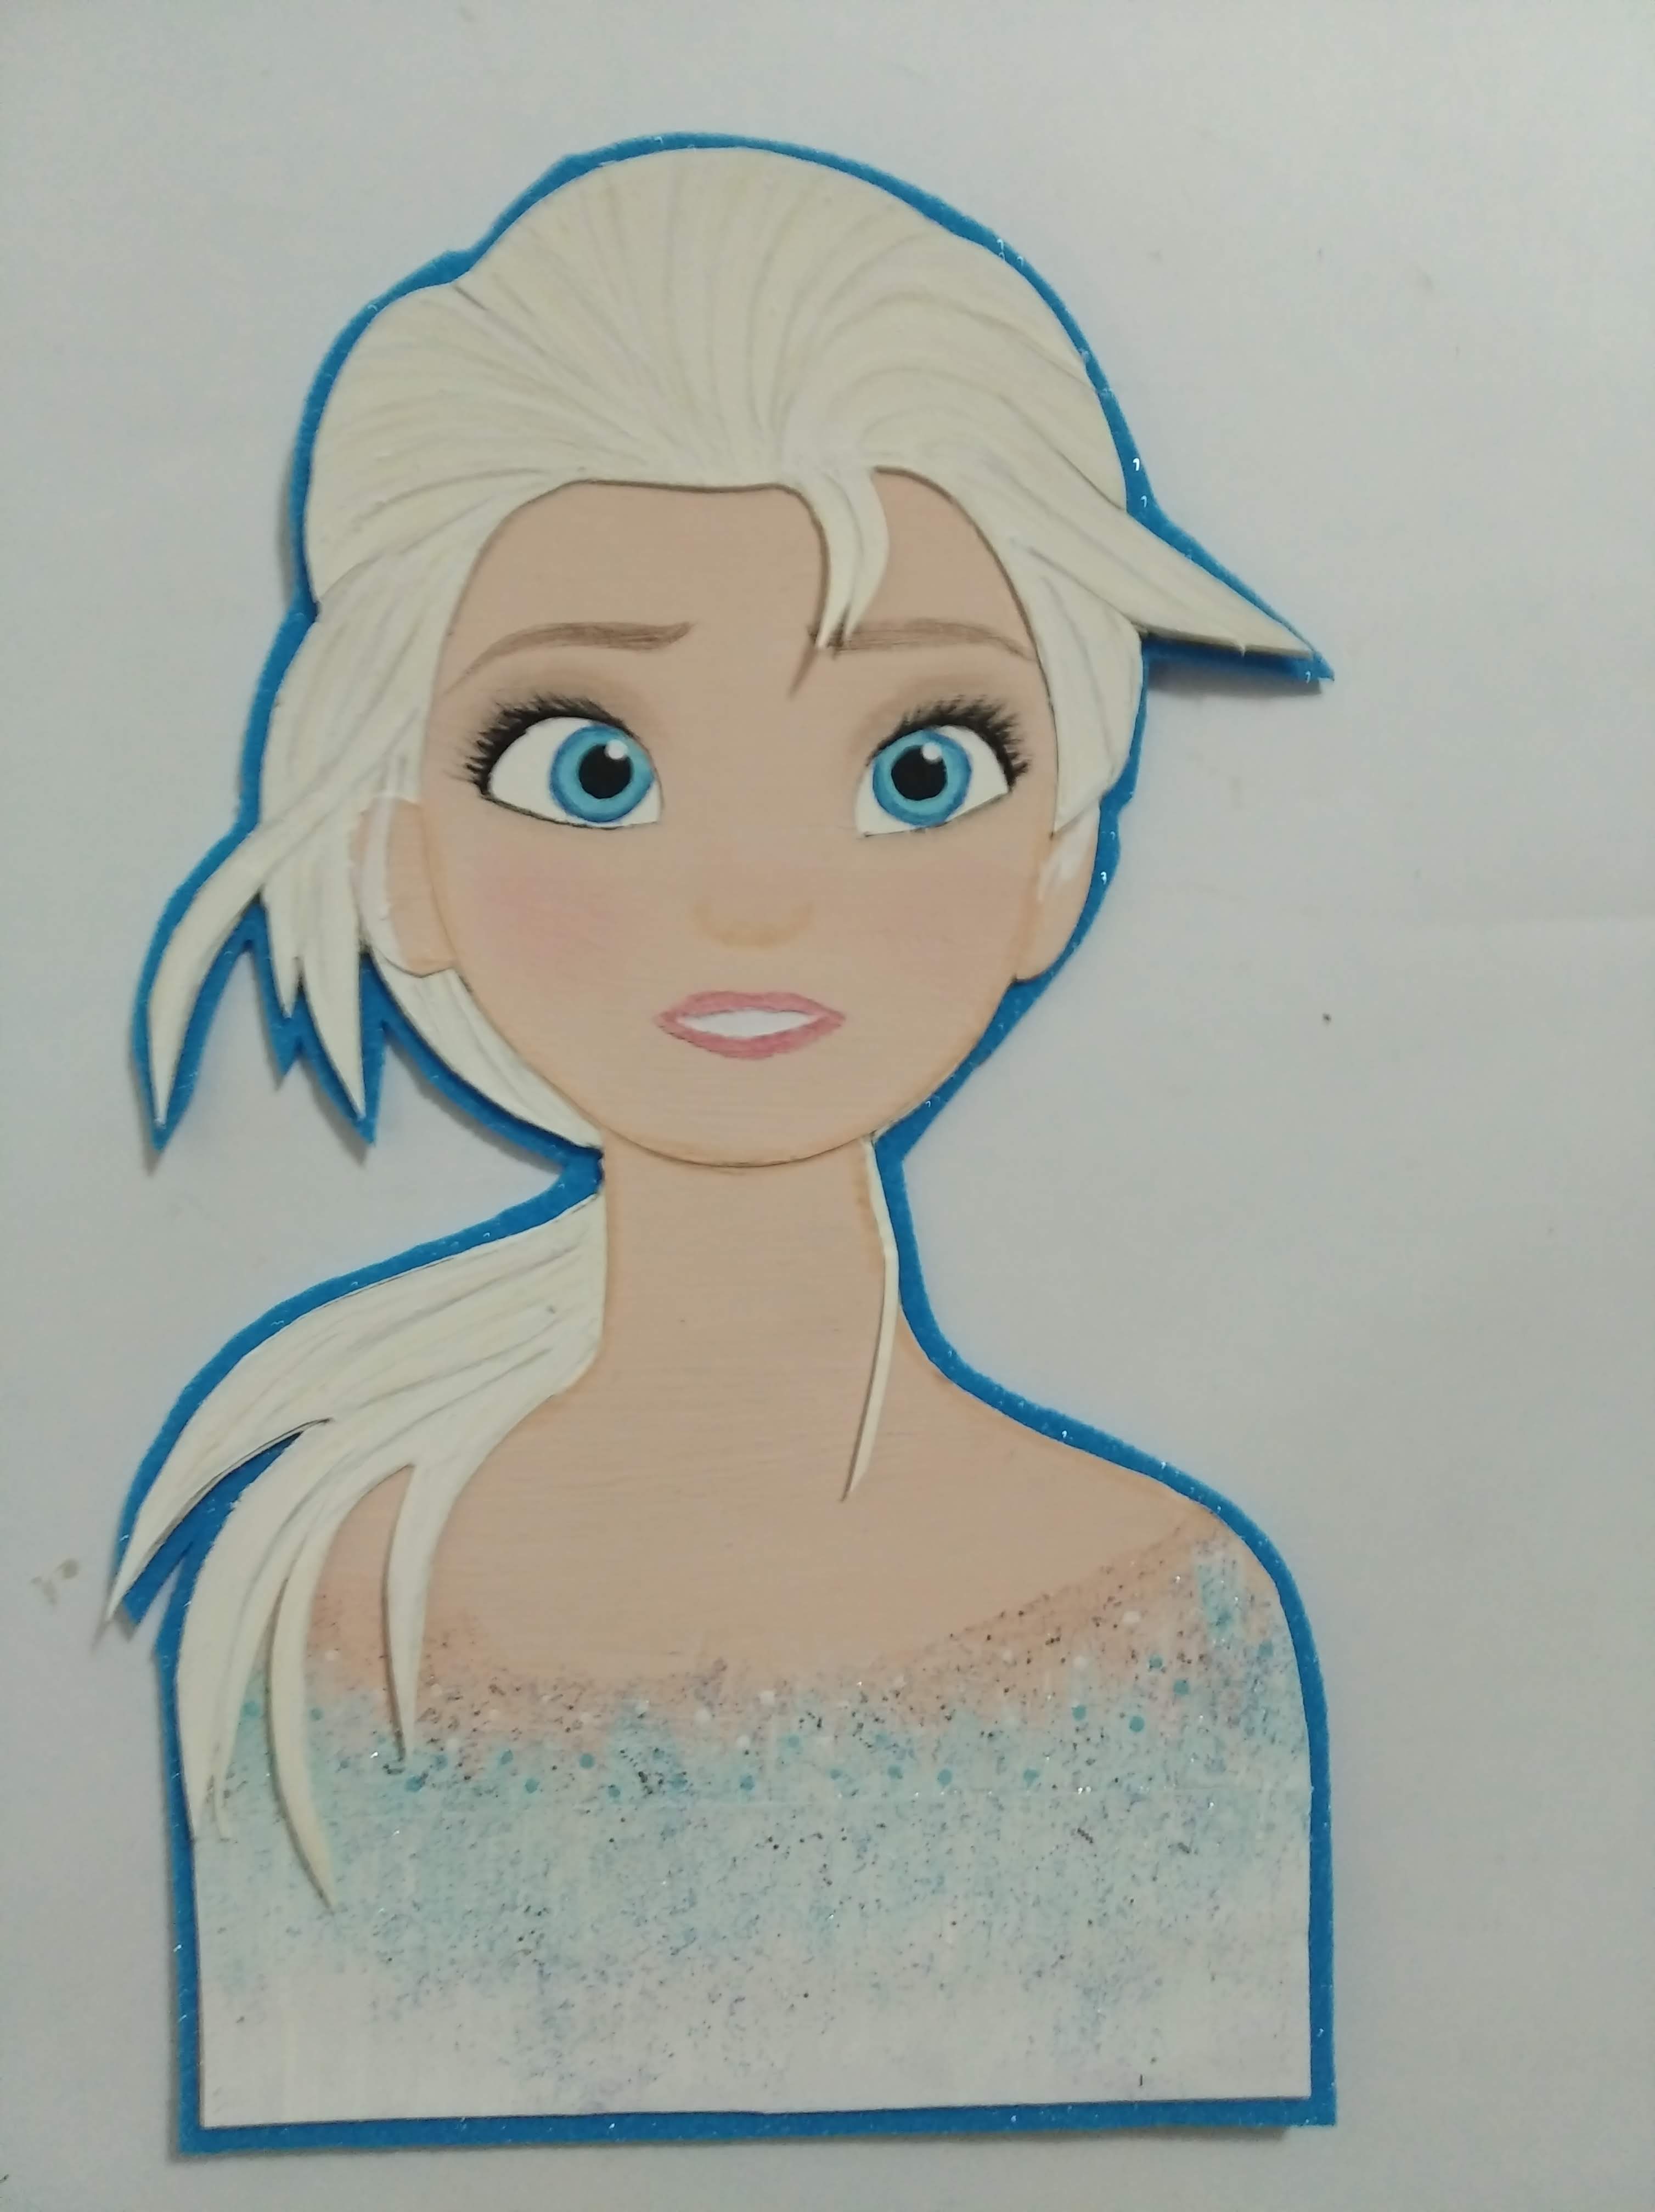
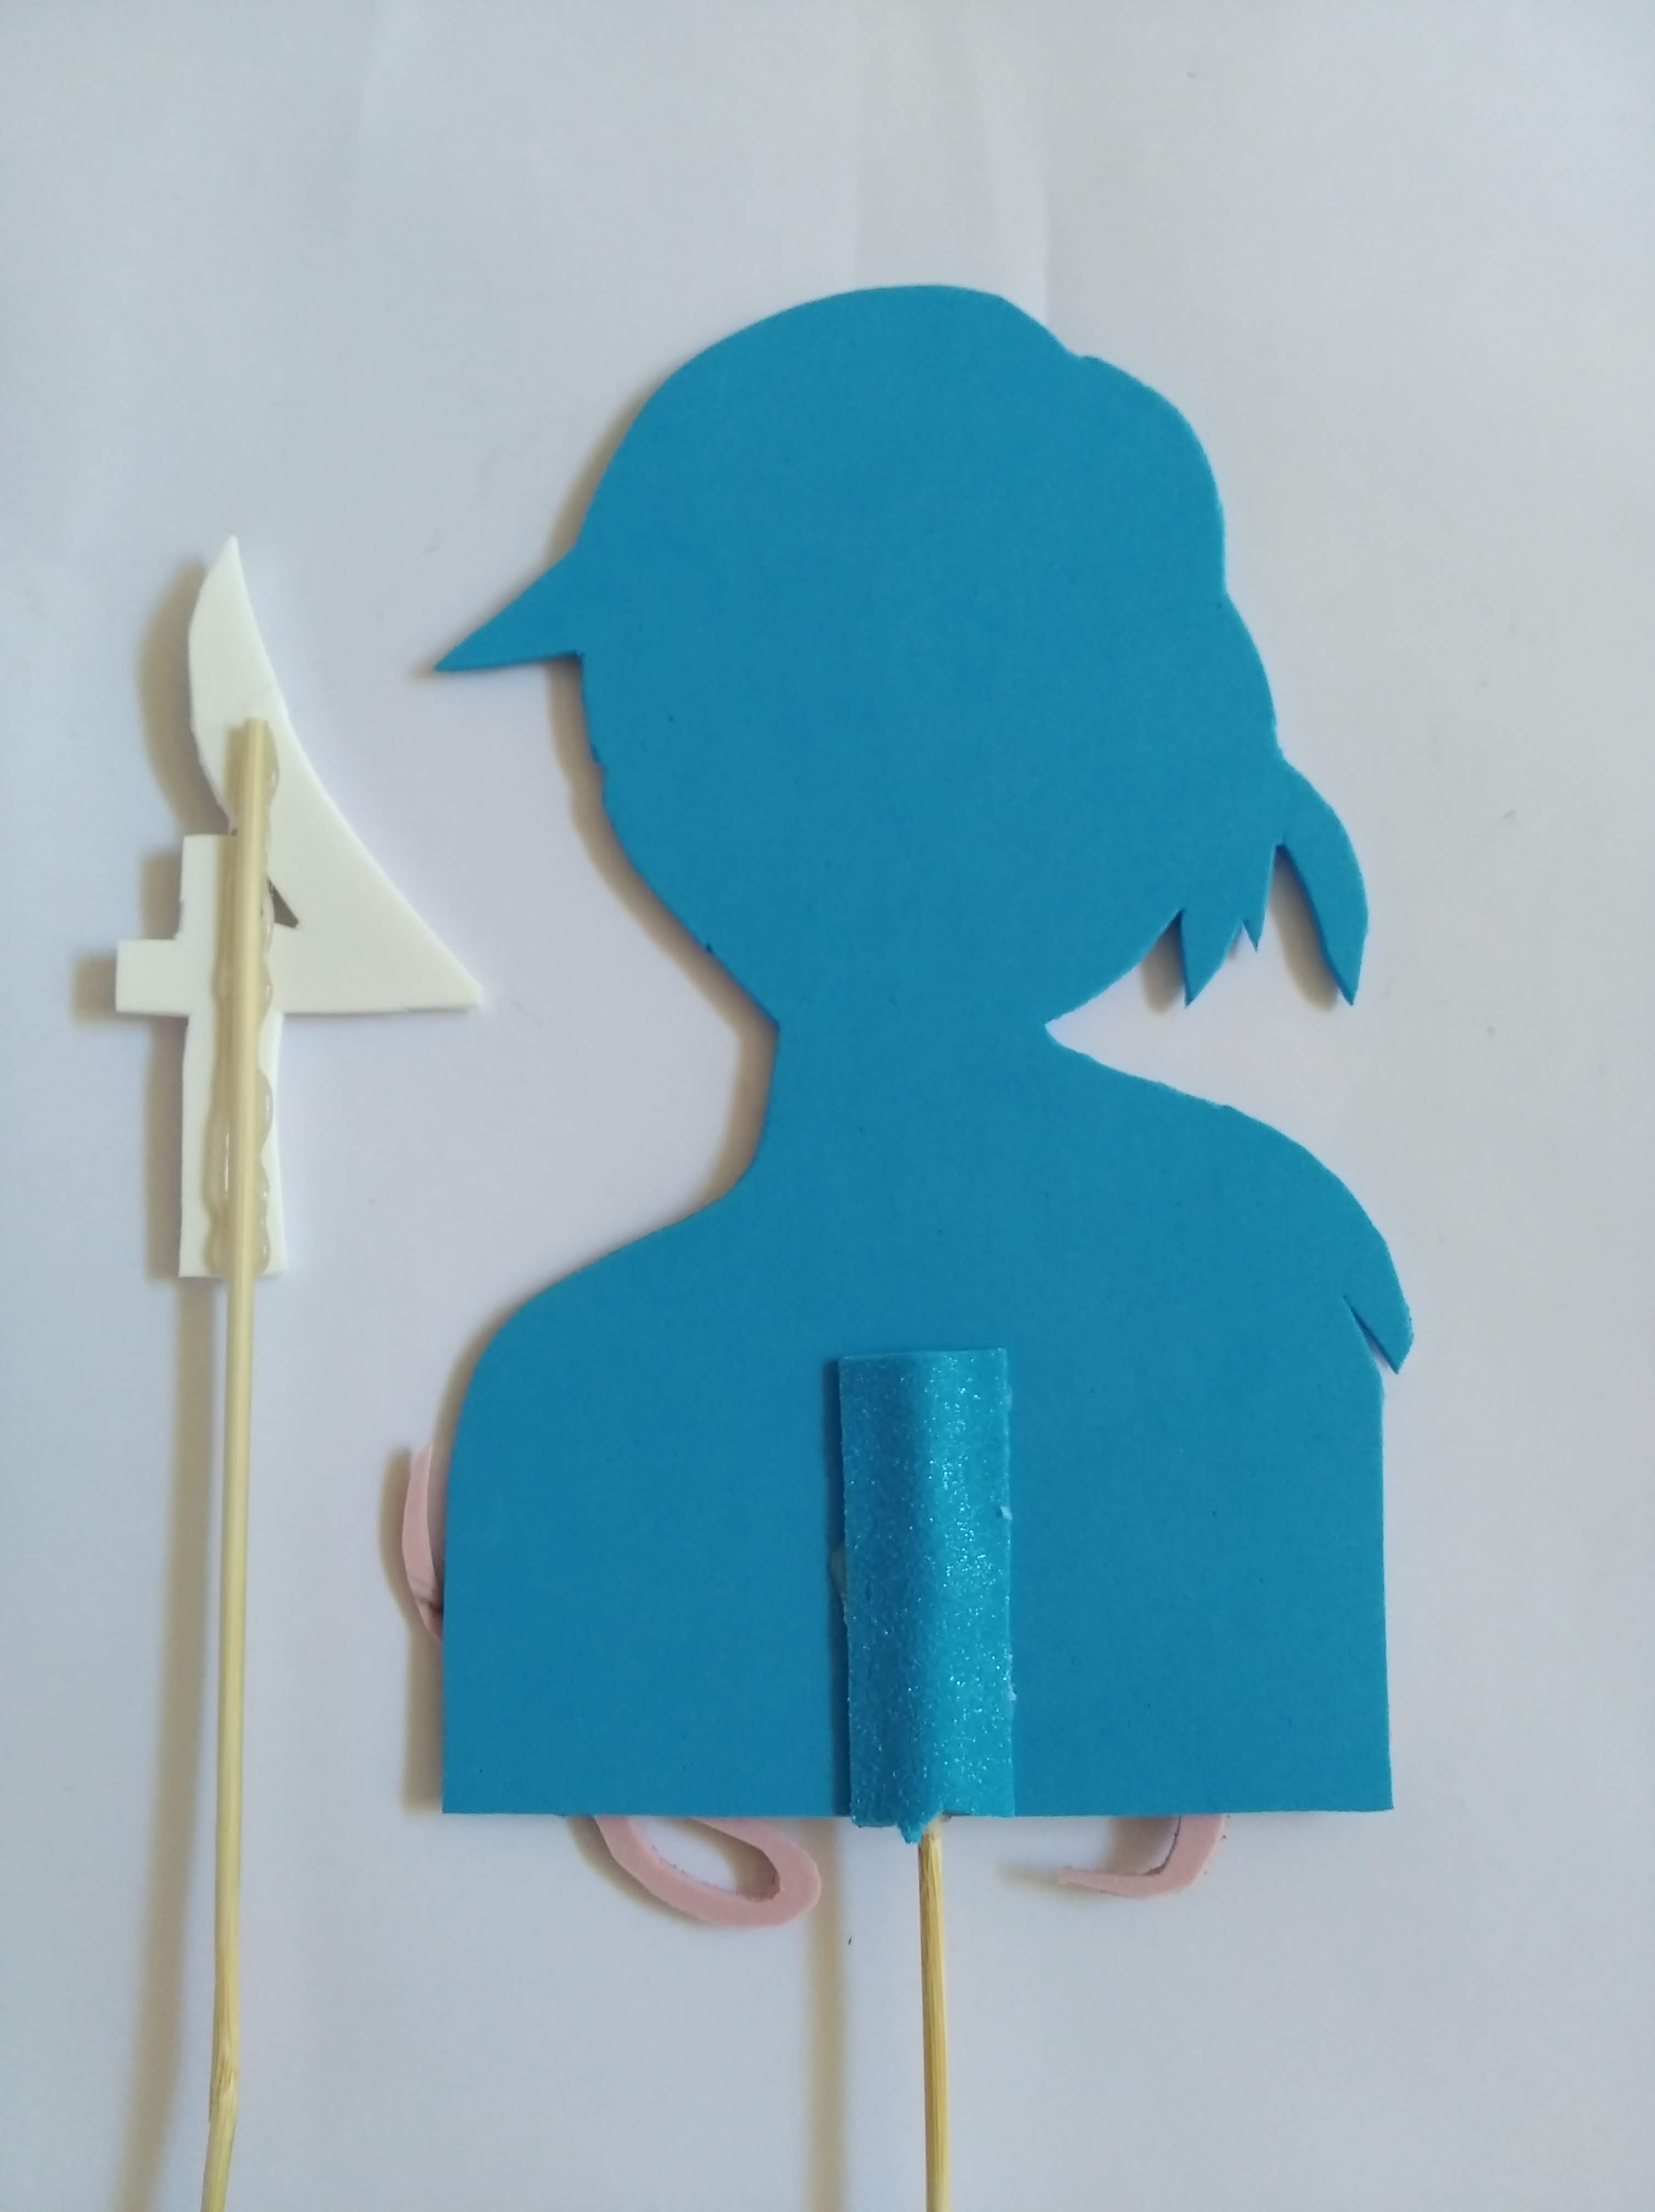
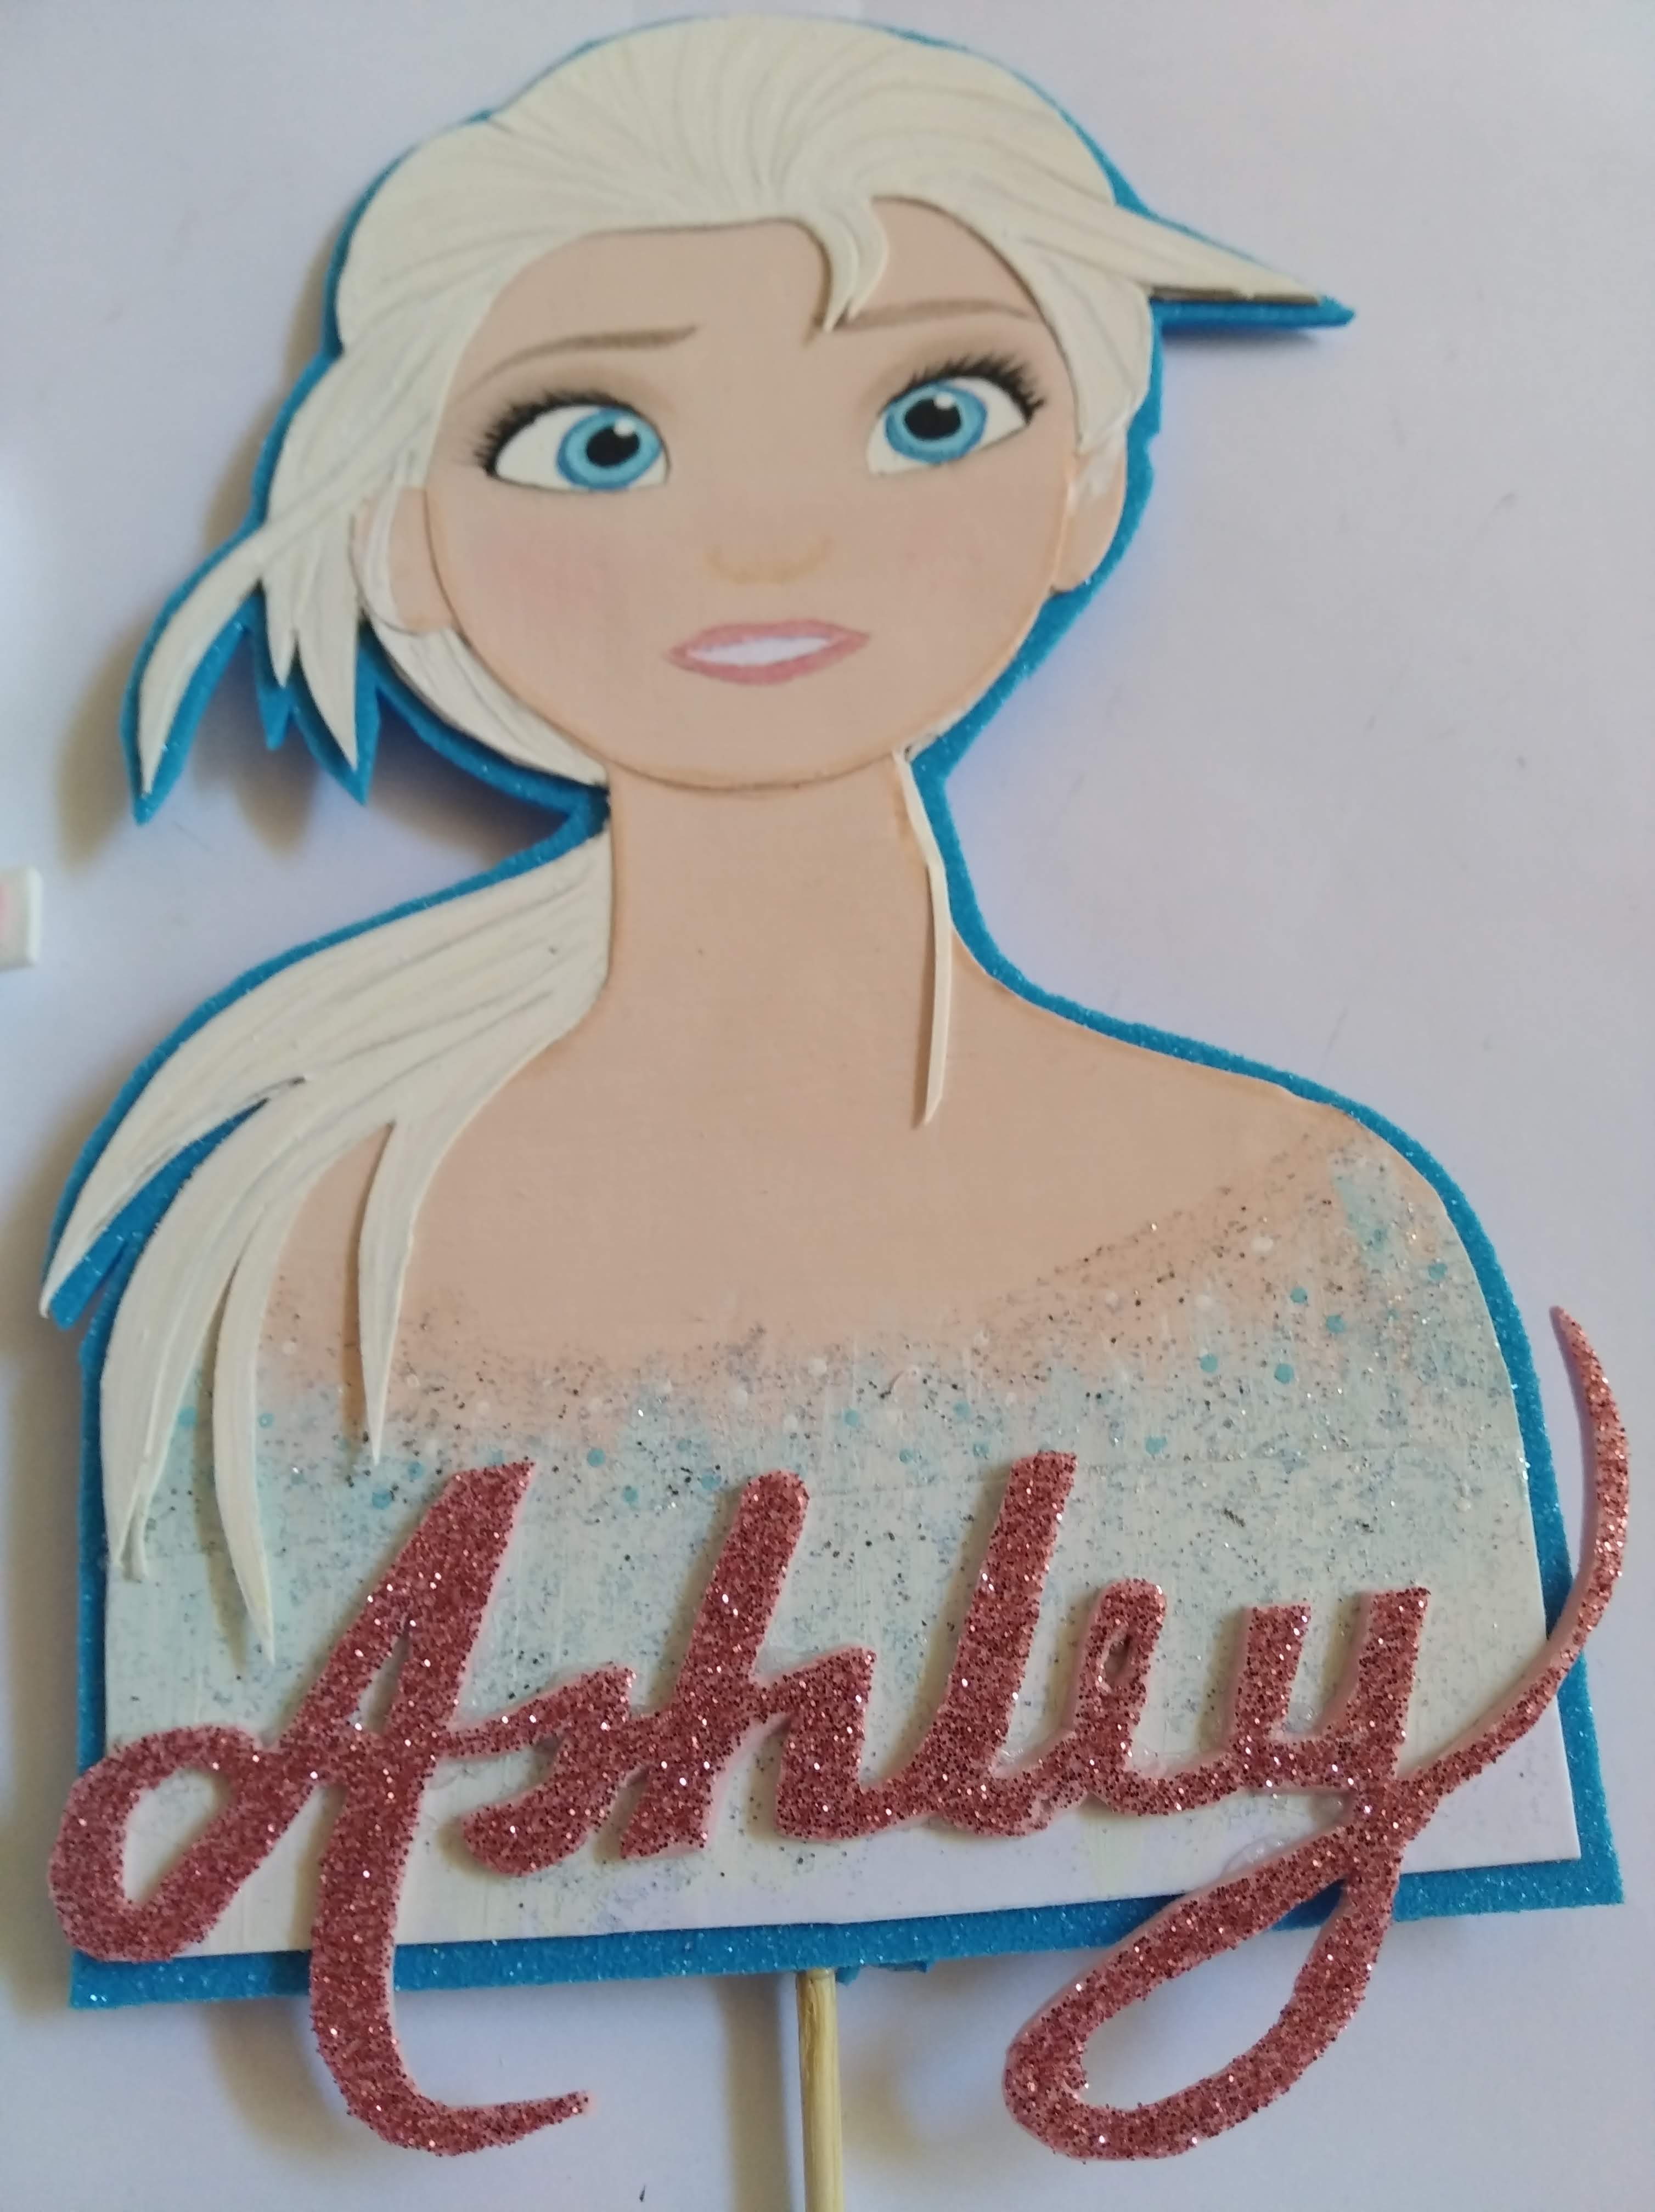
- Pegar a Elsa sobre el faomi azul y recortar dejando un pequeña separación del borde.
- Recortar el nombre en el foami escarchado rosado y pegar sobre lo que seria parte del vestido.
- Recortar la edad en el foami rosado escarchado y luego pegar sobre foami blanco
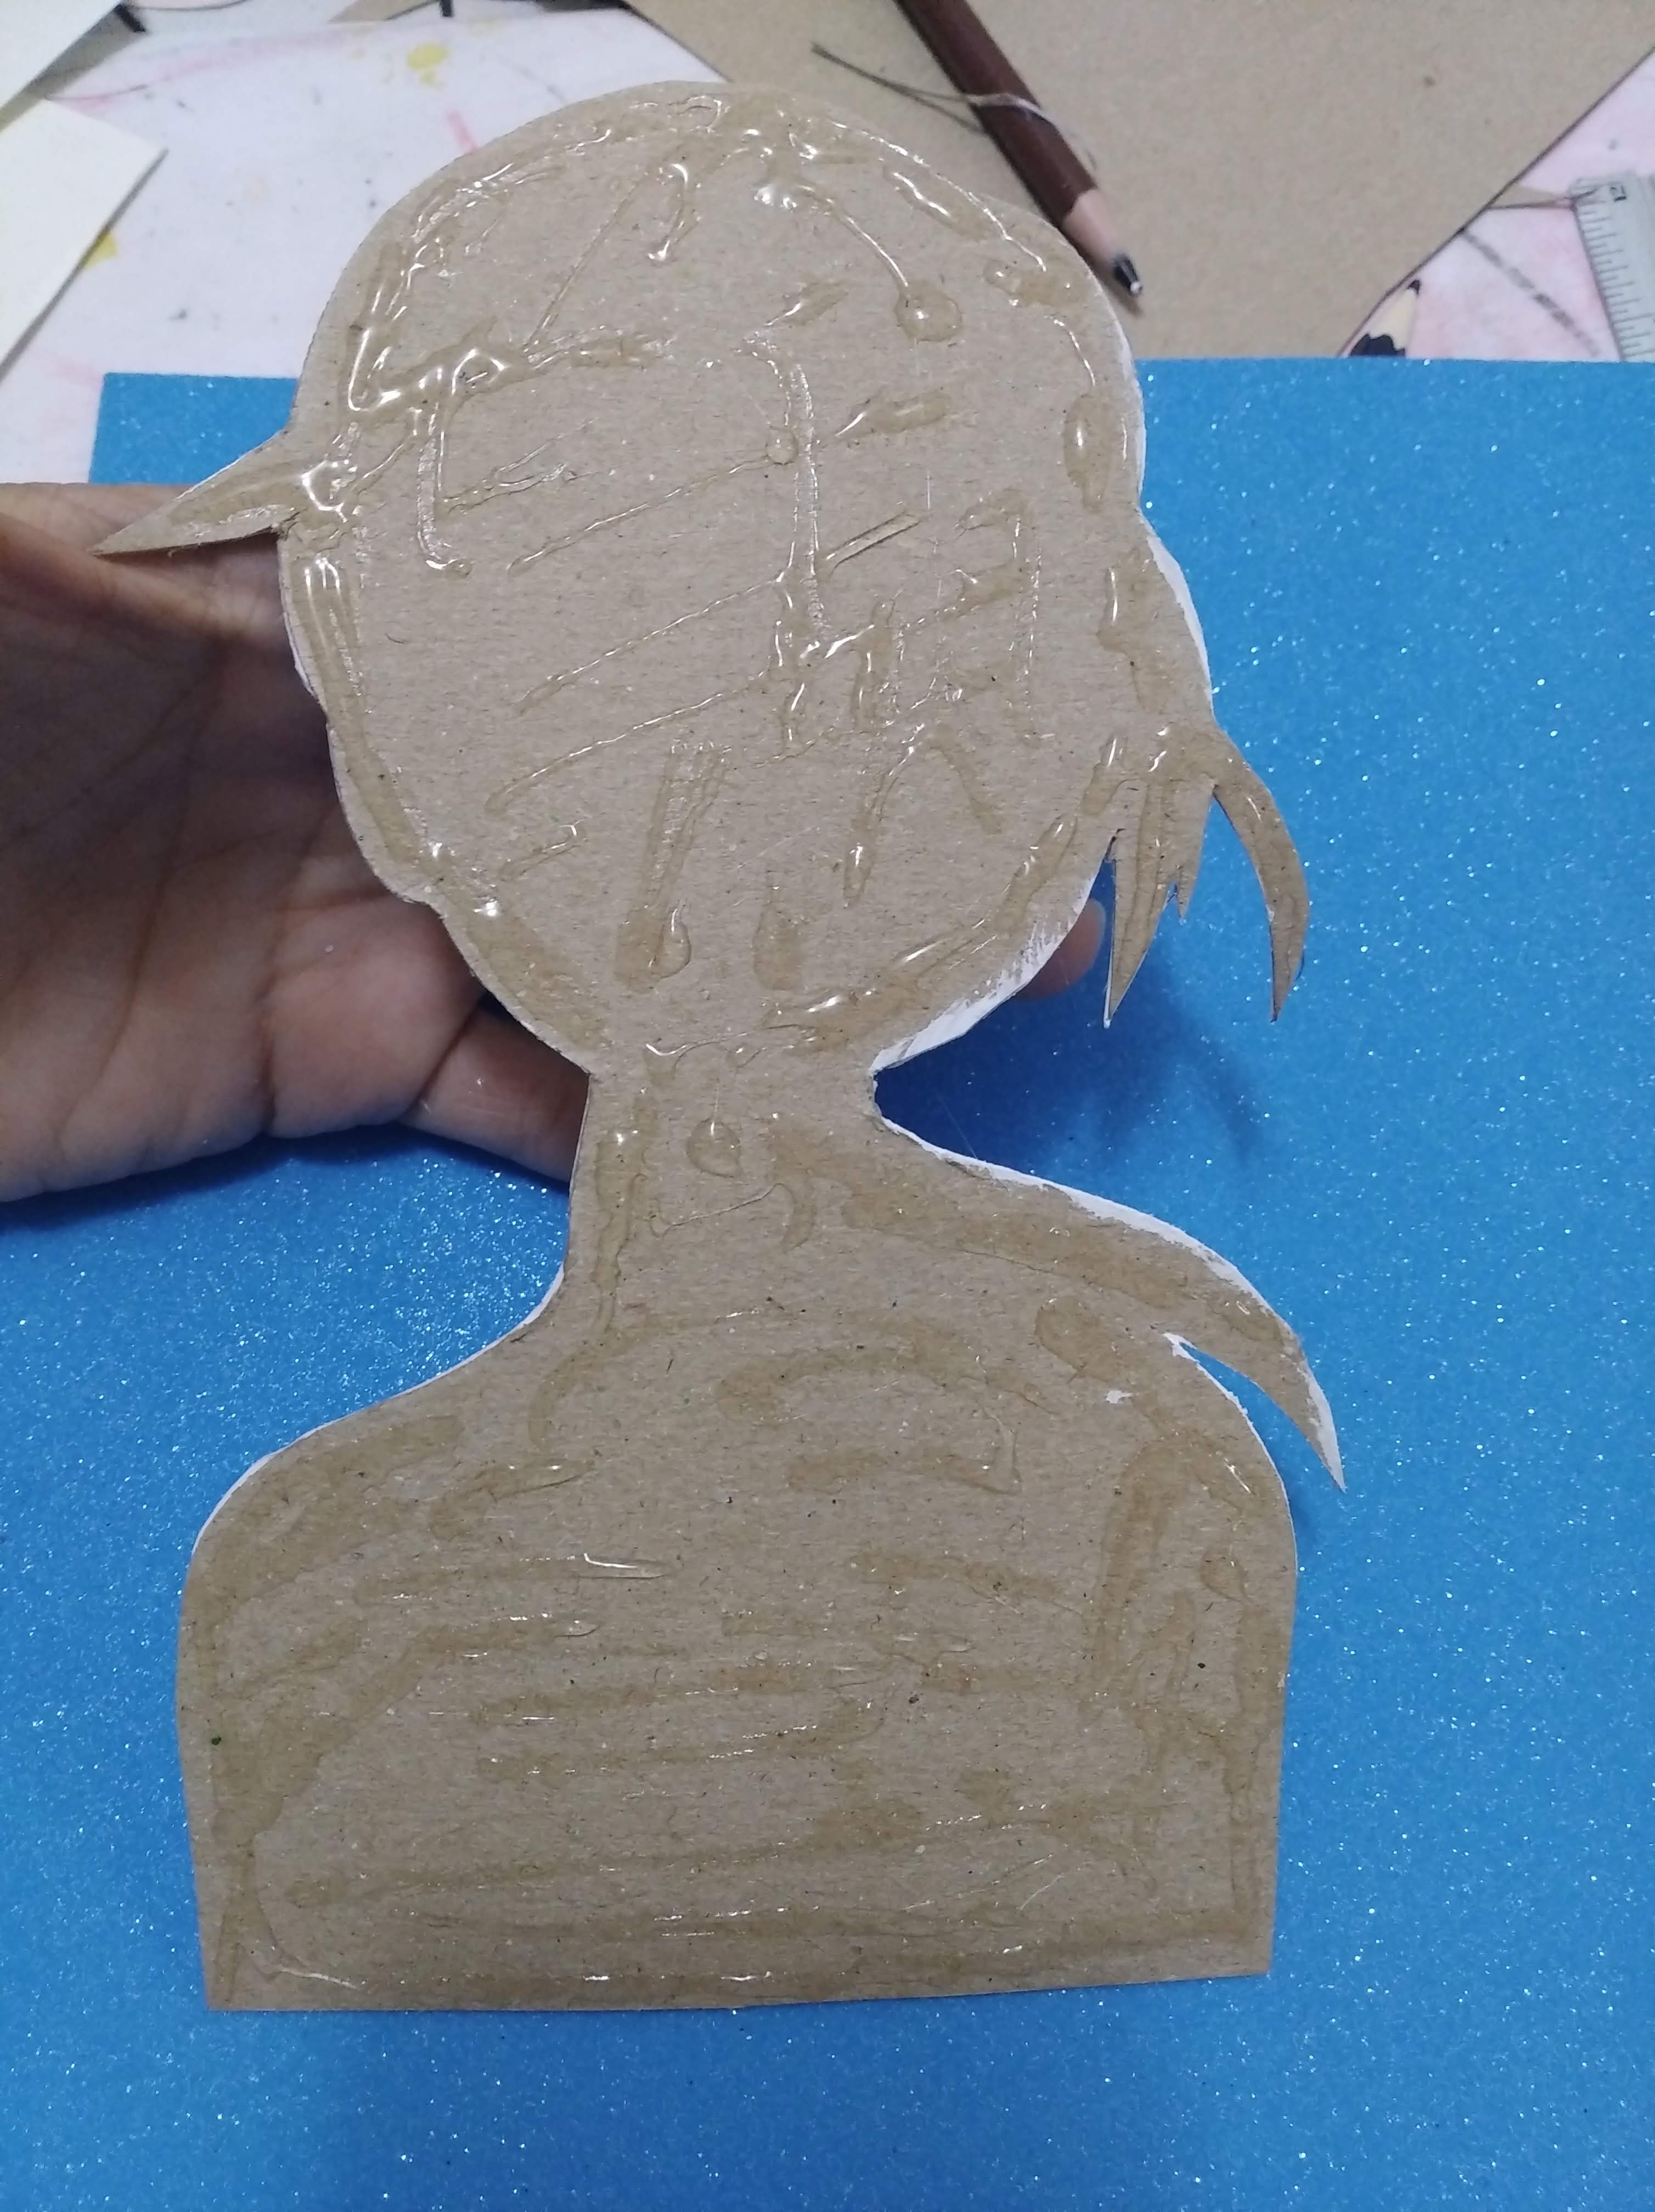
- A ambas piezas pegarles con silicón caliente el palito de madera.
- Listo, a disfrutar de una hermosa decoración para pastel / torta….
Inglés
Hello Friends at Hive... nice to greet you again, especially to the community creator of @Build-It.
As you can imagine by several of my previous posts, I am a person who loves birthdays, I think it is the most sacred day that every person has during the year and that's why I like to create decorations for birthday cakes... I like to be part of the magic that surrounds birthdays and all the good vibes that are always created around the cake.
Frozen is an animated movie that captivated the hearts of many children and adults, this version, the number 2, captivated my niece Ashley and I wanted to offer her a special gift to decorate her cake and then she could use it as decoration for whatever she wanted.
I hope you can review the whole thing and appreciate the magic of doing everything with love... I invite you to do something similar to offer exclusivity to your loved ones and friends....
Here are the materials used, the process and the images of the work.
- Elsa's design
- 2 white cardboards
- Cold paints in colors: flesh and pink (to achieve the skin color according to the design).
- Colored cold paints: white, black and blue (for the eyes).
- Pearlescent Cold Paint (to paint part of the dress)
- Wood Colors (to add color and details to the face)
- Blue semi-frosted Foami (for the background)
- Soft pink frosted Foami (for the name and age)
- Pencil
- Scissors
- Cutter (cutter)
- Cold Silicone
- Hot Silicone
- 2 Altura sticks (wood)
- and lots of love...
- Draw the design of Elsa
- Mix the flesh-colored and pink paints until you get a color similar to the color of the character.
- With the previous mixture paint one of the white cardboards, let it dry very well and then put it in a book so that the cardboard remains without wrinkles or folds...
- On the other white cardboard, draw the design that corresponds to the hair, mark the lines with soft brown and black crayons and then apply white paint on top to soften the lines.
- When the cardboard of the face is ready, mark gently in the paint what would be the face and the area corresponding to the eyes cut with the cutter.
- On a small piece of white cardboard mark out the eyes and paint with the corresponding cold paints.
- Once these three pieces are ready separately, assemble them by gluing them with the cold silicone.
- The details of the face such as mouth, eyebrows, eyelashes and blush, make them with soft colors.
- Glue Elsa on the blue faomi and cut out leaving a small separation from the edge.
- Cut out the name on the pink frosted foami and glue it on what would be part of the dress.
- Cut out the age on the pink frosted foami and then glue on white foami.
- Glue the wooden stick to both pieces with hot silicone.
- Ready, enjoy a beautiful decoration for a cake / cake....
As my native language is Spanish, I used the Deepl translator for this publication.
IMÁGENES / IMAGES


SALUDOS / GREETINGS
Todas las Fotos fueron tomadas con mi teléfono Redmi 7A.
Contenido original de @keco (fotos y texto) - Todos los derechos reservados Publicado en HIVE así como en mi instagram : http://instagram.com/carton_pintura_algo_mas
All Photos were taken with my Redmi 7A phone.
Original content from @keco (photos and text)- All rights reserved Posted on HIVE as well as on my instagram: http://instagram.com/carton_pintura_algo_mas
Ya me imagino un gran pastel con éste hermoso topper. Felicidades por tu talento @keco
Gracias Emilio... Saludos
🙌🤗
Congratulations, your post has been upvoted by @dsc-r2cornell, which is the curating account for @R2cornell's Discord Community.
Agradecida por valorar mi publicación.