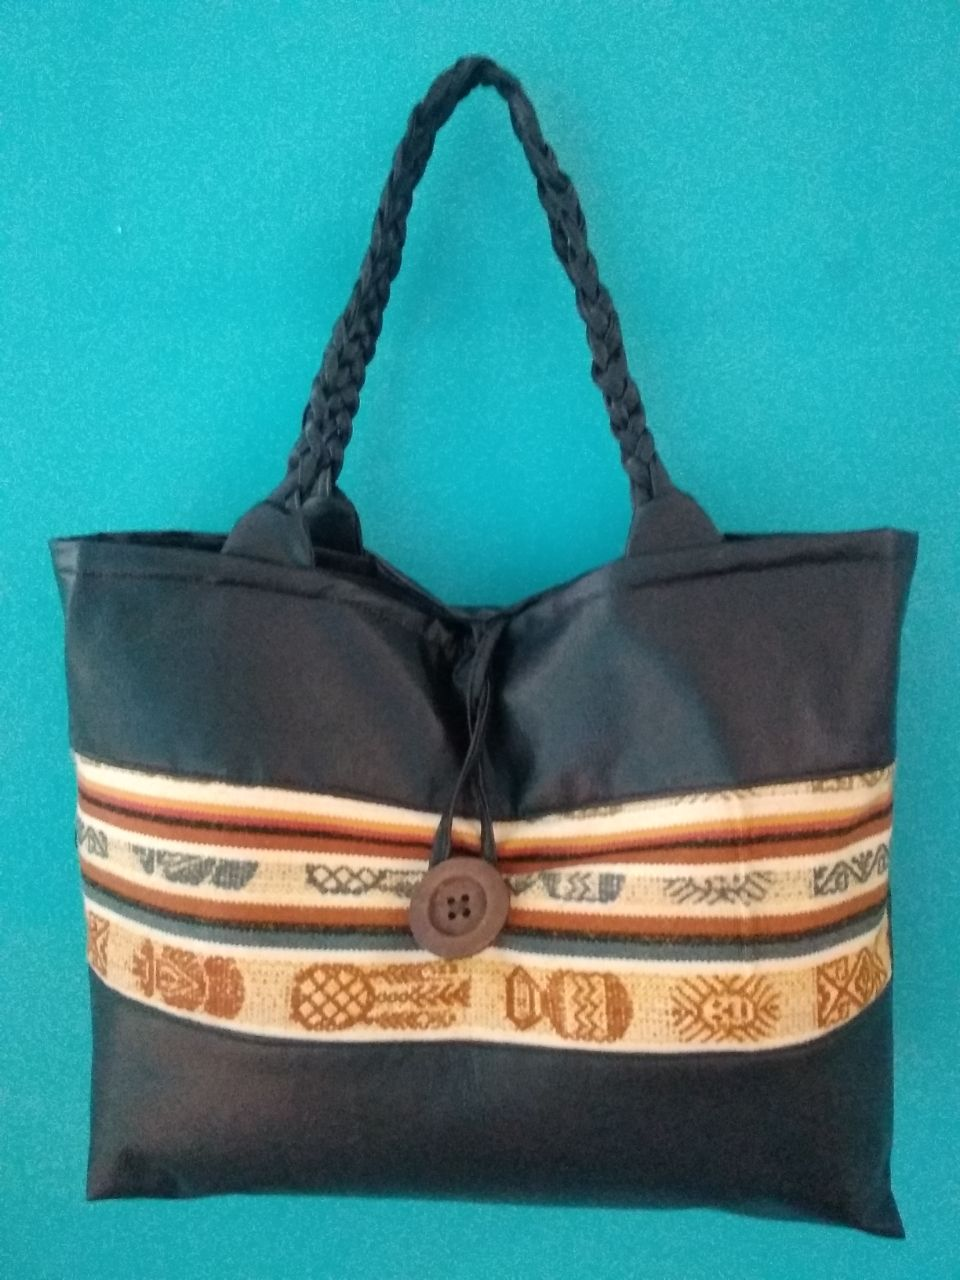

Bag with ethnic fabric appliqué.
Hi, friends. Who doesn't like accessories or ethnic or tribal touches in their outfit?
Thinking about that, I present this bag made of soft faux leather with an ethnic embroidery fabric appliqué. For the handles, I wove two braids and a wooden button to close it.
You can make it in the material you want, make it on a plain color or printed. The most important thing is this that I give you: the pattern with measurements and the step by step.
I am sure that many will dare to create, let their imagination fly.
Materials:
- Two-skin 55 cm x 1.50 wide
- Ethnic fabric 52 x 44
- I lining a piece of 44x1.50
- 1 button
- Threads
- Pair of scissors
- Measuring tape
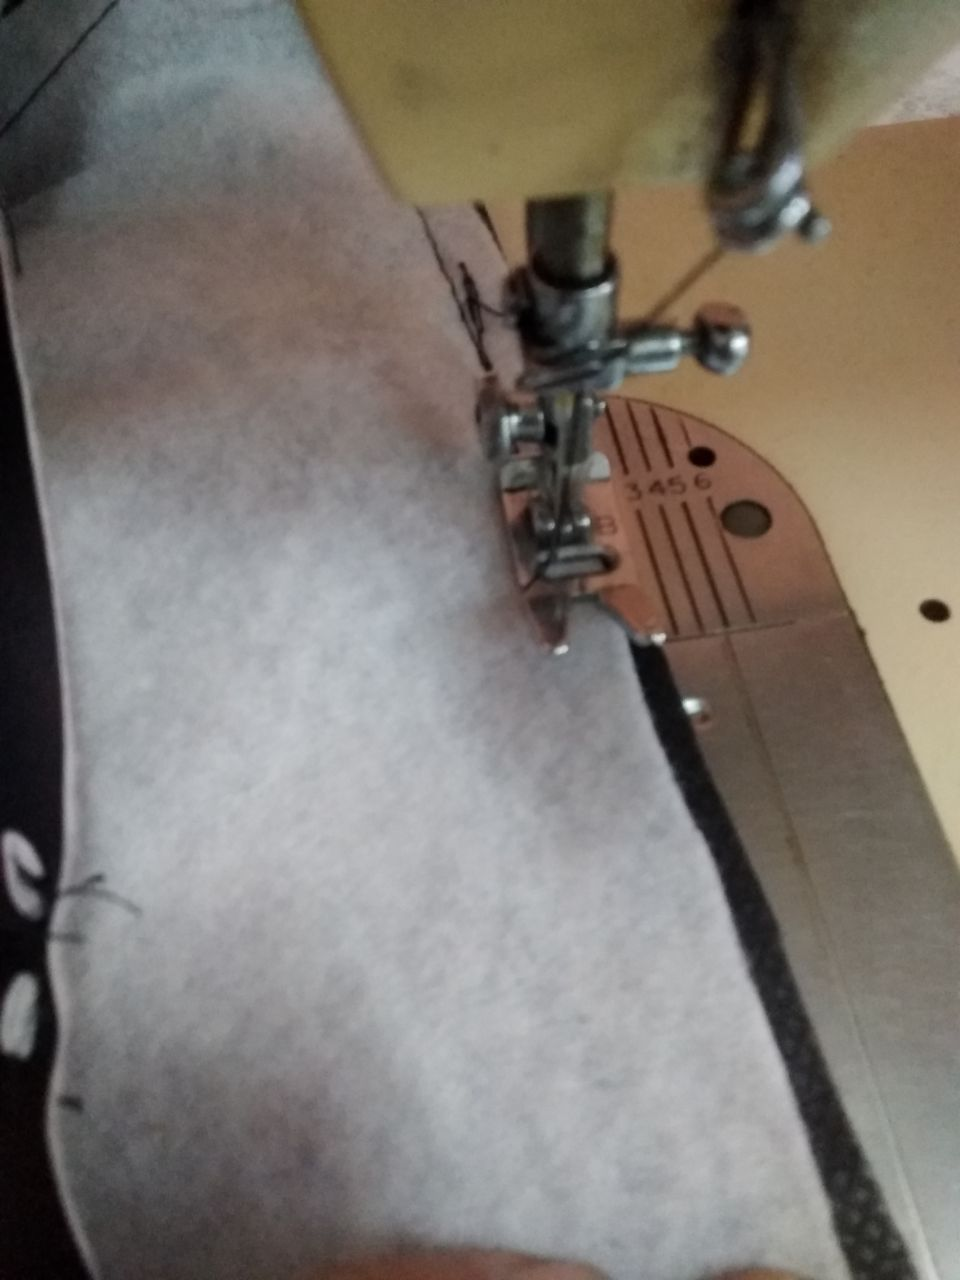
- Sewing machine
Piece cutting pattern (A, B, C, D, E, F) See image.
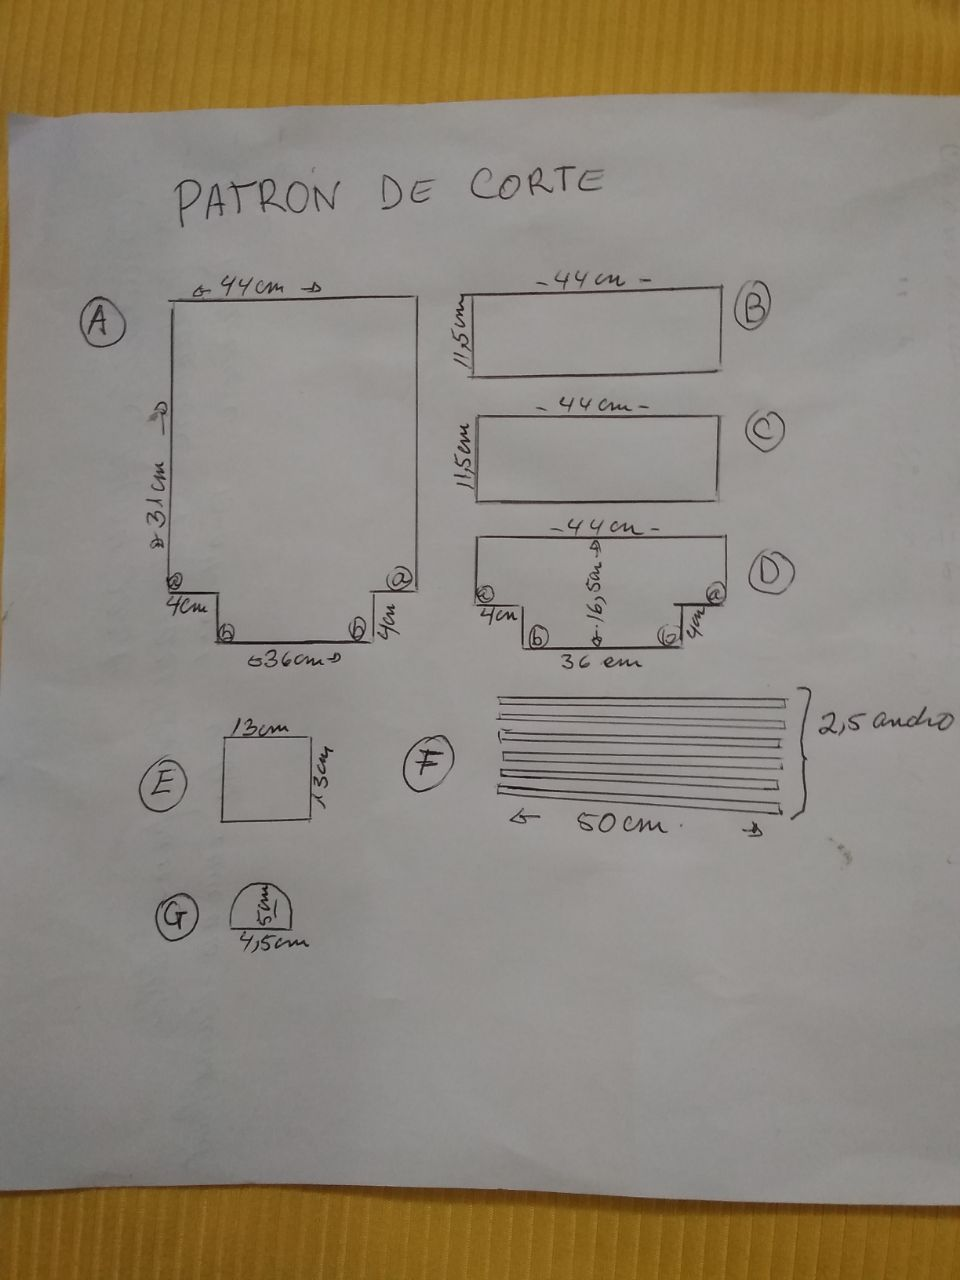
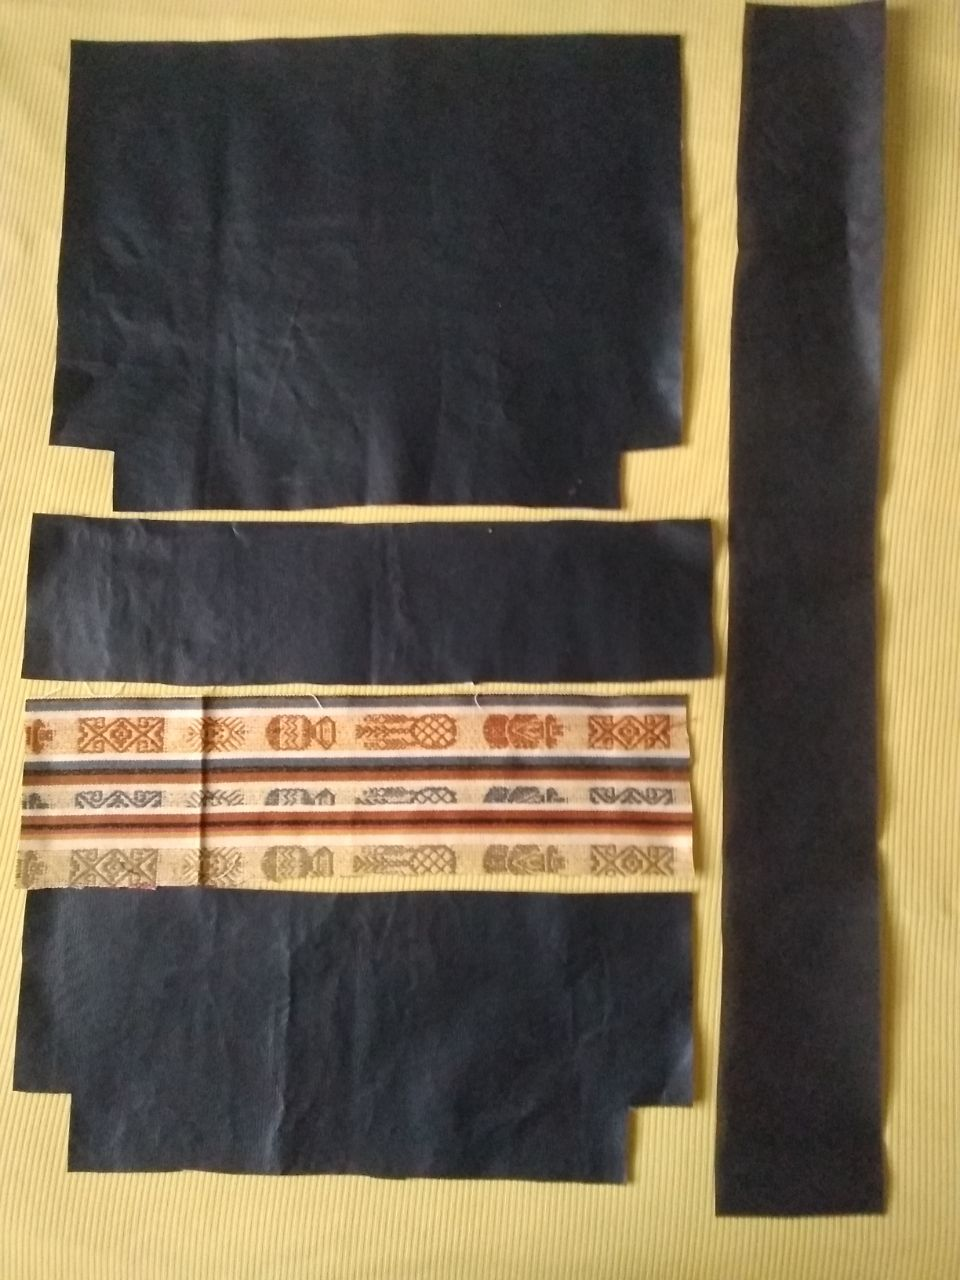
Cut (faux soft leather)
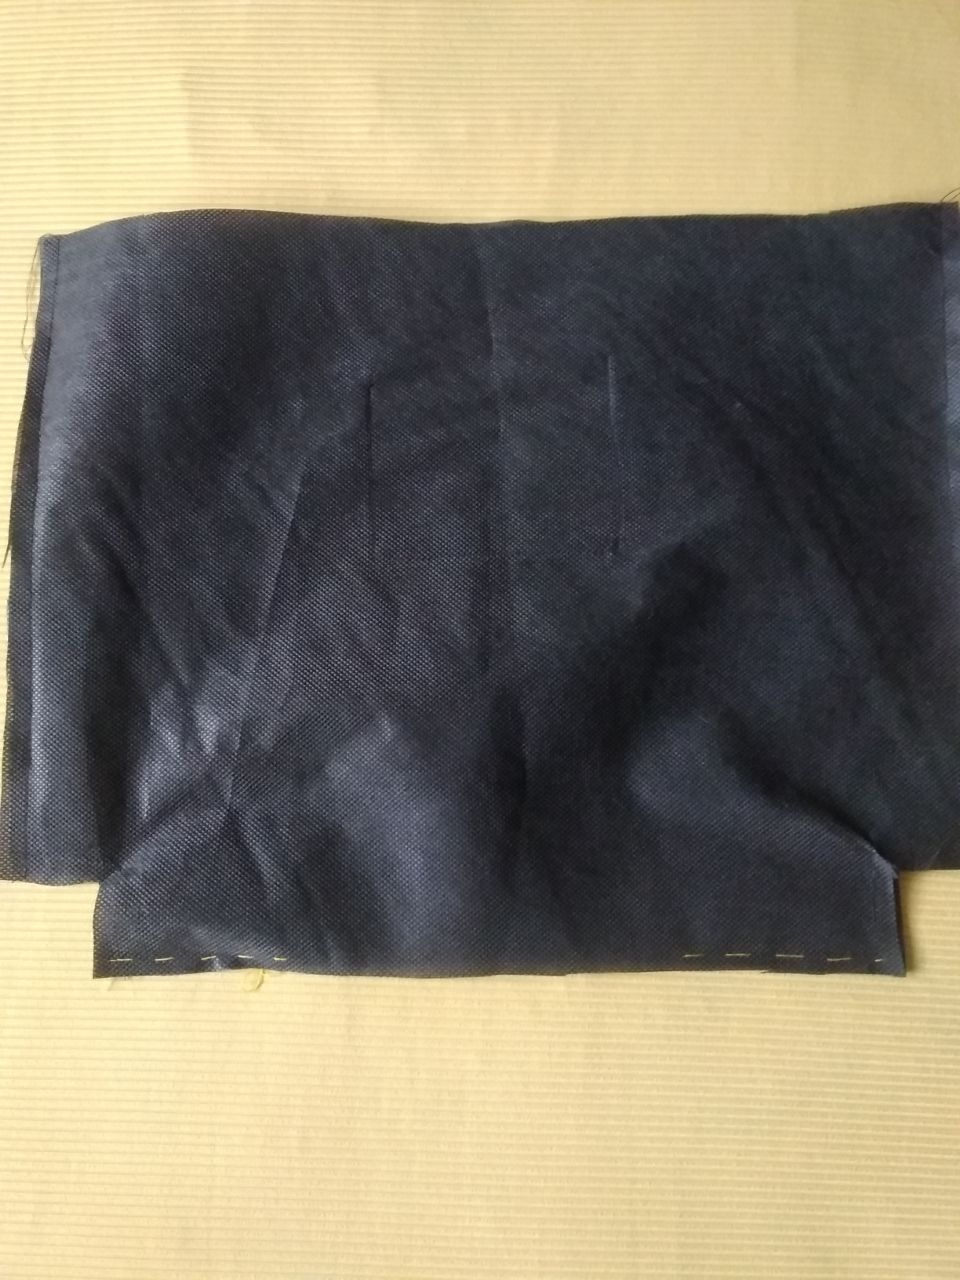
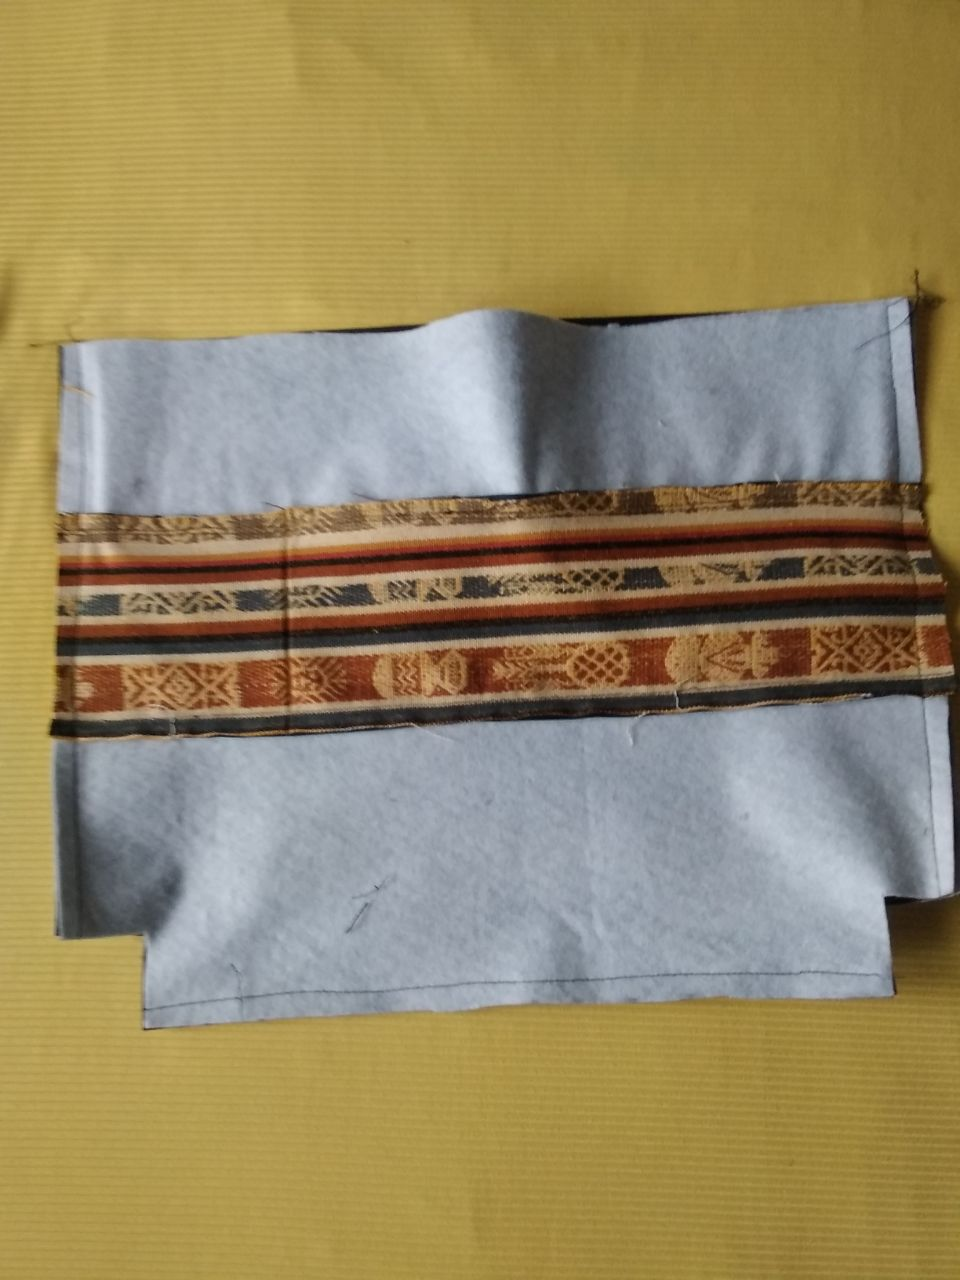
- Cut 1 piece with the measurements of figure A (rear)
- Cut a rectangle with the measurements of figure B (upper front)
- Cut 1 piece with the measurements of figure D (front bottom)
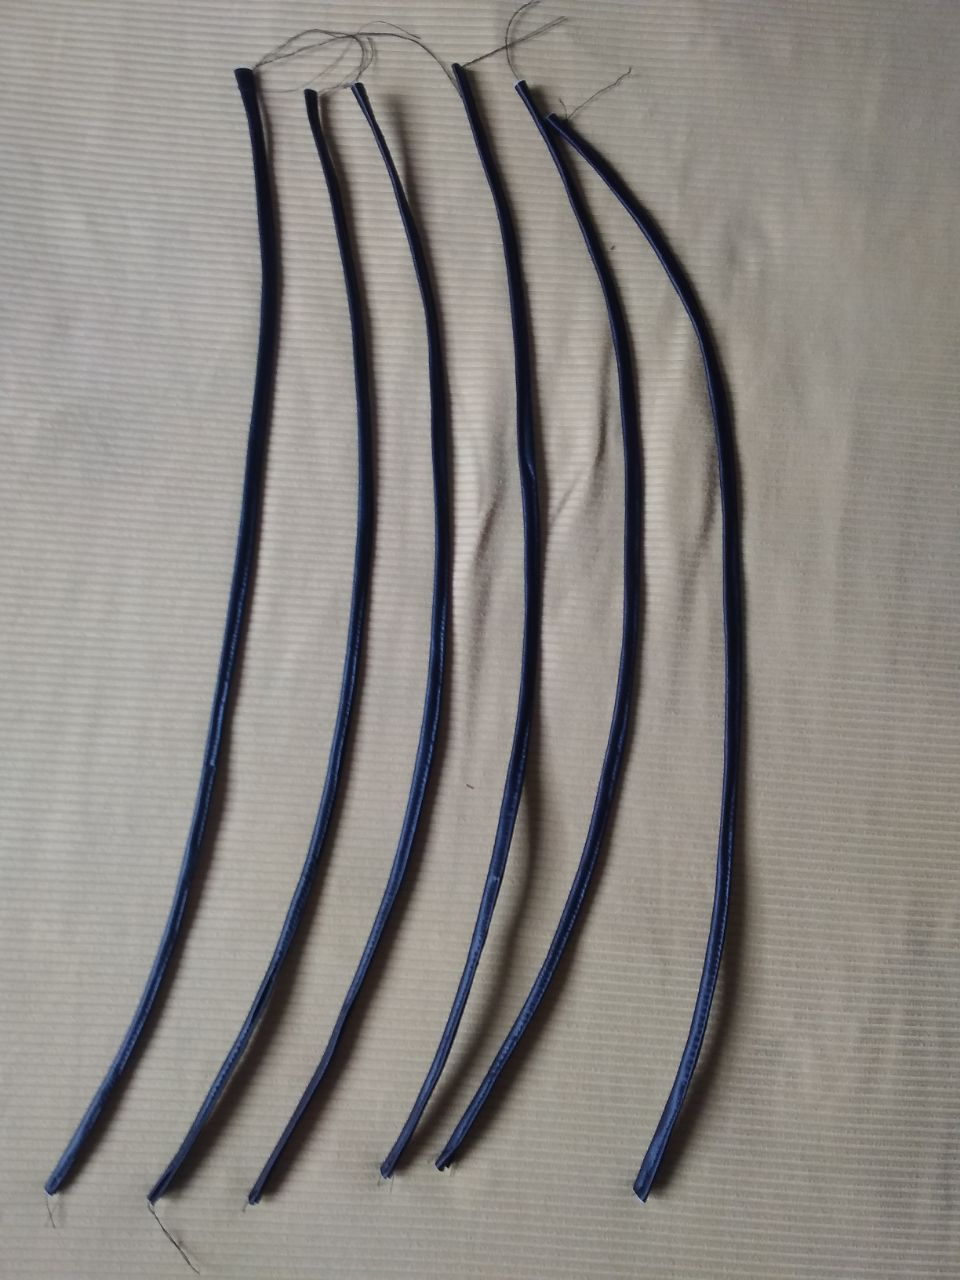
- Cut 6 strips for the braids of 2.5 cm x 50 cm long see figure F
- Ethnic fabric cut
- Cut a rectangle with the measurements of figure C
For the lining
- Cut 2 pieces (for front and rear) see figure A
- Cut a 13 x 13 square for the pocket
Assembly (lining)
- Topstitch the top of the pocket and a lid of the lining
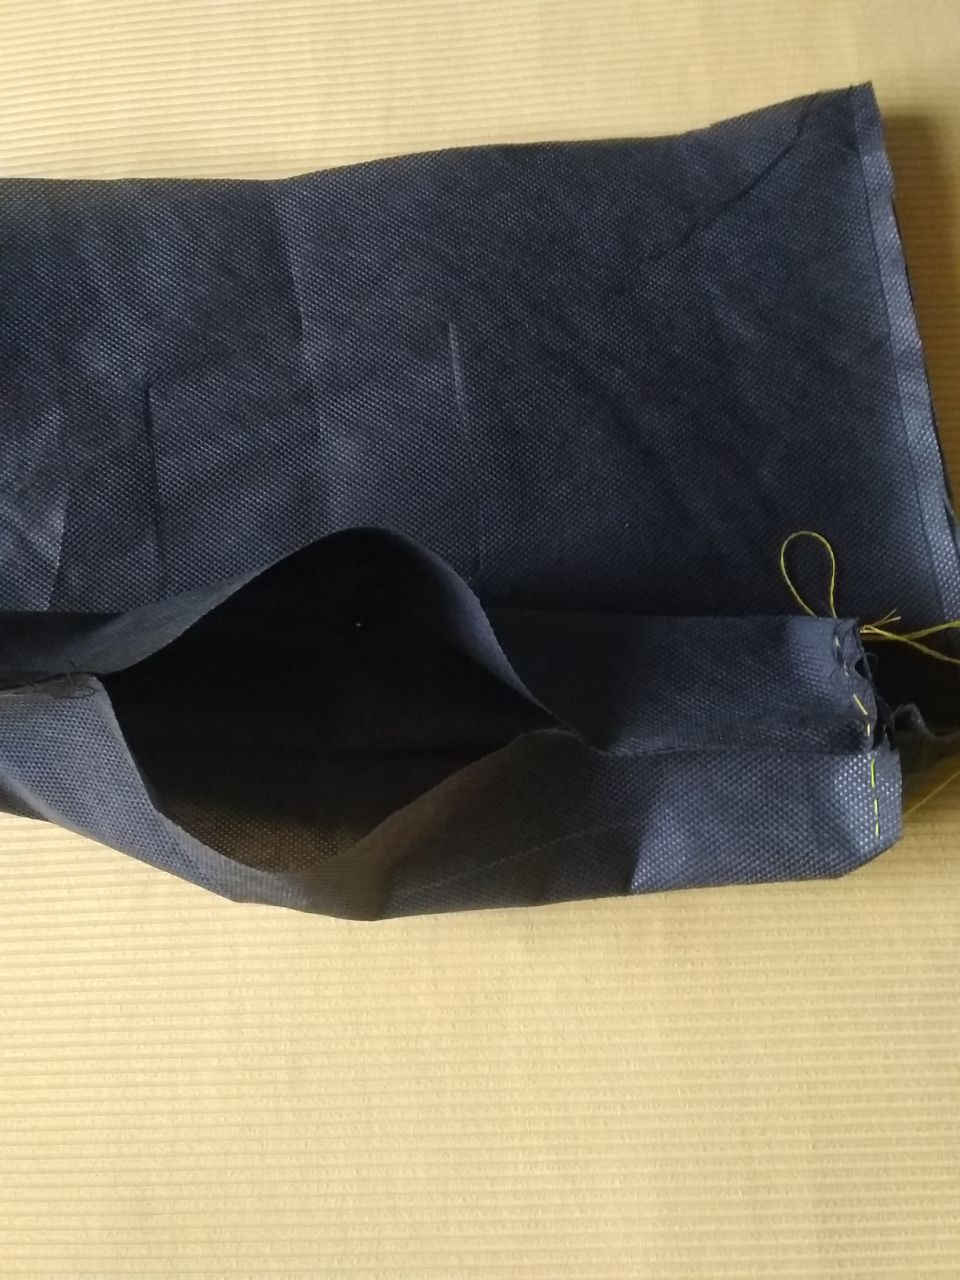
- Close the lining on the sides
- Sew the bottom of the lining at the ends, approximately 8 cm on each side, leaving a part without sewing exactly in the center (there it will be turned over later)
- Close the points of (a- b) in both corners. Reserve.
Outside of the bag
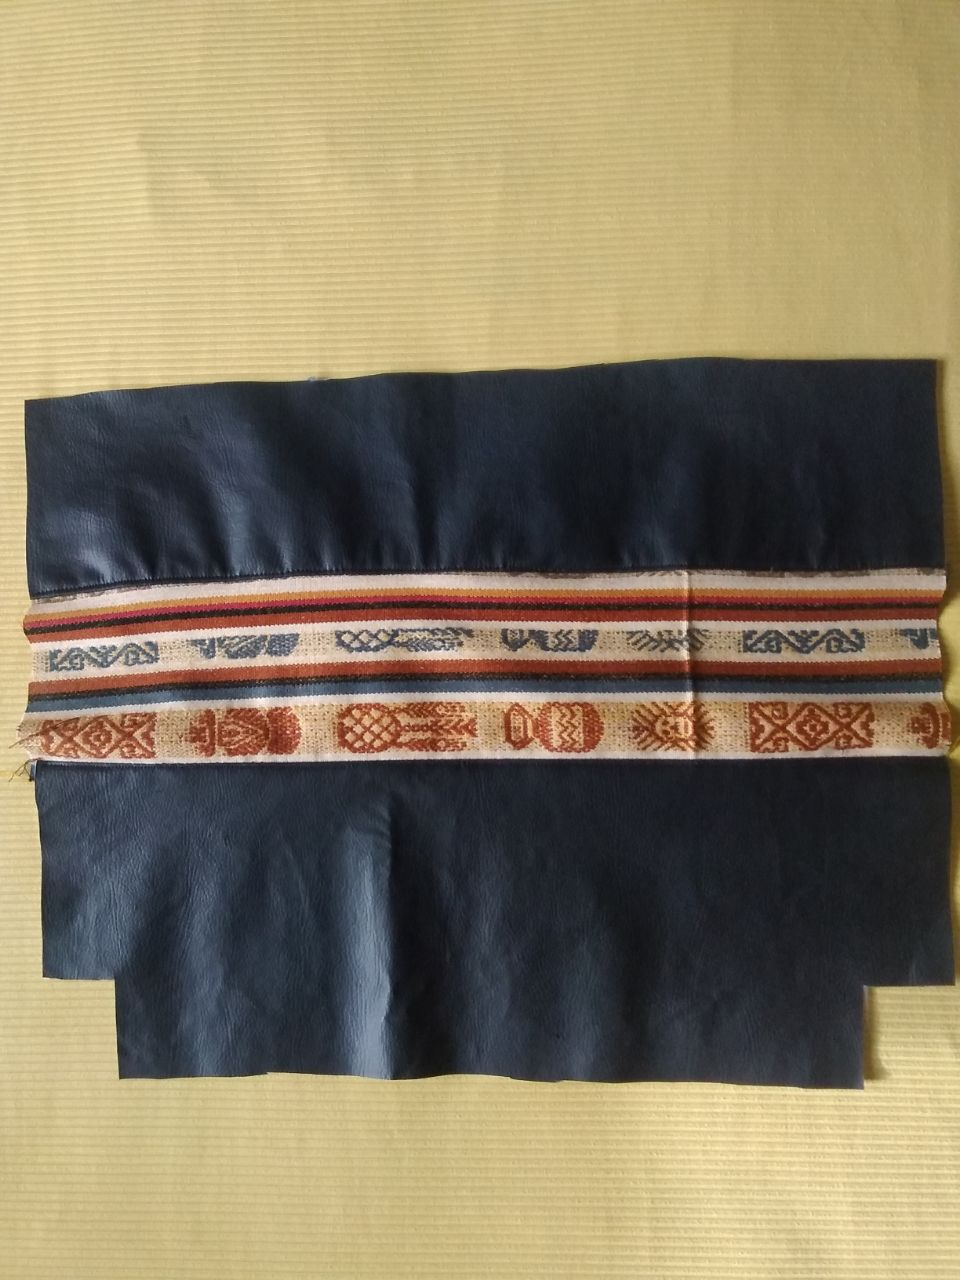
- Take piece B (faux soft leather) and sew to piece C (ethnic fabric)
- Sew piece D (double leather) to the ethnic fabric
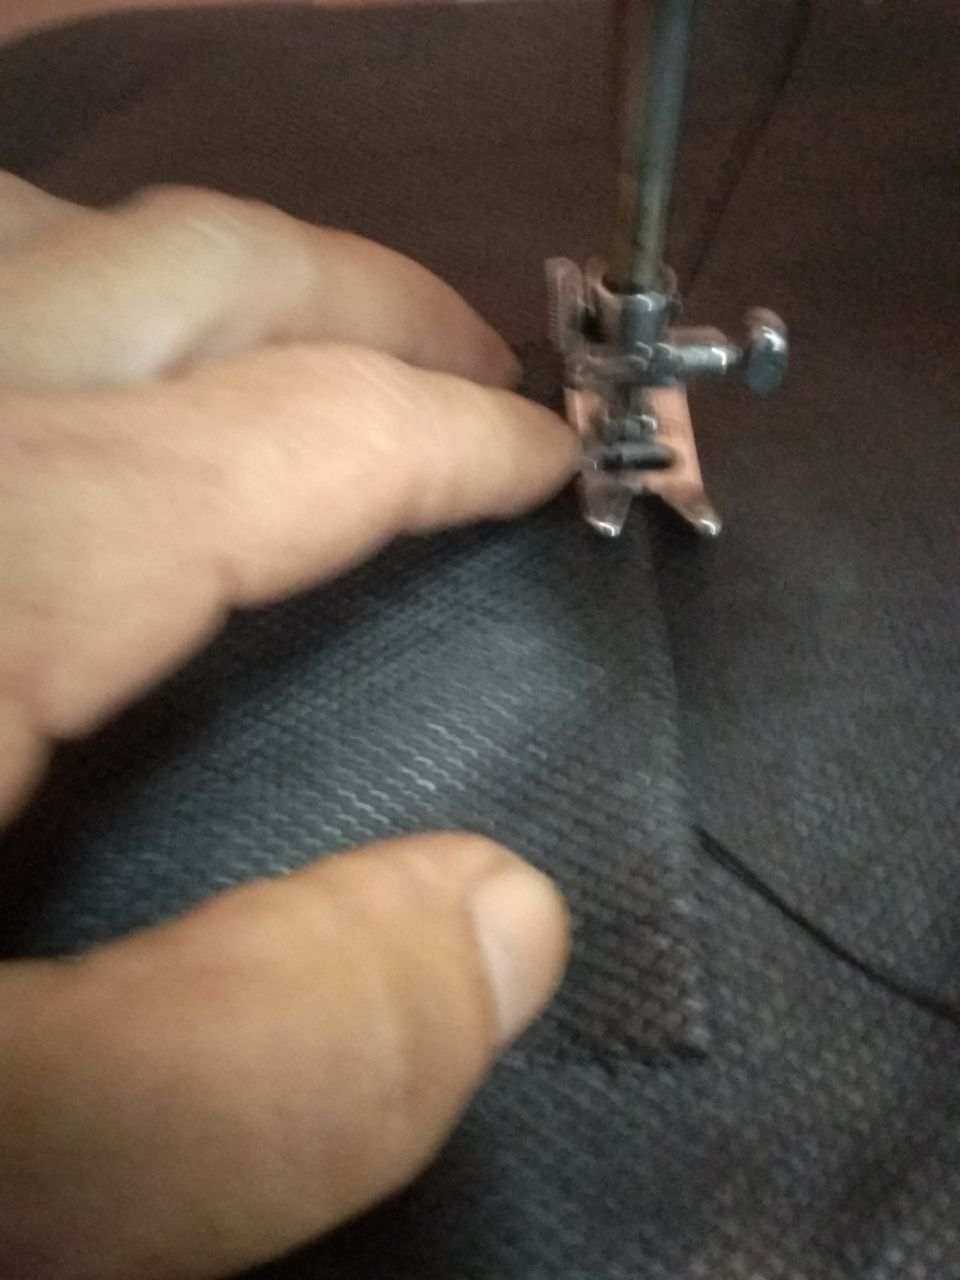
- Topstitch the seams as an ornament
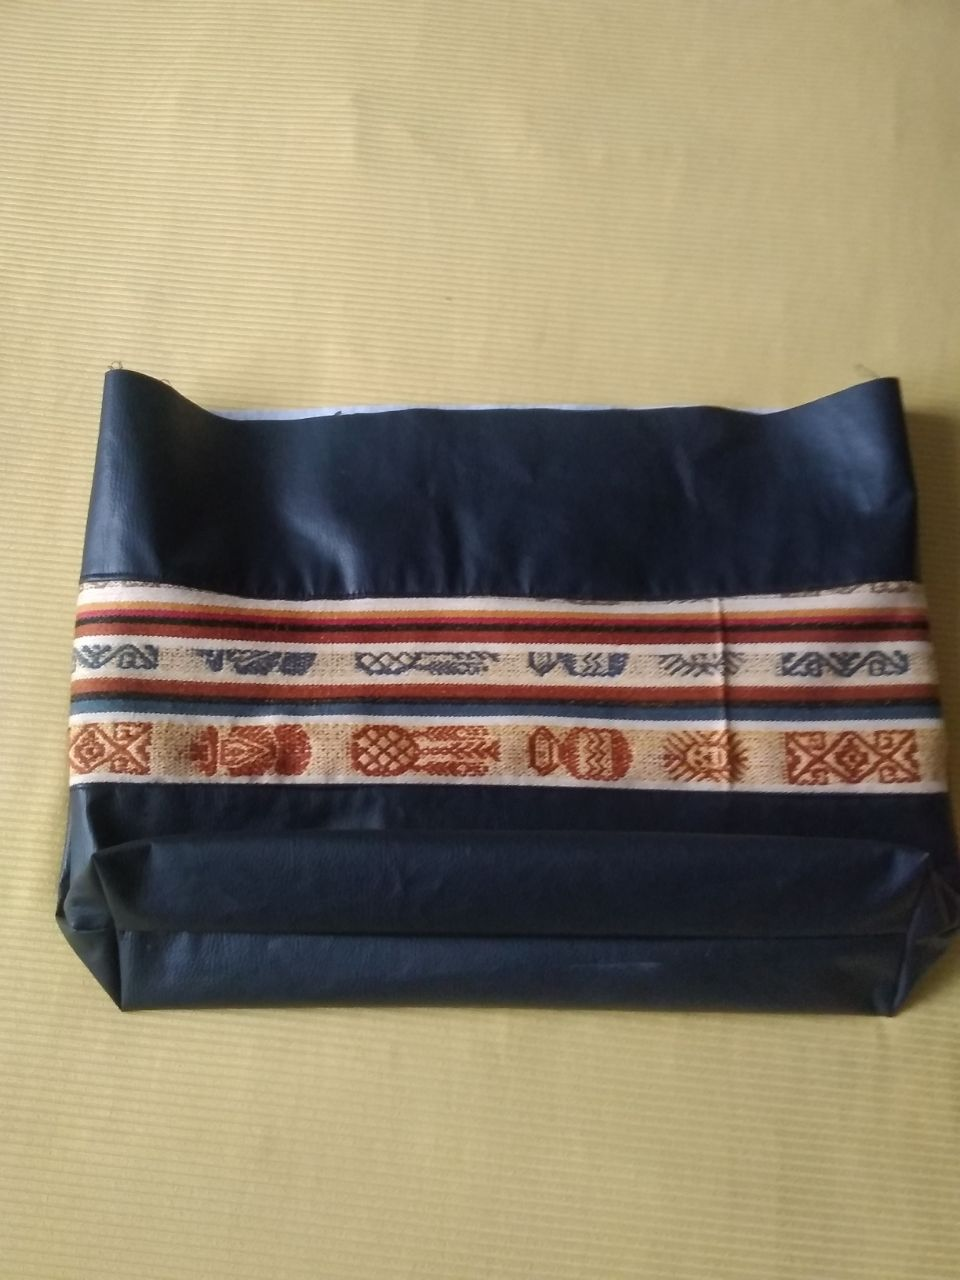
- Join the rear piece A, to the front that we already made
- Sew the sides and the entire bottom
- At the bottom ends sew both openings (a-b)
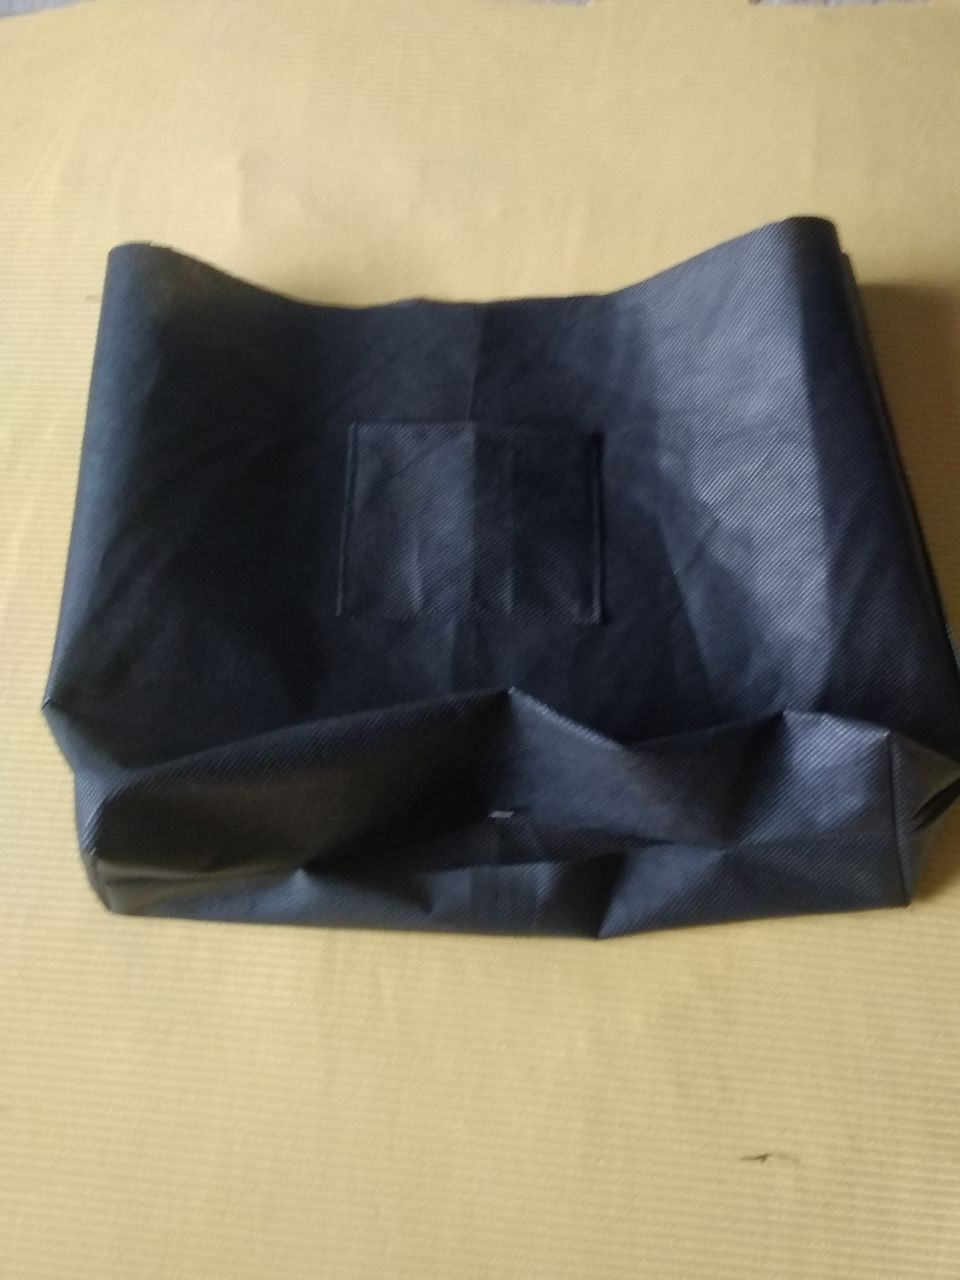
The bag would be armed
The handles:
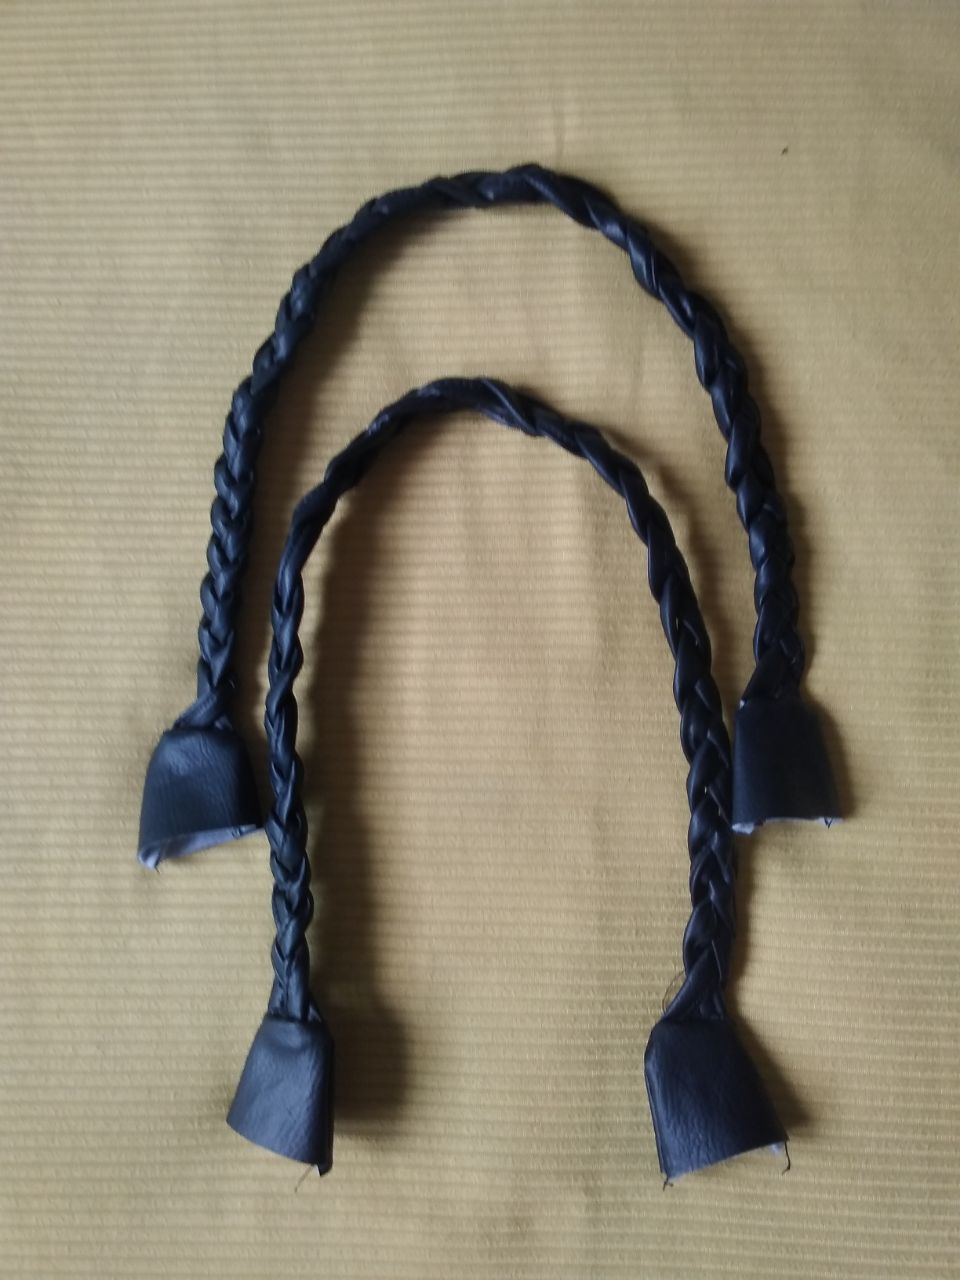
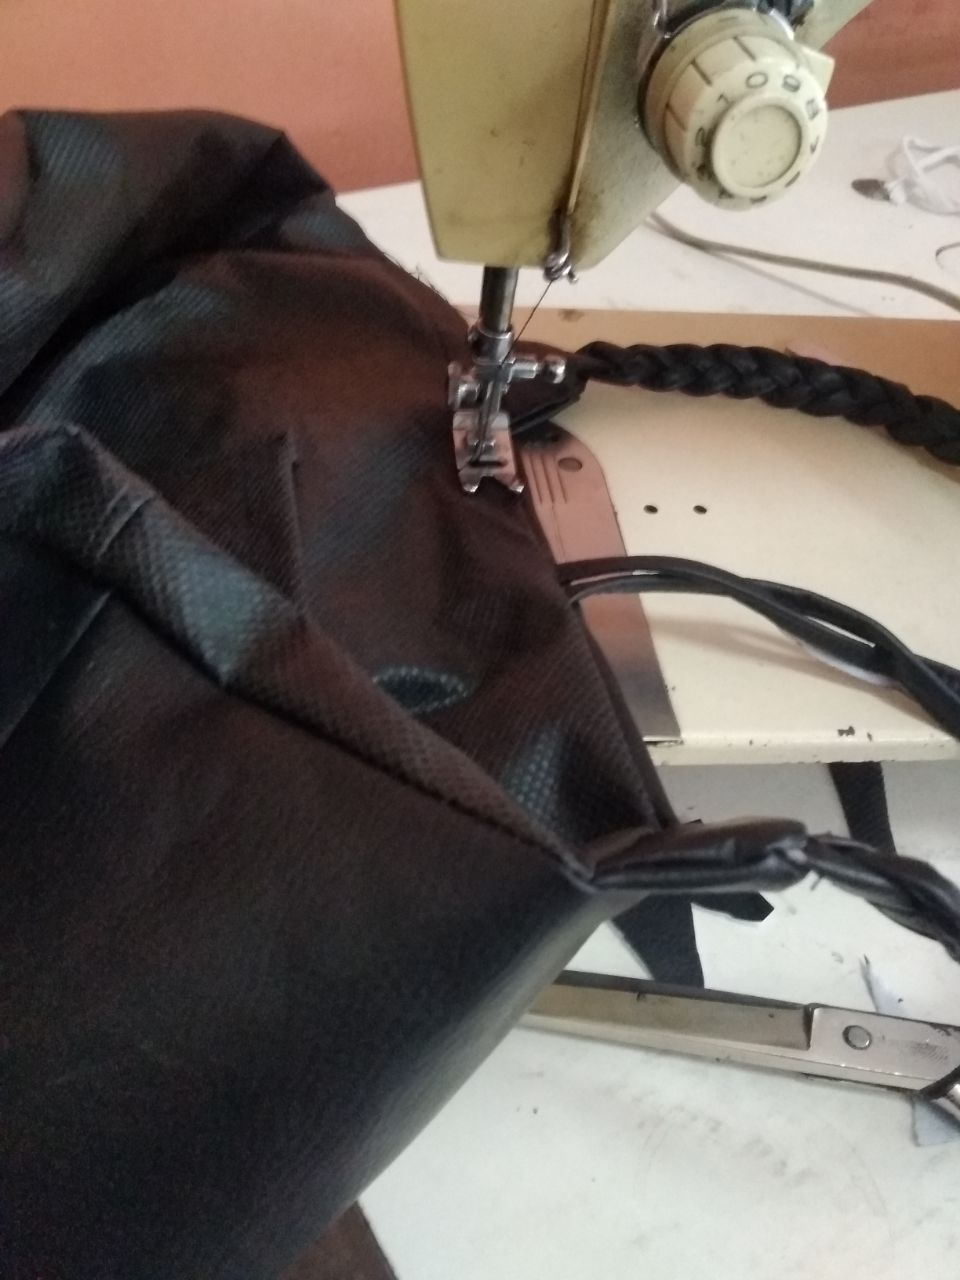
- Take the 6 strips and sew one by one along the selvage
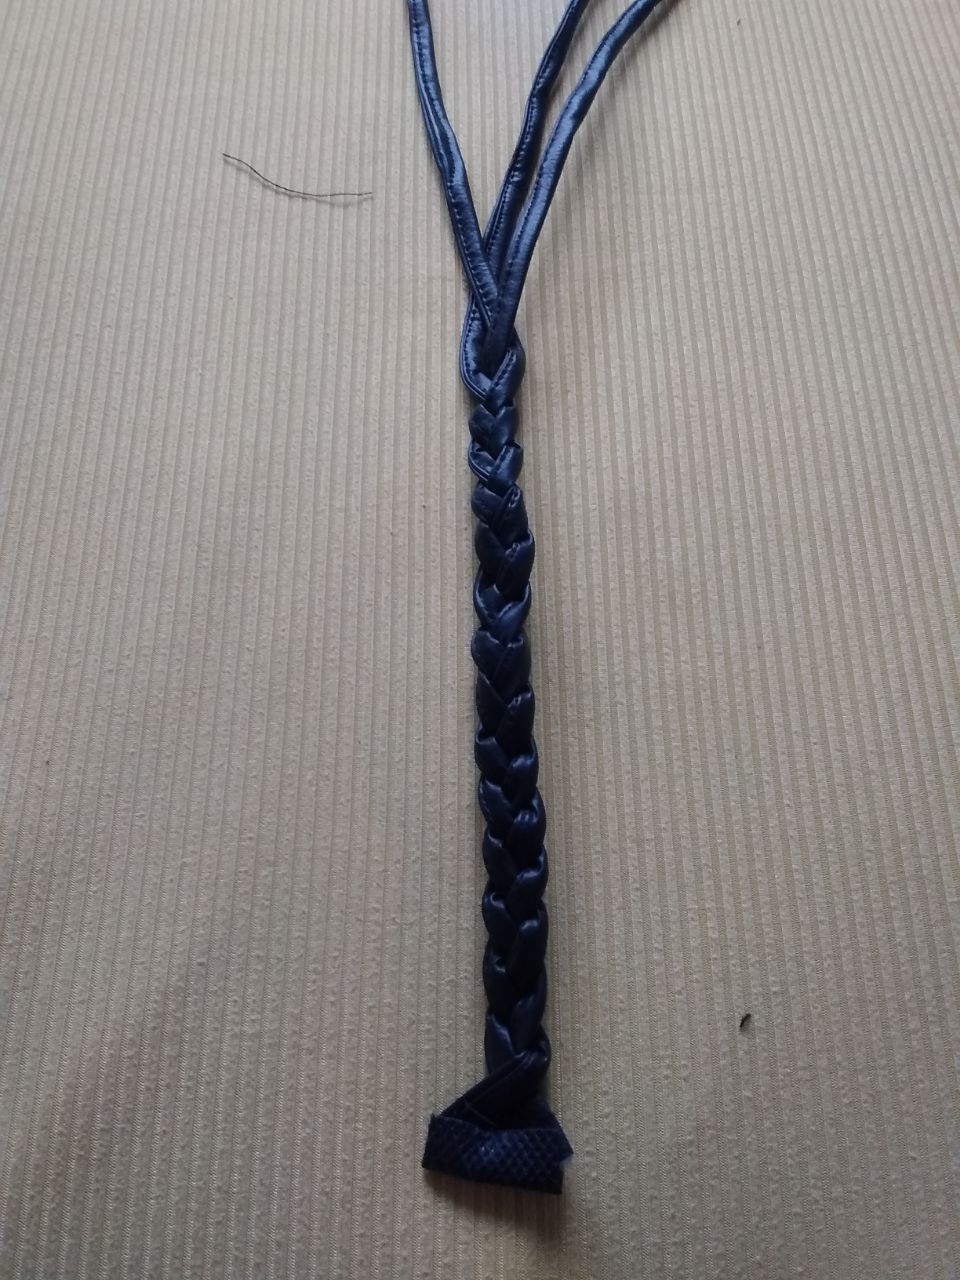
- With three strips make a braid, repeat operation
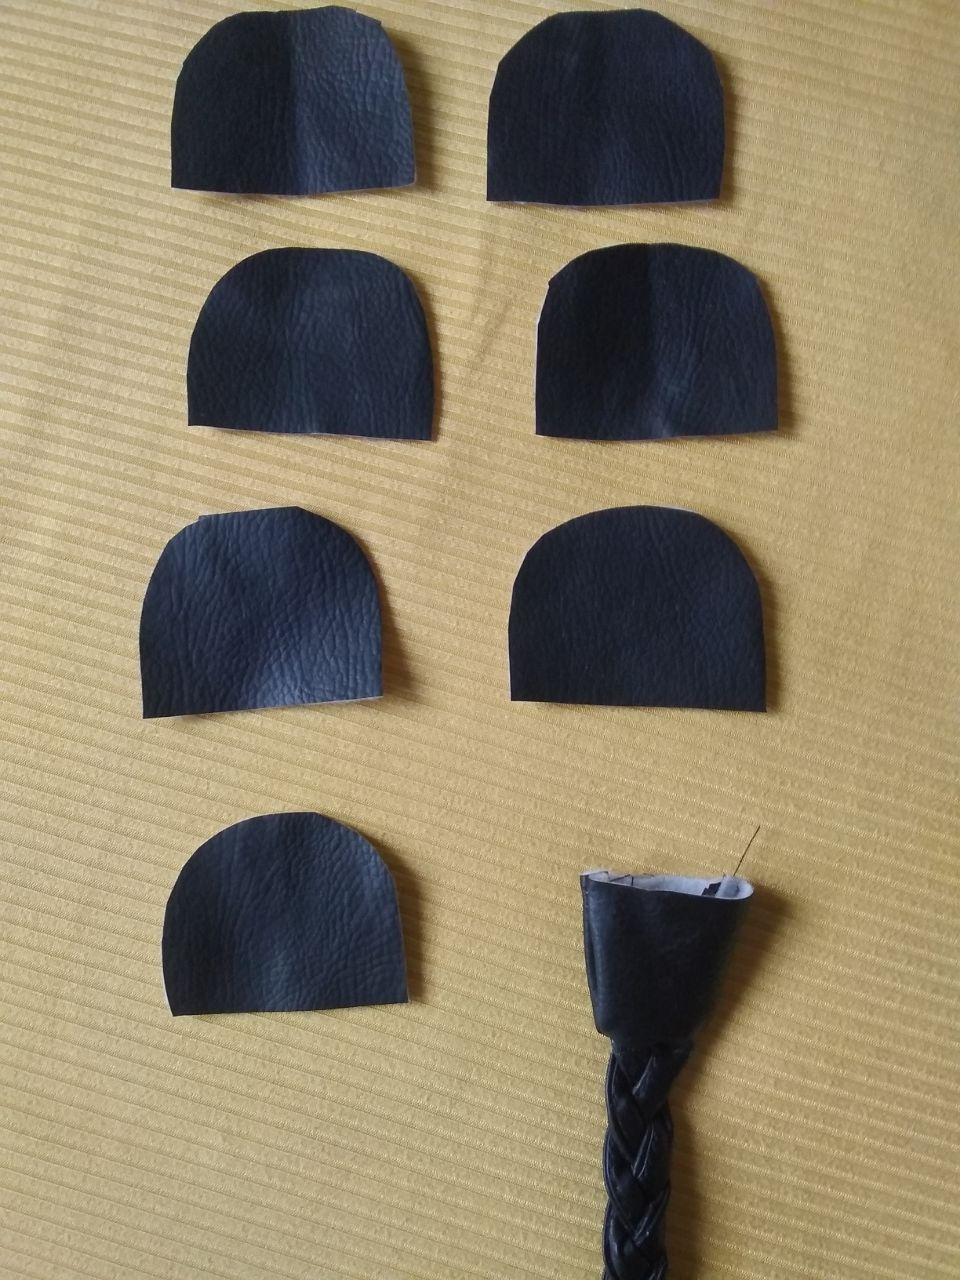
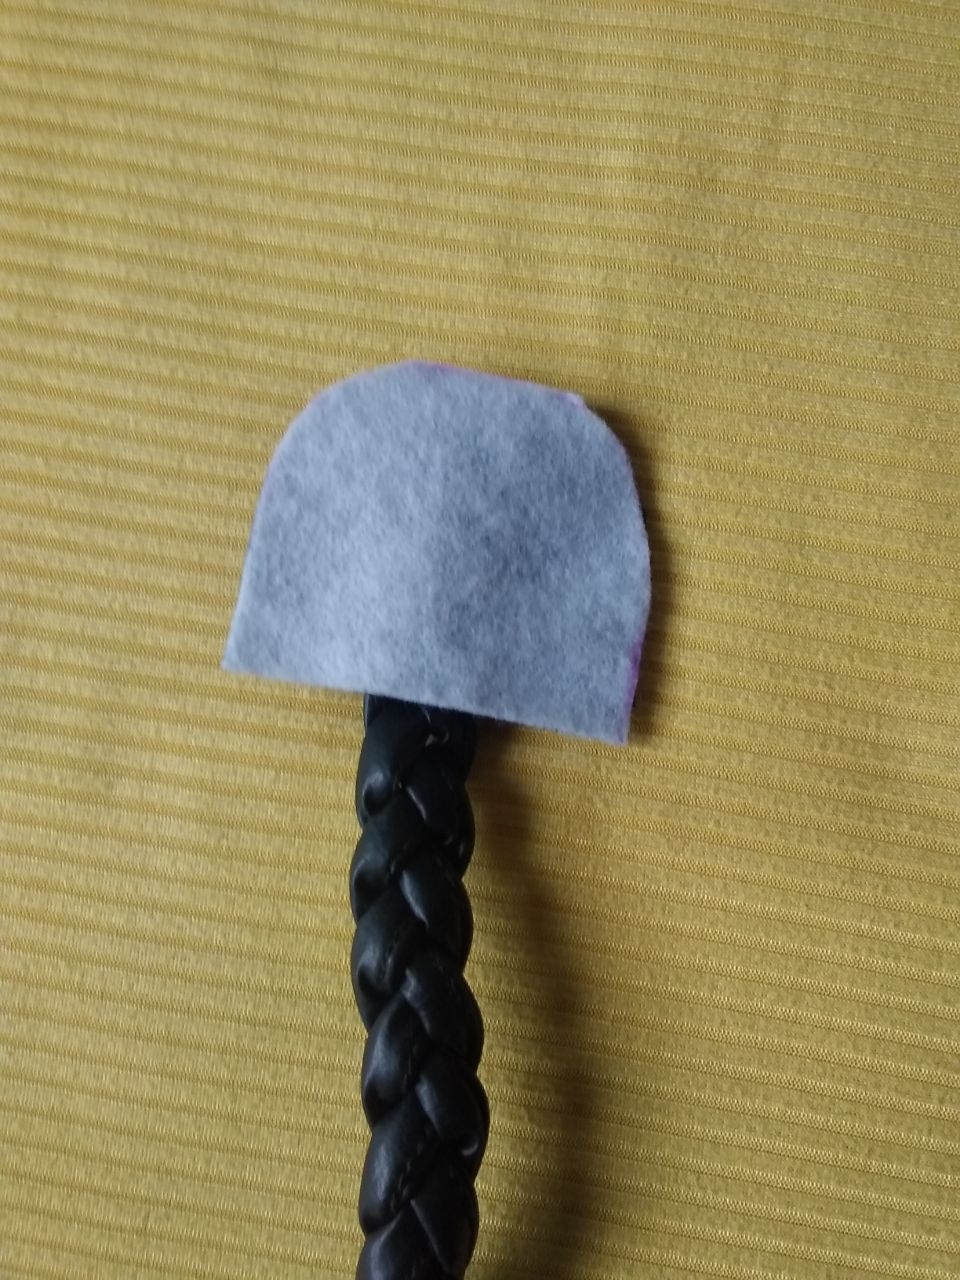
- Cut 8 pieces as a semicircle of 5 cm x 4.5 cm
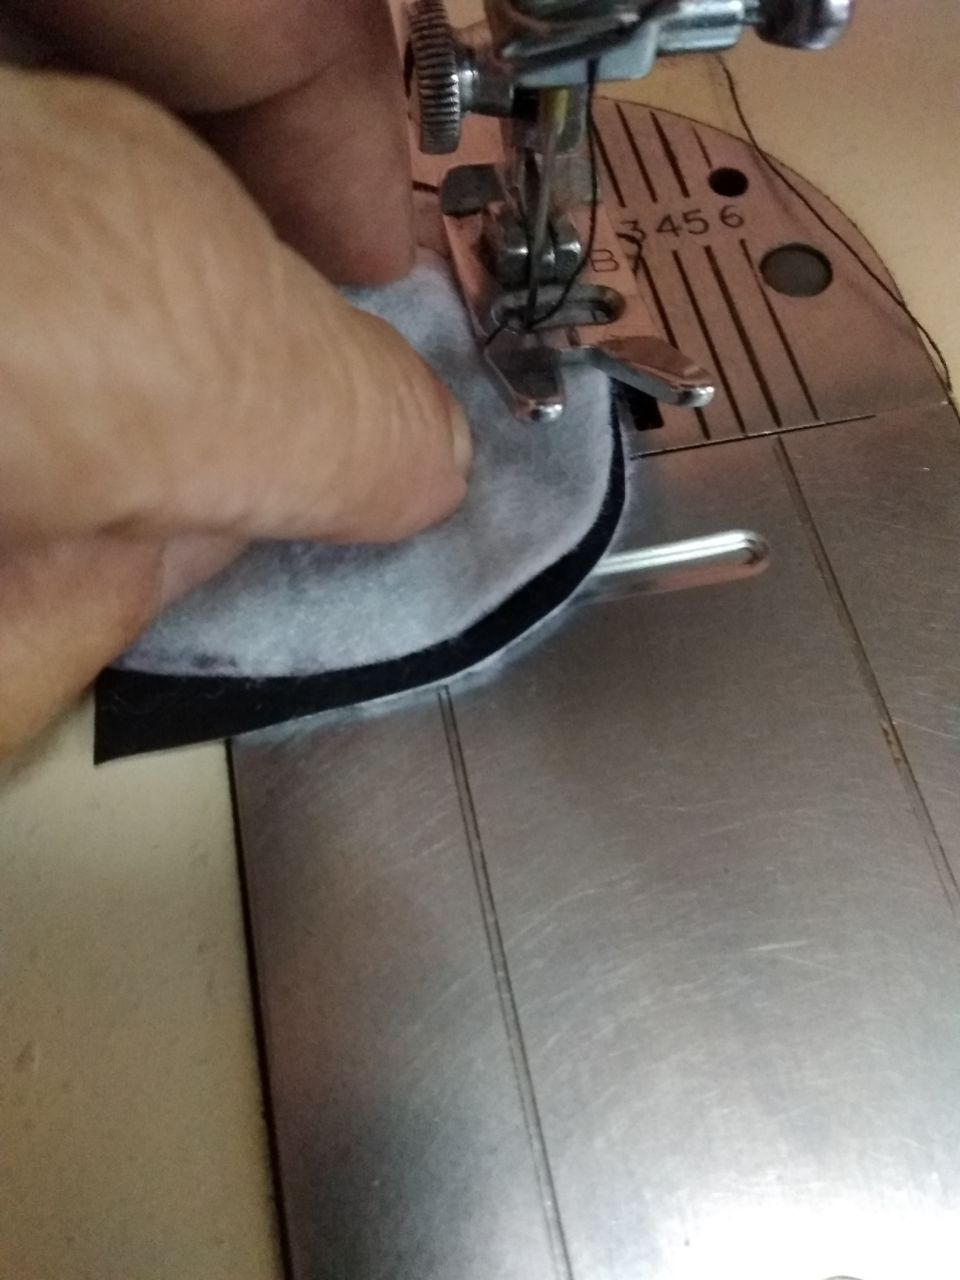
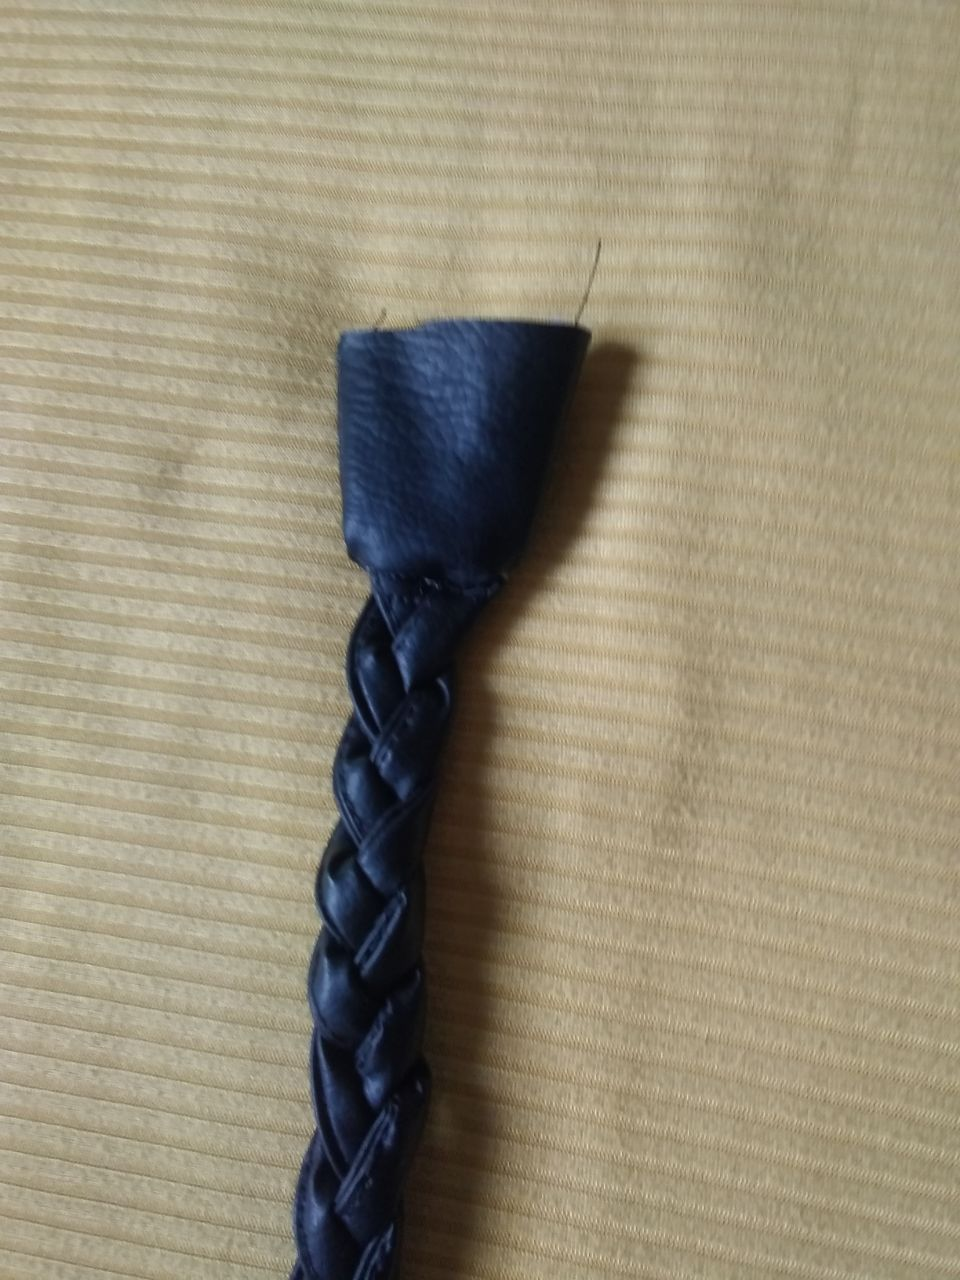
- We are going to take 2 semicircles and put one end of the clineja sew and turn. Repeat the same process at all ends of the clineja. We already have the handles ready.
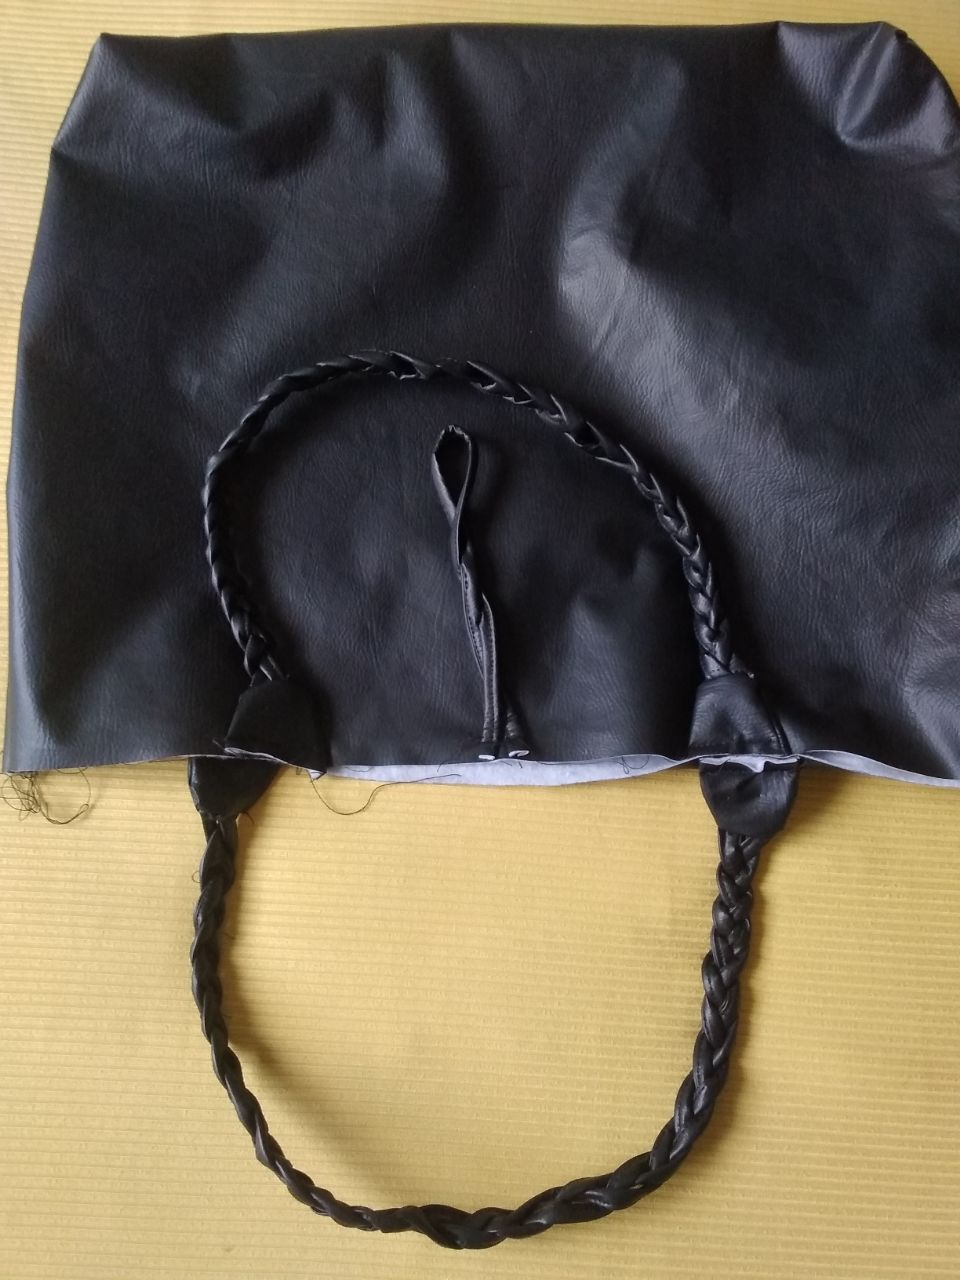
- Attach the handles to the bag
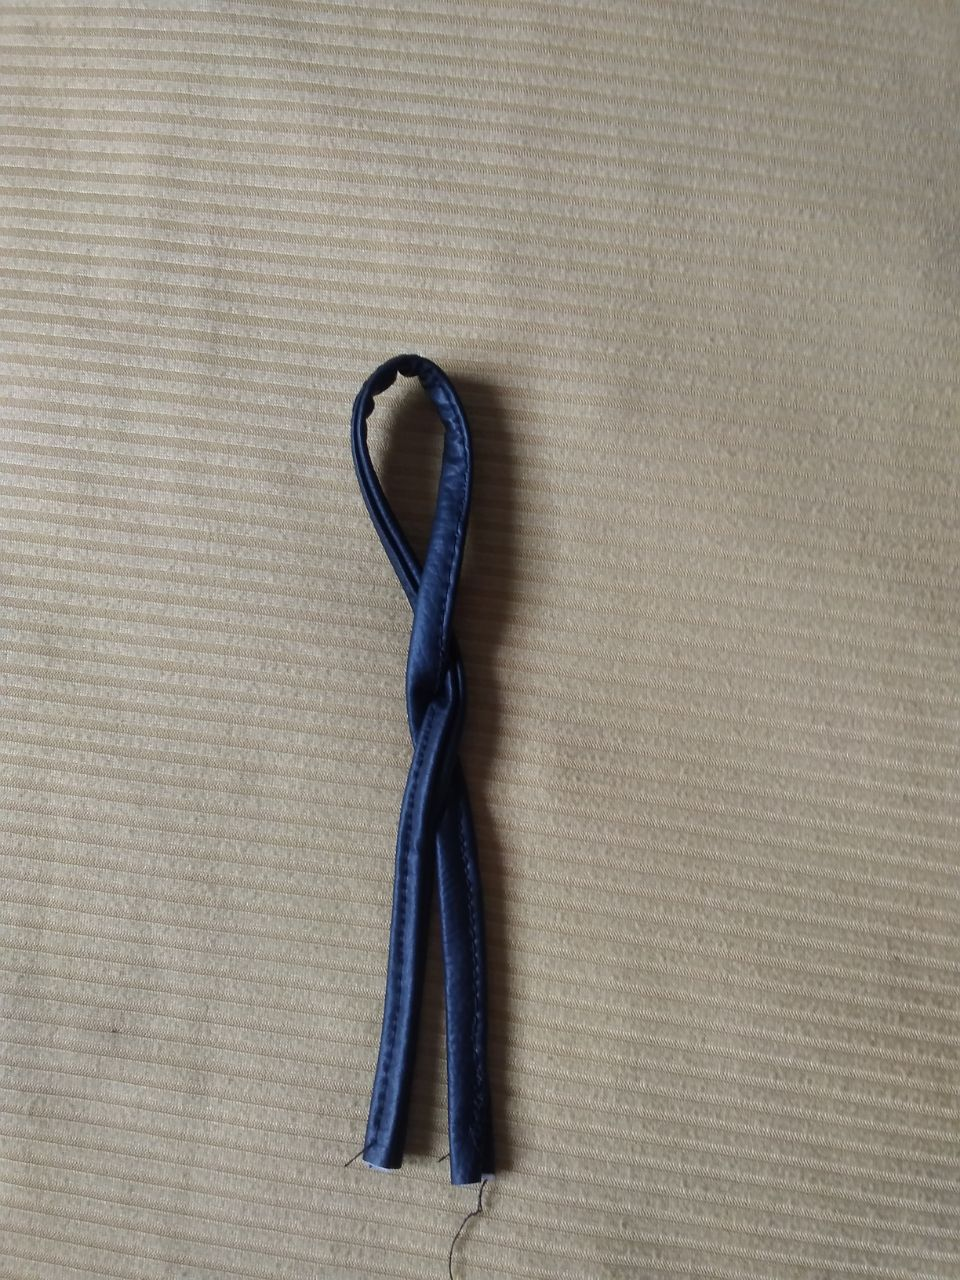
- Sew a strip on the 28 cm x 2.5 cm selvedge, secure to the bag at the back (in the upper center)
- Sew the button on the ethnic fabric (in the center)
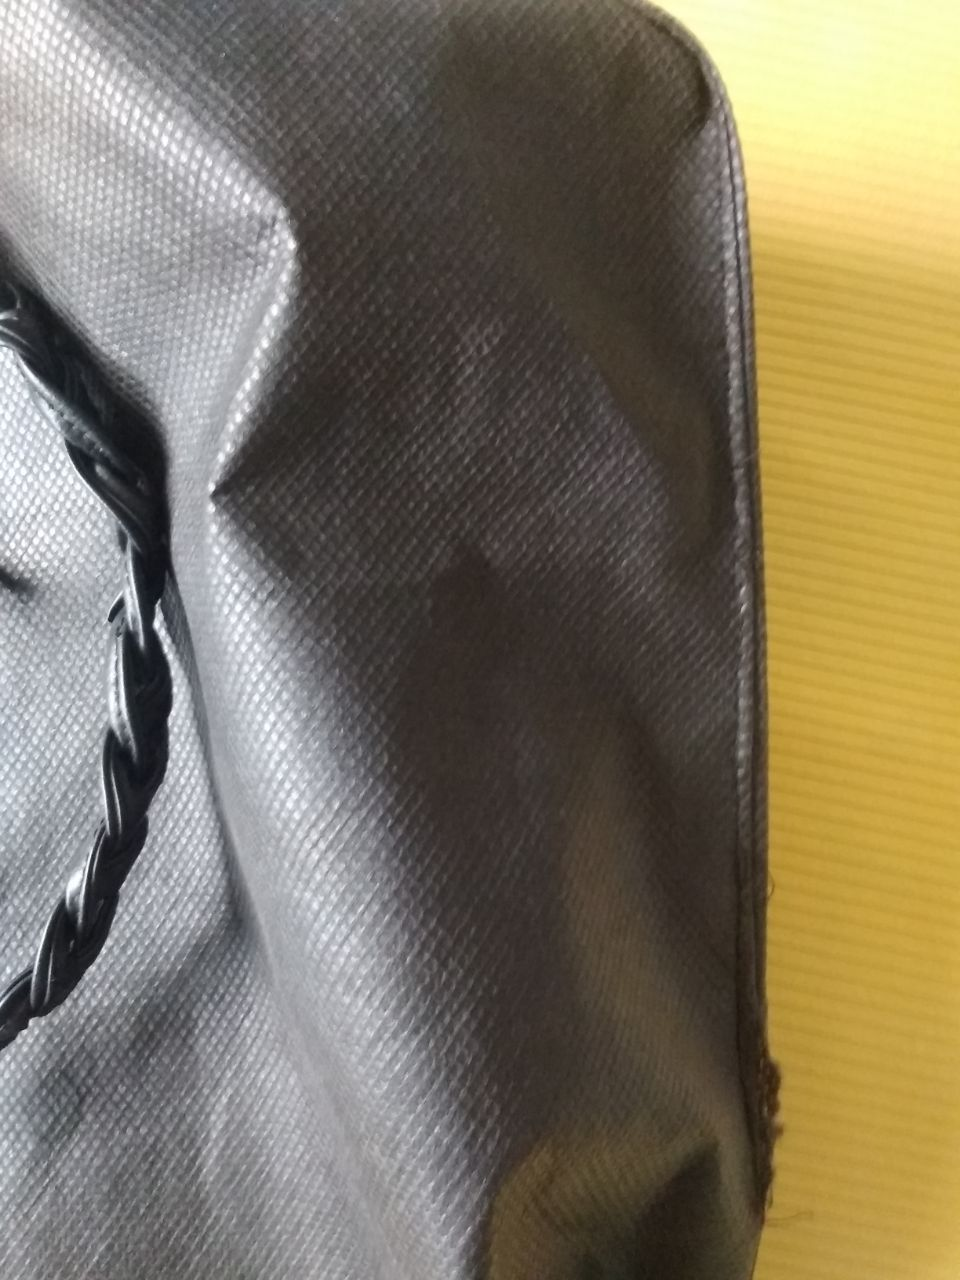
- Put the bag on the right side (double leather) making sure that the handles are also inside and put it inside the lining (the latter must be upside down) sew all around
- Flip the bag through the opening that we had left in the lining.
- Seam the entire selvage, as reinforcement measure
- Finally sew the hole that of the lining
Great! We have a beautiful casual bag. See you in the next post.
The texts and photos are my authorship


Versión en español
Bolso con aplique en tela étnica.
Hola amigos de la comunidad. A quien no le gusta accesorios o toques étnicos o tribales en su atuendo?
Pensando en eso, les presento un bolso elaborado en bipiel con aplique en tela de bordado étnico. Para las asas tejí dos clinejas y un botón de madera para cerrarlo.
Ustedes pueden elaborarlo en el material que deseen, hacerlo unicolor o estampado todo. Lo más importante es que les envío: el patrón con medidas y el paso a paso.
Estoy segura que muchos se atreverán a crear, que vuele su imaginación.
Materiales:
- Bipiel 55 cm x 1.50 de ancho
- Tela étnica 52 x 44
- Forro un retazo de 44x1.50
- 1 botón
- Hilos
- Tijeras
- Cinta métrica
- Máquina de coser
Patrón de corte piezas ( A,B,C,D,E,F) Ver imagen.
Corte ( bipiel)
- Cortar 1 pieza con las medidas de la figura A ( trasero)
- Cortar un rectángulo con las medidas de la figura B (delantero superior)
- Cortar 1 pieza con las medidas de la figura D (delantero inferior)
- Cortar 6 tiras para las trenzas de 2.5 cm x 50 cm de largo ver figura F
- Corte de la tela étnica
- Cortar un rectángulo con las medidas de la figura C
Para el forro
- Cortar 2 piezas ( para delantero y trasero) ver figura A
- Cortar un cuadrado de 13 x 13 para el bolsillo
Ensamblaje ( forro)
- Hacer un pespunte a la parte superior del bolsillo y a una tapa del forro
- Cerrar el forro por los laterales
- Coser el fondo del forro por los extremos, aproximadamente unos 8 cm de cada lado, dejando una parte sin coser exactamente en el centro (por allí se volteara posteriormente)
- Cerrar los puntos de (a- b) en ambas esquinas. Reservar.
Parte externa del bolso
- Tomar la pieza B ( bipiel) y coser a la pieza C ( tela étnica)
- Coser la pieza D ( bipiel) a la tela étnica
- Hacer un pespunte sobre las costuras a manera de adorno
- Unir el trasero pieza A , al delantero que ya hicimos
- Coser los laterales y el fondo completo
- En los extremos del fondo coser ambas aberturas ( a-b)
Quedaría armado el bolso
Las asas:
- Tomar las 6 tiras y coser una a una por el orillo
- Con tres tiras hacer una clineja, repetir operación
- Cortar 8 piecitas como un semicirculo de 5 cm x 4,5 cm
- Vamos a tomar 2 semicirculos y meter un extremo de la clineja coser y voltear. Repetir el mismo proceso en todos los extremos de la clineja. Ya tenemos listas las asas.
- Fijar las asas al bolso
- Coser una tira por el orillo de 28 cm x2,5 cm fijar al bolso en el trasero ( en el centro superior)
- Coser el botón en la tela étnica ( en el centro)
- Poner al derecho el bolso ( bipiel) cuidando que las asas queden dentro también y meterlo dentro del forro ( este último debe estar al revés) coser por todo el alrededor
- Voltear el bolso por la abertura que habíamos dejado en el forro .
- Repisar con costura todo el orillo , a medida de refuerzo
- Por último coser el orificio que del forro
Listo! Tenemos un hermoso bolso casual. Nos vemos en el próximo post.
Los textos y las fotos son de mi autoría
Gracias
Muy bien elaborado, me encantó. Mucho éxito!
Gracias, hecho con cariño
Hermosooo, felicidades por tan lindo trabajo 😍
Gracias, me alegra que te guste.
Congratulations @ling.ramirez! You have completed the following achievement on the Hive blockchain and have been rewarded with new badge(s) :
Your next target is to reach 300 upvotes.
You can view your badges on your board and compare yourself to others in the Ranking
If you no longer want to receive notifications, reply to this comment with the word
STOPCheck out the last post from @hivebuzz:
Support the HiveBuzz project. Vote for our proposal!