Holaaaaa! Mis queridísimos amigos de Hive.
Hoy quiero compartir con ustedes este paso a paso para pintar en teja con pintura al frío.
Me encanta la decoración y siempre he intentado hacerlo todo con mis propias manos, aunque hay cosas que se me hace imposible realizar y claro, también hay que colaborar con el crecimiento de la economía.
Hello! My dear friends at Hive.
Today I want to share with you this step by step to paint tile with cold paint.
I love decoration and I have always tried to do everything with my own hands, although there are things that I cannot do and of course, you also have to collaborate with the growth of the economy.

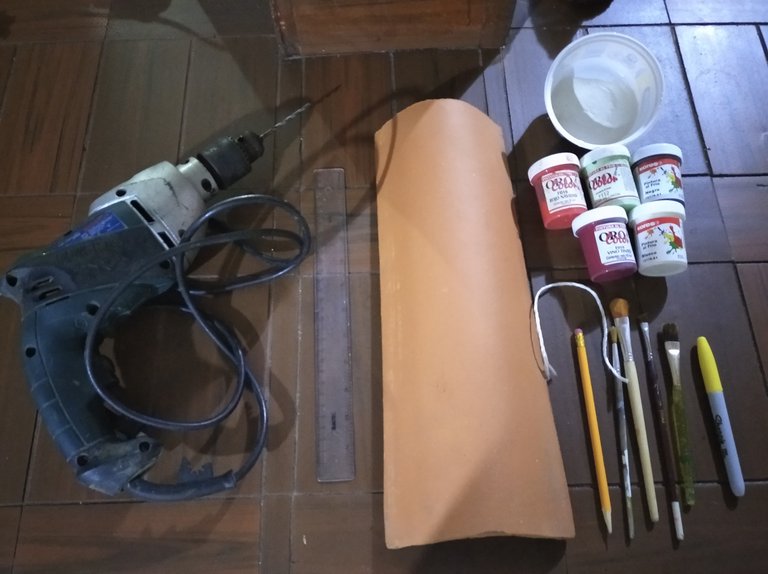
Para realizar esta pieza necesitaremos de los siguientes materiales:
- 1 teja
- 1 taladro
- Regla
- Lápiz
- Borrador
- Pinturas al frío
- Pinceles
- Pasta Profesional
- 20 cm de cordón
To make this piece we will need the following materials:
- 1 tile
- 1 drill
- Ruler
- Pencil
- Draft
- Cold paints
- Brushes
- Professional pasta
- 20 cm of cord
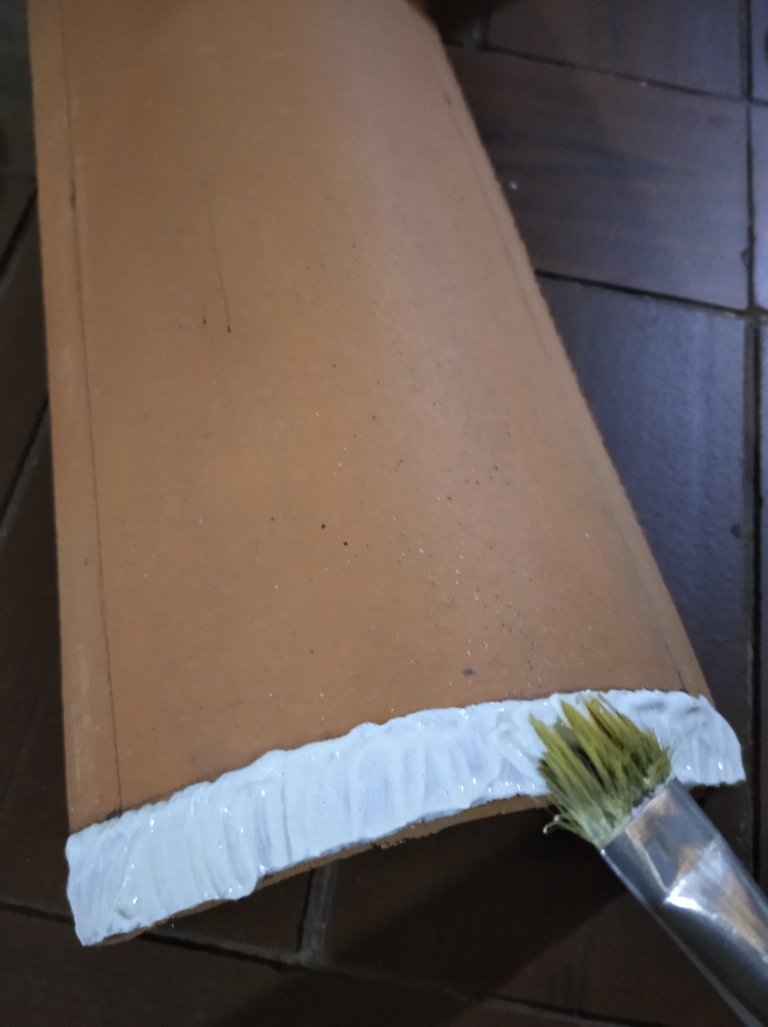
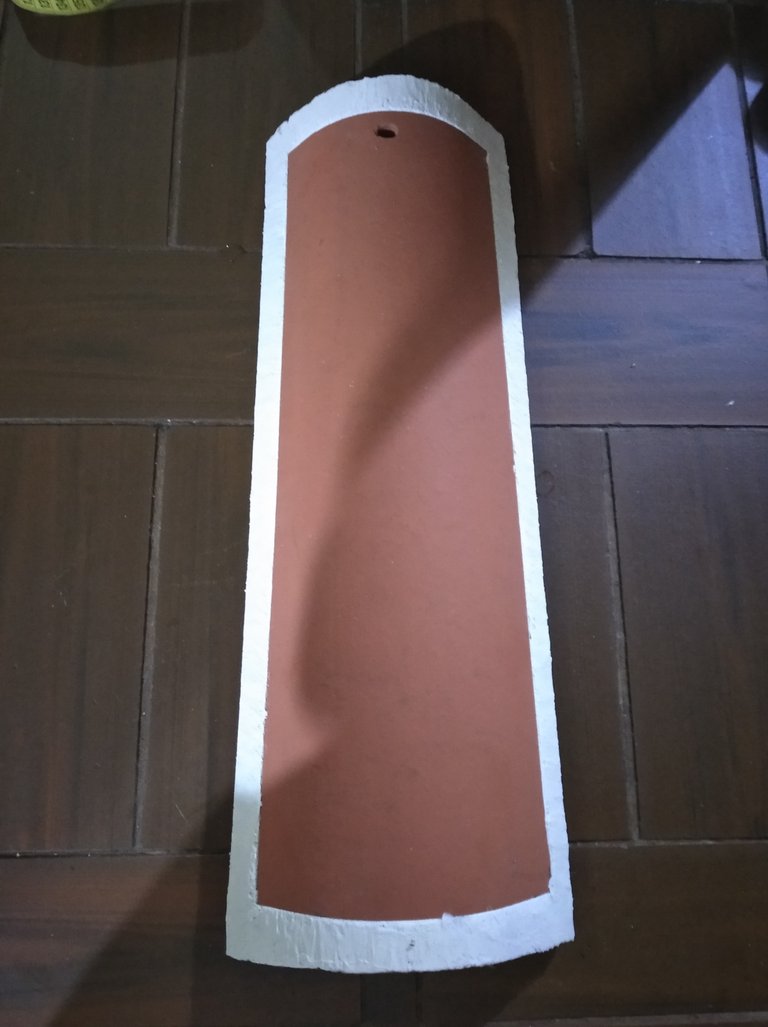
Con la ayua de la regla y el lápiz, marcamos un rectángulo a 2 cm de ditancia del borde de la teja. Luego la rellenamos todo el contorno con nuestra pasta y dejamos secar bien.
Con el taladramos hacemos una perforación a 4 cm de distancia del borde superior.
- With the help of the ruler and the pencil, we mark a rectangle 2 cm away from the edge of the tile- Then we fill it all around with our paste and let it dry well.

- With the drill we make a hole 4 cm away from the upper edge.
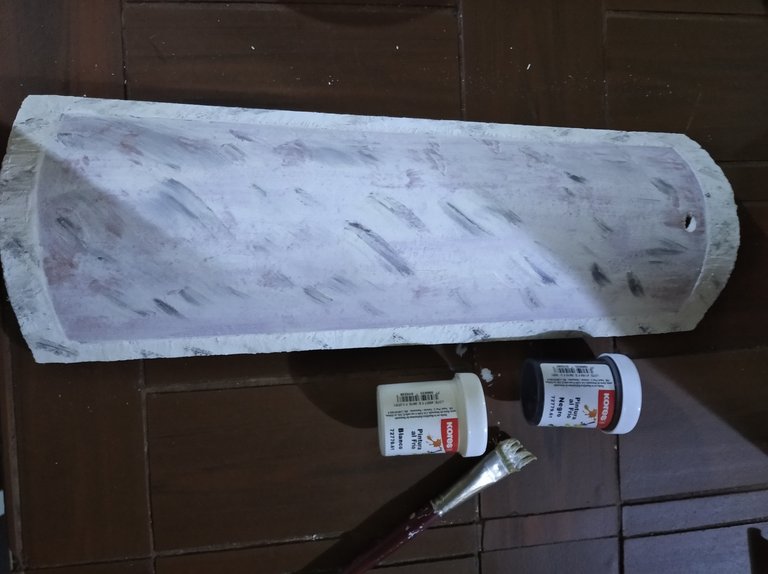
- Pintamos con nuestra pintura al frío blanca toda la teja y dejamos secar. Luego con la pintura negra realizamos unos matices por toda la superficie.
- We paint the entire tile with our cold white paint and let it dry. Then with the black paint we make some shades all over the surface.
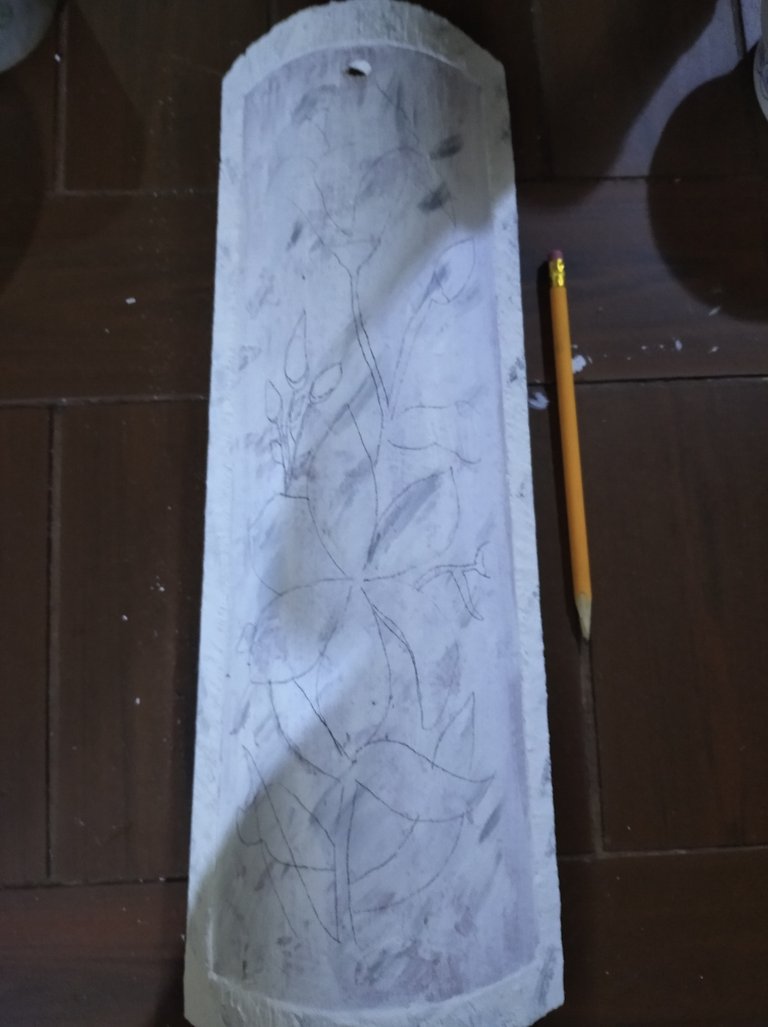
- Una vez seca, plasmamos con el lápiz nuestro diseño seleccionado.
- Once dry, we capture our selected design with the pencil.
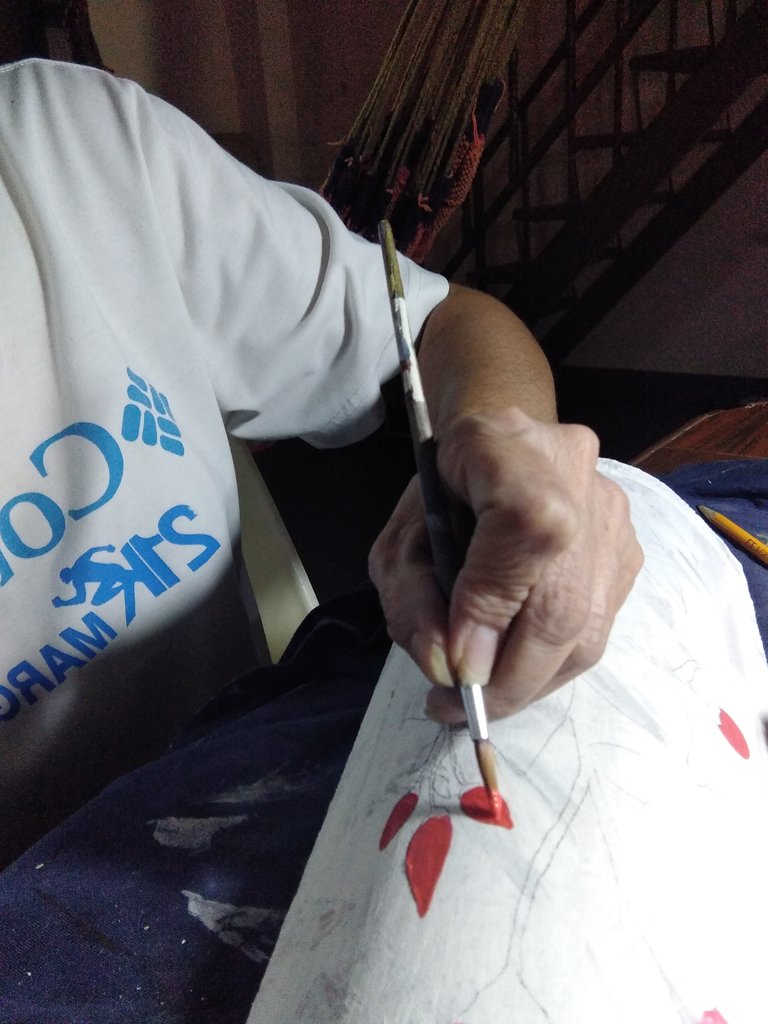
- A continuación procedemos a pintar nuestro dibujo con los colores seleccionados.
- Next we proceed to paint our drawing with the selected colors.
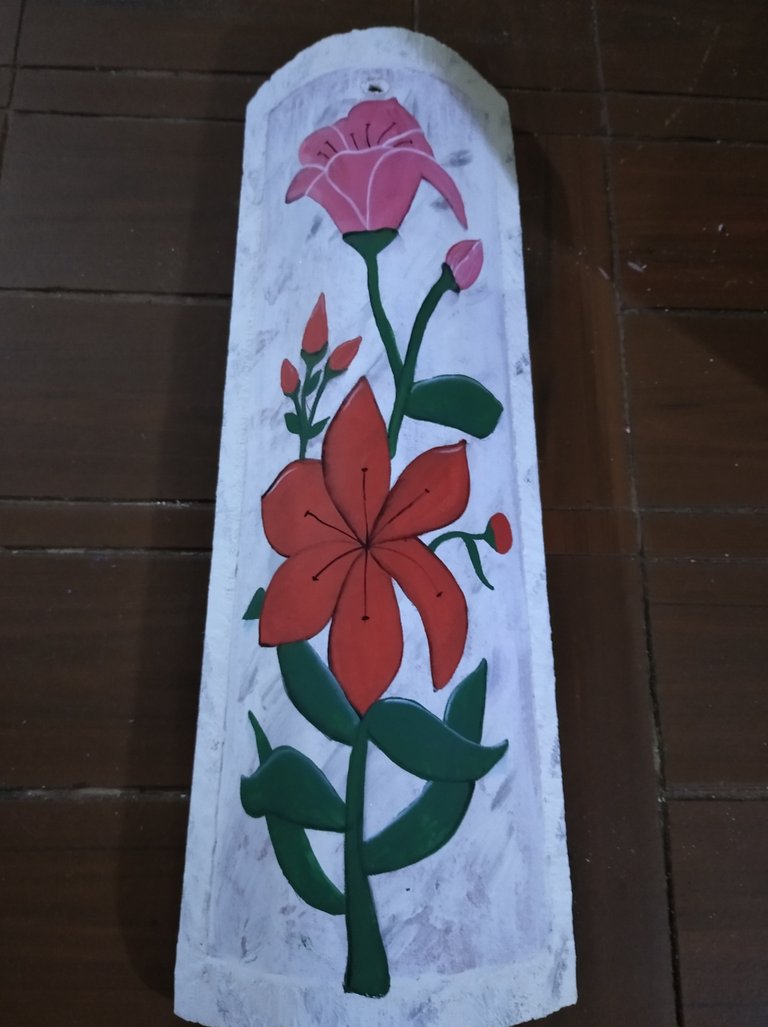
- Aplicamos nuestras técnicas de delineado, difuminado y sombreado para realzar y culminar nuestro diseño. Colocamos el cordón en el hueco perforado y listo.
- We apply our outlining, blurring and shading techniques to enhance and complete our design. We place the cord in the perforated hole and that's it.
Espero les haya gustado y los invito a seguir mis publicaciones y así compartir ideas y opiniones.
¡Muchas Gracias!
Los quiero mucho.
I hope you liked it and I invite you to follow my publications and thus share ideas and opinions.
Thank you so much.
I love you so much
Congratulations @linita! You have completed the following achievement on the Hive blockchain and have been rewarded with new badge(s) :
Your next target is to reach 900 upvotes.
Your next payout tagret is 50 HP.
The unit is Hive Power equivalent because your rewards can be split into HP and HBD
You can view your badges on your board and compare yourself to others in the Ranking
If you no longer want to receive notifications, reply to this comment with the word
STOPCheck out the last post from @hivebuzz:
Curador: @Mariale07
Waoo nunca se me habría ocurrido hacer una manualidad con una teja, te quedó increible. Felicidades, gracias por compartir. Saludos y Bendiciones!