¡Feliz Noche Comunidad Creativa! | ¡Happy Night Creative Community!
Hace mucho que no compartía un post en esta comunidad y el día de hoy he decidido traerles un tutorial muy fácil para elaborar un lindo reno con foami y un tubo de cartón, es ideal para decorar en esta época y dar ese toque navideño a nuestro hogar, a continuación les dejo el paso a paso y espero que les guste ❣
It has been a long time since I shared a post in this community and today I decided to bring you a very easy tutorial to make a cute reindeer with foam and a cardboard tube, it is ideal to decorate at this time and give that Christmas touch to our home , then I leave you the step by step and I hope you like it ❣

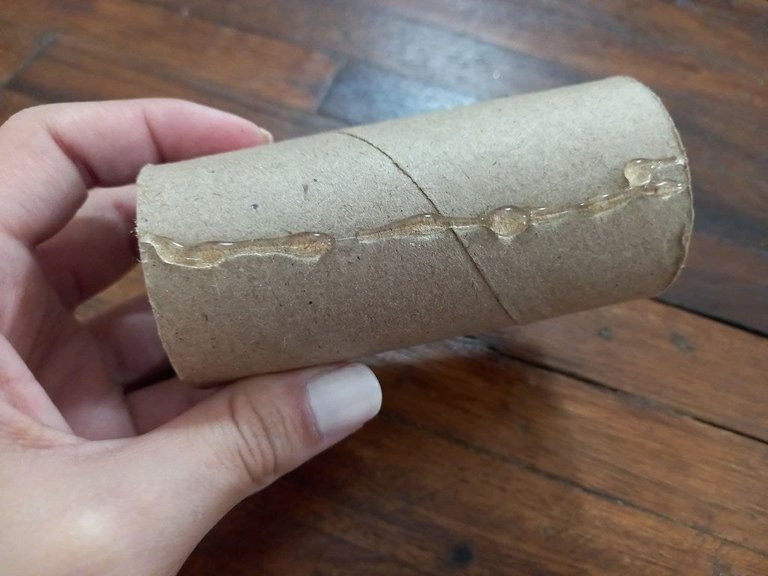
- 1 Tubo de cartón.
- Foami escarchado marrón claro.
- Foami escarchado marrón oscuro.
- Foami escarchado blanco.
- Foami escarchado negro.
- Foami escarchado rojo.
- Foami escarchado dorado.
- Hoja de papel.
- Tijera.
- Lápiz.
- Regla.
- Abrehuecos.
- Silicón.
- Pistola de silicón.
- 1 cardboard tube.
- Light brown frosted foam.
- Dark brown frosted foam.
- White frosted foam.
- Black frosted foam.
- Red frosted foam.
- Golden frosted foam.
- Paper sheet.
- Scissor.
- Pencil.
- Rule.
- Open holes.
- Silicone.
- Silicone gun.


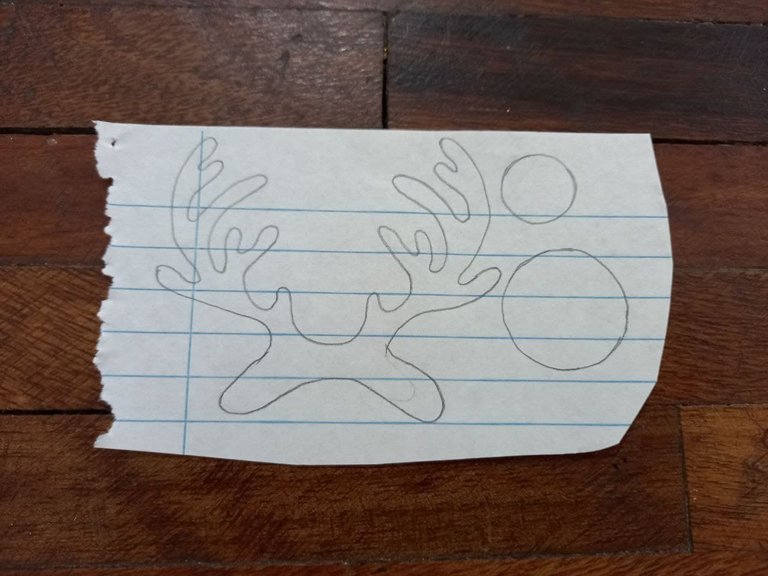
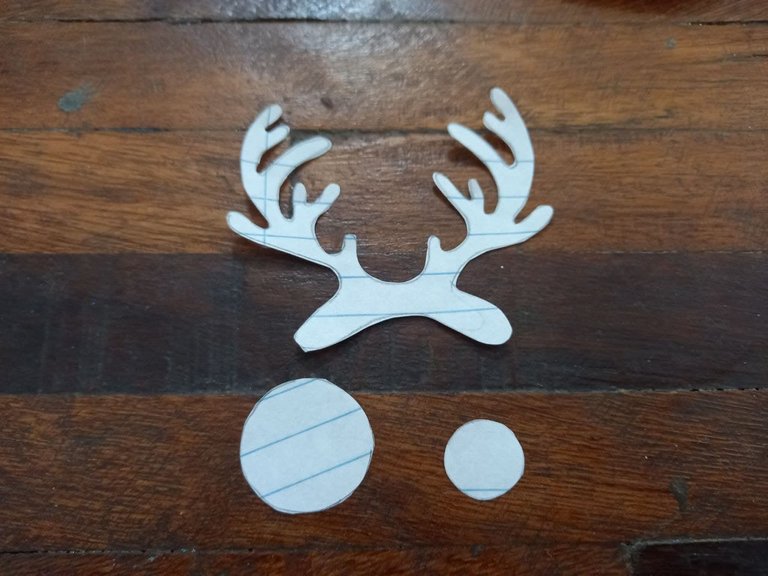
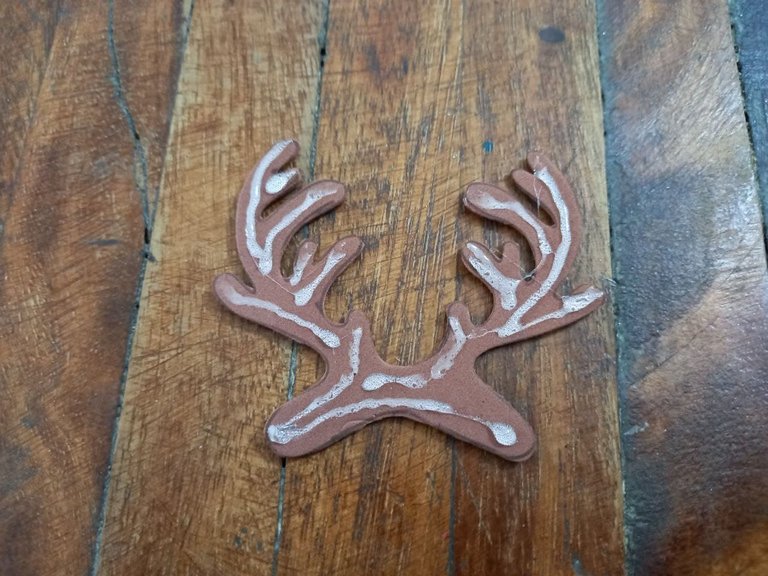
🎄 PASO 1. En la hoja de papel vamos a dibujar los cuernos del reno del tamaño adecuado para colocarlos sobre el tubo de cartón, también necesitamos 2 círculos, uno mediano para la nariz y otro más pequeño para los ojos, ahora pasamos las figuras al foami del color que corresponde, los cuernos en marrón oscuro, la nariz en rojo y los ojos en blanco y recortamos.
🎄 STEP 1. On the sheet of paper we are going to draw the antlers of the reindeer of the right size to place them on the cardboard tube, we also need 2 circles, a medium one for the nose and a smaller one for the eyes, now we pass the figures to the foami of the corresponding color, the horns in dark brown, the nose in red and the eyes in white and cut out.


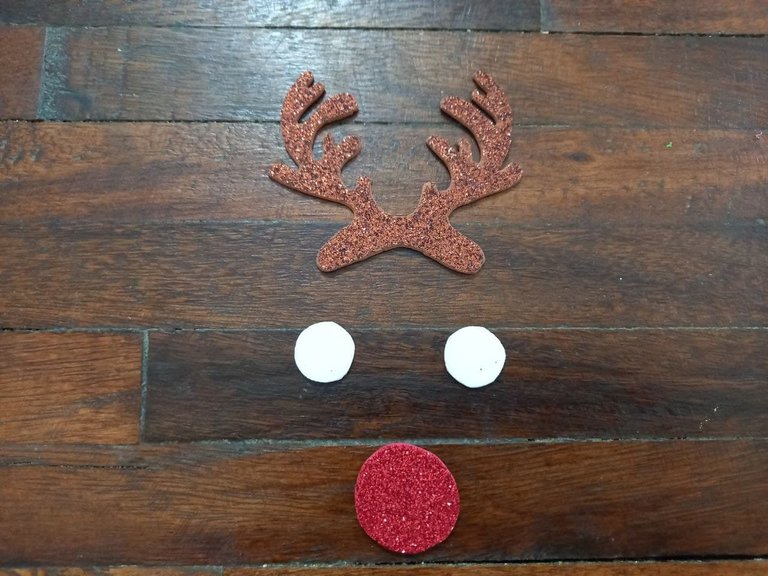
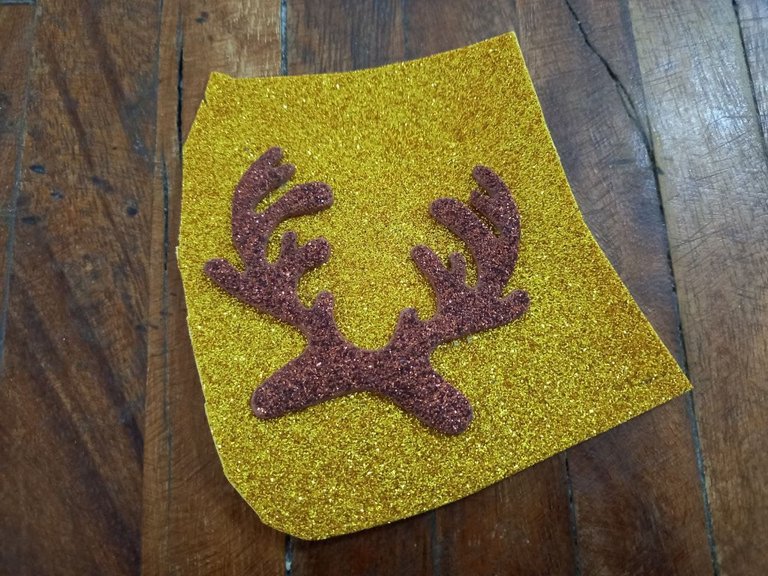
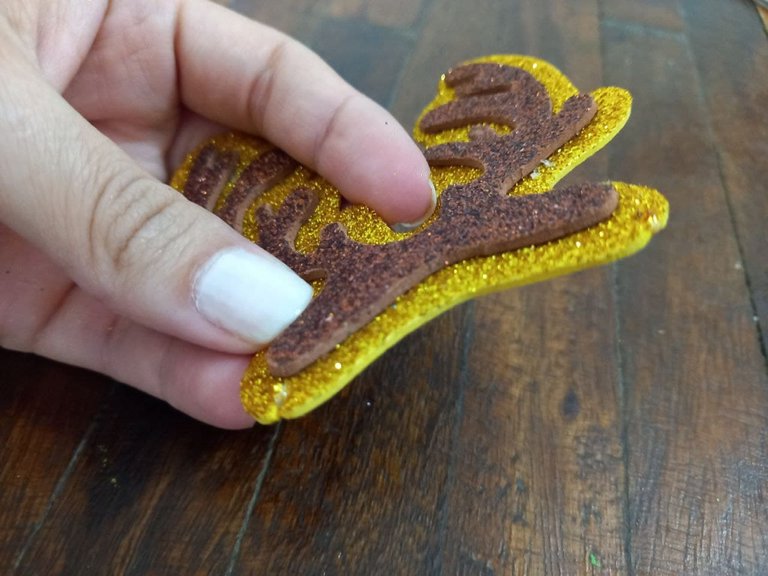
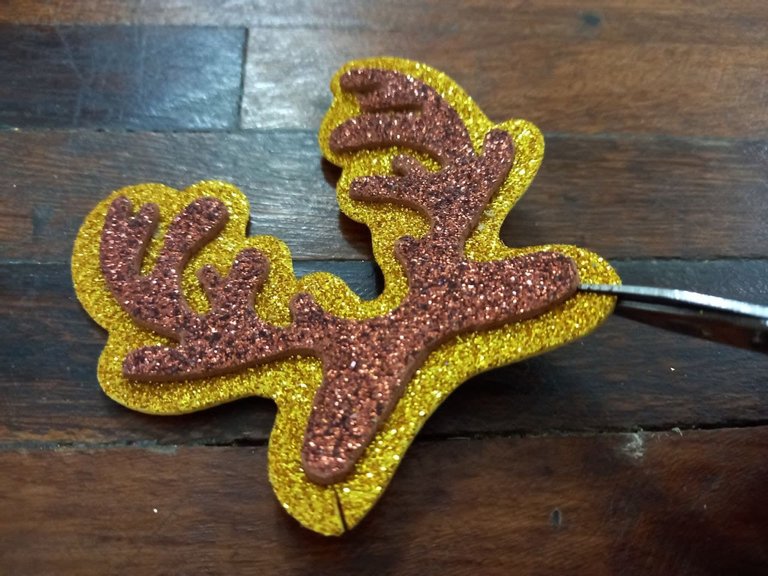
🎄PASO 2. Aplicamos silicón en la parte trasera de los cuernos y los pegamos sobre el foami dorado, luego recortamos dejando un delgado borde de foami dorado alrededor de los cuernos.
🎄 STEP 2. We apply silicone to the back of the horns and glue them over the golden foami, then we cut out leaving a thin edge of golden foami around the horns.

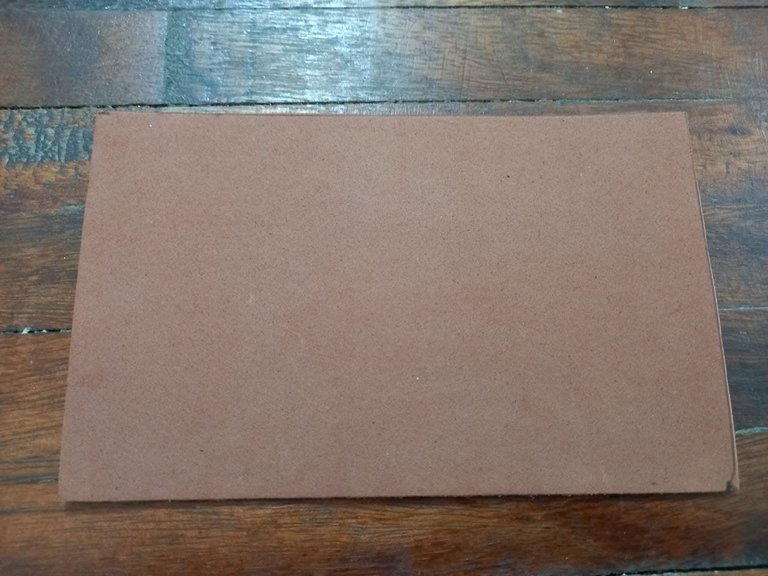
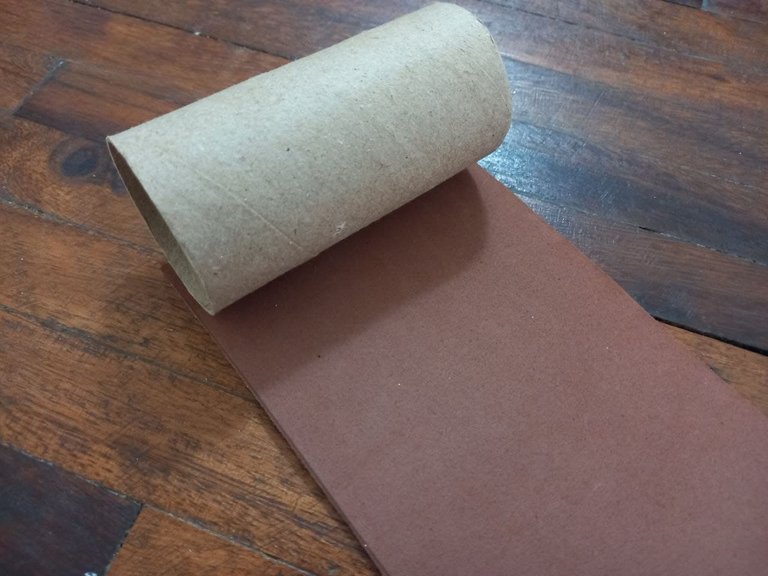
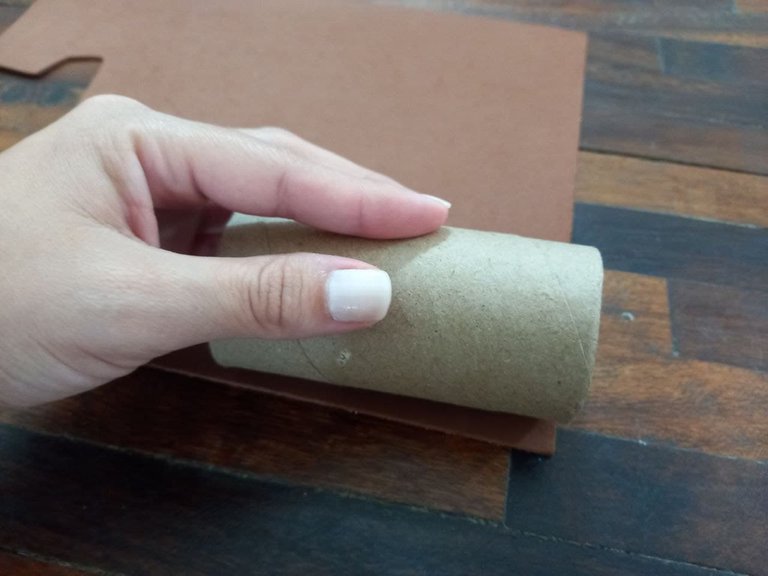
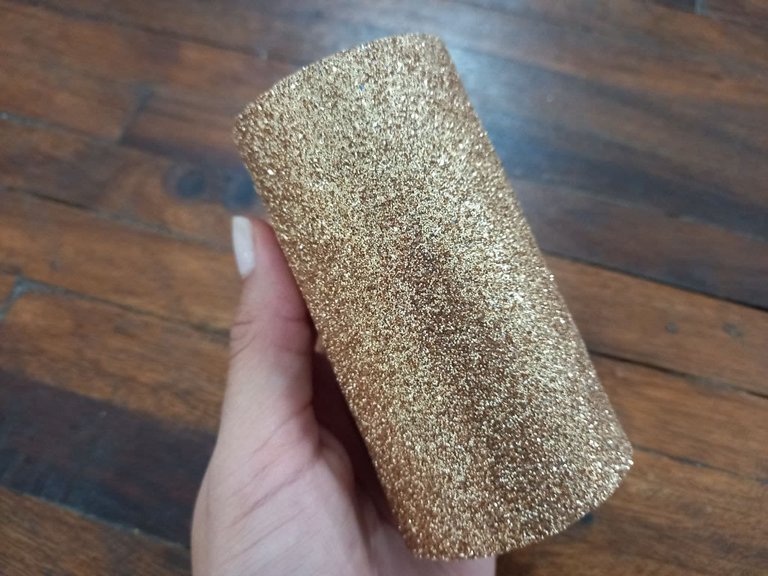
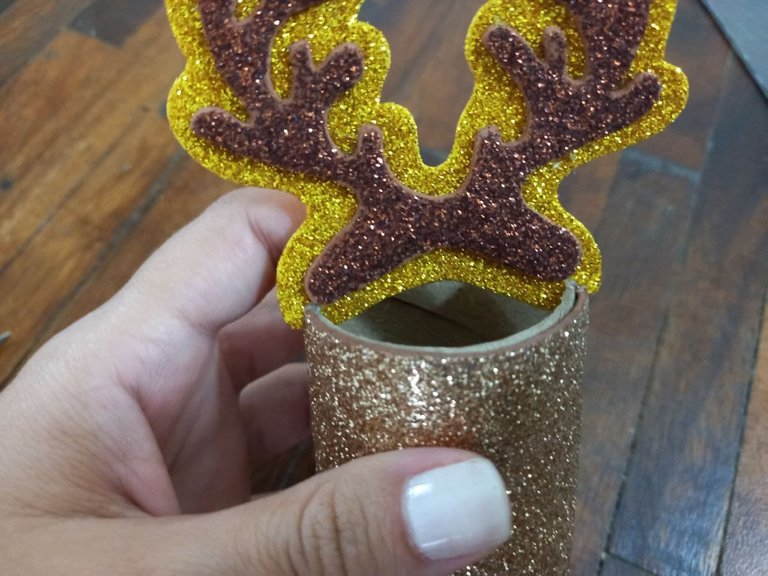
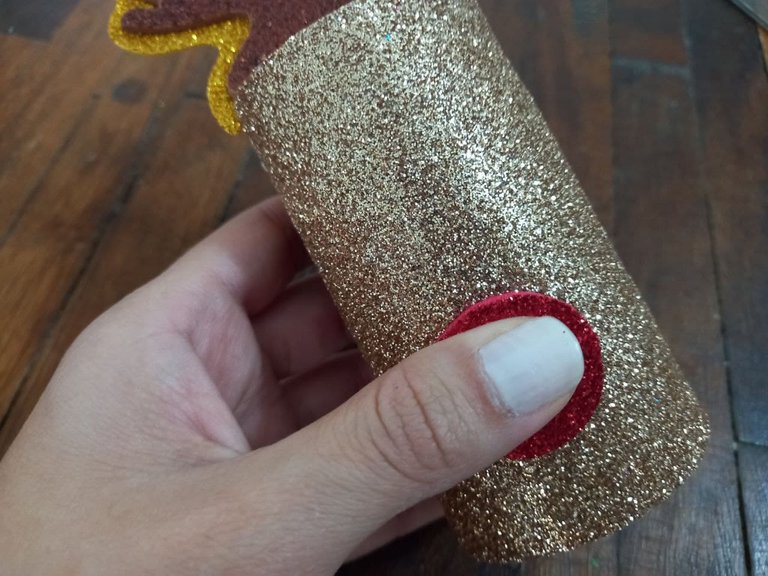
🎄PASO 3. Con ayuda de la regla medimos el foami marrón claro del tamaño justo para cubrir el tubo de cartón, luego comenzamos a forrarlo con el foami hasta cubrirlo por completo.
🎄 STEP 3. With the help of the ruler we measure the light brown foam of the right size to cover the cardboard tube, then we begin to line it with the foam until it is completely covered.
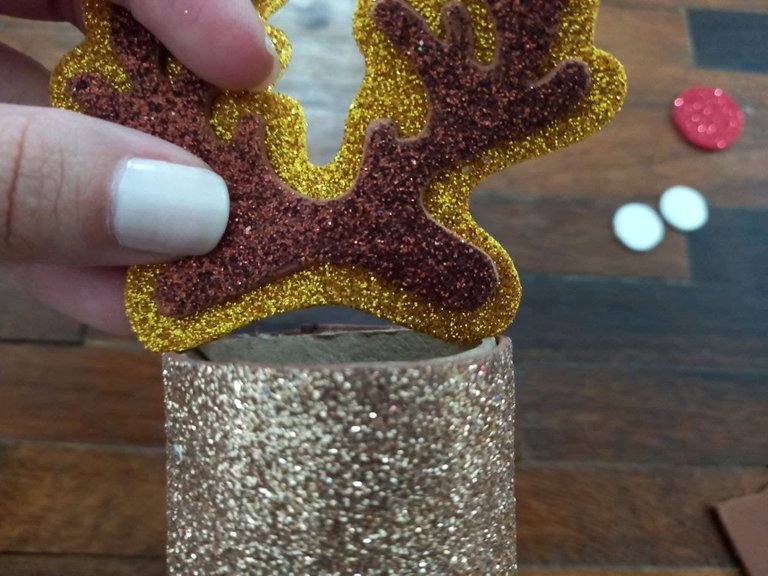
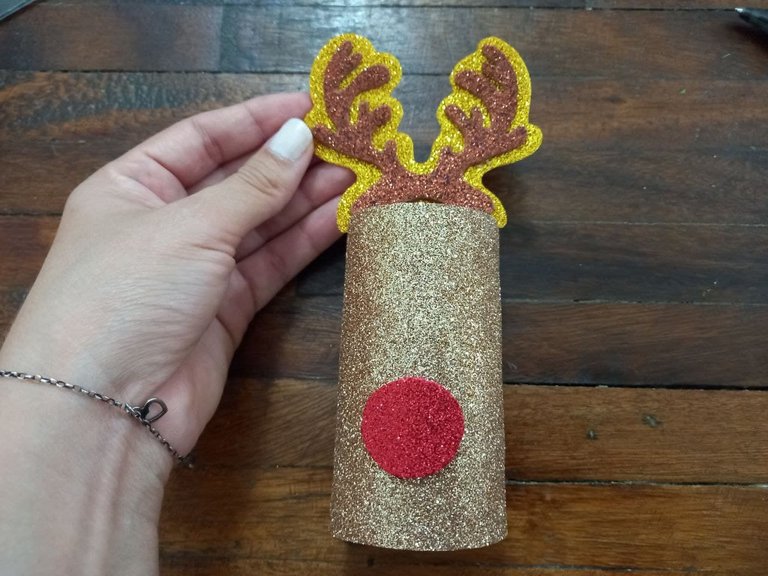
🎄PASO 4. Colocamos los cuernos sobre el tubo de cartón ya forrado con foami y con la tijera hacemos un pequeño corte en cada extremo de los cuernos que toca el tubo de cartón, aplicamos silicón en el corte y los pegamos sobre el tubo de cartón.
🎄 STEP 4. We place the horns on the cardboard tube already lined with foam and with the scissors we make a small cut at each end of the horns that touches the cardboard tube, we apply silicone in the cut and stick them on the cardboard tube.
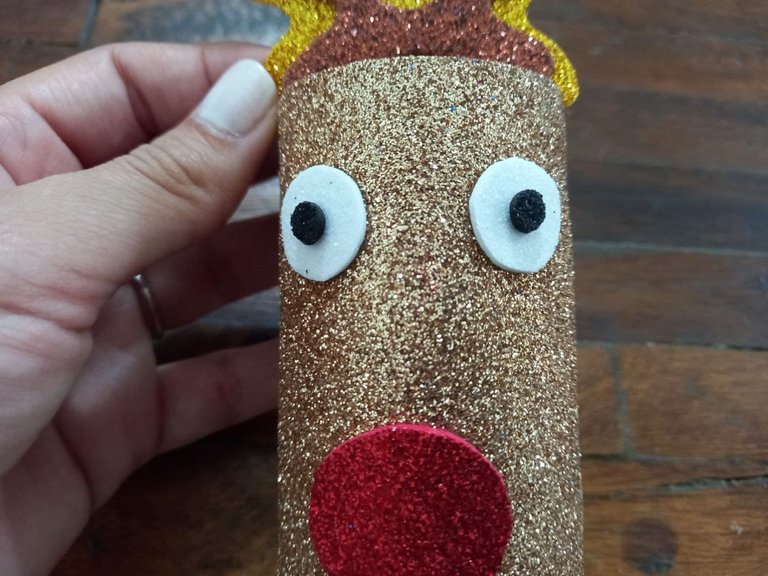
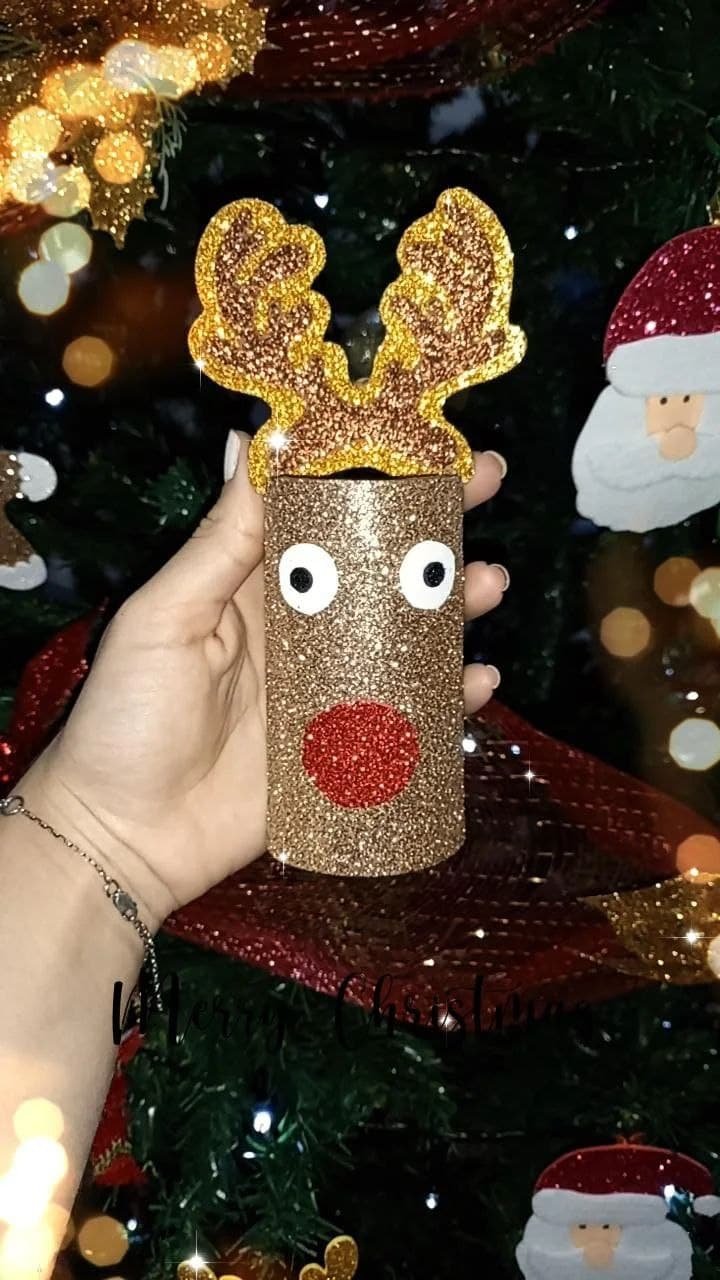
🎄PASO 5. Pegamos la nariz en el centro del tubo de cartón un poco por debajo de la mitad, luego pegamos los ojos y con el abrehuecos hacemos 2 círculos en foami color negro y los pegamos sobre los ojos.
🎄 STEP 5. We glue the nose in the center of the cardboard tube a little below the middle, then we glue the eyes and with the hole opener we make 2 circles in black foami and glue them over the eyes.
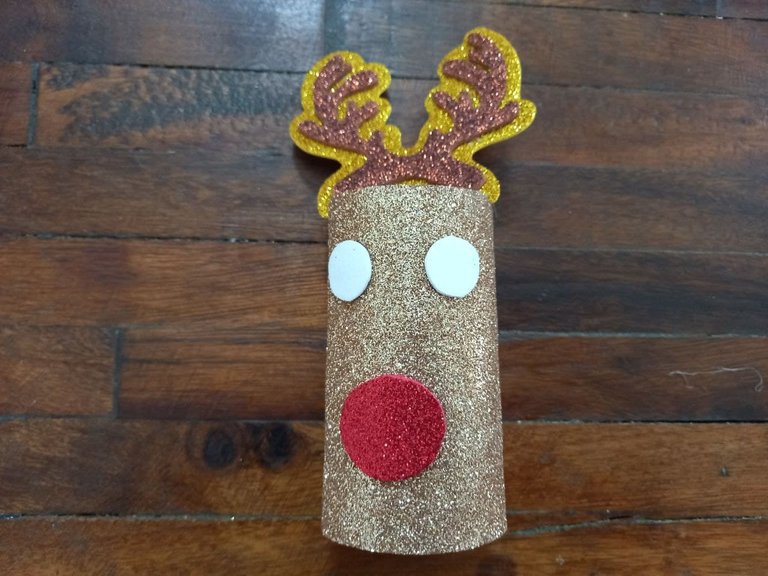
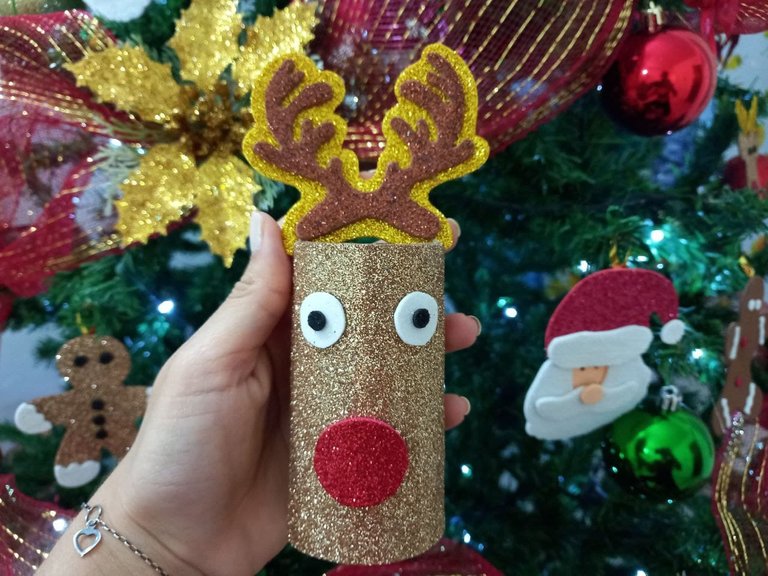
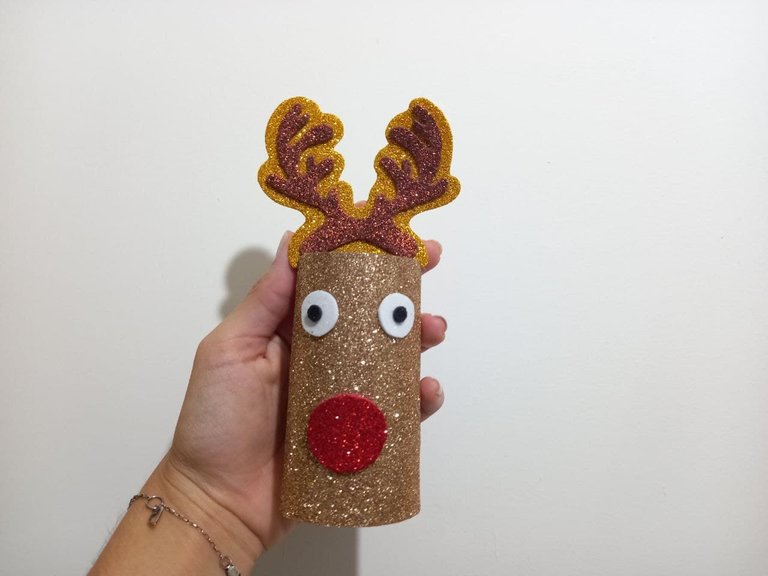
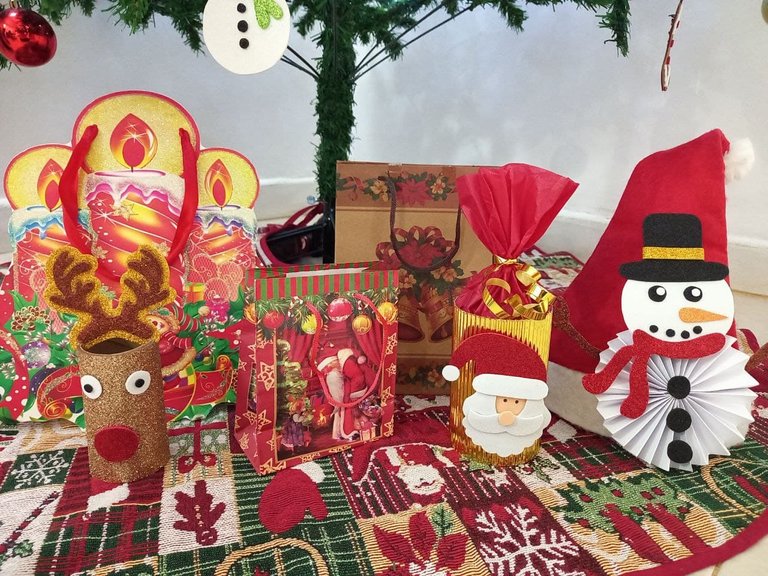
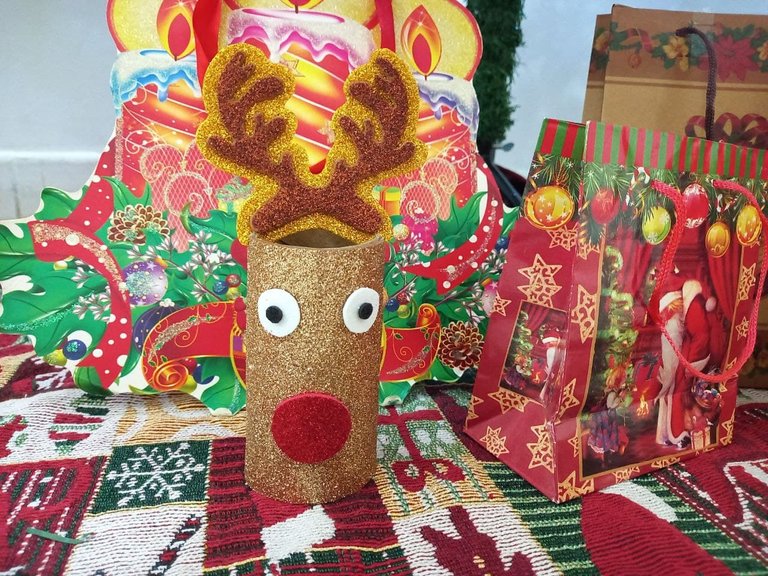
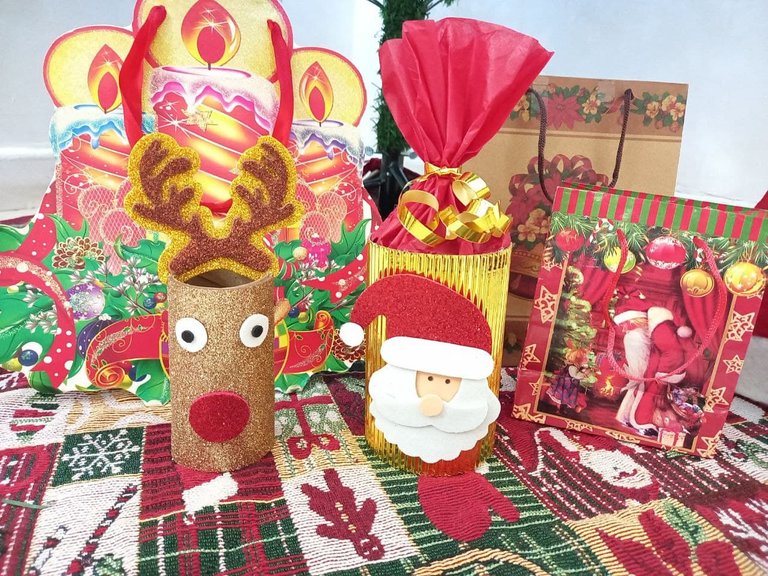
¡Y listo! De esta manera tan sencilla tenemos un lindo adorno para decorar cualquier espacio de nuestro hogar en navidad, es muy fácil de hacer y a la vez es tan lindo que en cualquier parte luce muy bien. Espero que les haya gustado este tutorial y se animen a elaborar esta linda idea en casa 💟
¡And ready! In this simple way we have a nice ornament to decorate any space in our home at Christmas, it is very easy to do and at the same time it is so cute that it looks great anywhere. I hope you liked this tutorial and are encouraged to make this nice idea at home 💟


Todas las fotografías son de mi propiedad.
Fotografías capturadas con mi Samsung Galaxy A12
Nos vemos en mi próxima publicación.
¡Tengan un feliz día!
All photographs are my property.
Photos captured with my Samsung Galaxy A12
See you in my next post.
¡Have a happy day!
Que precioso te quedó este reno 😍😍😍🎄❤️.
Mucha sgracias, me alegra mucho que te haya gustado ♥️ un abrazo!
The rewards earned on this comment will go directly to the person sharing the post on Twitter as long as they are registered with @poshtoken. Sign up at https://hiveposh.com.
Muchas gracias por el apoyo brindado, un abrazo! ♥️