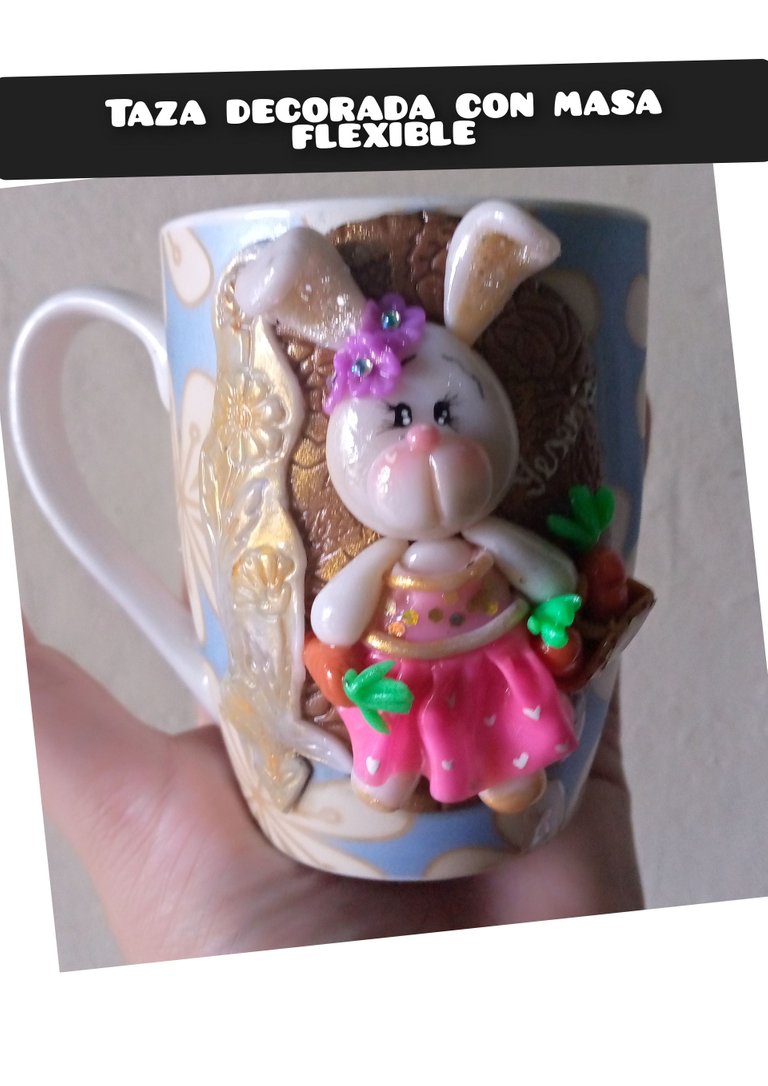
Hello! Hive family, I want to confess that I am a lover of crafts where one can create many things, either as ventures or for special details such as the ones I am going to show you, they are cups made with flexible dough of different designs, I hope you like it and I will be leaving you step by step.
Materiales usados
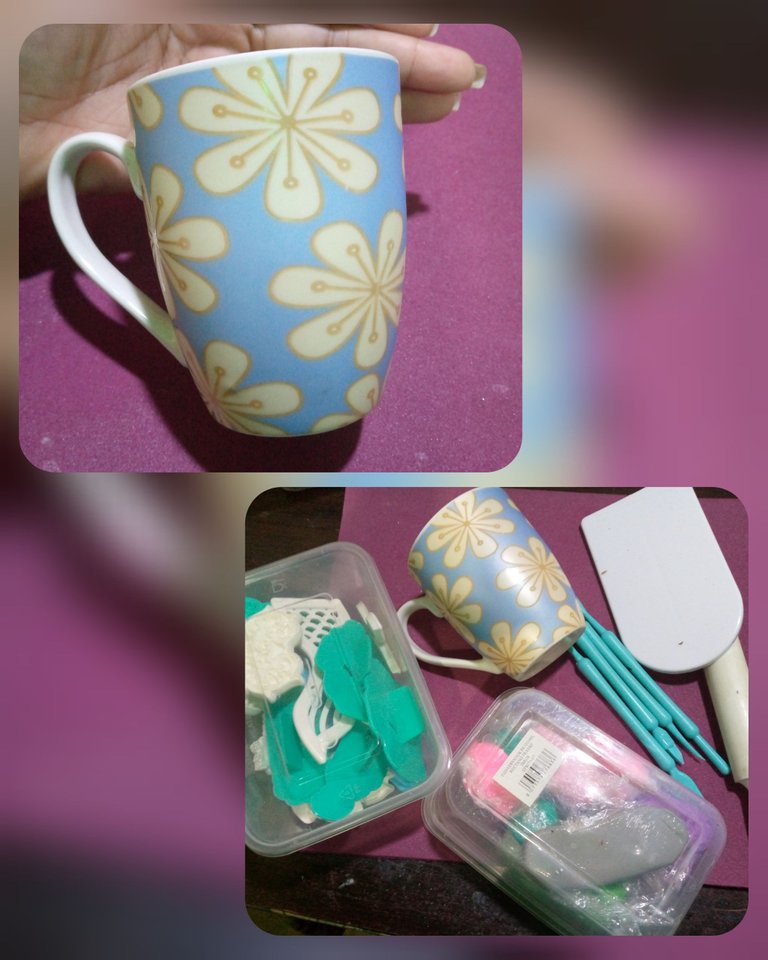
Masa flexible de varios colores
Estecas de moldeado
Rodillo liso
Moldes
Pinturas
Pinceles
Algunas sombras de maquillaje
Paso 1
Step 1
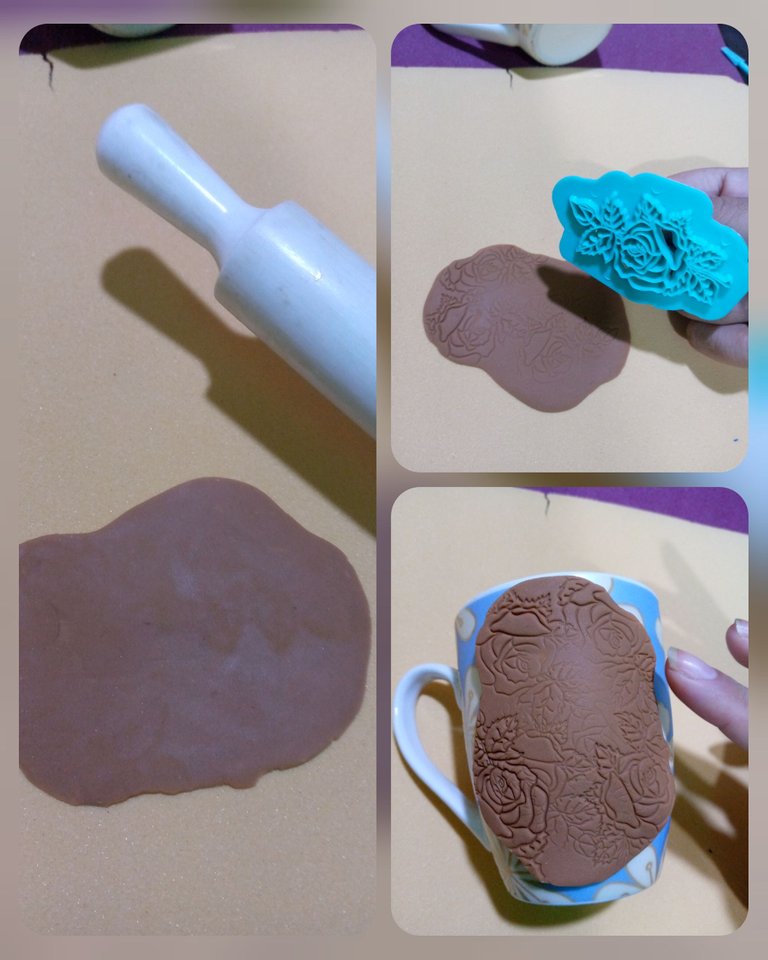
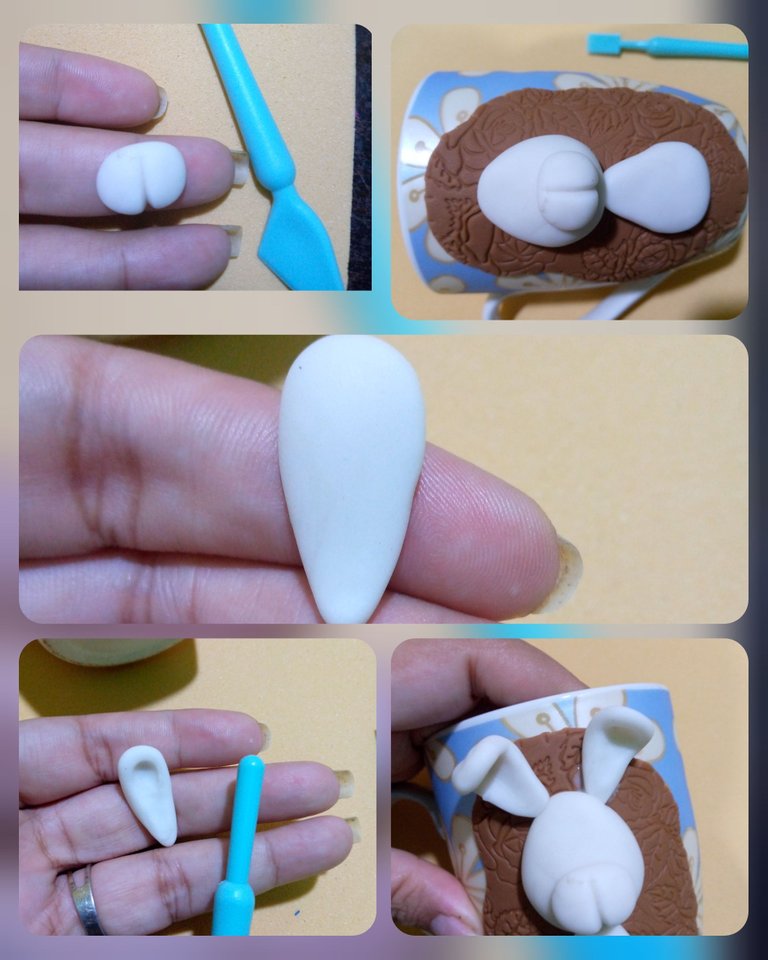
As you can see in the photograph of the usa, an ordinary cup, in this case I used one that I had already used, that doesn't matter, I start by stretching brown dough because it would be the basis of the design, to give details I use flat mold.
Paso 2
Step 2
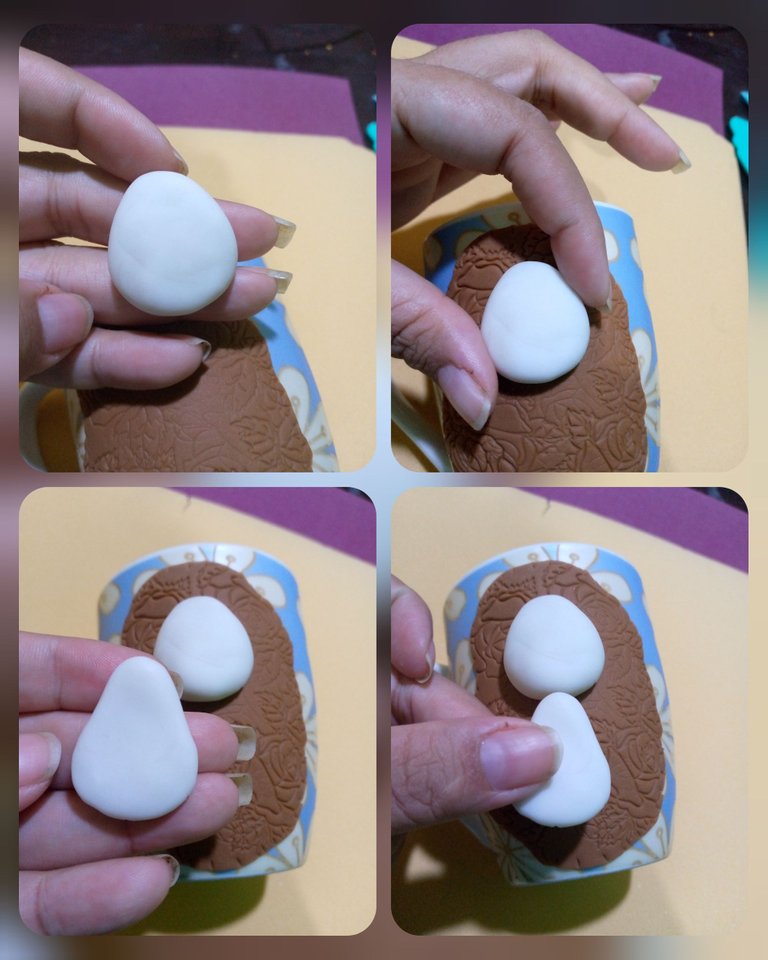
I begin by forming the body of the little piggy bank, the head is a ball and the body an elongated drop, I use white dough, it should be noted that white school glue is used for the joints, but the mug shouldn't be glued on yet because we're just using it as a base for the piece to dry.
Paso 3
Step 3
We continue with details of the trunk, a circle divided in two and the ears two elongated drops
Paso 4
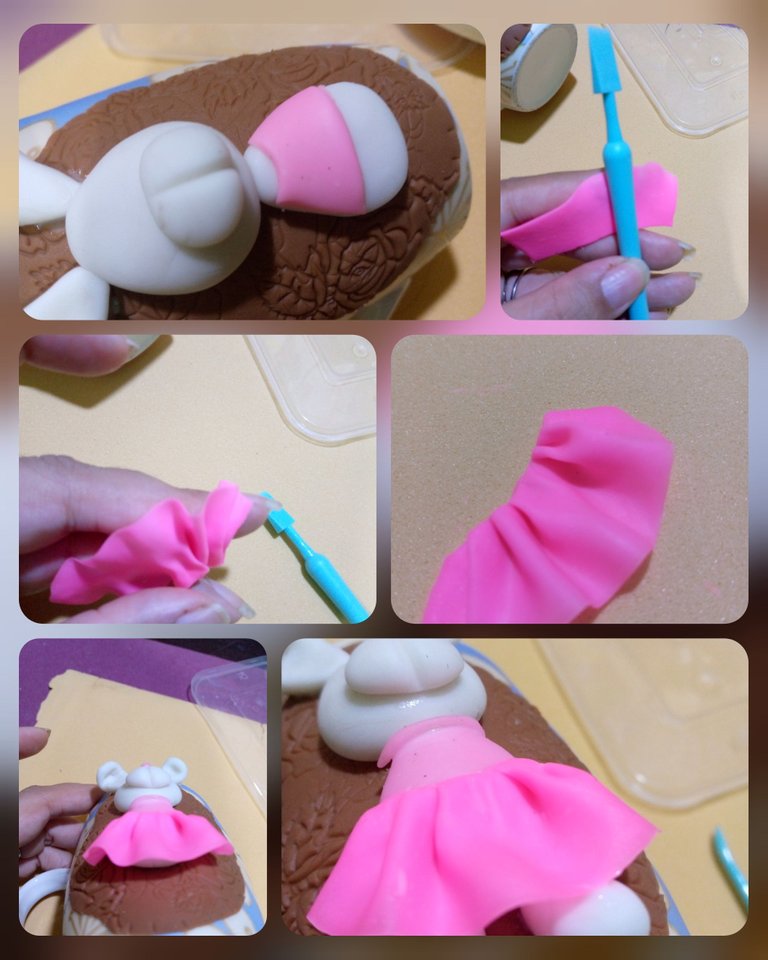
Sin embargo para realizar la falda hacemos pliegues ayudándonos con una estética de moldeado y cortando para hacer detalles de la falda con la misma masa flexible de color rosado.
Step 4
The bunny has to be dressed, the upper part is achieved by stretching the flexible dough a little with the rolling pin, it must be of the desired color, in this case, use a pink tone, we cut it and shape it to be perfect to the top.However, to make the skirt, we make folds, helping us with a molding aesthetic and cutting to make details of the skirt with the same flexible pink dough.
Paso 5
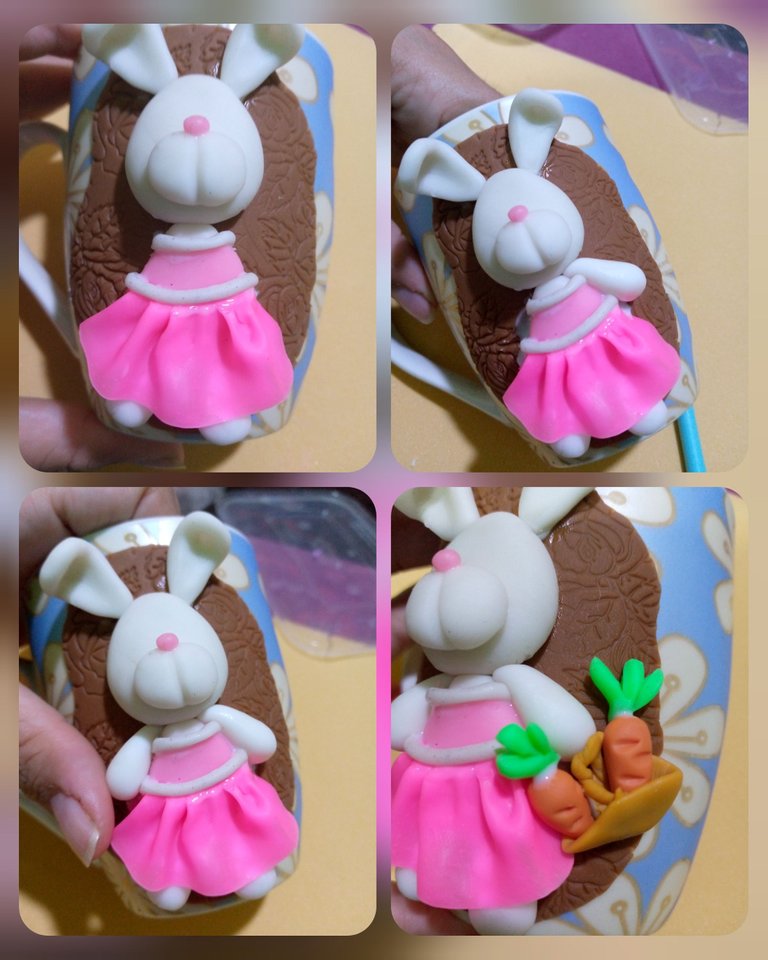
Aquí podemos observar la conejita totalmente vestida con la parte de arriba del vestido y la parte de la falda también agregue algunos detalles de zanahoria de una cesta para hacer más realismo el conejitoStep 5
Here we can see the bunny fully dressed with the top part of the dress and the skirt part also add some carrot details from a basket to make the bunny more realistic
Paso 6
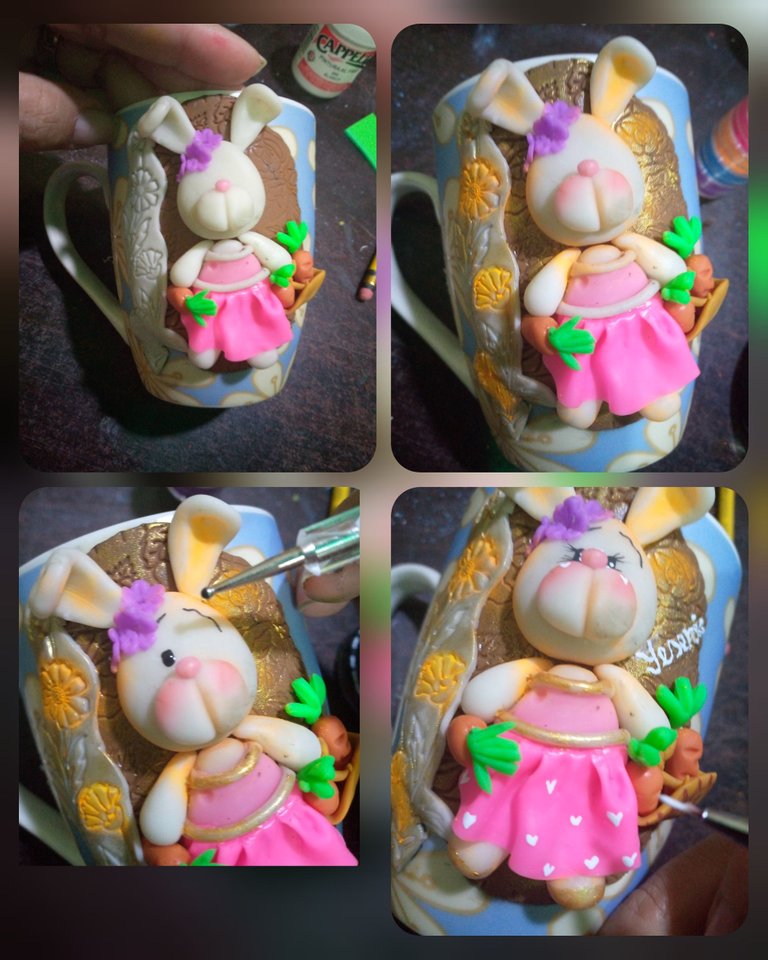
Para finalizar hacemos detalles de pintura utilizando un pincel fino y un puntero dónde esto nos ayuda a definir los detalles y los rasgos de la conejita y de la tasa como tal agregó algunos detalles de masa flexible a los lados y esto hace mejor vista la taza como tal, cabe destacar para que está taza podía ser utilizada luego como otra utensilio como tal se debe dejar secar por 24 horas el diseño de masa flexible luego este debe despegarse y lijar la base dónde fue moldeada es decir la taza. Para que la figura quede adherida a la tasa se debe hacer una mezcla de pega para cerámica esto dura aproximadamente 2 horas en secar luego para la protección de la misma se utiliza una capa de resina epóxica. De esta manera la taza puede ser utilizada como cualquier otra taza a excepción que no se puede meter en microondas.Espero les haya gustado el paso a paso de esta taza y que lo pongan en práctica cualquier duda pueden escribir y yo les estaré aclarando.
Step 6
Finally we paint details using a fine brush and a pointer where this helps us define the details and features of the bunny and the rate as such added some details of flexible mass to the sides and this makes the cup better visible as such, it should be noted that this cup could be used later as another utensil as such, the design of flexible mass must be allowed to dry for 24 hours, then it must be peeled off and sanded the base where it was molded ie the cup. In order for the figure to adhere to the rate, a mixture of ceramic paste must be made. This takes approximately 2 hours to dry, then a layer of epoxy resin is used to protect it. In this way the mug can be used like any other mug except that it cannot be microwaved.I hope you liked the step by step of this cup and that you put it into practice, any doubt you can write and I will clarify it for you.

Hermosa!
Gracias amiga
It was a pleasure😉
Fué un gusto 😉