Tutorial for making a basic and beautiful topper

Espero se encuentren súper bien, a veces queremos realizar un pastel sencillo o sin ningún motivo especial ya sea para una celebración personal o para dar un pequeño obsequio y no sabemos que hacer, así que hoy les mostraré como realizar un topper básico, es bastante facil de hacer y son muy pocos los materiales que se necesitan, a continuación te muestro todos los pasos. Los colores y el diseño es decisión personal, ya que el proceso que te mostraré se pueden utilizar en cualquier diseño.


I hope you are super well, sometimes we want to make a simple cake or without any special reason either for a personal celebration or to give a small gift and do not know what to do, so today I will show you how to make a basic topper, it is quite easy to do and very few materials are needed, then I show you all the steps. The colors and design is a personal decision, since the process I will show you can be used in any design.

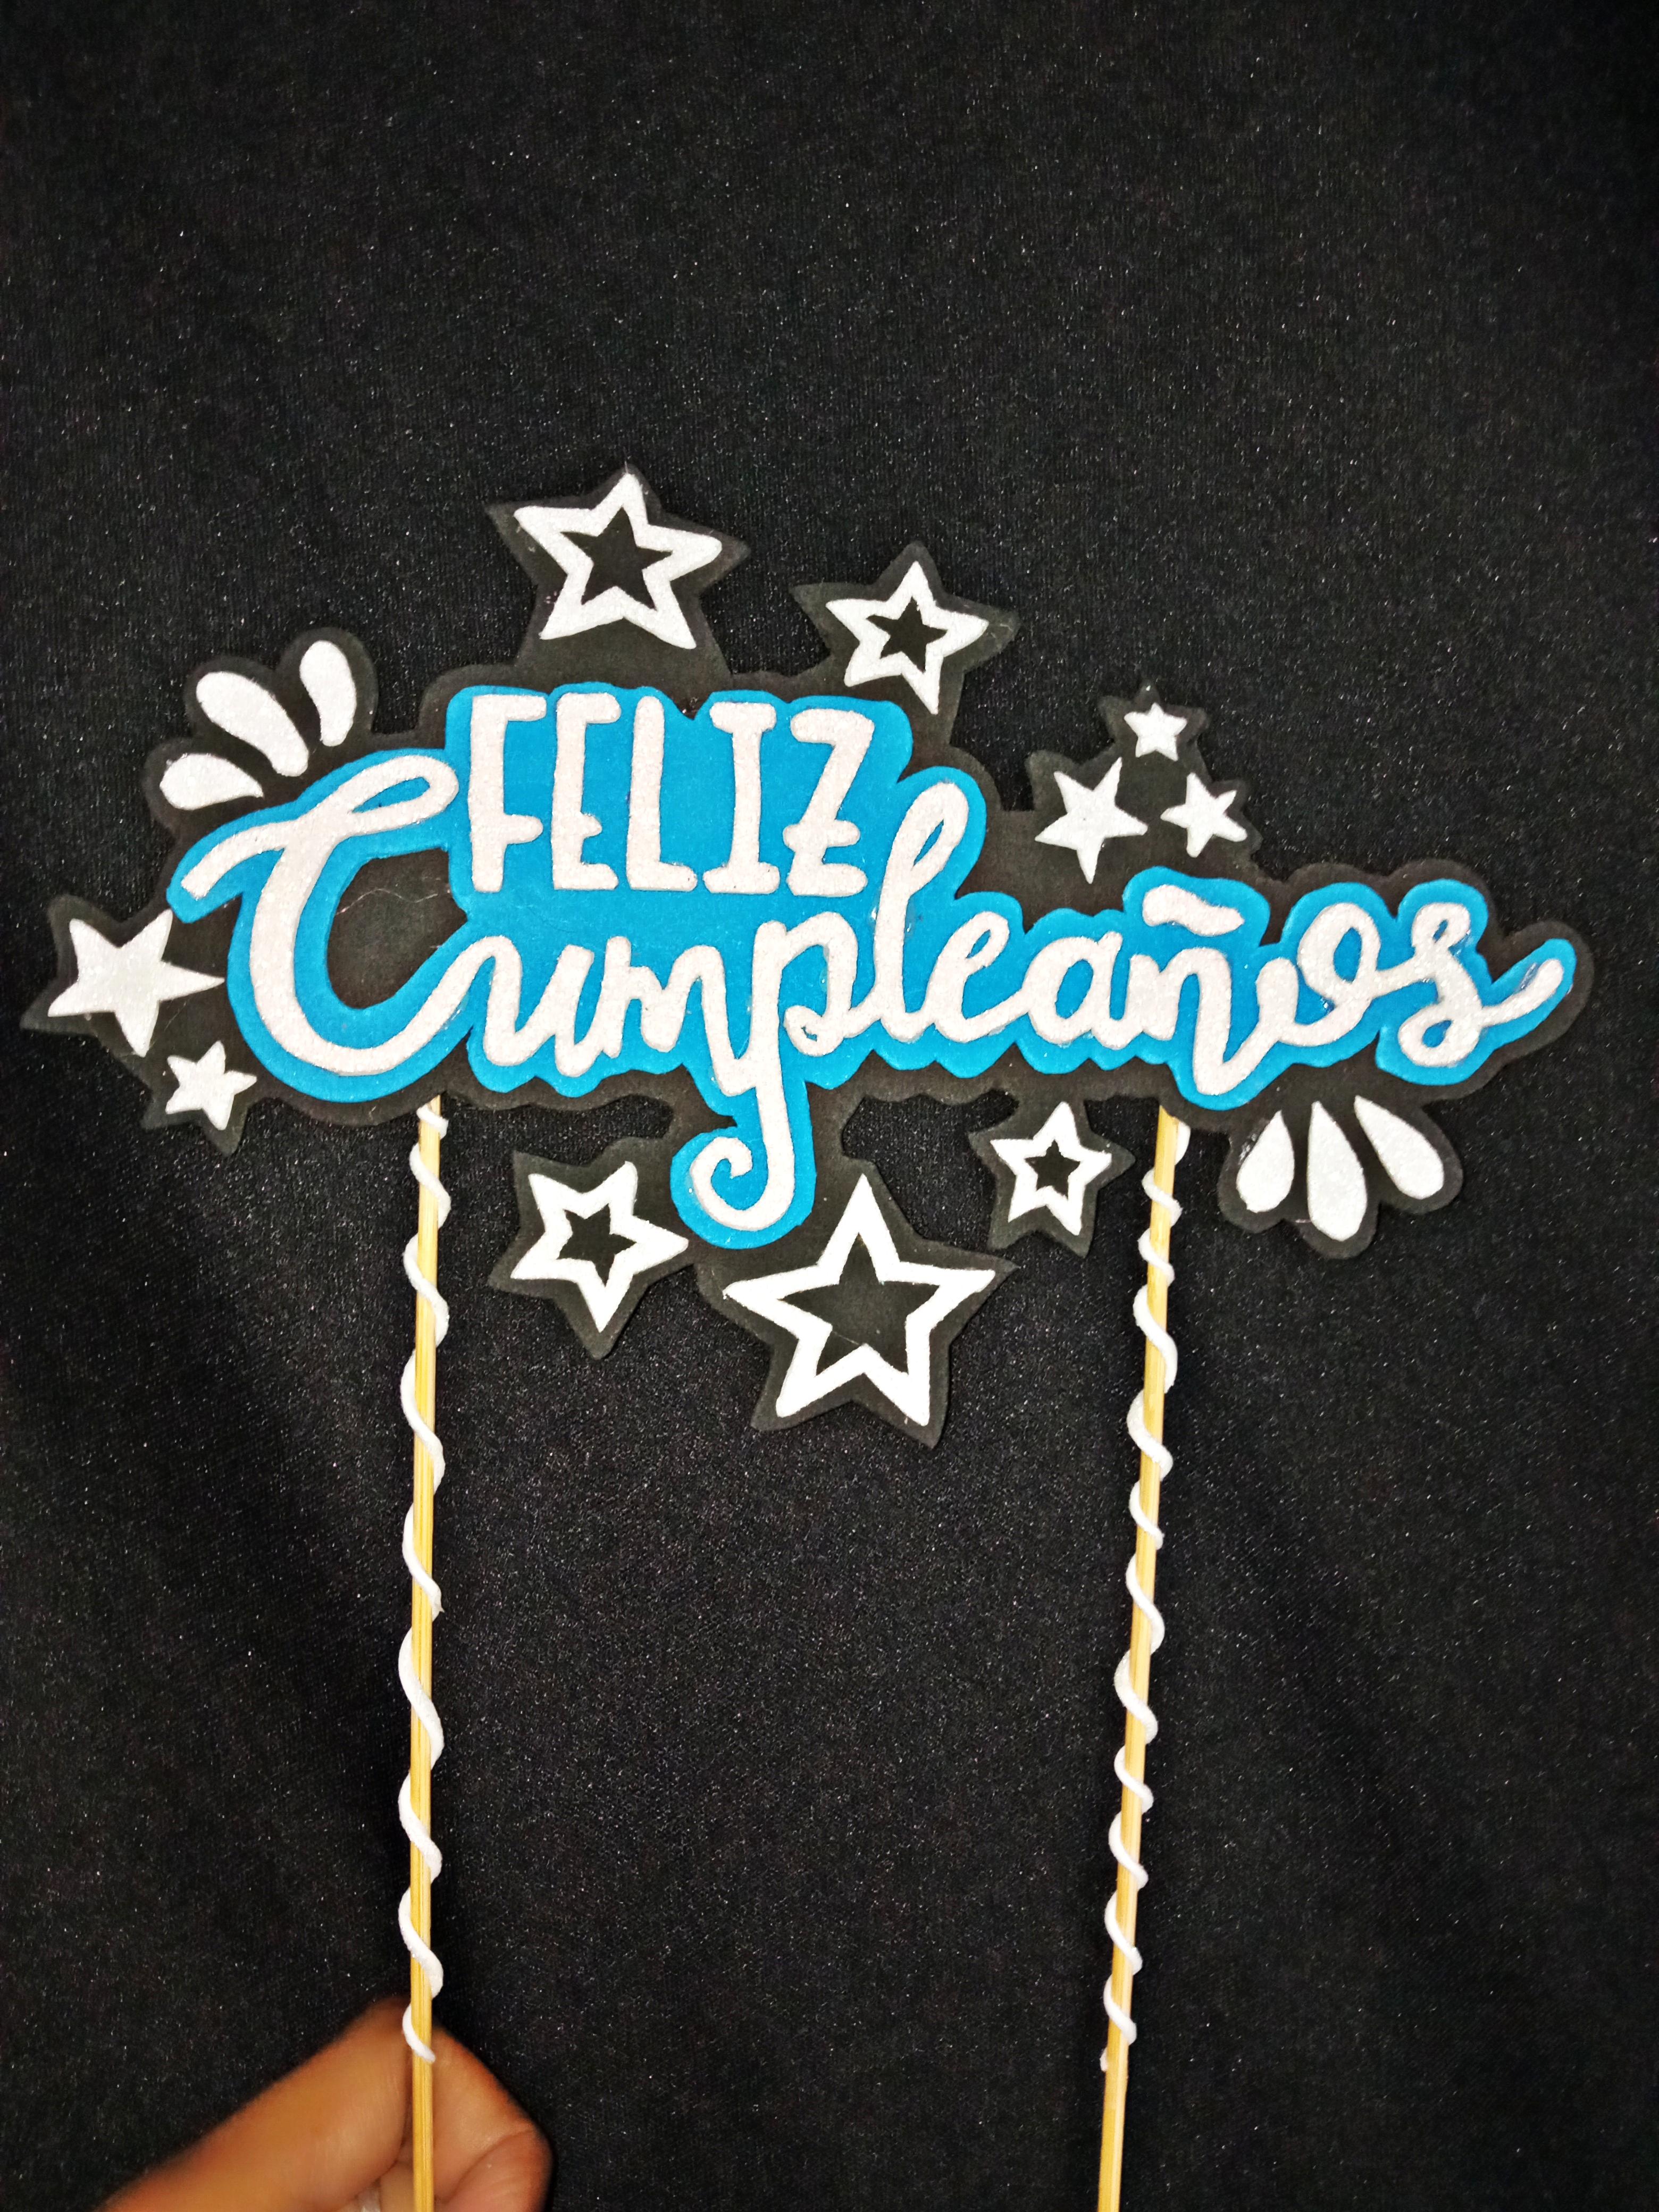
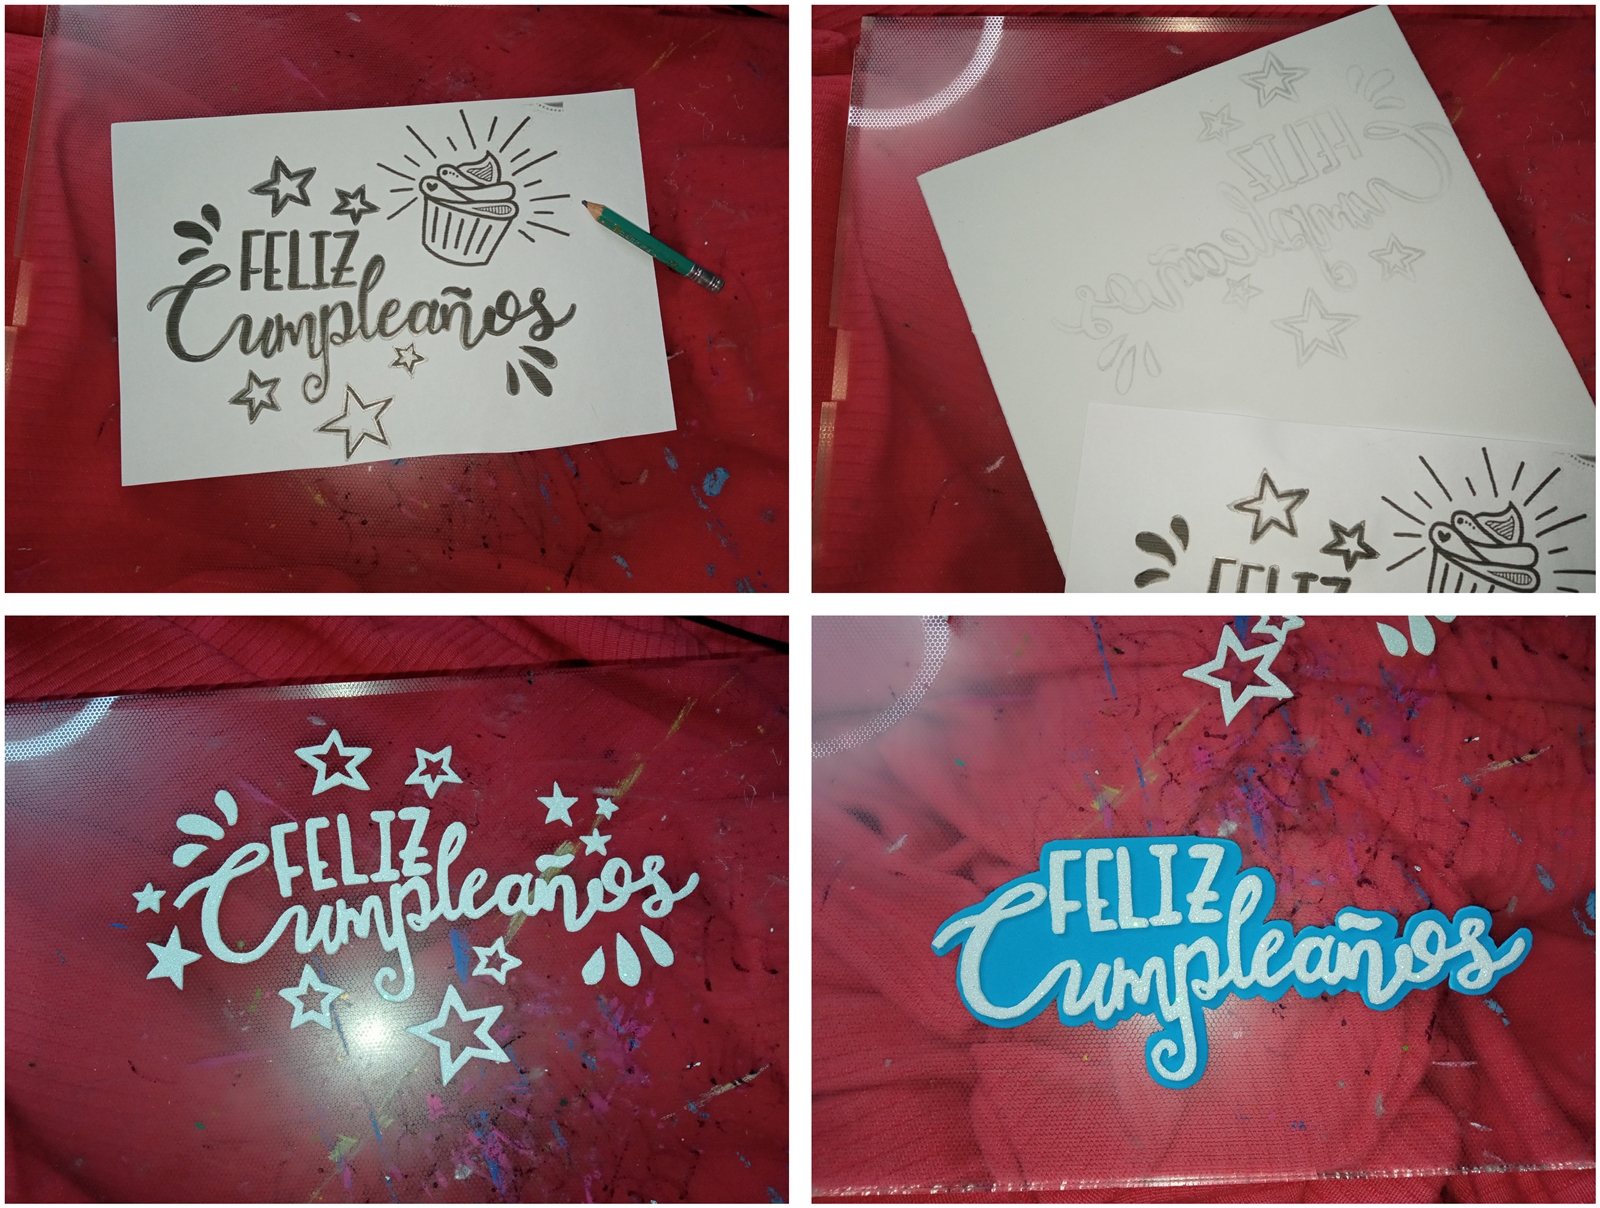
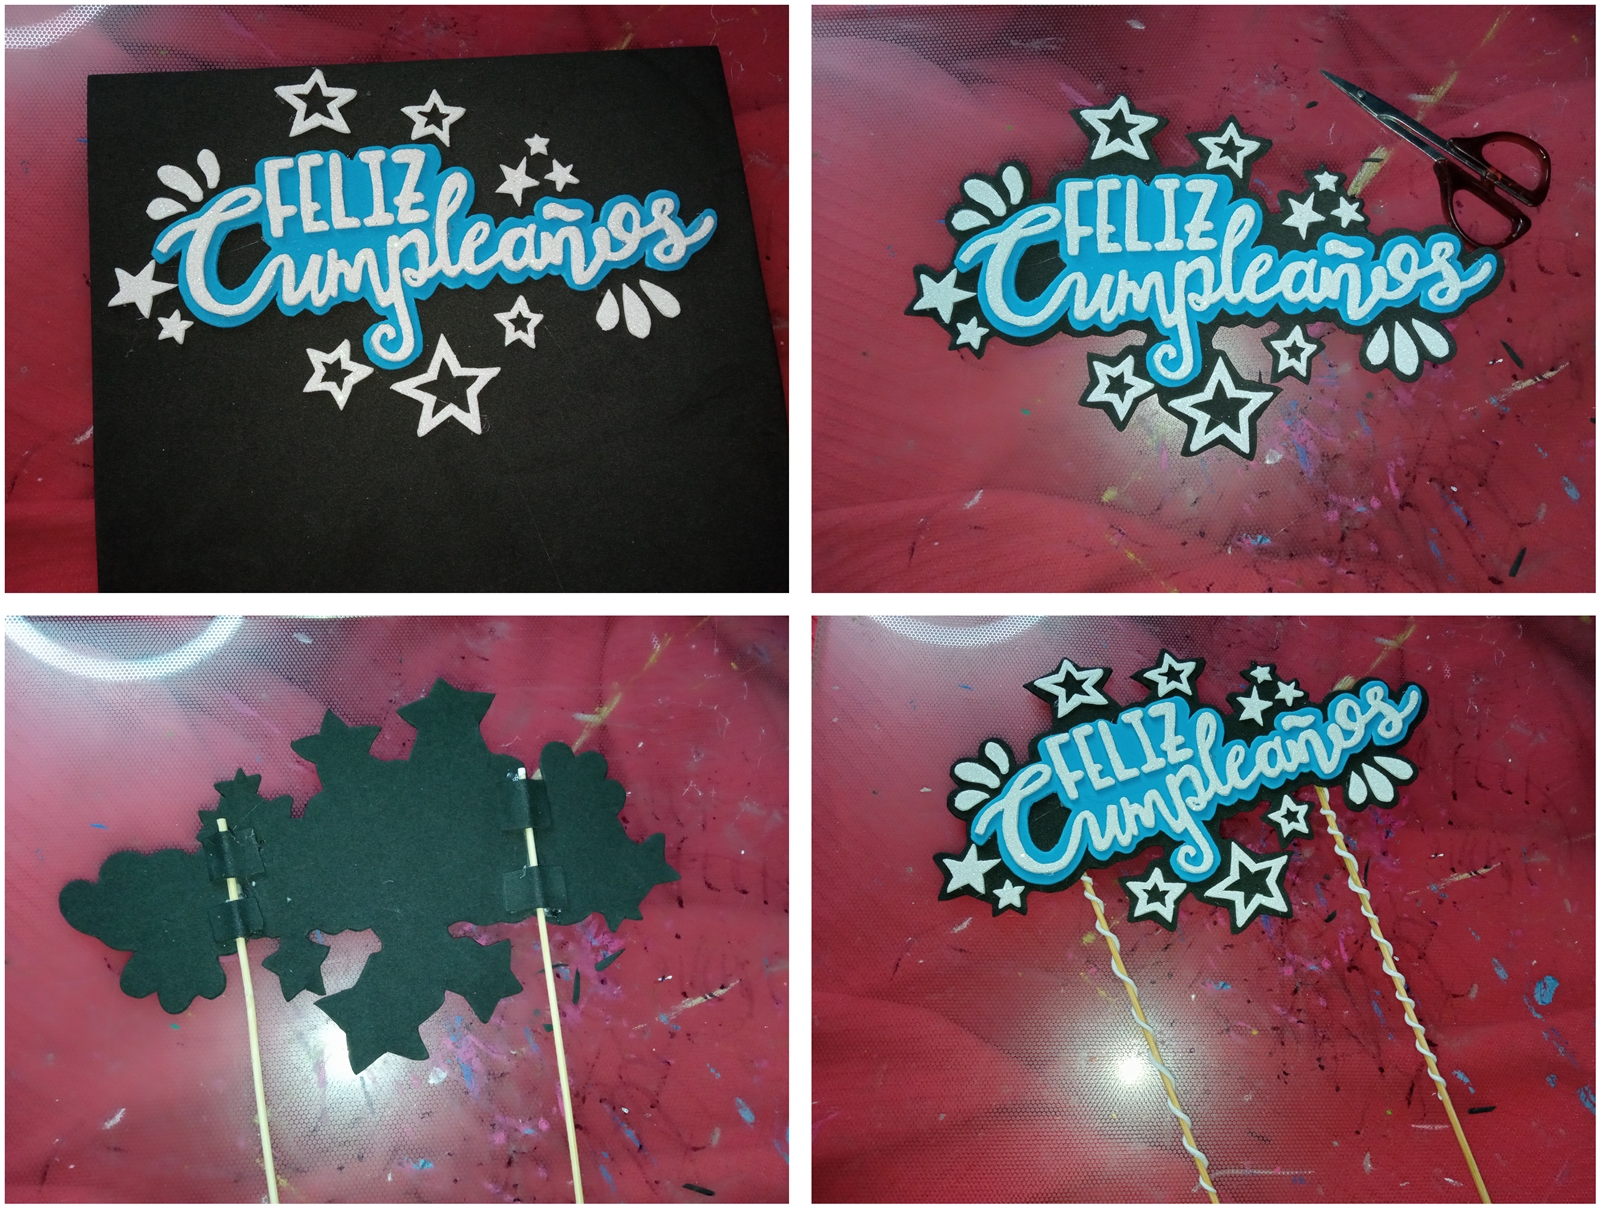
Para empezar a elaborar un topper de este tipo debemos buscar el diseño que haremos en internet, debe ser tipo plantilla para que no se nos dificulte, lo imprimimos y con un lápiz 6B o 3B empezamos a delinear cuidadosamente todos los bordes del diseño impreso, luego presionaremos el papel al foami para transferir el diseño base y ahora si empezar a recortar todas las piezas. Cuando ya tengamos listas las piezas procedemos a pegar lo que queramos resaltar en este caso yo elegí resaltar las letras a un foami de color, recortamos dejando unos milímetros de grosor y pegamos esto junto al resto de las piezas a un foami que nos funcionara de fondo volvemos a recortar dejando unos milímetros. En la parte trasera pegamos los palillos y los decoramos.
To start making a topper of this type we must find the design that we will do on the internet, it should be template type so we do not make it difficult, we print it and with a 6B or 3B pencil we begin to carefully outline all the edges of the printed design, then we will press the paper to the foami to transfer the base design and now if we start to cut all the pieces. When we have the pieces ready we proceed to paste what we want to highlight in this case I chose to highlight the letters to a colored foami, cut leaving a few millimeters thick and paste this along with the rest of the pieces to a foami that will work as a background we return to cut leaving a few millimeters. On the back we glue the toothpicks and decorate them.

Para realizar este topper utilicé: foami, palillos, silicon, lápiz 3B o 6B, tijeras y moldes.
To make this topper I used: foami, toothpicks, silicone, 3B or 6B pencil, scissors and molds.


The rewards earned on this comment will go directly to the person sharing the post on Twitter as long as they are registered with @poshtoken. Sign up at https://hiveposh.com.