Hello creative friends of the hive !!! I bring you a beautiful toothpick that I made with an image from the web.
Hola amigos creativos de la colmena!!! les traigo un hermoso palillero que hice con una una imagen de la web.
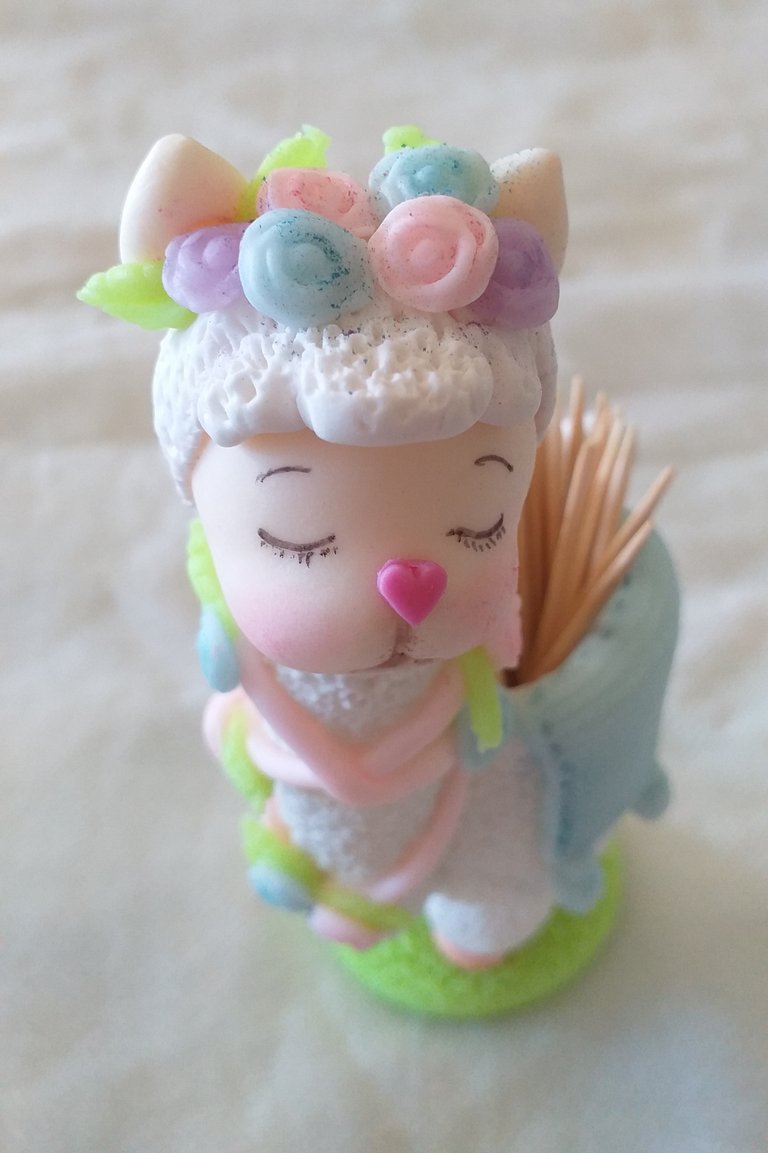
It is a very sweet toothpick with pastel colors.
Es un palillero muy dulce con colores pasteles.
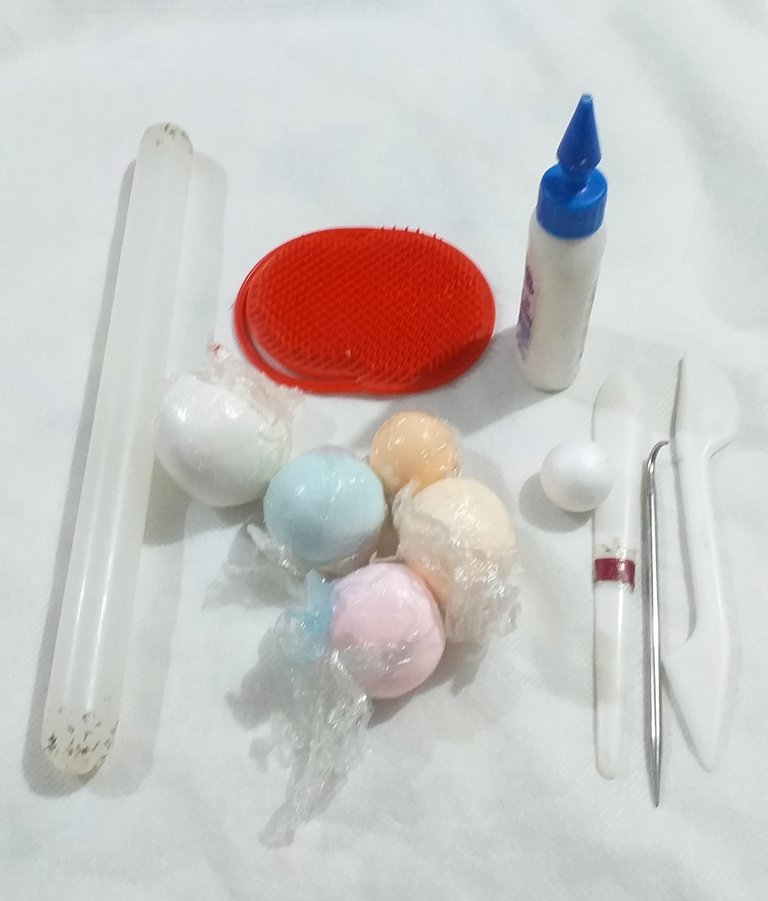
The materials I used are: cold porcelain of various colors, vinyl glue, cuttings, a polystyrene sphere, brush and rolling pin.
Los materiales que utilicé son: porcelana fría de varios colores, cola vinilica, estecas, una esfera de telgopor, cepillo y palo de amasar.
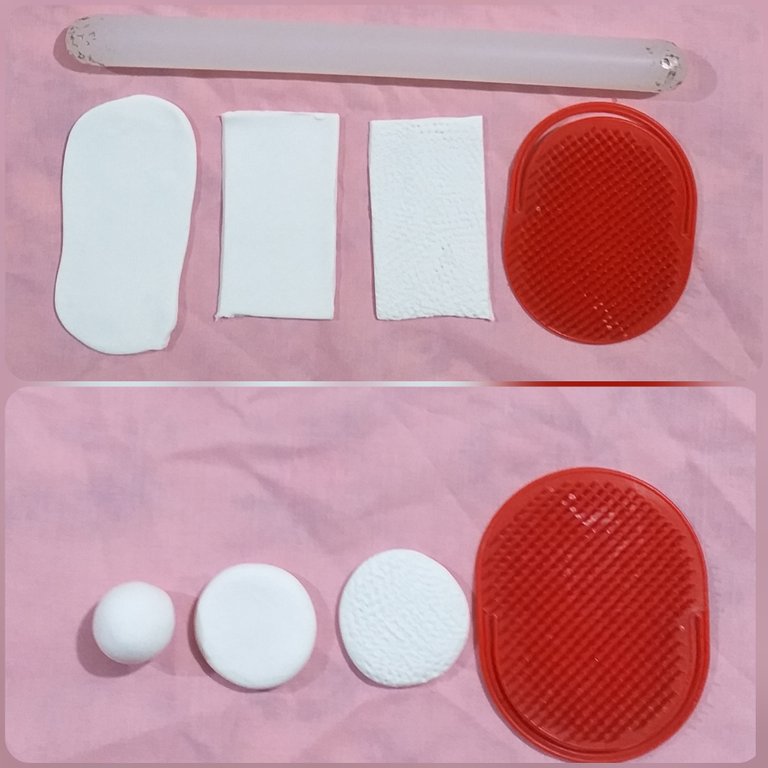
We stretch cold white porcelain, cut a rectangle and texture with the brush.
We make a ball with white dough, flatten and texture.
Estiramos porcelana fría blanca, cortamos un rectángulo y texturamos con el cepillo.
Hacemos una bola con masa blanca, aplanamos y texturamos.
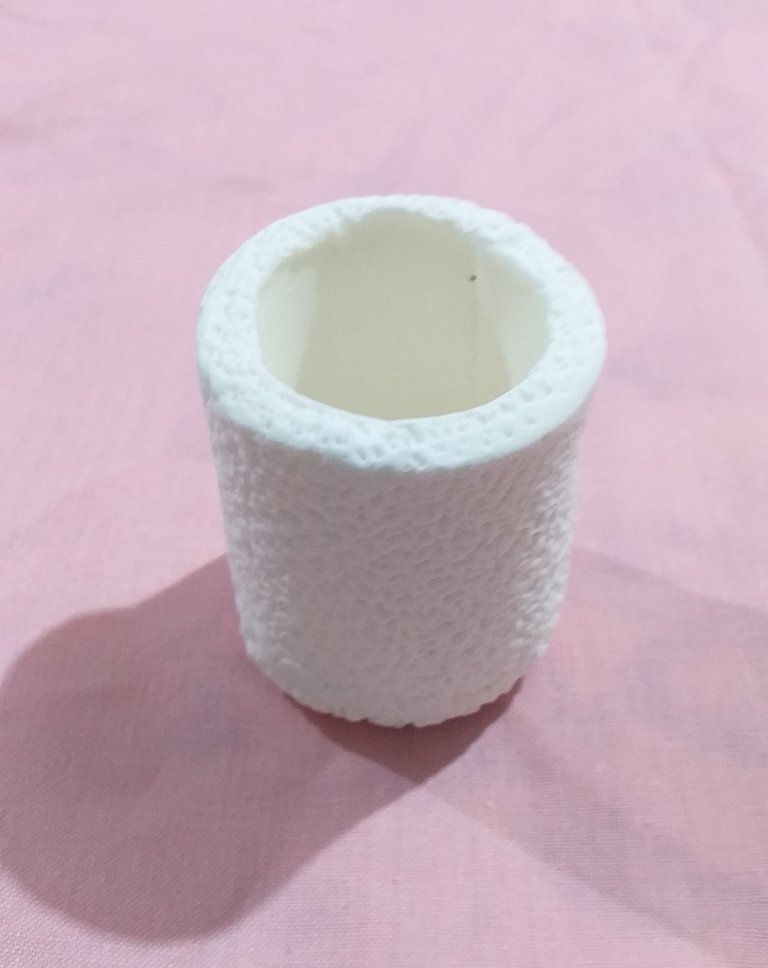
With the rectangle we form a cylinder. We put vinyl glue in the union.
We put vinyl glue on the edges of the flat circle and glue it to the base of the cylinder, leaving the textured part facing down.
Con el rectángulo formamos un cilindro. Ponemos cola vinilica en la unión.
Al círculo plano le ponemos cola vinilica en los bordes y lo pegamos en la base del cilindro dejando la parte texturada hacia abajo.
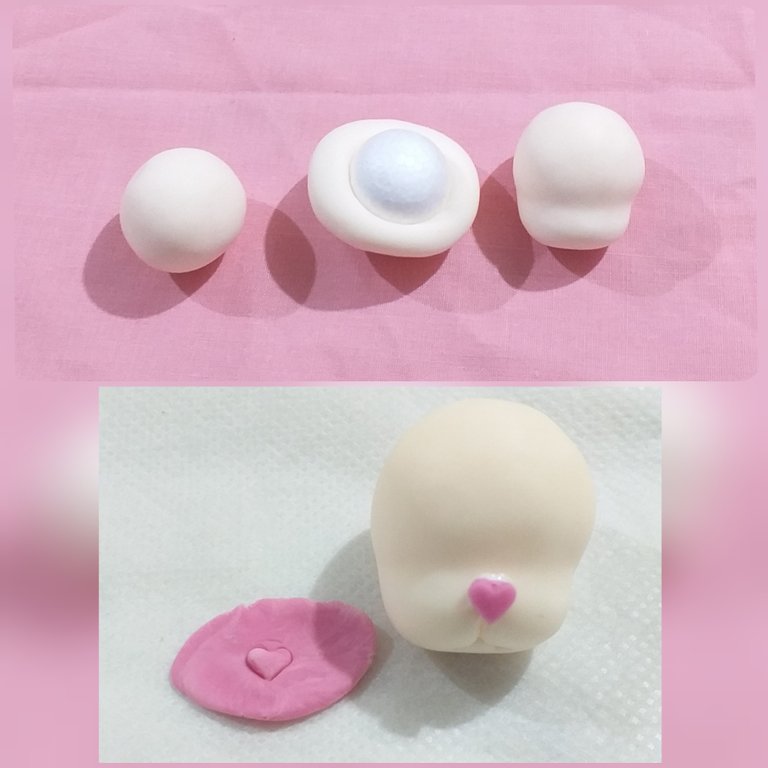
We make a ball of cold, skin-colored porcelain, insert the styrofoam sphere and form a head with a bit of a nose.
We roll out a little dough and use a small heart cutter for the nose (if you don't have it, you can make a small ball).
With a soft cut we divide the nose in half and mark the mouth.
Hacemos una bola de porcelana fría color piel, introducimos la esfera de telgopor y formamos una cabeza con un poco de morro.
Estiramos un poco de masa y usamos un pequeño cortante de corazón para la nariz (si no tenes podes hacer una bolita pequeña).
Con un corte suave dividimos el morro a la mitad y marcamos la boca.
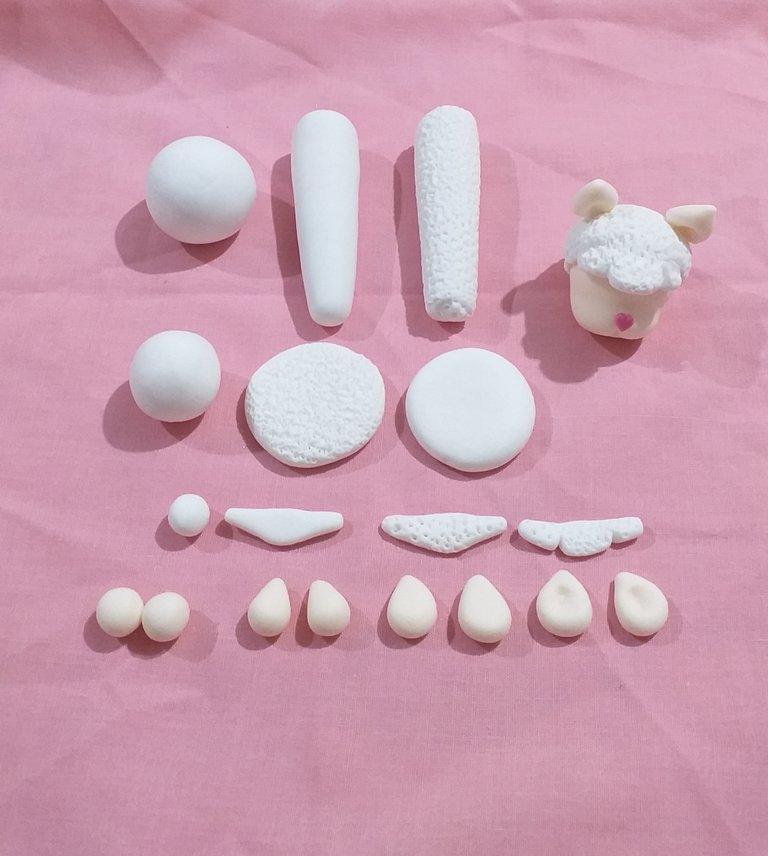
For the neck we make a ball of cold white porcelain, stretch until there is a finer part and texture with the brush.
To cover the head, we make a white ball, flatten and texture.
For the bangs we make a ball, we stretch leaving finer on the sides, we texture and we make two soft cuts.
For the ears, we make two equal skin-colored balls, we give them a teardrop shape, flatten and hollow in the middle.
We reserve the neck and glue the rest to the head with vinyl glue.
Para el cuello hacemos una bola de porcelana fría blanca, estiramos hasta que quede una parte más fina y texturamos con el cepillo.
Para cubrir la cabeza hacemos una bola también blanca, aplanamos y texturamos.
Para el flequillo hacemos una bolita, estiramos dejando más fino en los lados, texturamos y hacemos dos cortes suaves.
Para las orejas hacemos dos bolitas iguales color piel, le damos forma de lágrima, aplanamos y ahuecamos en el medio.
Reservamos el cuello y el resto lo pegamos a la cabeza con cola vinilica.
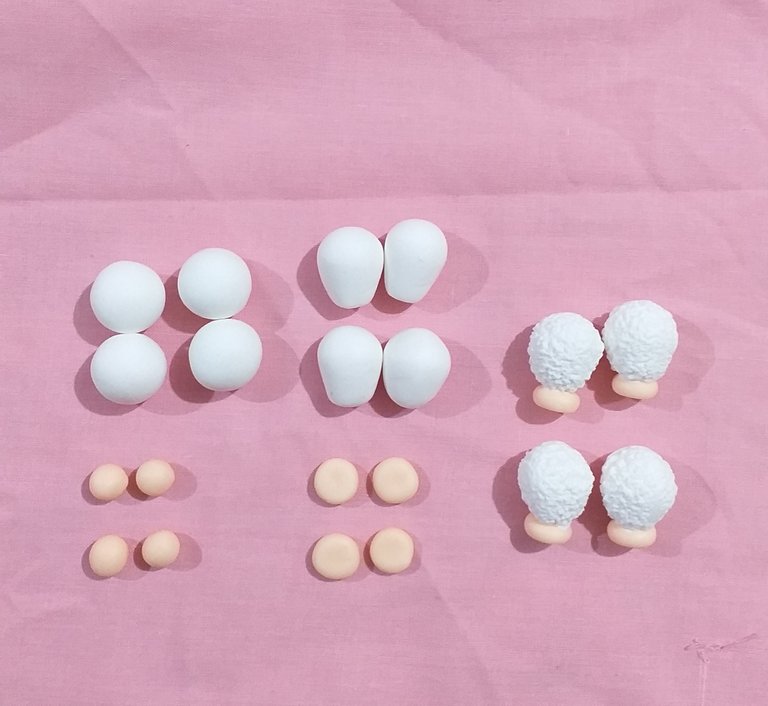
For the legs we make four equal balls, we give it a teardrop shape with the flat bottom part and we texture.
For the hooves we make four equal balls and flatten. We glue them to the legs.
Para las patas hacemos cuatro bolas iguales, le damos forma de lágrima con la parte de abajo plana y texturamos.
Para las pezuñas hacemos cuatro bolitas iguales y aplanamos. Las pegamos a las patas.
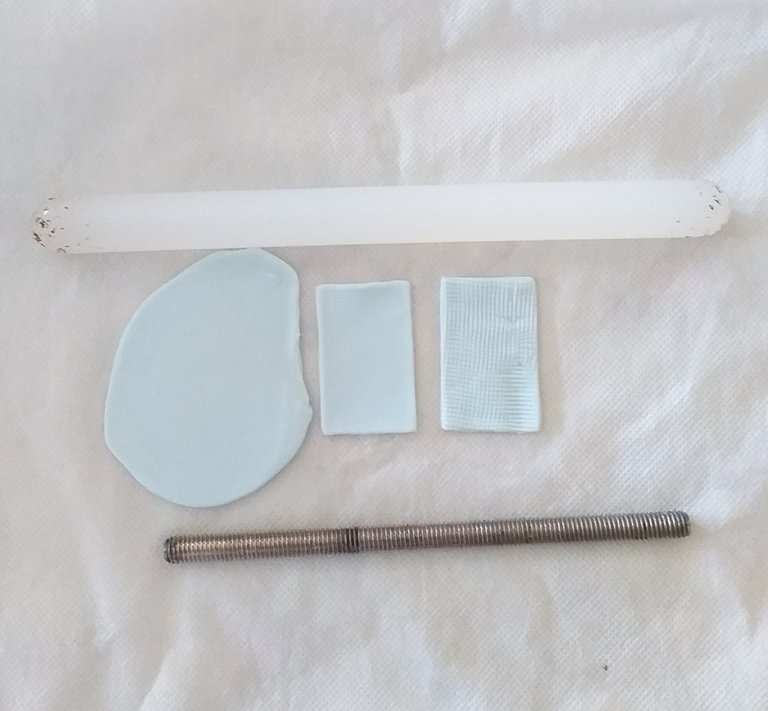
For the blanket we stretch the dough and shape it into a rectangle, we texture (I did it with a threaded rod but if you don't have it, you can use anything that has texture) and cut in half.
Para la manta estiramos masa y le damos forma de rectángulo, texturamos (yo lo hice con una varilla enroscada pero si no tenes podes usar cualquier cosa que tenga textura) y cortamos a la mitad.
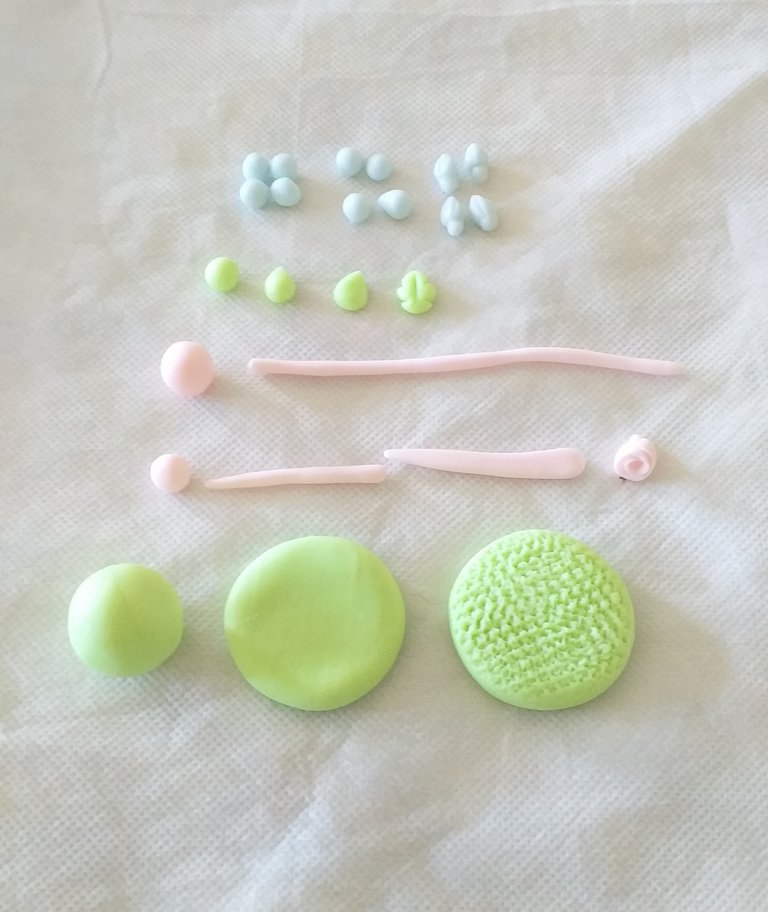
For the pompoms of the blankets we make three or four small balls, we give it a teardrop shape and we make soft cuts to simulate the threads.
For the leaves we make balls, we give them a teardrop shape, we flatten and mark the veins.
With a ball that we stretch long enough we prepare the rope.
For the roses we make balls of various colors, we stretch leaving a thin side and a thicker side, we flatten. We start by rolling from the thinnest part to the thickest part to shape the small roses.
For the base we make a green ball, flatten and texture to simulate grass.
Para los pompones de las mantas hacemos tres o cuatro bolitas pequeñas, le damos forma de lágrima y le hacemos unos cortes suave para simular los hilos.
Para las hojas hacemos bolitas, le damos forma de lágrima, aplanamos y marcamos las nervaduras.
Con una bolita que estiramos bastante largo preparamos la soga.
Para las rosas hacemos bolitas de varios colores, estiramos dejando un lado fino y otro más grueso, aplanamos. Empezamos enrollando desde la parte más fina hacia la parte más gruesa para dar forma a las pequeñas rosas.
Para la base hacemos una bola en color verde, aplanamos y texturamos para simular el pasto.
We glue the neck with the head, we attach it to the body.
We glue the legs and the blanket.
We glue the rope, the leaves and the flowers. Don't forget about the tail which is just a textured tear and the flowers on the head.
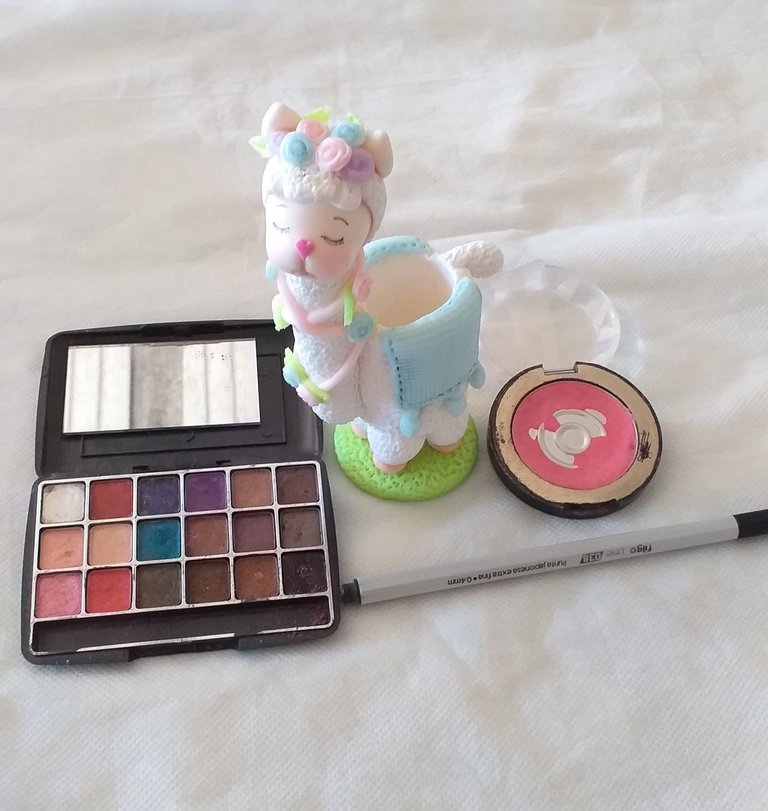
With a black micro fiber we draw the eyes and eyelashes and make up.
Pegamos el cuello con la cabeza, lo unimos al cuerpo.
Pegamos las patas y la manta.
Pegamos la soga, las hojas y las flores. No se olviden de la cola que es solo una lágrima texturada y las flores en la cabeza.
Con una micro fibra negra dibujamos los ojos y las pestañas y maquillamos.
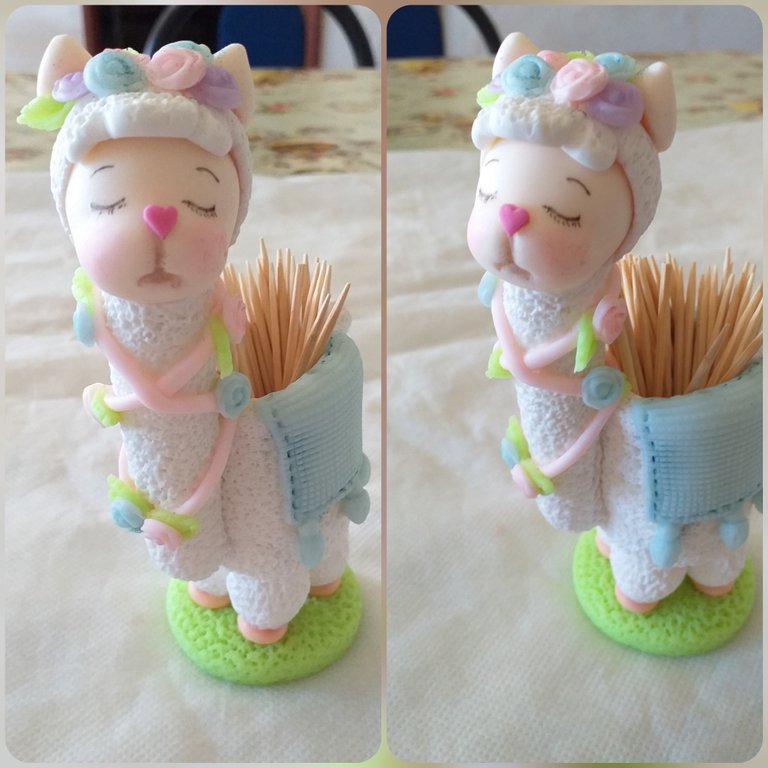
And so we finish our beautiful toothpick holder. As always, I hope you liked it and are encouraged to do it to decorate our table. Regards .Andrea
Y así terminamos nuestro bello palillero. Como siempre espero que les haya gustado y se animen a hacerlo para decorar nuestra mesa. Saludos .Andrea
Congratulations @somethingnice! You have completed the following achievement on the Hive blockchain and have been rewarded with new badge(s) :
Your next target is to reach 500 upvotes.
You can view your badges on your board and compare yourself to others in the Ranking
If you no longer want to receive notifications, reply to this comment with the word
STOPCheck out the last post from @hivebuzz: