
Hoy con muchos ánimos de sorprenderlos aquí les muestro como realizar un lindo caballito con materiales que ya estaban listo para ir a la basura, pero por suerte te diré que hacer con ellos y así no lo tiraras a la basura y lo guardaras para que tenga otro fin. Este caballito no solo es decorativo también nos servirá para colgar las colitas o pulsera de las más pequeñas y poder organizarlas mejor por color, también sirve como títere si es que quieres jugar con la niña antes de colgarlo en la pared.
Today with a lot of encouragement to surprise you here I show you how to make a cute little horse with materials that were already ready to go to the trash, but luckily I will tell you what to do with them and so you will not throw it away and save it to have another purpose. This little horse is not only decorative, it will also be useful to hang the little ones' bracelets or bracelets and organize them better by color, it also serves as a puppet if you want to play with the little girl before hanging it on the wall.
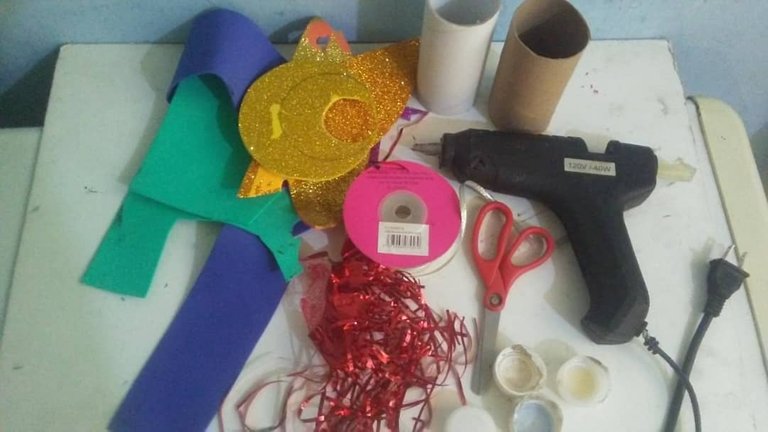
###Los materiales son los siguientes:
2 rollos de papel, foamis azul y verde, cinta de tela, tijera, bambalinas de color rojo, silicon y 4 tapas de refresco, alambre.
The materials are as follows:
2 rolls of paper, blue and green foamis, cloth tape, scissors, red bambalinas, silicon and 4 soda caps, wire.
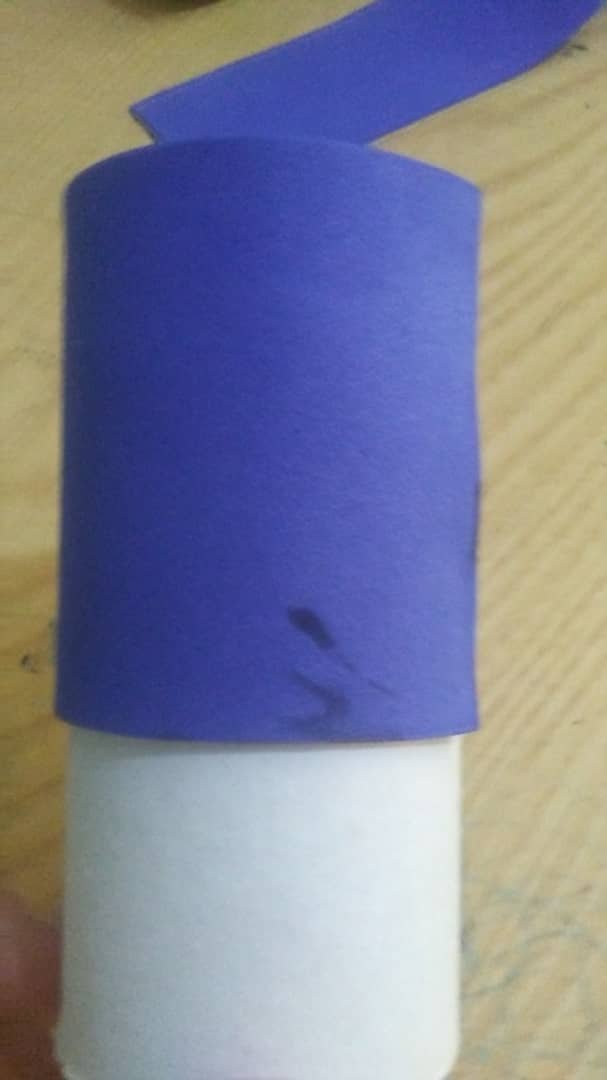
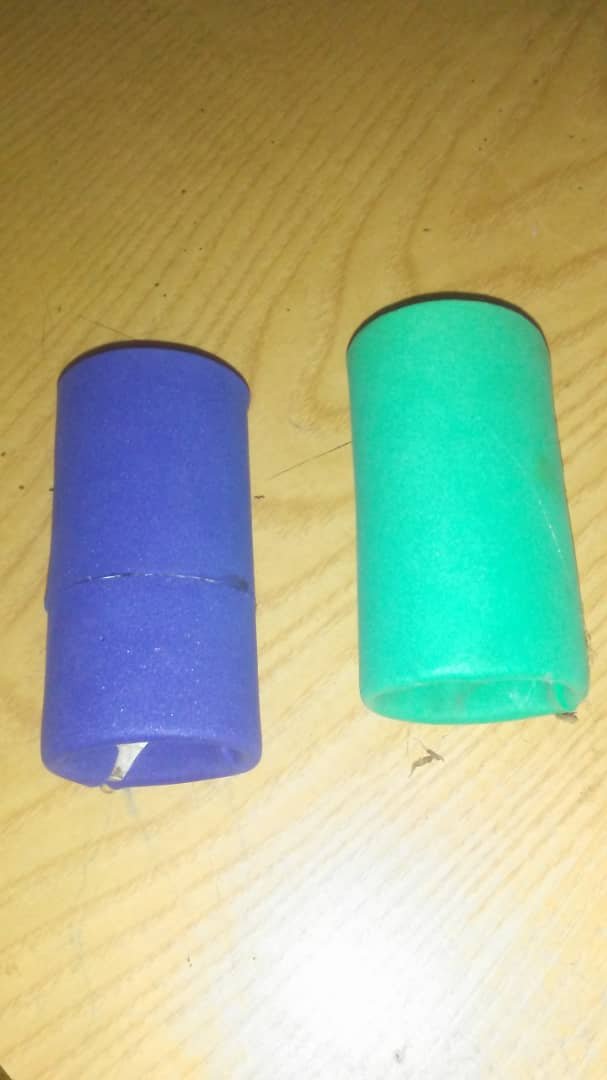
Primer pasó:
Forrar los rollos de papel con el foami.
First step:
Line the paper rolls with the foami.
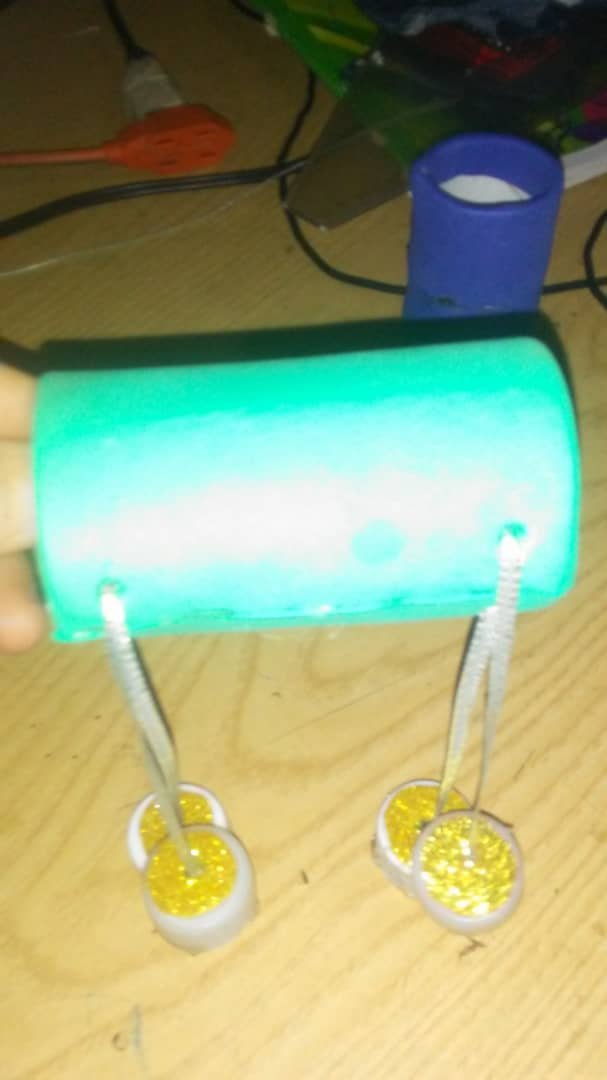
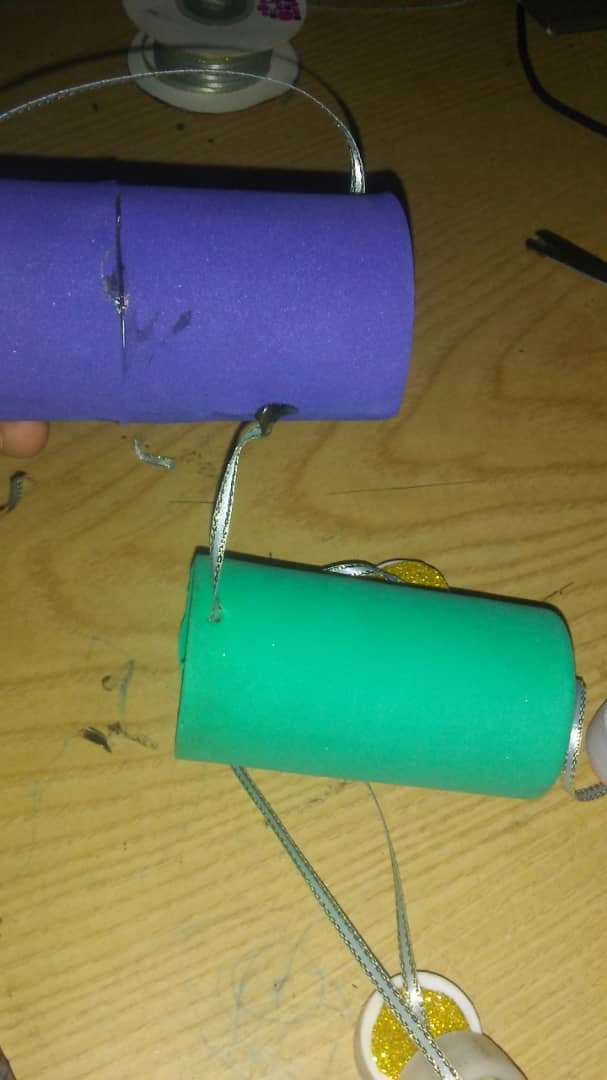
Segundo paso:
A unos de los rollos de papel abrirle cuatro agujeros pequeños para introducir una cinta de iguales tamaños, que vienen hacer las paticas del caballito y al final de las cintas pegarles 4 tapas de refrescos decoradas con foami.
Second step:
To one of the paper rolls open four small holes to introduce a ribbon of the same size, which will make the legs of the pony and at the end of the ribbons glue 4 soda caps decorated with foami.
Tercer paso:
En la parte de arriba se le coloca otra cinta donde luego se le introduce el otro rollo ya decorado.
Third step:
At the top, another ribbon is placed where the other decorated roll is inserted.
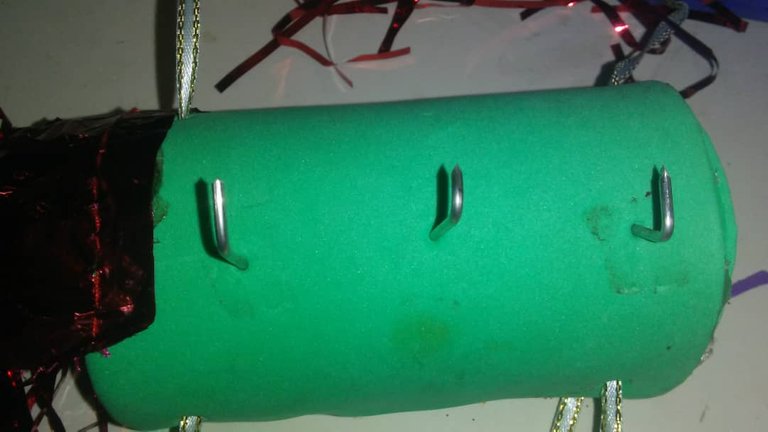
Ultimo paso:
se le introduce 3 alambritos en la parte del medio al cuerpo del caballito y en la parte de atrás se le coloca la bambalina de color rojo que viene hacer la colita, picadas en tiras, e igualmente a la cabeza como el pelo. Por ultimo se amarra con la misma cinta de tela para poderla colgar en la pared.
Last step:
3 wires are introduced in the middle part of the body of the horse and in the back part the red bambalina is placed to make the tail, cut into strips, and also to the head and the hair. Finally it is tied with the same fabric ribbon to be able to hang it on the wall.
Espero que le hayan gustado Chaito hasta el próximo post.
I hope you liked them Bye until the next post.
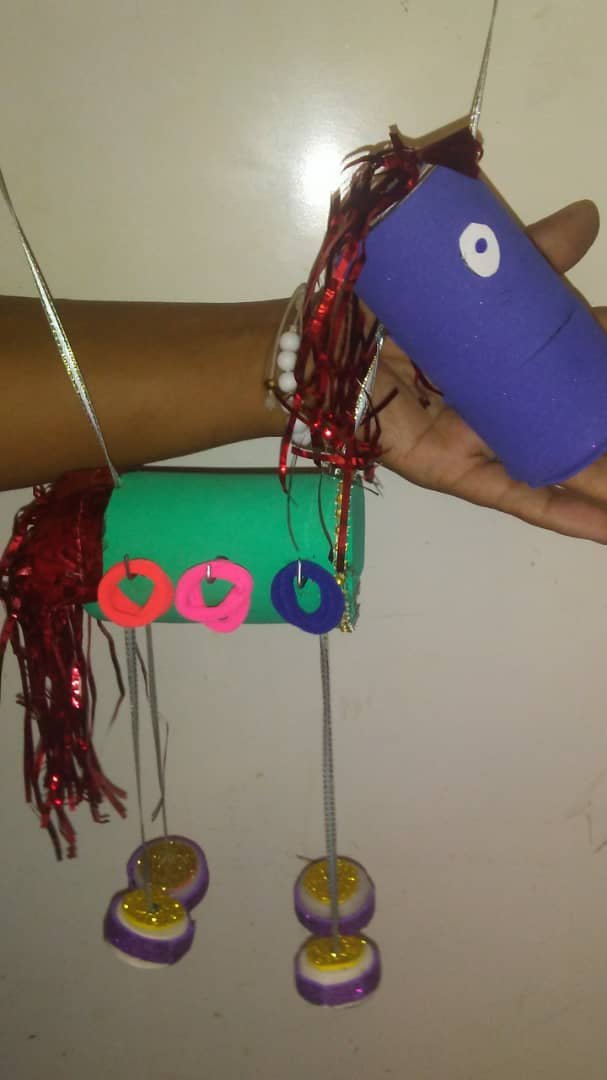
Que bueno @valprincess excelente creación para que le mantengas ordenados las colitas y pulseras a la princesa Valeri.