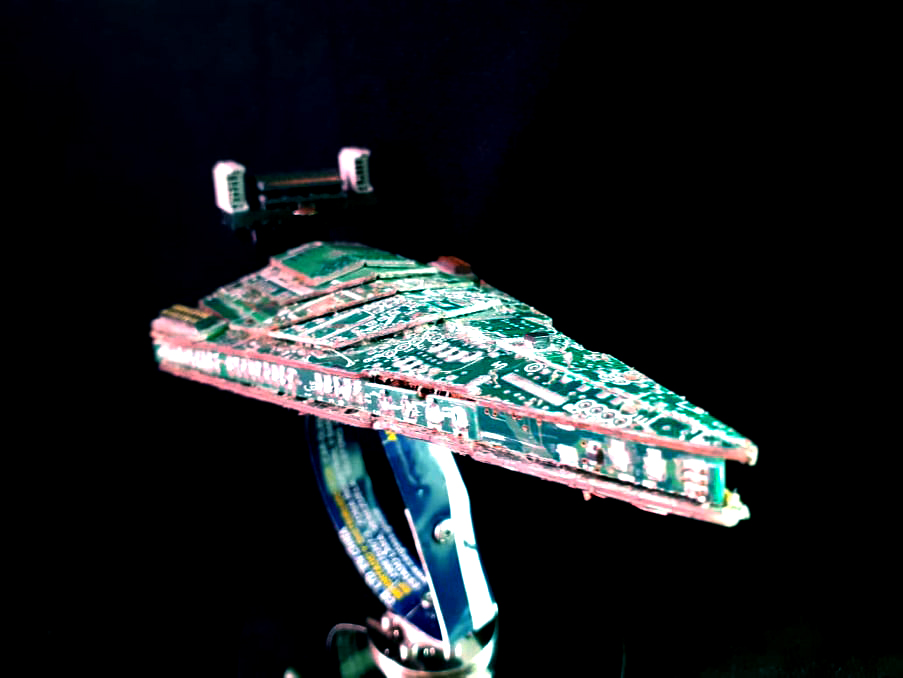
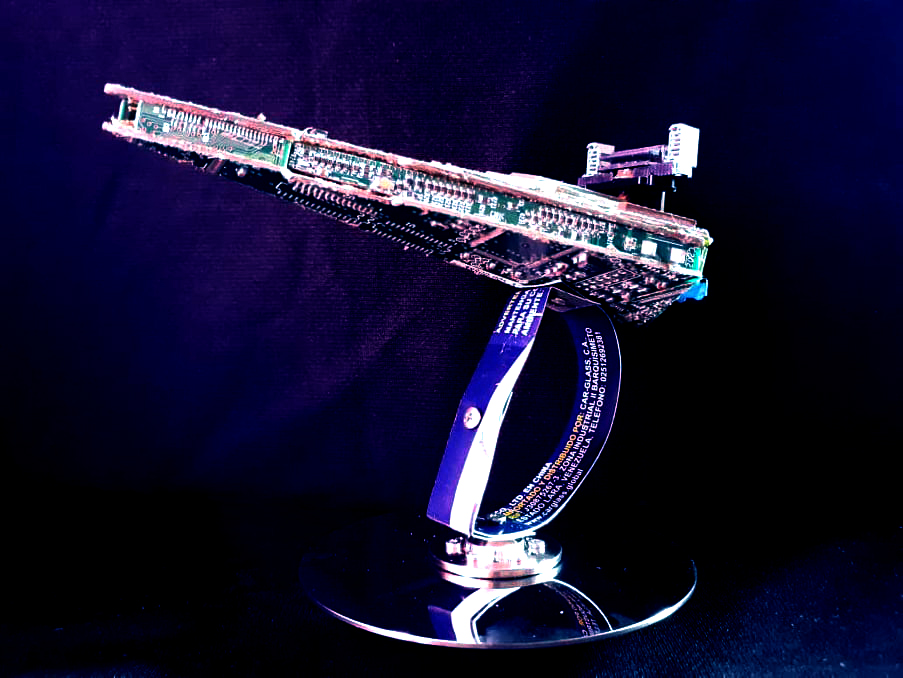
Hello friends of Hive I hope you are very well. I send a big greeting to all the artists that make life in this community who always bring their beautiful and very creative publications. Today I want to present my latest art work with PC pieces. It is the Imperial II-class Star Destroyer ship. Said ship in the Star Wars universe is a true war machine, it is 1600 meters long and is equipped with the most powerful weapons in addition to serving as a transport for the hunting ships of the imperial fleet. This craft is handcrafted from computer hard drive parts. Take the circuit boards and mostly everything comes from the hard drive. It took 5 days to make it and it was 15 centimeters long. I hope you like it and you like the result.
Hola amigos de Hive espero que se encuentren muy bien. Envio un gran saludo a todos los artistas que hacen vida en esta comunidad que siempre traen sus hermosas publicaciones muy creativas. Hoy quiero presentarles mi ultimo trabajo de arte con piezas de PC. Se trata de la nave Imperial II-class Star Destroyer. Dicha nave en el universo de Star Wars es una verdadera maquina de guerra, tiene una longitud de 1600 metros de largo y esta equipada con las armas mas poderosas ademas de servir como transporte para las naves caza de la flota imperial. Esta nave esta hecha a mano con piezas de disco duro de computadora. Tome las placas de circuitos y en su mayoria todo viene del disco duro. Tarde 5 dias en hacerla y mided 15 centimetros de largo. Espero que sea de su agrado y les guste el resultado.
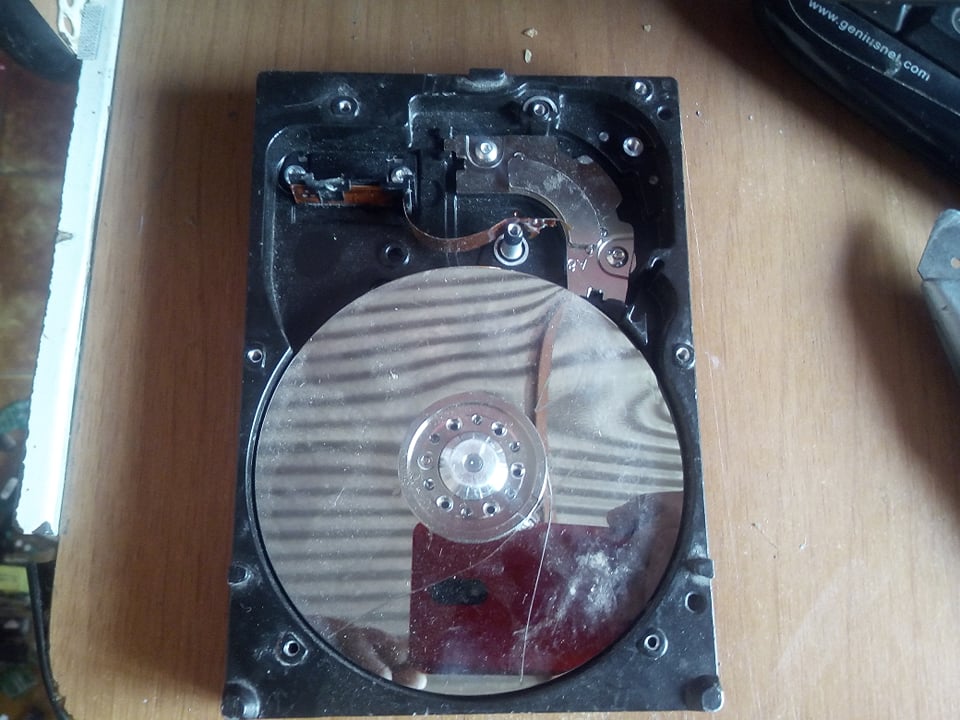
The material for this work is taken from a damaged hard drive. These pc components have many useful pieces when creating figures. Well, they look like pieces of minirobots. I have many accumulated and I have decided to give them another use creating pieces of art and sculptures of all kinds.
El material para este trabajo es sacado de un disco duro dañado. Estos componente de pc tienen muchas piezas utiles a la hora de crear figuras. Pues parecen piezas de minirobots. Tengo muchos acumulados y he decidido darles otra utilidad creando piezas de arte y esculturas de todo tipo.

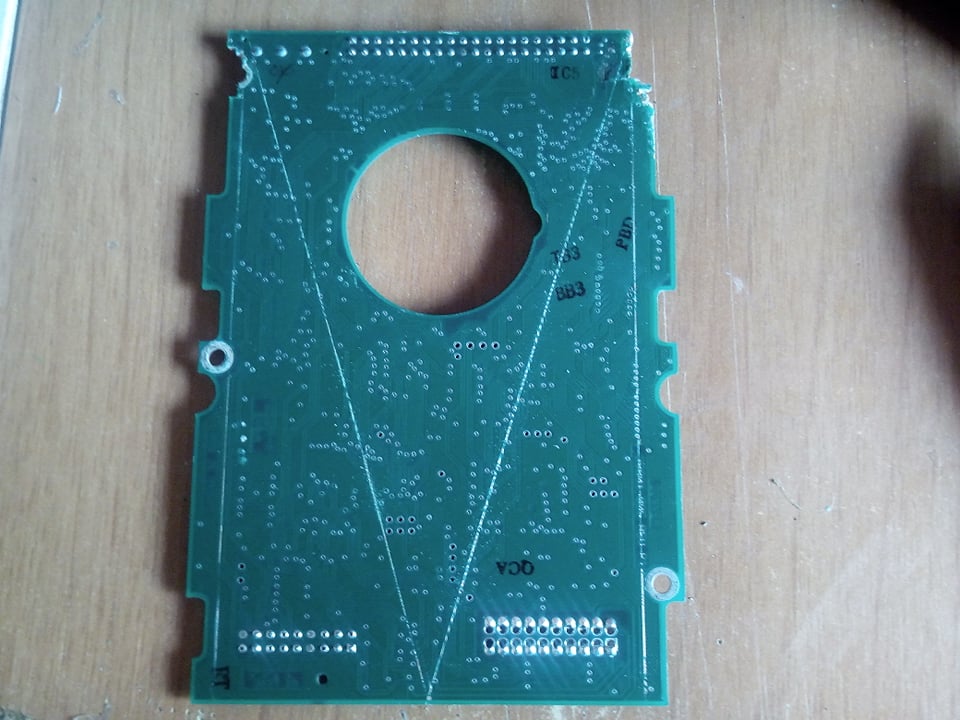
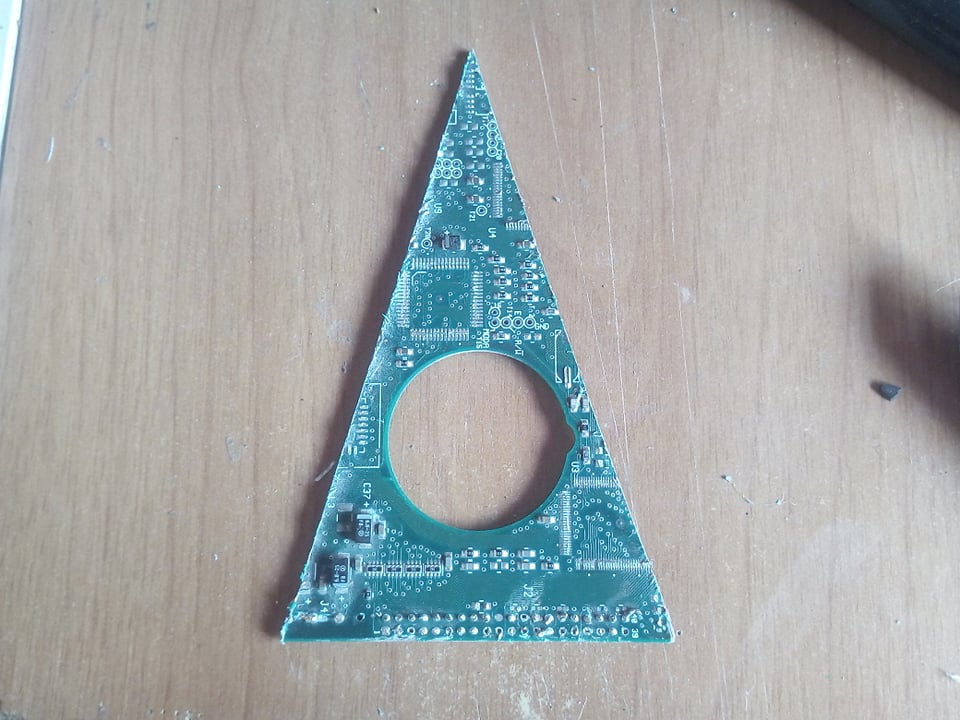
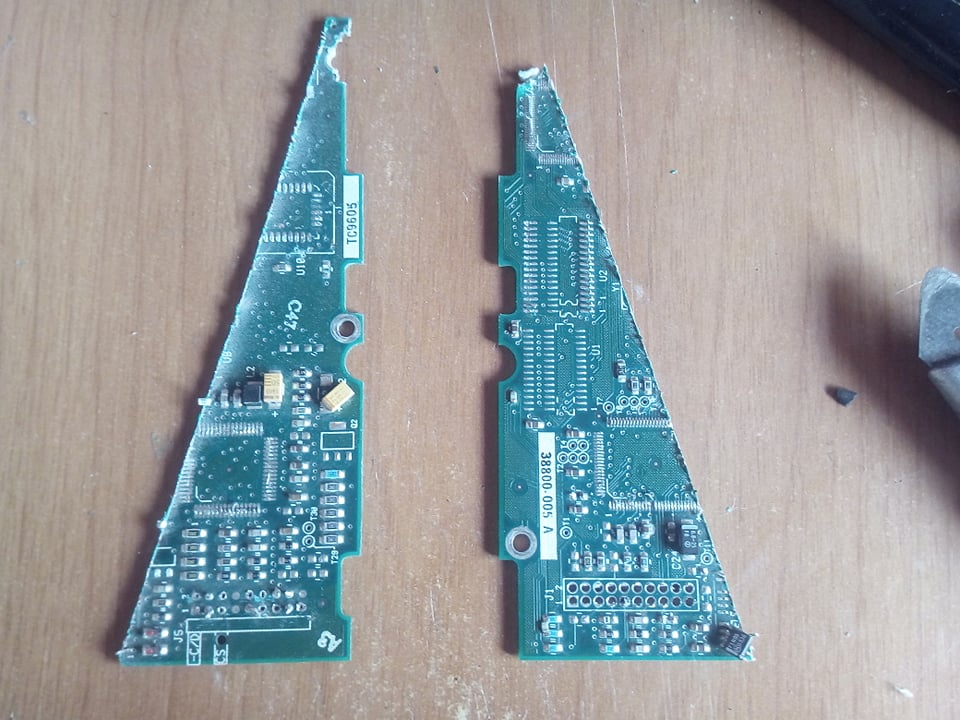
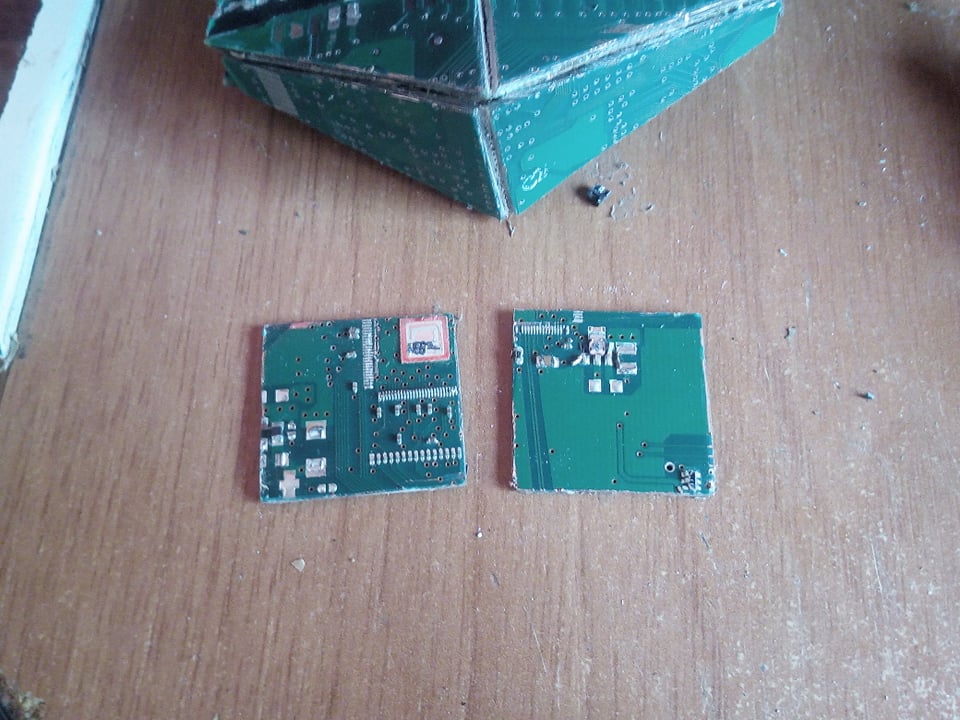
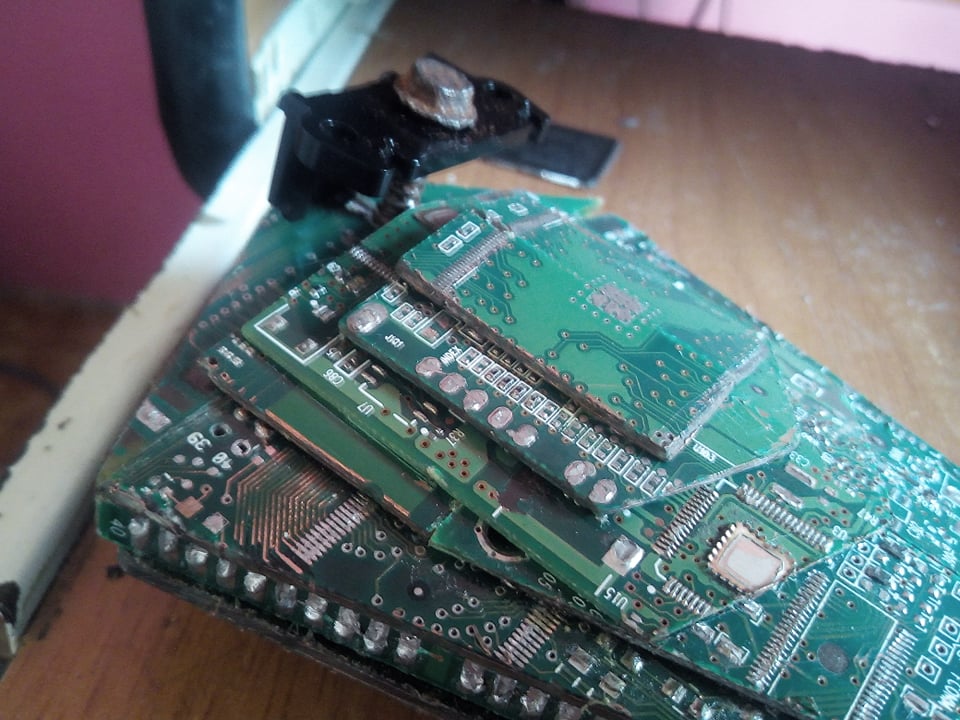
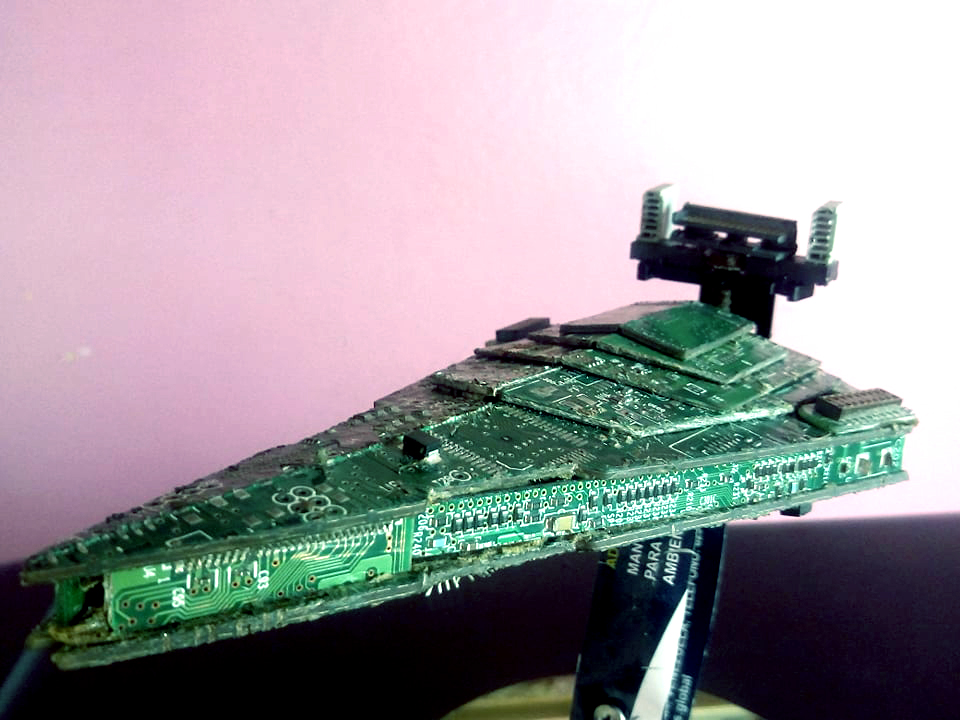
The first thing we must do is disassemble the hard drive in all its parts. Remove the circuit board and with a ruler measure the parts to be cut. We cut in a triangular shape and remove both layers from the ship. The top and the bottom.
Lo primero que debemos hacer es desarmar el disco duro en todas sus partes. Retirar la placa de circuitos y con una regla medir las partes que cortaremos. Cortamos de forma triangular y sacamos ambas capas de la nave. La parte de arriba y la parte de abajo.
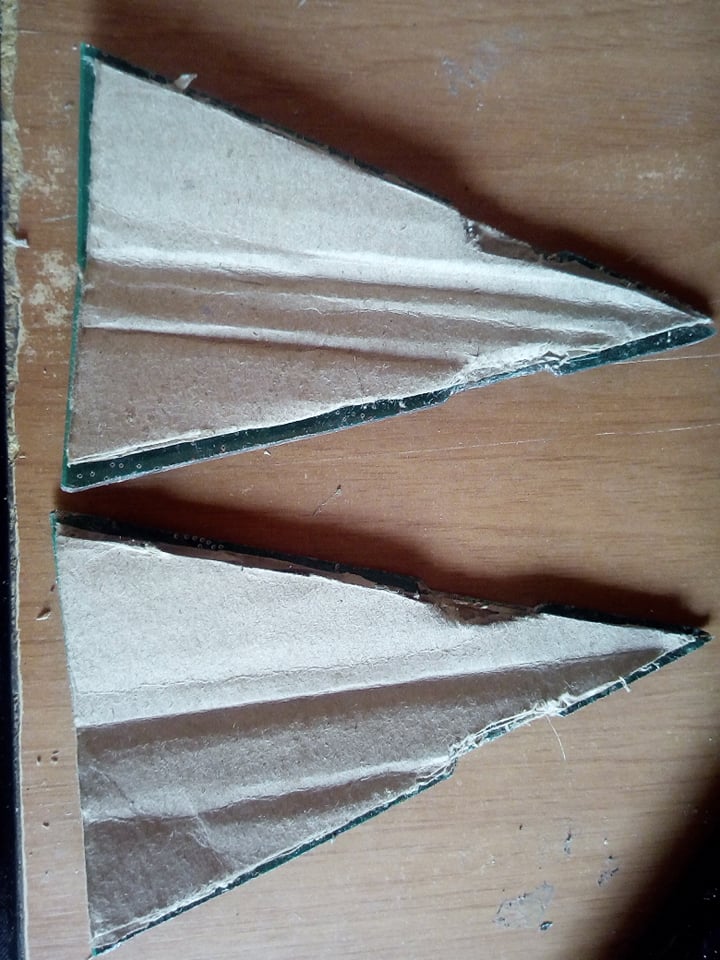
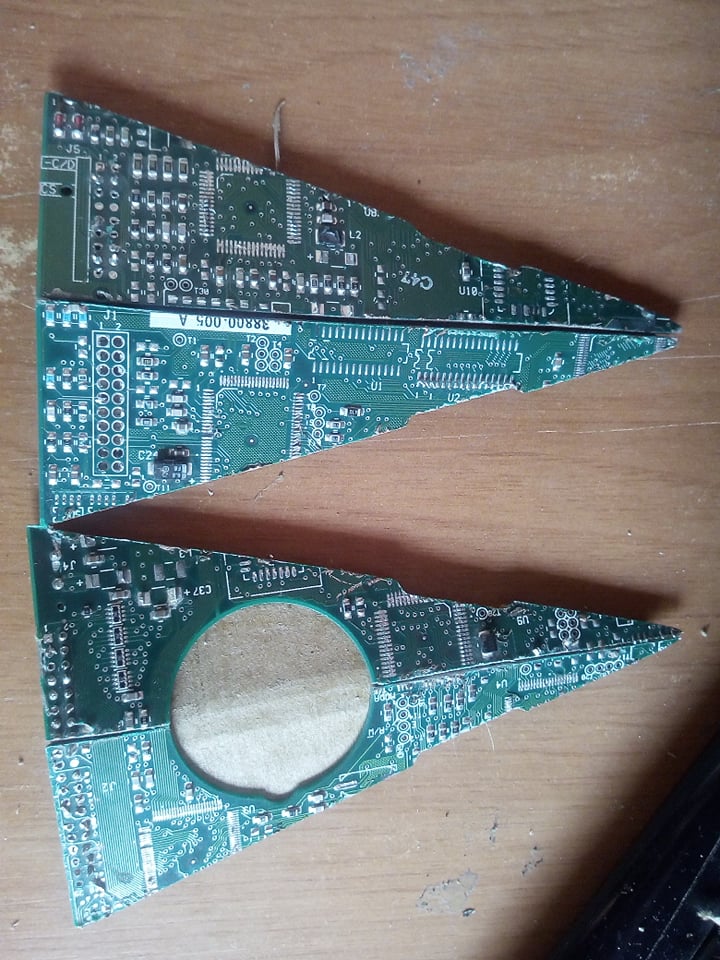
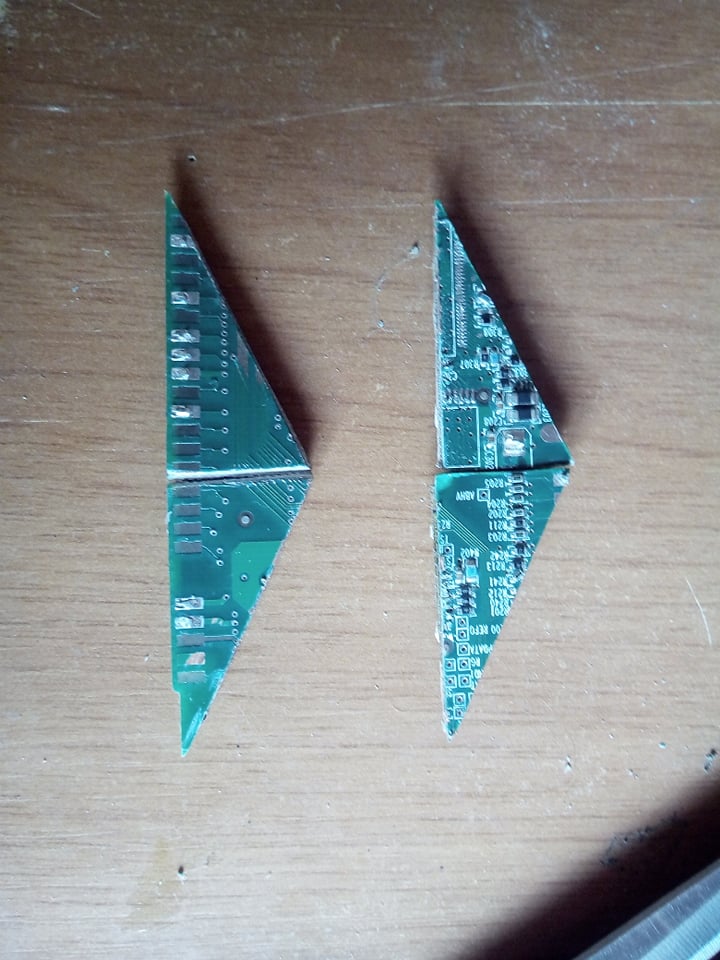
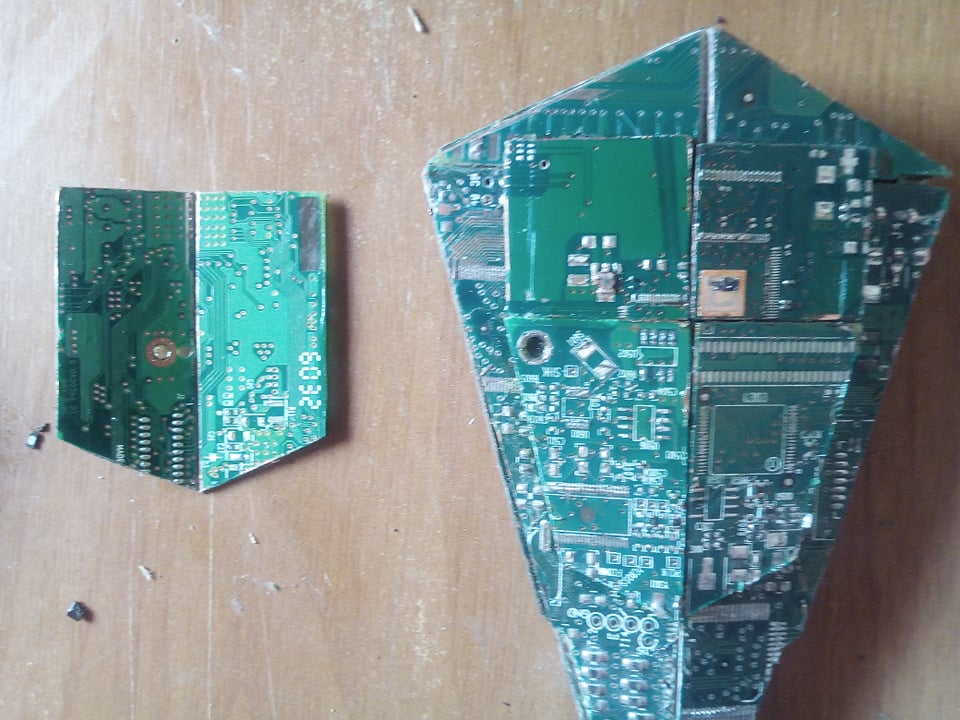
The next step is to join the circuit boards that we cut, for that we use plain cardboard. We put each triangle and join them with glue since being paper it joins faster and stronger. Then we make the tail of the ship by cutting these small pieces and we repeat the same process to join them and we are left in this way.
El siguiente paso es unir las placas de circuitos que cortamos, para eso utilizamos carton corriente. Le ponemos a cada triangulo y las unimos con pegamento ya que al ser papel se une mas rapido y fuerte. Luego hacemos la cola de la nave cortando estos pequeños trozos y repetimos el mismo proceso para unirlos y nos queda de esta manera.
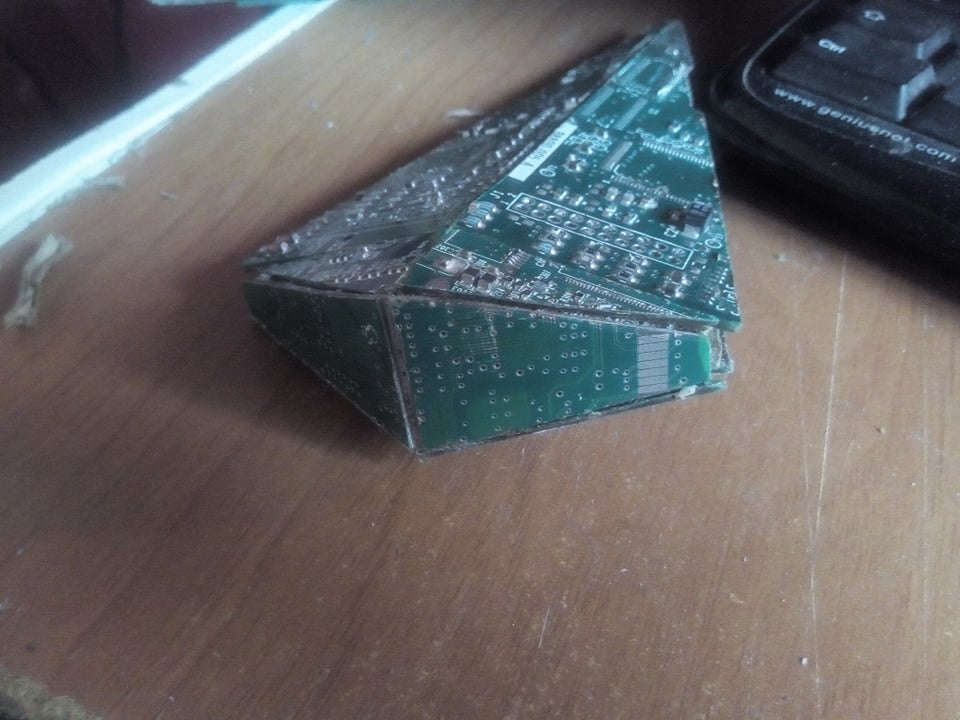
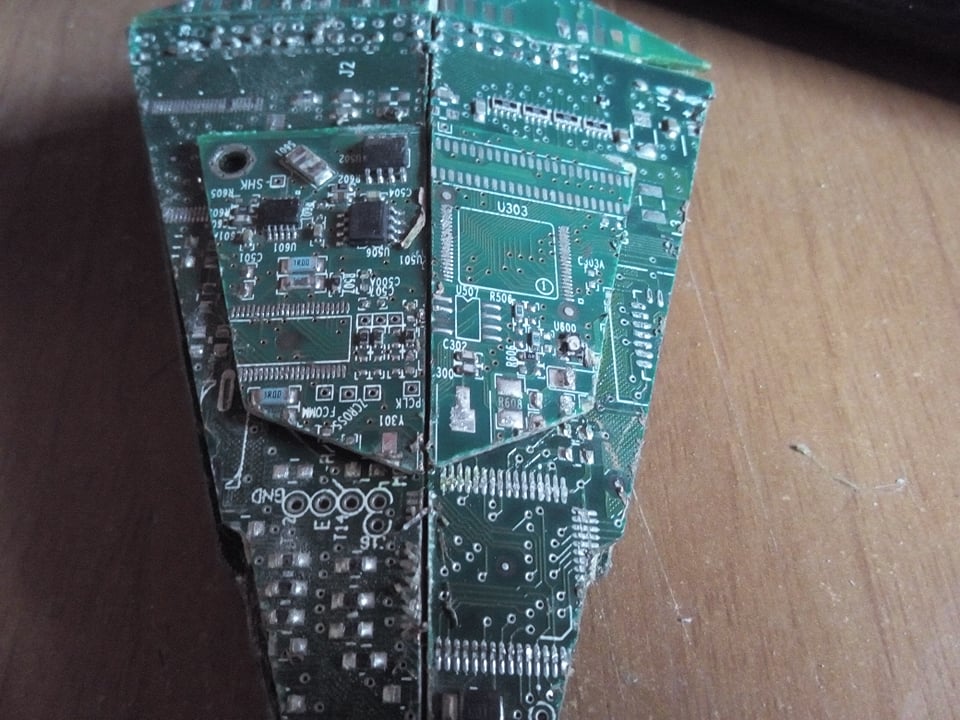
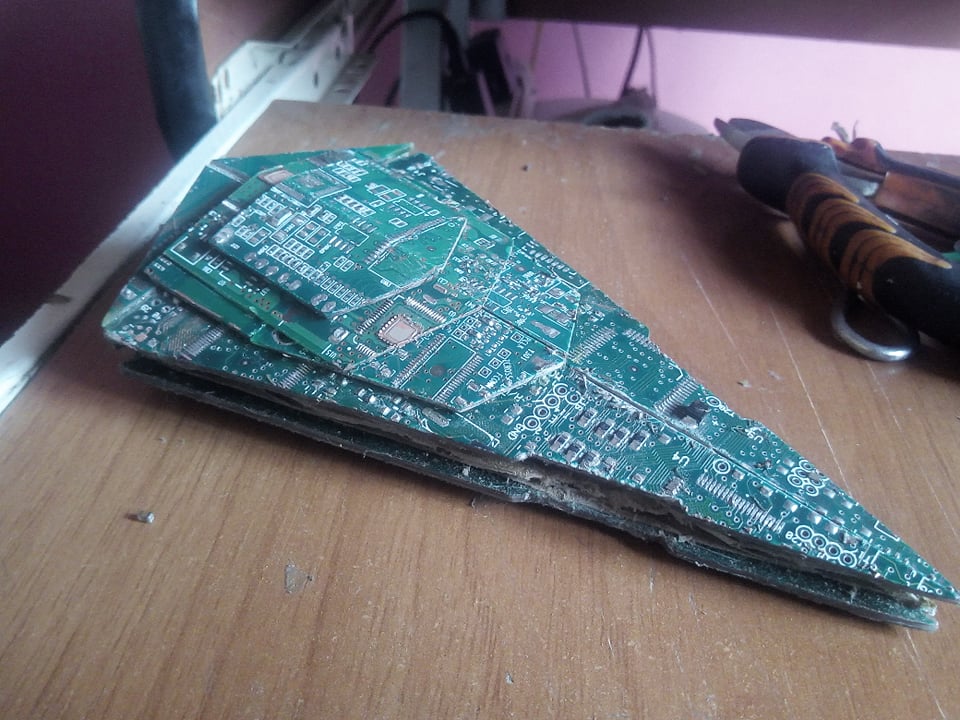
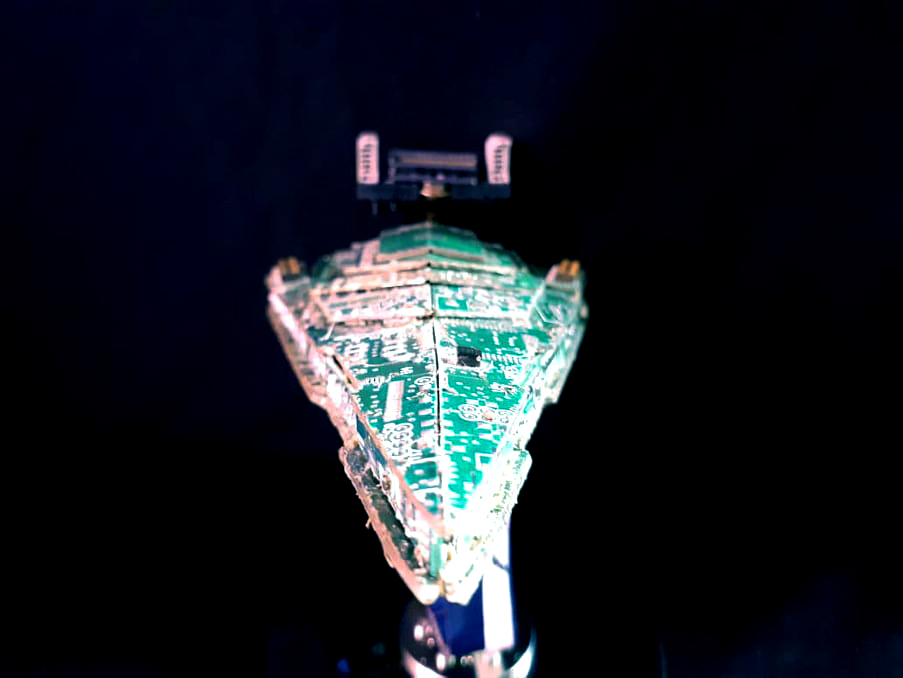
Then we started making the parts that represent the control tower and the controls of the Imperial Destroyer. Following the original model we use small pieces cut as triangles at the tip and square at the rest. We put them one on top of the other joining them with glue.
Despues comenzamos hacer las partes que representan la torre de control y los mandos del Destructor Imperial. Siguiendo el modelo original utilizamos piezas pequeñas cortadas como triangulos en la punta y cuadrado en el resto. Ls ponemos una encima de la otra uniendolas con pegamento.
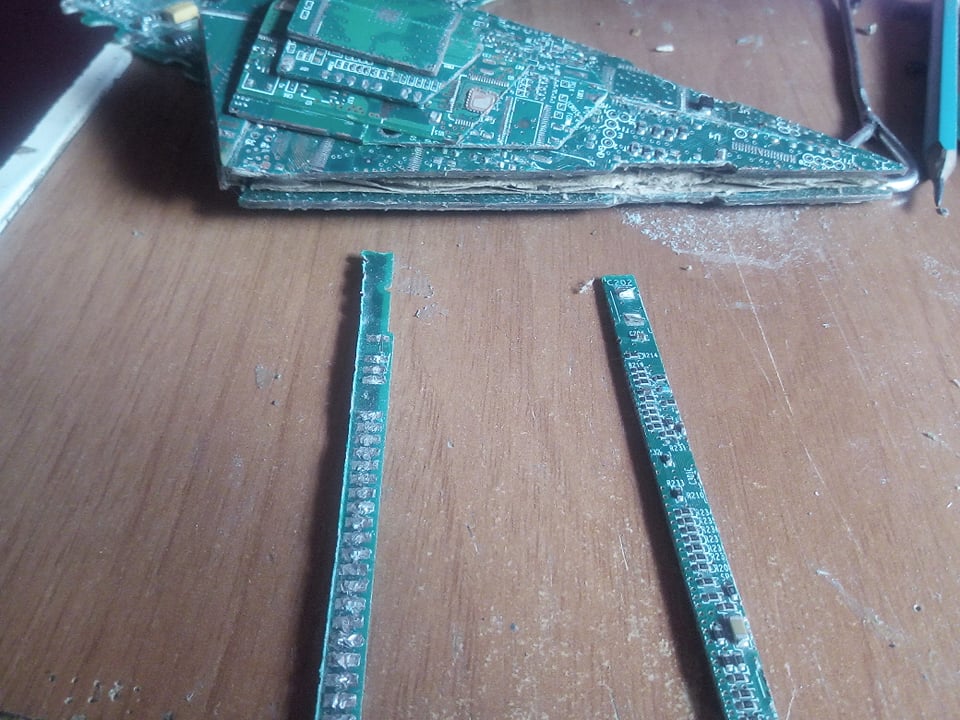
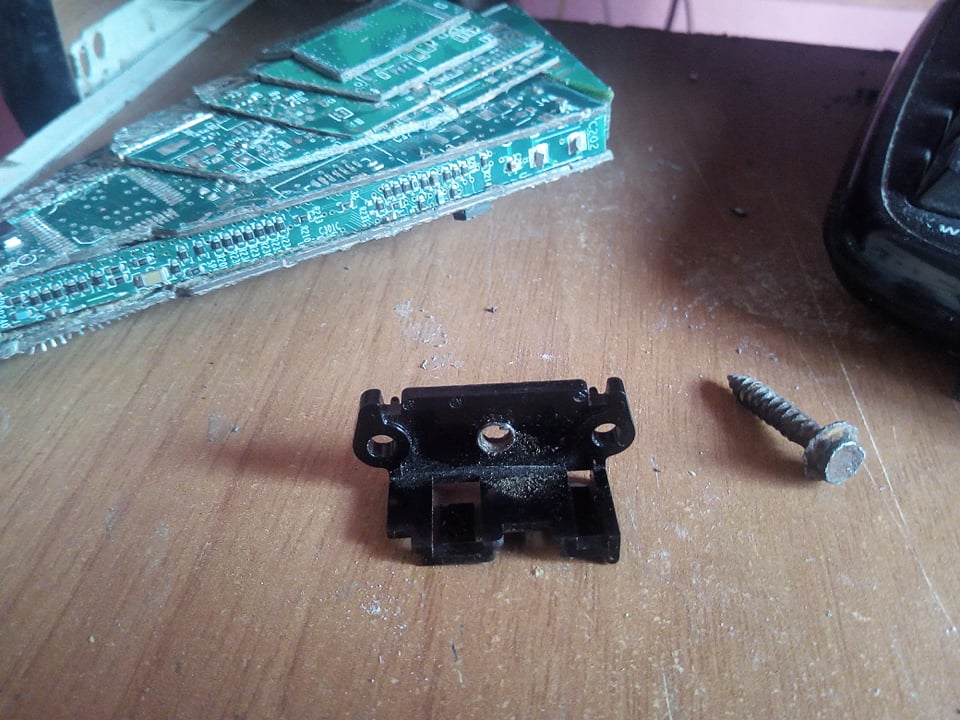
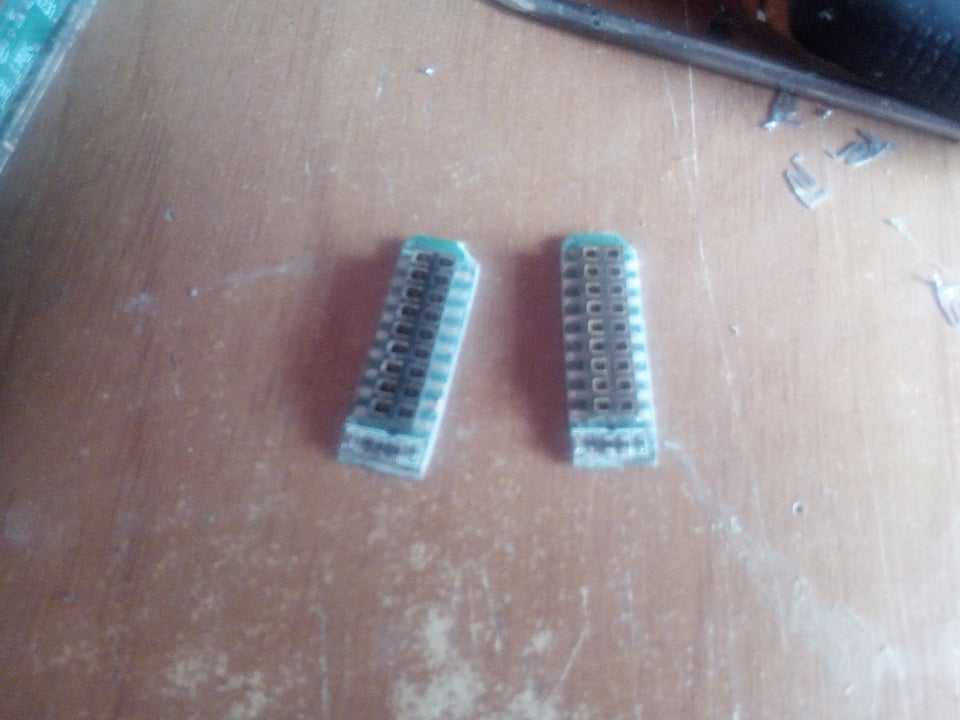
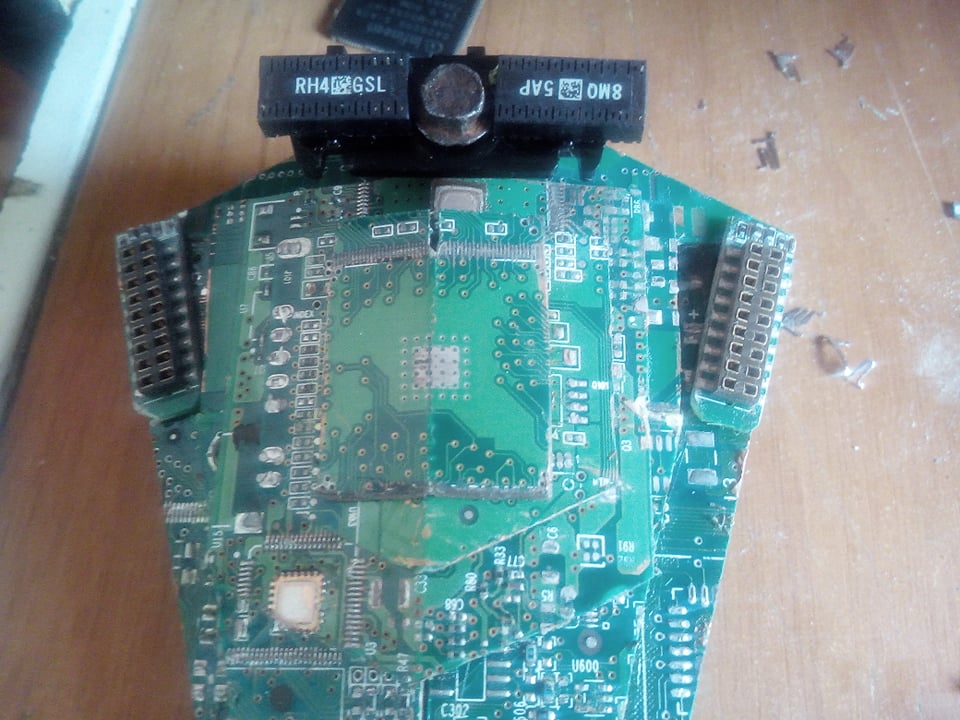

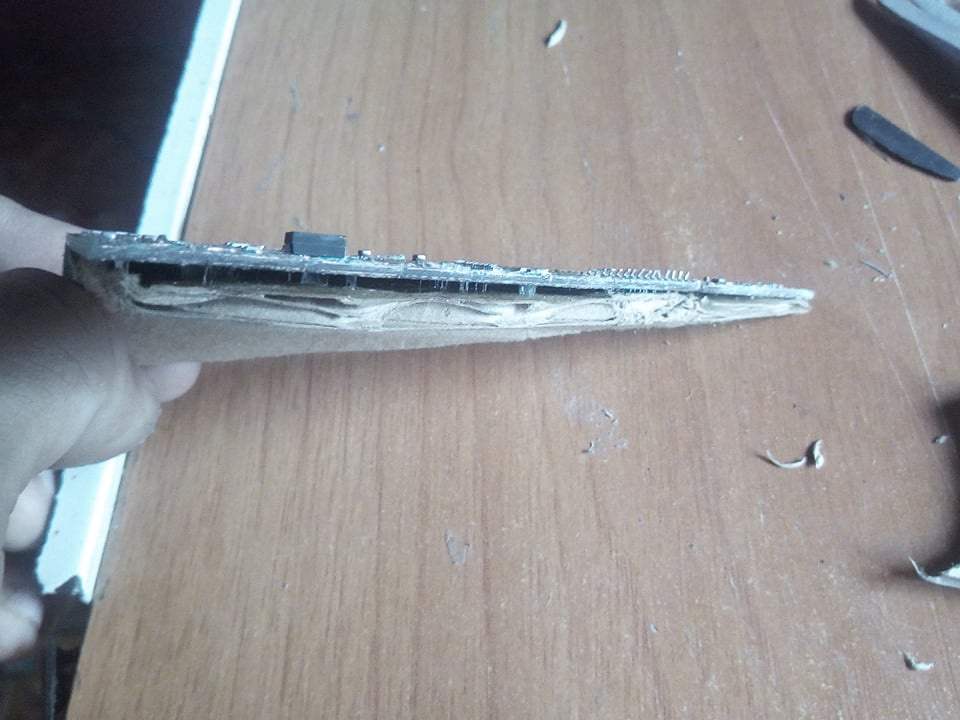
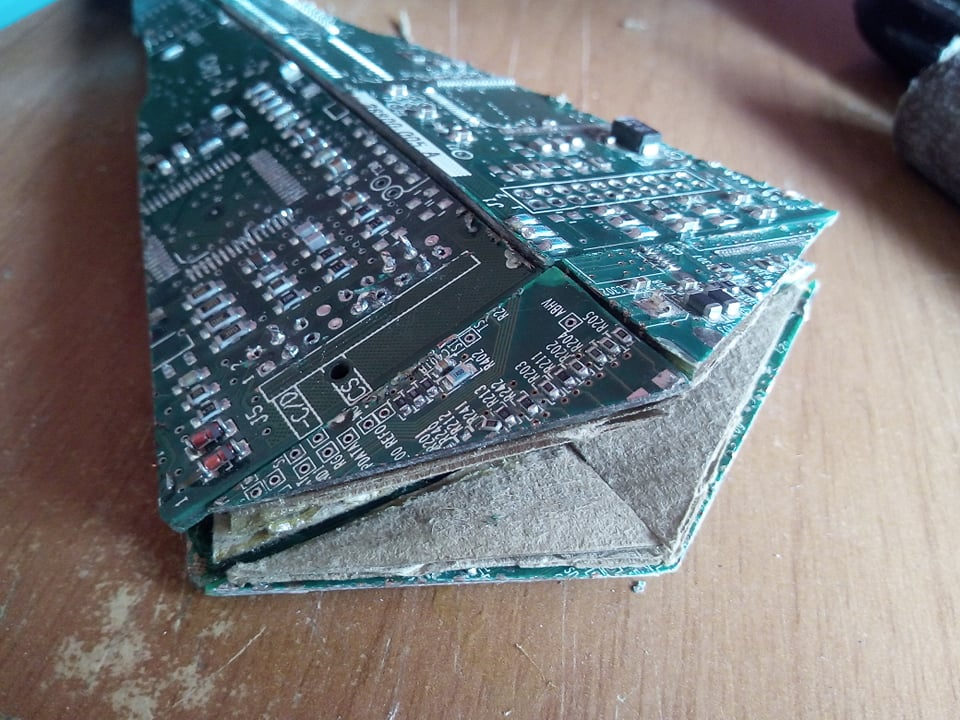
The next step is to seal the edges and we do this by cutting two thin strips of circuit board. We cut them to the size that fits us well and we place them on both edges. Then we finished making the control tower and the cannons of the Imperial Destroyer. To do it we use parts of the hard disk like these little pieces. Guiding us with the original model we look for the ones that are more similar so that it fits us better.
El siguiente paso es sellar los bordes y lo hacemos cortando dos tiras finas de placa de circuitos. Las cortamos del tamaño que nos quede bien ajustado y se las colocamos en ambos bordes. Despues terminamos haciendo la torre de control y los cañones del Destructor Imperial. Para hacerla utilizamos partes del disco duro como estas pequeñas piezas. Guiandonos con el modelo original buscamos las que sean mas parecidas para que nos quede mejor.
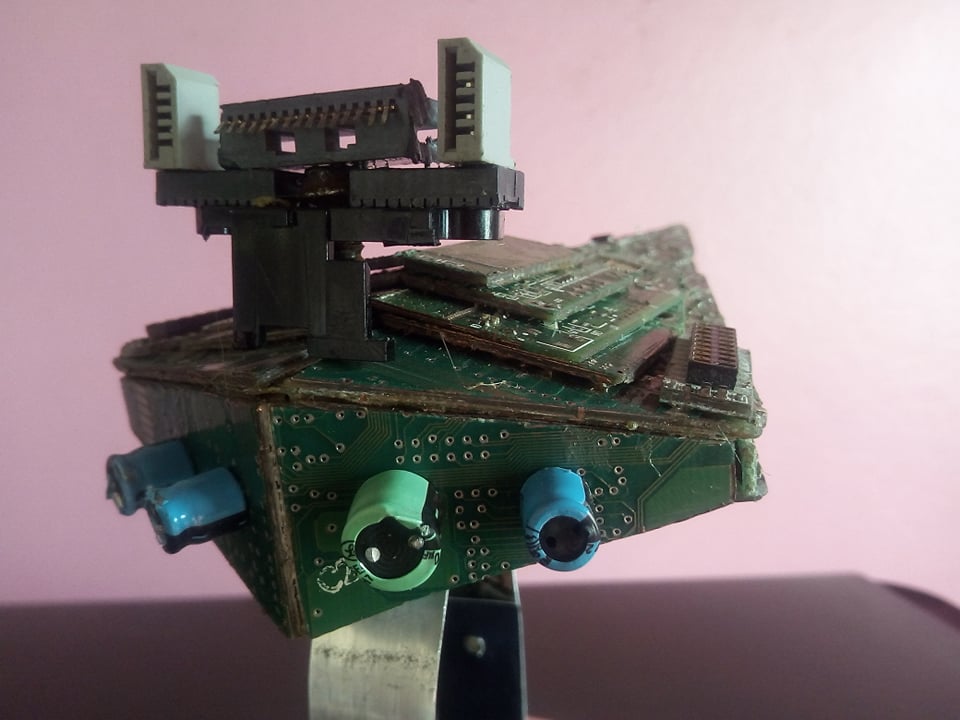

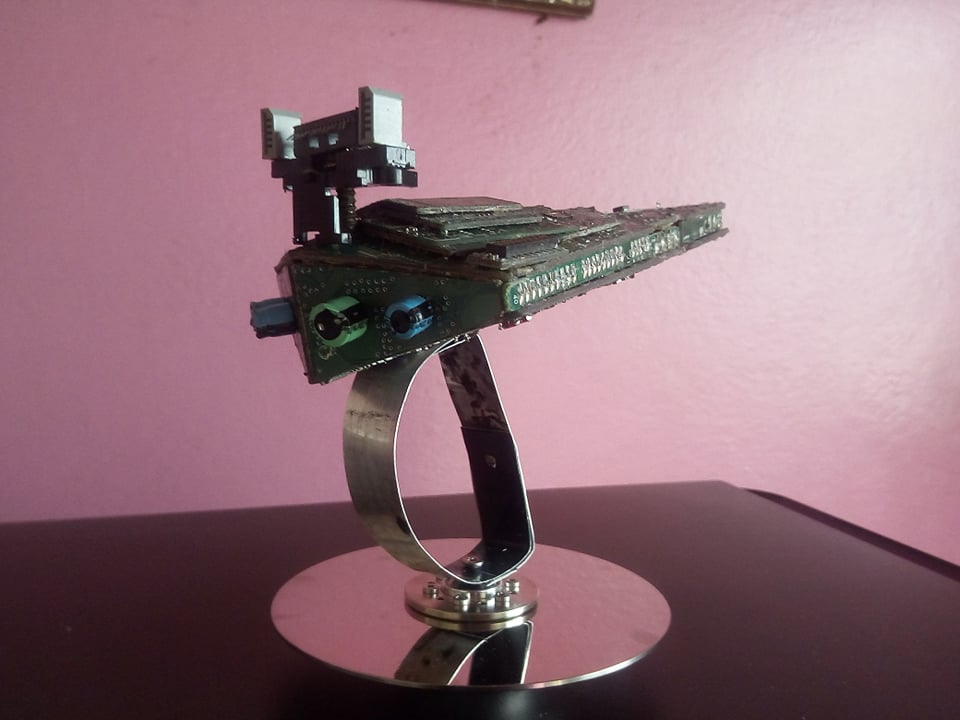
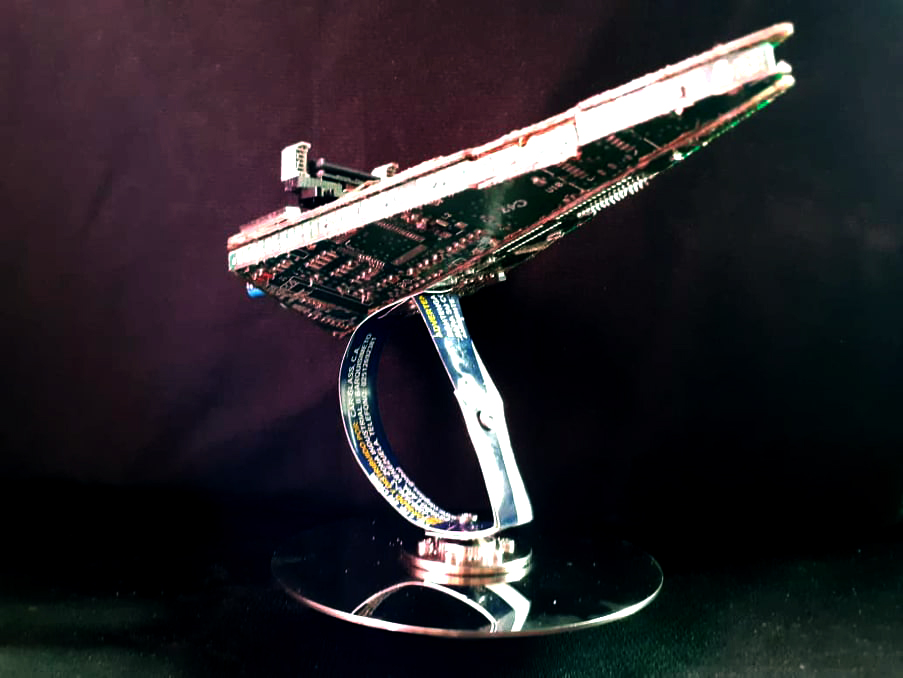
The last steps were easy. For the thrusters on the ship I used capacitors that come on some motherboards. And finally I made a pedestal for the ship using as a base the disk with its motor and in turn fastened with some bent aluminum sheets that are screwed from the ship to the disk.
Los ultimos pasos fueron algo sencillo. Para los propulsores de la nave utilicé condensadores que vienen en algunas placas madre. Y de ultimo hice un pedestal para la nave usando como base el disco con su motor y a su vez sujetado con unas laminas de alumino dobladas que van atornilladas desde la nave hasta el disco.
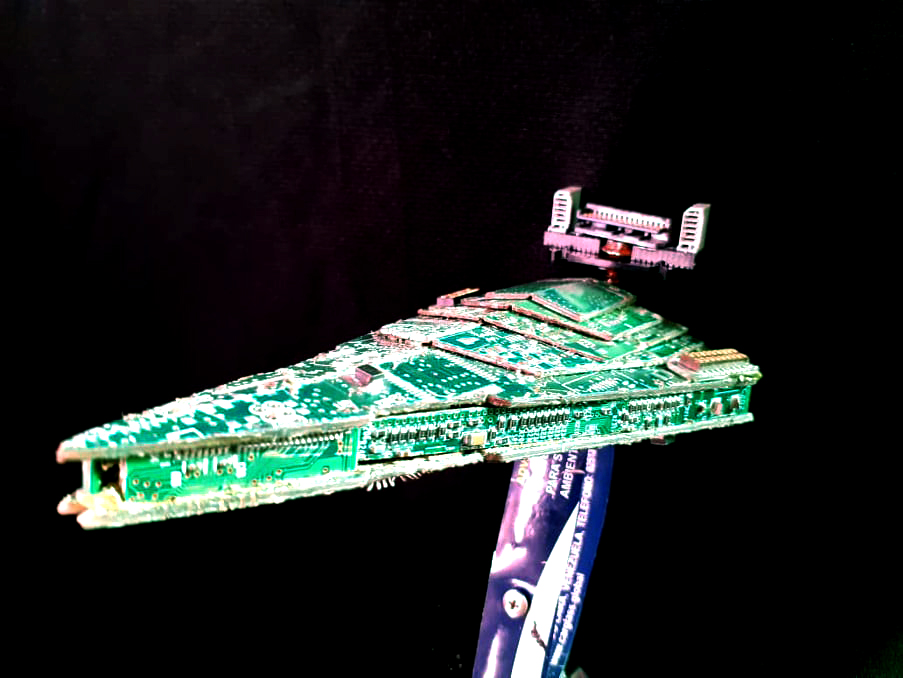
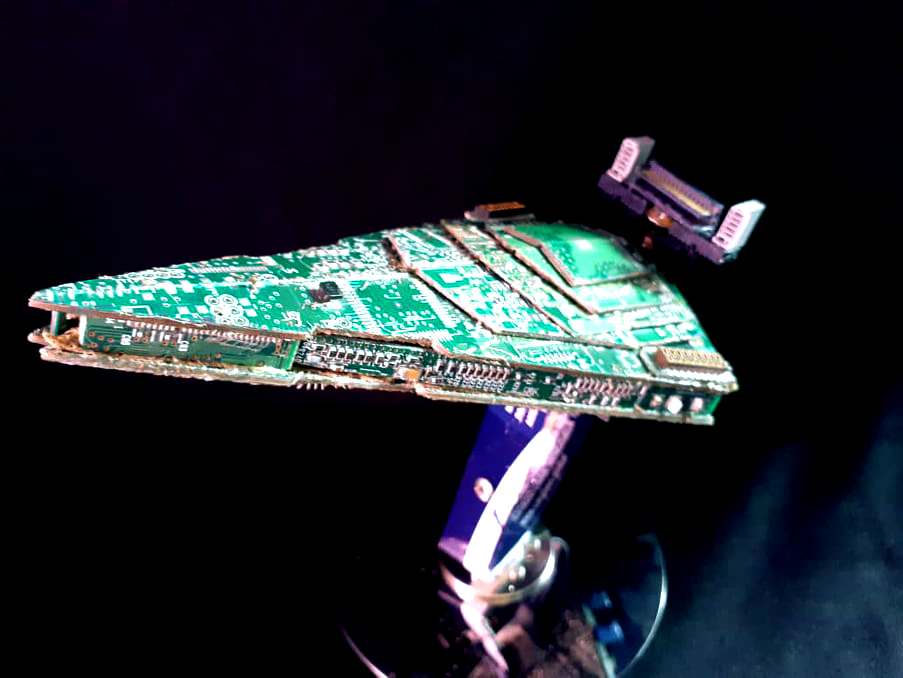
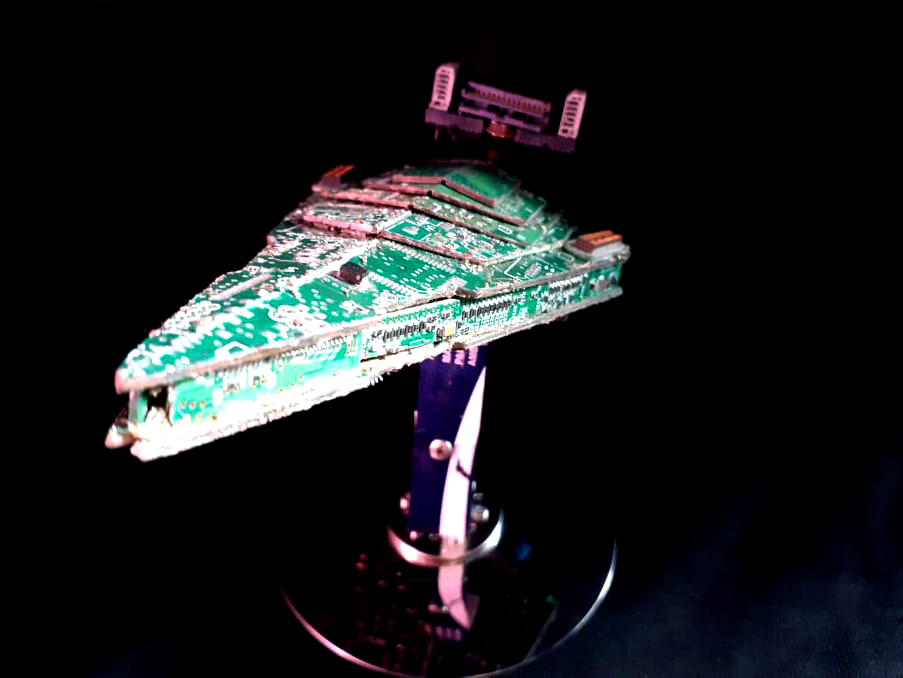
This is how the ship has been with the final finishes. Then I cleaned all its parts and applied a layer of transparent spray varnish to give it more shine and protect it from deterioration. It took almost 4 days to make this piece. As you can see, each part was taken from computer parts especially from the hard disk. Hope you liked and appreciated the building process. If you want you can follow me and so you will see my next jobs. I await your comments to know your opinion. Have a good day and may The Force be with you.
Asi es como ha quedado la nave con los acabados finales. Luego le hice limpieza a todas sus partes y le puse una capa de barniz transparente en spray para darle mas brillo y protejerla del deterioro. Tarde casi 4 días en hacer esta pieza. Como pudieron ver cada parte fue tomada de piezas de computadora especialmente del disco duro. Espero que les haya gustado y hayan apreciado el proceso de construcción. Si desean pueden seguirme y asi veran mis siguientes trabajos. Espero sus comentarios para saber su opinion. Que tengan un buen día y que La Fuerza los acompañe..

Gran trabajo mi amigo. Un saludo desde México.
@tipu curate
Upvoted 👌 (Mana: 65/78) Liquid rewards.
gracias amigo por el comentario y que bueno que te haya gustado mi trabajo. Muy agradecido por tu apoyo.
Great project! I've been looking for a good use for my old PCBs, and this is wonderful!
The cuts are very clean and precise, what did you use to cut the circuit boards?
I used a hacksaw. The precision is due to the fact that the time is new and cuts circuit boards very well. Also because I try to be very exact when measuring. I think you will put your computer parts to good use. This is a good chance.
Muchas gracias por el apoyo a mi trabajo por parte de ustedes. Muy agradecido