.jpeg)

Español
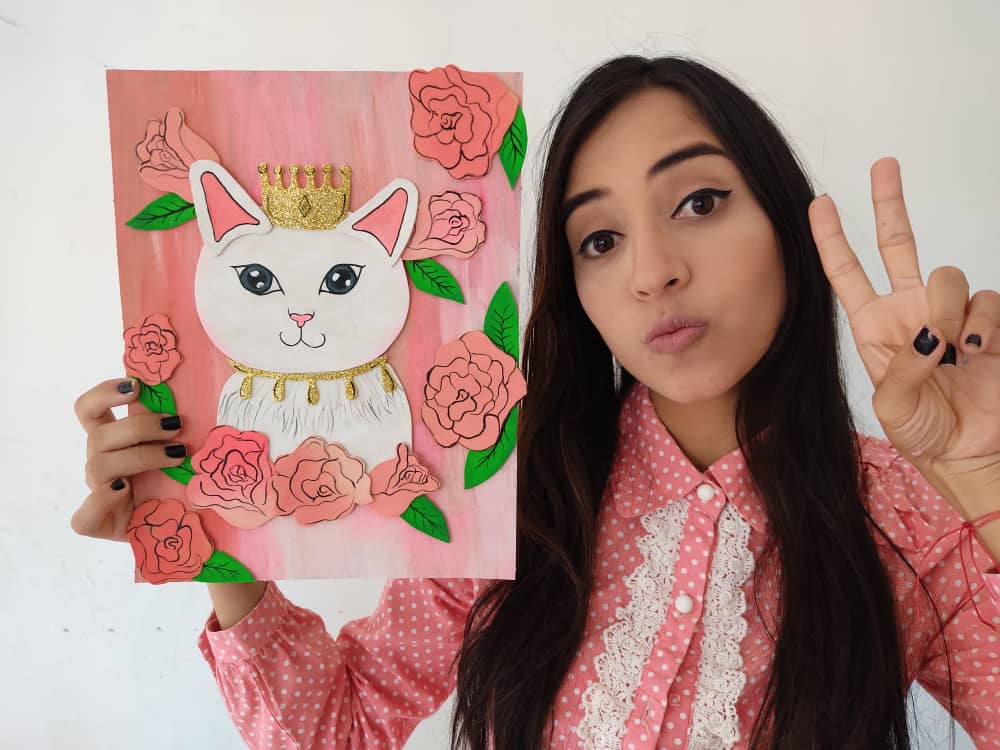
Hola querido HIVE ❤️ A pocos días para terminar este año, les traigo otro nuevo divertidísimo tutorial donde aprenderemos a realizar un hermoso cuadro de una gata reina, una perfecta imagen para decorar nuestras paredes favoritas dando ese toque creativo y personal, y lo mejor de todo es que esta hecho de materiales súper económicos y muy fáciles de conseguir. Así que, los invito a seguir disfrutando de este divertido trayecto, perfecto para el desarrollo de la creatividad de todos, especialmente de nuestros niños.
English
Hello, dear HIVE ❤️ A few days to finish this year, I bring you another new hilarious tutorial where we will learn how to make a beautiful painting of a queen cat, a perfect image to decorate our favorite walls giving that creative and personal touch, and the best of all is that it is done made of super cheap materials and very easy to get. So, I invite you to continue enjoying this fun journey, perfect for developing everyone's creativity, especially our children.
¿Qué están esperando?
Gracias a esta técnica podemos crear nuestro propio cuadro de gata reina, además, una hermosa obra hecha en casa es una manera creativa y muy económica de darle un toque de alegría a nuestro entorno. Antes de comenzar no olvidemos lavarnos nuestras manos.
What are they waiting for?
Thanks to this technique we can create our own queen cat painting, in addition, a beautiful work made at home is a creative and very economical way to give a touch of joy to our environment. Before we start, let's not forget to wash our hands.
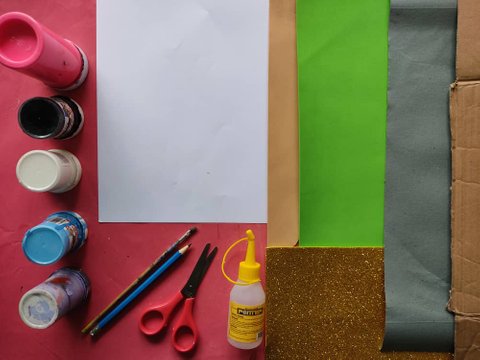
[Materiales | Materials]
Para realizar esta linda obra necesitaremos:
- Moldes.
- Foamy o goma eva.
- Papel vegetal o calco.
- Lamina de cartón.
- Regla.
- Lápiz.
- Marcador.
- Tijera.
- Cúter.
- Pincel o brocha.
- Pinturas.
- Silicón liquido o pegamento.
To make this cute work we will need:
- Molds.
- Foamy or eva foam.
- Vegetable paper or tracing.
- Cardboard sheet.
- Rule.
- Pencil.
- Bookmark.
- Scissors.
- Cutter.
- Brush or brush.
- Paintings.
- Liquid silicone or glue.
Procedimiento (paso a paso)
Process (step by step)
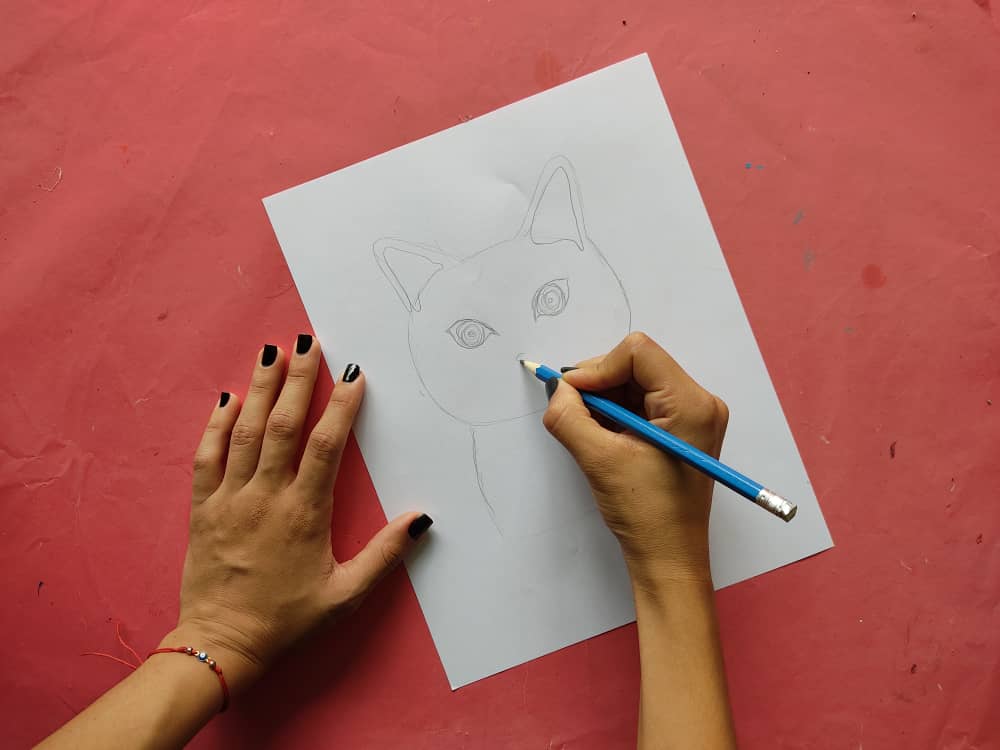
Primero, dibujamos una linda y elegante gatita rodeada de lindas flores y por supuesto con una bella corona de reina.
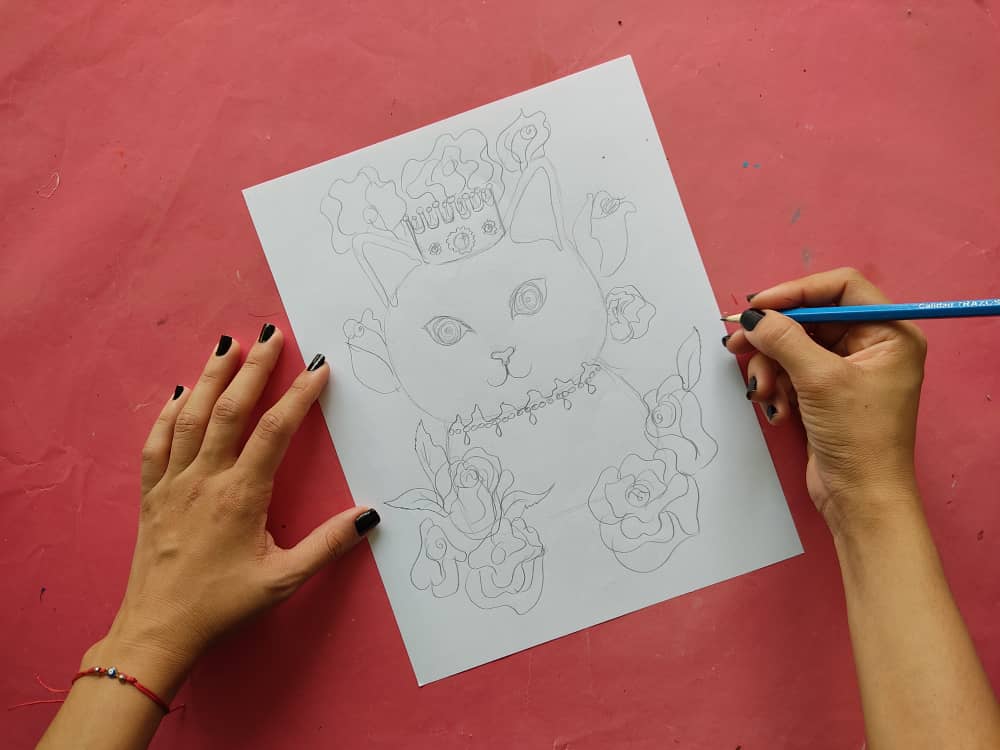
First, we draw a cute and elegant kitten surrounded by pretty flowers and of course with a beautiful queen crown.
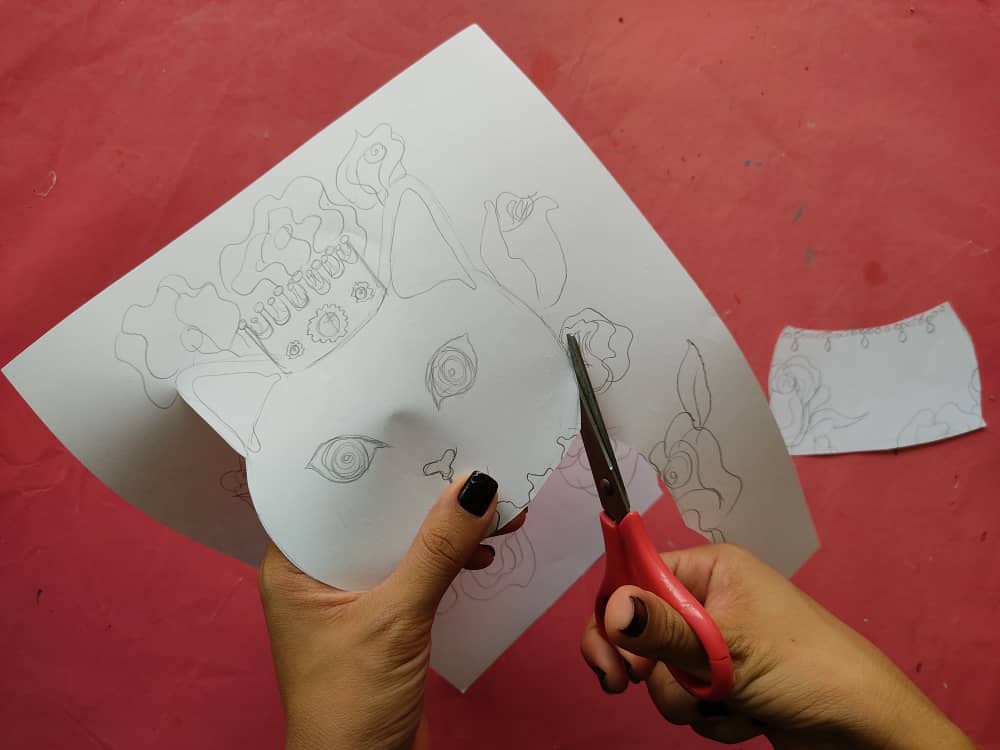
Seguidamente, recortamos con mucho cuidado nuestro dibujo separando su cabeza, orejas, y cuerpo.

Next, we carefully cut out our drawing, separating the head, ears, and body from it.
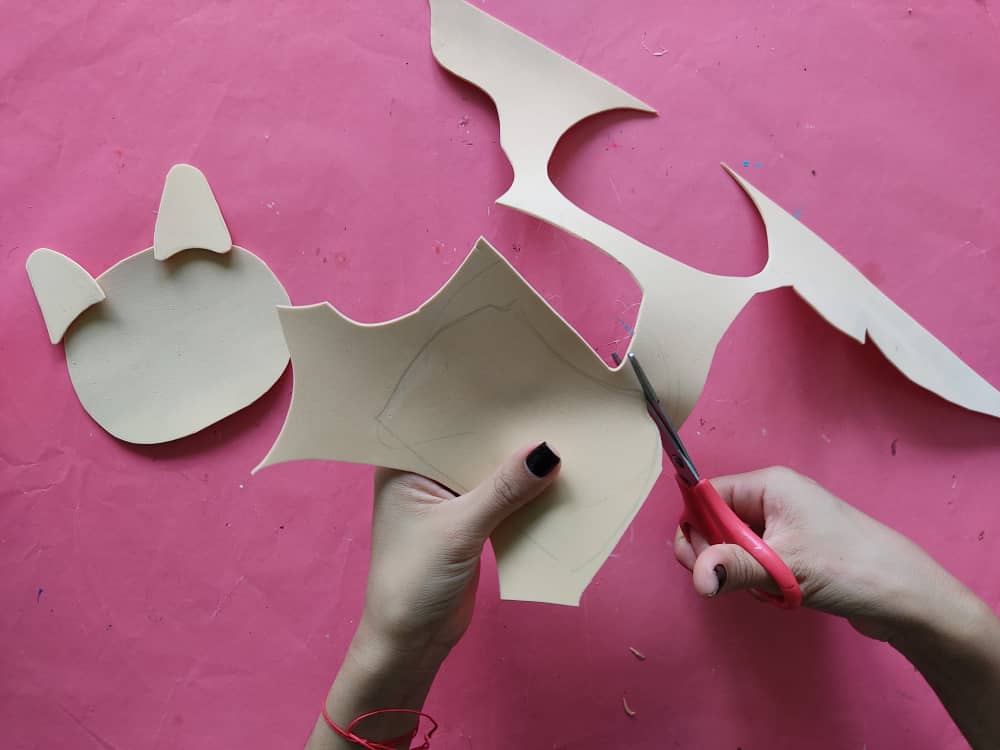
Ahora, transferimos las partes de nuestra obra al foamy de los colores que más nos gusten o tengamos, en este caso, yo opte por utilizar foamy color piel.
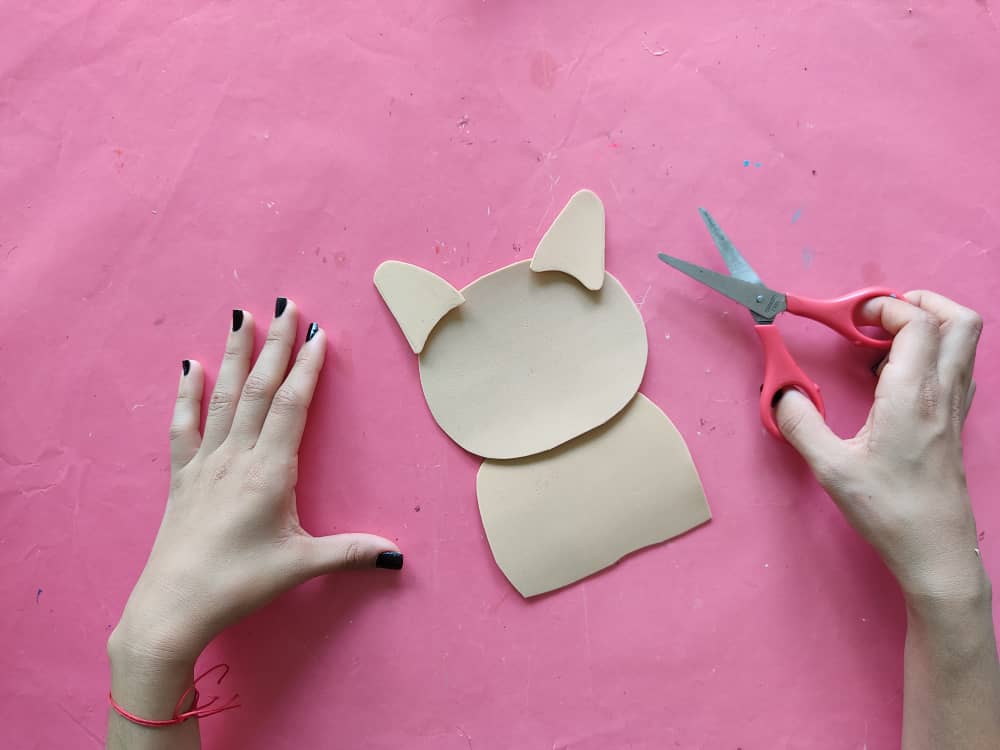
Now, we transfer the parts of our work to the foamy of the colors that we like or have the most, in this case, I chose to use skin-colored foamy.
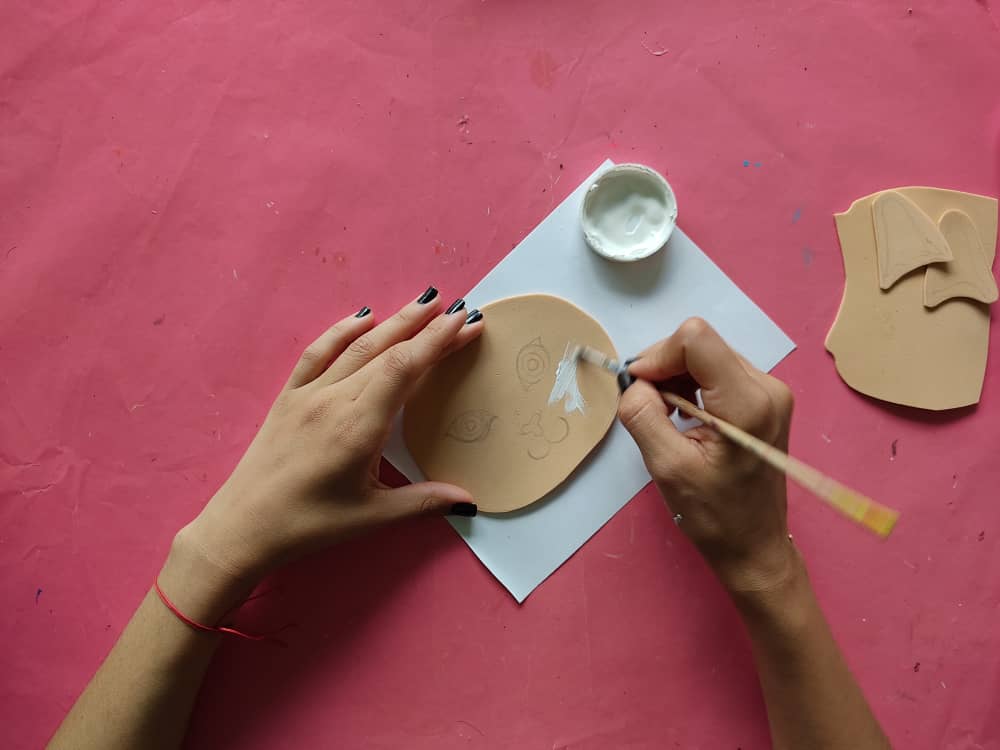
Luego, aplicamos una delicada base de color blanco a cada parte de nuestra reina.
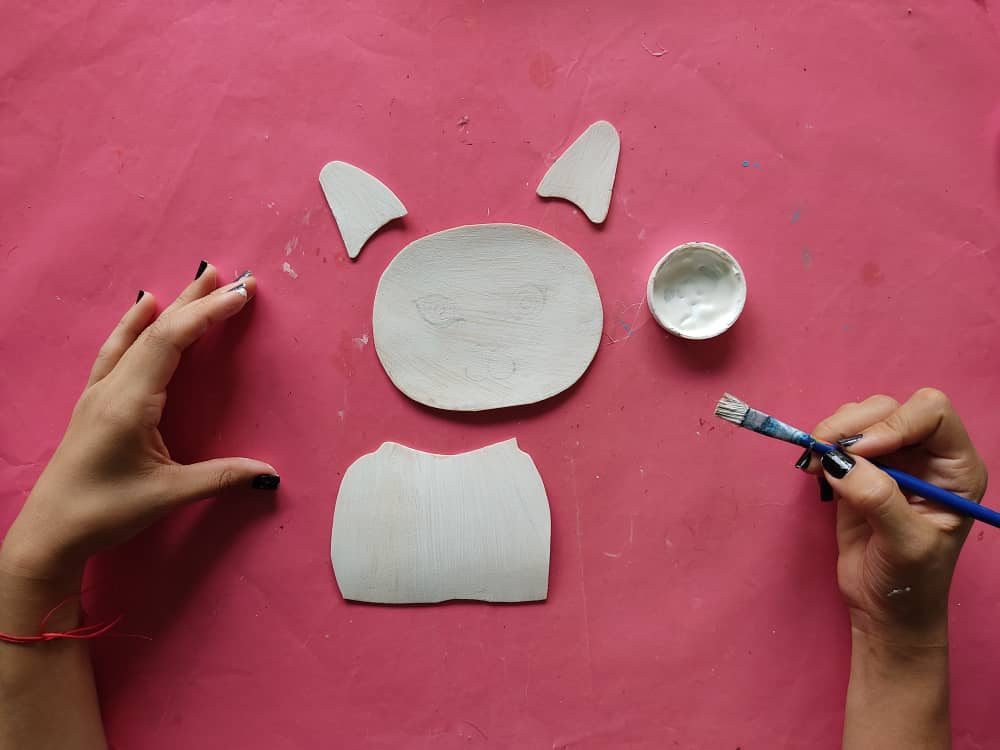
Then we apply a delicate white base to each part of our queen.
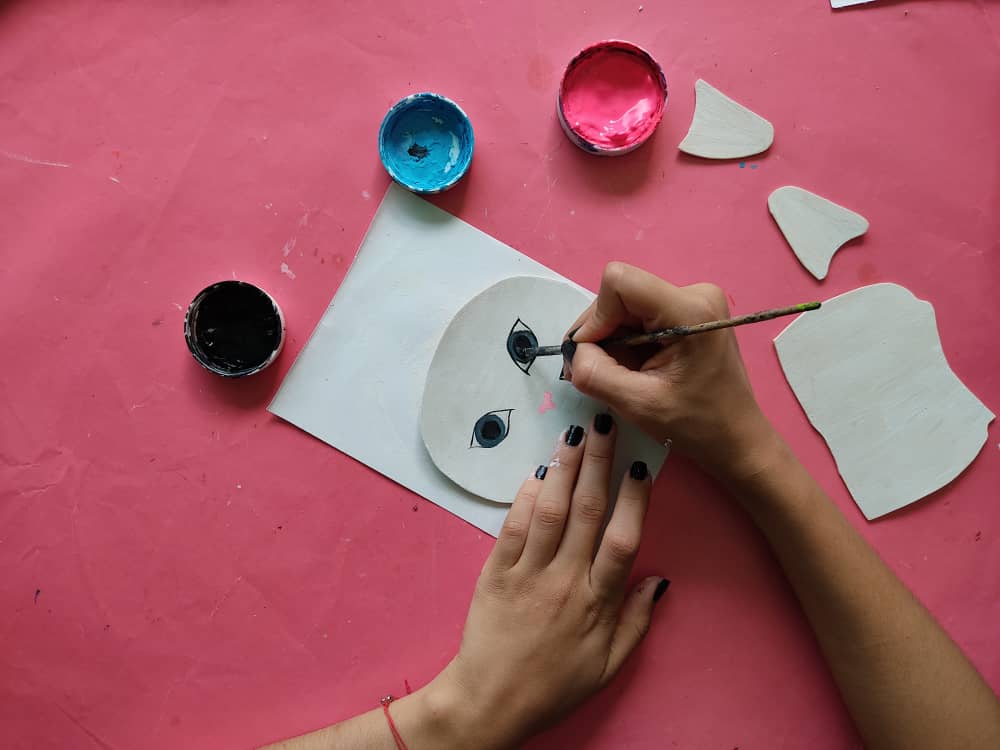
Una vez que estén totalmente secas la pintura base, comenzamos a definir la tierna cara de la gata, su pequeña nariz, boca, y sus ojos muy grandes y hermosos.
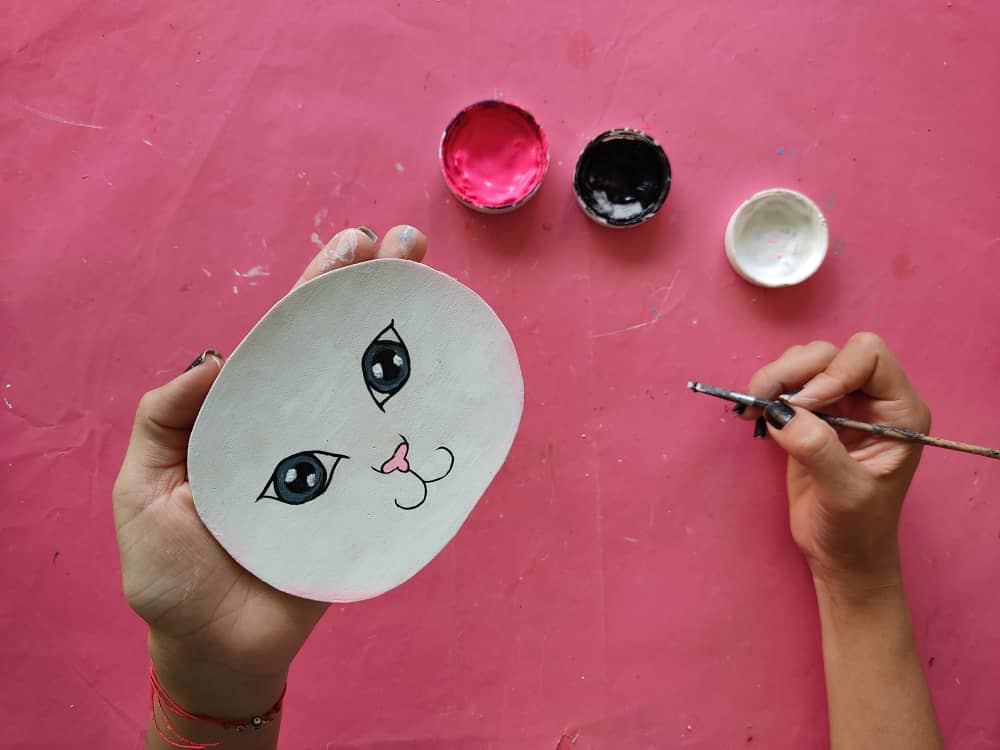
Once the base paint is completely dry, we begin to define the cute face of the cat, her small nose, mouth, and her very large and beautiful eyes.
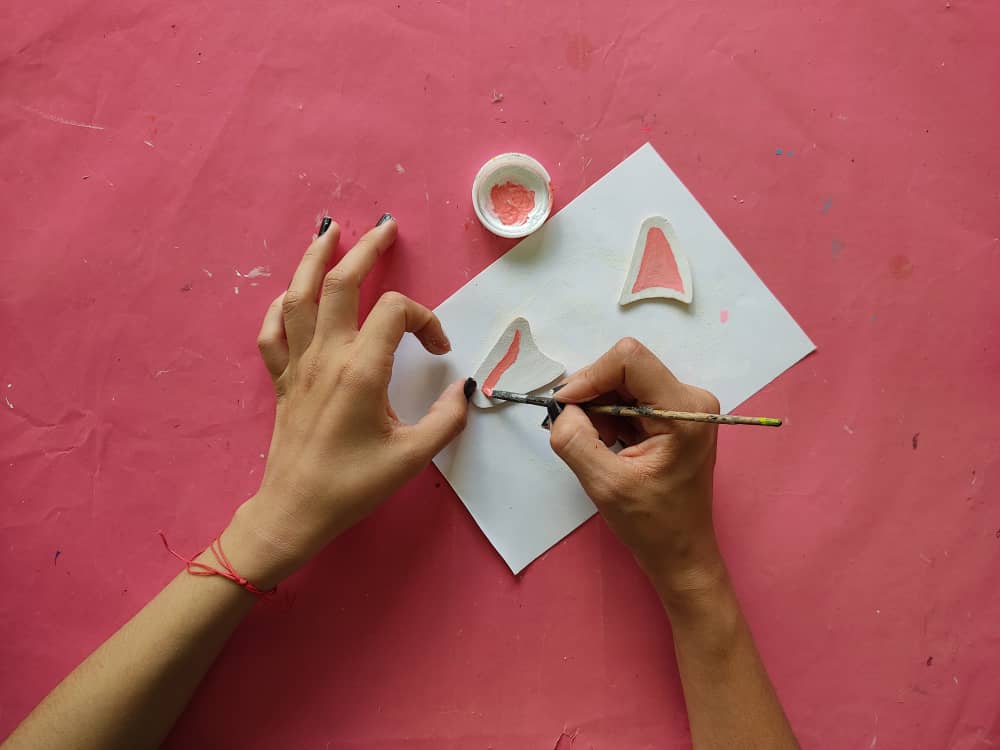
Seguidamente, pintamos el centro de las orejas de color rosado, y pintamos pequeñas hebras de cabello cerca del cuello de la gatita.
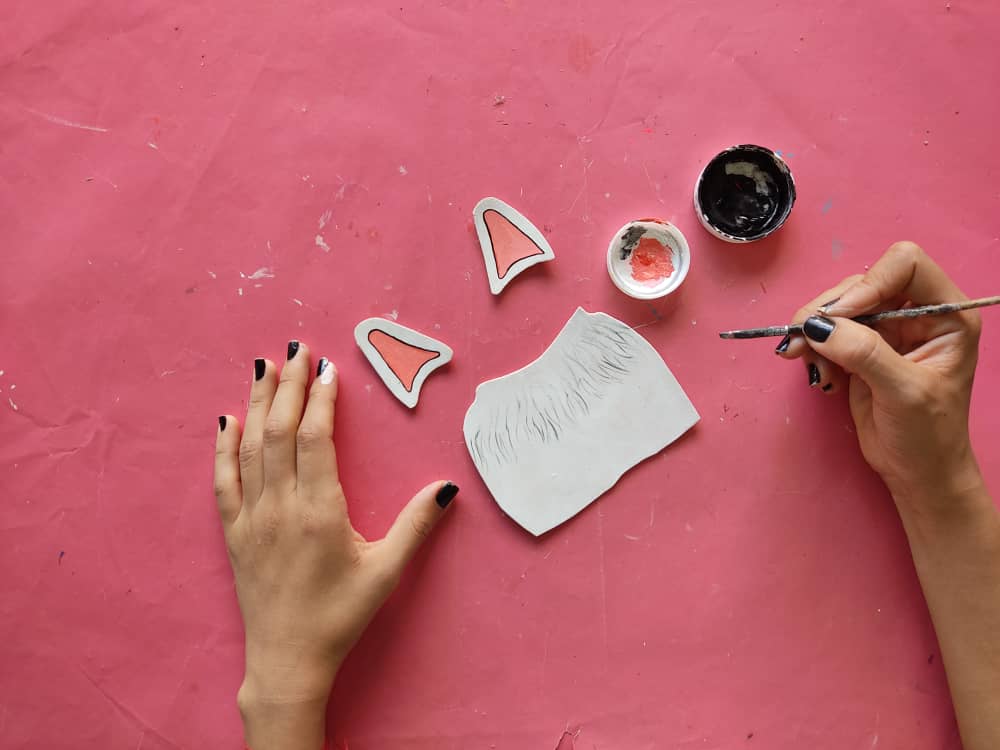
Next, we paint the center of the ears pink and paint small strands of hair near the kitten's neck.
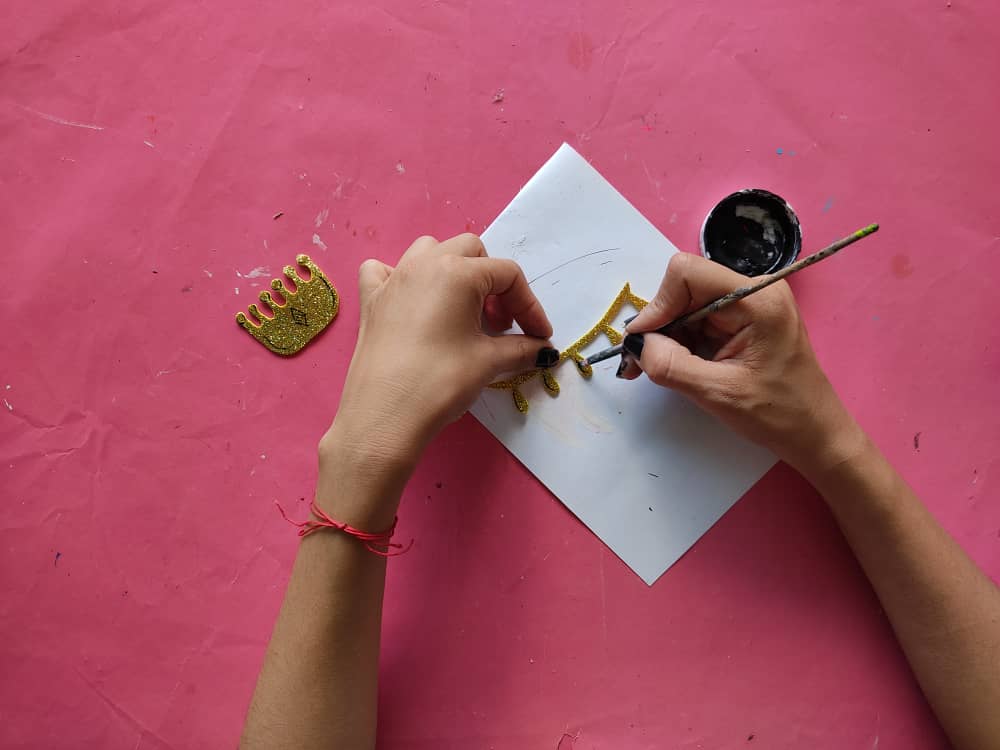
Ahora, elaboramos una hermosa corona y un elegante collar en el foamy dorado escarchado, y recortamos con mucho cuidado. Después, hacemos pequeñas marcas de color negro sobre estás para dar un toque de profundidad.
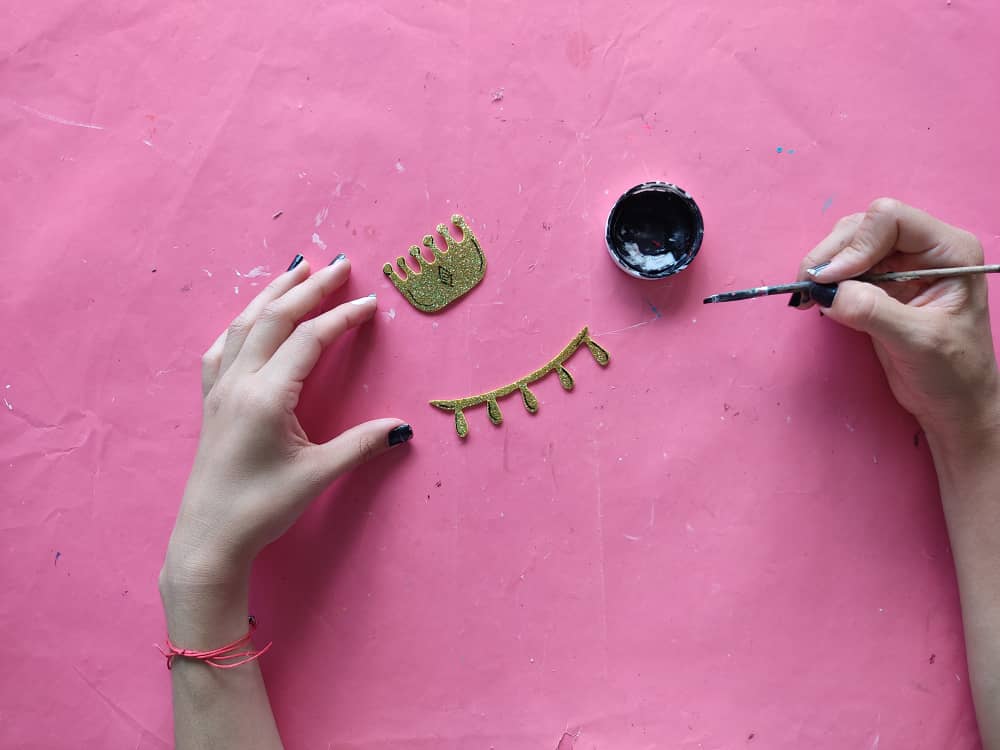
Now, we make a beautiful crown and an elegant necklace in the frosted golden foamy, and we cut very carefully. Then, we make small black marks on you to give a touch of depth.
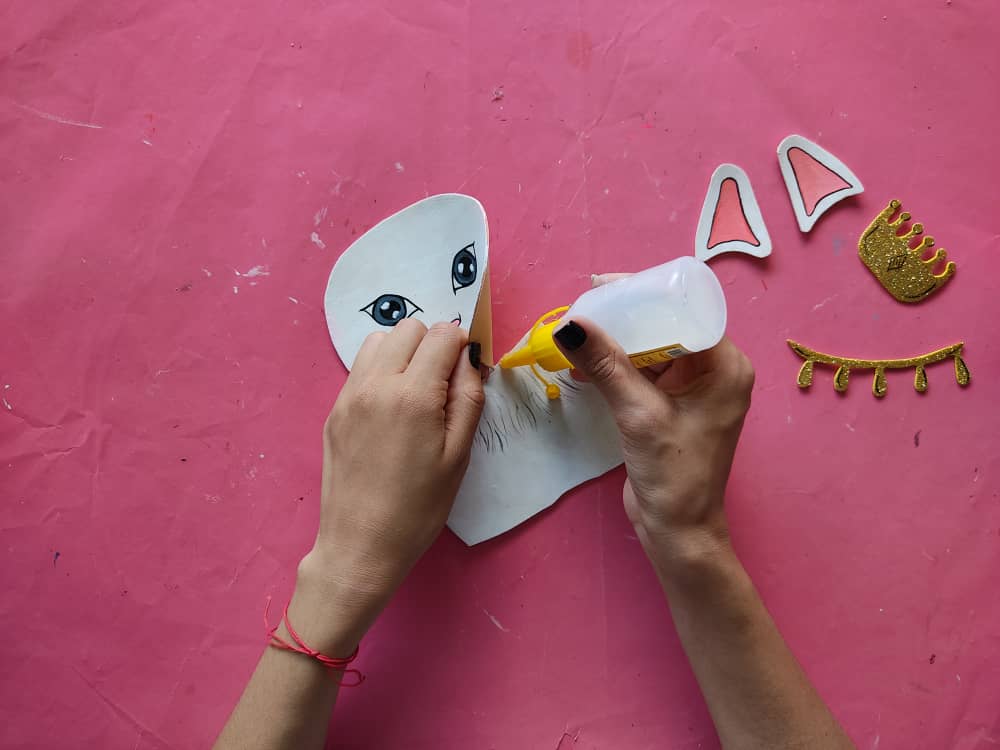
Una vez listas todas las partes de la reina, comenzamos a armar utilizando silicón frío y ubicando cada pieza en su lugar.
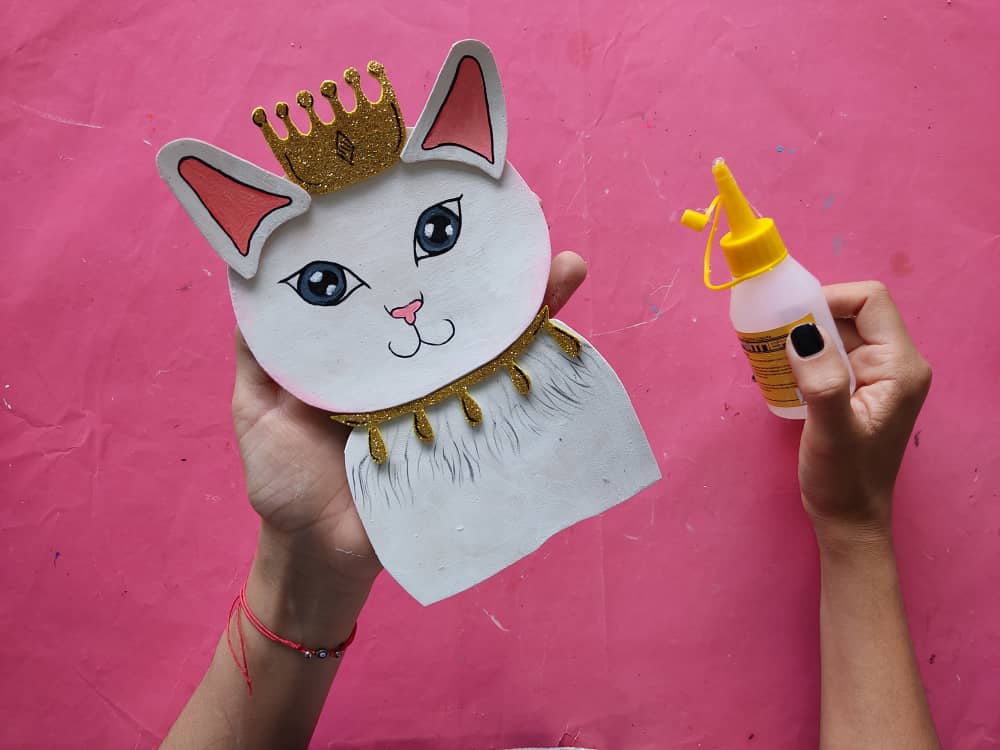
Once all the parts of the queen are ready, we begin to assemble using cold silicone and placing each piece in its place.
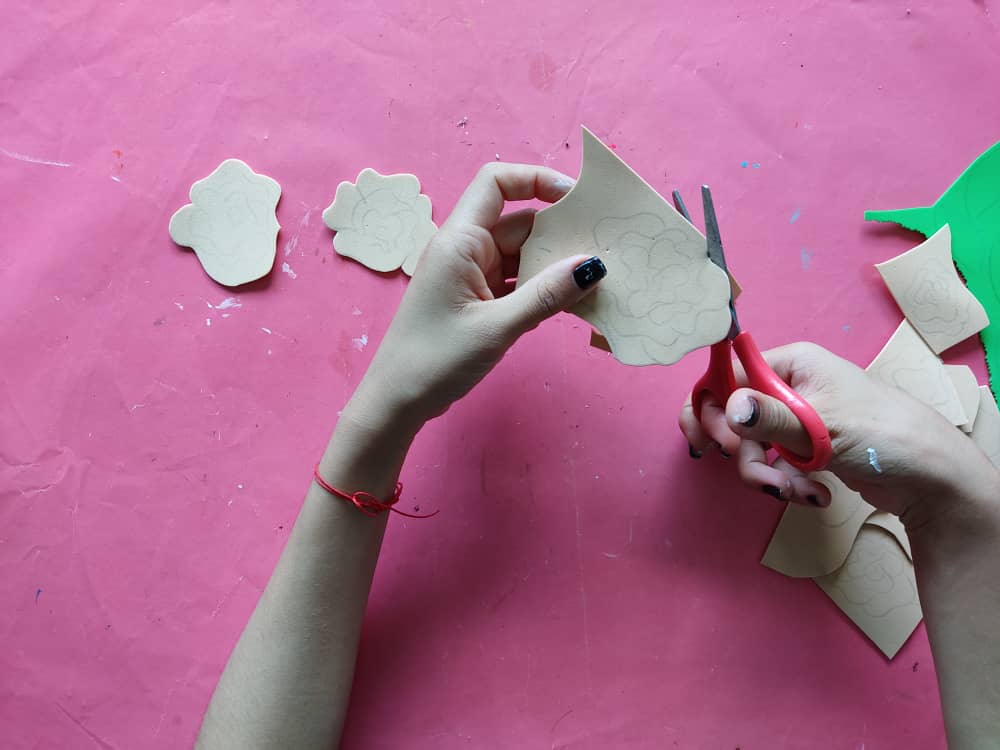
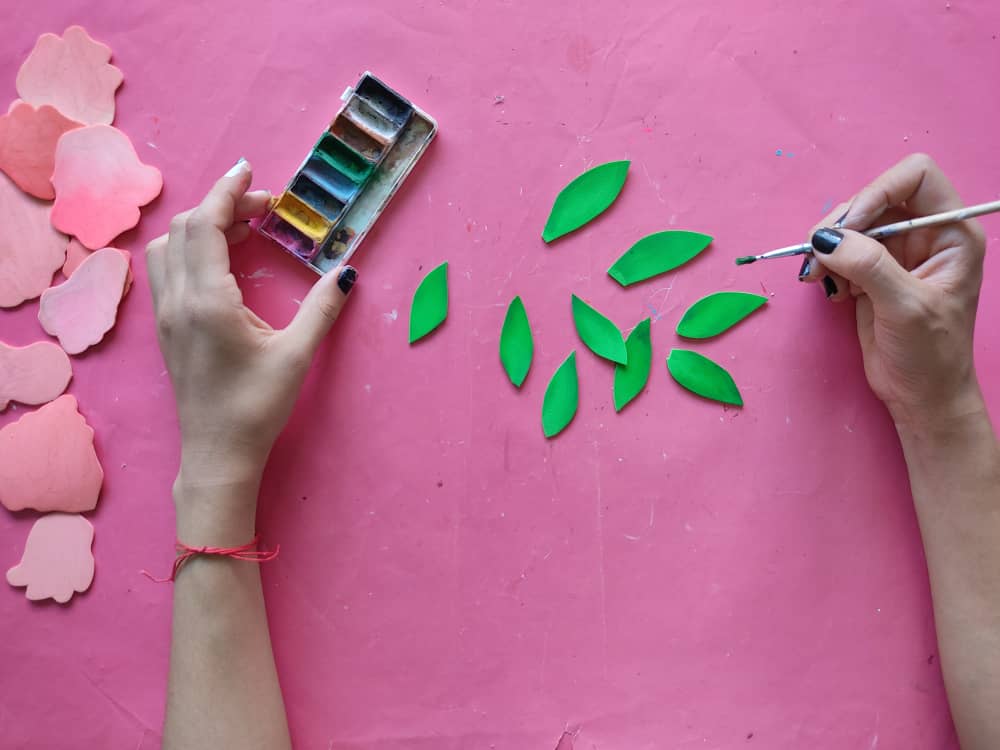
Ahora, elaboramos unas flores y sus hojas en retazos de foamy para decorar nuestra obra y recortamos.
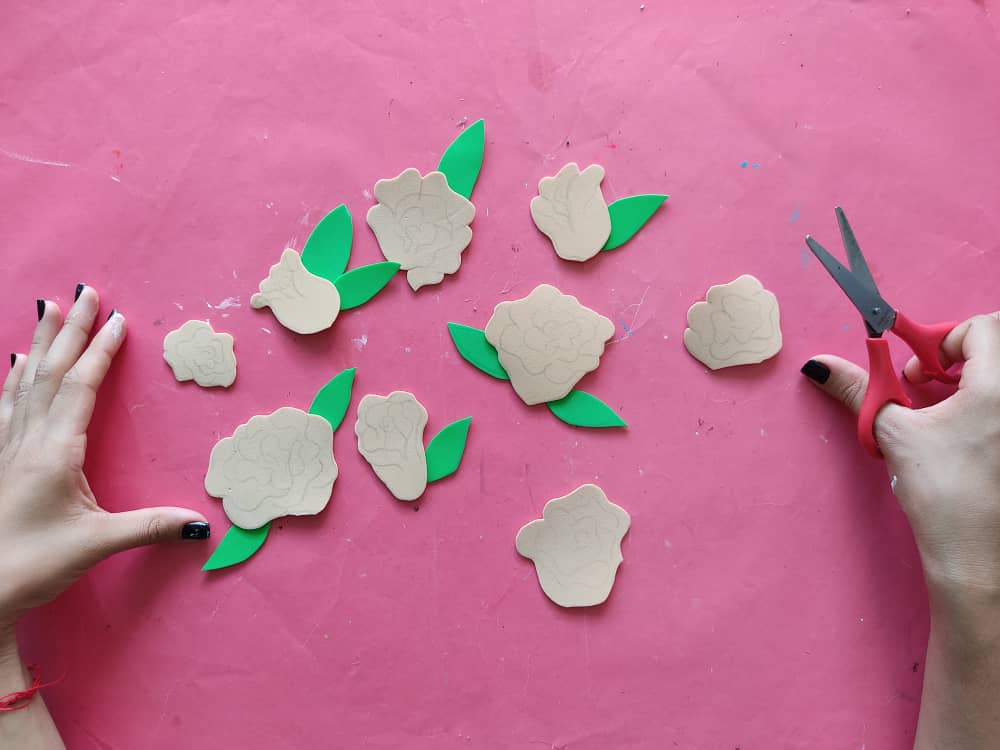
Now, we make some flowers and their leaves in foamy pieces to decorate our work and cut them.
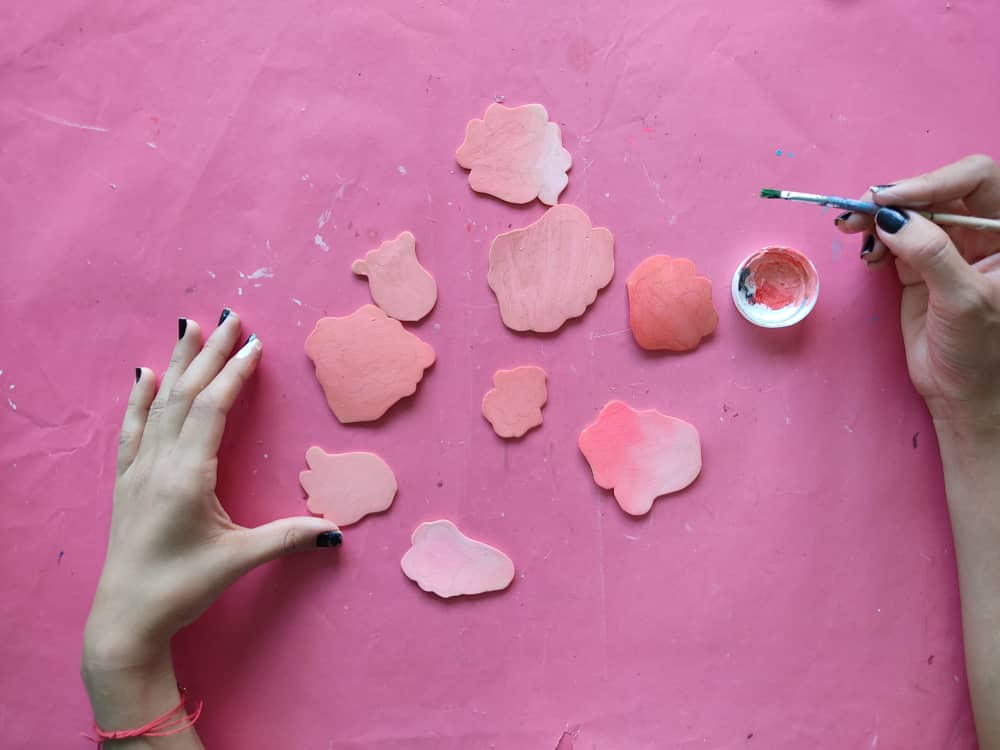
Luego, las pintamos de lindos colores entre coral, naranja, blanco y rosa, y marcamos los bordes y detalles en color negro.
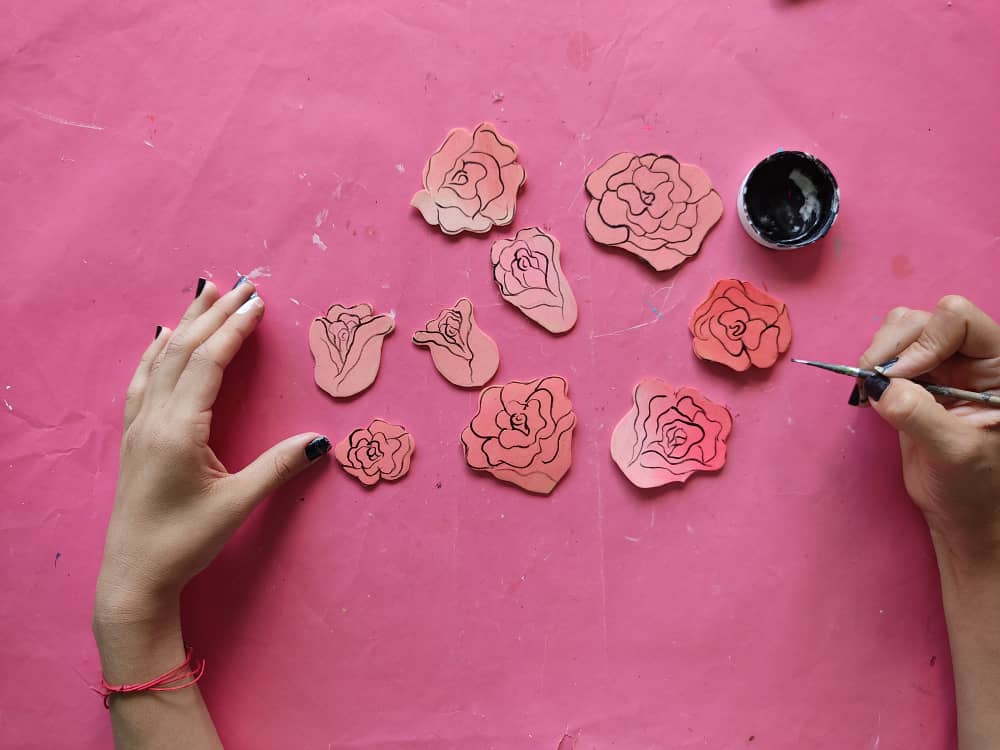
Then, we painted them in beautiful colors between coral, orange, white, and pink, and we marked the edges and details in black.
Seguidamente, sombreamos un poco los bordes de las hojas con un color verde más oscuro y definimos sus detalles con la ayuda del pincel fino y pintura negra.
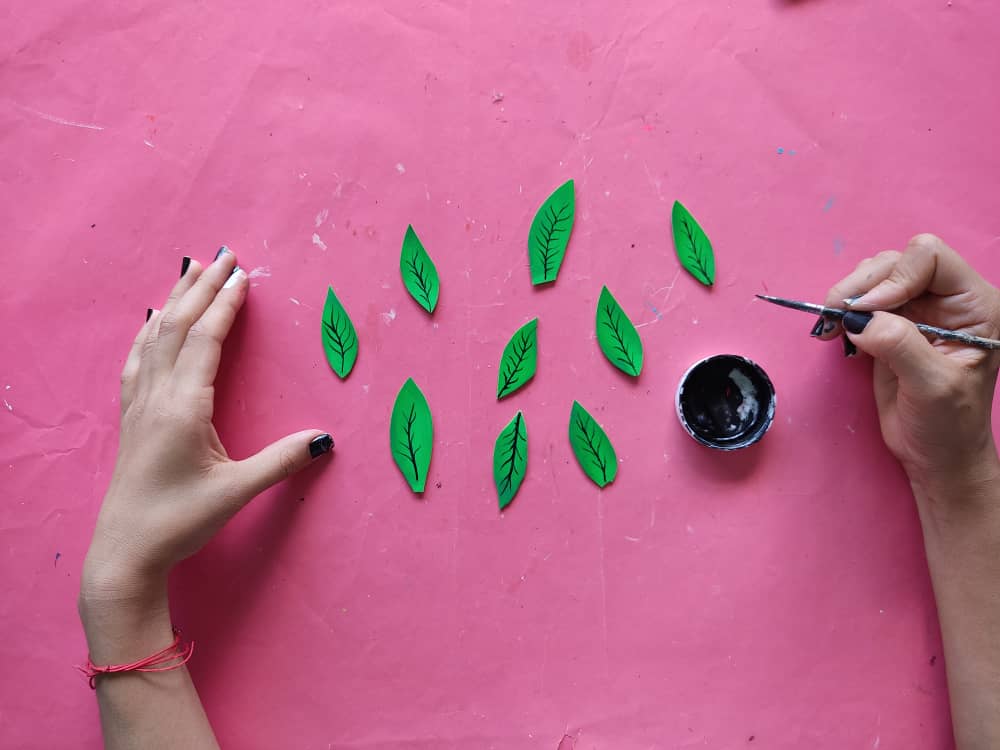
Next, we shade the edges of the leaves a little with a darker green color and define their details with the help of the fine brush and black paint.
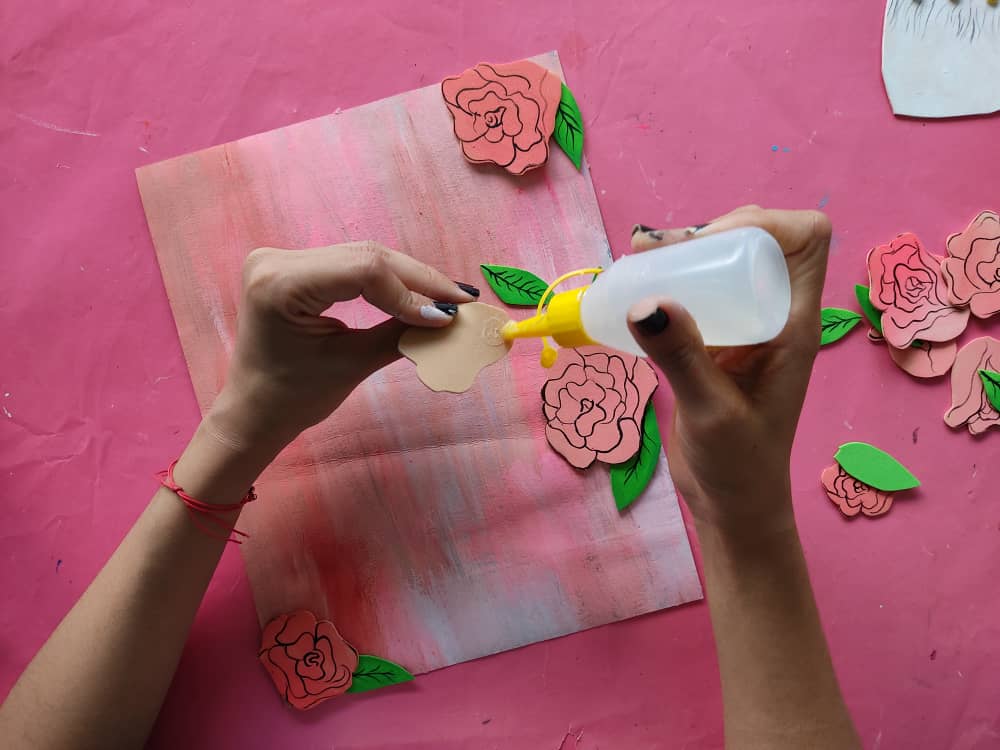
Ahora, fabricamos una base de cartón de aproximadamente 23 cm por 28 cm y la pintamos de colores muy tiernos como los de las flores. Después, pegamos algunas flores que estarán alrededor de la gata y algunas que irán detrás de ella.
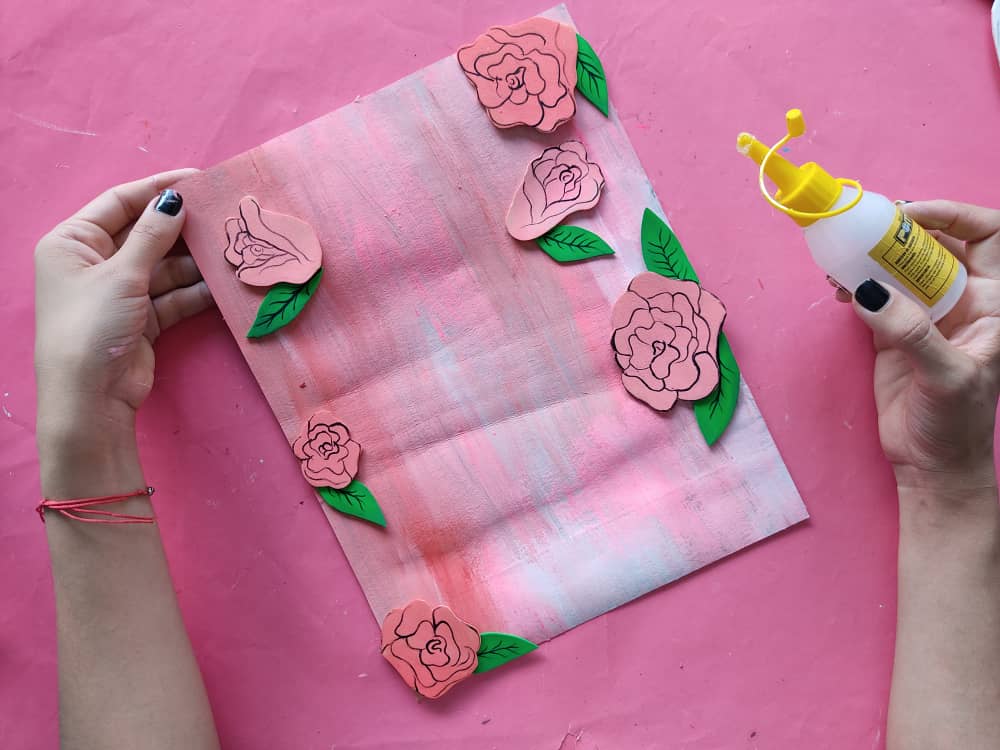
Now, we make a cardboard base of approximately 23 cm by 28 cm and paint it is very tender colors like those of the flowers. Next, we glue some flowers that will be around the cat and some that will go behind her.
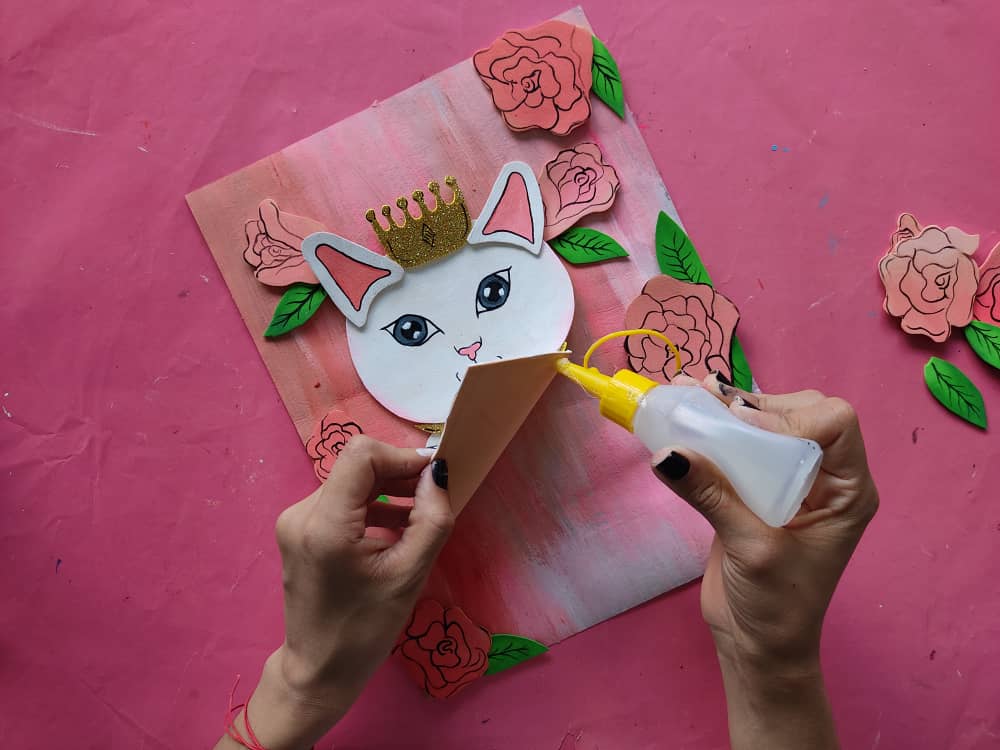
Luego, pegamos la gatita reina en el centro del cuadro y el resto de las flores en la parte inferior de esta.
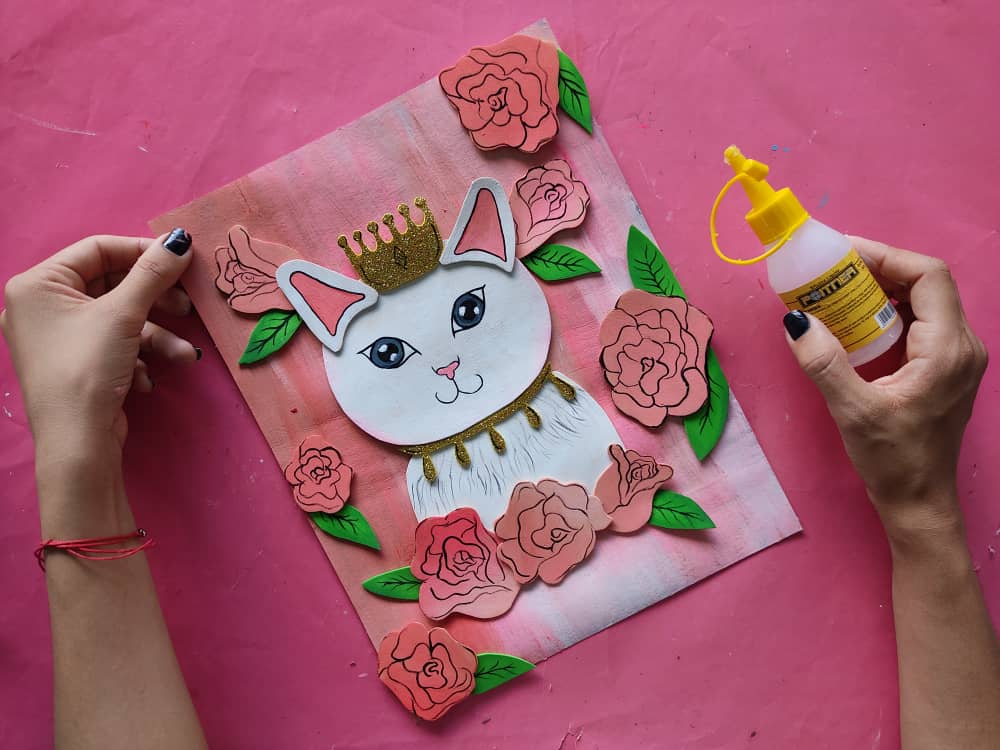
Then, we glue the queen kitten in the center of the frame and the rest of the flowers in the lower part of it.
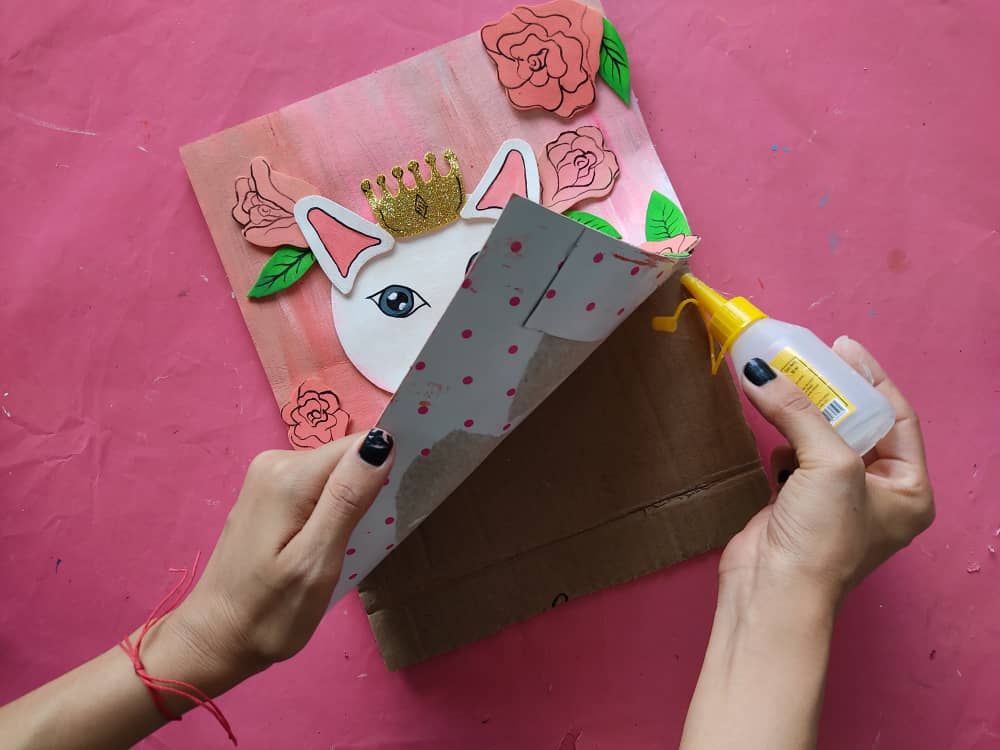
Finalmente, pegamos nuestro lindo cuadro a una base de cartón más grueso para que tenga mayor firmeza.
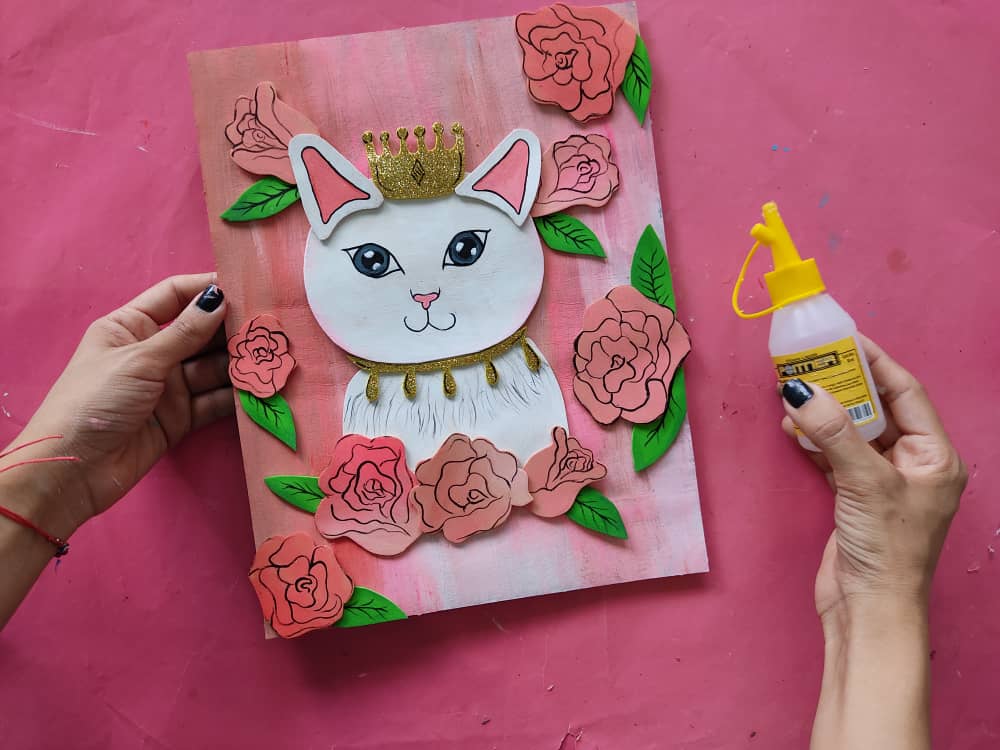
Finally, we glue our cute box to a thicker cardboard base to make it more firm.
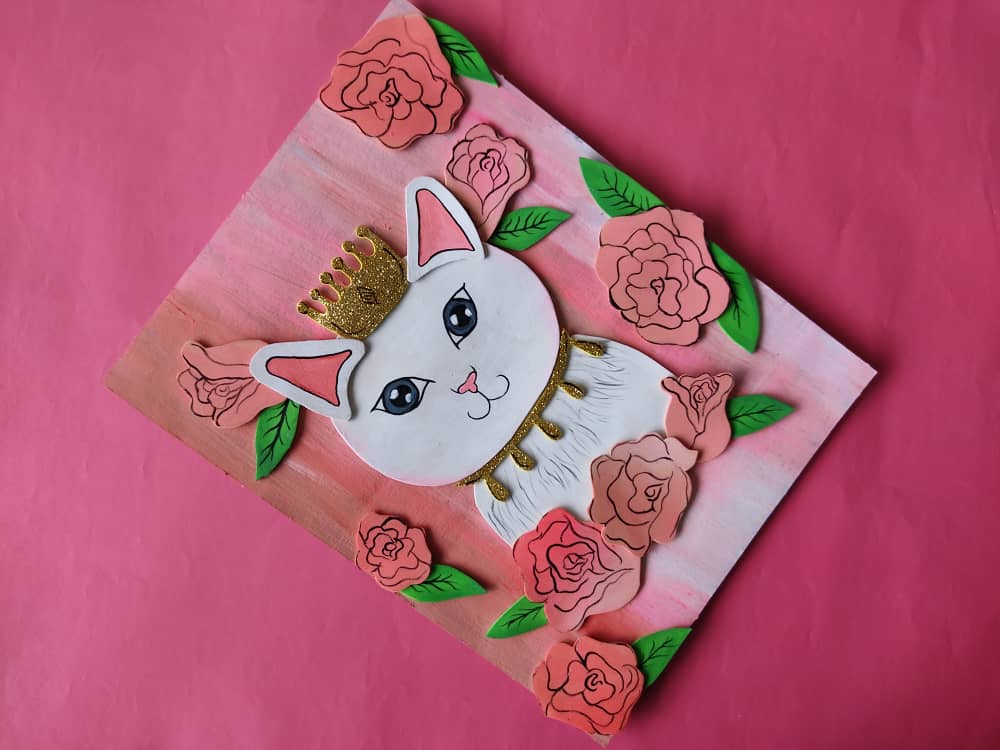
Gracias por acompañarme y espero que lo hayan disfrutado. ❤️
Thanks for joining and I hope you enjoyed it.❤️
.jpeg)
.jpeg)
.jpeg)
.jpeg)
.jpeg)
.jpeg)
.jpeg)


My twt #posh
👍👍
Congratulations, your post has been upvoted by @dsc-r2cornell, which is the curating account for @R2cornell's Discord Community.