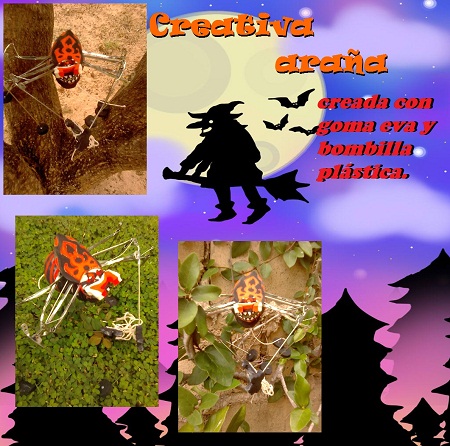
¡Hola a todos queridos amigos de Hive! bienvenidos una vez más a este nuevo capítulo de este maravilloso mundo de creatividad, en esta ocasión voy a compartirles una alegre araña, utilizando como parte principal una bombilla plástica que forma el cuerpo, acompañada de sus ocho patas de metal, obtenidas tras desalmar un viejo paraguas obsoleto, de este modo creamos una inusual y llamativa manualidad de halloween, ideal para lucir en estos días.
Hi all dear Hive friends! welcome once again to this new chapter of this wonderful world of creativity, this time I am going to share with you a cheerful spider, using as its main part a plastic bulb that forms the body, accompanied by its eight metal legs, obtained after desouling an old obsolete umbrella, in this way we create an unusual and striking halloween craft, ideal to wear these days.
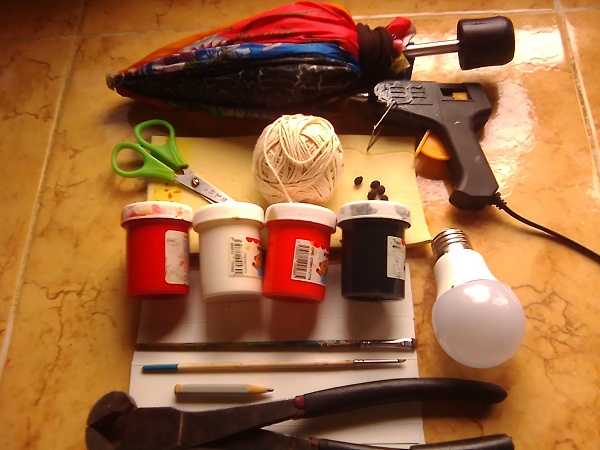
🎃 Materiales:
- Paraguas.
- Goma EVA.
- Tijera.
- Semillas.
- Pinturas al frio, rojo, blanco, naranja y negro.
- Trozo de cartón.
- Pinceles.
- Lápiz.
- Tenaza.
- Pistola de silicón.
- Bombilla plástica.
- Pabilo.
🎃 Materials:
- Umbrella.
- EVA foam.
- Scissors.
- Seeds.
- Cold paints, red, white, orange and black.
- Piece of cardboard.
- Brushes.
- Pencil.
- Pincer.
- Silicone gun.
- Plastic bulb.
- Wick.
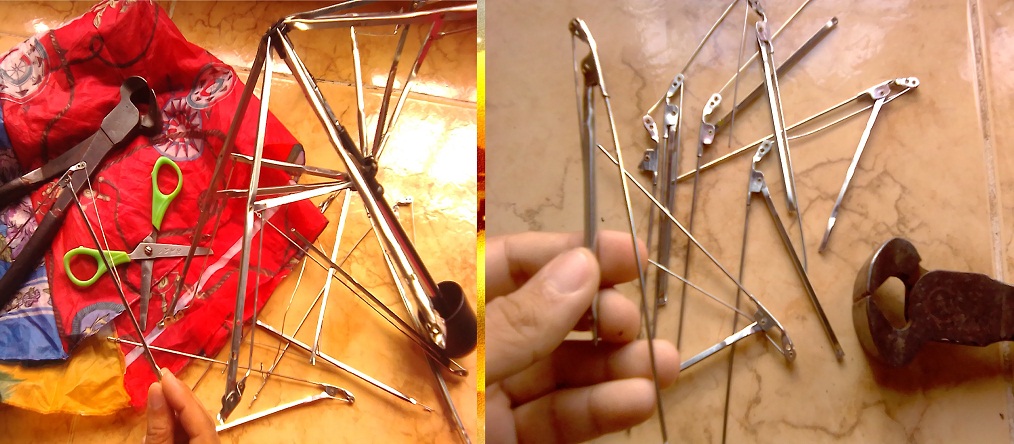
Vamos a comenzar armando las patas de nuestra arácnida amiga, para ello abrimos el paraguas, cortamos la cubierta de tela y separamos poco a poco las agujas de metal que luego cortaremos hasta obtener el tamaño deseado utilizando la tenaza como herramienta primordial.
We are going to start by assembling the legs of our arachnid friend, for this we open the umbrella, cut the fabric cover and gradually separate the metal needles that we will then cut until we obtain the desired size using the pliers as the main tool.
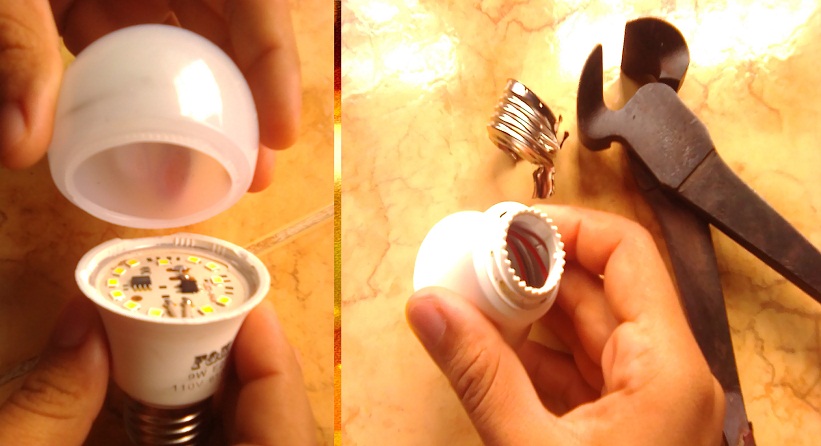
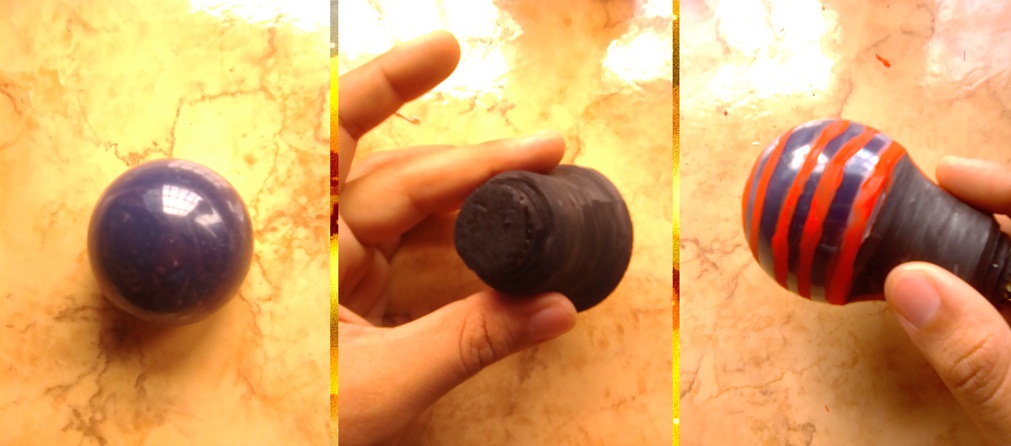
Ahora forzamos bien la parte de la bombilla para separarla de su base, ya listo eliminamos la punta de aluminio ubicada en la parte baja de la base, de este modo será más fácil fijar la cabeza de la araña sin ese obstáculo.
Now we force the part of the light bulb well to separate it from its base. Once we're ready, we eliminate the aluminum tip located in the lower part of the base, in this way it will be easier to fix the head of the chandelier without that obstacle.
Trazamos las figuras del rostro, quijada y lomo en la goma eva, mientras que en el cartón hacemos dos filas de dientes que irán adheridas a las fauces de la araña.
We trace the figures of the face, jaw and back on the EVA foam, while on the cardboard we make two rows of teeth that will be attached to the jaws of the spider.
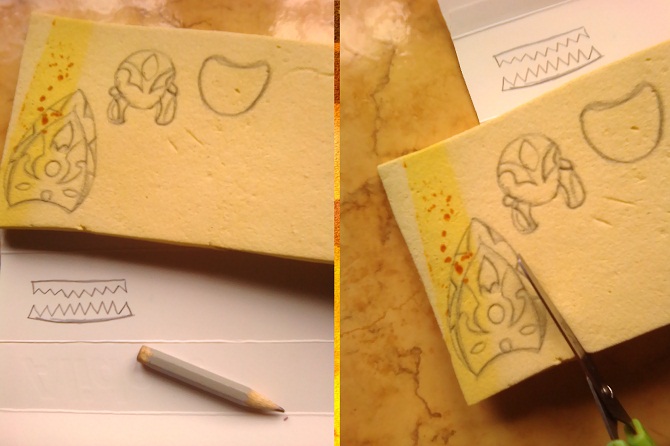
Pintamos la bombilla y base en negro, cortamos un trozo redondo de goma eva, igualmente lo pintamos en negro, lo fijamos como tapón en el orificio pequeño de la base, al estar secas las piezas las unimos nuevamente y le detallamos el trasero a la araña con rallas naranjas.
We paint the bulb and base in black, we cut a round piece of eva rubber, we also paint it in black, we fix it as a plug in the small hole of the base, when the pieces are dry we join them again and we detail the rear of the spider with orange stripes.
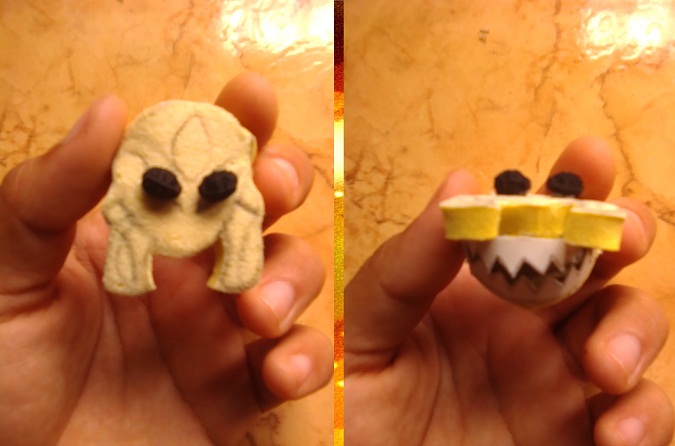
Armamos la cabeza de la araña, pegando la pieza del rostro y quijada juntos, con las filas de dientes de intermedio, como una gran y filosa sonrisa chiflada, luego le pegamos dos semillas a los lados como ojos.
We assembled the spider's head, gluing the face piece and jaw together, with the rows of teeth in between, like a big, sharp, wacky grin, then glued two seeds to the sides for eyes.
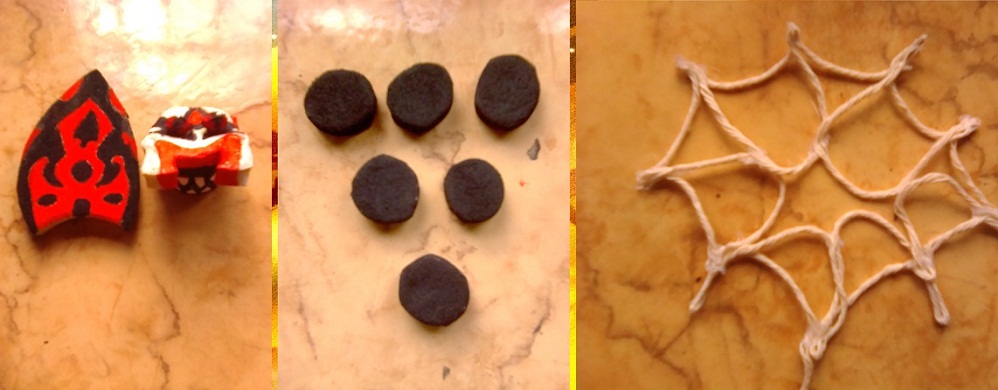
Pintamos el lomo y cabeza de la araña en blanco, negro, rojo y naranja, recortamos seis circulitos del mismos tamaño en la goma eva, los pintamos en negro y también recortamos un par de guantes pintados en este mismo color, seguidamente cortamos el hilo pabilo en varios flecos para armar lo que vendría siendo la telaraña.
We paint the back and head of the spider in white, black, red and orange, we cut out six circles of the same size in the foam, we paint them in black and we also cut out a pair of gloves painted in the same color, then we cut the wick thread in various fringes to assemble what would become the spider web.
Fijamos las piezas principales de goma eva a la bombilla, le adherimos las patas metálicas fijándolas debajo de la espalda y presionándolas con ella misma para evitar que se suelten, pegamos los circulitos en las puntas de las patas, dejando las dos del frente libre, ahí pegaremos los guantes y la telaraña como si la estuviera tejiendo con una grata sonrisa, también le fijamos una trencilla de pabilo atrás para que se vea como los sobrantes de la telaraña.
We fix the main pieces of eva rubber to the light bulb, we adhere the metal legs, fixing them under the back and pressing them with itself to prevent them from coming loose, we glue the little circles on the tips of the legs, leaving the two front ones free, there We will glue the gloves and the spider web as if we were weaving it with a pleasant smile, we will also attach a wick braid to the back so that it looks like the leftovers of the spider web.
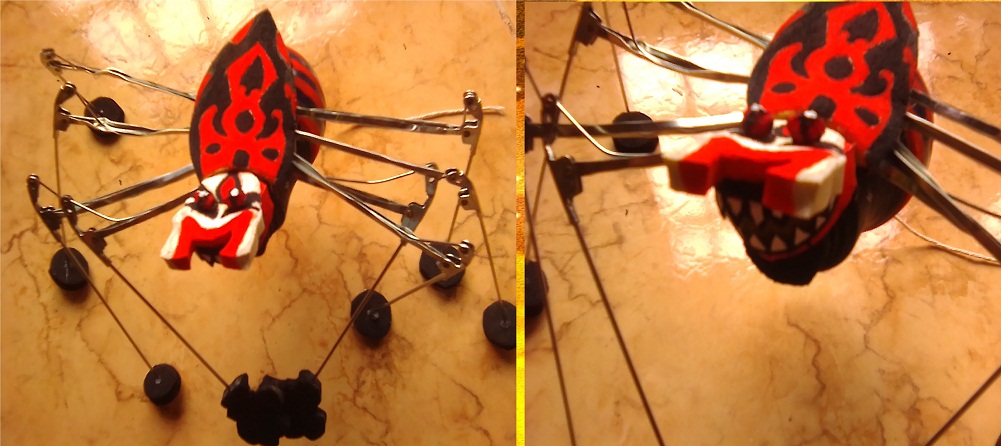
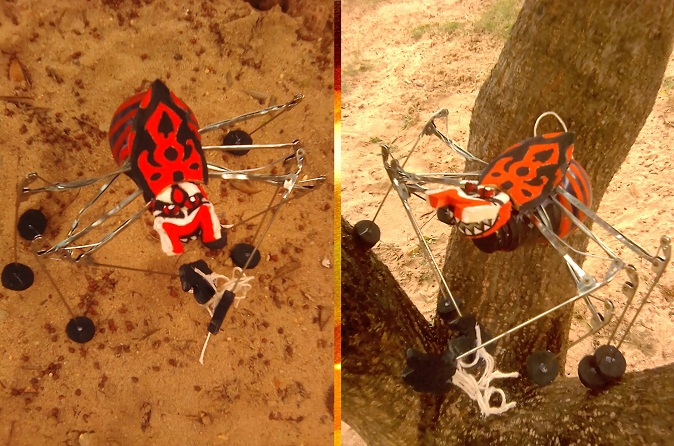
Este es el resultado tras terminar con su elaboración, atrayente e innovadora decoración inspirada en una arácnida compañera, que teje con gracia su telaraña con una graciosa sonrisa les desea a todos una feliz noche de brujas 🎃
This is the result after finishing its elaboration, attractive and innovative decoration inspired by an arachnid companion, who gracefully weaves her web with a funny smile and wishes everyone a happy Halloween 🎃
Nos despedimos por el día de hoy, espero que les guste esta simpática araña, los invito a que nos acompañen próximamente en más de estas increíbles y artísticas obras, ¡Hasta pronto!
We say goodbye for today, I hope you like this nice spider, I invite you to join us soon in more of these incredible and artistic works, see you soon!

💜 Las fotografías 📷 son de nuestra autoria y fueron tomadas con un teléfono inteligente (ZTE Blade L130) y editadas en Paint y Paint Tool SAI por @albakriz.
💜 The photographs 📷 are of our authorship and were taken with a smartphone (ZTE Blade L130) and edited in Paint and Paint Tool SAI by @albakriz.
💜 Traducción: traductor de Google.
💜 Translation: translate Google.
Thank you for sharing this amazing post on HIVE!
Your content got selected by our fellow curator rezoanulvibes & you just received a little thank you upvote from our non-profit curation initiative!
You will be featured in one of our recurring curation compilations which is aiming to offer you a stage to widen your audience within the DIY scene of Hive.
Make sure to always post / cross-post your creations within the DIYHub community on HIVE so we never miss your content. We also have a discord server where you can connect with us and other DIYers. If you want to support our goal to motivate other DIY/art/music/gardening/... creators just delegate to us and earn 100% of your curation rewards!
Stay creative & hive on!
some species of spiders give me the creeps so this is definitely creative and terrifying at the same time 😅 also love the fact that it's mostly made of recycled materials! thank you for sharing your creation! 😃
https://d.buzz
!ALIVE
@albakriz! You Are Alive so I just staked 0.1 $ALIVE to your account on behalf of @ilovewintergem. (3/10)
The tip has been paid for by the We Are Alive Tribe through the earnings on @alive.chat, feel free to swing by our daily chat any time you want.

Thank you very much @ilovewintergem! I'm glad you liked it. Greetings! 💜💜💜💜💜
Hi! Do join the #dbuzzphotochallenge (☞゚ヮ゚)☞
https://peakd.com/hive-194913/@dbuzz/dbuzz-color-contest--round-294--green
what a good use of a broken umbrella