Español
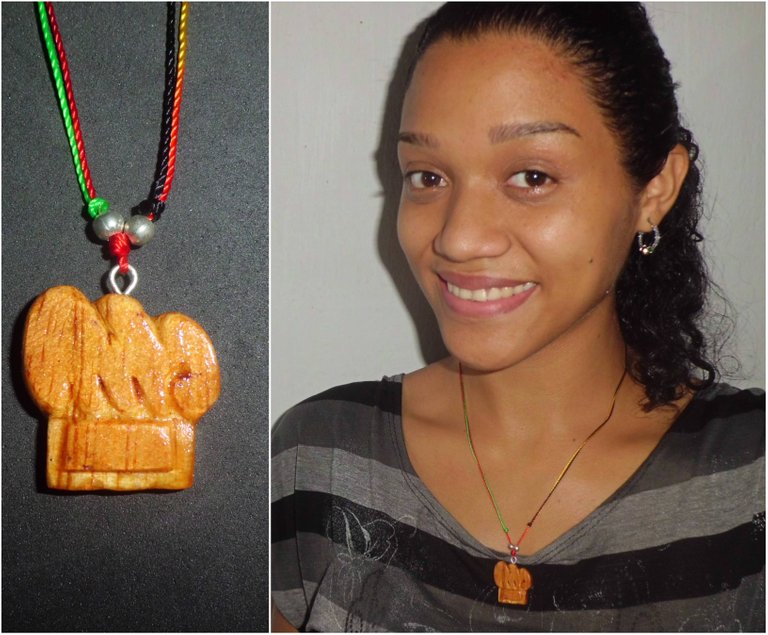
Hola queridos amigos de esta hermosa comunidad, espero se encuentren bien, hoy quiero compartir con ustedes un lindo colgante de chef tallado a mano en madera. Espero les guste. Acompáñame a ver el proceso.
English.
Hello dear friends of this beautiful community, I hope you are well, today I want to share with you a nice chef pendant hand carved in wood. I hope you like it. Join me to see the process.
Materiales
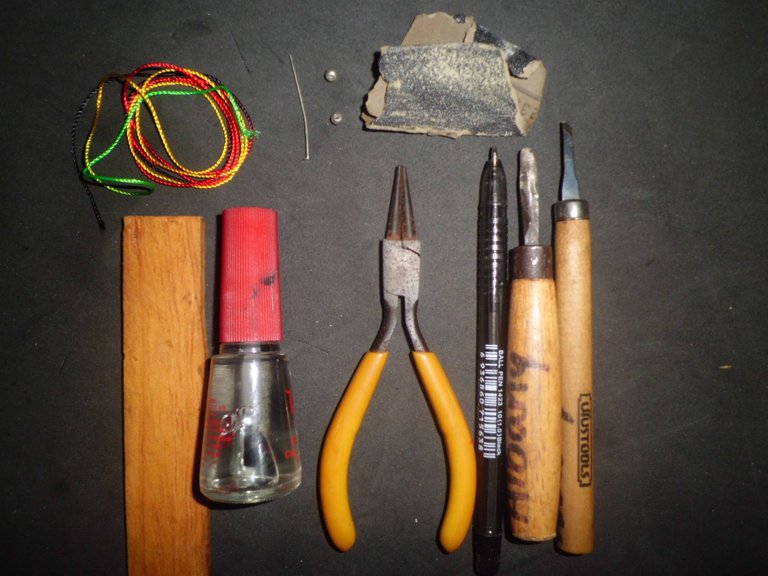
Madera.
Buriles o gubias de tallar madera.
1 metro de hilo chino o yute.
2 canutillos plateados.
Un pedacito de alambre.
Lapicero.
Piqueta de bisutería.
Lija.
Pintura de uña transparente.
Materials
Wood.
Burins or wood carving gouges.
1 meter of Chinese thread or jute.
2 silver-plated canutillos.
A piece of wire.
Pen.
Jewelry piqueta.
Sandpaper.
Transparent nail polish.
Paso a paso
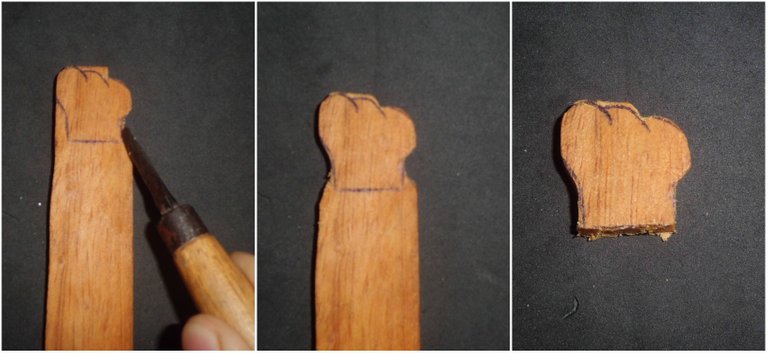
Primero tome la madera, y con el lapicero dibuje la forma del gorro de chef y con ayuda de los buriles, procedí a tallar retirando pedazo de madera hasta obtener la pieza.
Step by step.
First I took the wood, and with the pencil I drew the shape of the chef's hat and with the help of the burins, I proceeded to carve removing pieces of wood until I obtained the piece.
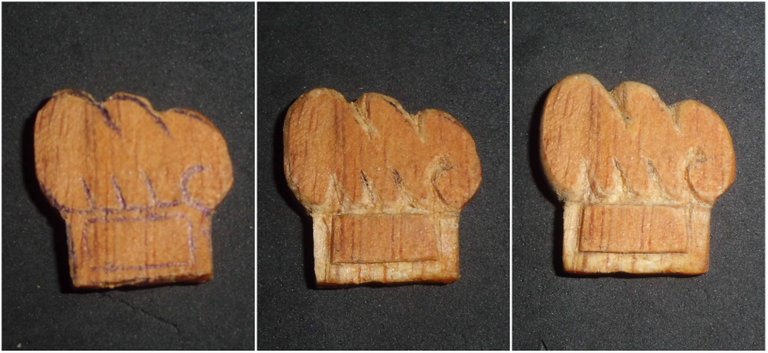
Seguidamente marque el diseño con lapicero luego procedí tallar y lijar dándole una contextura suave.
I then marked the design with a pencil and proceeded to carve and sand it to give it a smooth texture.
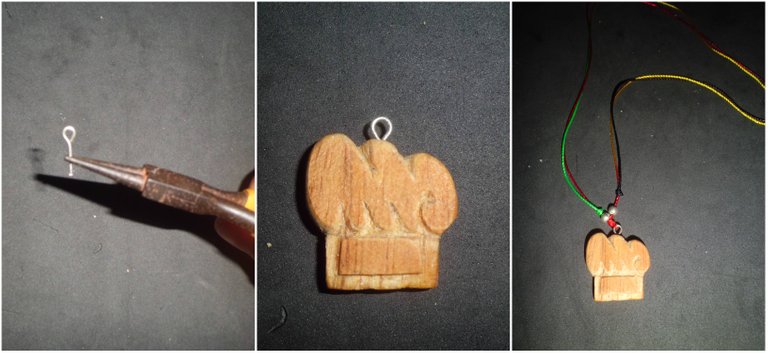
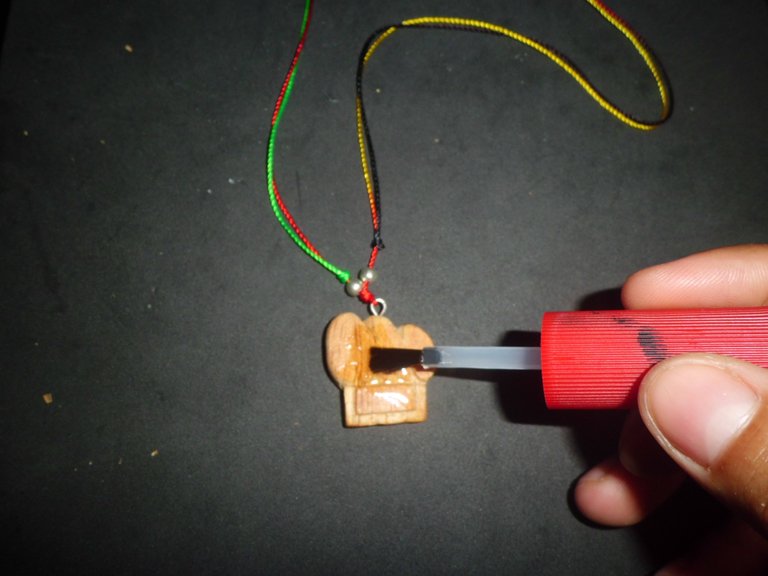
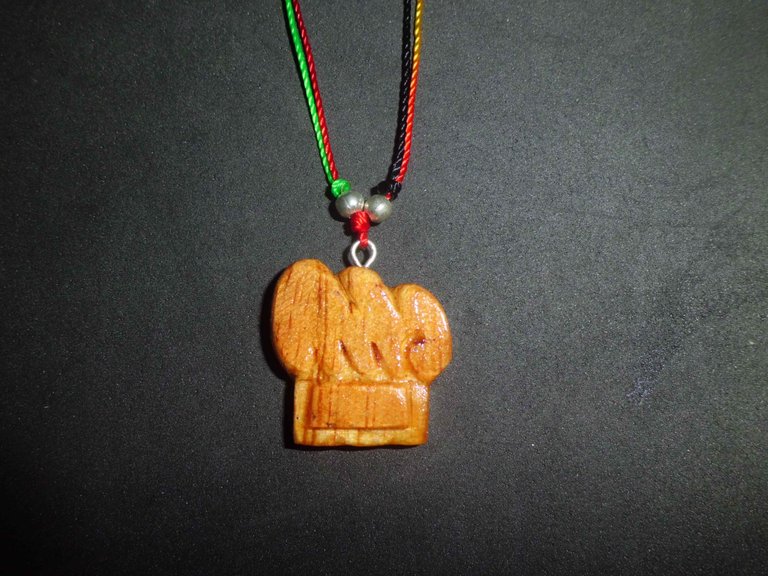
Luego tome el alambre y con la piqueta lo doble en forma de aro, y lo introduje con fuerza con la piqueta en la parte de arriba, posteriormente doble el hilo chino a la mitad y lo amarre en el aro de alambre e introduje los dos canutillos plateados y luego hice dos nudos a los extremos de manera que deslice al jalarlos y finalice barnizando con la pintura de uña transparente.
Then I took the wire and with the pickaxe I bent it in the shape of a ring, and I introduced it with force with the pickaxe in the upper part, later I folded the Chinese thread in half and I tied it in the wire ring and I introduced the two silver-plated canutillos and then I made two knots at the ends so that it slides when pulling them and I finished varnishing with the transparent nail paint.
Hasta otra oportunidad. Espero que les haya gustado, gracias por todo su apoyo, besos y bendiciones.
Until another opportunity. I hope you liked it, thanks for all your support, kisses and blessings.

Fotos de mi autoría, tomadas por mi / Photos of my authorship, taken by me.
Traductor usado: Deepl / Translated with www.DeepL.com/Translator (free version)
Copyright @albanygomez96. All rights reserved.
Thank you for sharing this amazing post on HIVE!
Your content got selected by our fellow curator @rezoanulvibes & you just received a little thank you via an upvote from our non-profit curation initiative!
You will be featured in one of our recurring curation compilations and on our pinterest boards! Both are aiming to offer you a stage to widen your audience within and outside of the DIY scene of hive.
Join the official DIYHub community on HIVE and show us more of your amazing work and feel free to connect with us and other DIYers via our discord server: https://discord.gg/mY5uCfQ !
If you want to support our goal to motivate other DIY/art/music/homesteading/... creators just delegate to us and earn 100% of your curation rewards!
Stay creative & hive on!
Thank you for all your support, blessings.
Yay! 🤗
Your content has been boosted with Ecency Points, by @albanygomez96.
Use Ecency daily to boost your growth on platform!
Support Ecency
Vote for Proposal
Delegate HP and earn more