Saludos a toda la comunidad de Hive Diy.
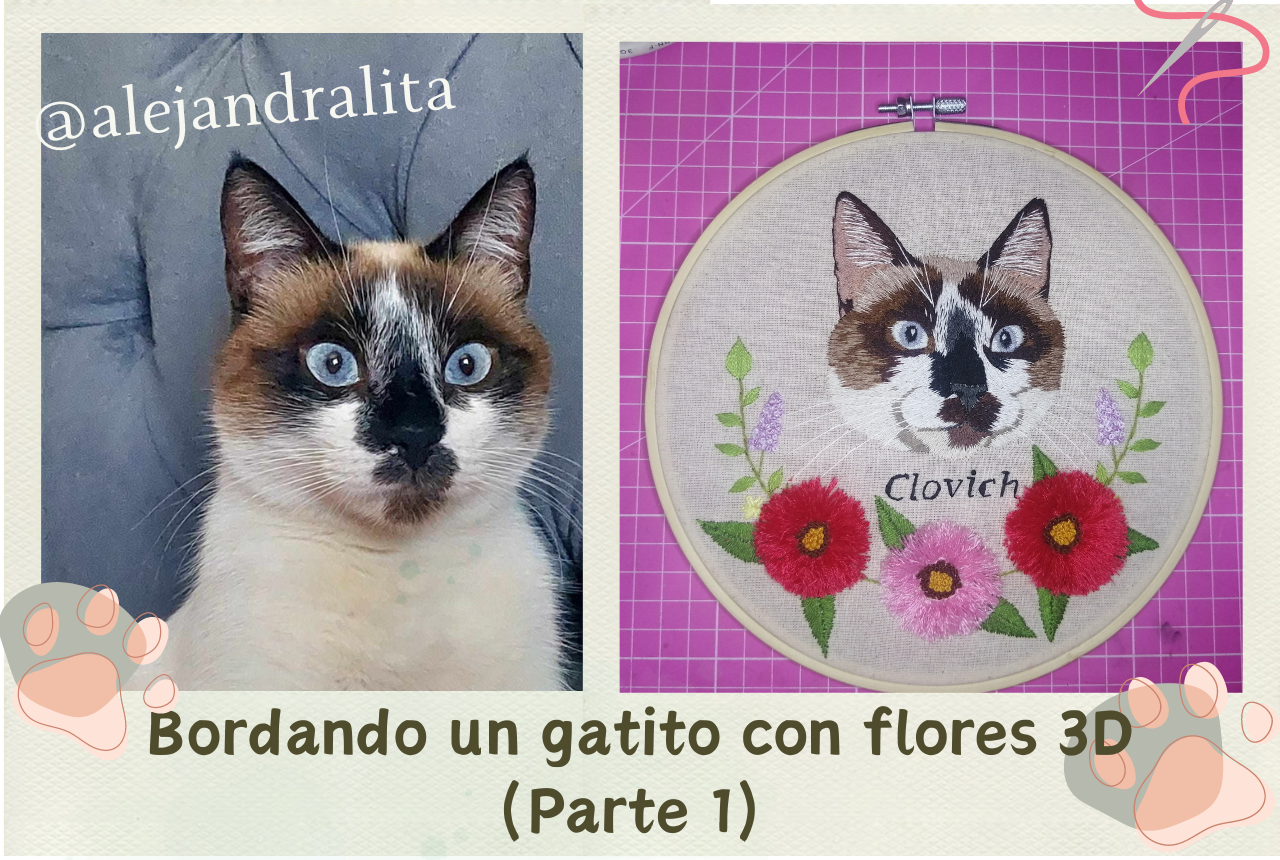
Hoy en la mañana termine un cuadro bordado que me pidieron es un lindo gatito de ojos azules. El joven ya me había pedido un cuadro y quedo tan encantado que quiso otro más 😊
Me hablo su pareja felicitandome que lo que hacía era muy lindo y que la carta que va en cada pedido también la hizo llorar de emoción.
Para mi no hay mejor regalo que leer ese tipo de mensajes, me alegra que mi arte llegue a los corazones ❤️
Espero que al igual que yo les guste el resultado.
Vamos a ver el paso a paso!
Greetings to all the Hive Diy community.
Today in the morning I finished an embroidered picture that I was asked for is a cute blue eyed kitten. The young man had already ordered a picture from me and was so pleased that he wanted another one 😊.
His partner spoke to me congratulating me that what he was doing was very nice and that the letter that goes with each order also made her cry with emotion.
For me there is no better gift than to read that kind of messages, I'm glad that my art reaches the hearts ❤️
I hope you like the result as much as I do.
Let's see the step by step!
Materiales / Materials

- Tela crea blanca o tela manta
- 1 Bastidor de 20 cm
- Hilos de bordar
- Agujas
- Lapiz de tinta termosensible (se borran con calor)
- Tijera
- Plancha
- Tableta digital
- Creates or blanket fabric
- 1 frame of 20 cm
- Embroidery threads
- Needles
- Thermosensitive ink pen (erases with heat)
- Scissors
- Iron
- Digital tablet
|
|
|


|
|
|


|

|
Empezamos abriendo el programa de dibujo que tengas en tu tableta, yo use Sketchbook, aquí solo vamos a hacer algo simple con la herramienta color crop vamos a hacer un clic en todas las zonas en donde ves diferentes colores de pelaje y cada uno de ellos los iras marcando en un espacio en blanco,con esto obtendrás los tonos de hilos que necesitaremos.
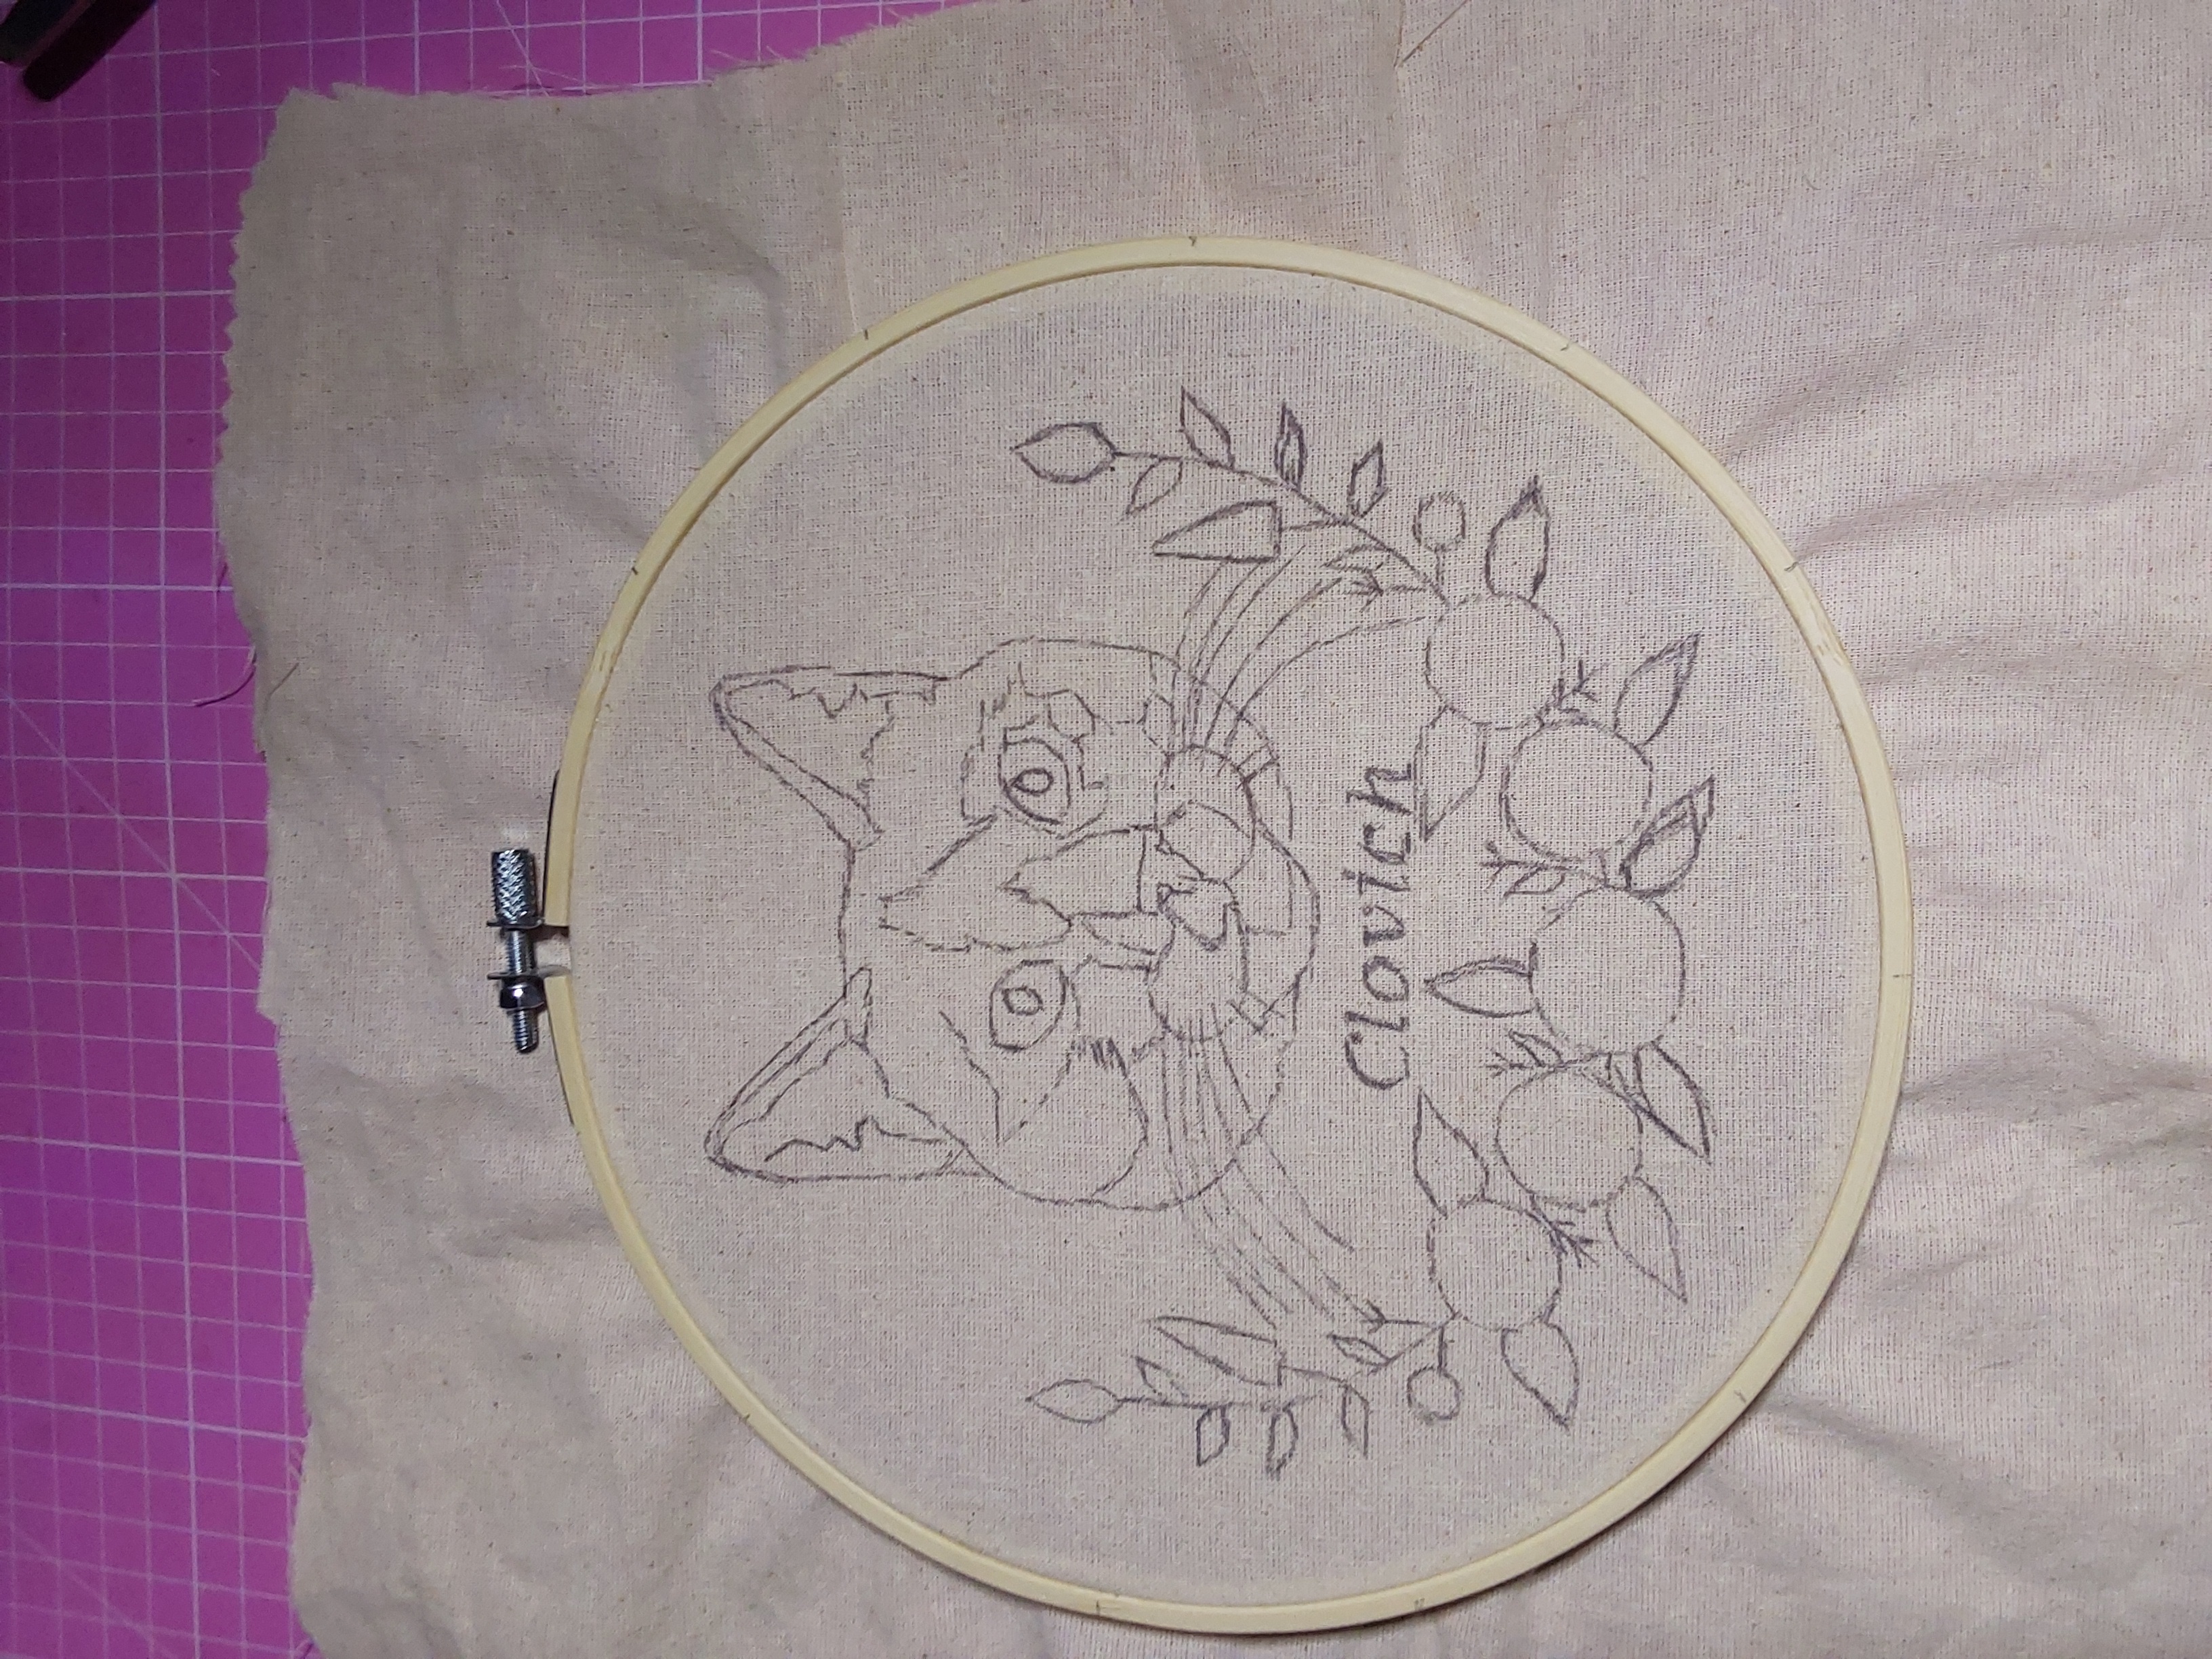
Ya listo los hilos nuevamente abrimos la imagen y en la primera capa en donde esta el gato debes hacerla un poco más transparente. Crea otra capa en donde va a ir nuestro diseño. Empezamos marcando todo el contorno del gato, dibujamos sus ojos, también el pelaje con cada uno de sus colores, no olvidemos de marcar los bigotitos. Pero ojo no marques más de seis, porque si dibujas muchos va a parecer que se lo esta tragando una araña 😂
Hacemos un circulo grande que asemeja el bastidor, creamos hojitas y otros circulos que serán nuestras flores 3D.
También agregamos el nombre de la mascota.
We start by opening the drawing program that you have on your tablet, I used Sketchbook, here we are just going to do something simple with the color crop tool we are going to click on all the areas where you see different colors of fur and each one of them you will mark them in a blank space, with this you will get the shades of threads that we will need.
Once the threads are ready we open the image again and in the first layer where the cat is you must make it a little more transparent. Create another layer where our design is going to be. We start marking all the outline of the cat, we draw its eyes, also the fur with each of its colors, don't forget to mark the whiskers. But be careful not to mark more than six, because if you draw too many it will look like a spider is swallowing it 😂.
We make a big circle that resembles the frame, we create leaves and other circles that will be our 3D flowers.
We also add the name of the mascot.
|
|
|
|
|
|
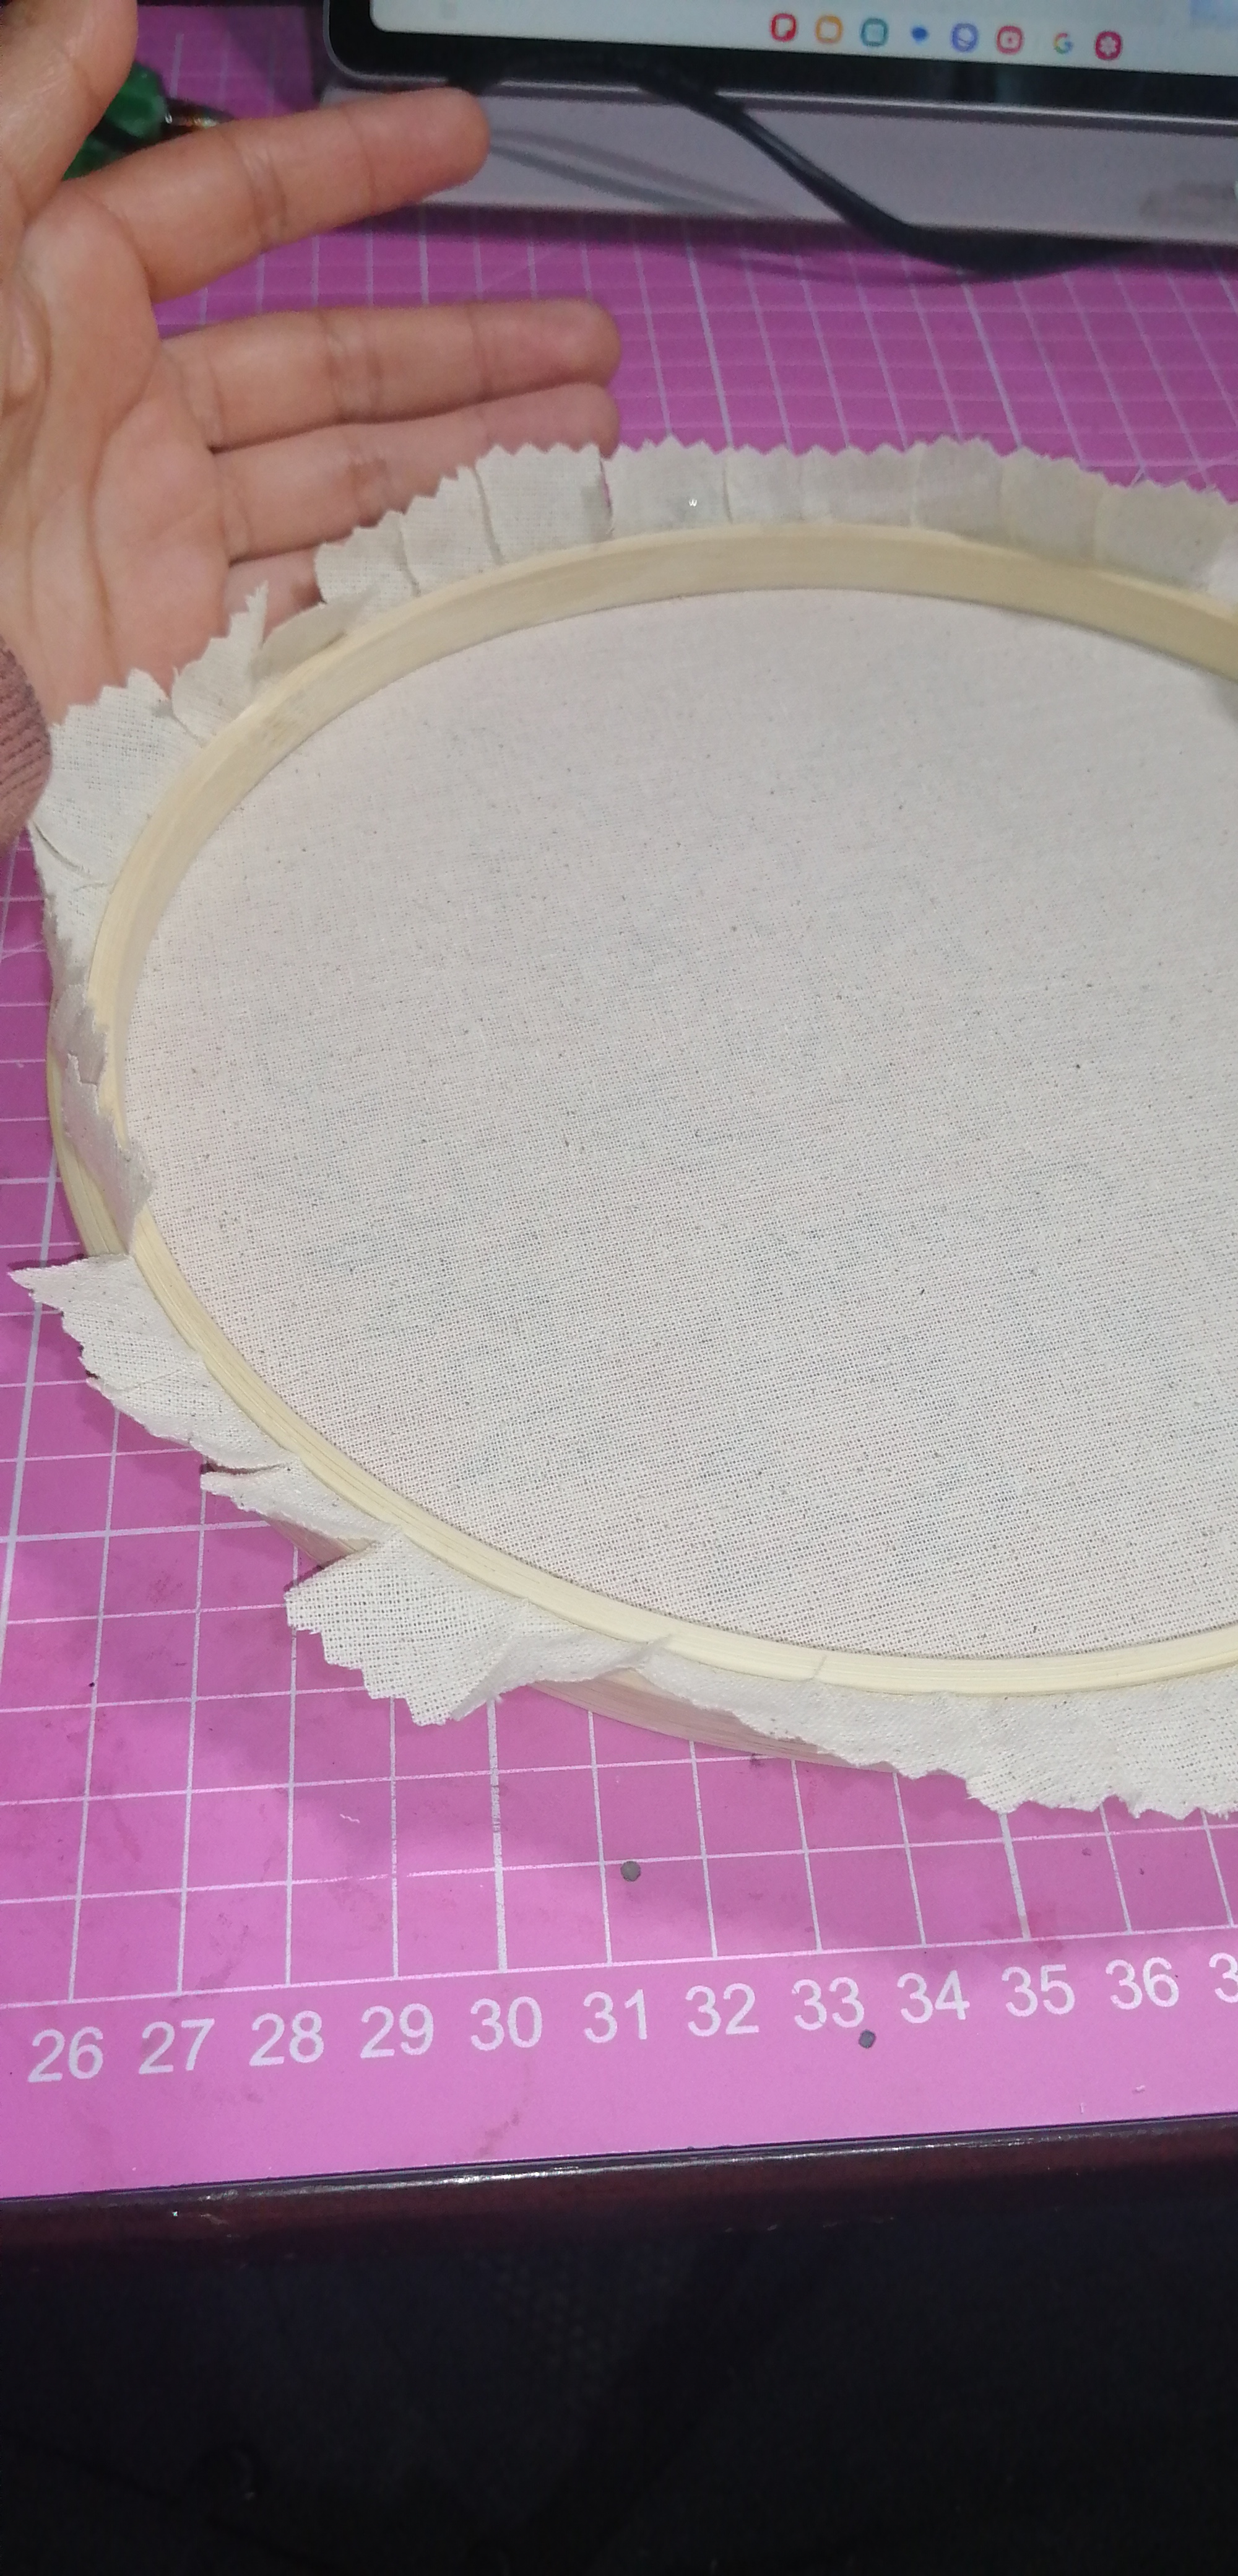
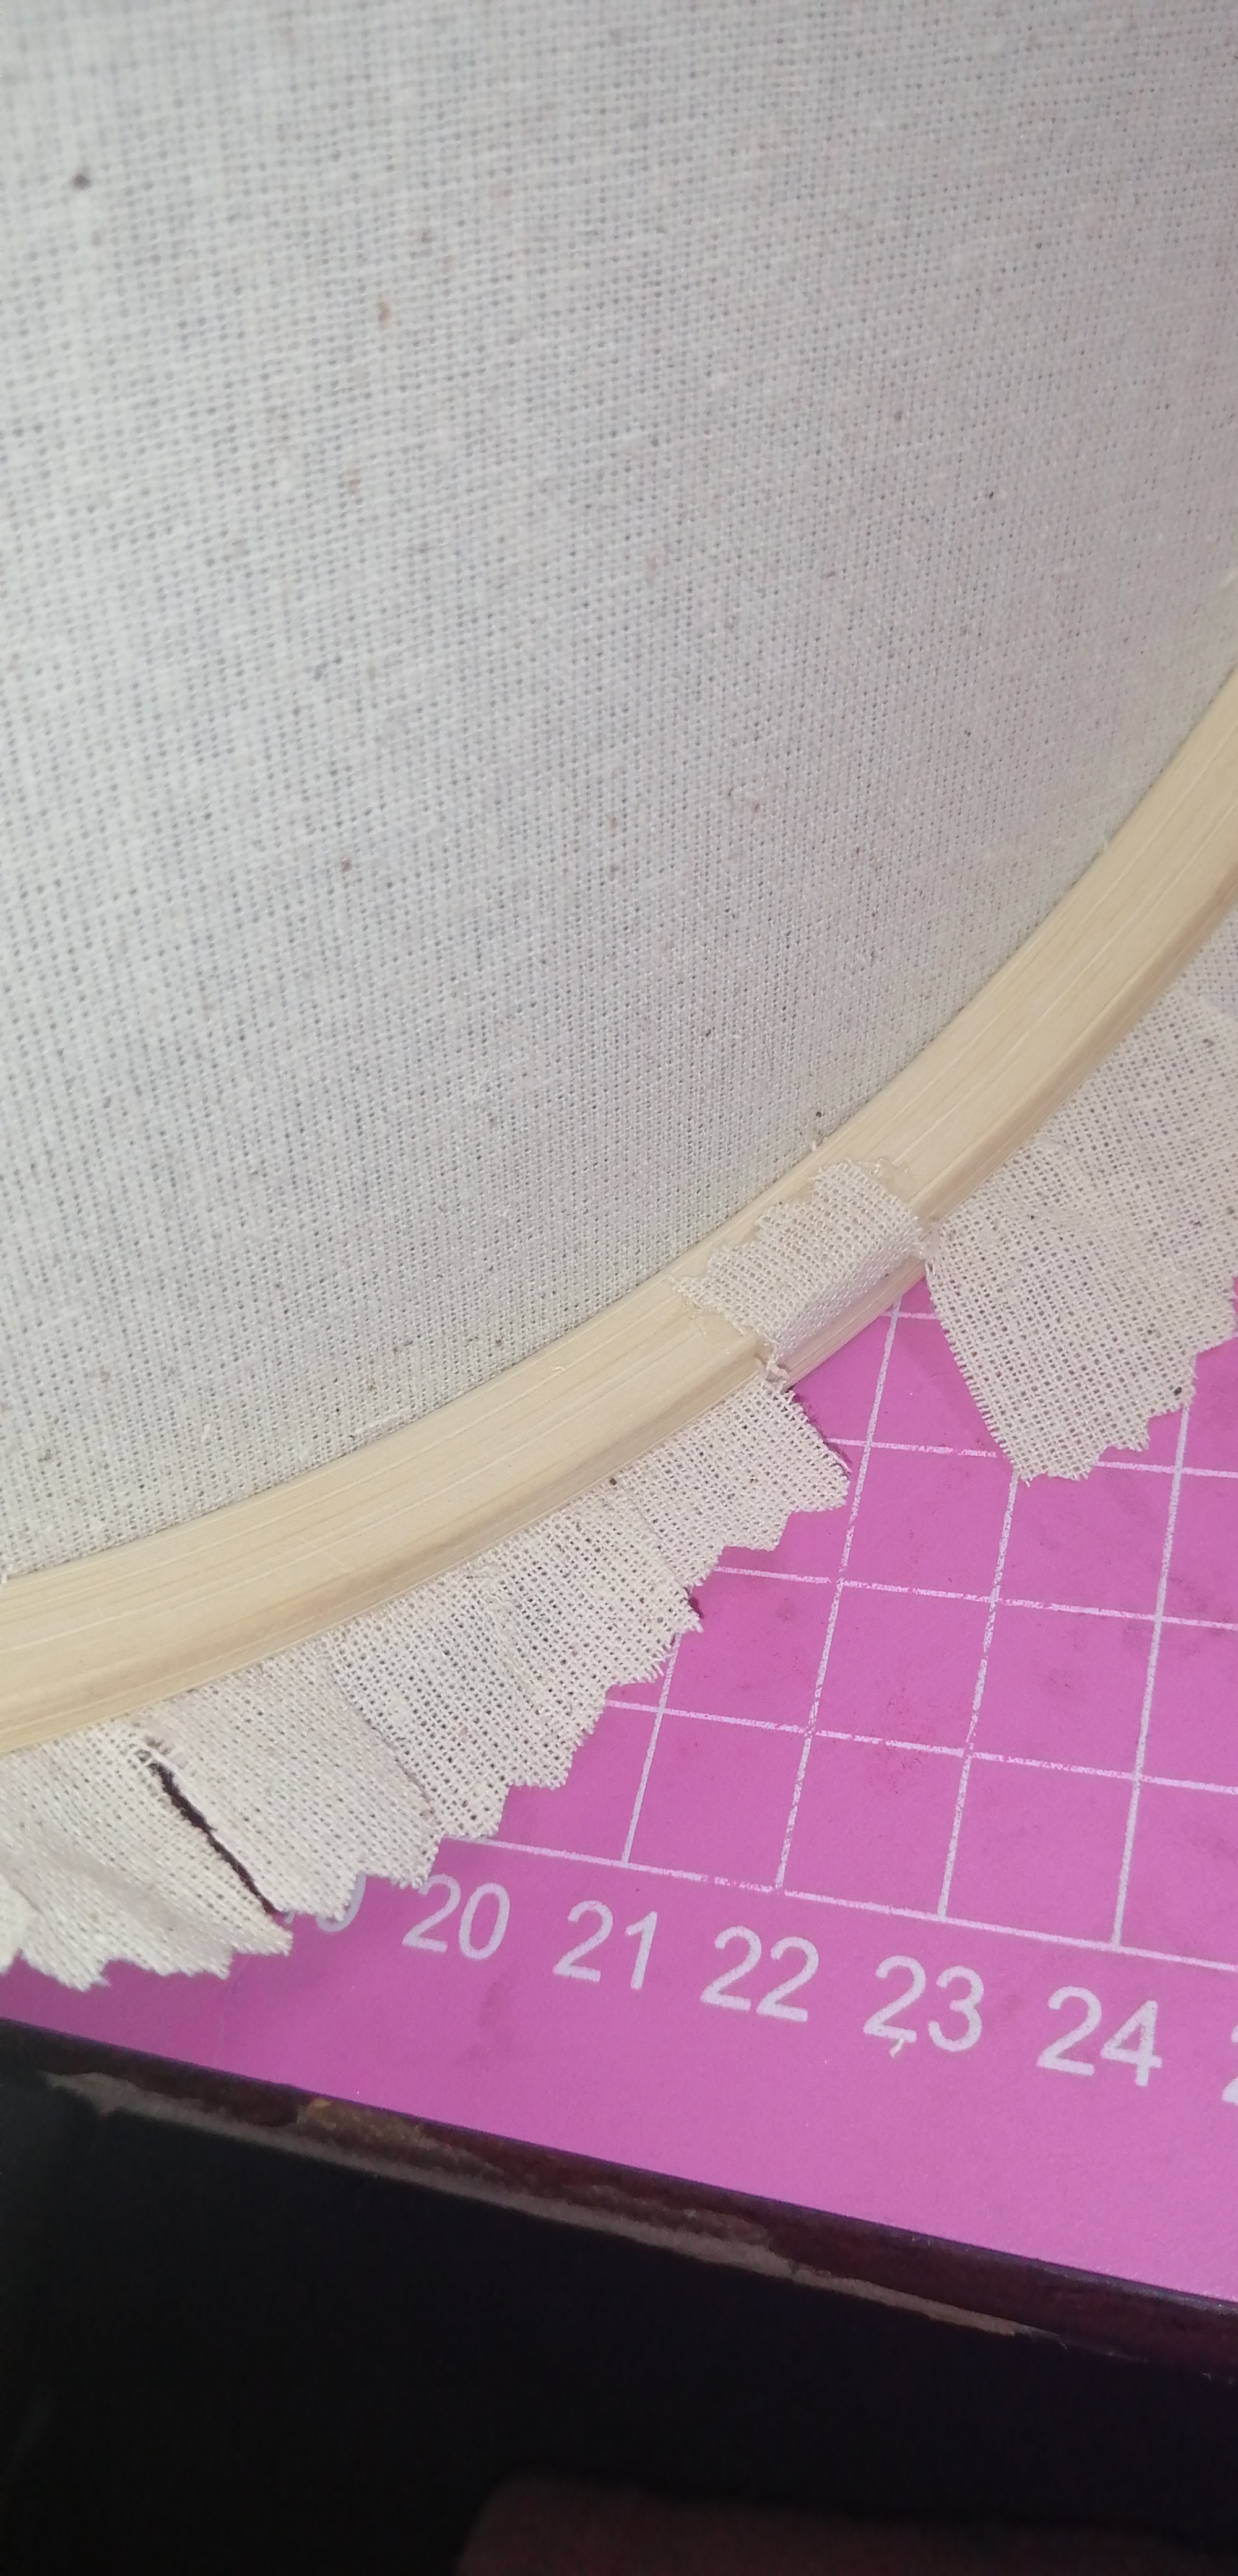
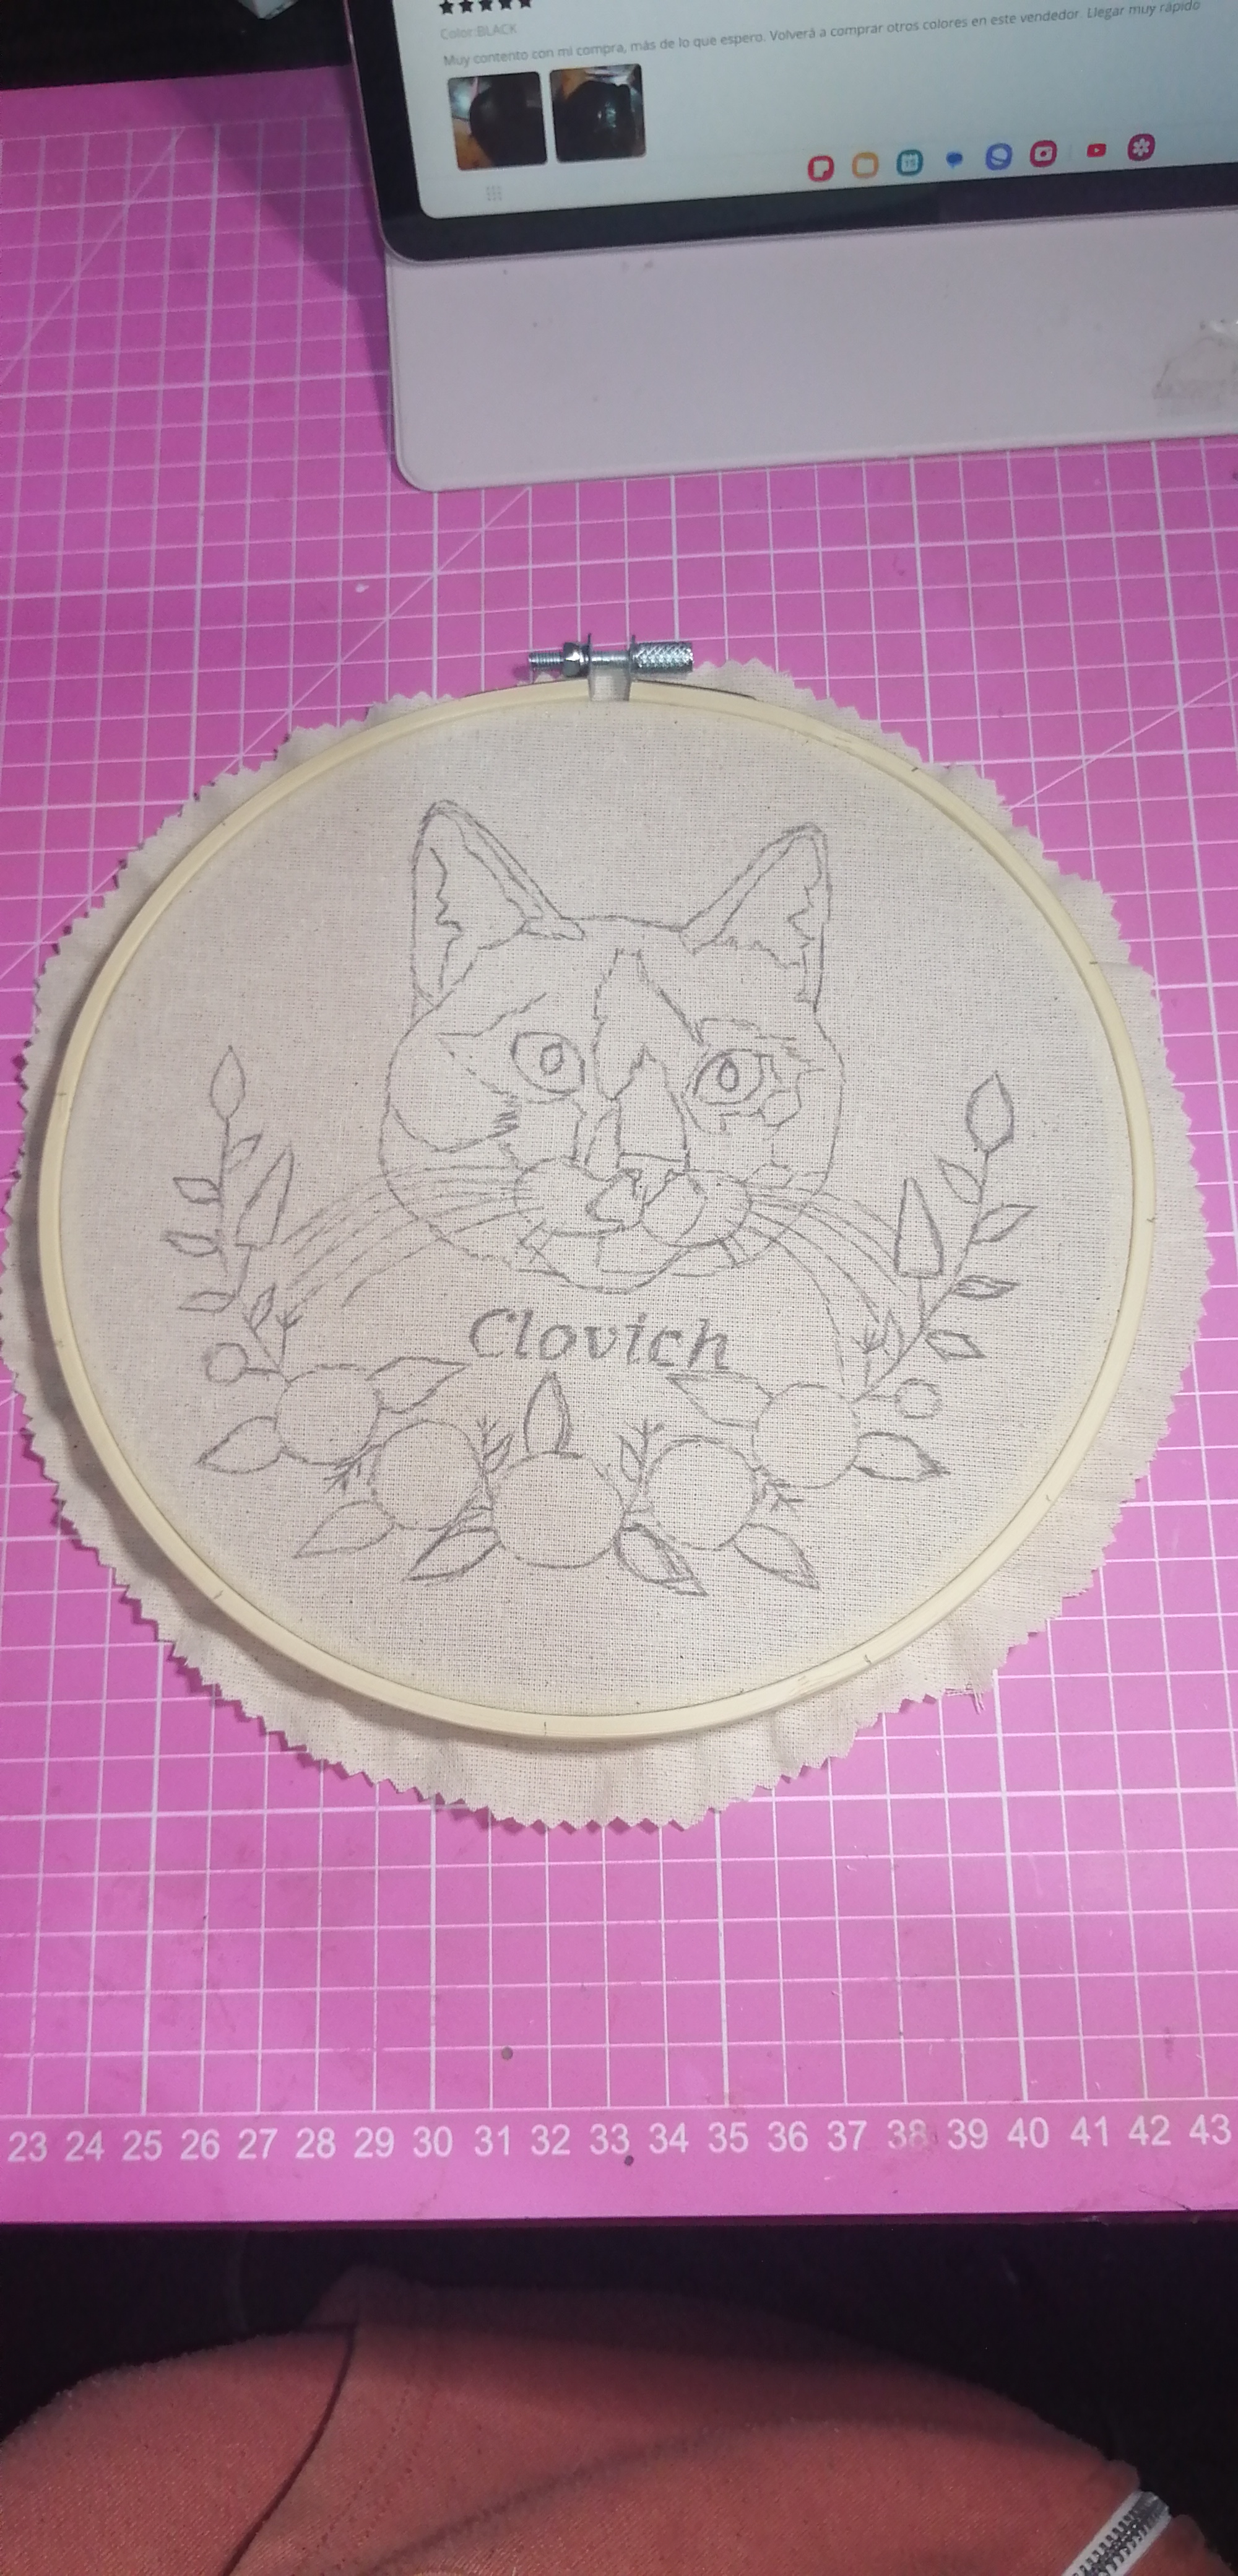
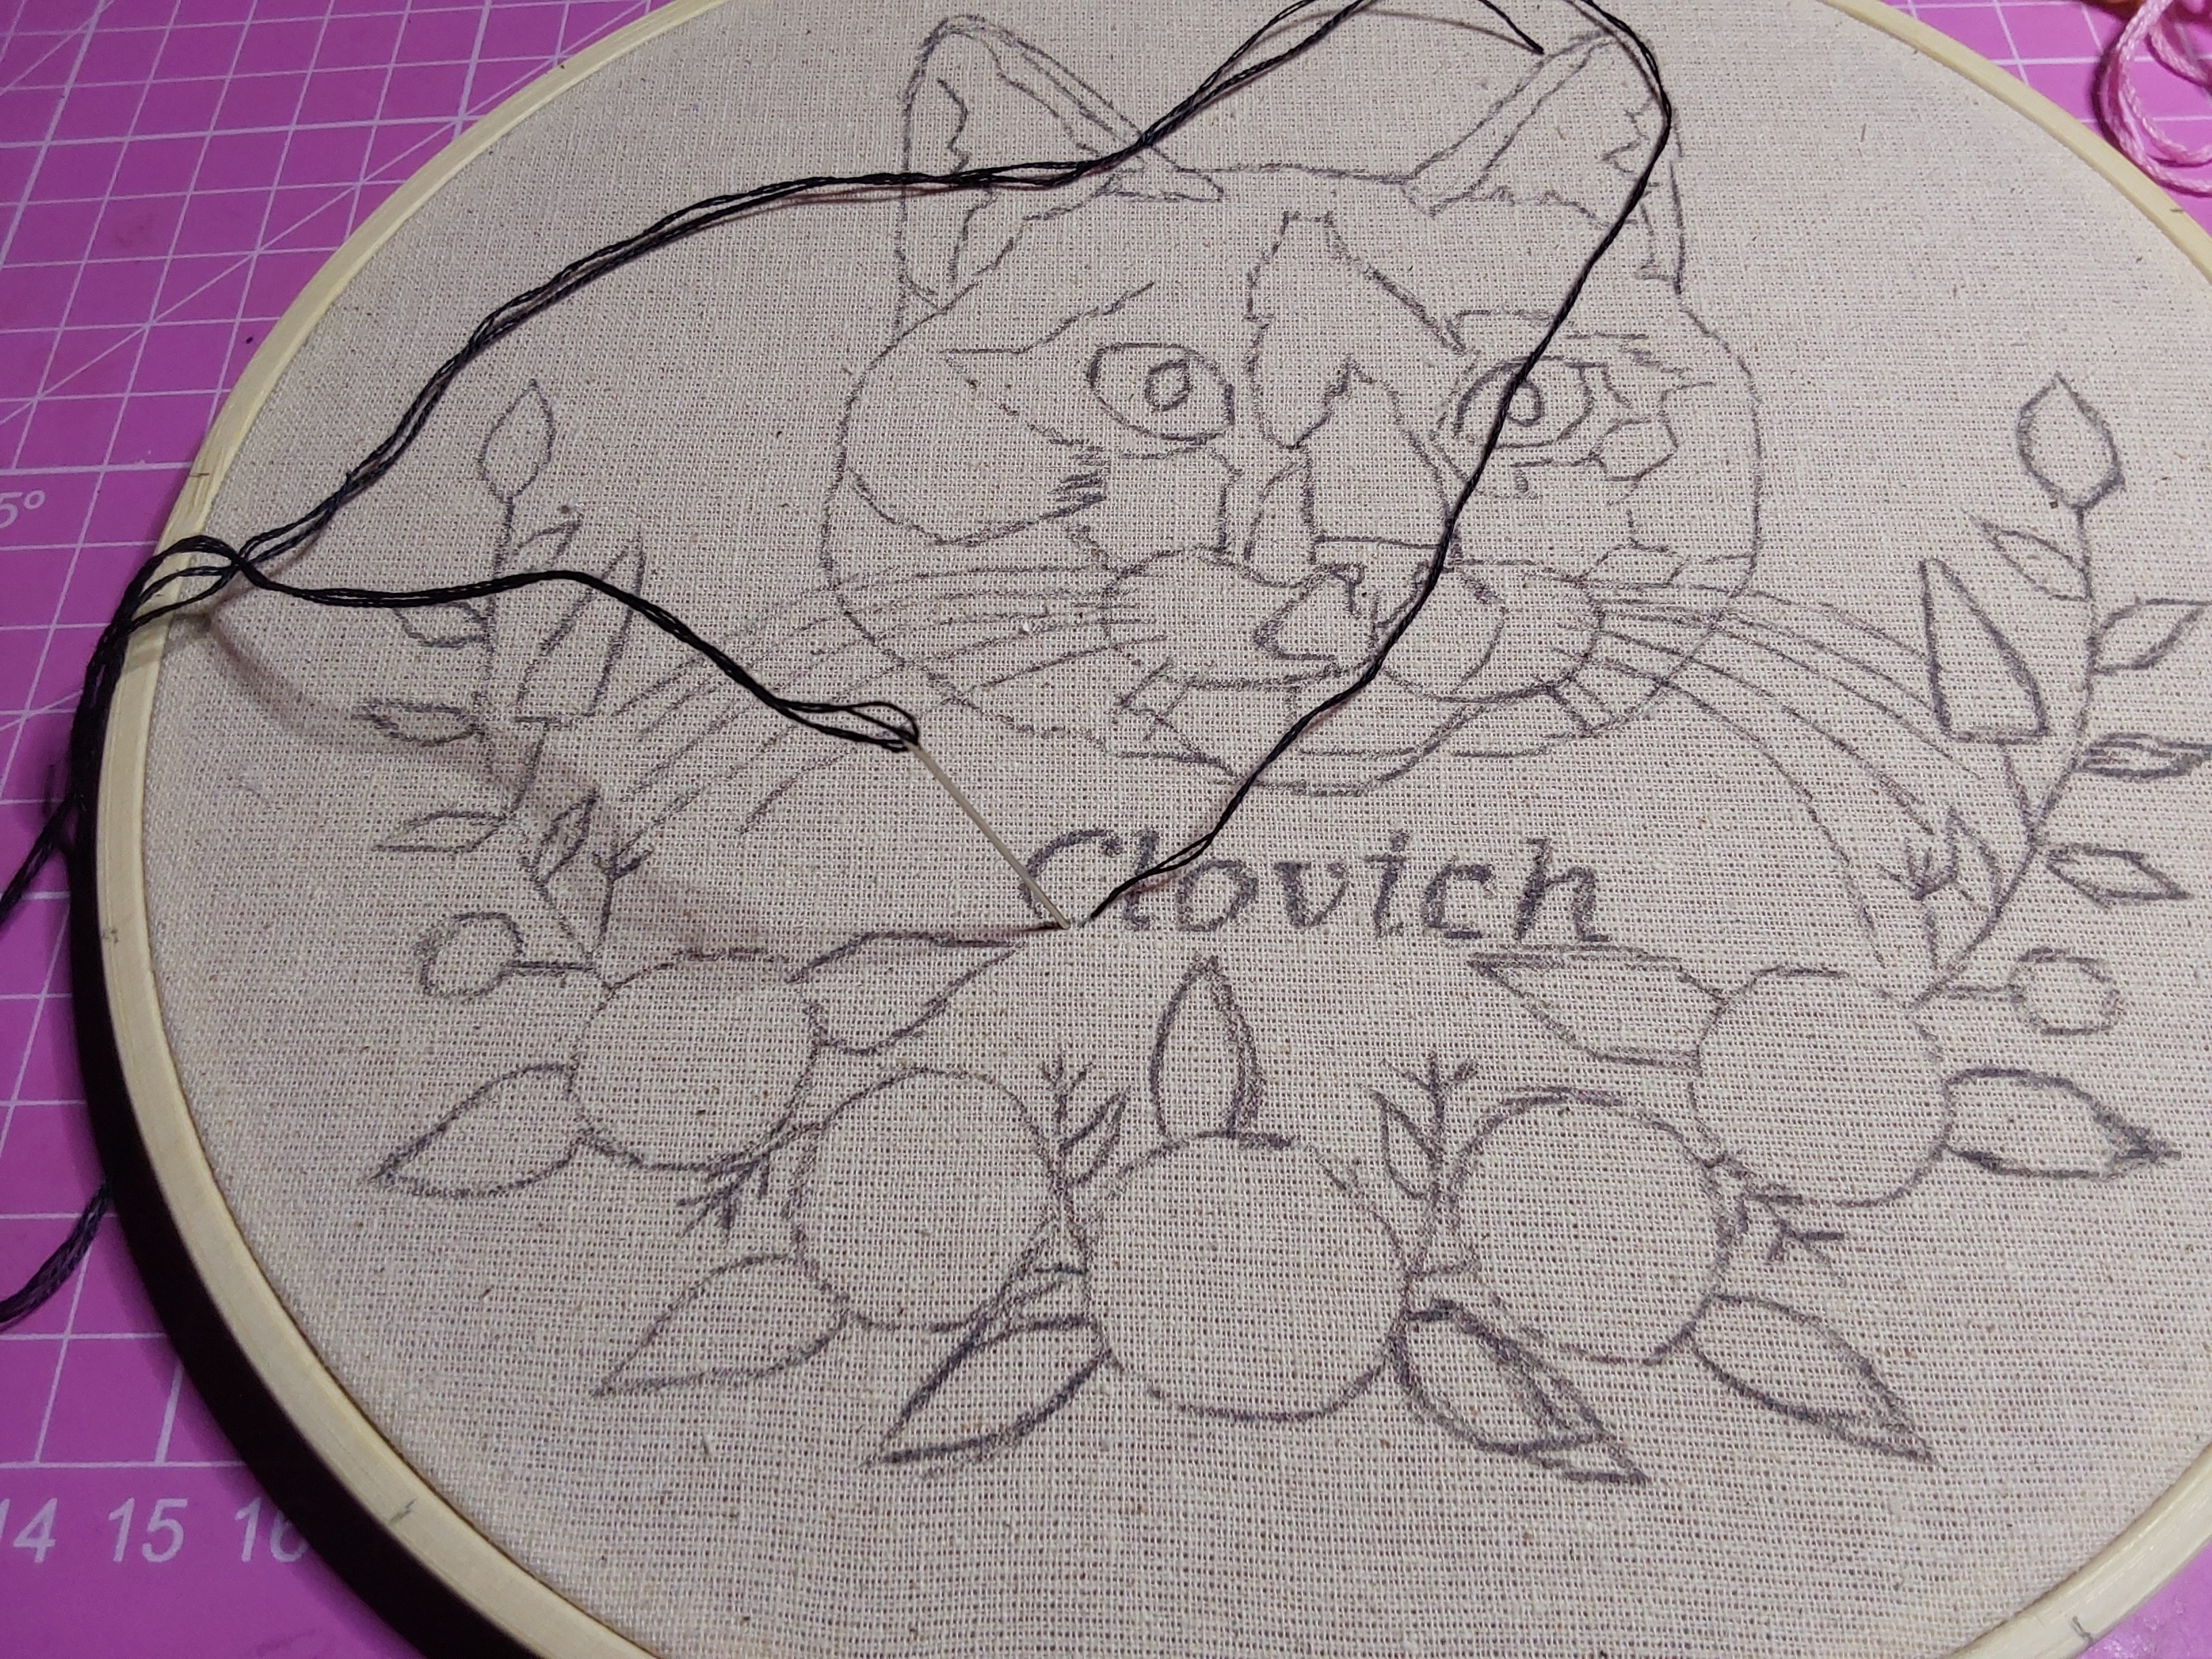
Ya estamos listos, ahora ponemos la tela en el bastidor y giramos y ponemos arriba de la tableta y empezamos a calcar el diseño lentamente. Cuando ya este listo volvemos a acomodar la tela en el bastidor y cortamos el exceso de tela pero dejamos aprox. Unos 2 cm estos se cortaran en pequeños espacios, para luego con la pistola de silicona pegamos para que quede firme la tela en el bastidor. Solo echaremos pegamento en la madera que va por dentro del bastidor doblamos la tela y pegamos. (la silicona no debe caer a la tela ya que esta mancha y quedara sucio nuestro trabajo)
Cabe recalcar que mi patrón tiene más círculos porque iba a hacer más flores pero después pense que me aburriría en hacer tantas así que seguí con el patron que tenía 😂.
We are ready, now we put the fabric in the frame and turn and put it on top of the tablet and start to trace the design slowly. When it is ready we return to accommodate the fabric in the frame and cut the excess fabric but leave about 2 cm these will be cut into small spaces, and then with the silicone gun we glue to make it firm the fabric on the frame. We will only put glue on the wood that goes inside the frame, fold the fabric and glue (the silicone should not fall on the fabric as this stain and our work will be dirty).
It should be noted that my pattern has more circles because I was going to make more flowers but then I thought I would get bored making so many so I continued with the pattern I had 😂.
|
|
|
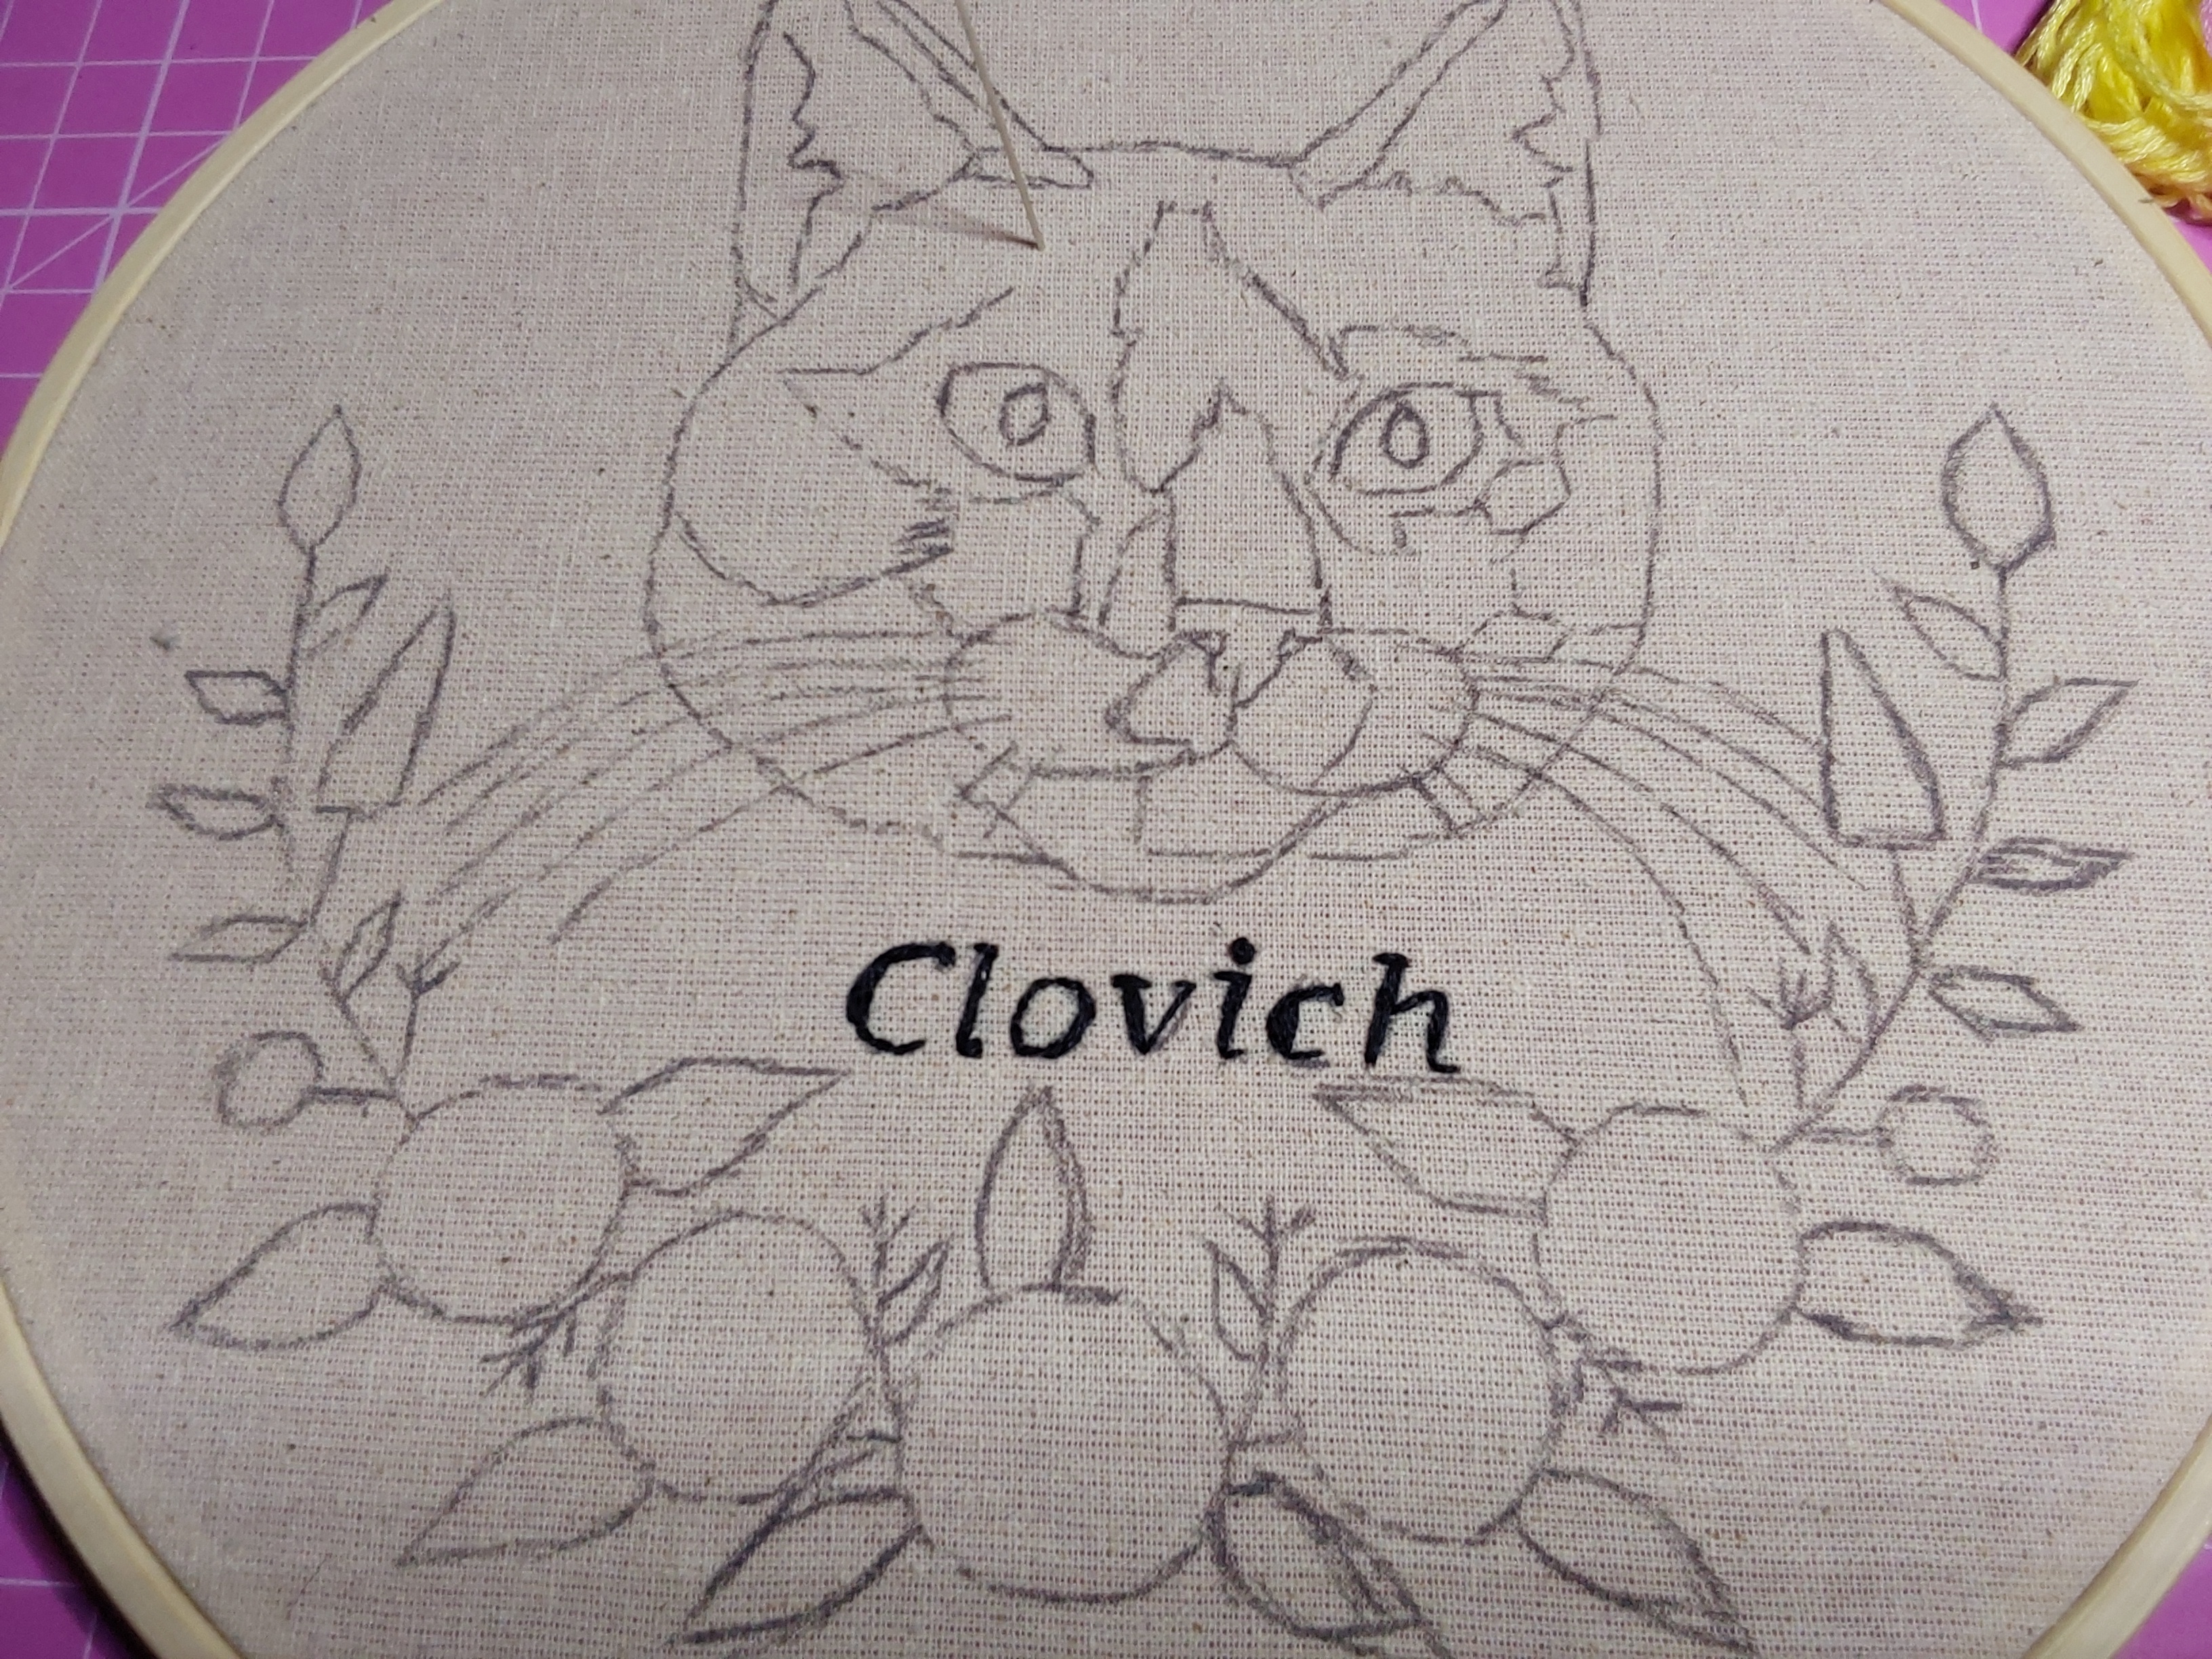
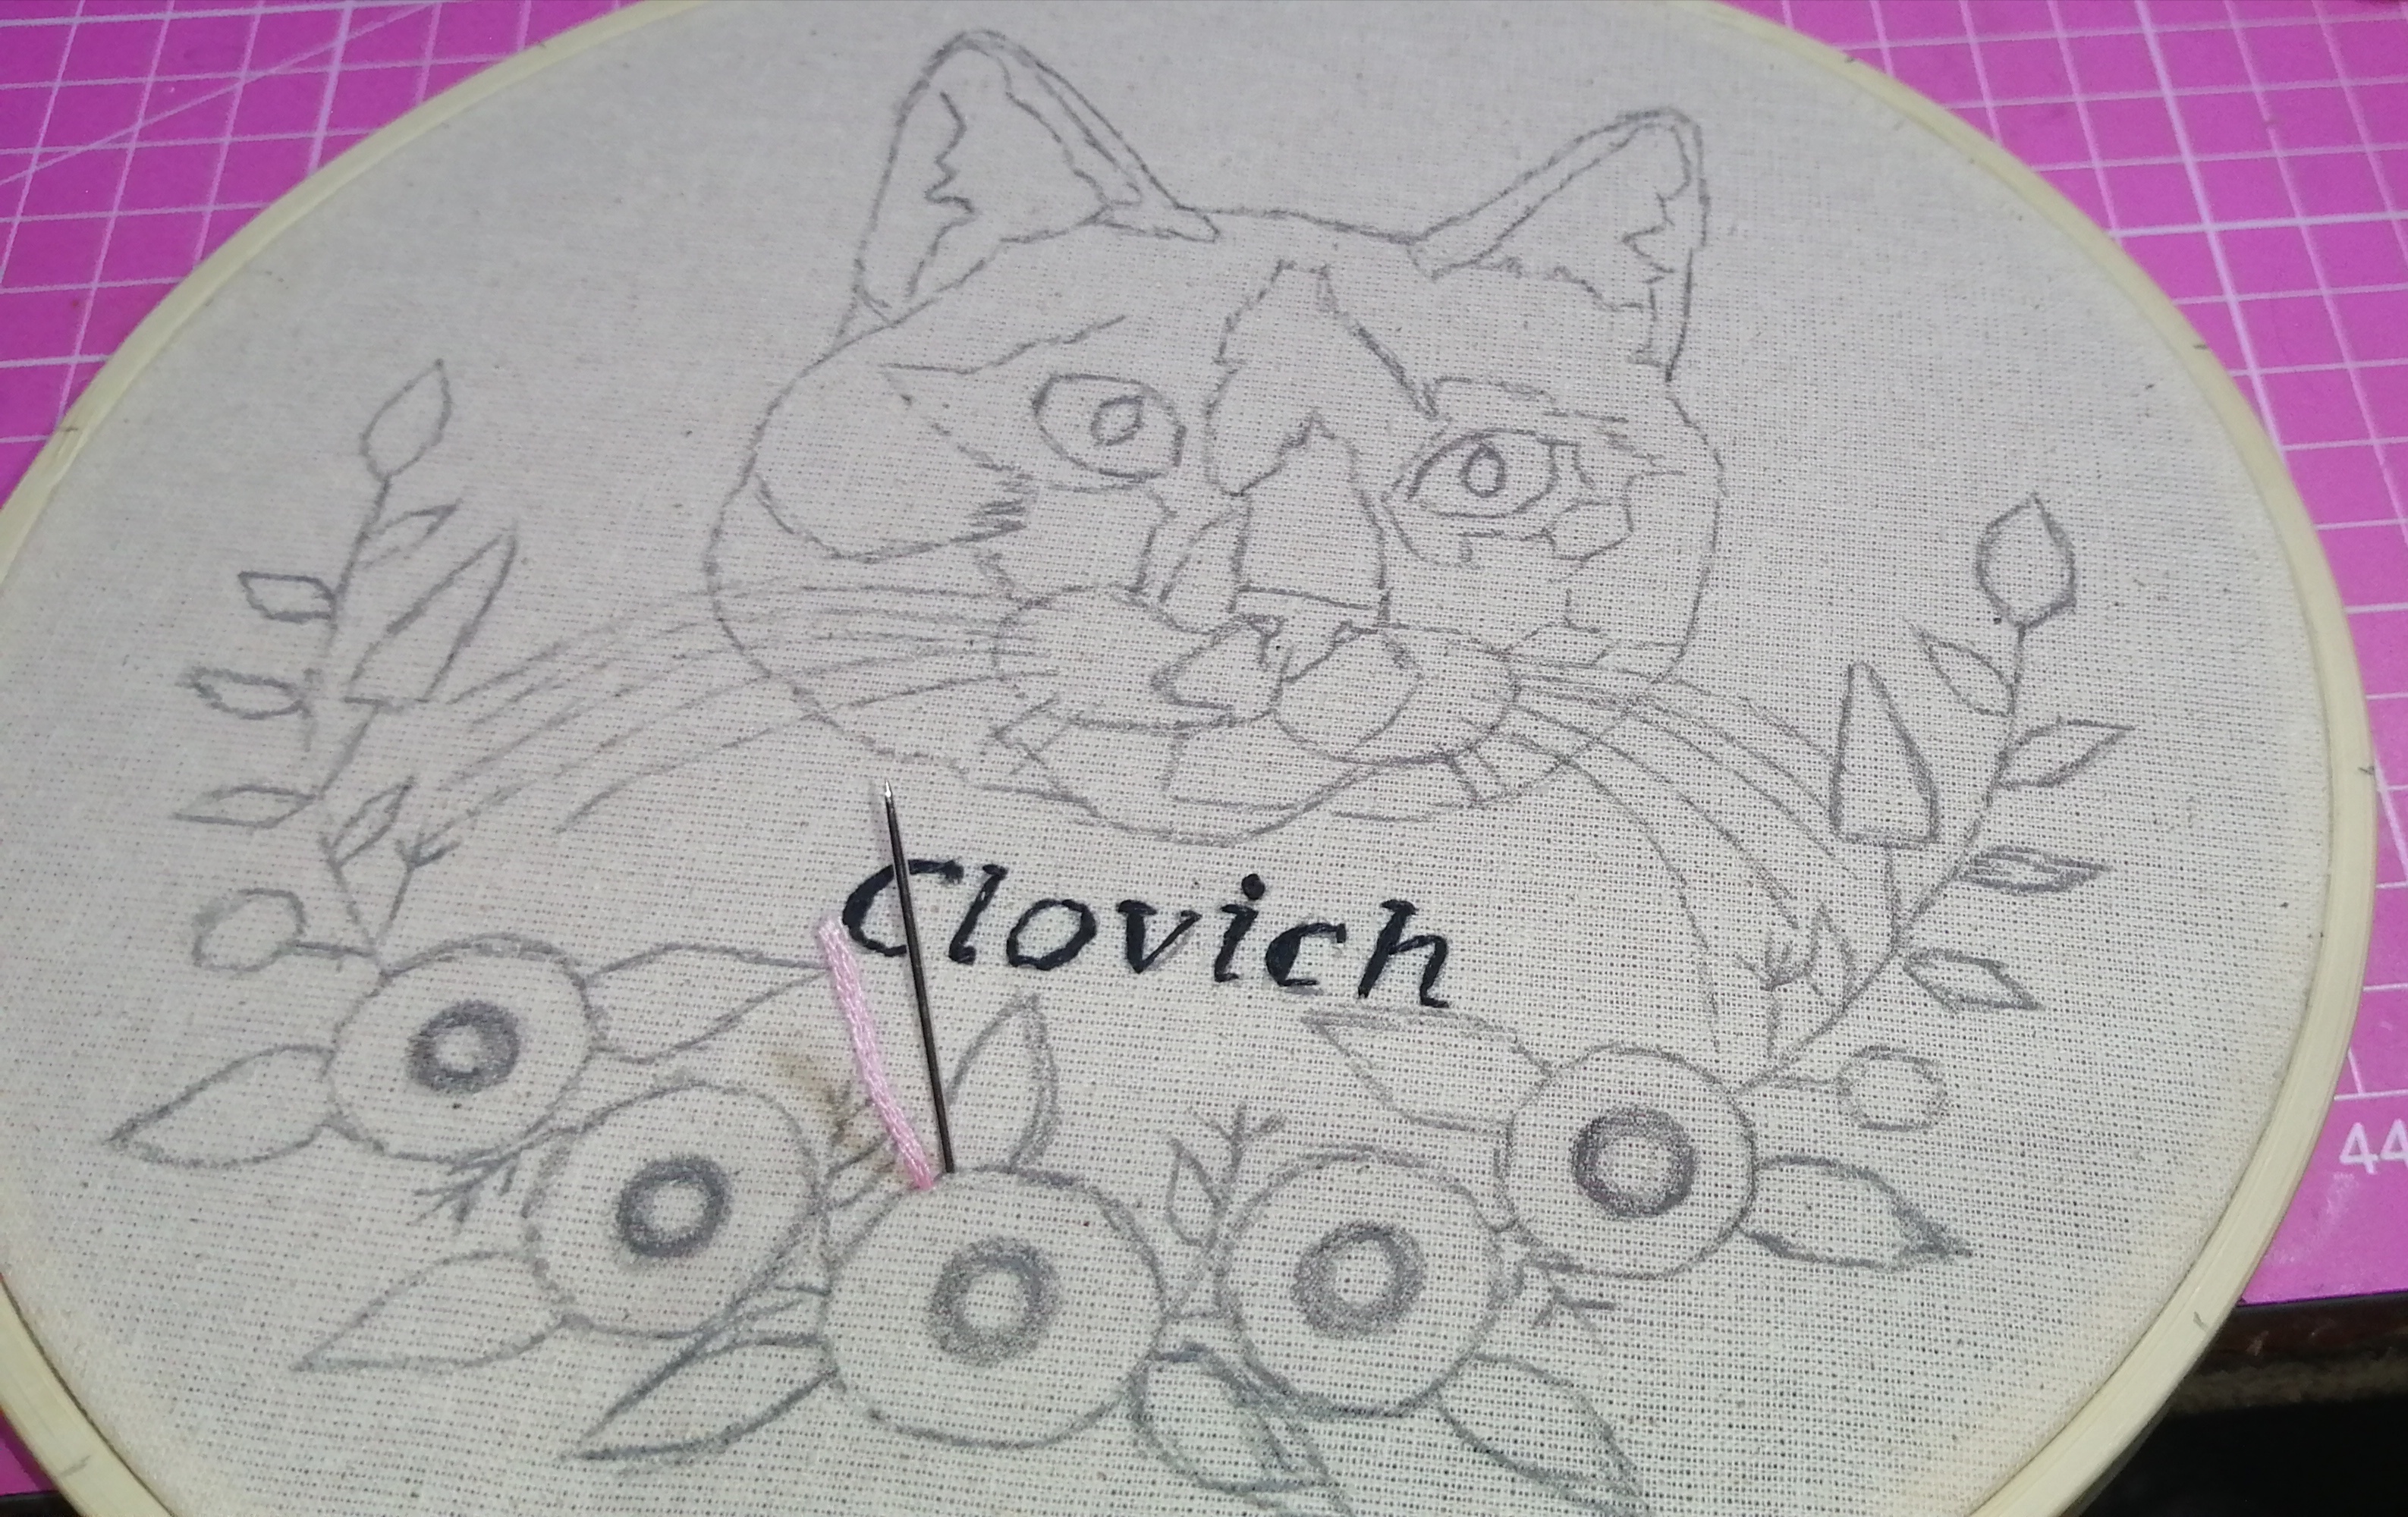
Ahora ya estamos listos, yo empecé bordando el nombre, utilizamos solo dos hebras. Podemos rellenar el nombre con punto tallo o punto atrás yo lo hice con punto atrás. Recuerde siempre que al terminar hacemos puntadas que se entrelazan atrás para que asi quede apretado el hilo y se suficiente con eso para no hacer nudos.
Now we are ready, I started embroidering the name, we used only two strands. We can fill the name with stem stitch or back stitch, I did it with back stitch. Always remember that at the end we make stitches that are intertwined at the back so that the thread is tight and that is enough to avoid knots.
|
|
|

|
|
|
|
|
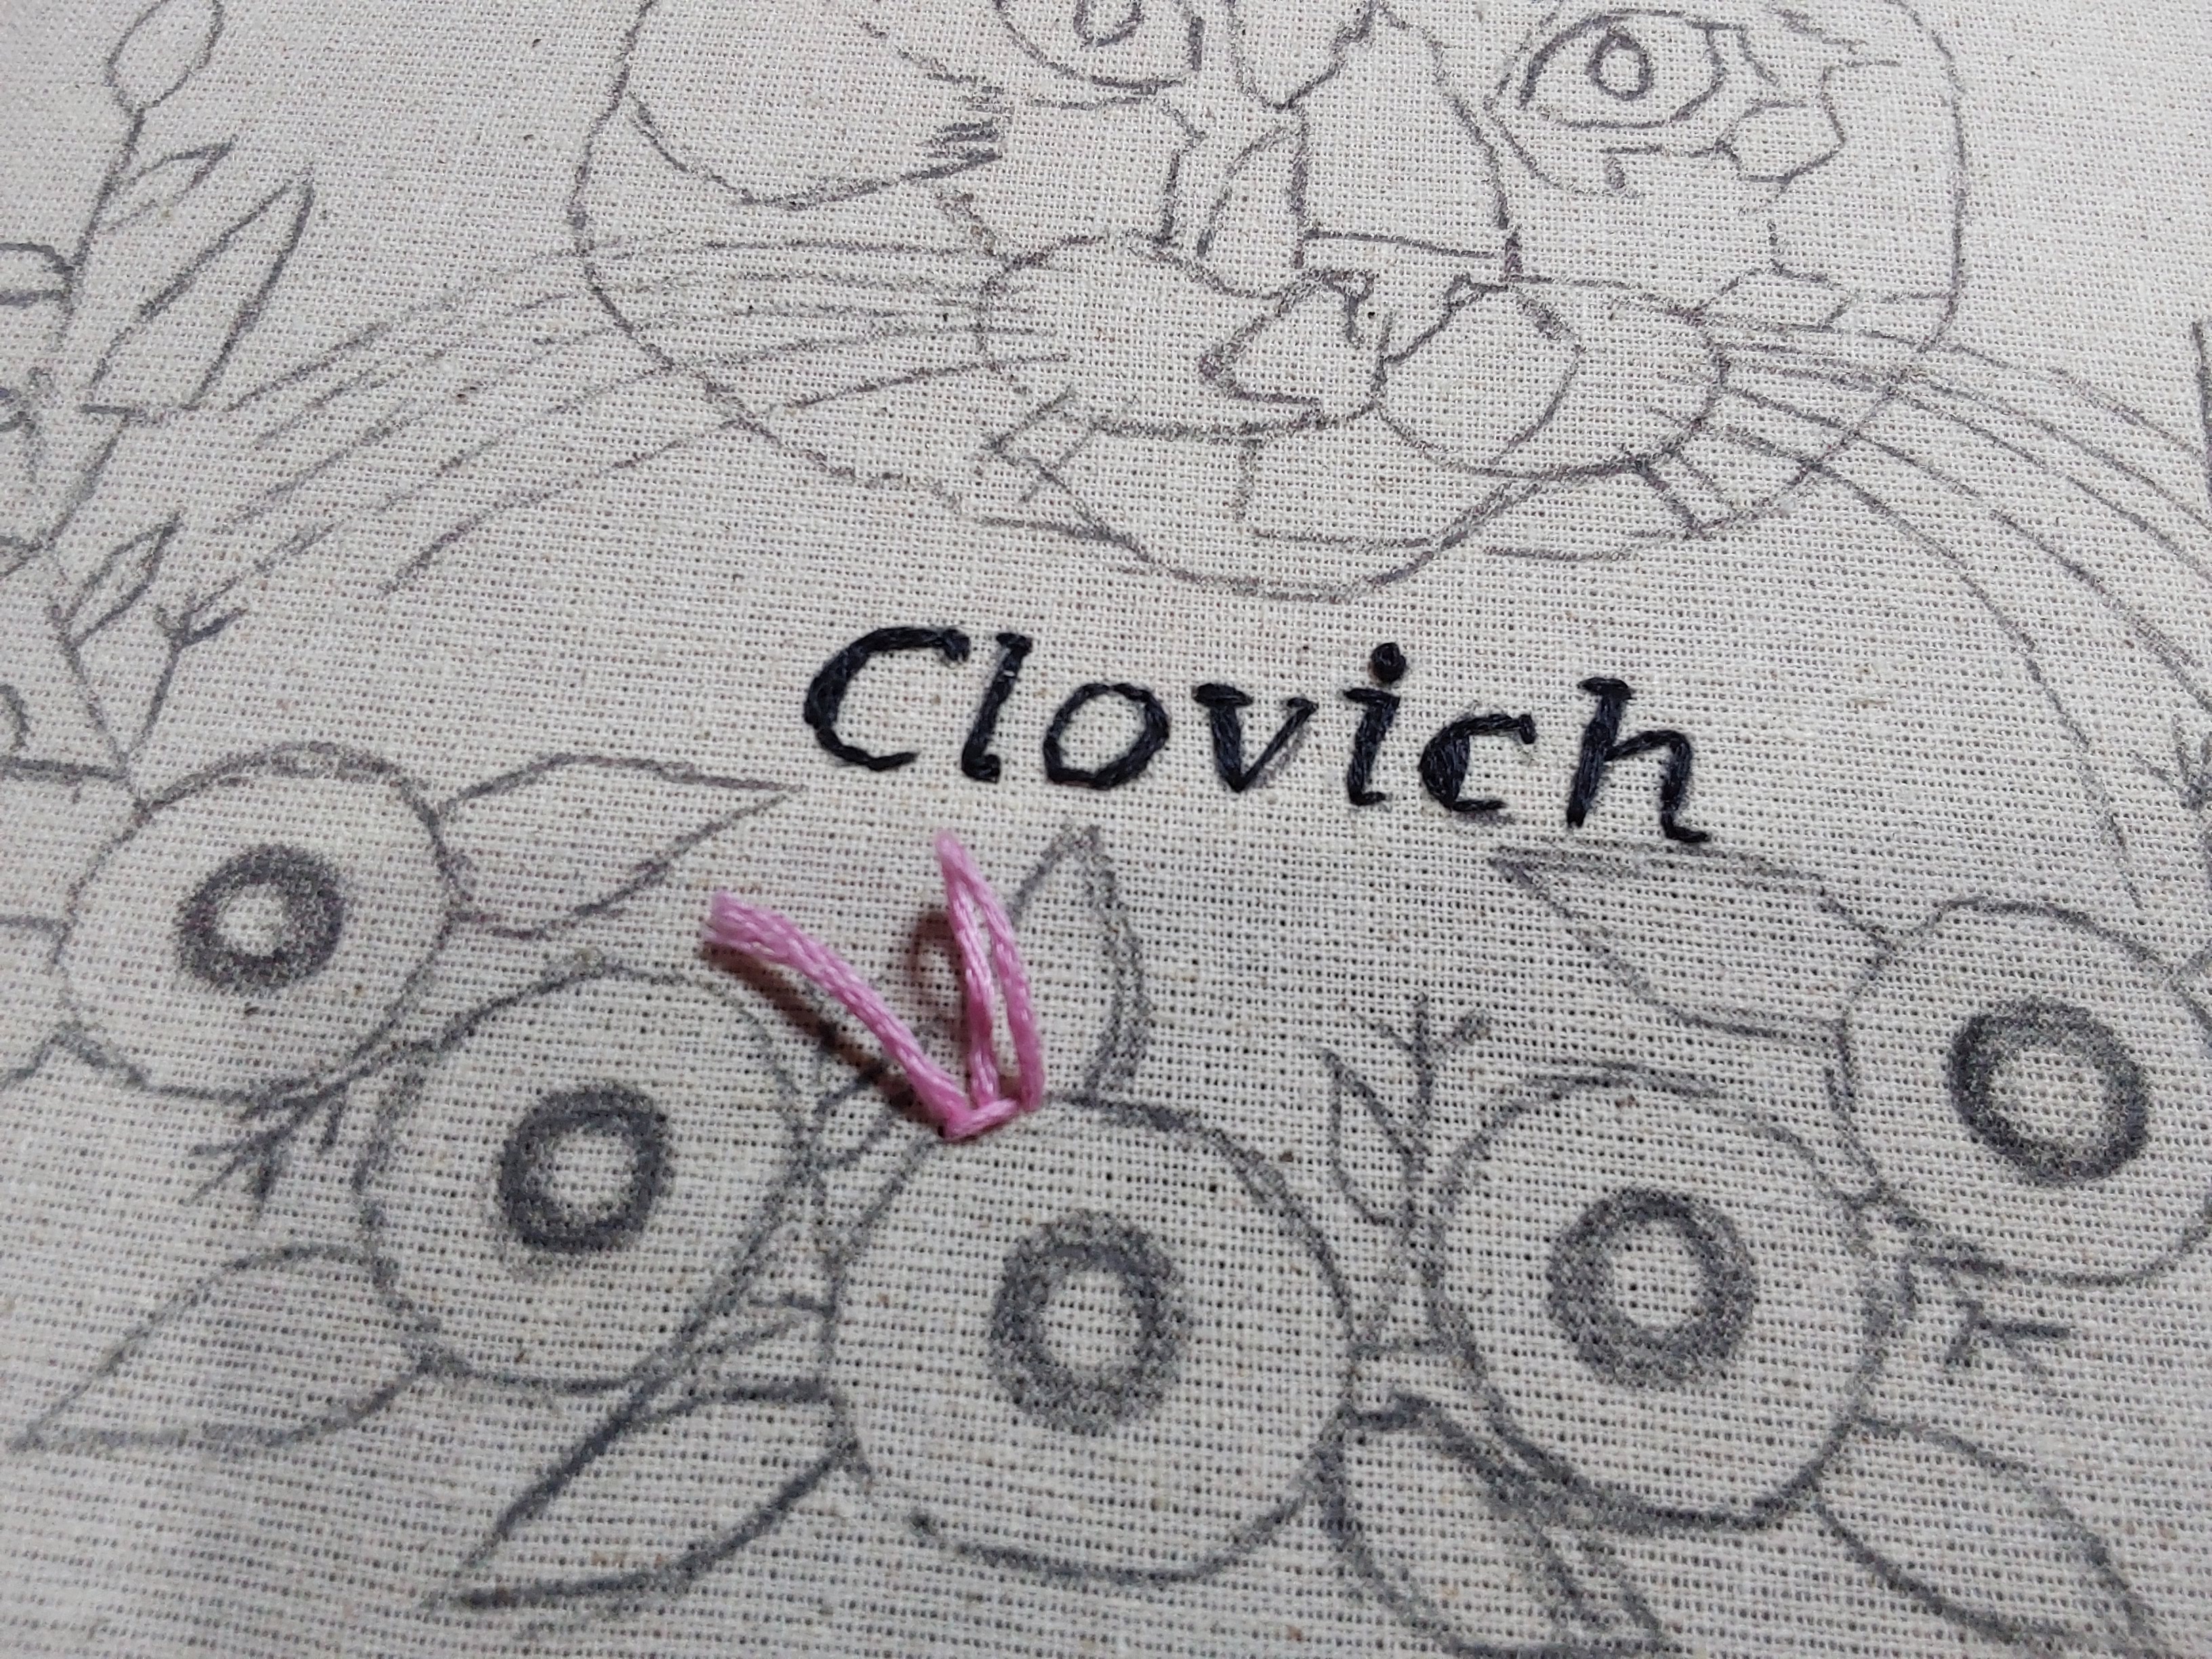
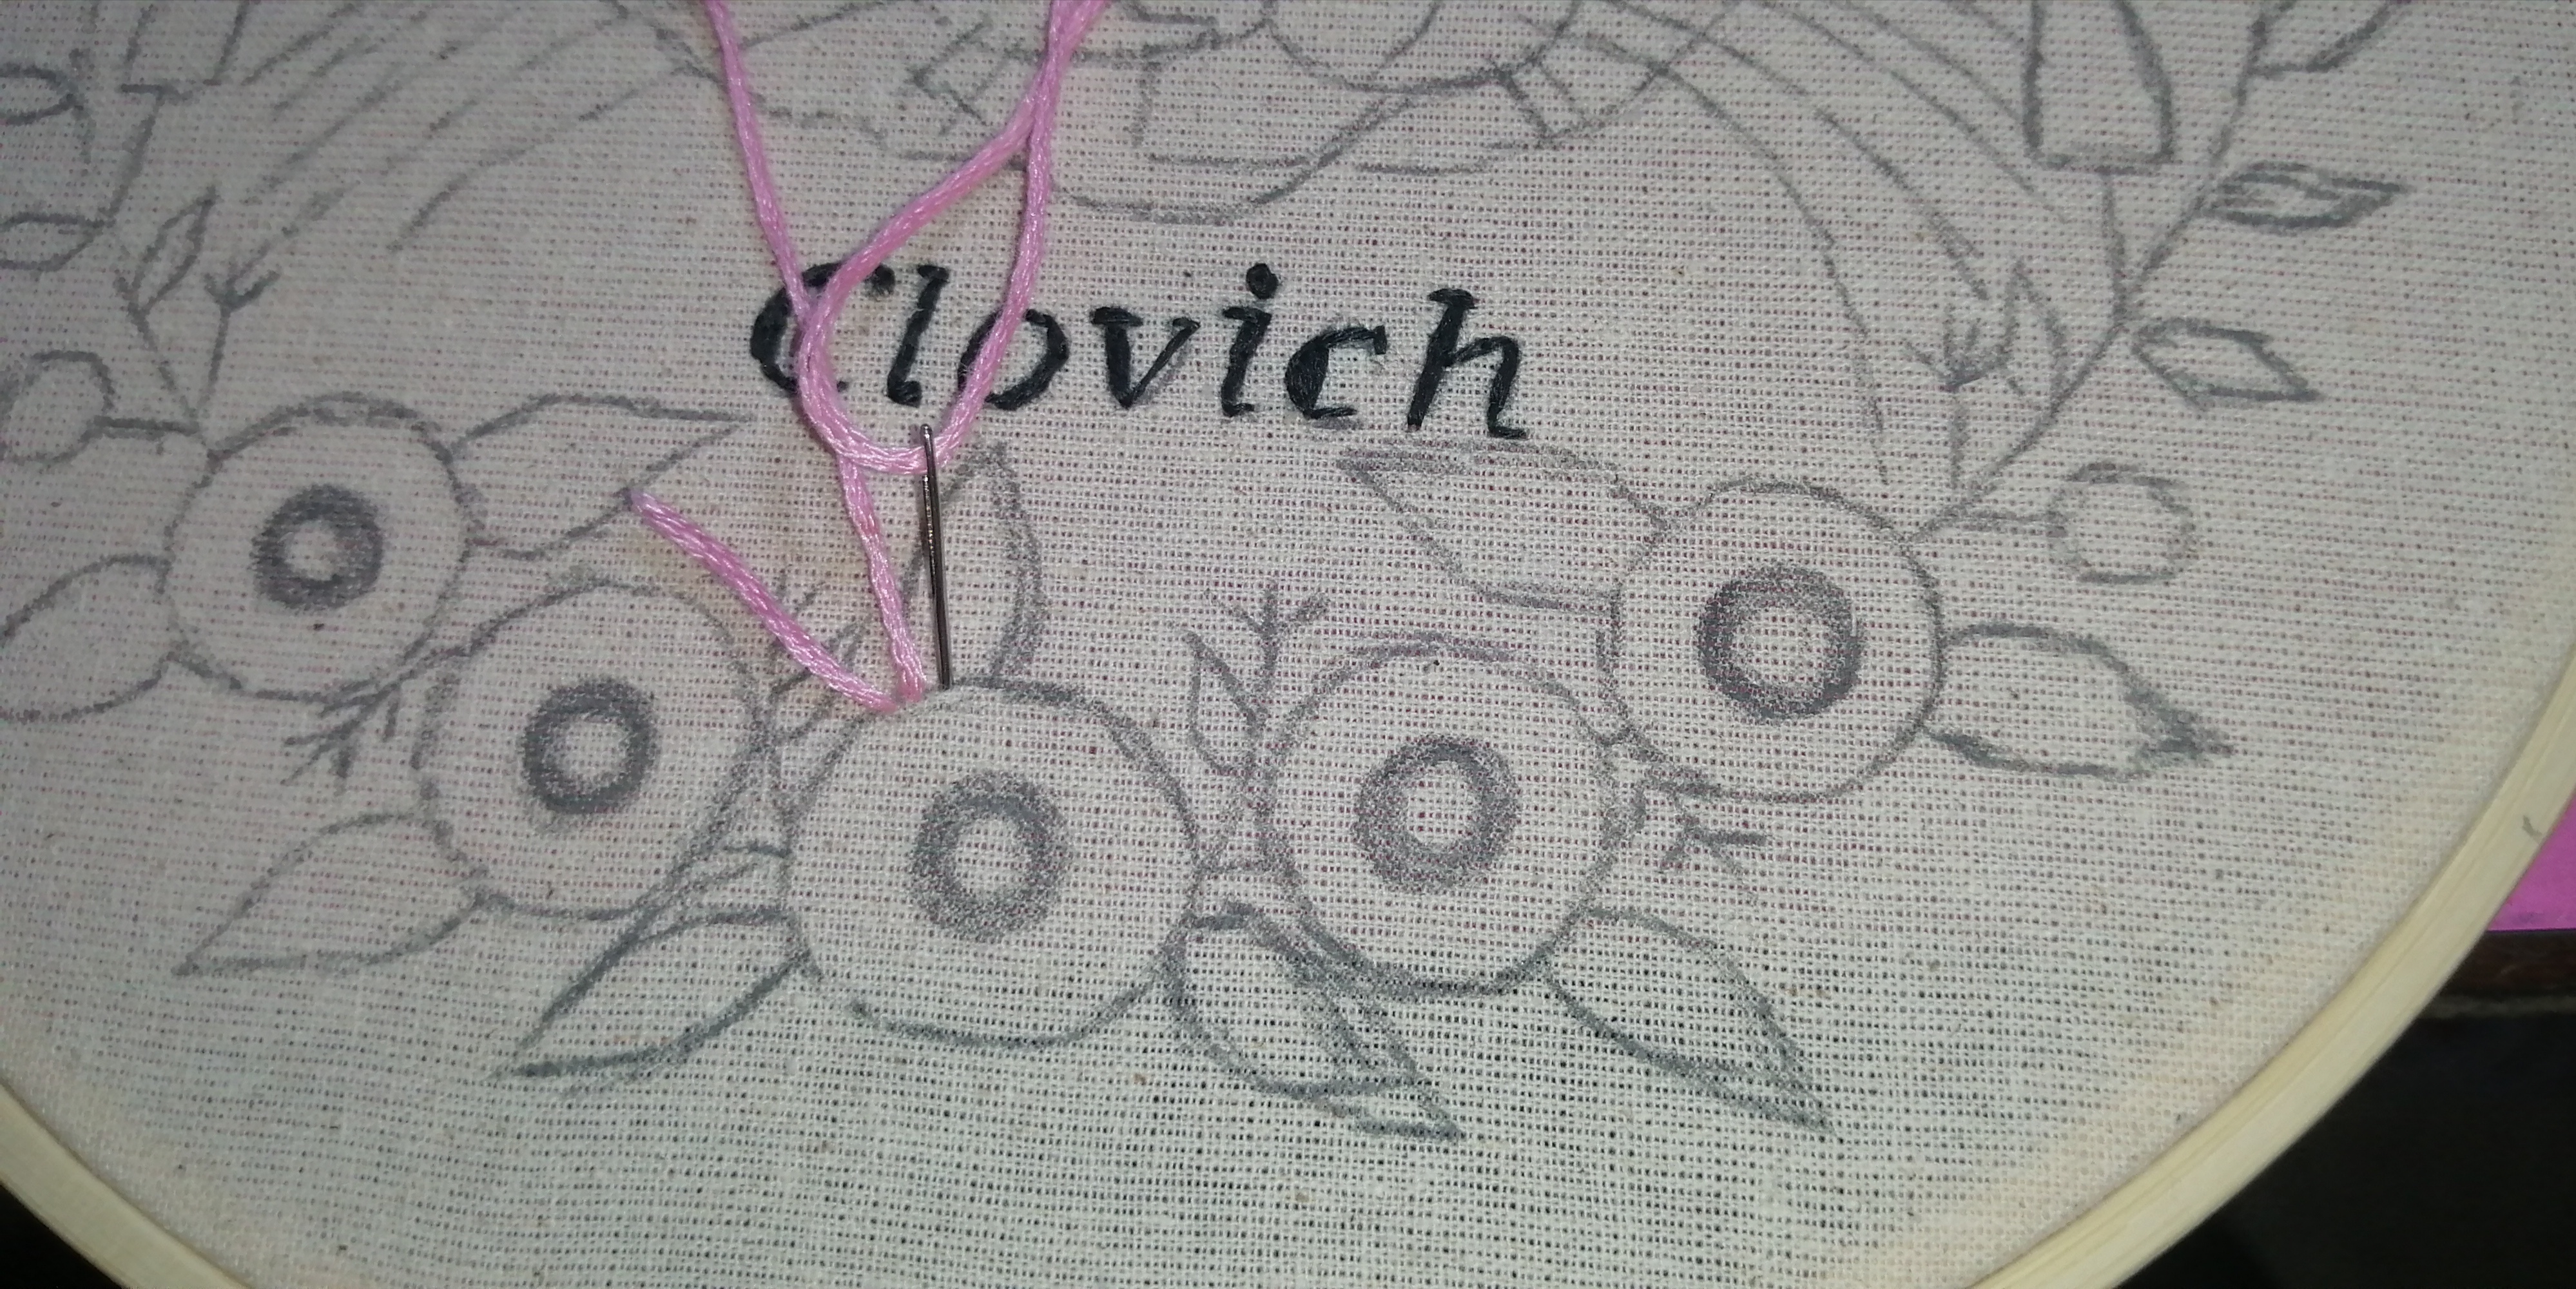
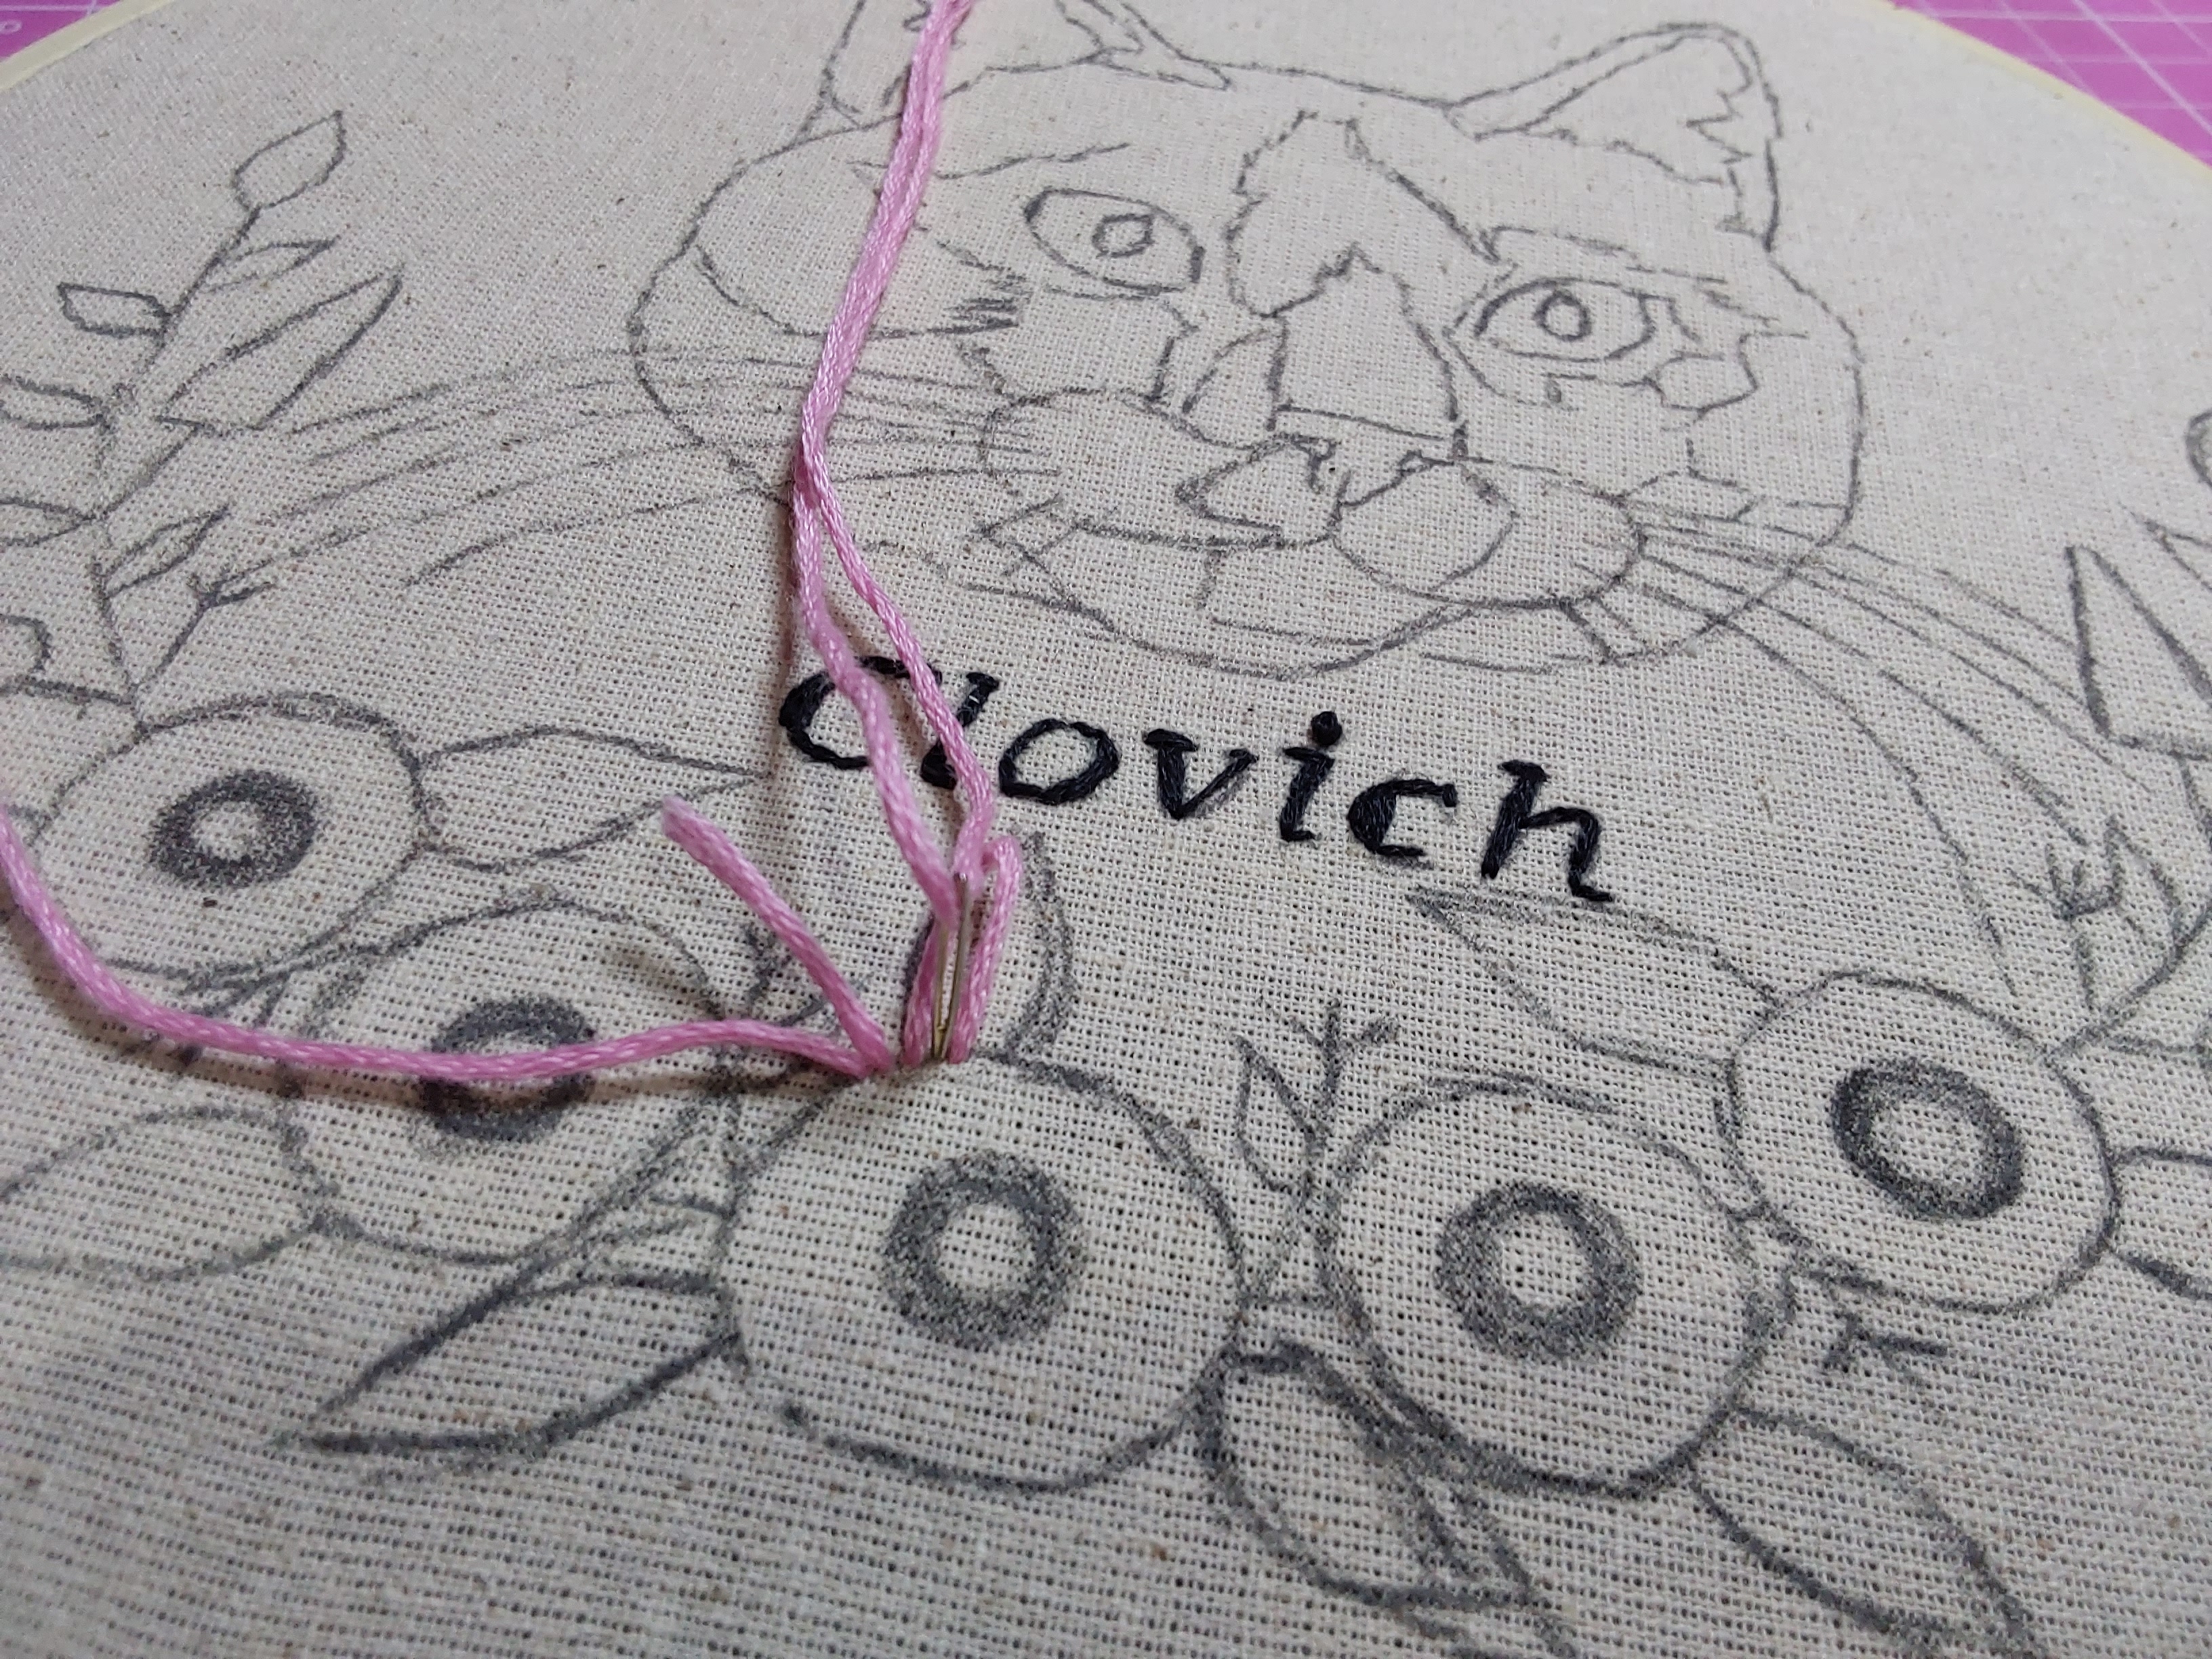
Ahora seguimos con el proceso de las flores. Primero debemos hacer un circulo pequeño en medio, este nos servirá de guía. Usaremos las 6 hebras. La primera puntada se hace en el circulo más grande la puntada será por arriba dejando aprox unos 3 cm. de hilo (como se ve en la imagen) Luego volvemos a entrar y dejamos el hilo a la misma altura del anterior, ahora nos devolvemos y salimos delante de la primera puntada y nos metemos entre la primera y segunda así apretaremos los puntos. Se que suena complejo por eso es mejor ver las imágenes 🤭
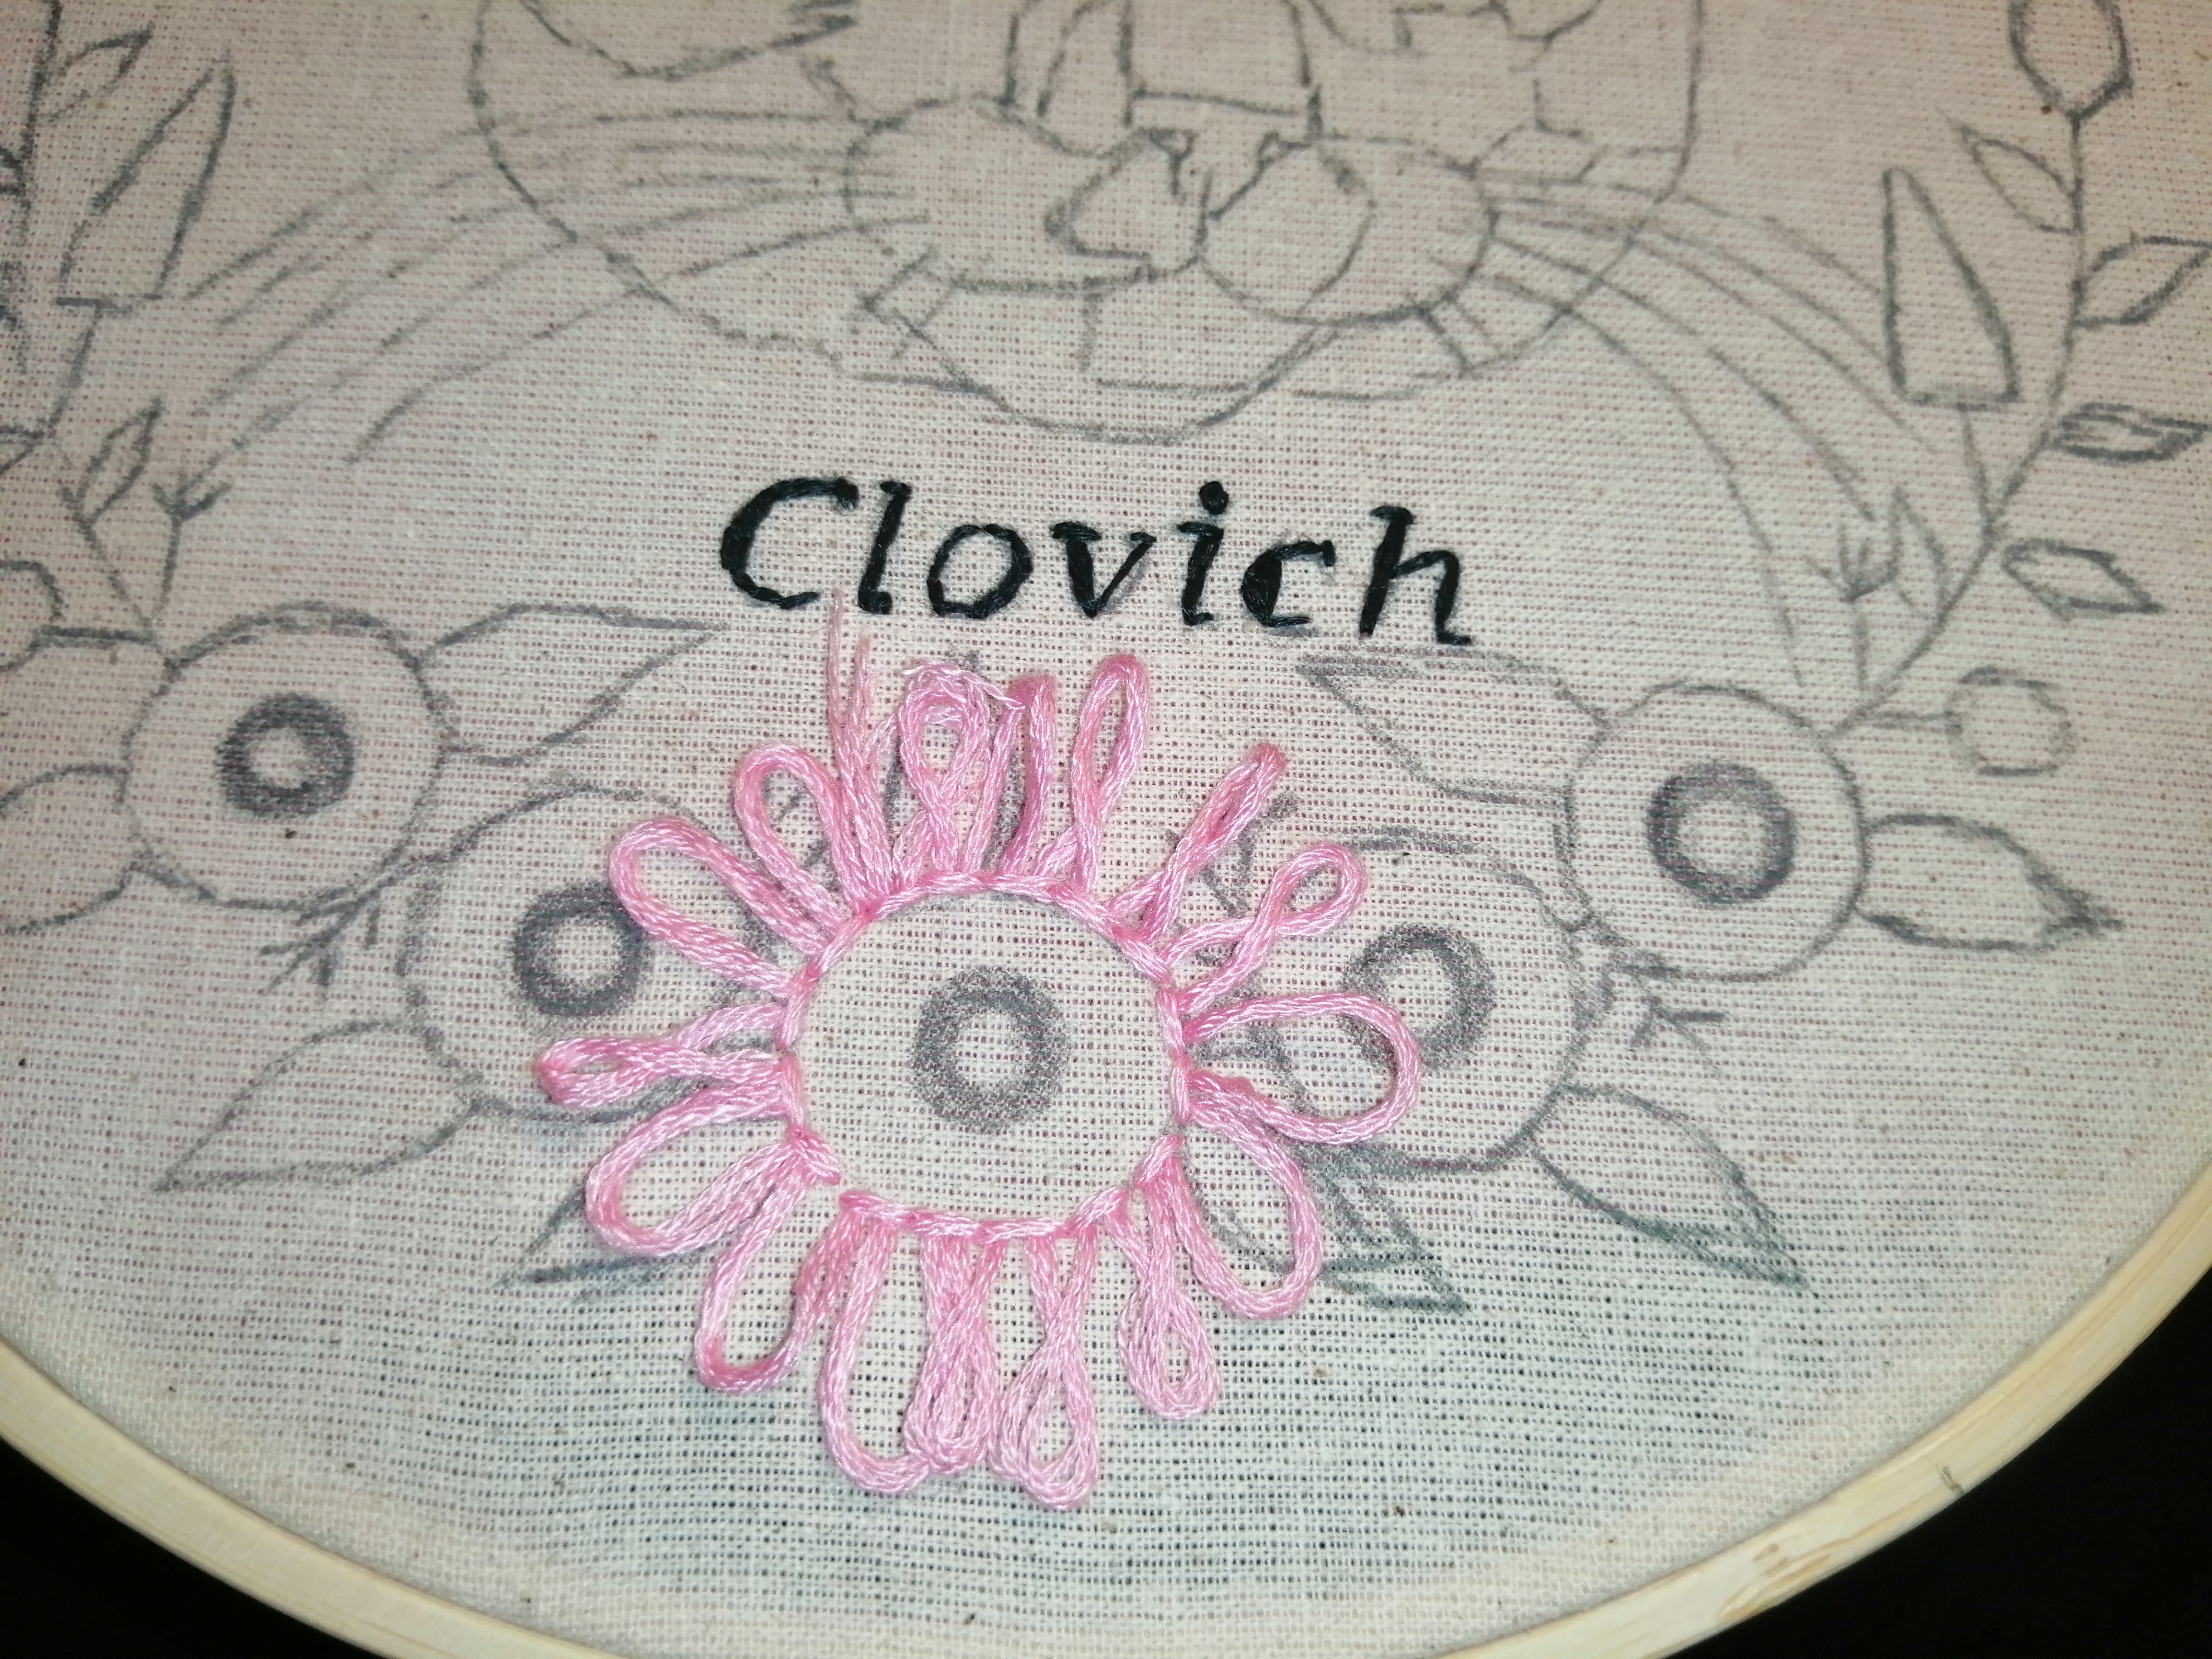
Este proceso lo repetimos hasta llegar al círculo pequeño.
Now we continue with the process of the flowers. First we must make a small circle in the middle, this will serve as a guide. We will use the 6 strands. The first stitch is made in the largest circle the stitch will be from above leaving approx. 3 cm. of thread (as seen in the picture) Then we go back in and leave the thread at the same height of the previous one, now we go back and out in front of the first stitch and get in between the first and second stitch so we will tighten the stitches. I know it sounds complex so it is better to see the pictures 🤭.
We repeat this process until we reach the small circle.

|

|

|

|
|

|
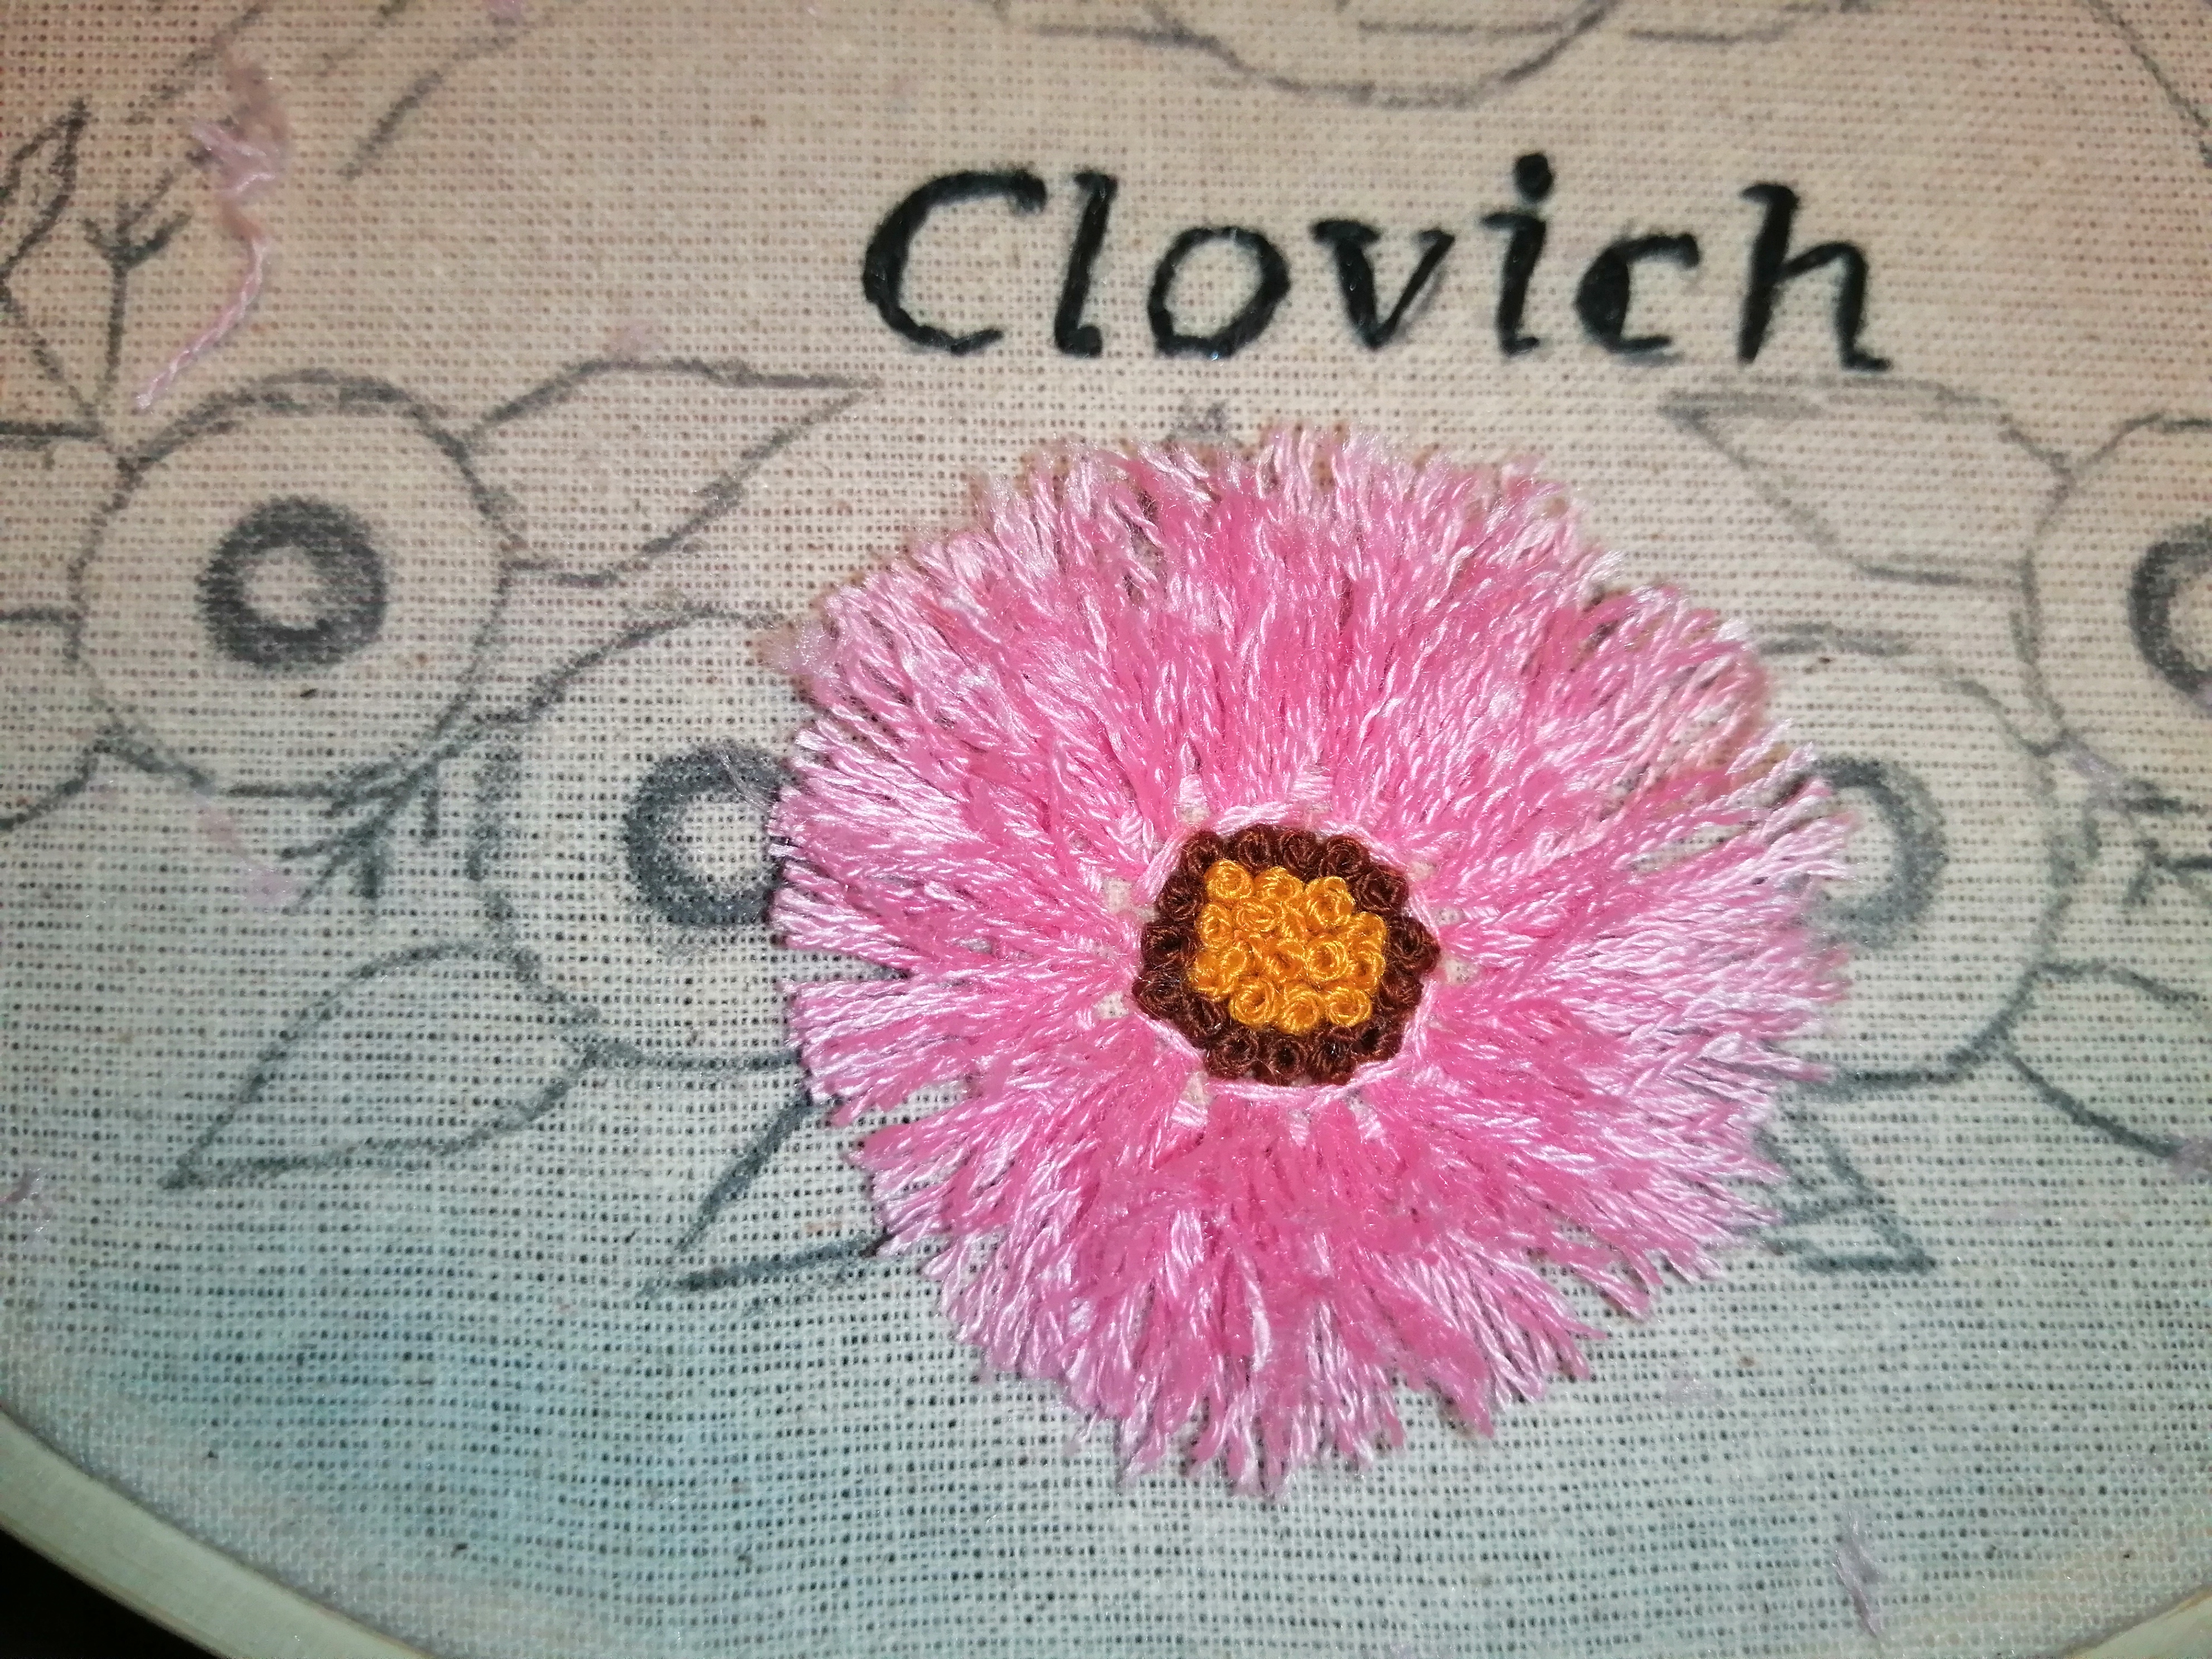
Ahora nos toca hacer la parte interior de la flor, este lo haremos con punto francés con 4 vueltas. Los primeros puntos los haremos con un tono más oscuro luego en el interior buscamos uno más claro. ya esta listo! Y ya esta lista esta florecita ahora cortamos las puntas y peinamos muy bien para que se suelten todas las hebras. Y volvemos a repetir con las otras dos flores. Ahora sí estamos listos, miren que belleza 🥰
Now we have to make the inner part of the flower, this will be done with a stem stitch with 4 rows. The first stitches will be made with a darker tone, then in the interior we will look for a lighter tone. And this little flower is ready, now we cut the ends and comb very well so that all the strands are released. And repeat with the other two flowers. Now we are ready, look how beautiful 🥰.
|
|
|
|
|
|

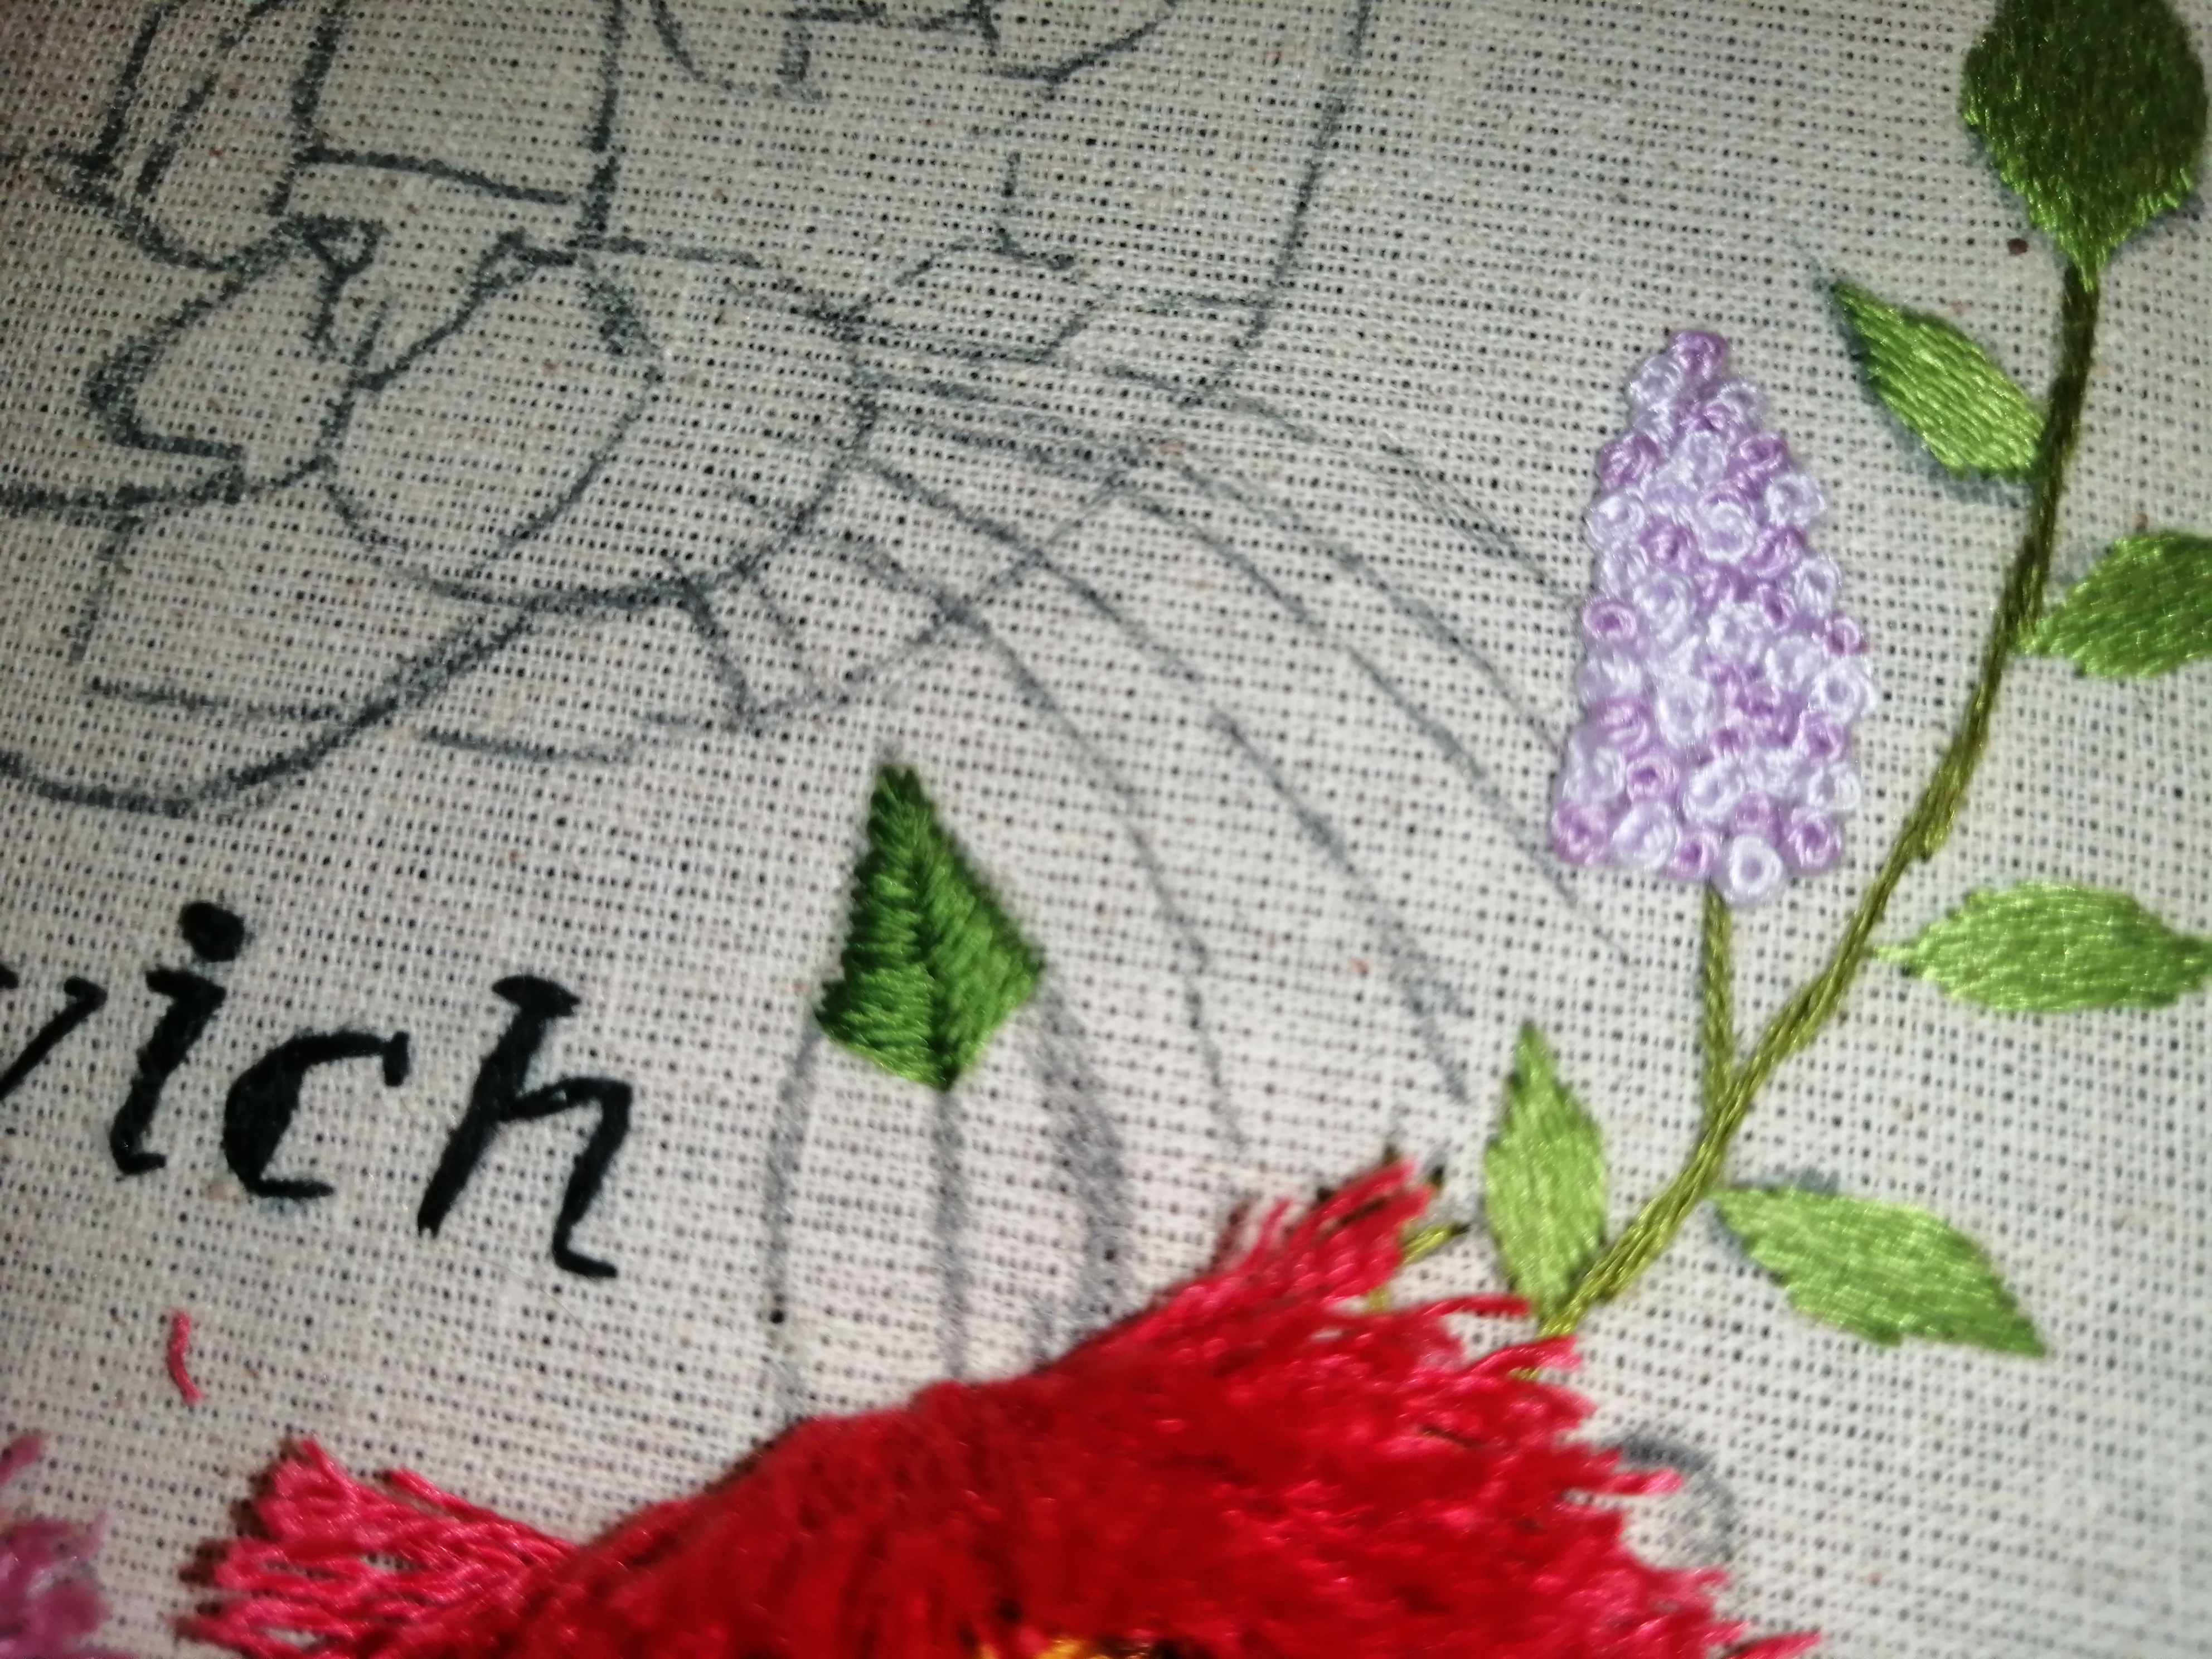
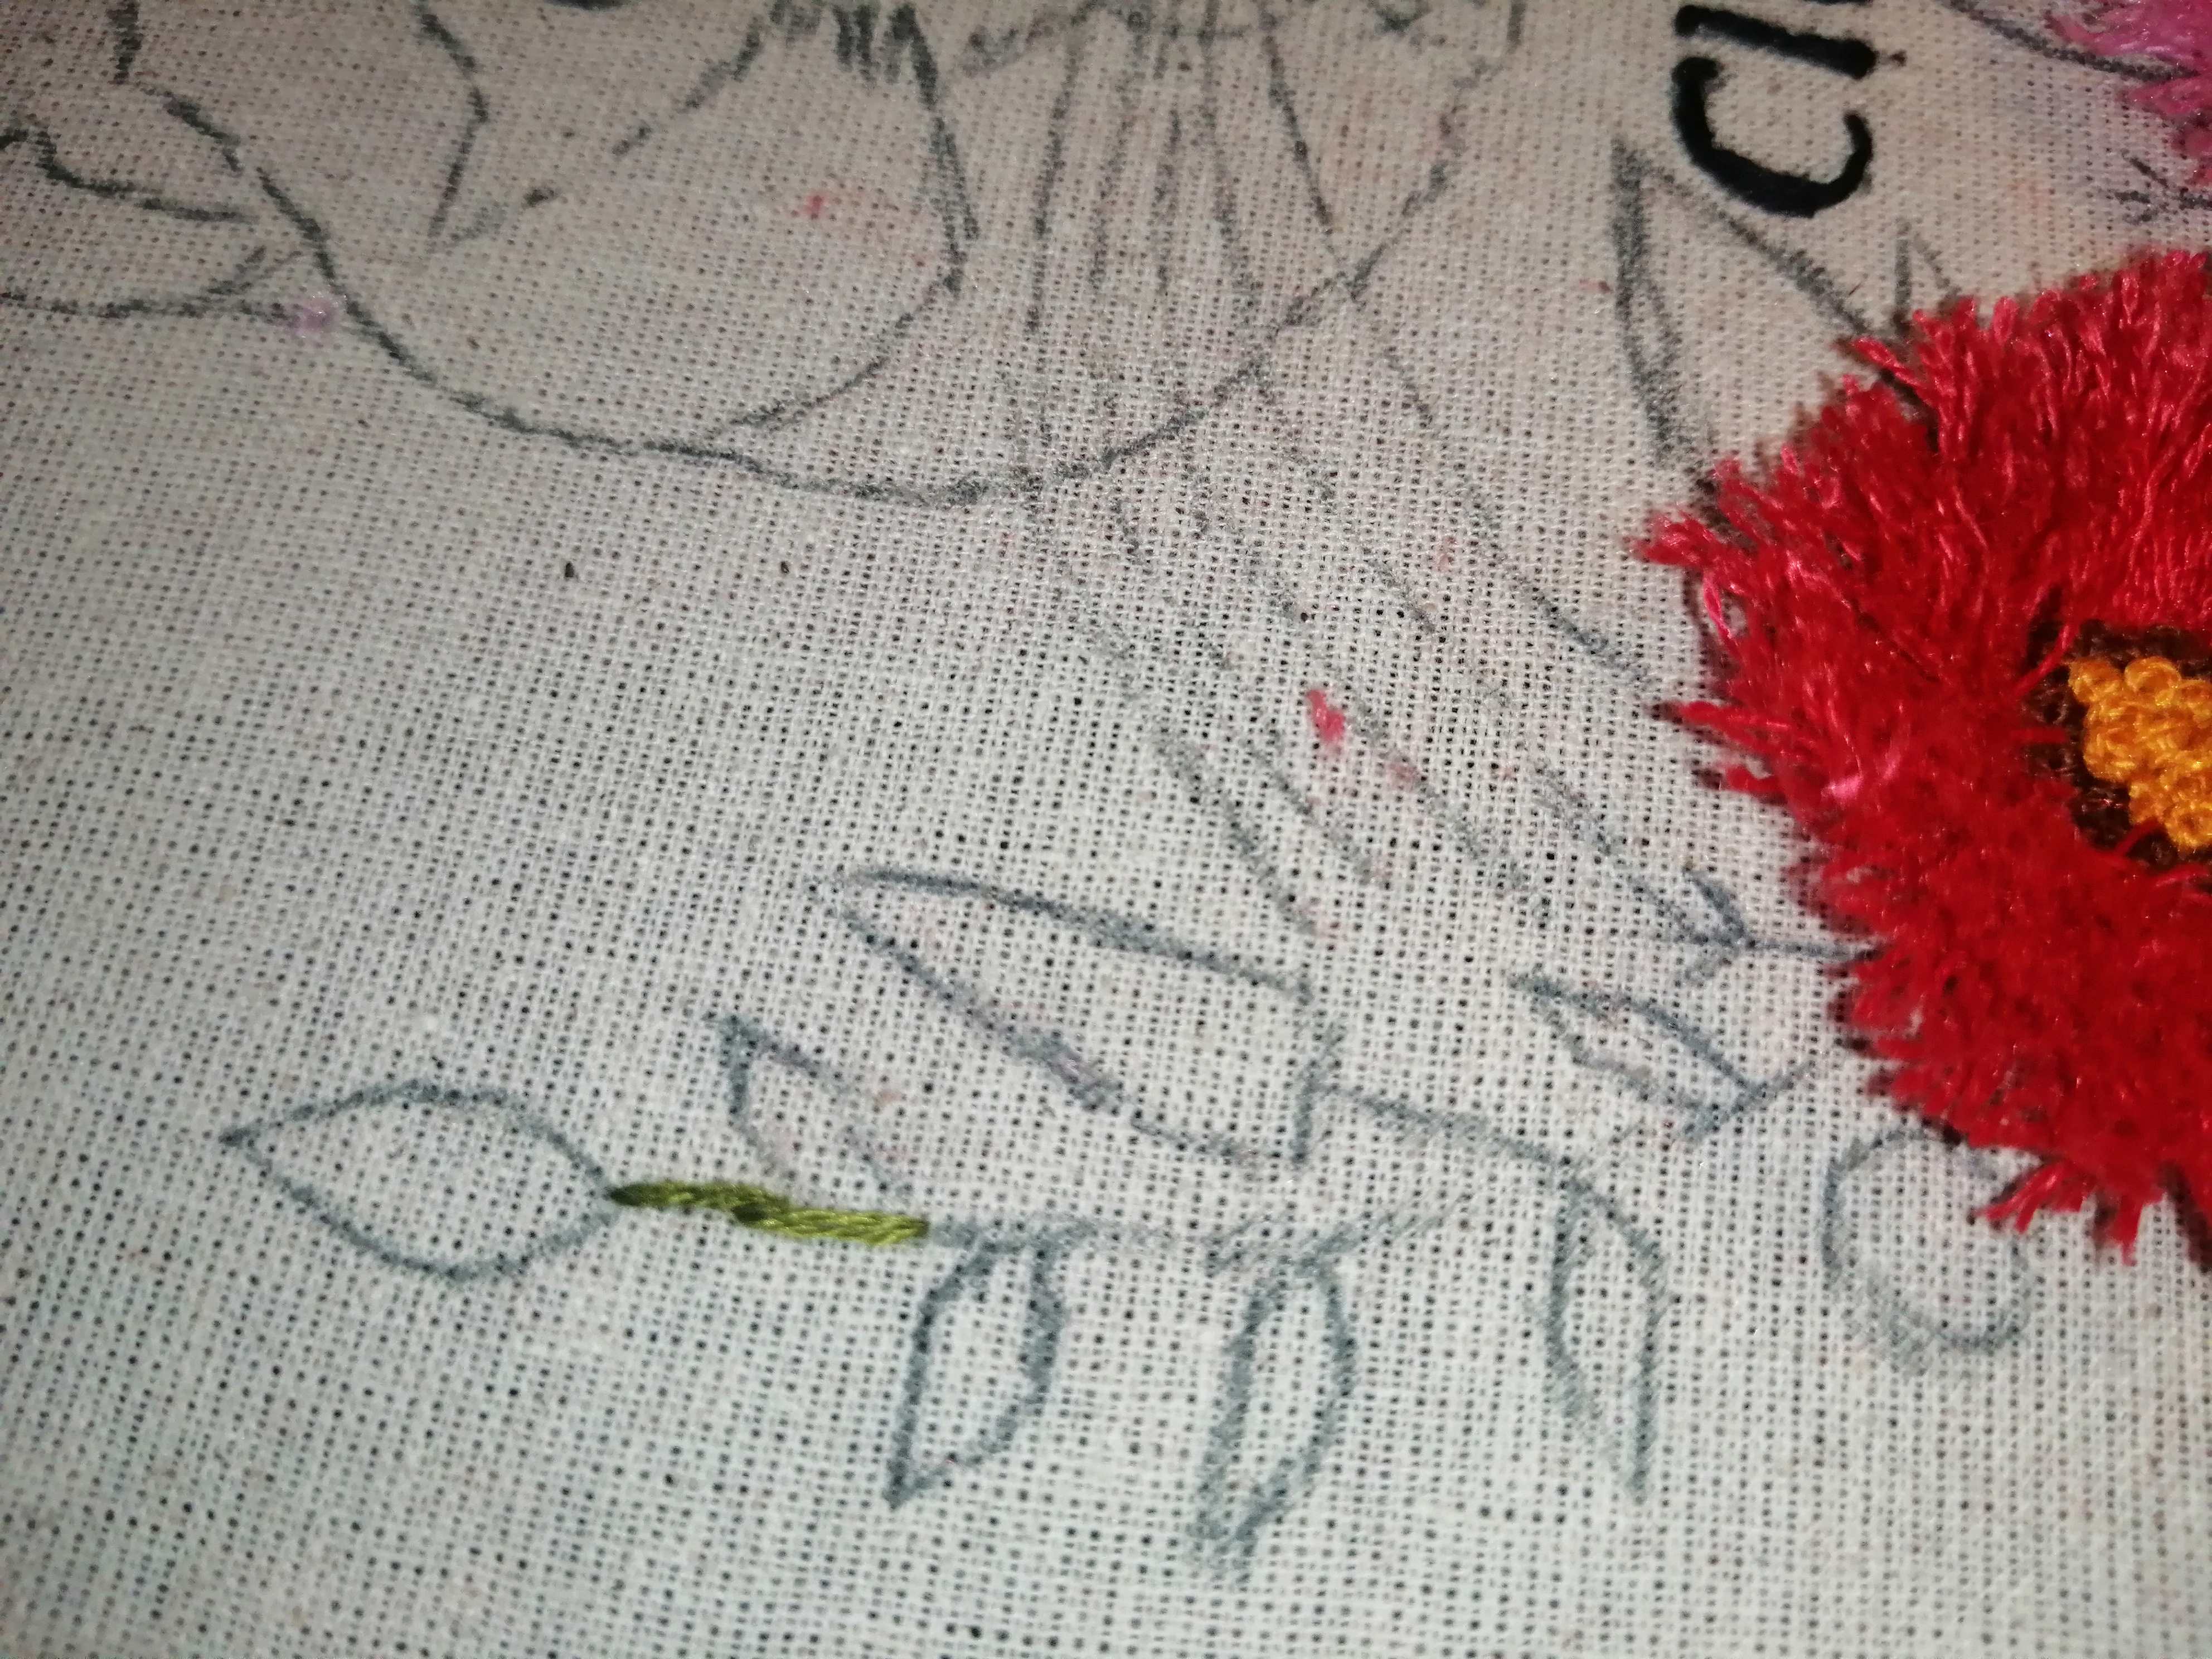
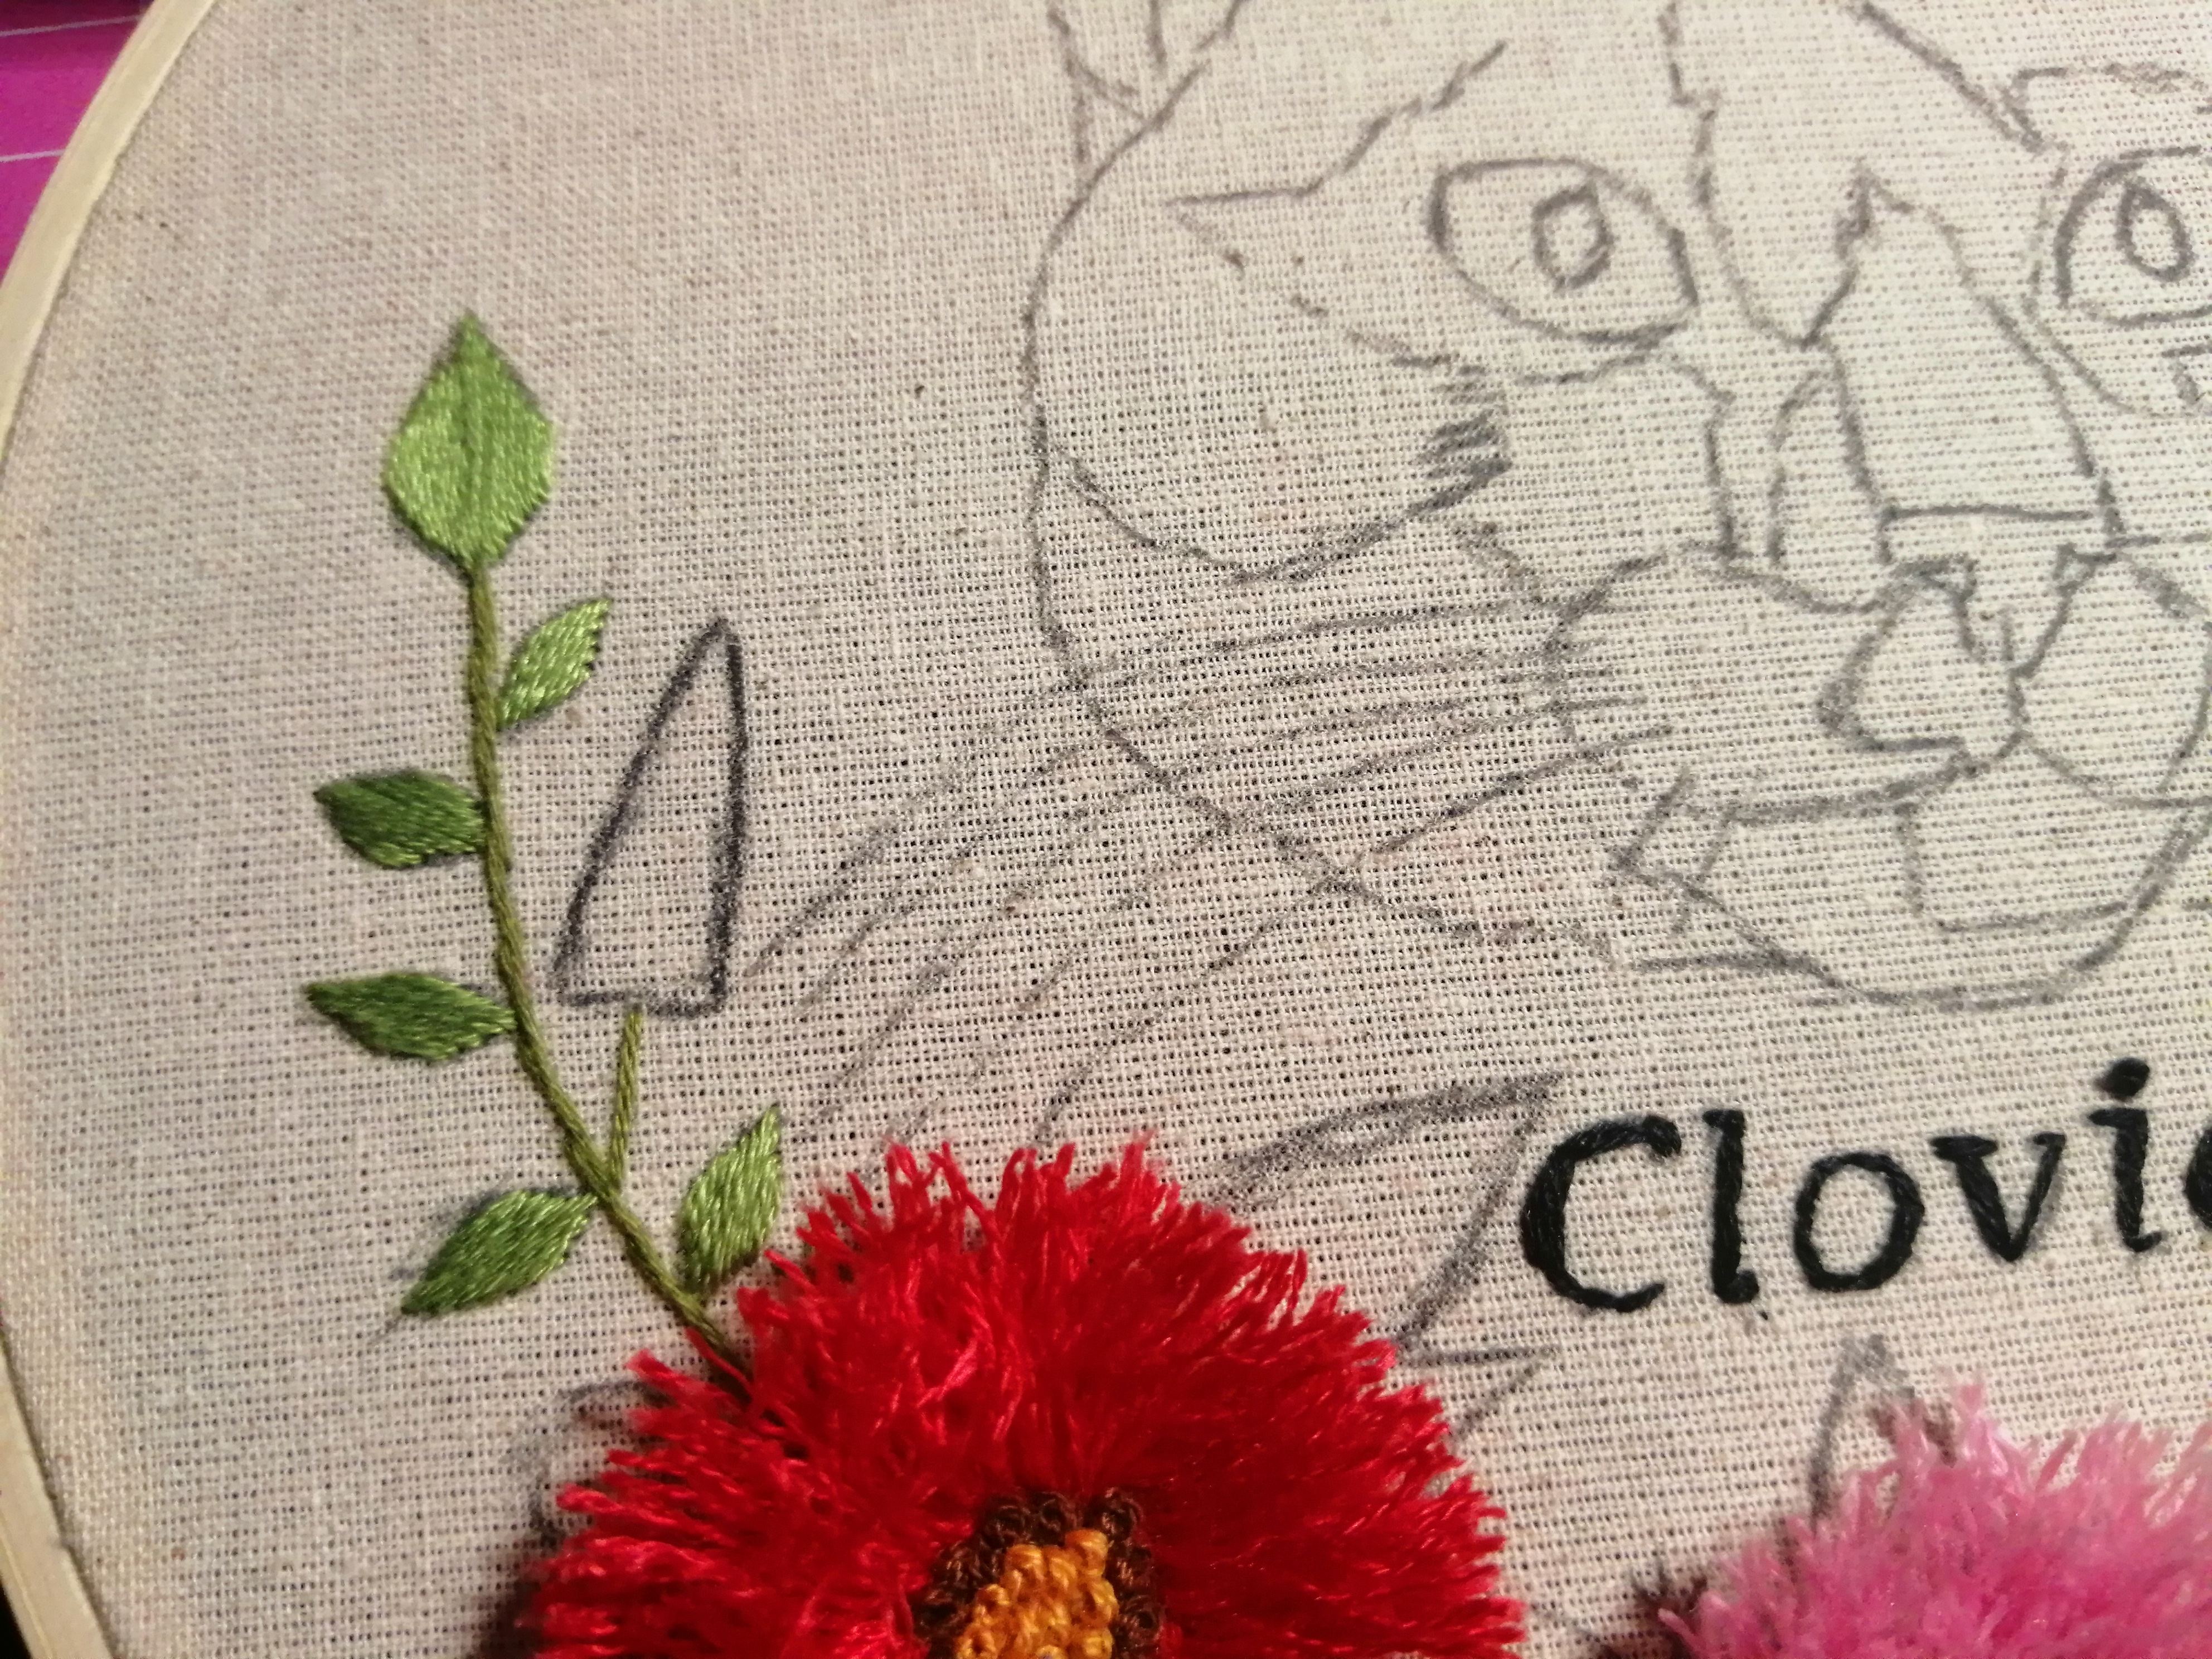
Ahora nos toca hacer el tallo de las flores y adivinen que punto se utiliza. Ohhh adivinaron punto tallo jajaja que sería una puntada simple pero en vez de partir en la misma linea este se empieza de un costado y enmedio de la puntada anterior. Nuevamente repito como se ve en la imagen. 😁 Las hojitas pequeñas las haremos con punto relleno y lavandas las haremos con punto francés utilizando dos tonos de diferentes morados. Haremos puntadas desordenadas pero respetando el patron. Las hojas grandes la rellenaremos primero poniendo una puntada en medio desde arriba y abajo. Y luego vamos rellenando cona puntada en forma de v dejando la puntada de enmedio.
Now it's time to make the stem of the flowers and guess which stitch is used. Ohhh you guessed the stem stitch hahaha that would be a simple stitch but instead of starting on the same line this one starts from the side and in the middle of the previous stitch. Again I repeat as seen in the picture. 😁 The small leaves we will make with filled stitch and the lavender leaves we will make with French stitch using two shades of different purples. We will make disordered stitches but respecting the pattern. The large leaves will be filled first by putting a stitch in the middle from above and below. And then we will fill in with a v-shaped stitch leaving the stitch in the middle.


Ahora solo nos queda pasar la plancha y sacar las rayas de el bolígrafo.
Y estamos listos!!
Miren que belleza de flores 😍 las puedes utilizar para bordar en manteles, chaquetas o lo que se te ocurra! 🌿🌸
Now we just need to pass the iron and remove the stripes from the pen.
And we are ready!
Look what a beauty of flowers 😍 you can use them to embroider on tablecloths, jackets or whatever you can think of! 🌿🌸
**Todas las Imágenes son de mi autoria.
Traducido al inglés con Google traductor.
All images are my own.
Translated into english with google traslator.
Eso eran los trabajos que quería que subieras, son tan hermosos. Aunque él osito que hiciste en tela tambien te quedó muy bello. Re talentosa, me gusta todo los proyectos que crea. 👍
Muchas gracias 🥺 lloro de emoción 😁
Un trabajo muy bien echo y hermoso. Tienes muy buenas habilidades bordando.
Muchas gracias 😊
Un trabajo muy hermoso Waooo te felicito, me encanta que nos quieras regalar tu paso a paso completo, hasta llegar al resultado final.
Bendiciones...
!DIY
Awwww muchas gracias 🤗
You can query your personal balance by
!DIYSTATSQue hermoso trabajo te ha quedado precioso el bordado tal cual, tienes unas manos muy ingeniosas con mucho talento.😉
Aww muchas Gracias que bueno que les gusto 😸
Amé cada detalle de este proceso creativo.
Te felicito ☺️. Gracias por compartir tu proyecto con nosotros
!discovery 45
Gracias a ti por darte el tiempo de ver mi post 🐾🌼
This post was shared and voted inside the discord by the curators team of discovery-it
Join our Community and follow our Curation Trail
Discovery-it is also a Witness, vote for us here
Delegate to us for passive income. Check our 80% fee-back Program
Es un trabajo muy bello, el resultado final es increíble!
Muchas Gracias 🥰
Muy lindo tu trabajo. Me encantó. Éxitos.
Muchas Gracias 🌿🐾
Congratulations, your post has been upvoted by @dsc-r2cornell, which is the curating account for @R2cornell's Discord Community.
Enhorabuena, su "post" ha sido "up-voted" por @dsc-r2cornell, que es la "cuenta curating" de la Comunidad de la Discordia de @R2cornell.
Es increíble lo que se puede lograr con el bordado, demasiado hermoso la felicito 😊
Sii hay tantas alternativas y formas para trabajar con el bordado logras obras muy lindas.
Congratulations @alejandralita! You have completed the following achievement on the Hive blockchain And have been rewarded with New badge(s)
Your next target is to reach 3750 upvotes.
You can view your badges on your board and compare yourself to others in the Ranking
If you no longer want to receive notifications, reply to this comment with the word
STOPCheck out our last posts:
Que lindo trabajo , esas flores súper y el gato 😺 me encantó 👌❤️
Muchas gracias 🤗😸
Quedó muy lindo ☺️
Wao que maravilla 😲 primero tengo que elogiar la belleza de ese michi, que hermosura de gatito jeje
Que precioso trabajo y cuanta dedicacion, toda una profesional 👌 no es para menos que hayan quedado tan contentos, esta precioso ❤️
Muchas gracias 🤗 he bordado tantos gatitos y la gente es muy feliz y se emociona mucho al ver el resultado 😁
This is so cute!!
Waooo quede demasiado impactado por esta increíble habilidad que tienes, te felicito! te quedo bastante bonito el bordado, se nota que ya llevas tiempo en esto no? cuanto tiempo llevas?.. espero puedas seguir compartiendonos mas bordados, de verdad me encantó mucho, un saludo <3 nuevo seguidor sin dudas:)
Awww muchas gracias 🥰 llevo unos 3 años bordando. Claro compartiré todo lo qie hago con mi emprendimiento 🤗🐾
https://reddit.com/r/blogs/comments/1ae7ar7/engesp_bordando_un_gatito_con_flores_3d_parte/
The rewards earned on this comment will go directly to the people( @yolimarag ) sharing the post on Reddit as long as they are registered with @poshtoken. Sign up at https://hiveposh.com.
es increíble tu bordado, hace unos dias vi la primera parte y me encantó, me gusta como explicas todo, que lastima que no fue mejor recompensado. Hay una comunidad de tejido y bordado, se llama needleworkmonday, alli estamos todas las mujeres amantes del arte de trabajar con agujas. anímate con un próximo proyecto y si gustas me etiquetas para verlo.
yo he querido aprender a bordar asi y me parece hermoso. he realizado como dos proyectos nada mas, creo que he ido perdiendo el miedo. tu haces una buena explicación en tus post y eso me encanta. muchas gracias.