Saludos a toda la comunidad de Hive Diy.
Es primera vez que creo un post por aquí. Soy amante del bordado y de la naturaleza así que van a poder ver varios de mis proyectos.
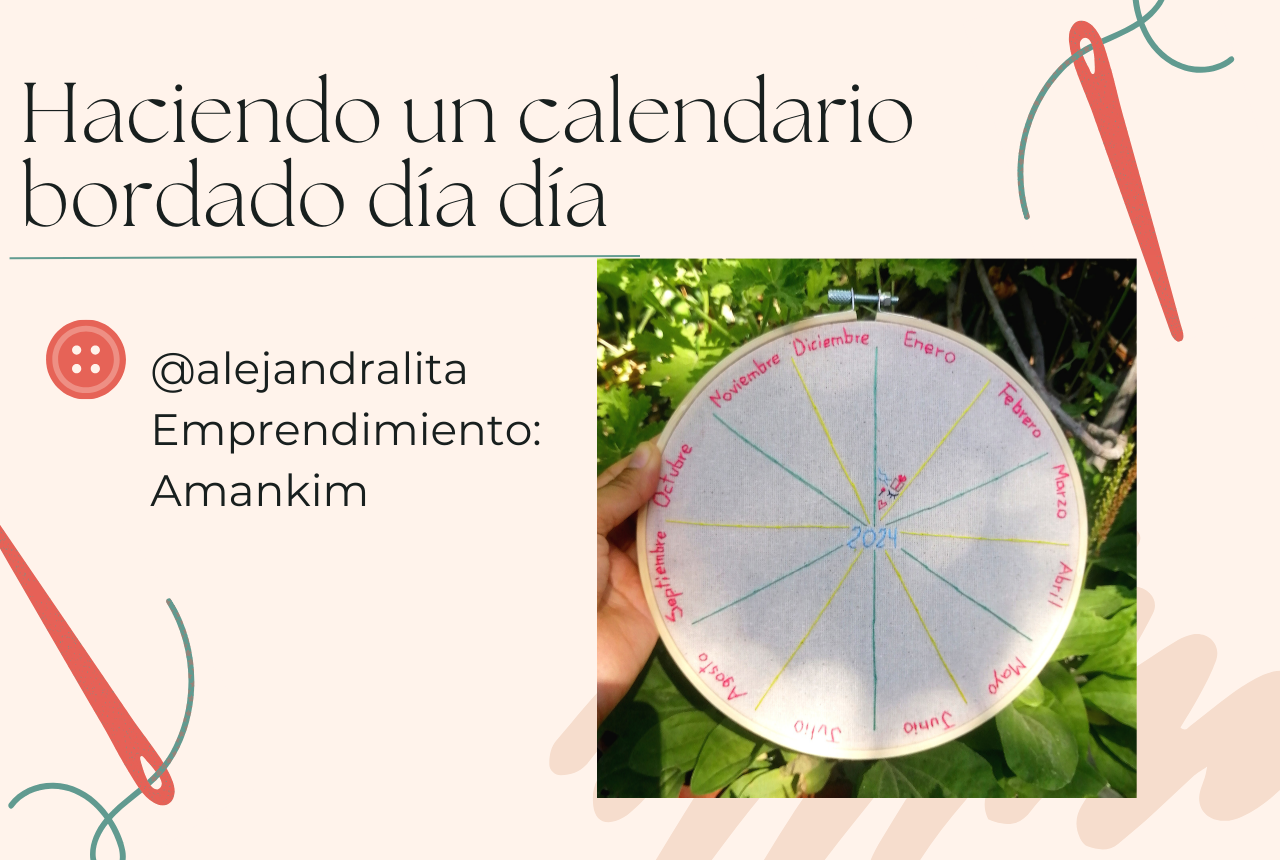
Hace unos días atrás cree un proyecto que llevaba hace unos años pensando, pero por tiempo y fechas nunca me animaba. Ahora que estamos partiendo el año lo puedo compartir con ustedes para que se animen y puedan ver lo bueno y lo malo de todo el año. Es un proyecto simple pero recién se logra ver el resultado el último día del año. Así que paciencia. 😁
A Greetings to all the Hive Diy community.
This is the first time I create a post here. I love embroidery and nature so you will be able to see some of my projects.
A few days ago I created a project that I had been thinking about for a few years, but due to time and dates I never got around to it. Now that we are starting the year I can share it with you so that you can see the good and the bad of the whole year. It's a simple project but you only get to see the result on the last day of the year. So patience 😁
Materiales / Materials
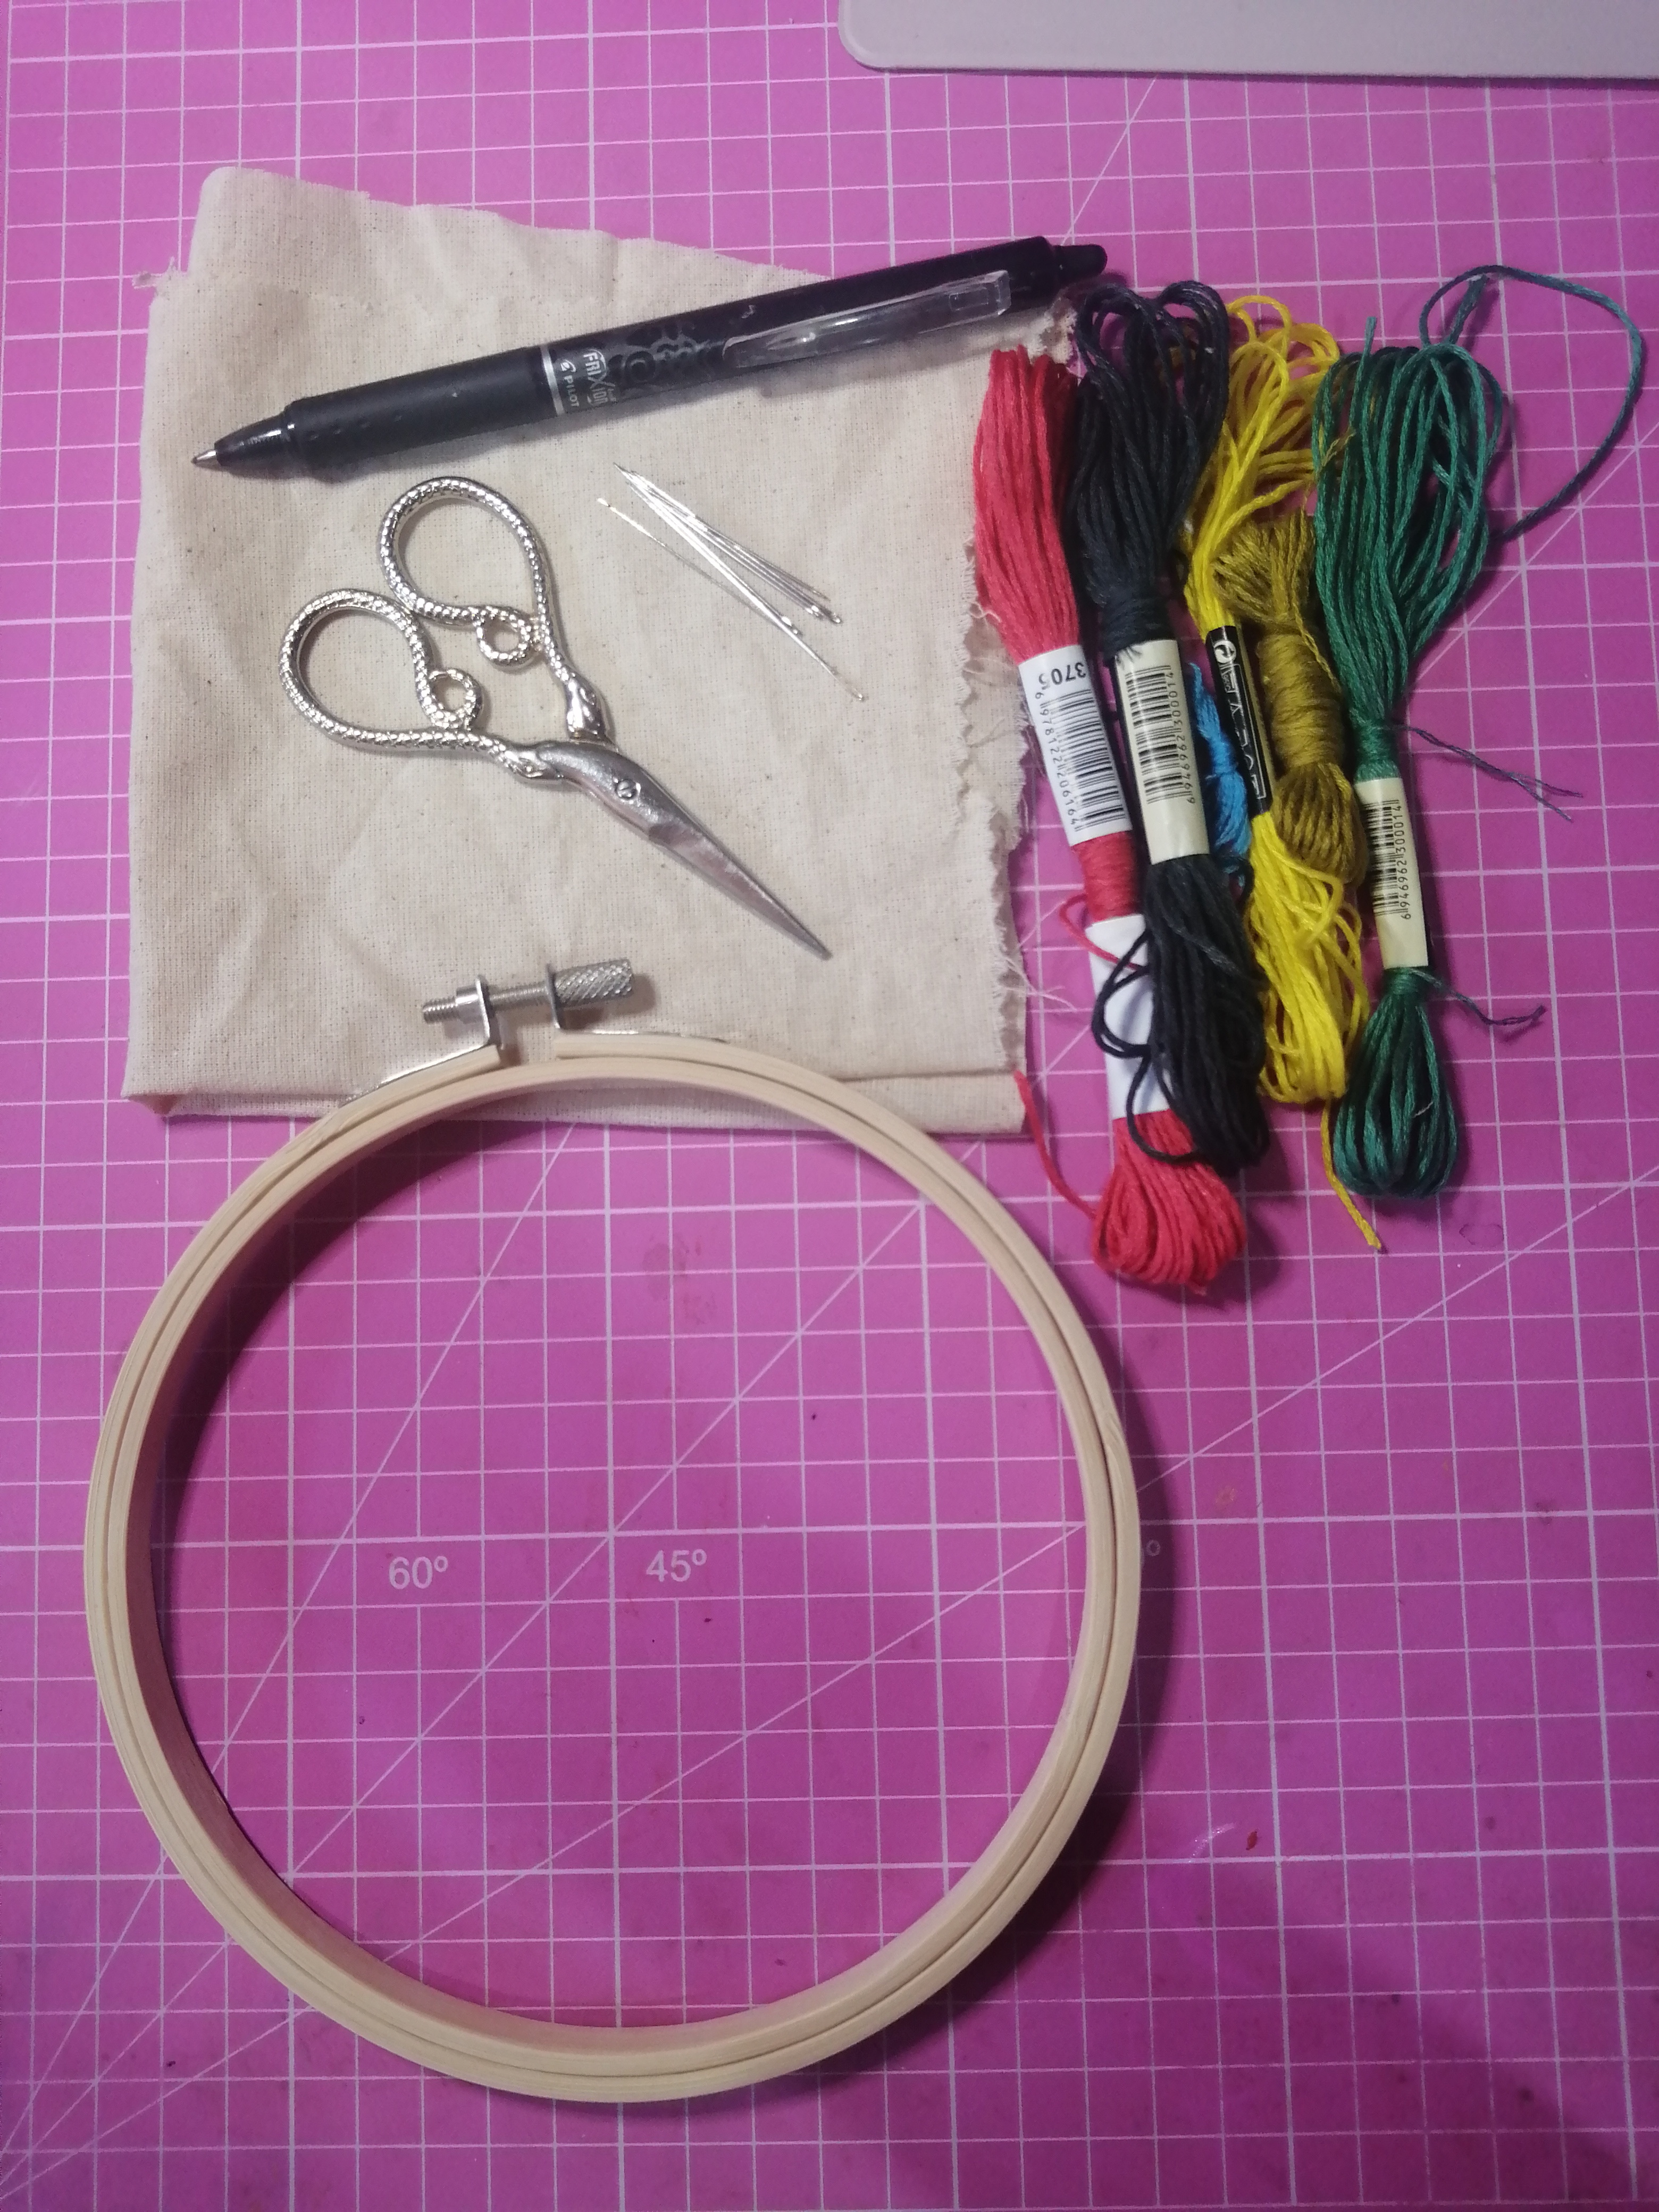
- Tela crea o tela manta
- Bastidor de 30 o 20 cm
- Hilos de bordar diferentes tonos
- Agujas
- Lapiz de tinta termosensible (se borran con calor)
- Regla
- Tijera
- Plancha
- Creates or blanket fabric
- 30 or 20 cm frame
- Embroidery threads in different shades
- Needles
- Thermosensitive ink pencil (can be erased with heat)
- Ruler
- Scissors
- Iron
|
|
|
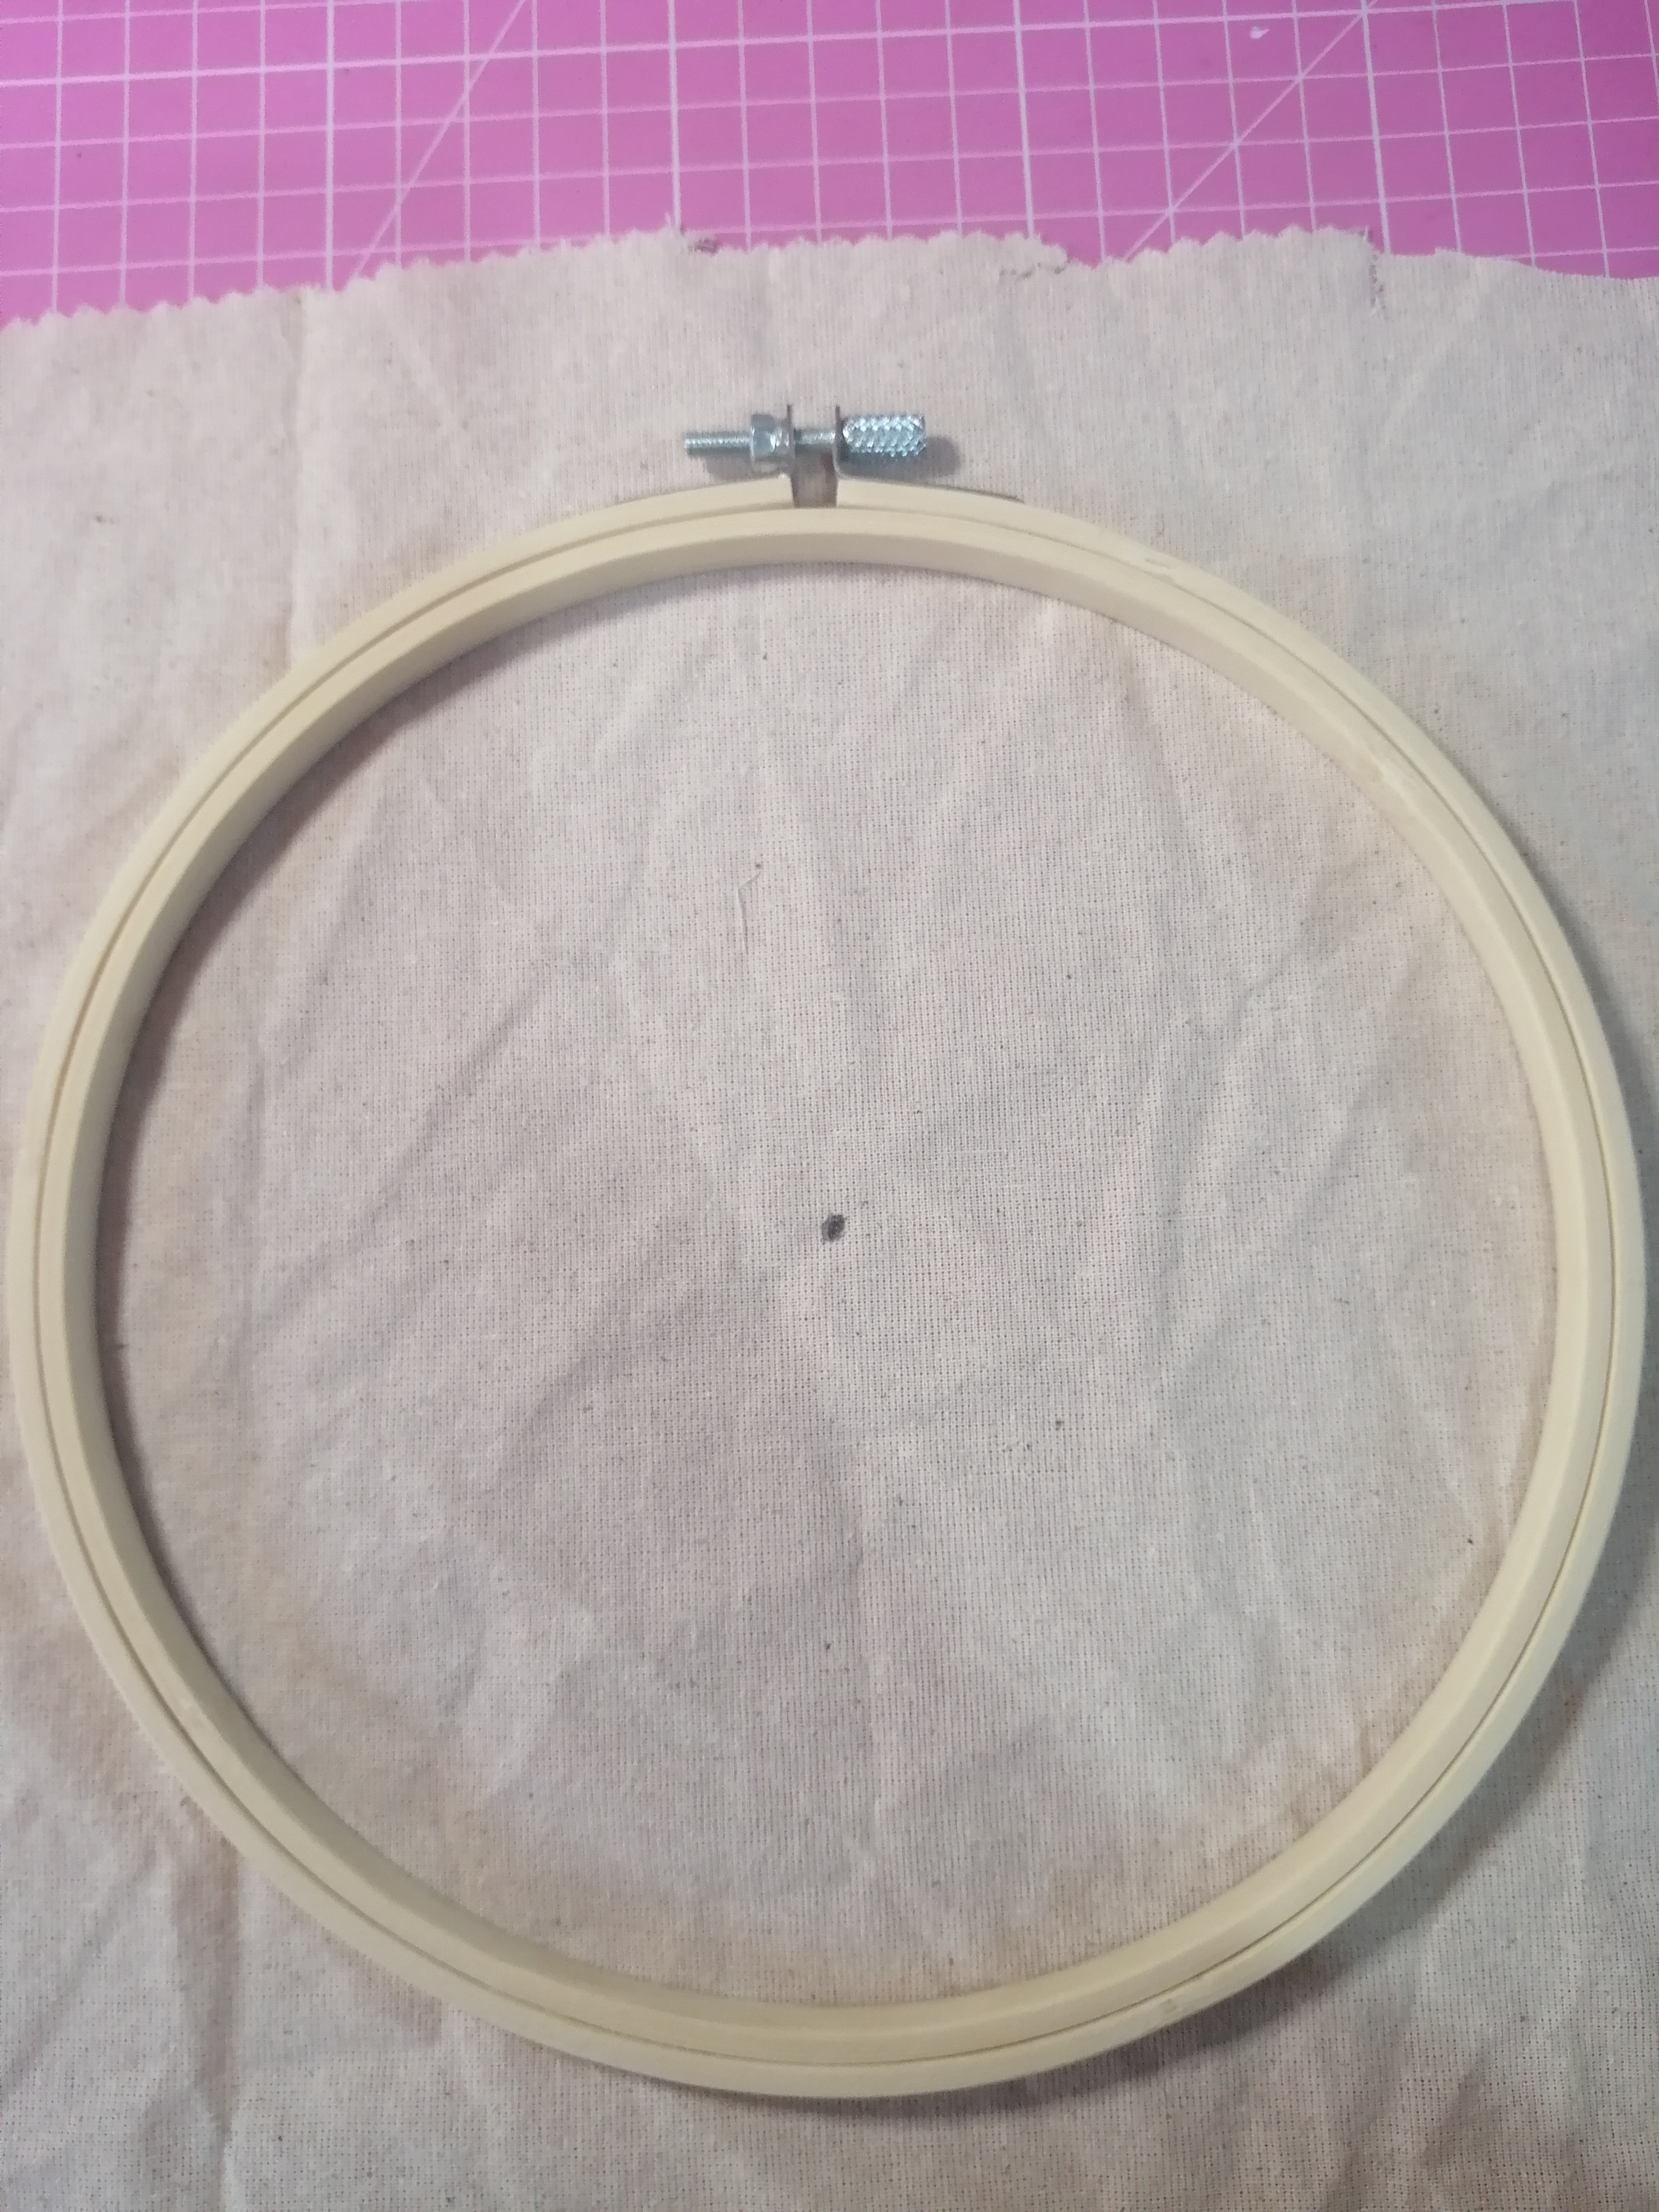
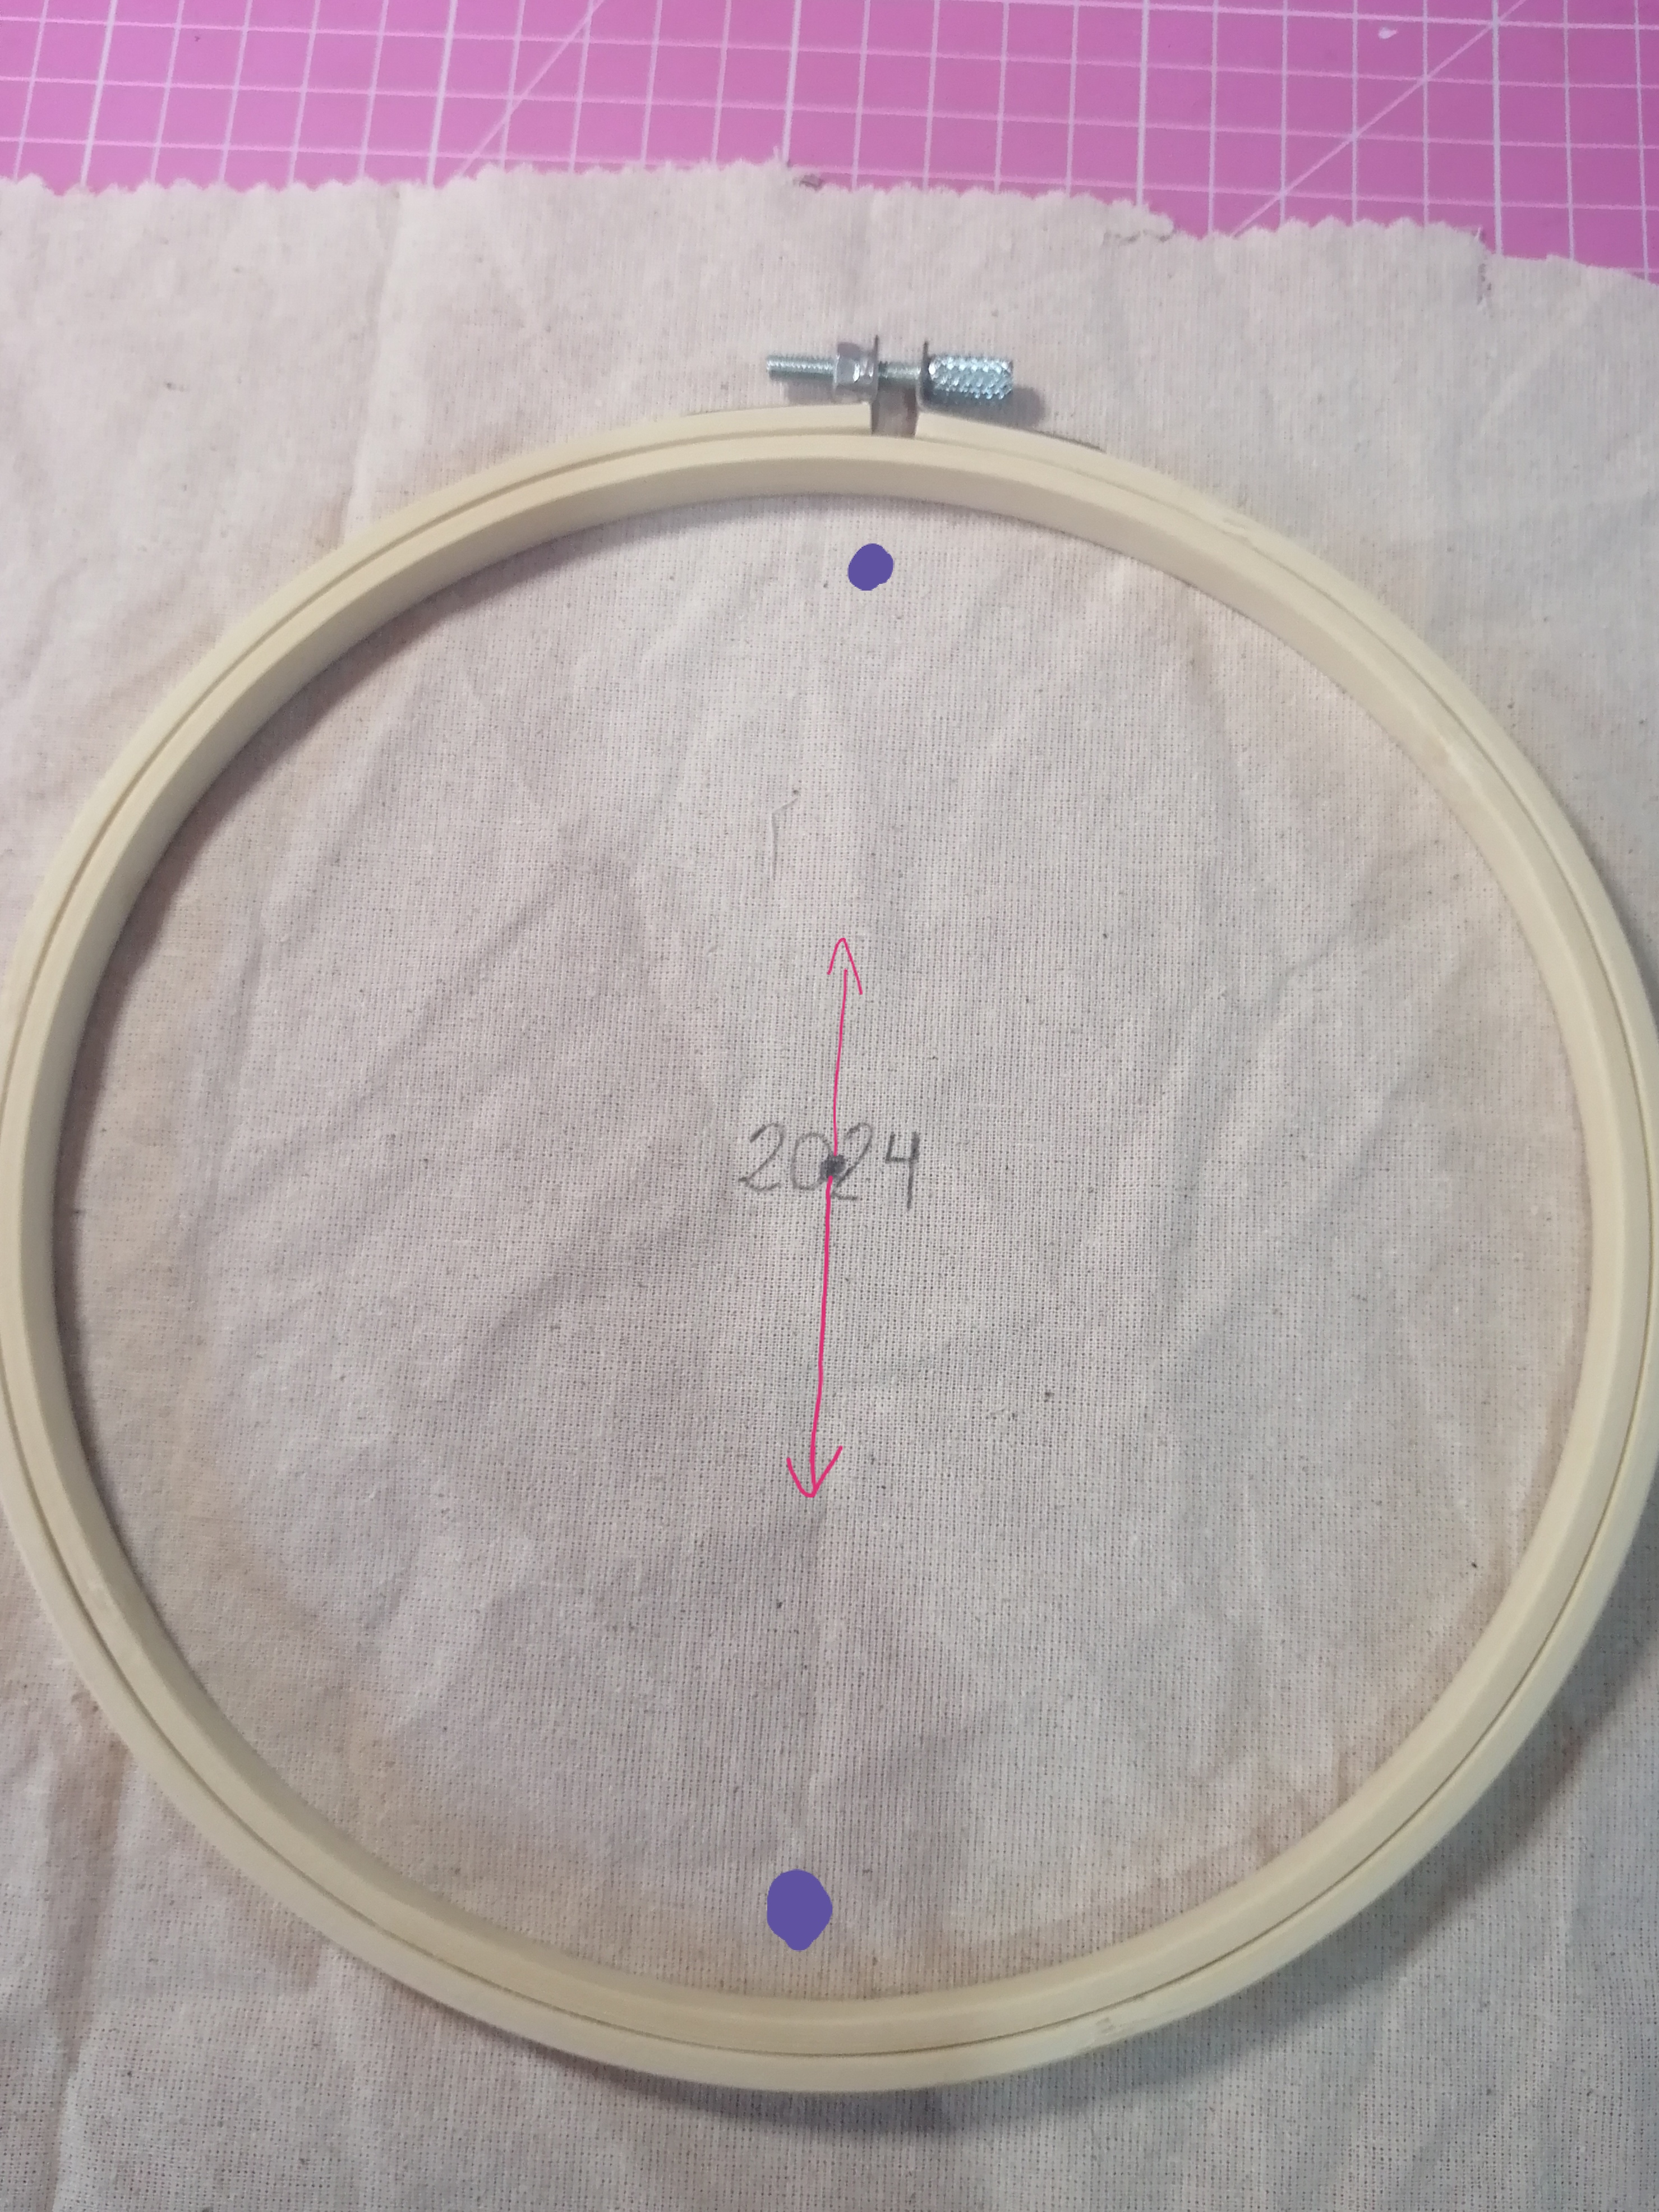
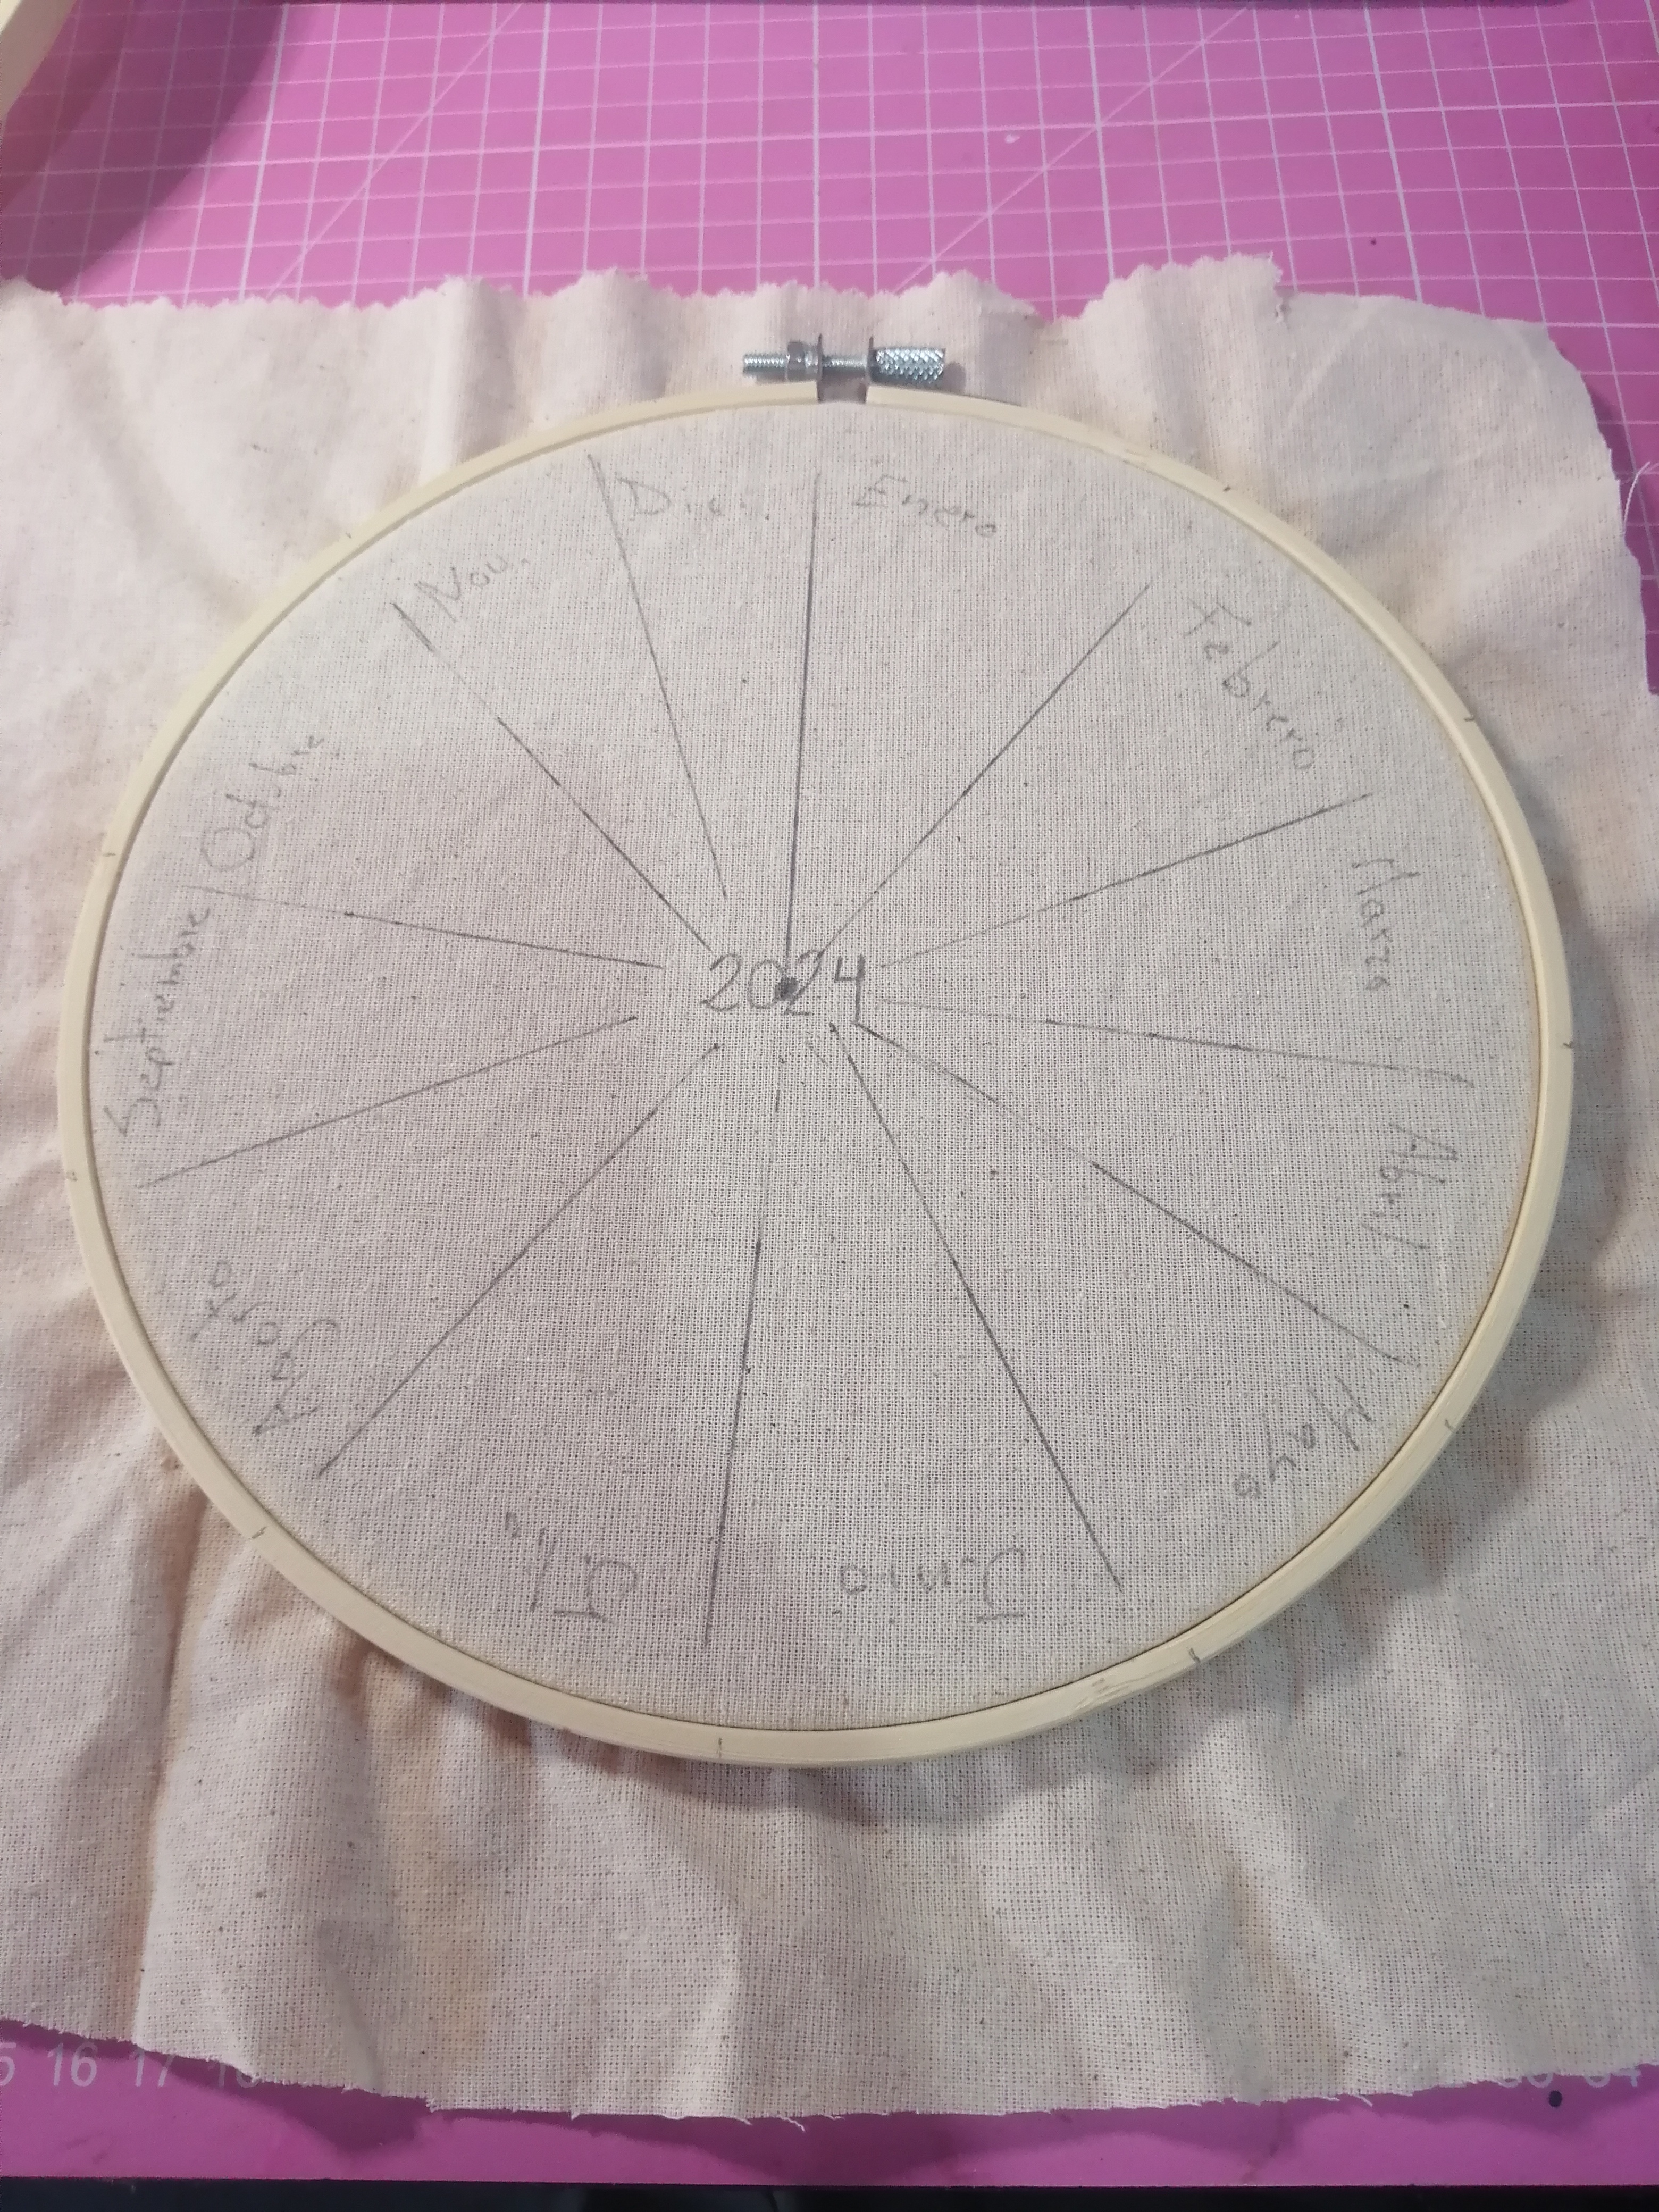
Empezamos poniendo el bastidor arriba de la tela para ver las dimensiones que debe tener nuestro calendario diario.
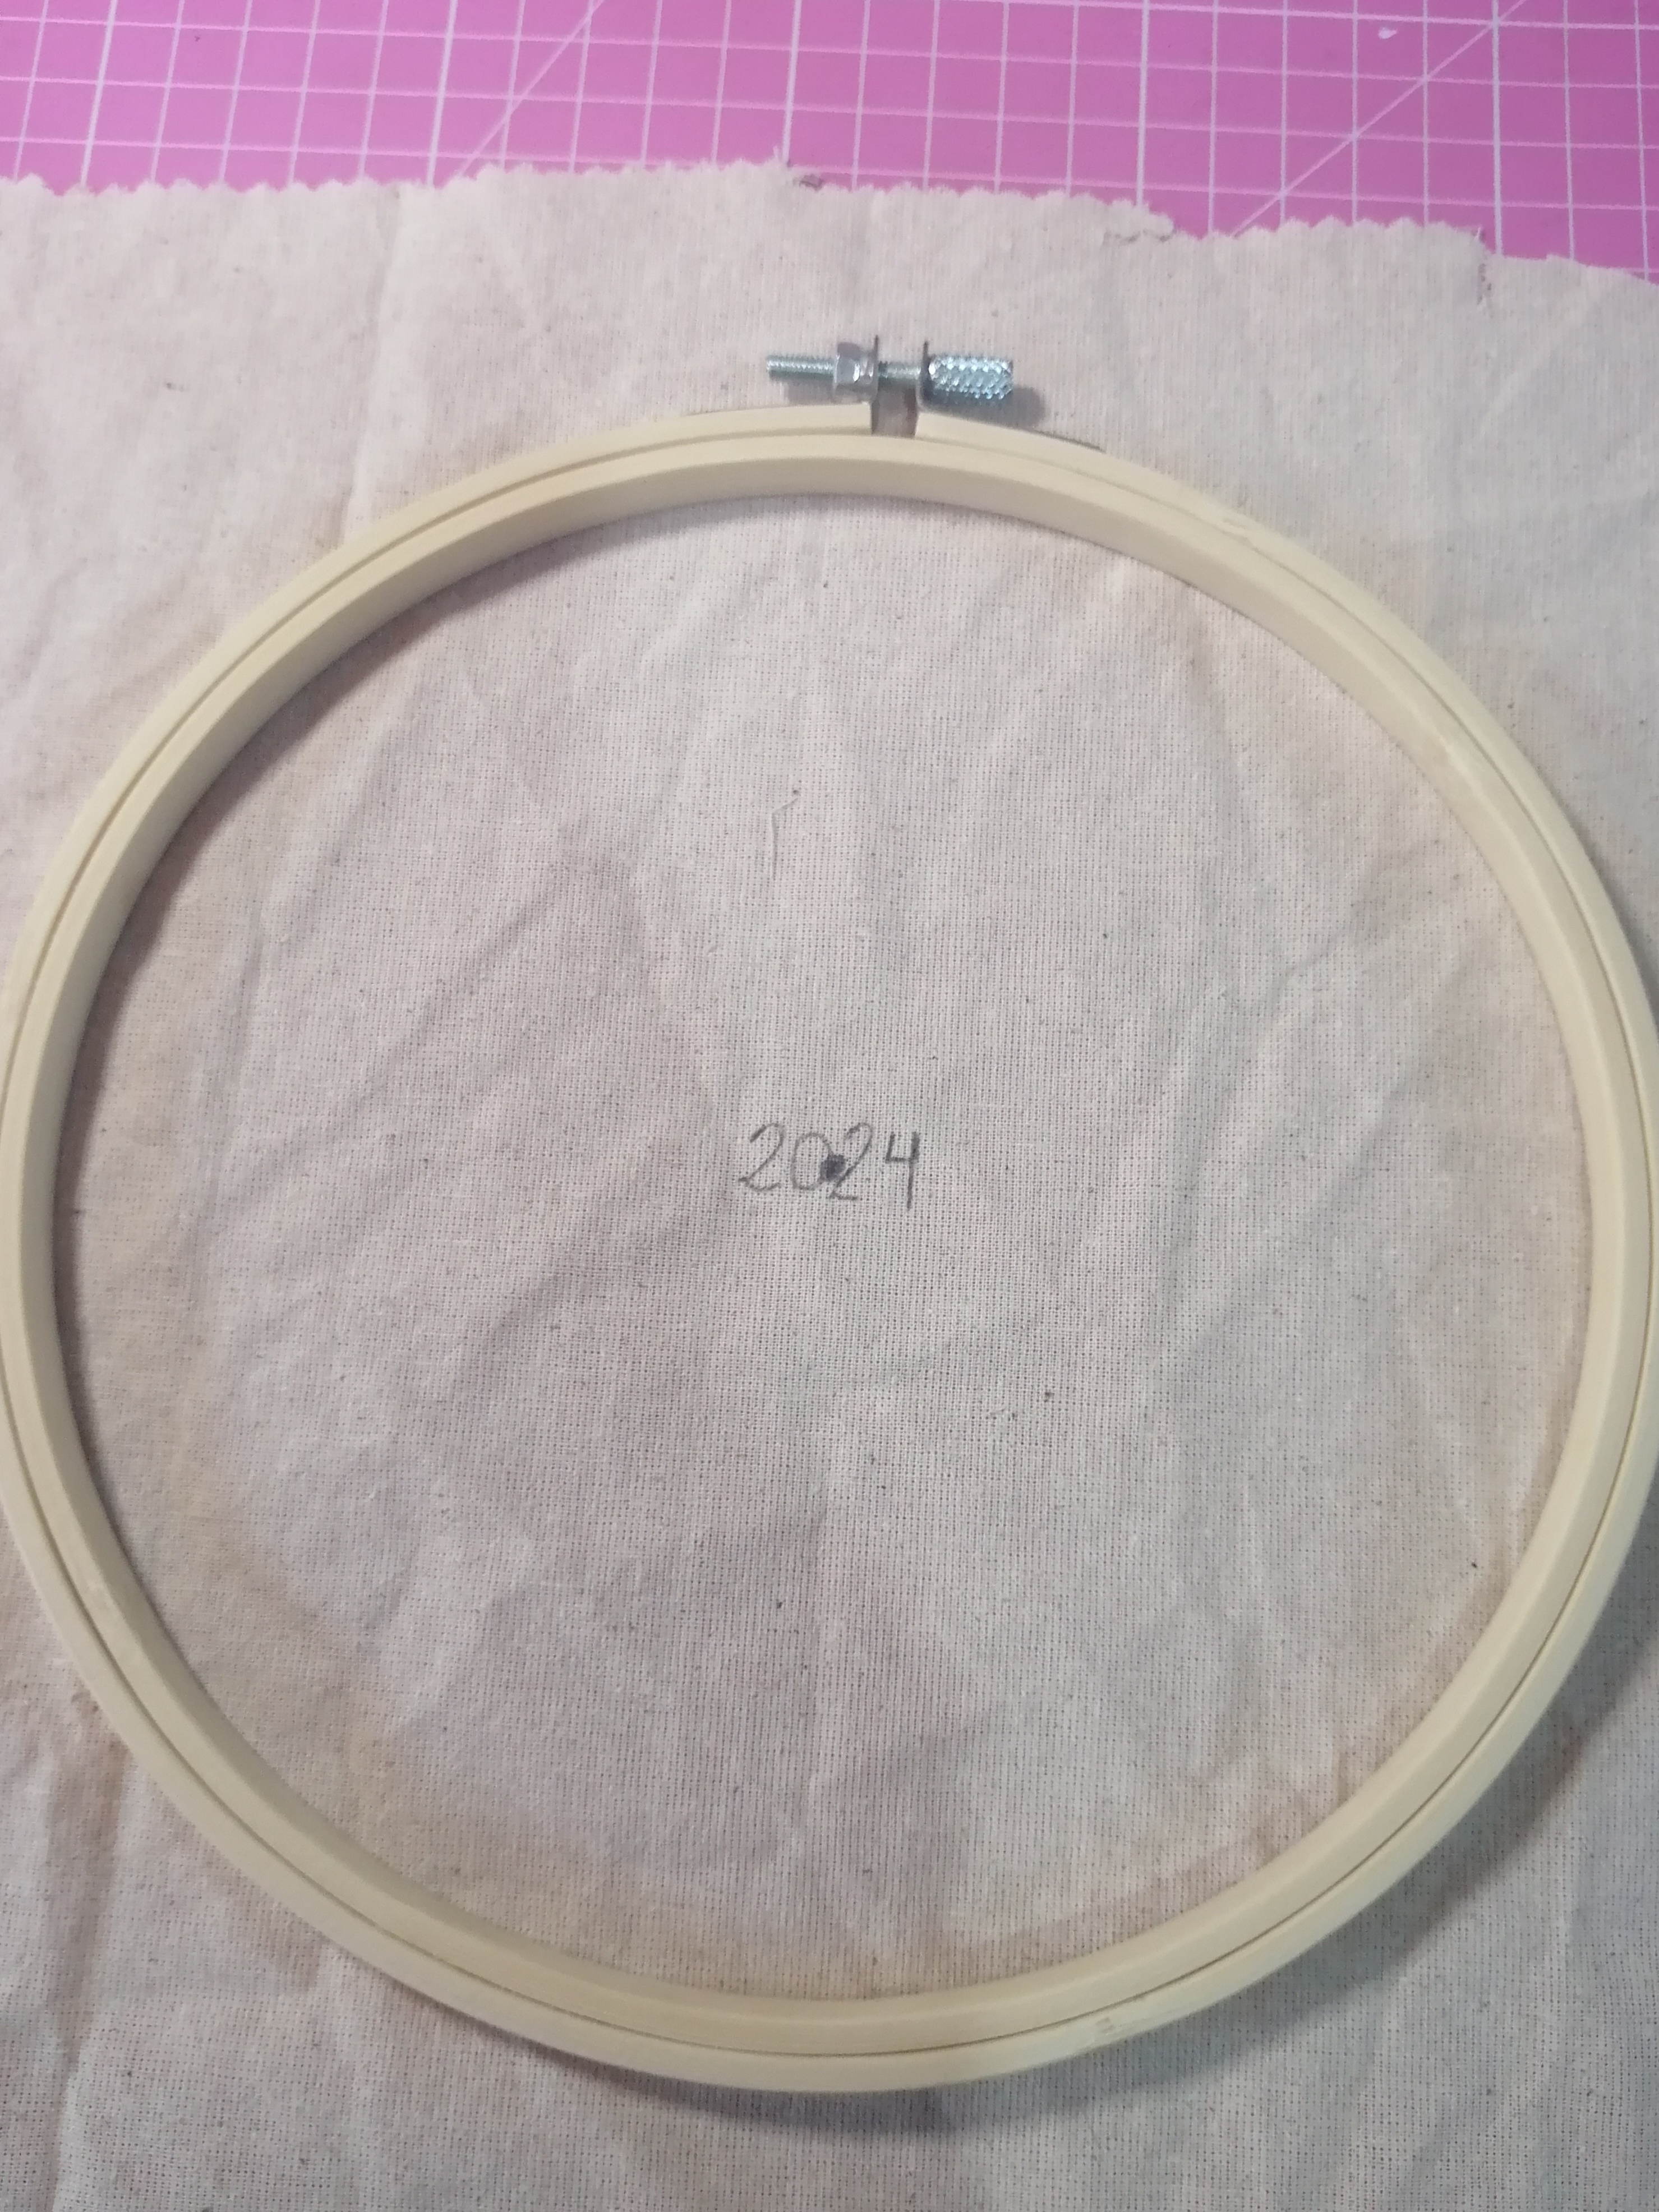
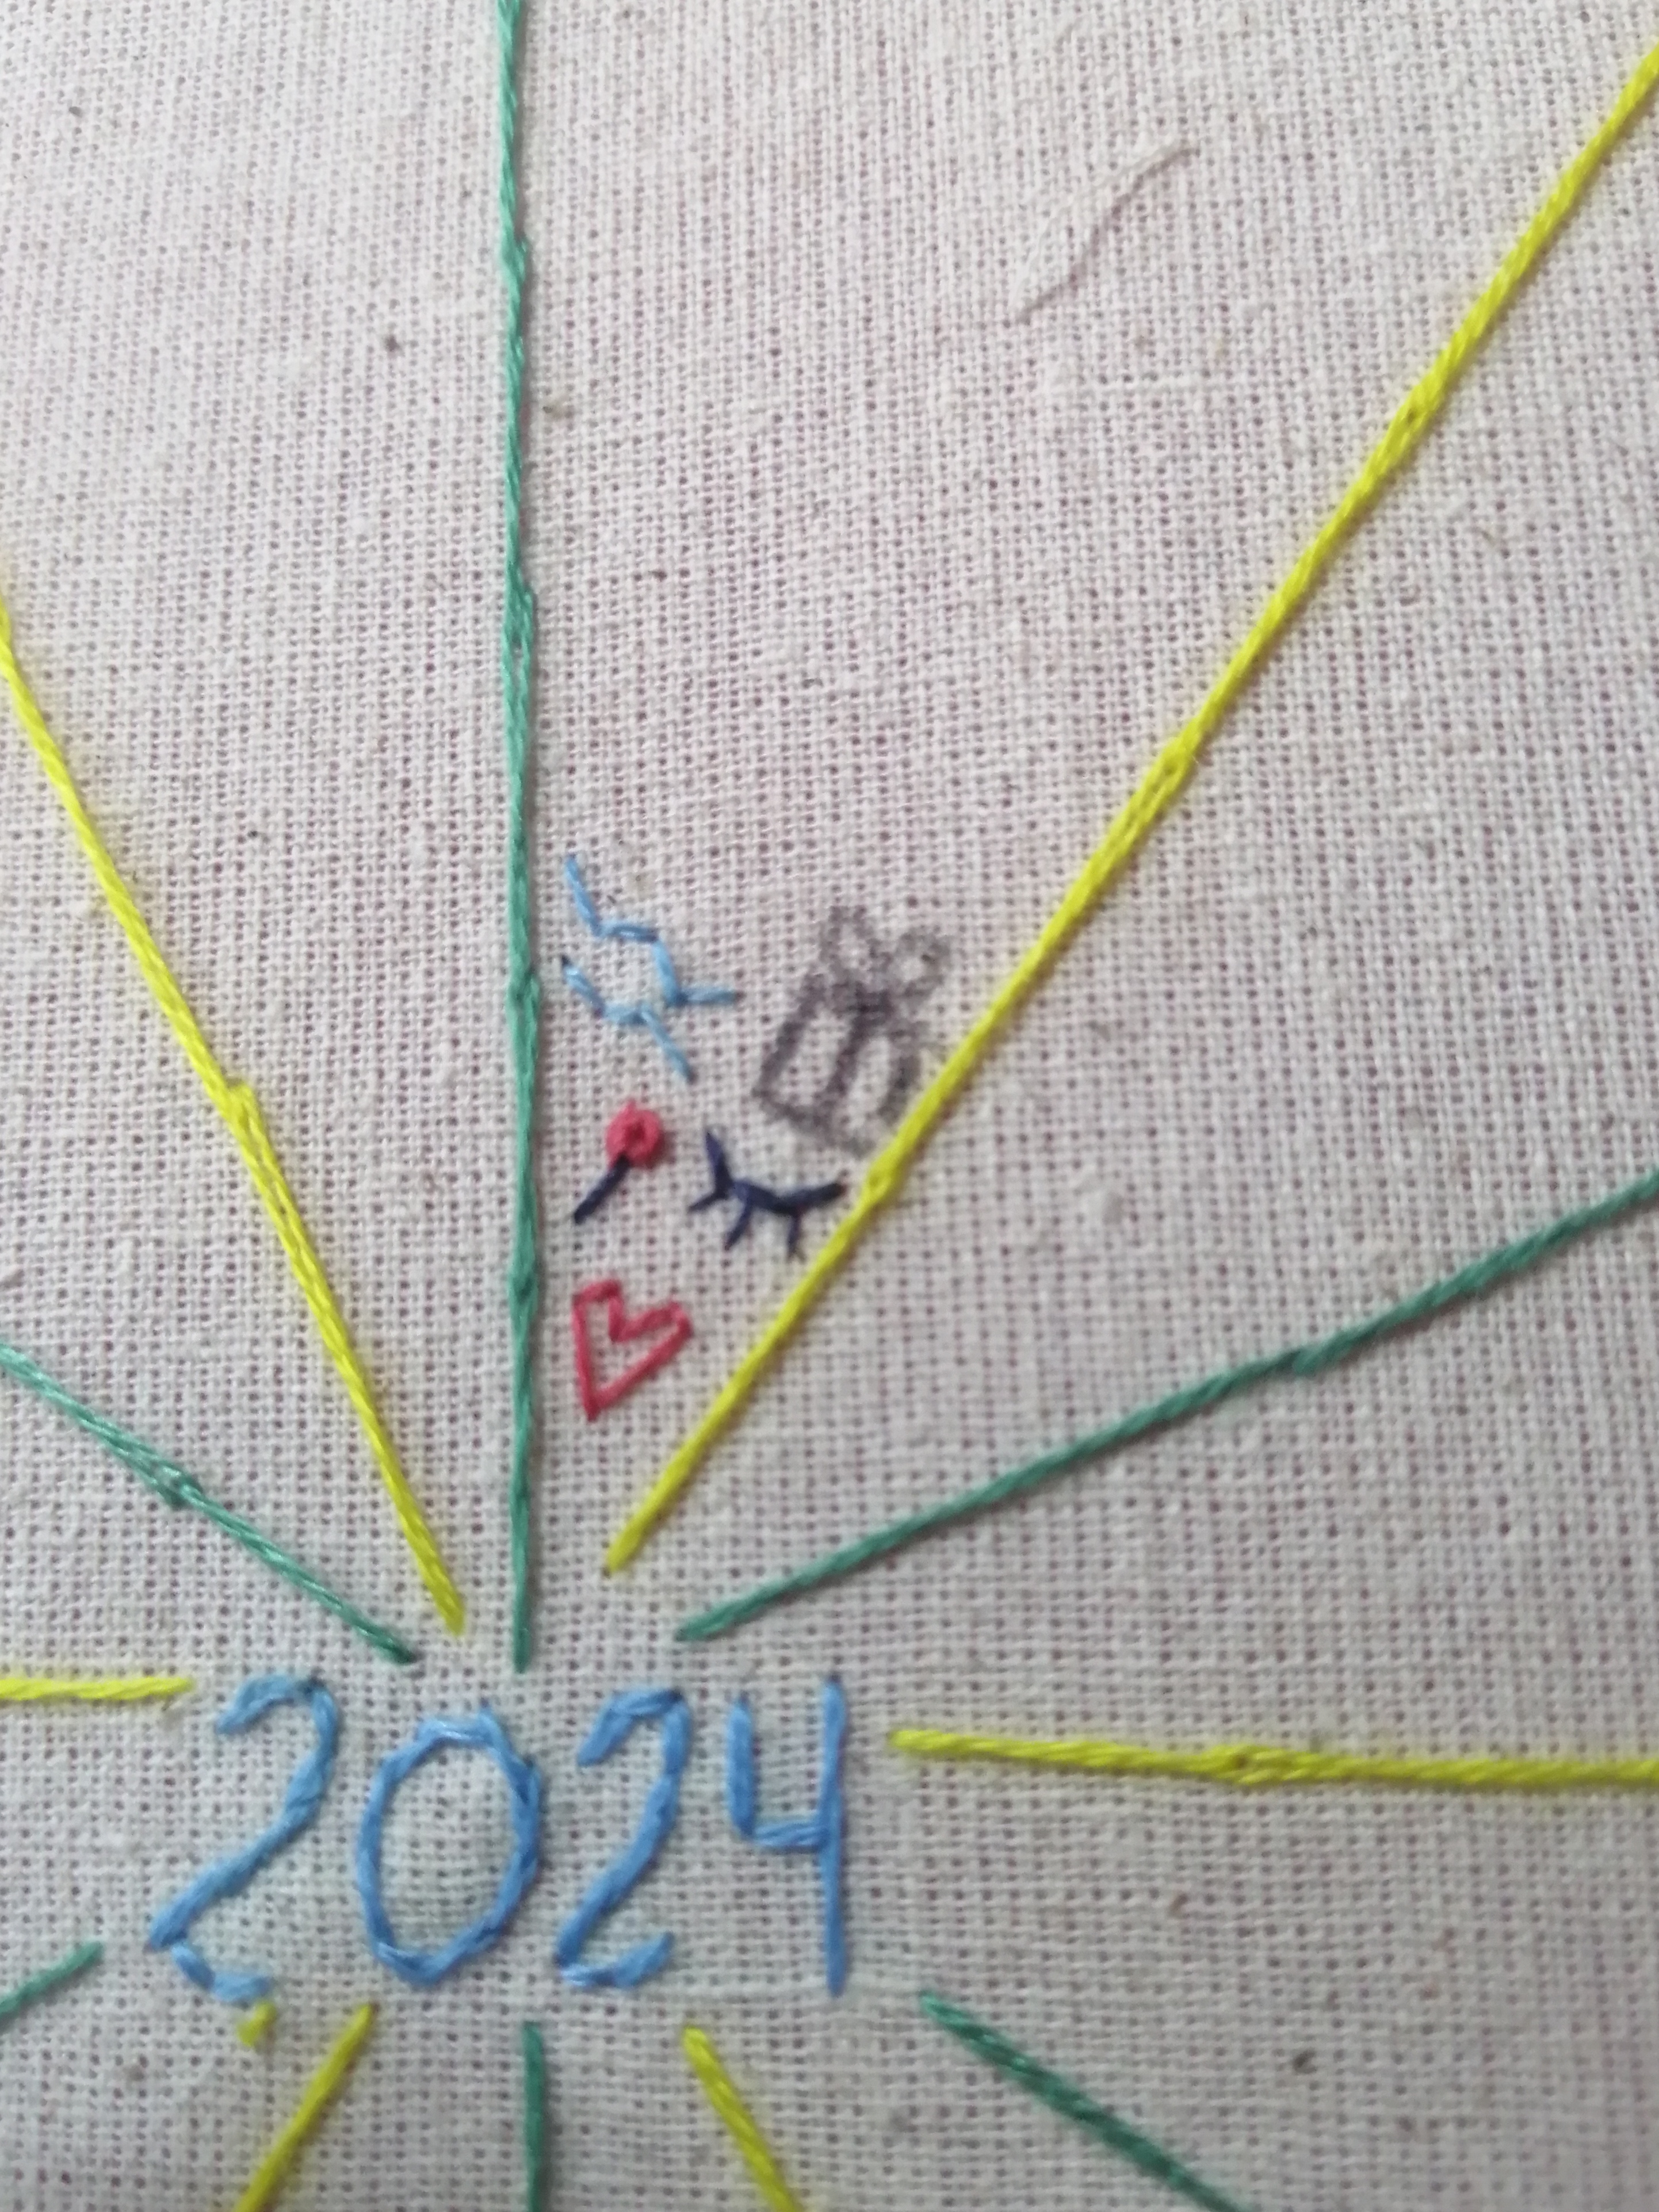
Con la regla medimos 10 cm. justo a la mitad y hacemos un punto. En ese punto escribiremos el año actual que sería 2024.
We start by placing the frame on top of the fabric to see the dimensions that our daily calendar should have.
With the ruler we measure 10 cm. right in the middle and make a point. At that point we will write the current year, which would be 2024.
|
|
|

|
|
|
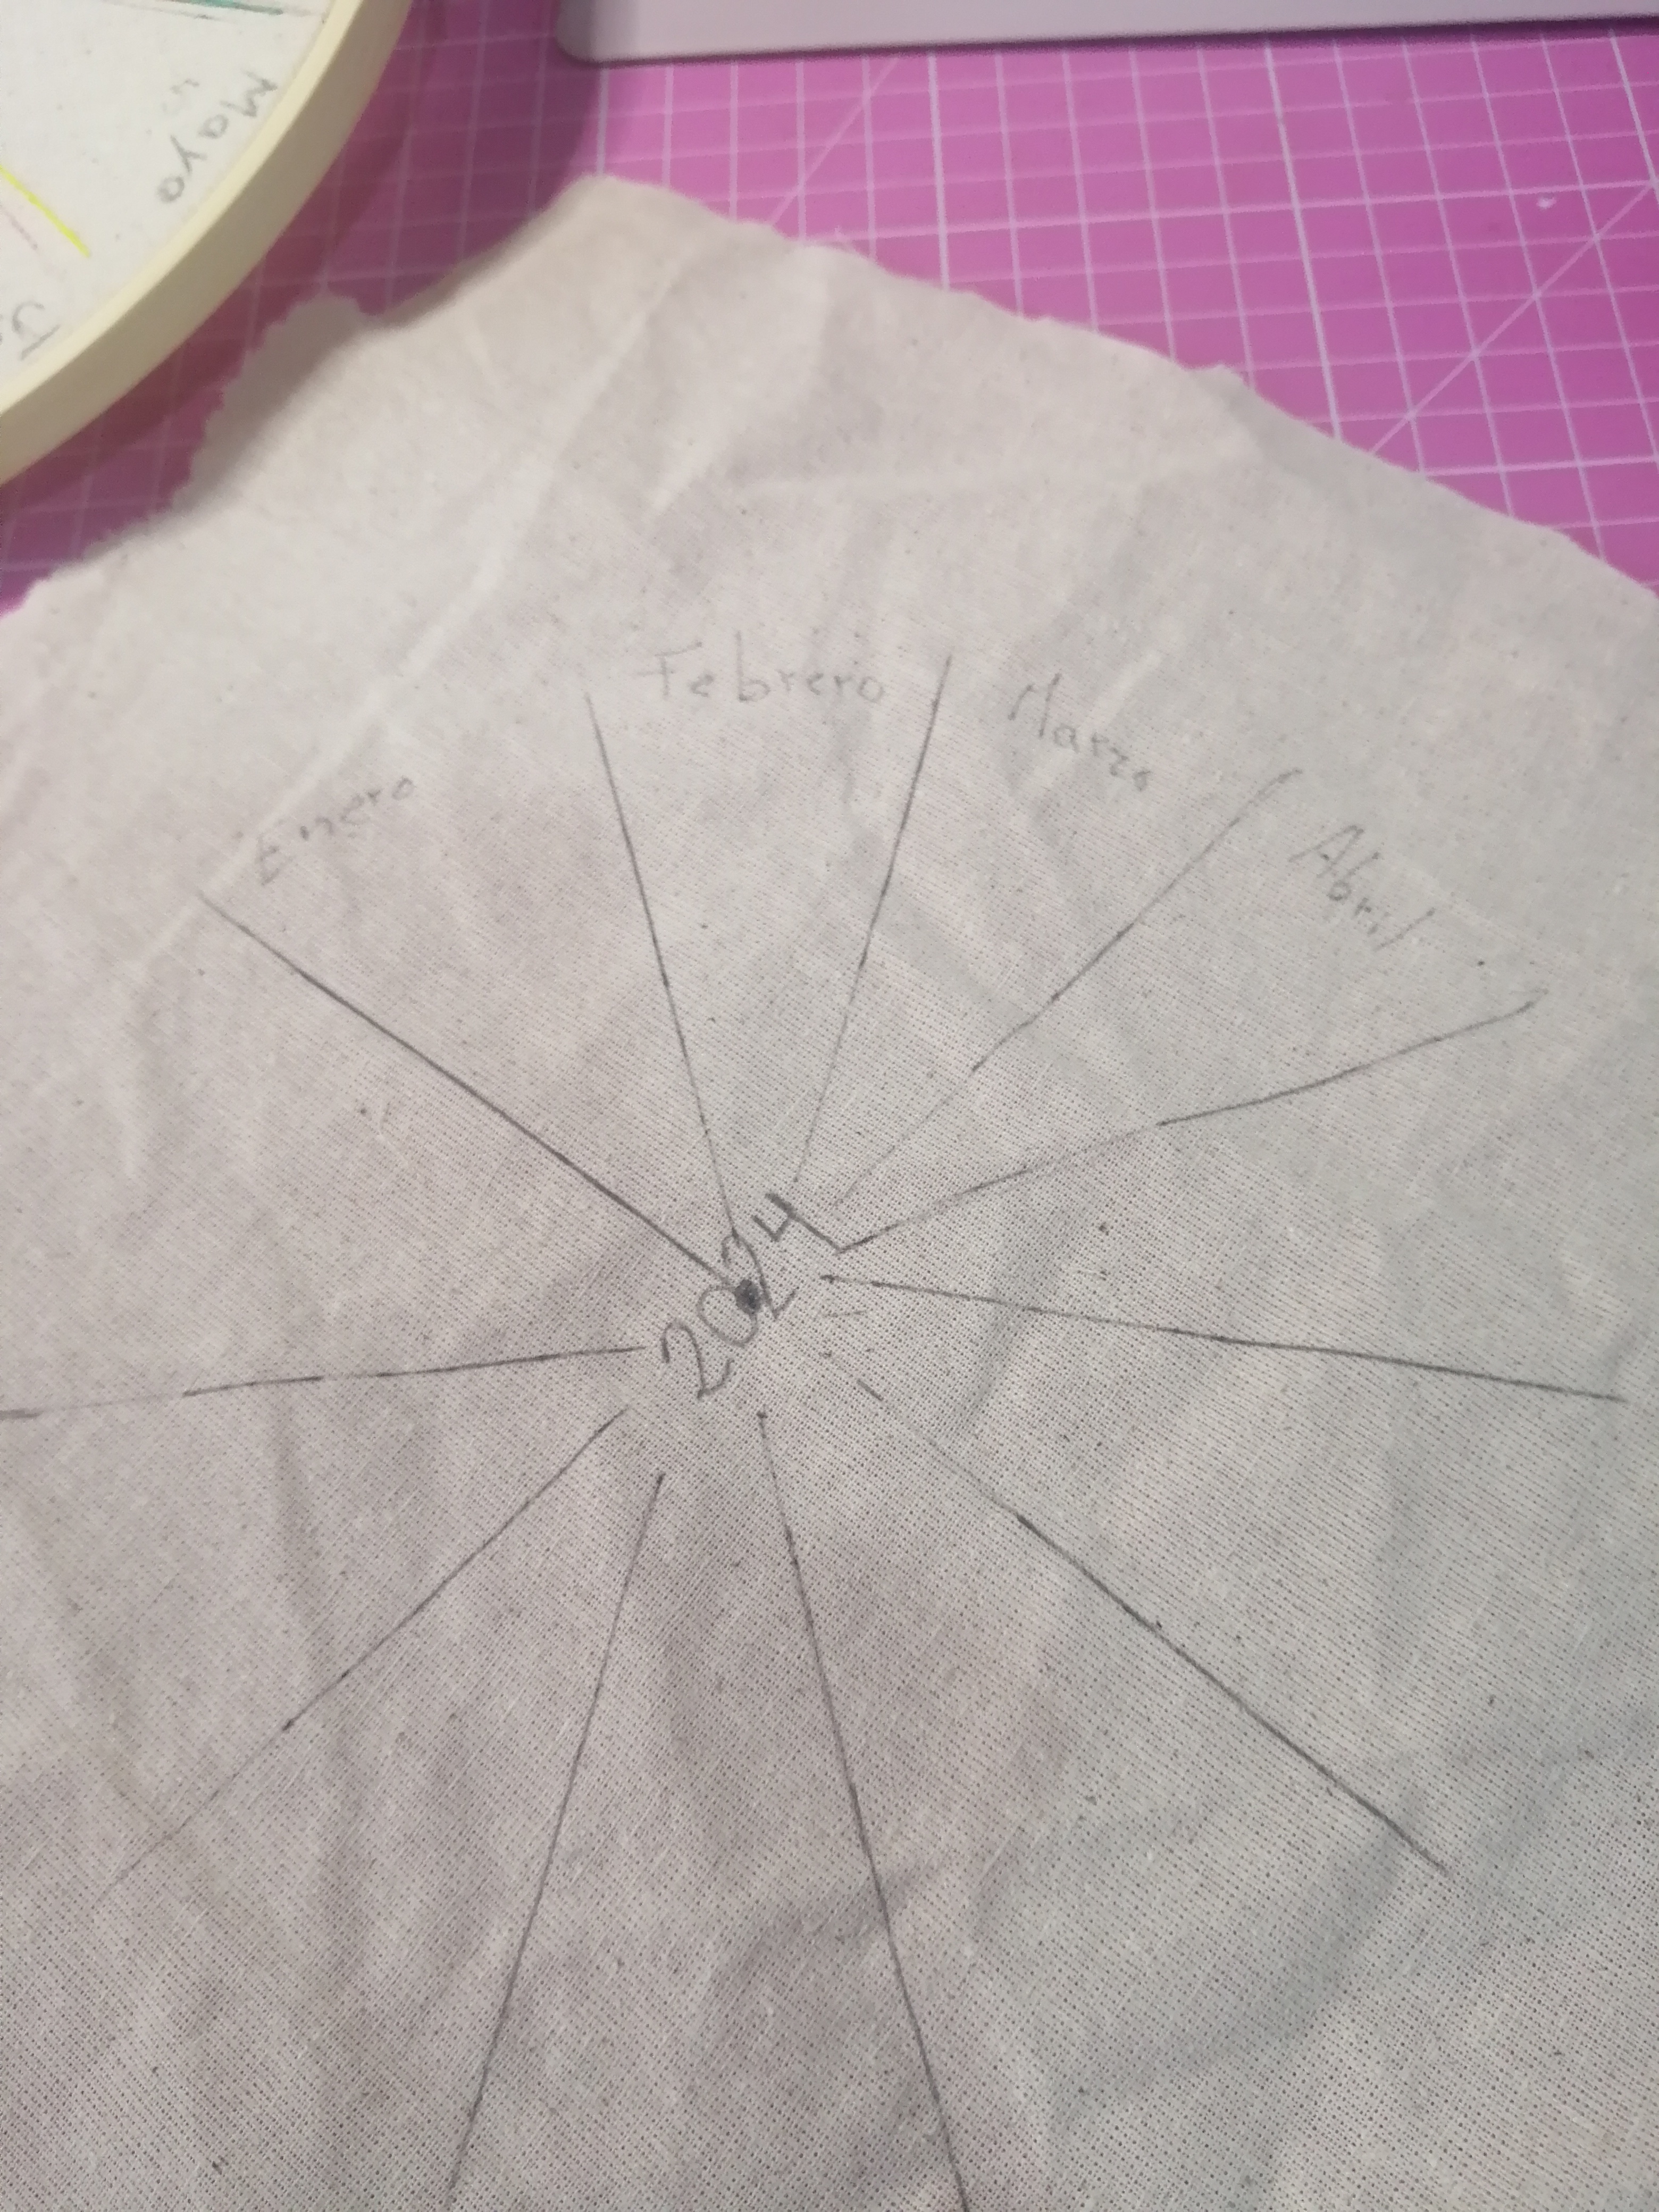
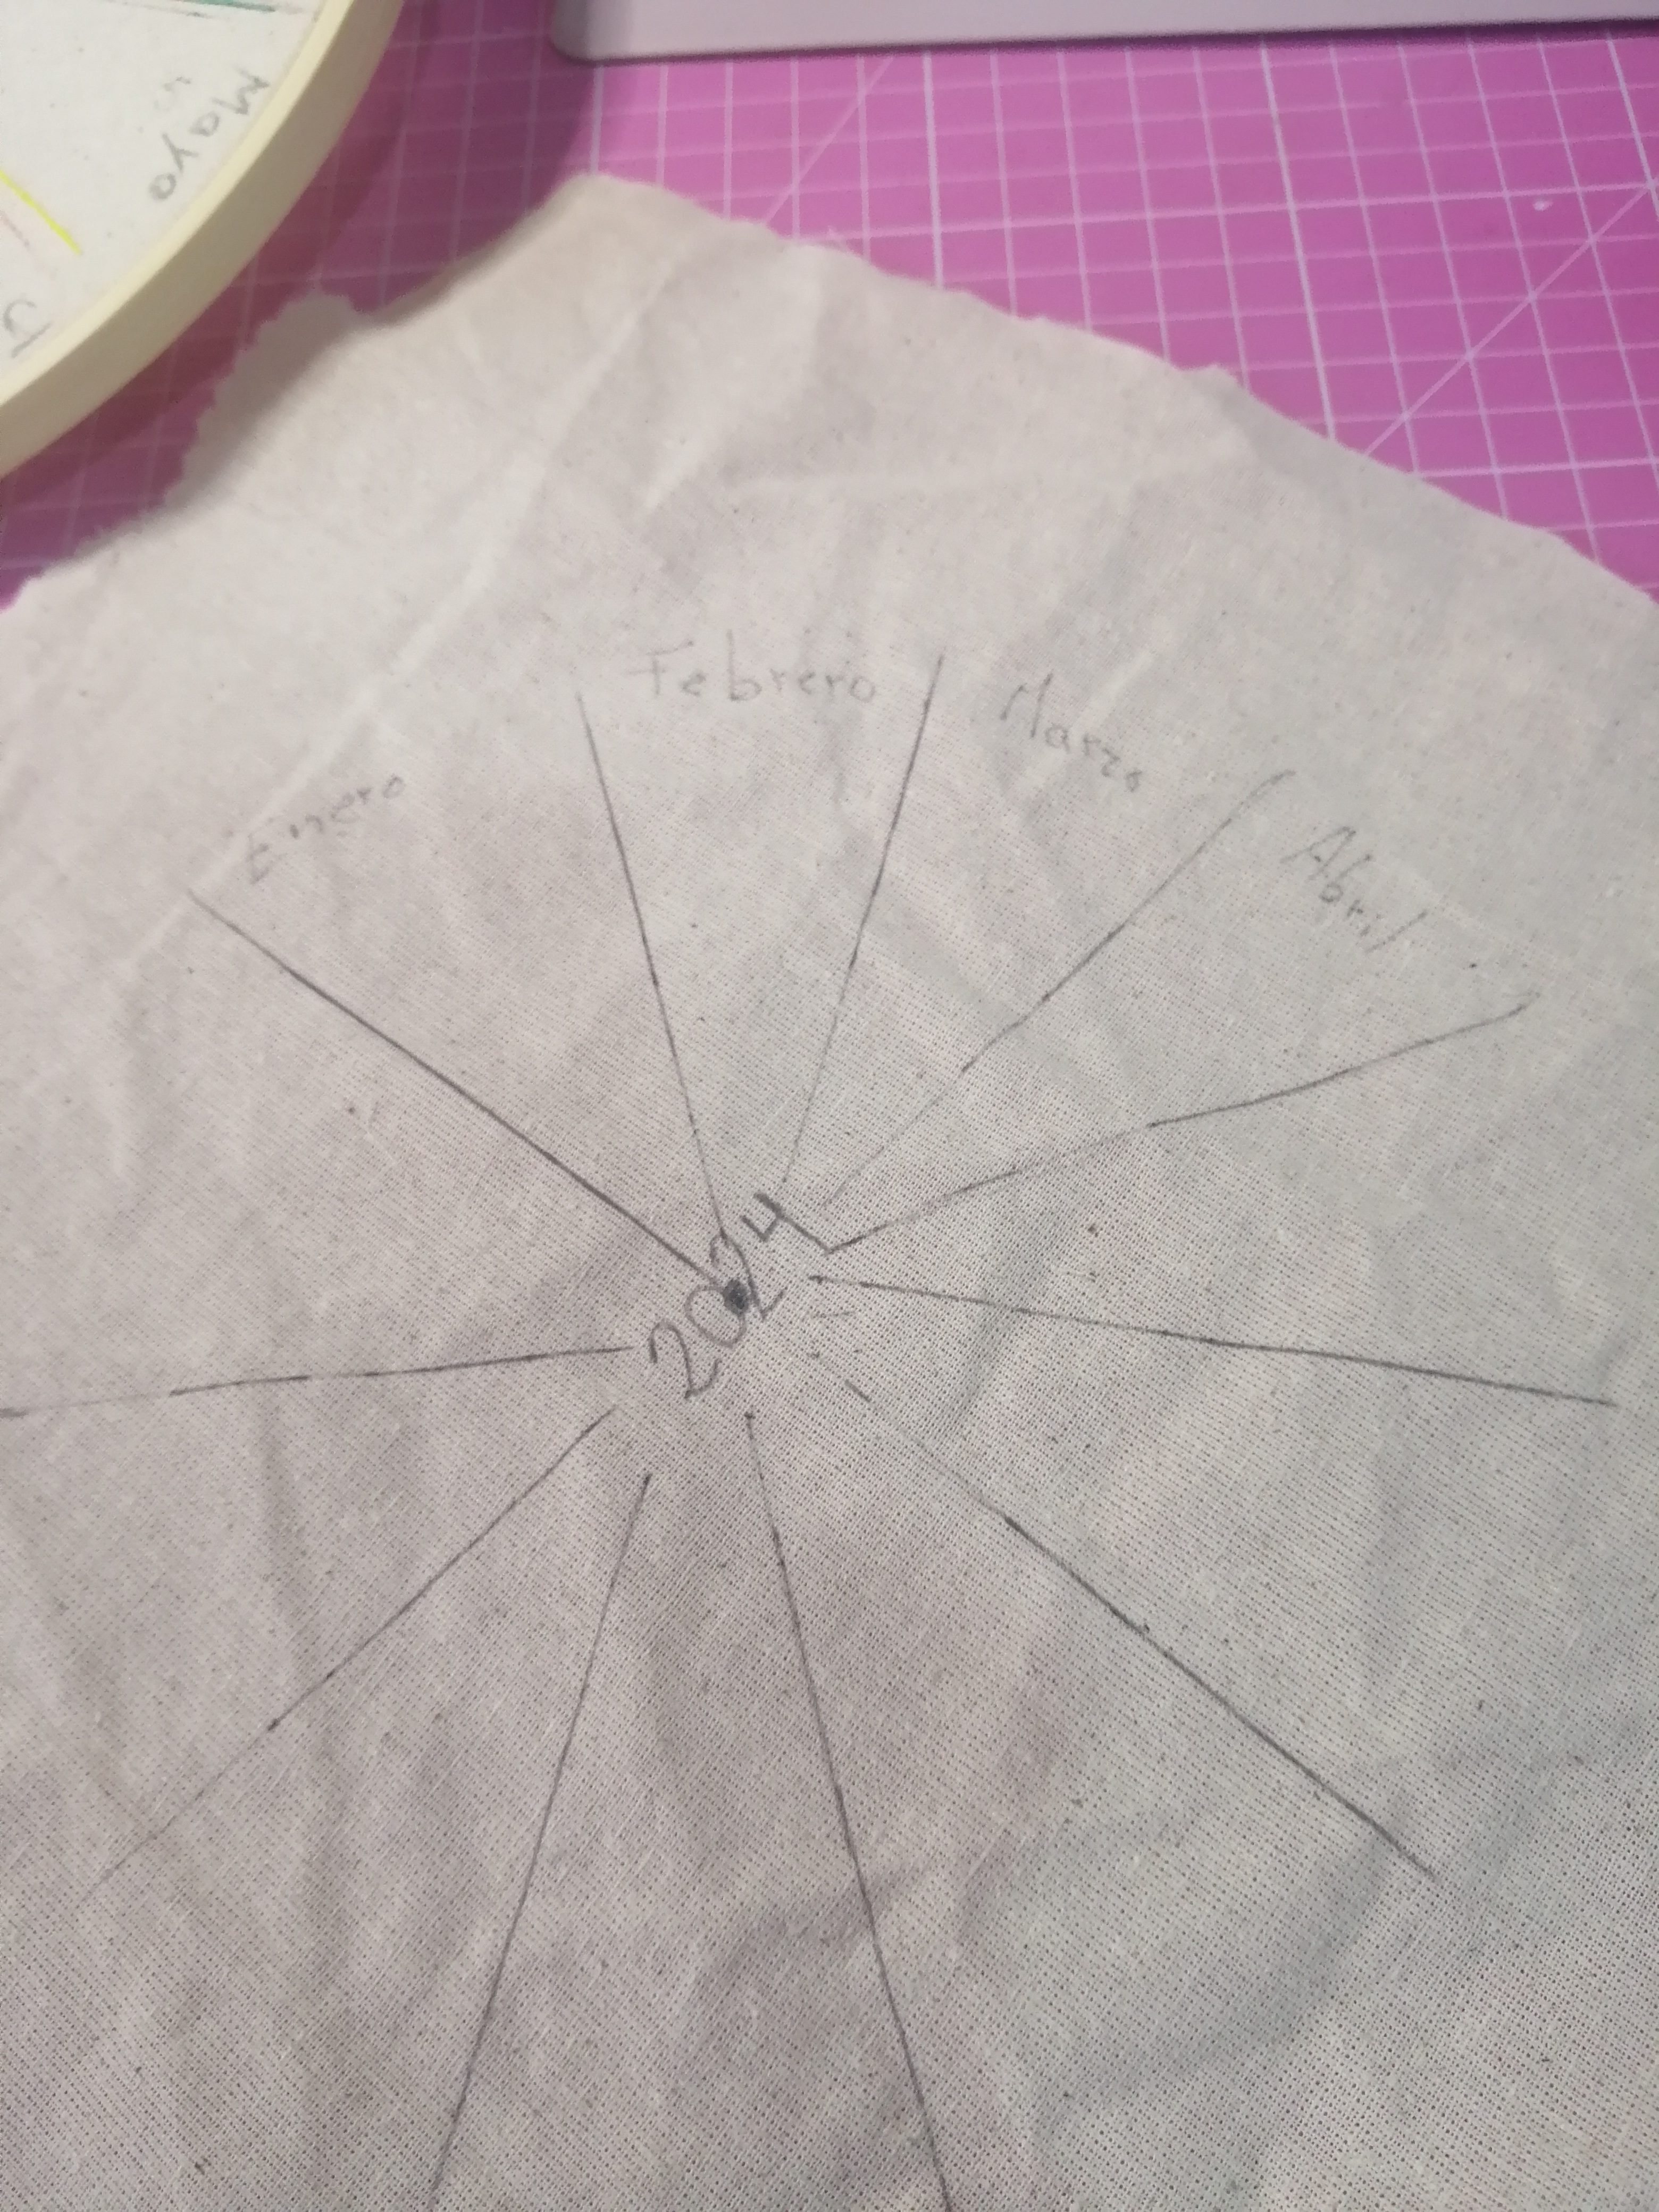
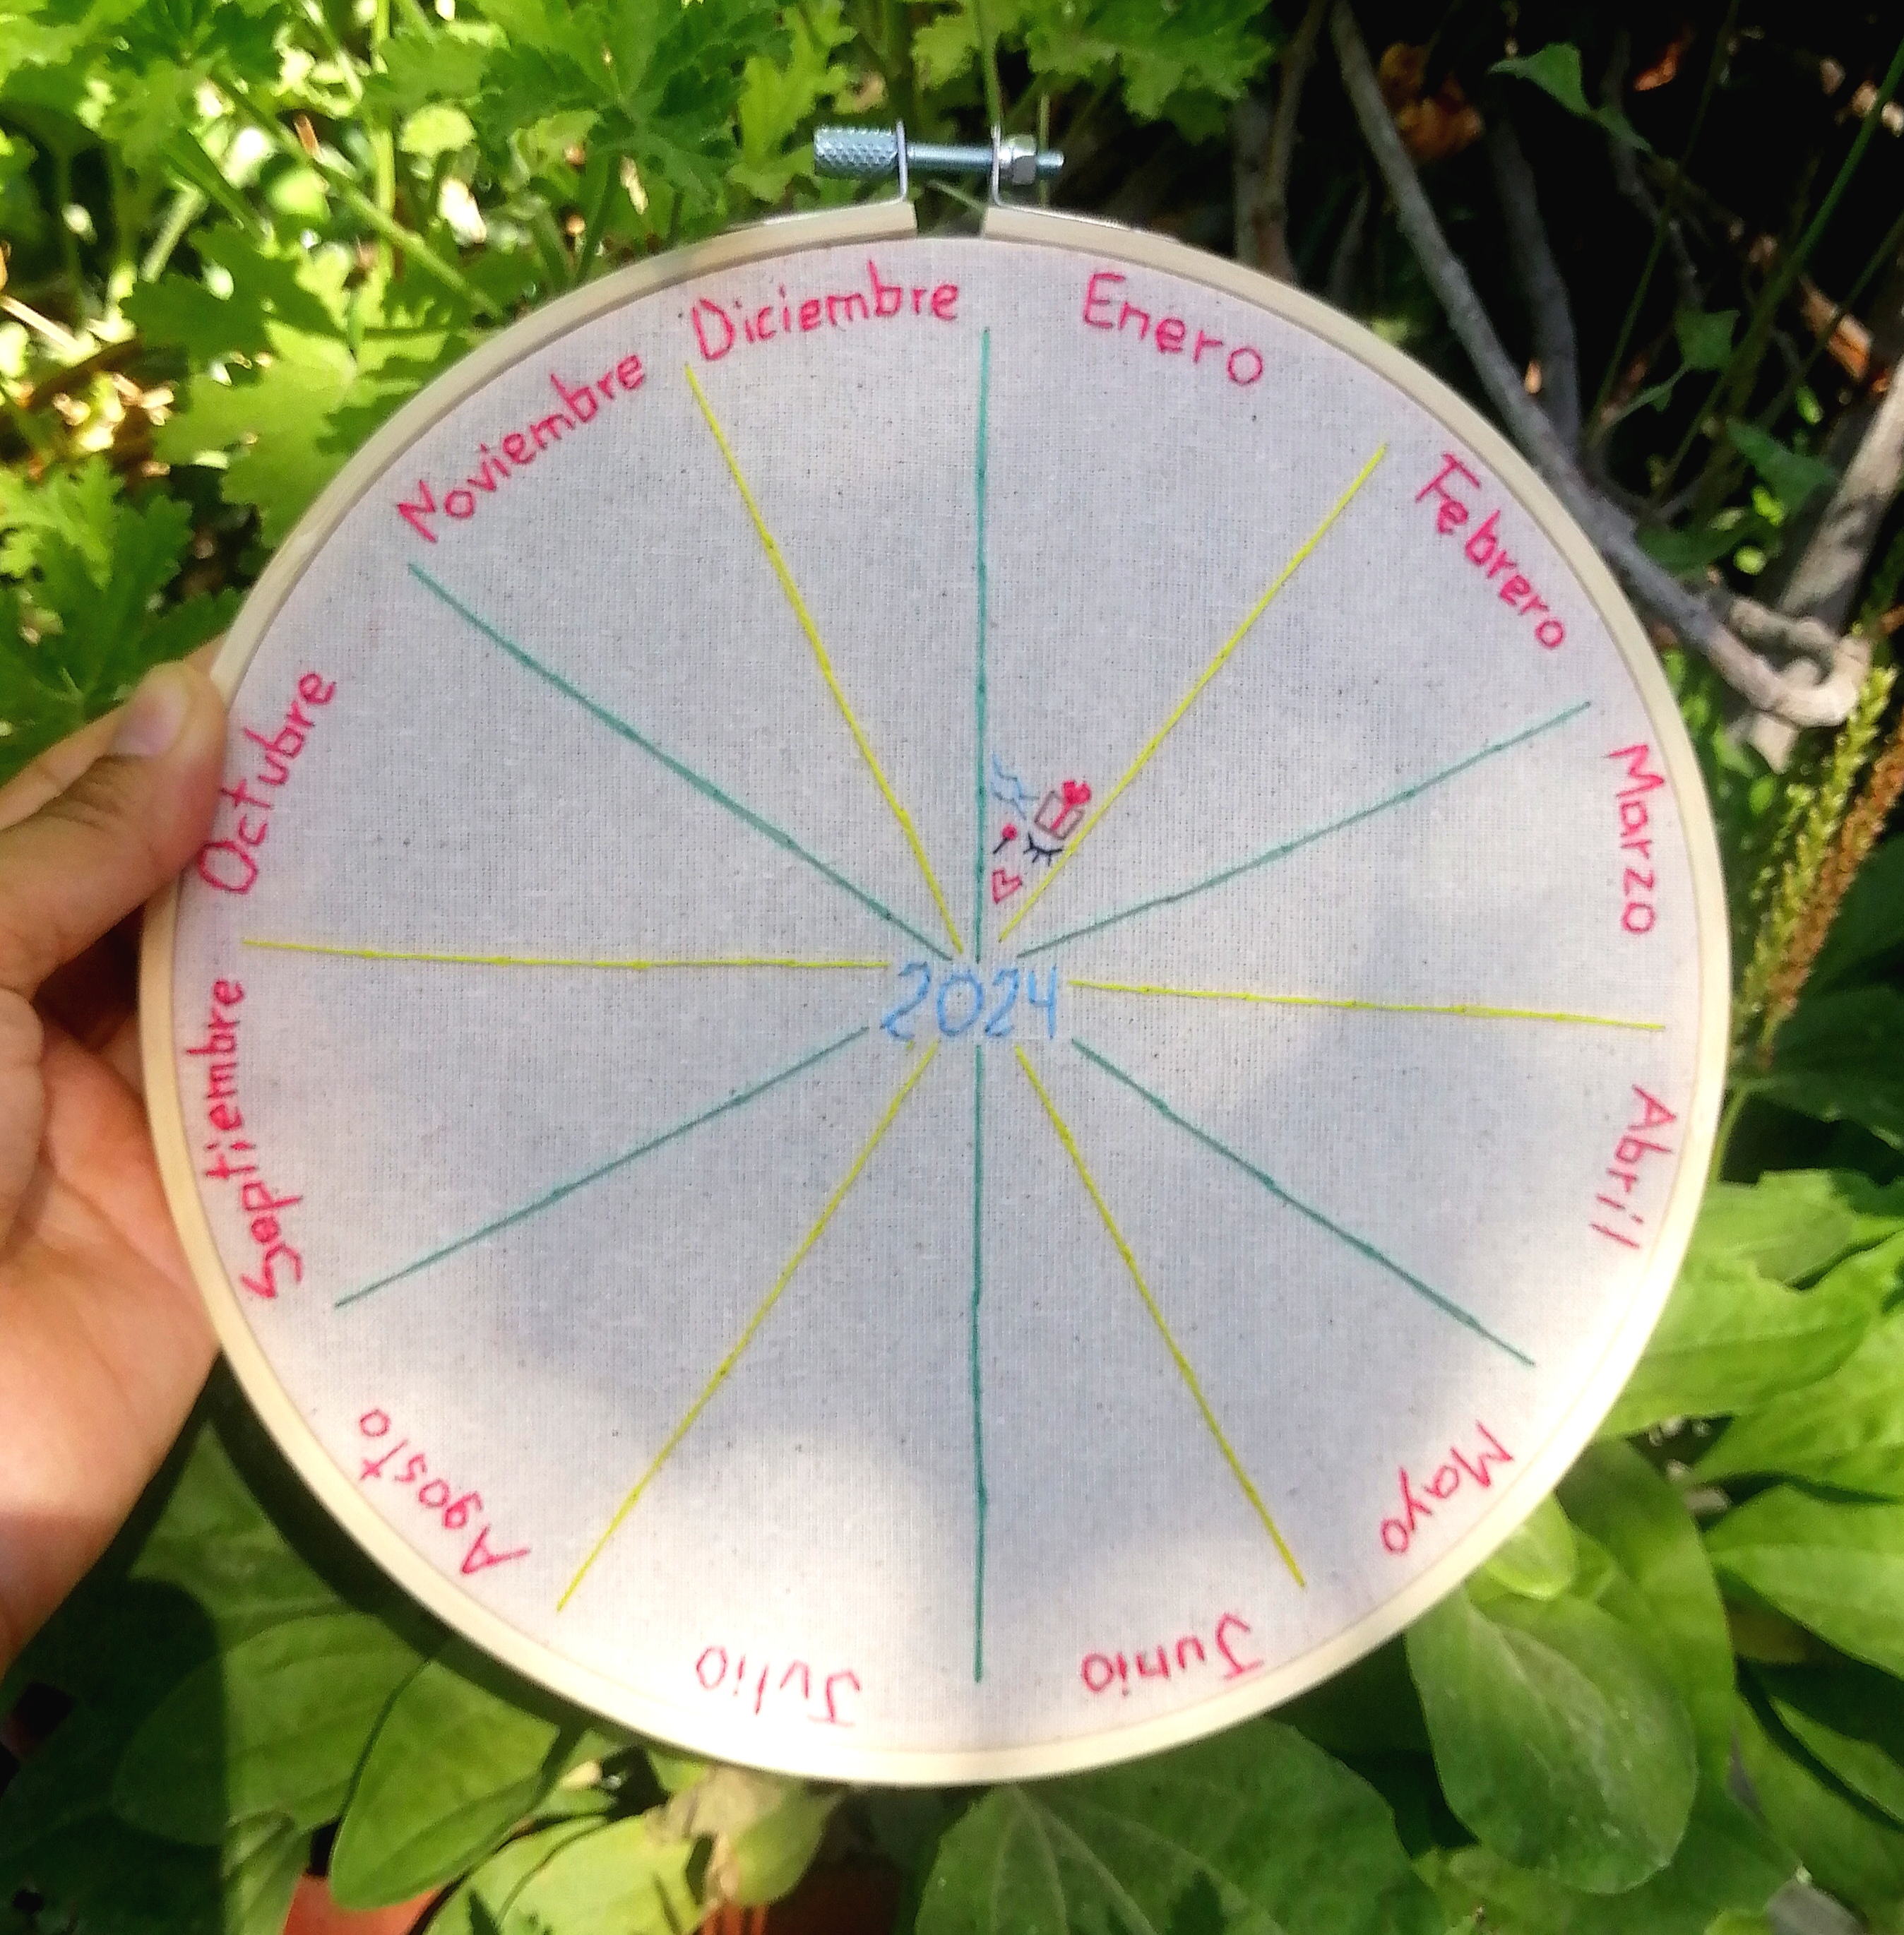
Nuevamente desde el punto hacemos dos líneas una hacia arriba y otra hacía abajo, cuando estén listas debemos agregar 5 líneas más en cada lado, para que así queden doce espacios de similares dimensione, es ahí donde la regla es útil (Pov:En la foto hay solo 11 espacios 😅 tuve que agregarle uno más pequeño pero después lo arregle) Ahora escribiremos los meses en cada espacio.
Ya estamos listos!
Again from the point we make two lines one up and one down, when they are ready we must add 5 more lines on each side, so that there are twelve spaces of similar dimensione, this is where the ruler is useful (Pov:In the picture there are only 11 spaces 😅 I had to add a smaller one but later I fixed it) Now we will write the months in each space.
Now we are ready!
|
|
|
|
|
|

|
|
|

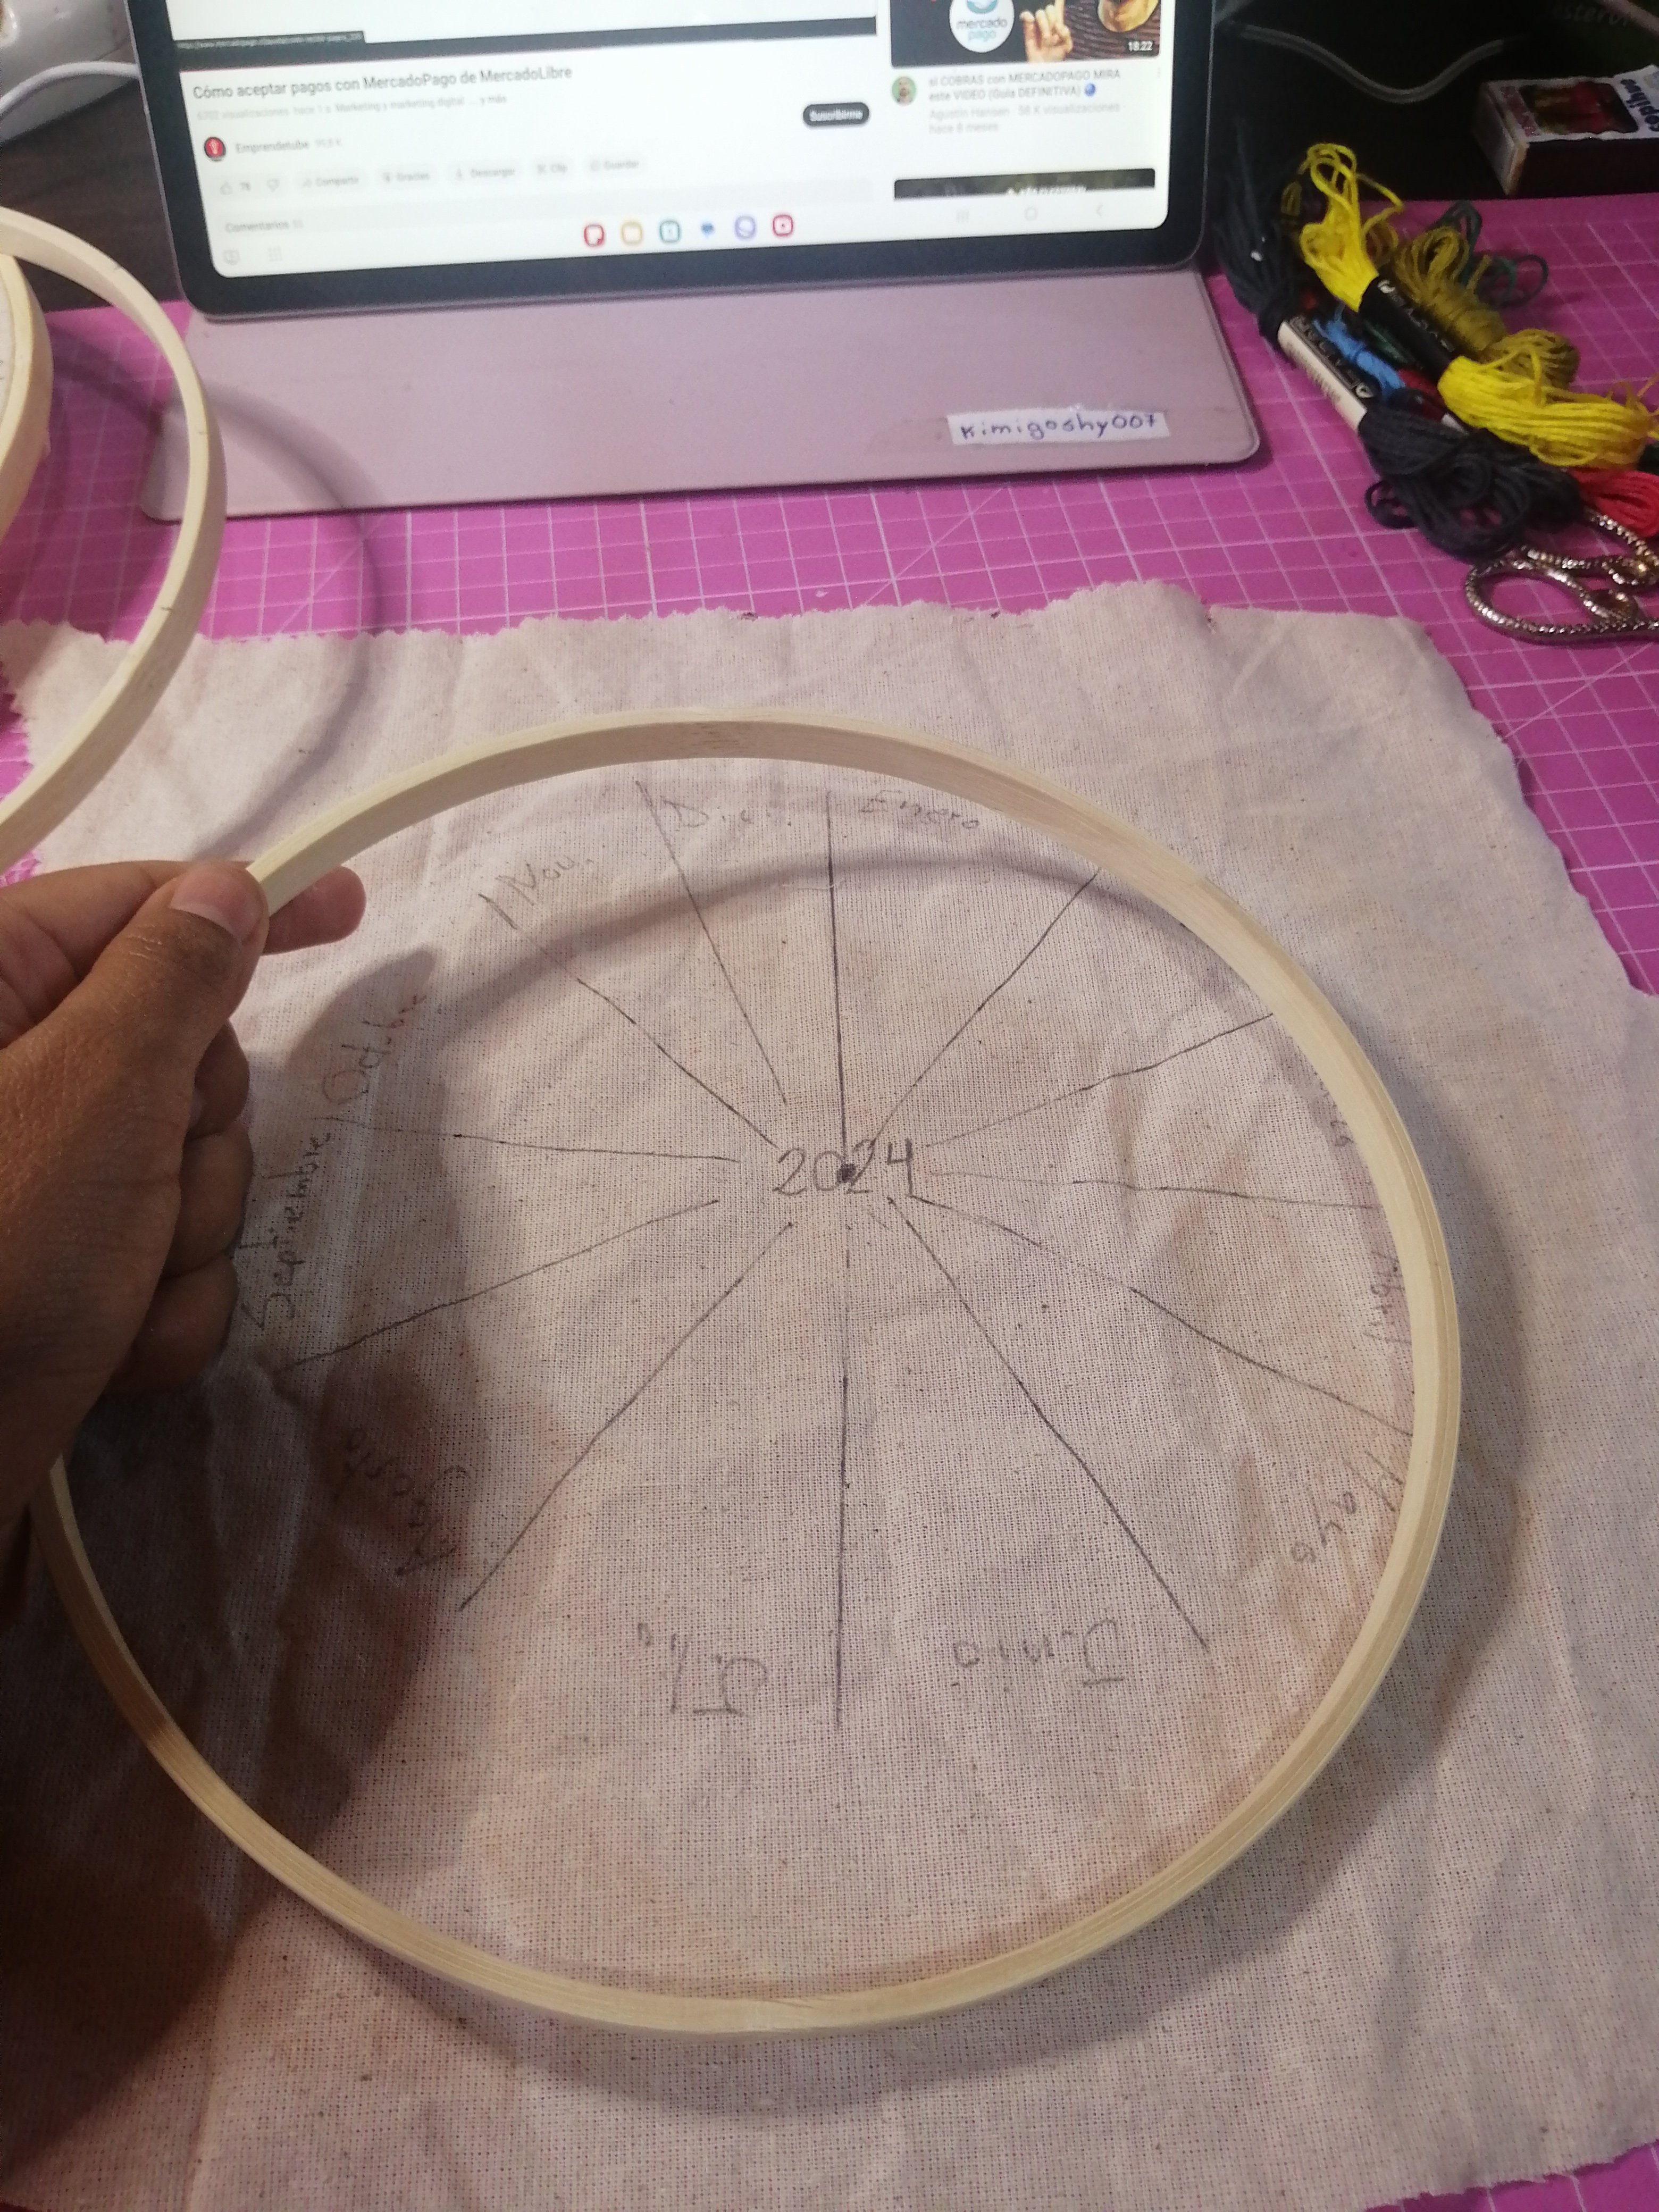
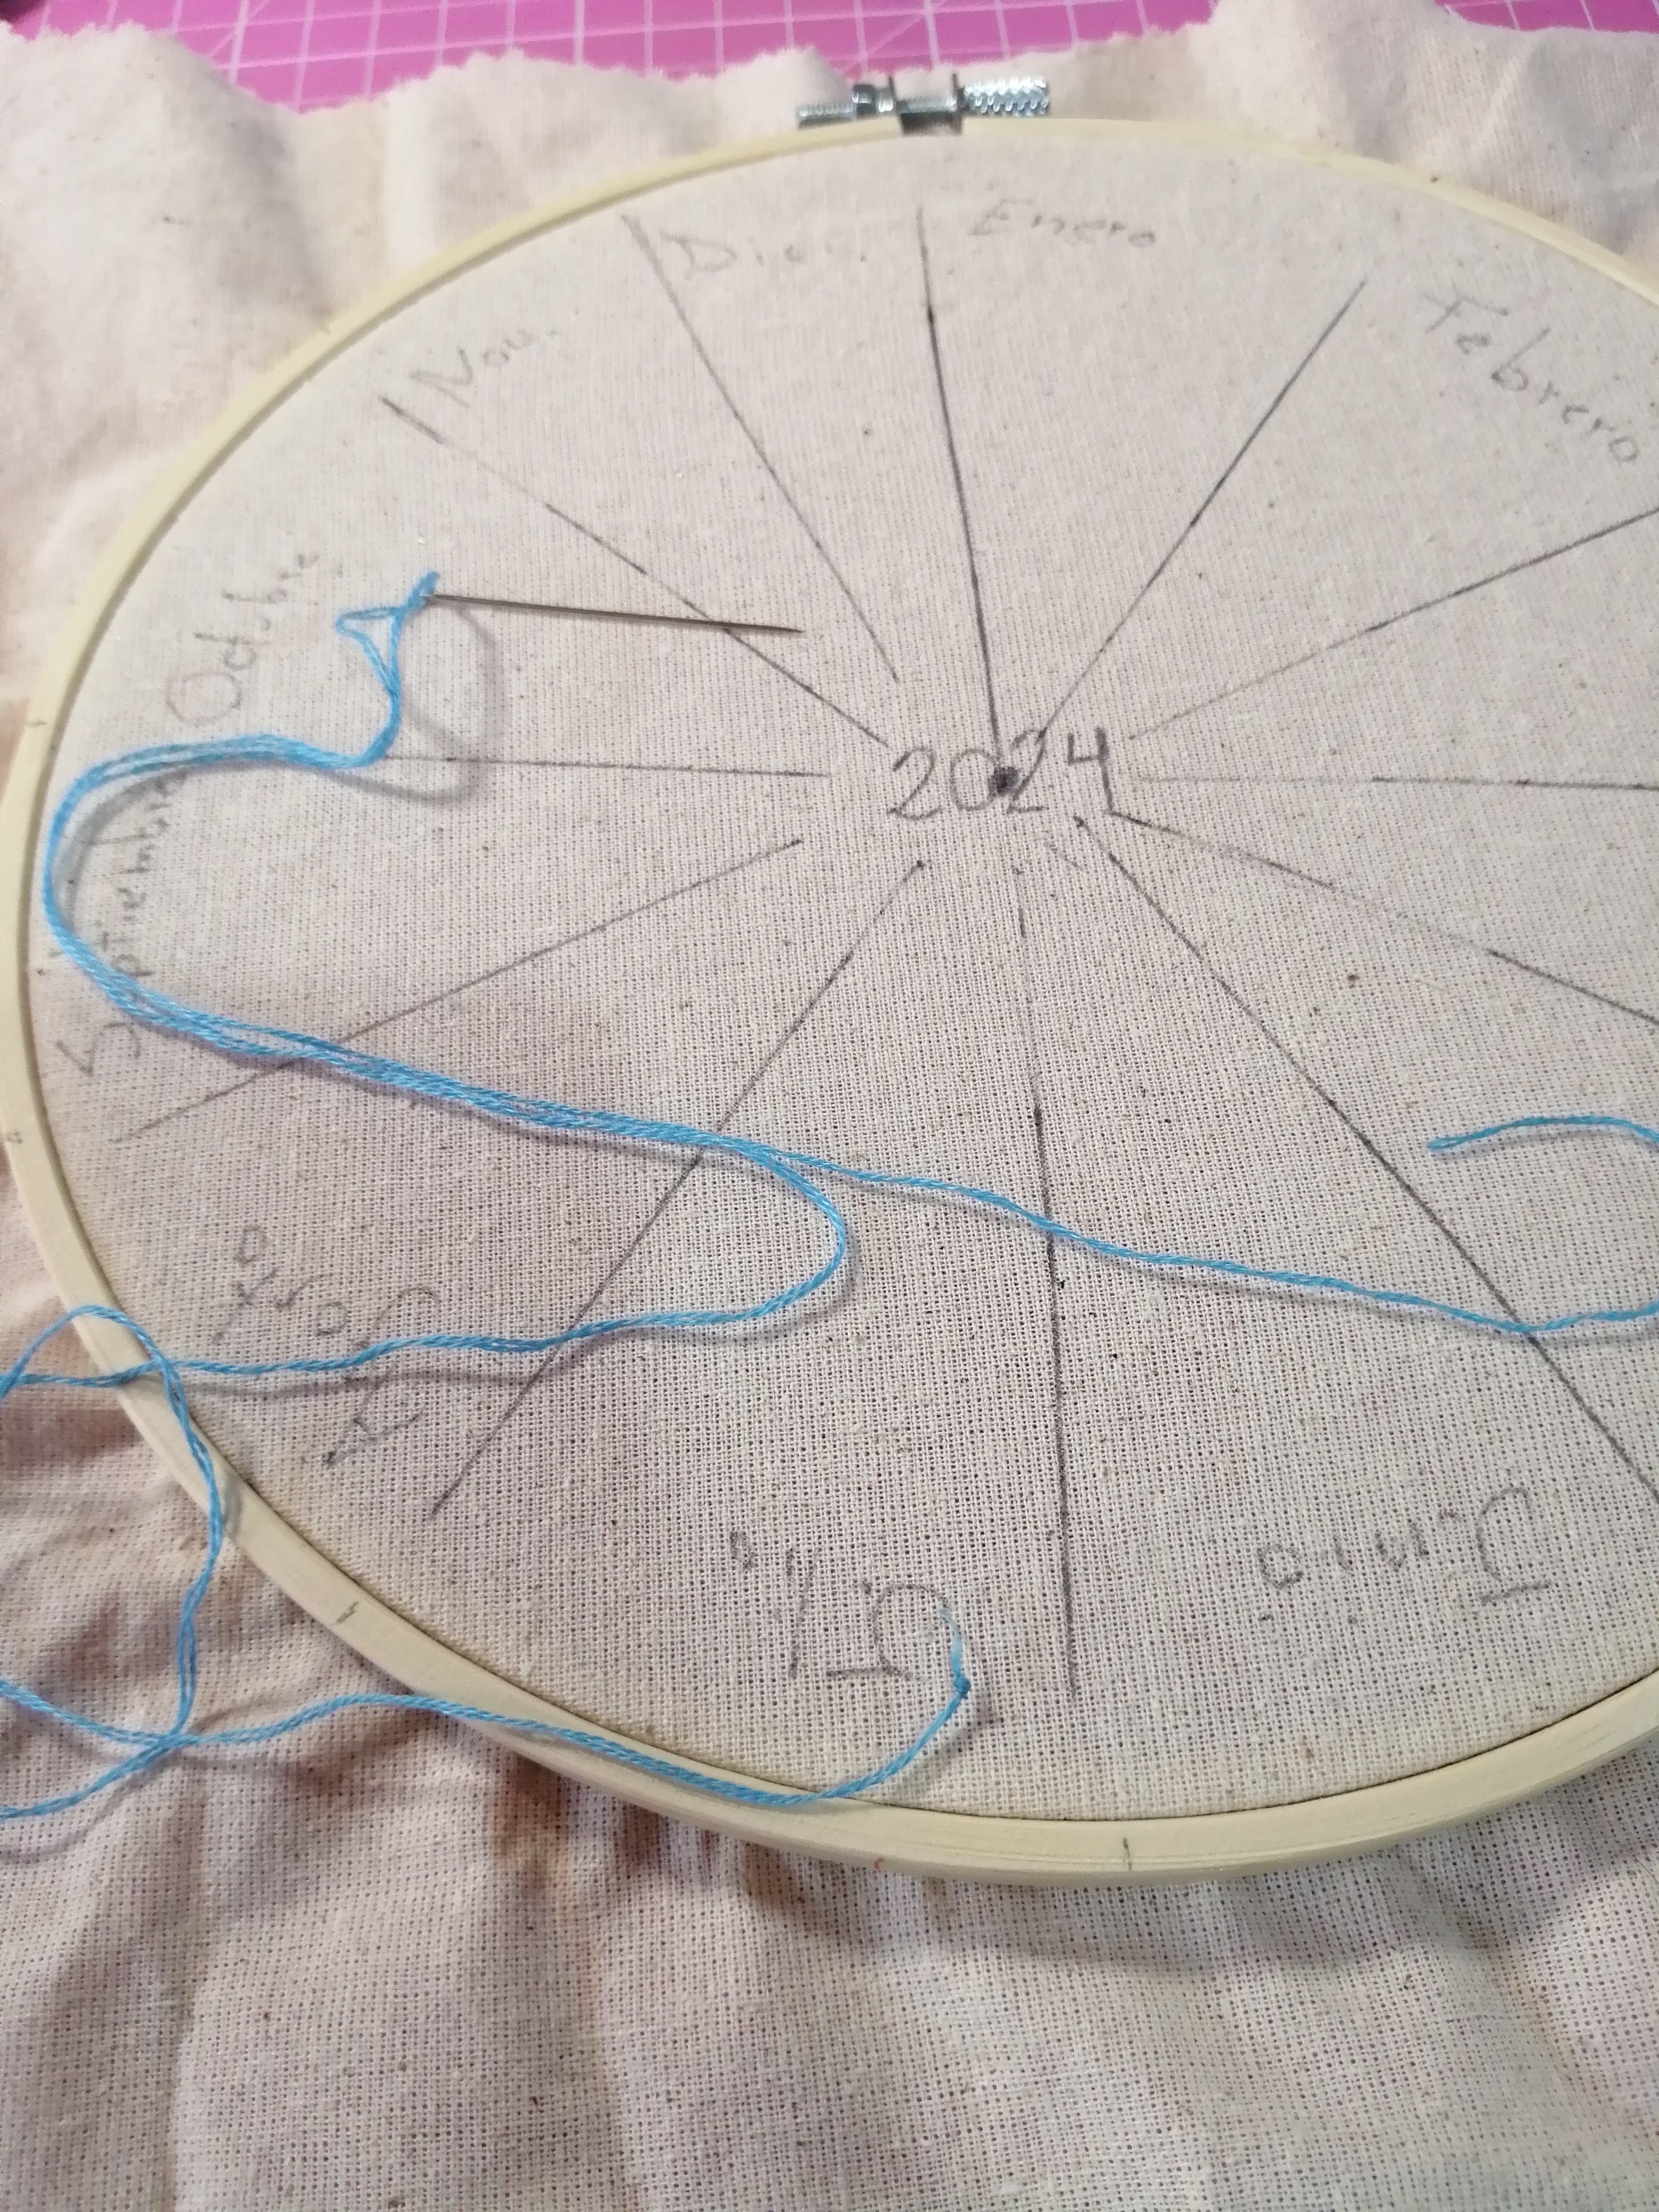
Seguimos con el bastidor, usamos la parte del bastidor que no lleva tornillo, este irá detrás del dibujo y el con tornillo irá arriba, debemos tensionar la tela de tal manera que cuando golpees con un dedo en medio de la tela logre sonar como tambor.
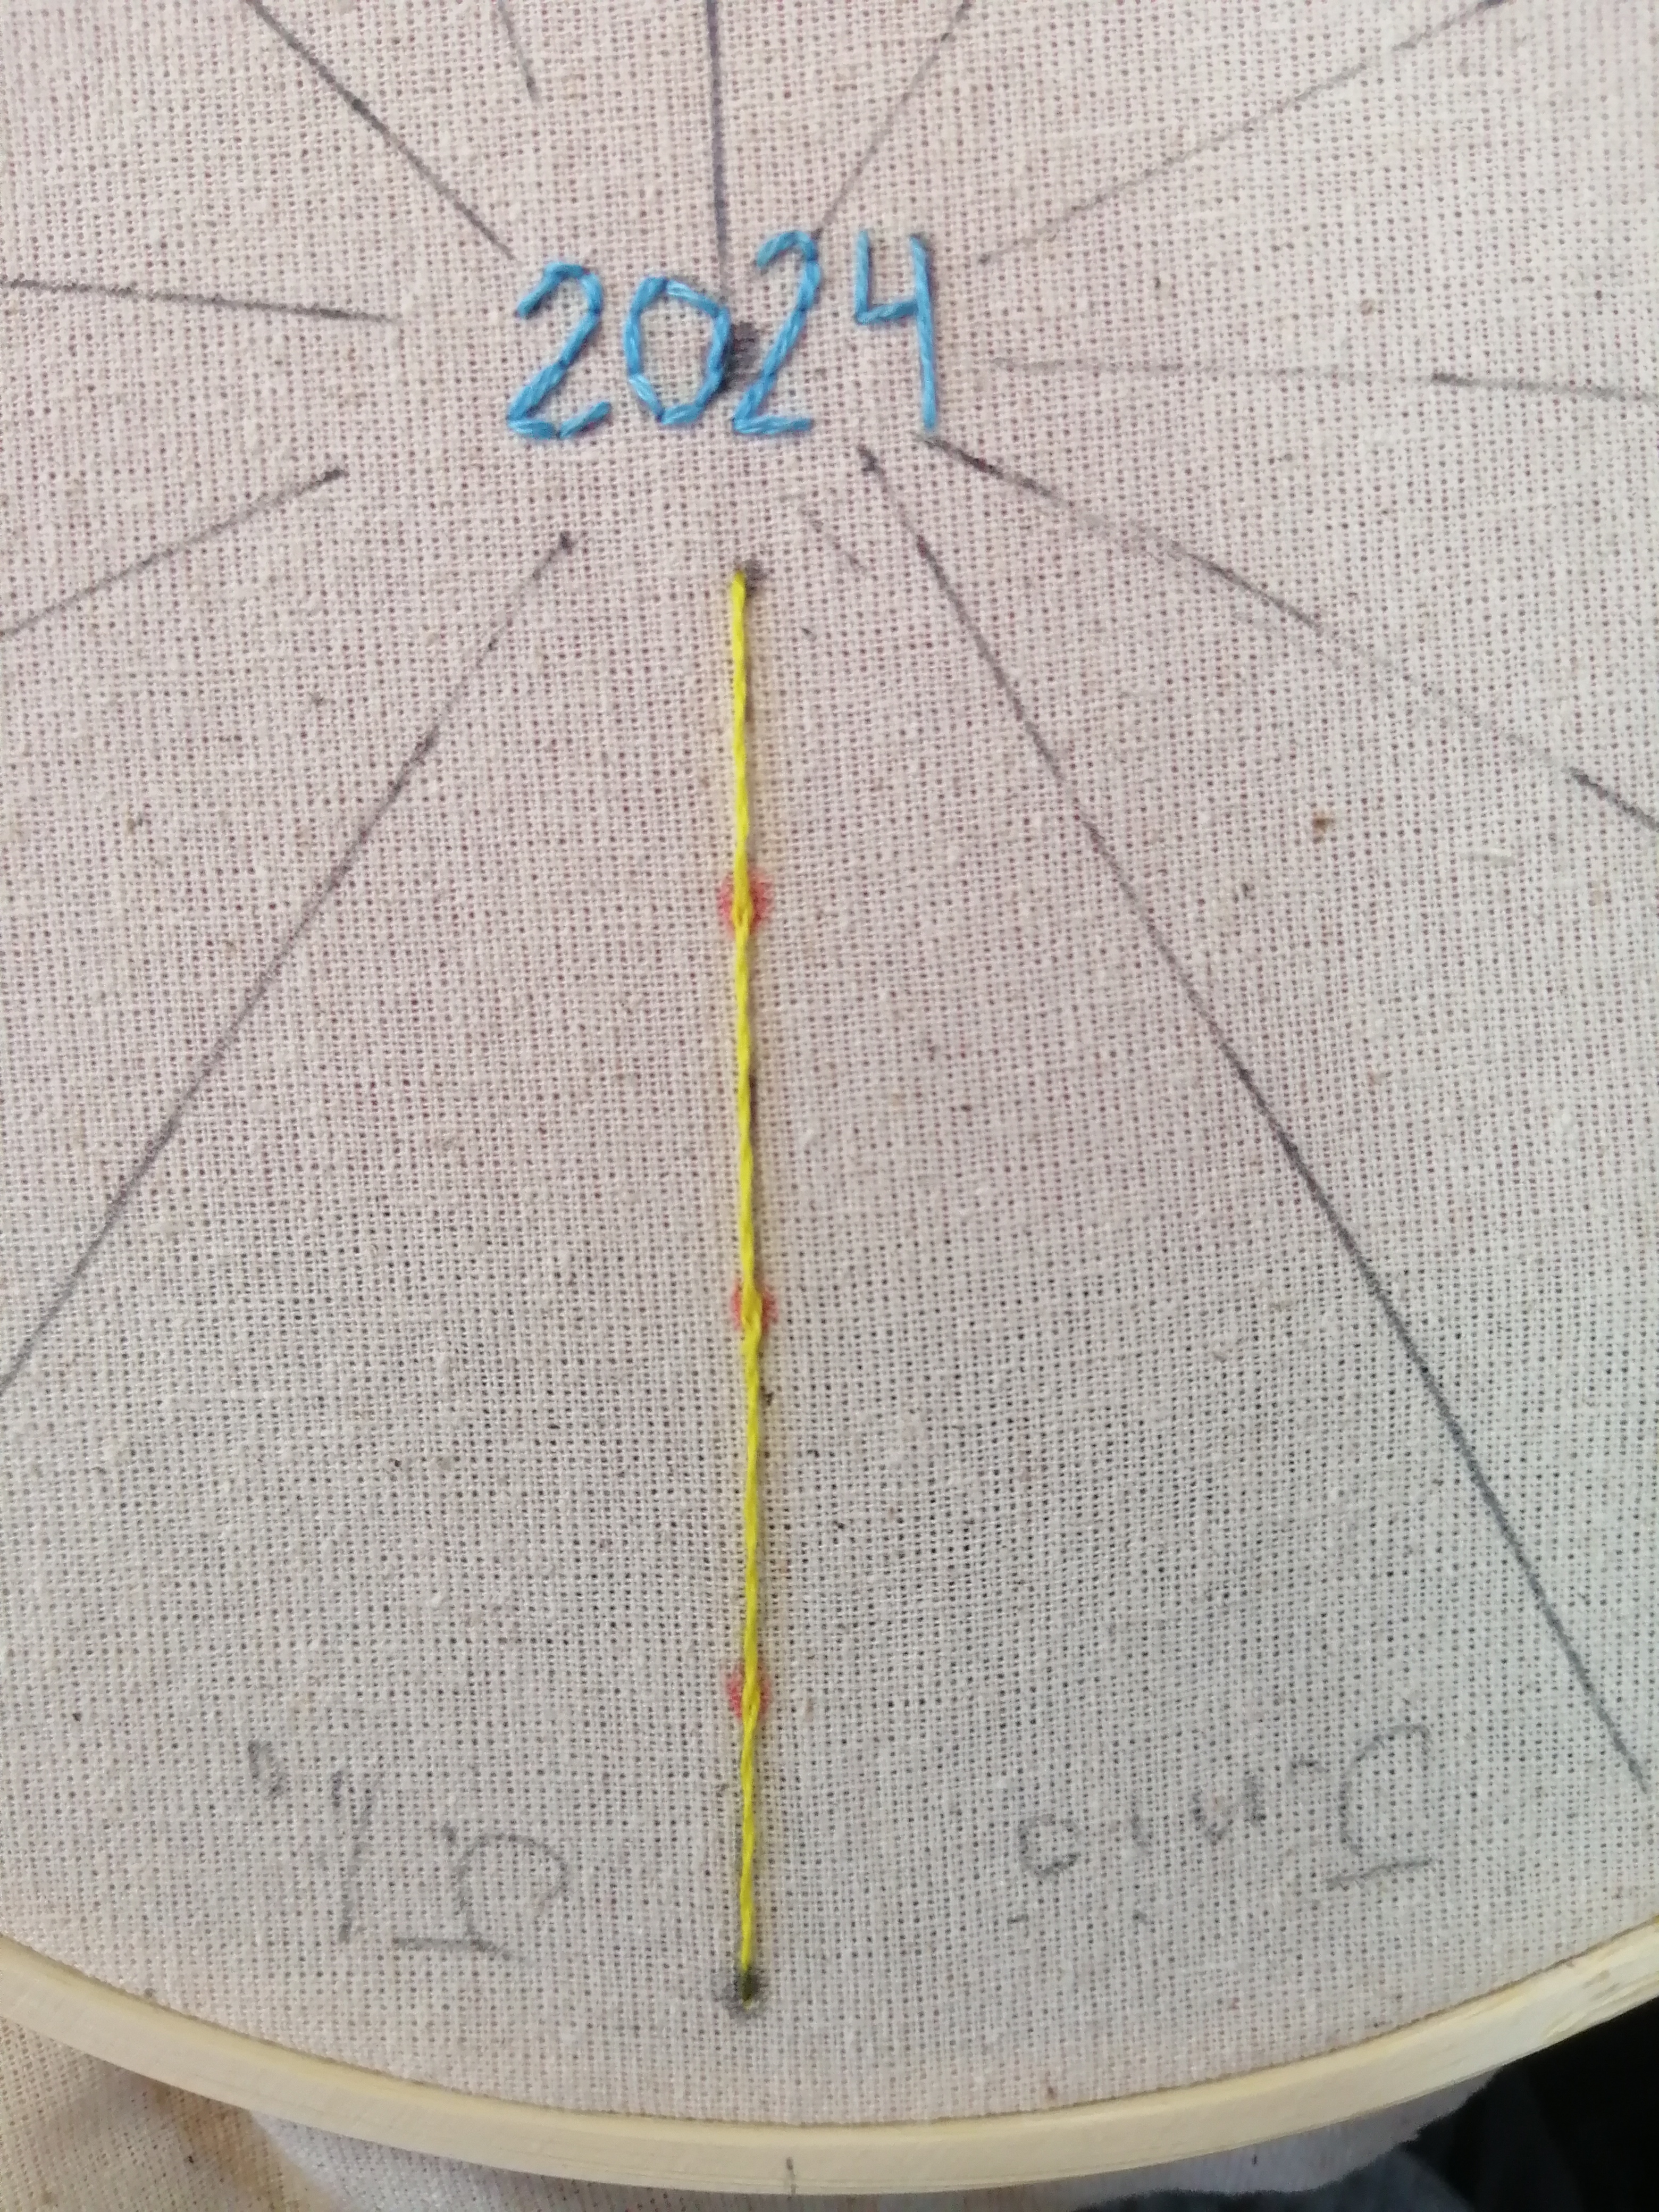
El siguiente paso es bordar, el hilo de bordar esta dividido por 6 hebras de las cuales solo usaremos dos. (Tip de principiante: para que el hilo no se enrede lo mejor es usar una medida que sería desde tu mano hacía el codo esa dimension es el largo que siempre deberás usar) enebramos la aguja hacemos nudo al final y comenzamos, bordando los números con punto atrás.
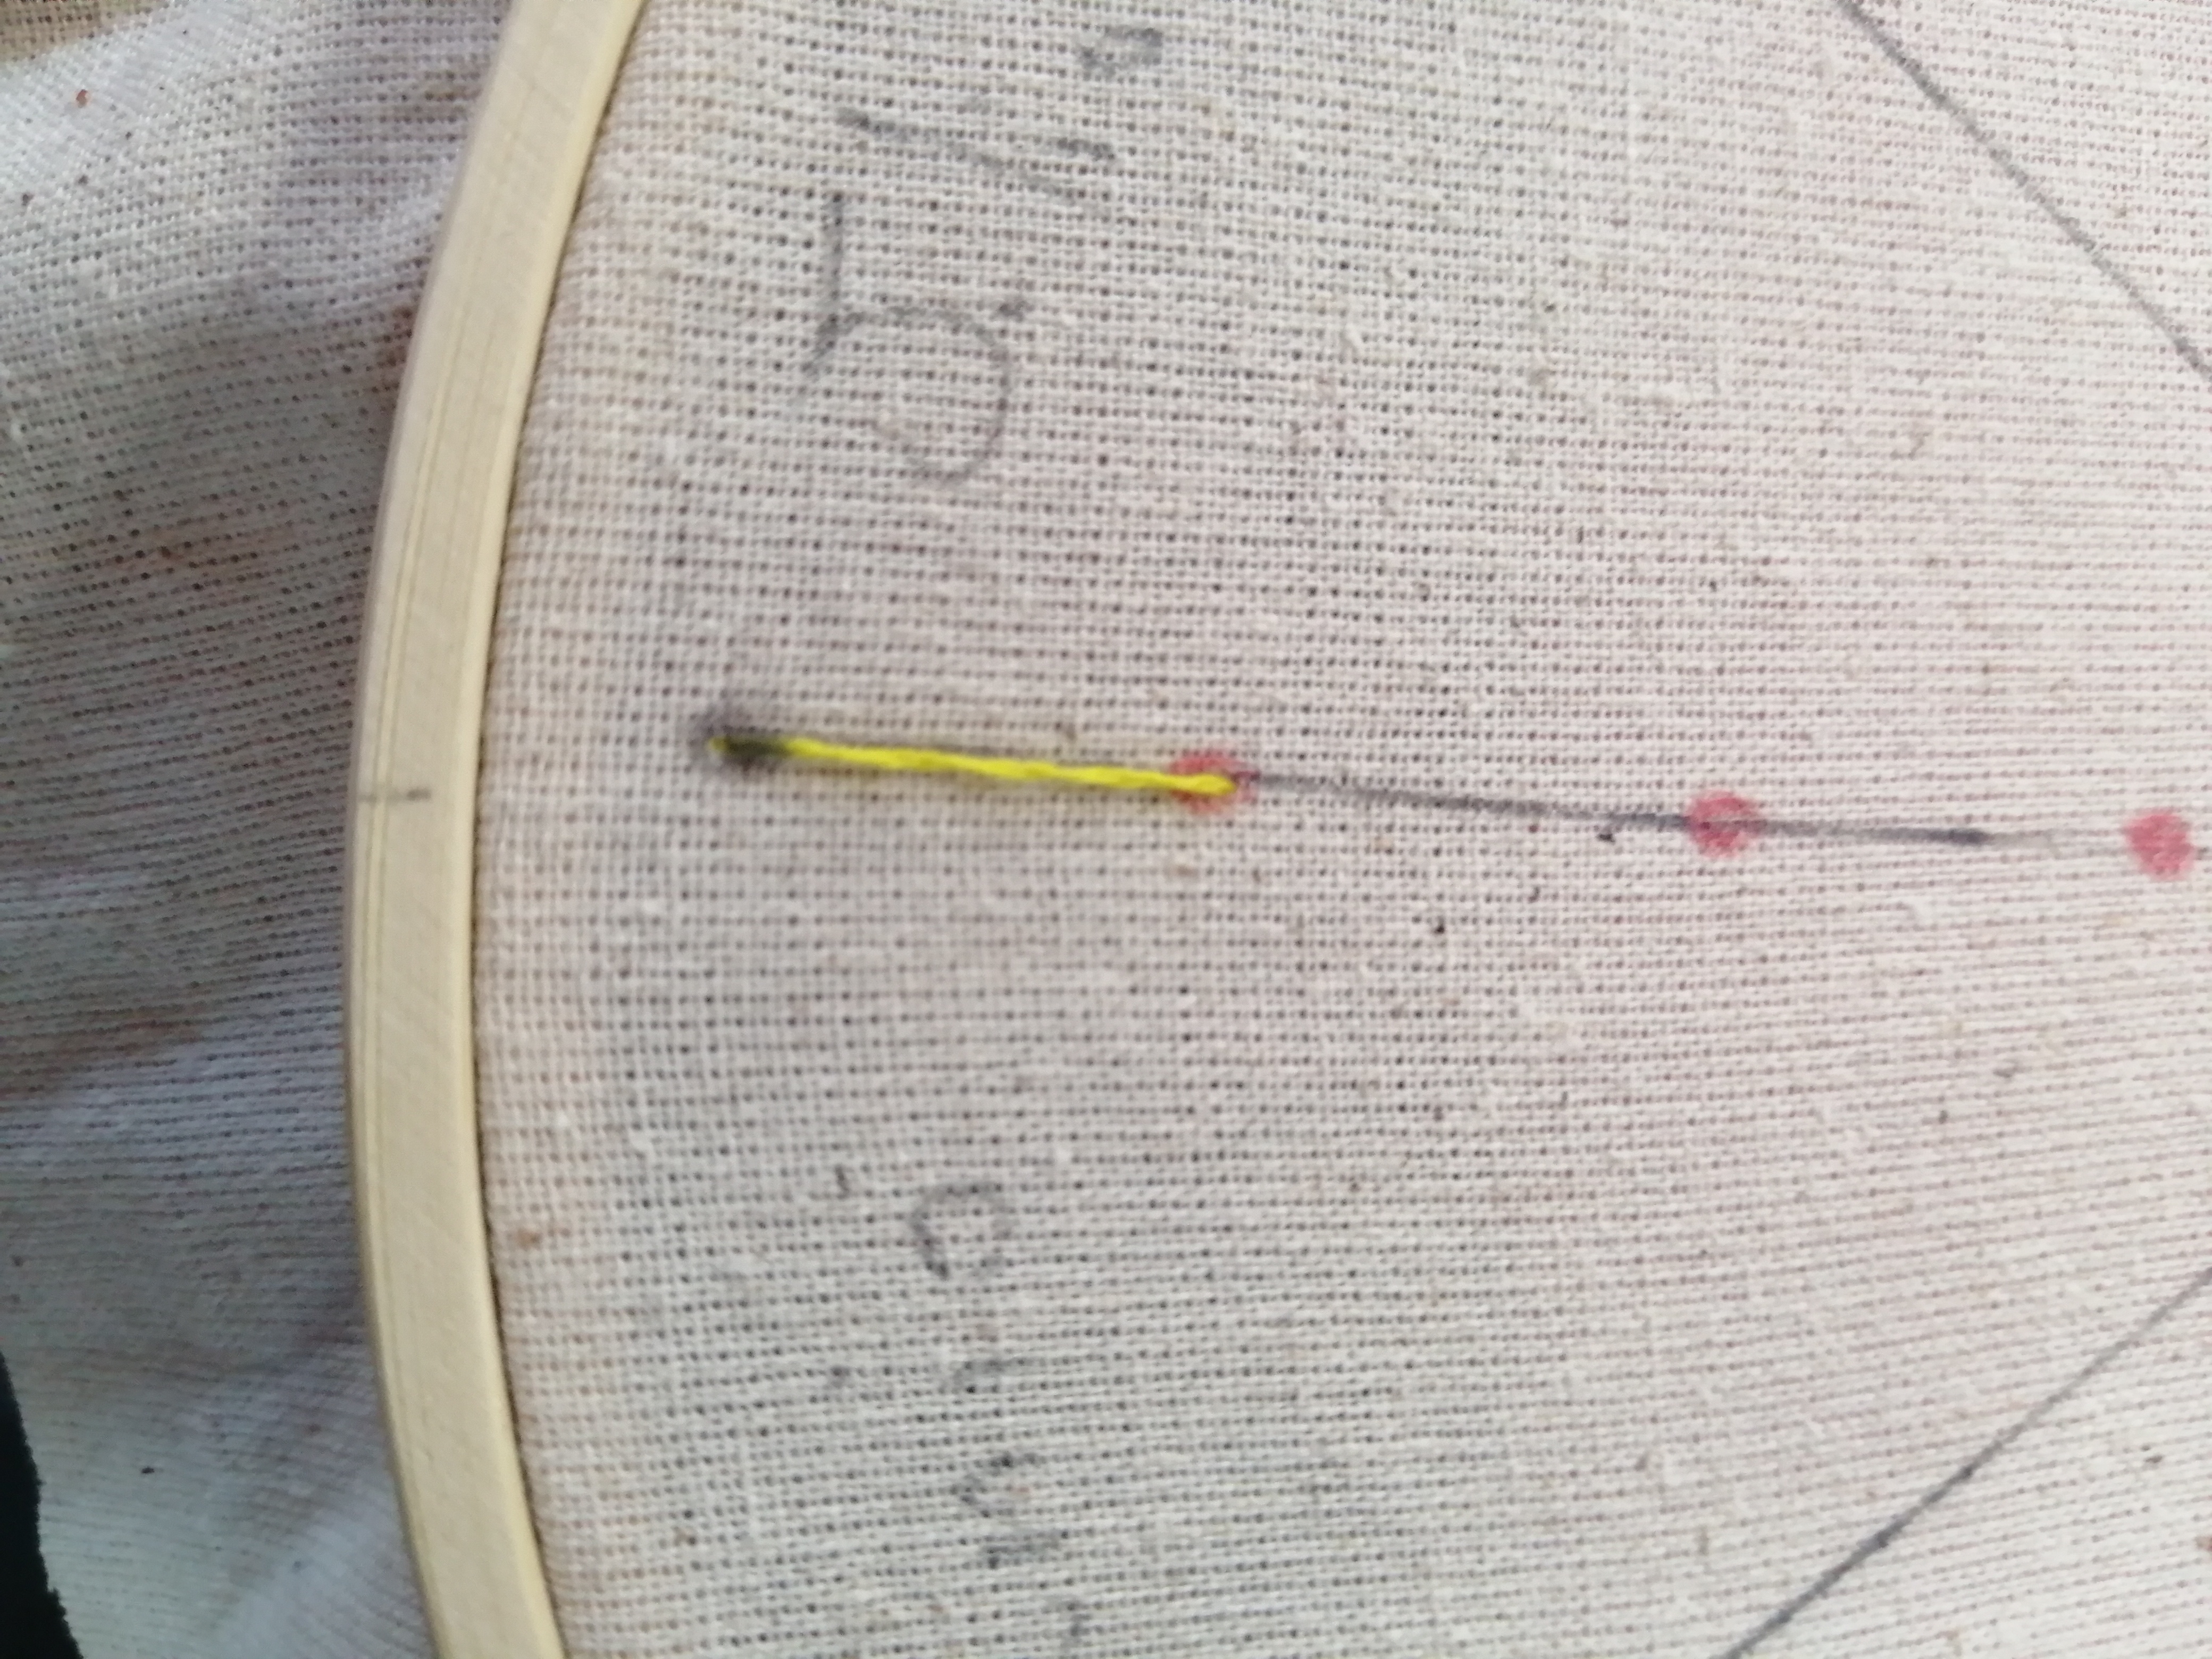
Luego seguimos con las rayas largas tenemos dos maneras de hacerlo, la primera sería dos puntadas desde el punto que se ve en la imagen hasta el punto que está hacía el número. A mi parecer esta no se ve tan prolija y se suelta
Mejor lo hacemos con punto que se ve en la imagen.
Hacemos la primera puntada y la segunda se toma desde dentro de la primera.
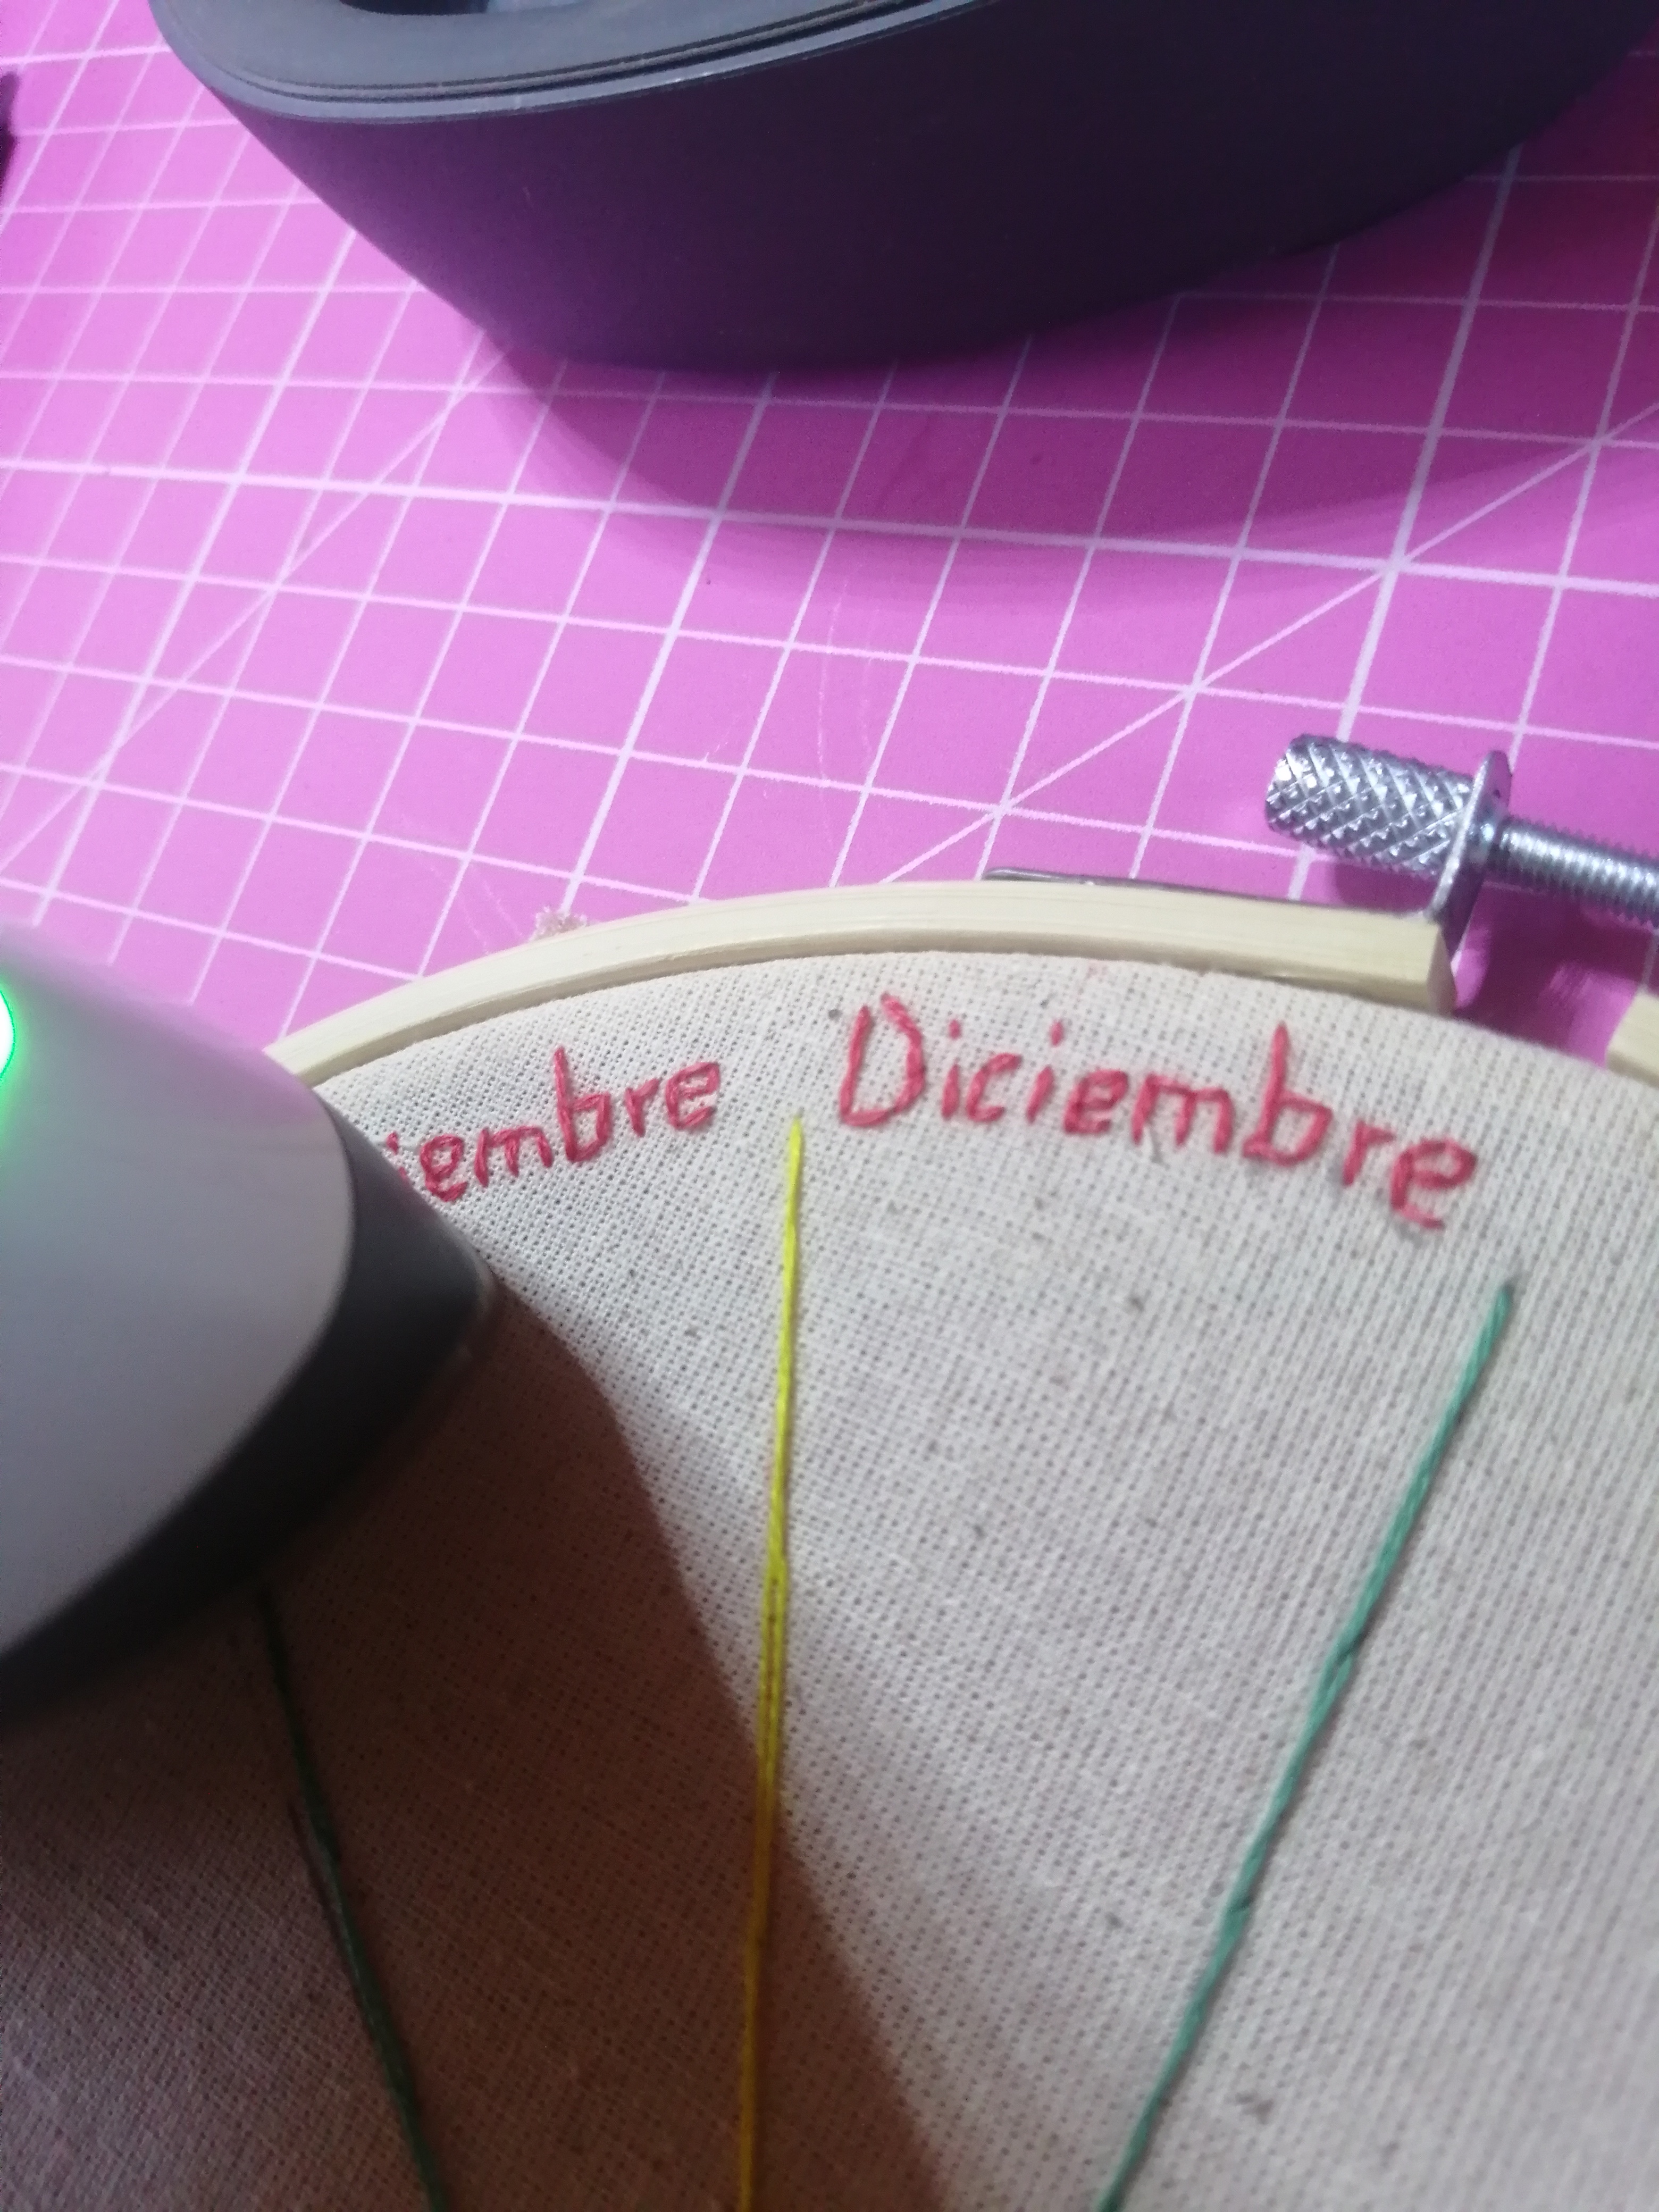
Cuando ya terminamos todas las lineas, continuamos con los meses tu eliges el color que quieras yo elegí rojo.
We continue with the frame, we use the part of the frame that does not have a screw, this will go behind the drawing and the one with the screw will go on top, we must tension the fabric in such a way that when you hit with a finger in the middle of the fabric it will sound like a drum.
The next step is to embroider, the embroidery thread is divided by 6 strands of which we will only use two. (Beginner's tip: so that the thread does not tangle it is best to use a measure that would be from your hand to the elbow that dimension is the length that you should always use) we thread the needle, tie a knot at the end and start embroidering the numbers with back stitch.
Then we continue with the long stripes we have two ways to do it, the first one would be two stitches from the stitch you see in the picture to the stitch that is towards the number. In my opinion this one does not look so neat and it gets loose.
It is better to do it with the stitch shown in the picture.
We make the first stitch and the second stitch is taken from inside the first stitch.
When we have finished all the lines, we continue with the months, you choose the color you want, I chose red.
|
|
|
Estando todo bordado calentamos la plancha y borramos todo lo que marcó el lápiz.
Ahora toca rellenar yo empecé el proyecto el día 5 por ende tuve que bordar 5 dibujos. Cabe mencionar que cada uno de los dibujos es algo representativo de lo que más marcó tu día. Así irás bordando día tras día, cuando lo veas terminado verás lo bueno y lo malo del mes y luego del año. 🤗❤️
Once everything is embroidered we heat the iron and erase all the pencil marks.
Now it's time to fill in. I started the project on day 5, so I had to embroider 5 drawings. It is worth mentioning that each of the drawings is something representative of what marked your day. So you will be embroidering day after day, when you see it finished you will see the good and bad of the month and then the year. 🤗❤️
|
Gracias por leerme espero les guste este proyecto simple pero lindo.
Thanks for reading I hope you like this simple but cute project.
Todas la imágenes son de mi autoria.
All images are my own.
Your calendar is very nice!
Muchas gracias 😊
It is pretty cool. Good to see how you made this. Nice work! Thank you for sharing this.
Gracias 🌹
That's very ingenious!
Queda muy bello cuando se completa 😍
Que bonito, sirve para desestresarse día a día. 🤗
Espero que pronto muestres tus bordados de mascotas. 🥰
Sí, queda muy bello. Sii pronto subiré uno de mascotas 😚
Gran trabajo amiga saludos para ti.
Gracias a ti por leerme 🤗😚
Contáctenos para saber más del proyecto a nuestro servidor de Discord.
Si deseas delegar HP al proyecto: Delegue 5 HP - Delegue 10 HP - Delegue 20 HP - Delegue 30 HP - Delegue 50 HP - Delegue 100 HP.
From Venezuela, our witness drives decentralization and the adoption of Web3 technology, creating opportunities for the local community and contributing to the global ecosystem. // Desde Venezuela, nuestro testigo impulsa la descentralización y la adopción de la tecnología Web3, generando oportunidades para la comunidad local y contribuyendo al ecosistema global.
Sigue, contacta y se parte del testigo en: // Follow, contact and be part of the witness in:
Congratulations @alejandralita! You have completed the following achievement on the Hive blockchain And have been rewarded with New badge(s)
Your next target is to reach 1750 upvotes.
You can view your badges on your board and compare yourself to others in the Ranking
If you no longer want to receive notifications, reply to this comment with the word
STOPMuchas gracias 🤗