¡Saludos Amigos de Hive DIY ! | Hello Hive Friends DIY!
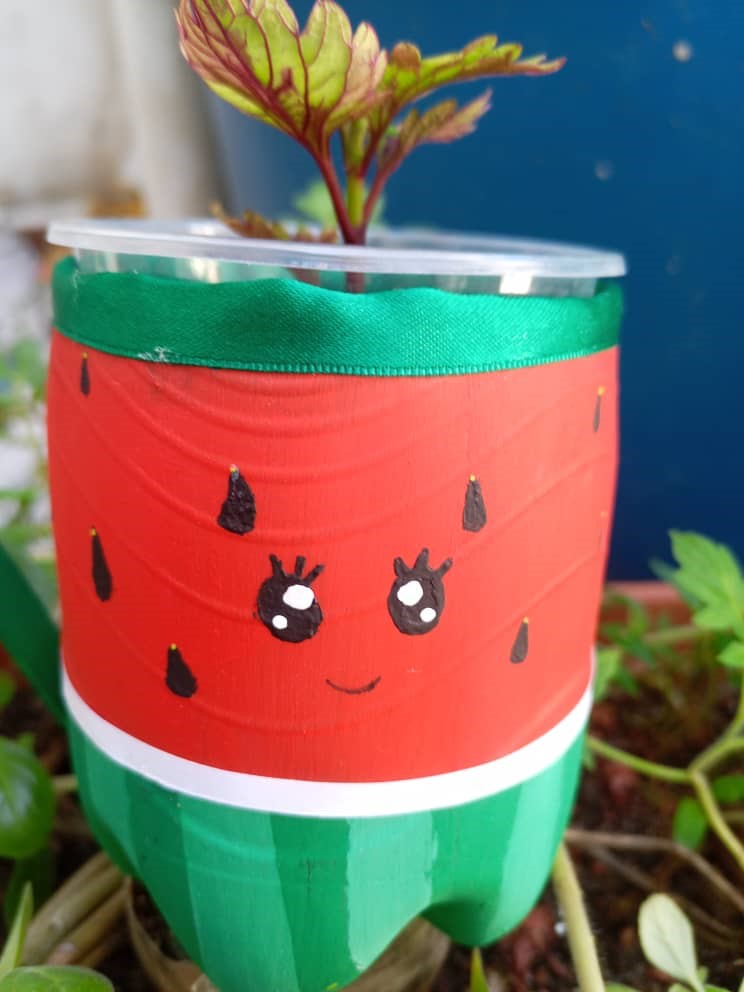
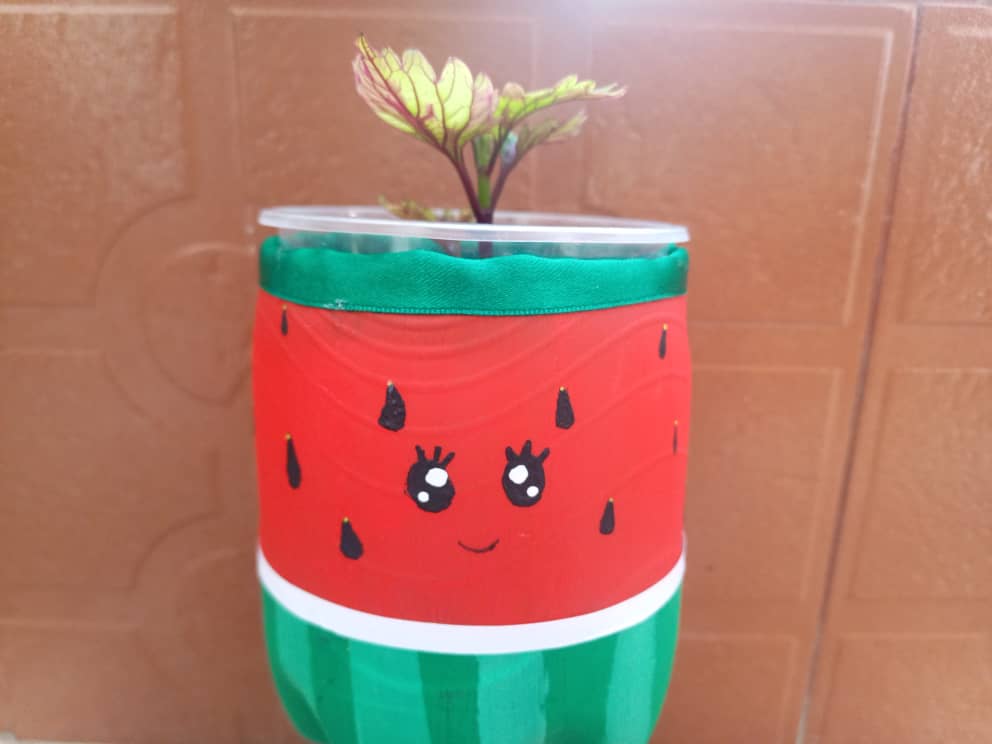
Saludos amigos de Hive DIY, hoy les presento como preparé un lindo matero utilizando un envase reciclable e inspirado en la Sandía una maravillosa fruta que nos regala unos colores muy lindo para adornar el jardín. En mi hogar no tengo patio ya que la casa es de terreno pequeño y el espacio que tenemos al final lo acondicionamos con terracota, pero es un lugar ideal para tener algunas plantas en materos, por esa razón he decido darle vida a mis plantas con este matero inspirado en la Sandía.
Greetings friends from Hive DIY, today I present to you how I prepared a beautiful pot using a recyclable container and inspired by the Watermelon, a wonderful fruit that gives us very nice colors to decorate the garden. In my home I don't have a patio since the house is on a small piece of land and the space we have at the end is conditioned with terracotta, but it is an ideal place to have some plants in pots, for that reason I have decided to give life to my plants with this Watermelon inspired pot.

Materiales | Materials
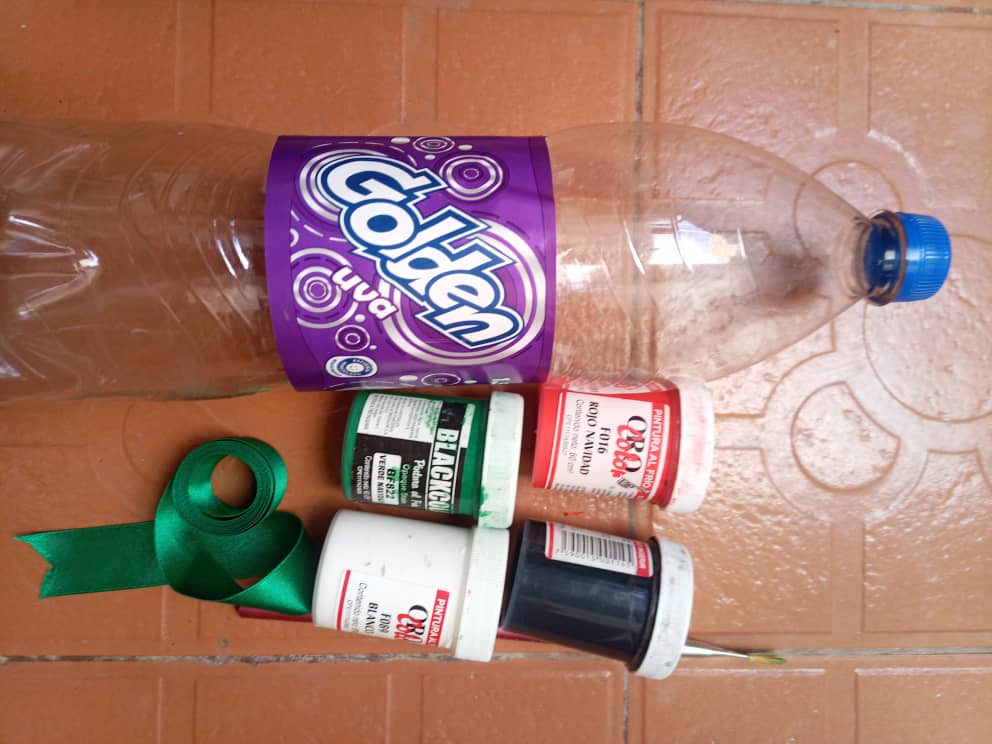
- Botella plástica para reciclar
- Pintura de color rojo
- Pintura de color negro
- Pintura de color verde
- Pintura de color blanco
- Pincel
- Cinta de color verde de 2,5 cm de ancho
- Cinta de color blanca de 0,5 cm de ancho.
- Silicón
- Tijera
- Plastic bottle to recycle
- Red paint
- Black paint
- Green paint
- White paint
- Brush
- 2.5 cm wide green ribbon
- 0.5 cm wide white ribbon.
- silicone
- Scissors
Procedimiento | Process
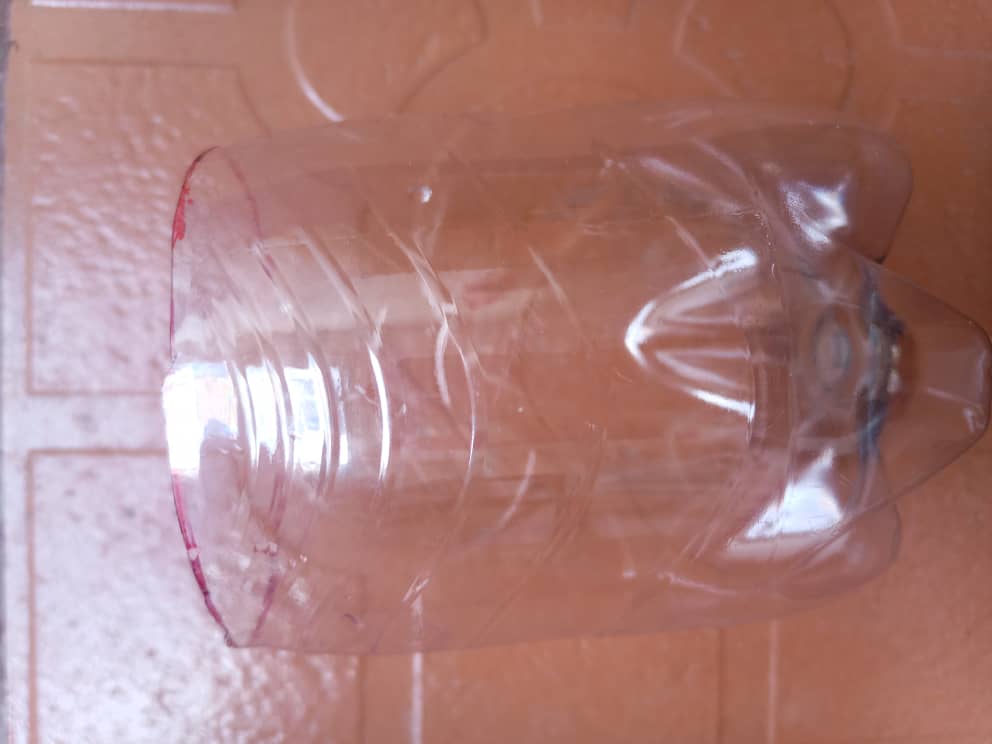
PASO 1. Lo primero fue acondicionar la botella plástica para usar, para eso retire la propaganda de refresco, y luego con una regla medí la botella desde abajo hacia arriba con la finalidad de marcar once (11) centímetros hace arriba. Luego marque la botella con un marcador para ser cortada en esa medida. Con ayuda de exacto realice el corte de la botella con mucho cuidado. Así quedó el envase para el matero de sandía con once centímetros de altura y ocho centímetros de diámetro.
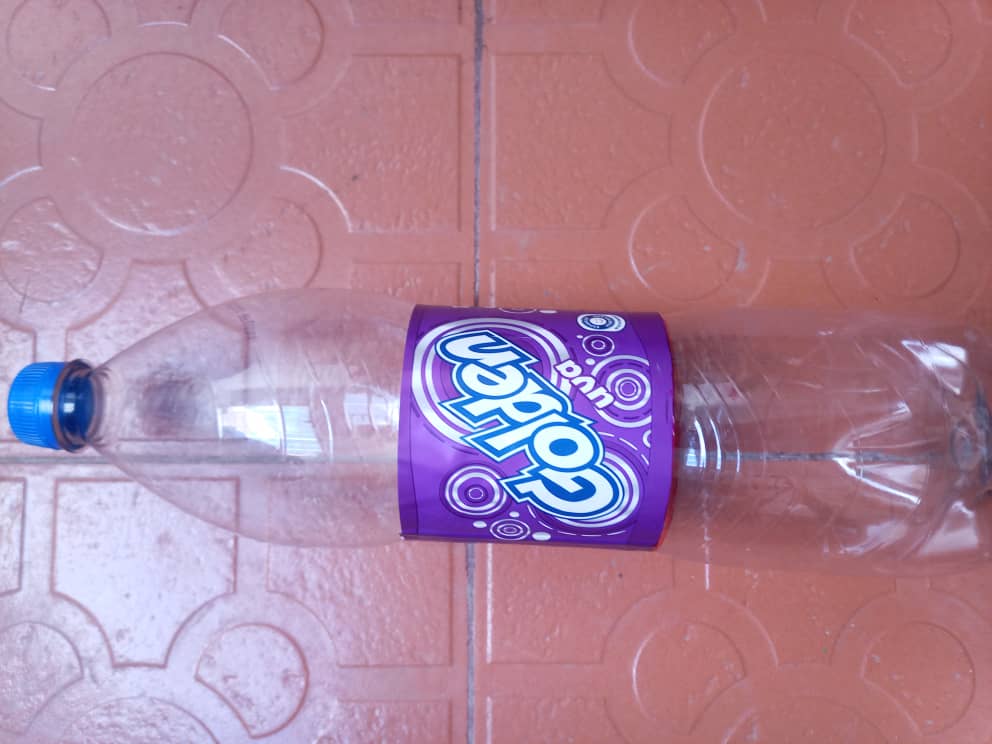
STEP 1. The first thing was to prepare the plastic bottle for use, for that I removed the soft drink advertising, and then with a ruler I measured the bottle from the bottom to the top in order to mark eleven (11) centimeters at the top. Then mark the bottle with a marker to be cut to size. With the help of exact cut the bottle very carefully.
This is how the container for the watermelon pot was eleven (11) centimeters high and eight (8) centimeters in diameter.
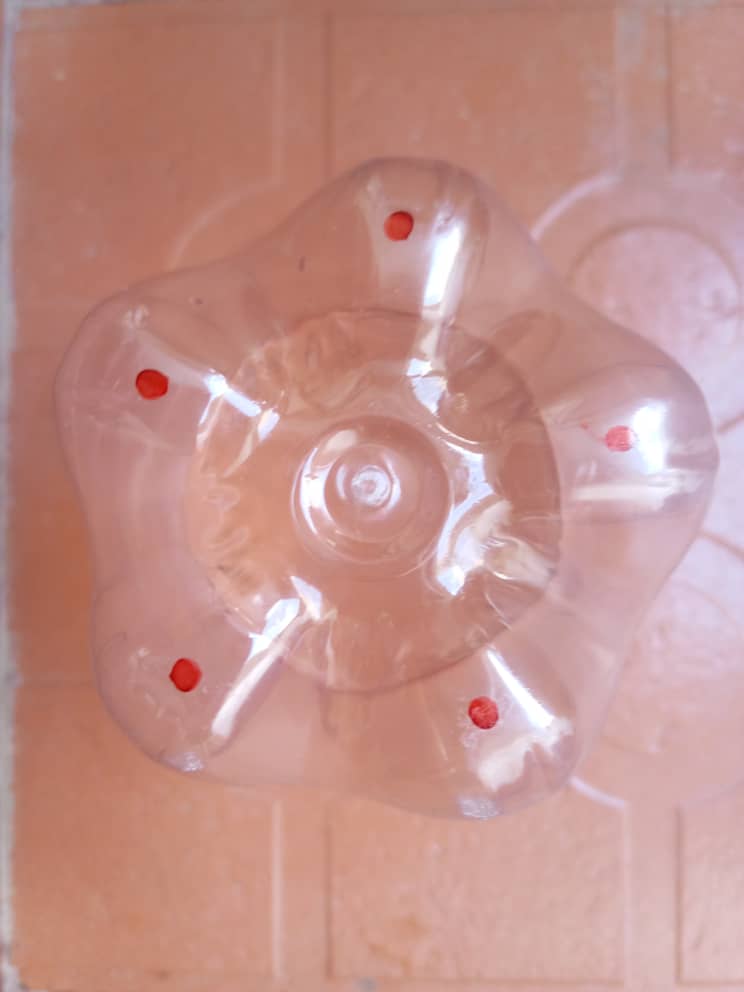
PASO 2. Al tener la botella cortada, la coloque hacia abajo y le marqué en los cinco extremos de base con un marcador.
STEP 2. Having the bottle cut, I placed it down and marked the five base ends with a marker to be holes.
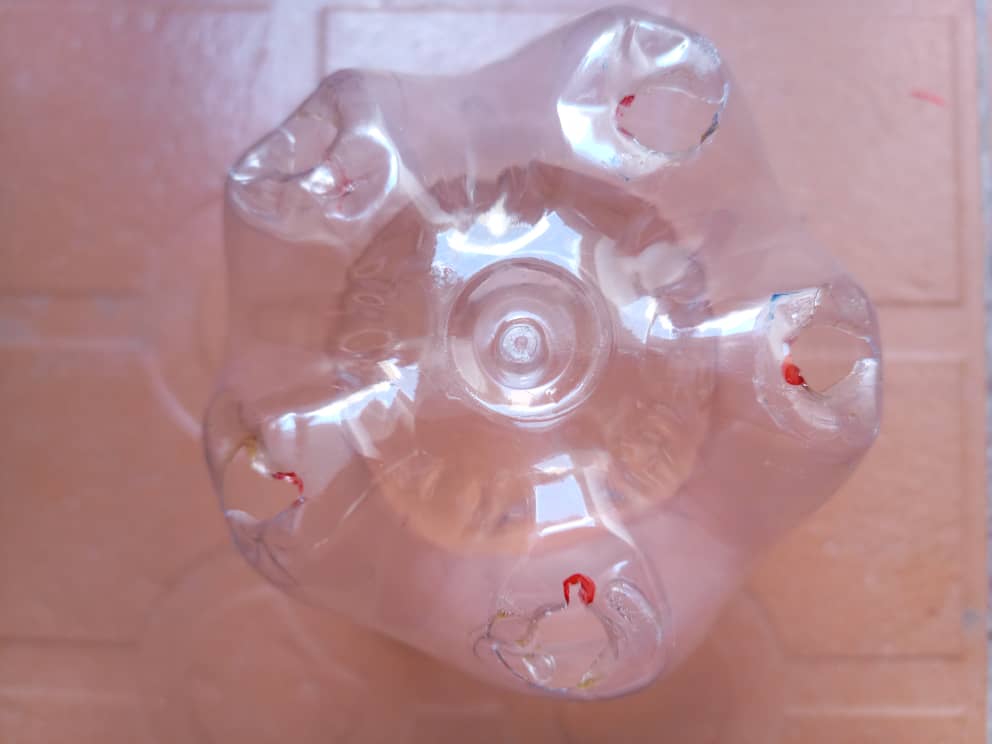
PASO 3. Puse a calentar la pistola de silicón y luego de calentar utilice la punta hacer los cinco (5) orificios en la botella. Estos orificios tienen la finalidad de añadirle al matero el desagüe que requiere para que la planta no se ahogue y puede llevar su proceso de crecimiento normal.
STEP 3. I put the silicone gun to heat and after heating, use the tip to make the five (5) holes in the bottle. These holes are intended to add to the pot the drainage it requires so that the plant does not drown and can carry out its normal growth process.
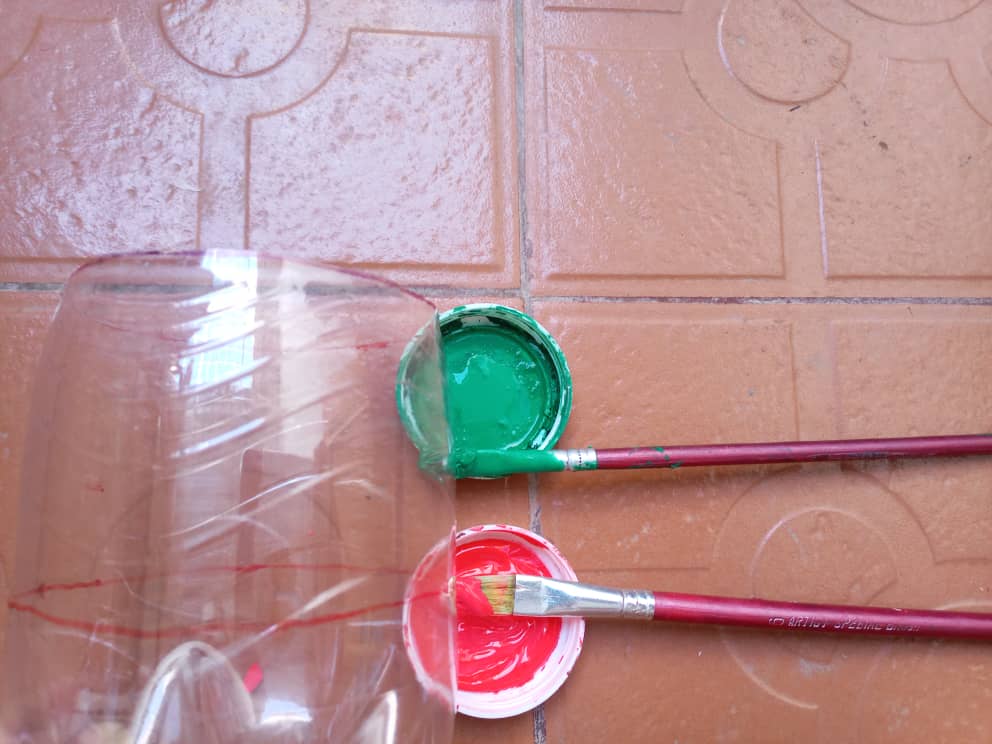
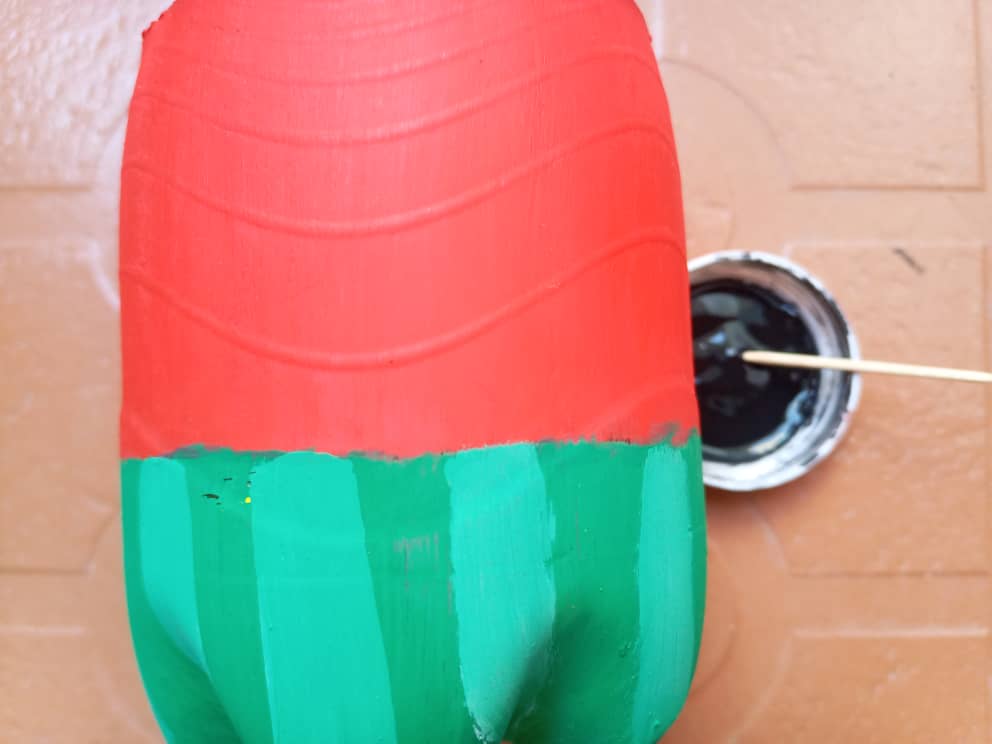
PASO 4. Ahora se inicia la pintura de botella con el color verde y el color rojo. Para eso fue necesario marcar la botella con un marcador cuatro (4) centímetros de alto quedando la parte superior con un mayor tamaño y representar la pulpa de la sandía. Entonces aplique pintura color verde oscuro en los cuatro (4) centímetros de abajo y pintura color roja en los siete (7) centímetros superiores.
STEP 4. Now start painting the bottle with the green color and the red color. For that, it was necessary to mark the bottle with a marker four (4) centimeters high, leaving the upper part with a larger size and representing the pulp of the watermelon. Then apply dark green paint to the bottom four (4) inches and red paint to the top seven (7) inches.
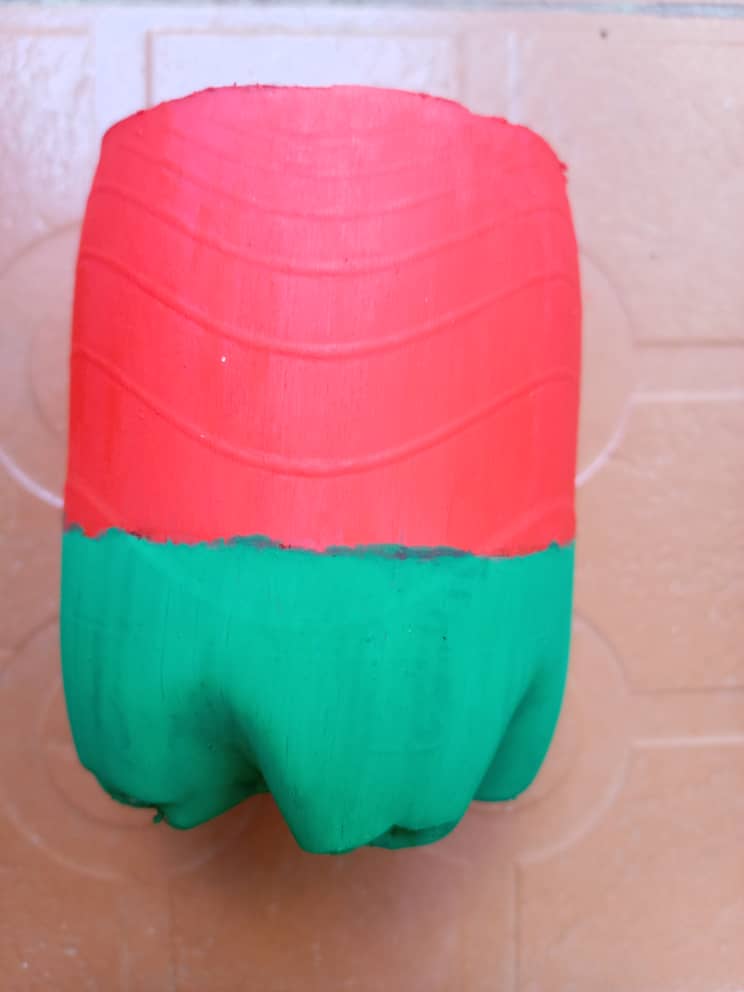
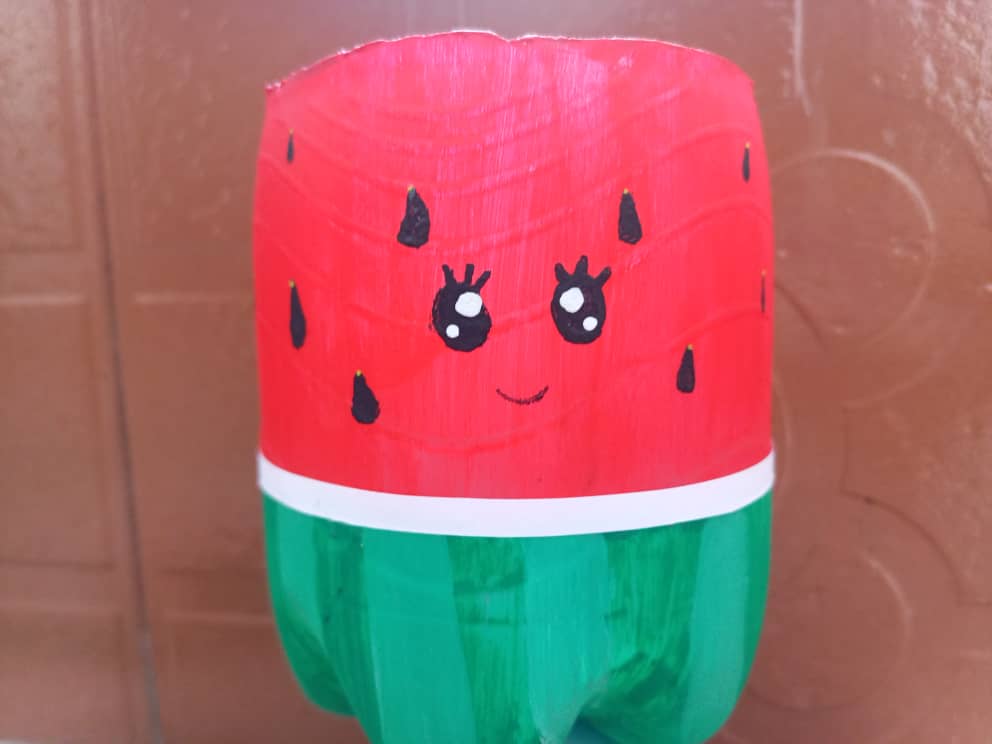
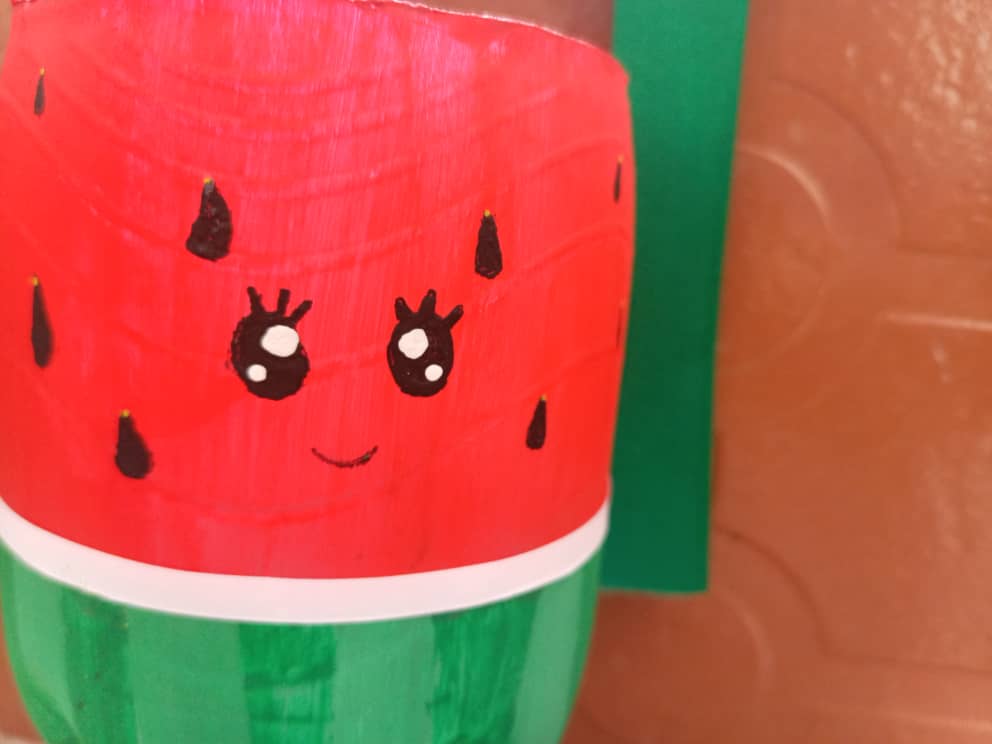
PASO 5. Seguidamente aplique pintura color verde claro en forma de listones para simular los colores de la concha de la patilla. Y con la pintura color negro pinte los detalles en la parte ya pintada de color rojo, dibujando semillas y a la vez el rostro del matero de patilla, con unos lindos ojos tipo kawaii, para definir el color de los ojos utilice también pintura color blanco.
STEP 5. Then apply light green paint in the form of ribbons to simulate the colors of the temple shell. And with the black paint paint the details in the part already painted red, drawing seeds and at the same time the face of the sideburn pot, with cute kawaii-type eyes, to define the color of the eyes also use white paint.
PASO 6. Luego tomé la medida de la cinta color blanco para cubrir todo el matero, la corte y la pegue para cubrir con silicón entre la división de colores de la patilla, es decir entre la concha y la pulpa de la fruta.
STEP 6. Then I took the measure of the white tape to cover the entire pot, cut it and glued it to cover with silicone between the colored division of the pin, that is, between the shell and the pulp of the fruit.
PASO 7. Ahora para finalizar la cinta de color verde de 2,5 cm de ancho y pegue en el borde del matero en la parte superior, procurando que la mitad de la cinta cubriera la parte externa y la interna para de este modo disimular el corte realizado en el envase.
STEP 7. Now to finish the 2.5 cm wide green tape and stick it on the top edge of the flowerpot, making sure that half of the tape covers the outside and the inside to thus hide the cut made in the container.
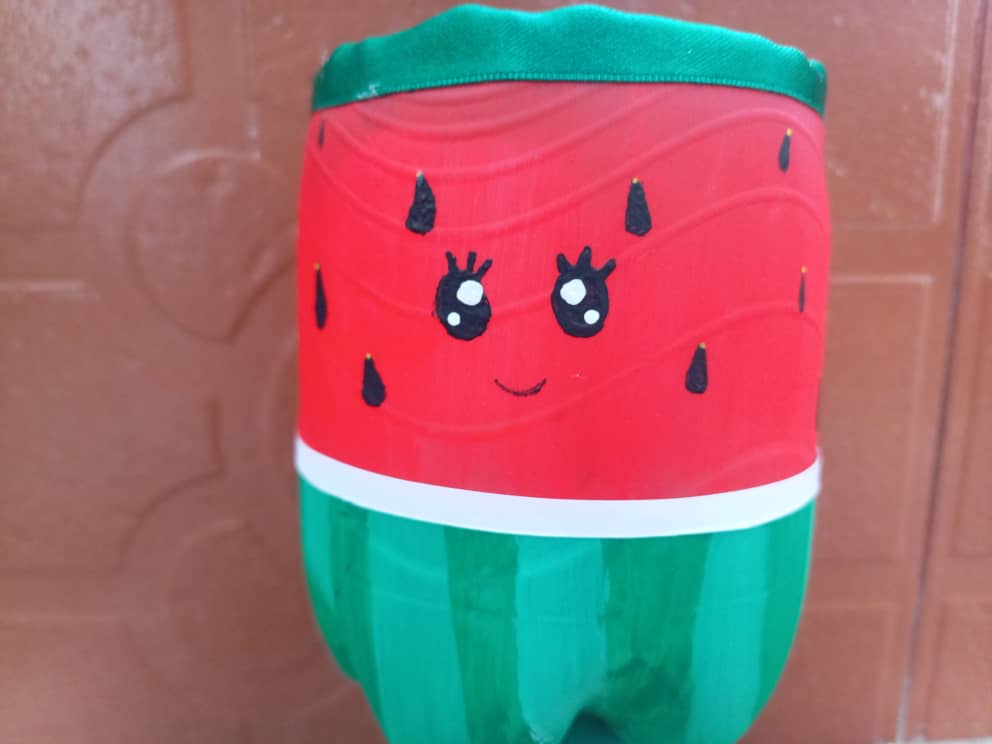
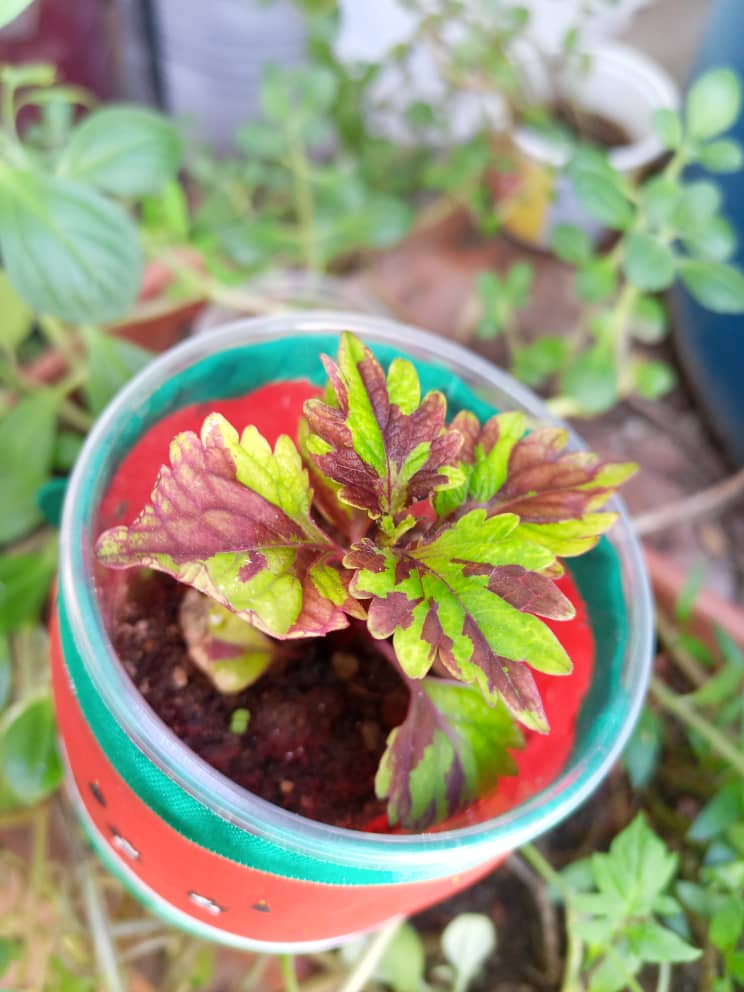
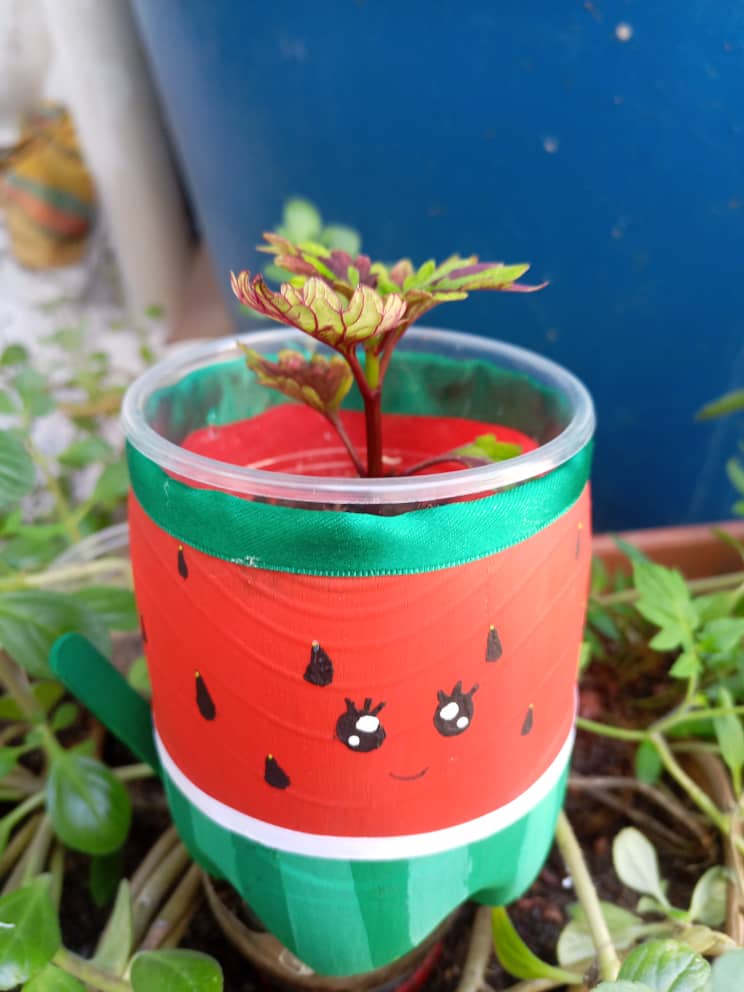
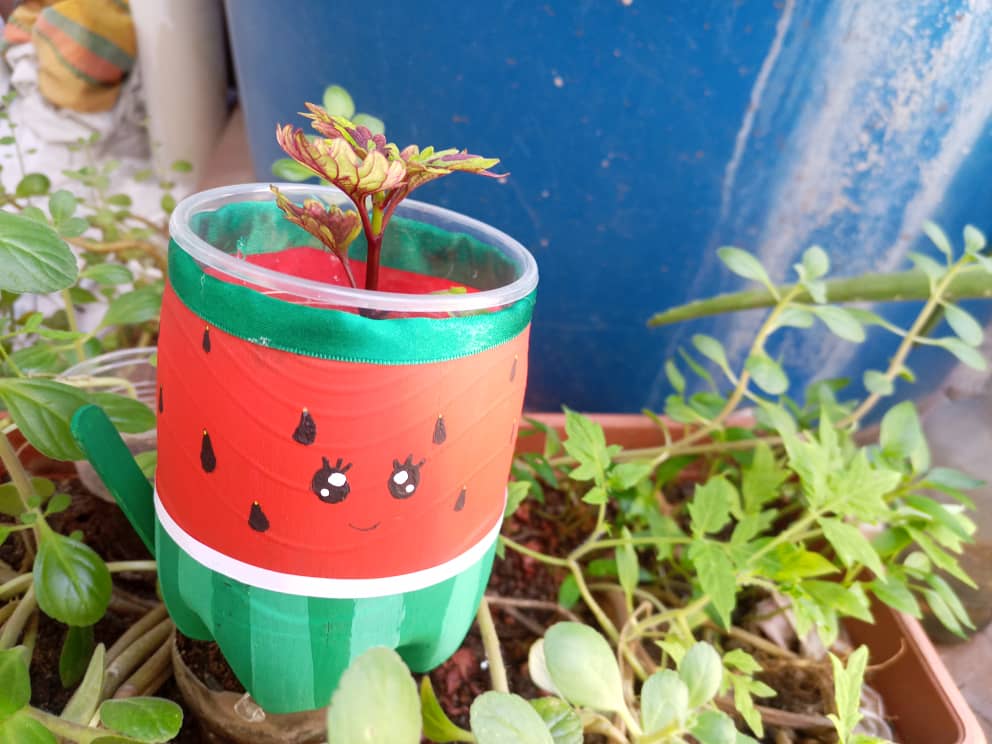
PASO 8. Ya listo mi matero inspirado en sandía a colocar dentro mi planta adornar mi jardín con este lindo matero de sandía.
STEP 8. My watermelon-inspired pot is ready to place inside my plant to decorate my garden with this cute watermelon pot.

Todas las fotografías son propias y tomadas con mi Redmi Note_9
¡Espero su visita en mi próximo post!
All photographs are my own and taken with my Redmi Note_9
I look forward to your visit in my next post!

The rewards earned on this comment will go directly to the person sharing the post on Twitter as long as they are registered with @poshtoken. Sign up at https://hiveposh.com.
Congratulations, your post has been upvoted by @dsc-r2cornell, which is the curating account for @R2cornell's Discord Community.
ma che carino!!!!!!😁
Que bello. Yo me fuí al monte a buscar frascos, botellas y todo tipo de envases para hacer maternos también, llevo 2.me inspiraste, los voy a publicar!