Hola amigos! espero estén muy bien!
Hoy quiero compartir con ustedes un proyecto que realicé en base a materiales reciclados. La verdad es que tengo muchos envases de plástico en la casa, de suavizante, de refrigerante, de leche y otros más, así que quise ayudar un poco en la conservación del medio ambiente haciendo algunas actividades manuales como esta.
Estuve buscando varias ideas en internet, y esta me pareció fácil, además contaba con los materiales que necesitaba en casa. Sinceramente, me sorprendí con la cantidad de basura no biodegástico en casa y me gustaria darle una utilización mejor a esos envases, además de económizar un poco y entretenerme un rato hacendo esta actividad, creo que hacer estas artes manueles es desestresante y también puede ser muy divertida para los niños. :D
Para realizar este pequeño neceser utilicé:
- Envase de suavizante viejo
- Cartón
- Tijera
- Silicón caliente
- Una tela vieja
- Cuchillo
- Teipe o cinta adhesiva.
Procedimiento:
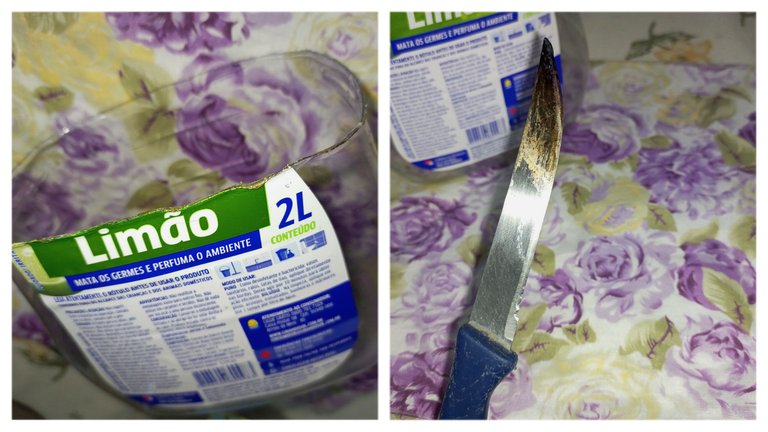
Lo primero que hice fue cortar el pote de suavizante por la mitad con la ayuda de un cuchillo, para hacer el corte más fácil y rápido, calenté la punta del cuchillo para así quemar el plástico. Utiliccé un cuchillo mas viejito pues, una vez que quemamos con el, este también se quema como pueden ver en la imagen. 😅
Hello friends! I hope you are doing well!
Today I want to share with you a project I did with recycled materials. The truth is that I have many plastic containers in the house, softener, refrigerant, milk and others, so I wanted to help a little in the conservation of the environment by doing some manual activities like this.
I was looking for several ideas on the internet, and this one seemed easy, plus I had the materials I needed at home. Honestly, I was surprised with the amount of non-biodegastic garbage at home and I would like to give a better use to those containers, in addition to economize a little and entertain me for a while doing this activity, I think that making these arts and crafts is de-stressing and can also be fun for children. :D
To make this little toiletry bag I used:
- Old fabric softener container,
- Cardboard
- Scissors
- Hot glue
- An old cloth
- Knife
- Tape or adhesive tape.
Procedure:
The first thing I did was to cut the softener pot in half with the help of a knife, to make the cut easier and faster, I heated the tip of the knife to burn the plastic. I used an older knife because, once we burned with it, it also burns as you can see in the image 😅
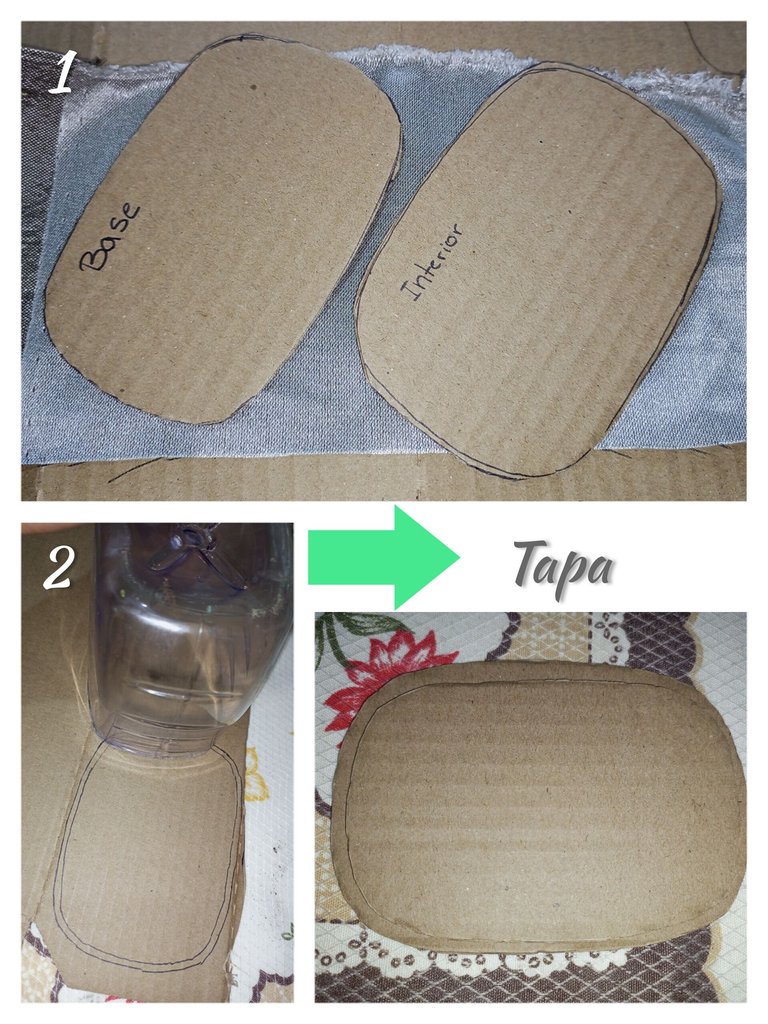
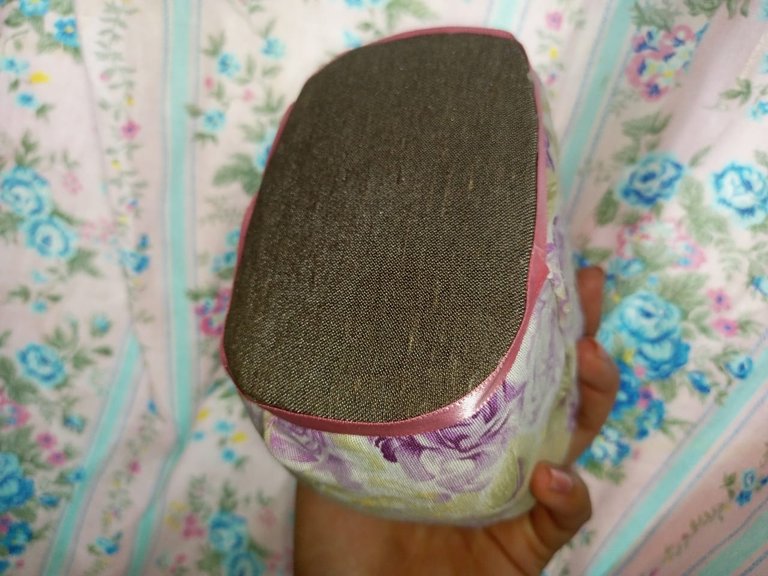
Luego corté los cartones utilizando como referencia la medida de la base, y también la medida de la parte de arriba, posicionando cada lado del pote sobre el carton para marcar la forma.
Para hacer la tapa, agrande unos dos milimetro la figura que marque, y la segunta figura la hice un poco más pequeña para que quedara justo al entrar en el pote. Luego forre todo con tela.
Then I cut the cardboard using as a reference the measurement of the base, and also the measurement of the top, positioning each side of the pot on the cardboard to mark the shape.
To make the lid, I enlarged about two millimeters the figure I marked, and the second figure I made a little smaller so that it would fit just inside the pot. Then I lined the whole thing with fabric.

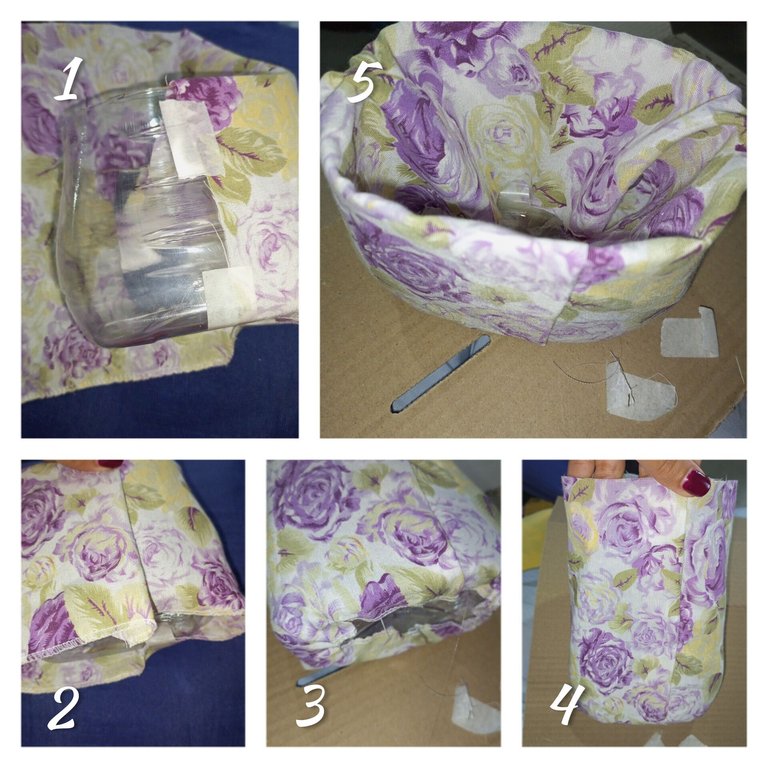
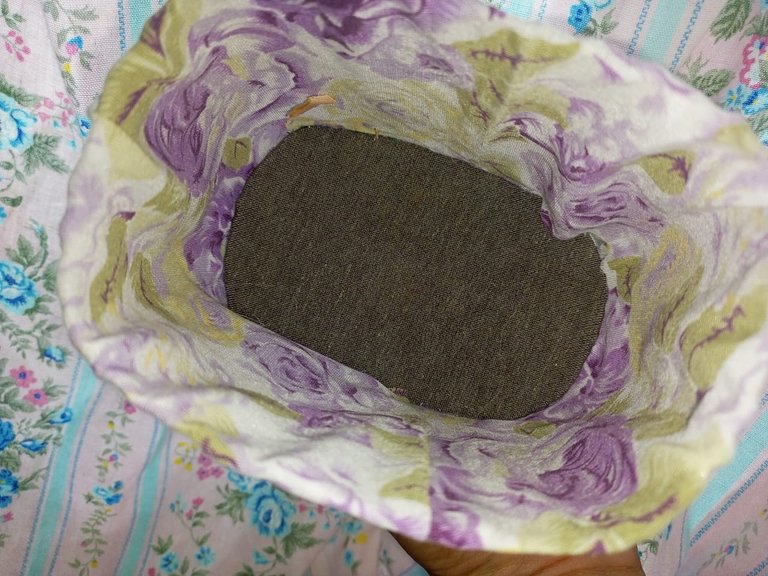
El pedacito de cartón que va adentro también lo forre con tela, lo indroduje luego que cubrí con tela todo el contorno del pote.
Para forrar el pote, primero asegure la tela con la ayuda de la cinta adesiva, la tela media el doble alto, para foder forrar tano la parte de afuera como la de adentro. luego procedí a pegar todo con silicón caliente.
The little piece of cardboard that goes inside is also lined with fabric, which I produced after I covered the entire contour of the pot with fabric.
To decorate the pot, I first secured the fabric with the help of the adhesive tape, the fabric half twice as high, to be able to line both the outside and the inside. then I proceeded to glue everything with hot silicone.
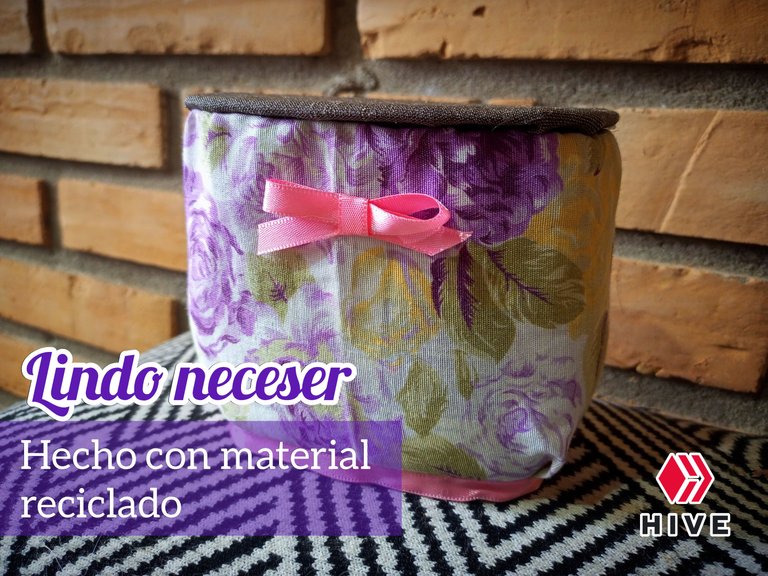
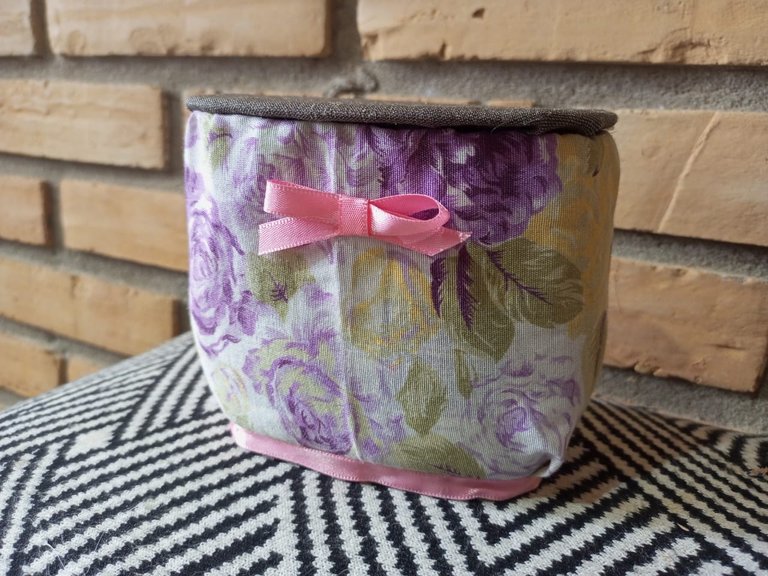
Y ya con el el envase forrado y la tapa también solo queda hacer unos detallito, yo coloque cinta de tela rosada en el borde de lase y un lacito en el frente para decorar, y ya esta listo mi neceser para ser usado, ¿qué les parecio?
A mi me pareció muy facil de realizar esta manualidad, así que pueden quedar libres de hacerla también con sus niños en casa, me parece que insentivar a los niños a recuclar o hacer cosas consus manos ayuda a su desarrollo creativo e intelectual, asi que ¡manos a la obra!
Espero estar por aqui de nuevo con otro proyecto de reciclaje, quizás con un gabetero o otre canasta, o un envase para guardar bolsas, estén pendientes! :) Si tienen alguna otra idea que me pueda ser útil para reutilizar potes de plástico y cartón estré agradecida. :D
And now with the container lined and the lid also only remains to make a few details, I placed pink fabric ribbon on the edge of the container and a bow on the front to decorate. and now my vanity case is ready to be used, what did you think?
I found it very easy to make this craft, so you can be free to do it also with your children at home, it seems to me that encouraging children to collect or make things with their hands helps their creative and intellectual development, so let's get to work!
I hope to be here again with another recycling project, maybe with a cabinet or another basket, or a container to make bags, stay tuned! :) If you have any other ideas that could be useful to reuse plastic and cardboard pots I'd be grateful. :D

¡Hasta la próxima! Gracias por visitar mi blog. Todas las imágenes son de mi propiedad. | Until next time! Thank you for visiting my blog. All images are my property.
It's lovely to see that creative things like these are still being done, especially when it's for practical items, which are useful around the house:)
Happy Weekend!
Muchas gracias, saludos!
Preciosa idea!
Y es demasiado útil. Bue trabajo 😊😊😊
!PIMP
You must be killin' it out here!
@ismaelrd04 just slapped you with 1.000 PIMP, @alina97.
You earned 1.000 PIMP for the strong hand.
They're getting a workout and slapped 1/1 possible people today.
Read about some PIMP Shit or Look for the PIMP District
Se ve muy bonito, no se nota que lo hiciste con reciclaje
La idea está muy creativa😸💡