😊¡Hello my hive diy friends!.😊
¡Feliz y bendecida tarde tengan todos! es un placer para mi volver a estar con todos ustedes comparteindo un nuevo post. Agradecida con Dios por permitirme volver a estar con ustedes a través de esta hermosa y creativa comunidad.
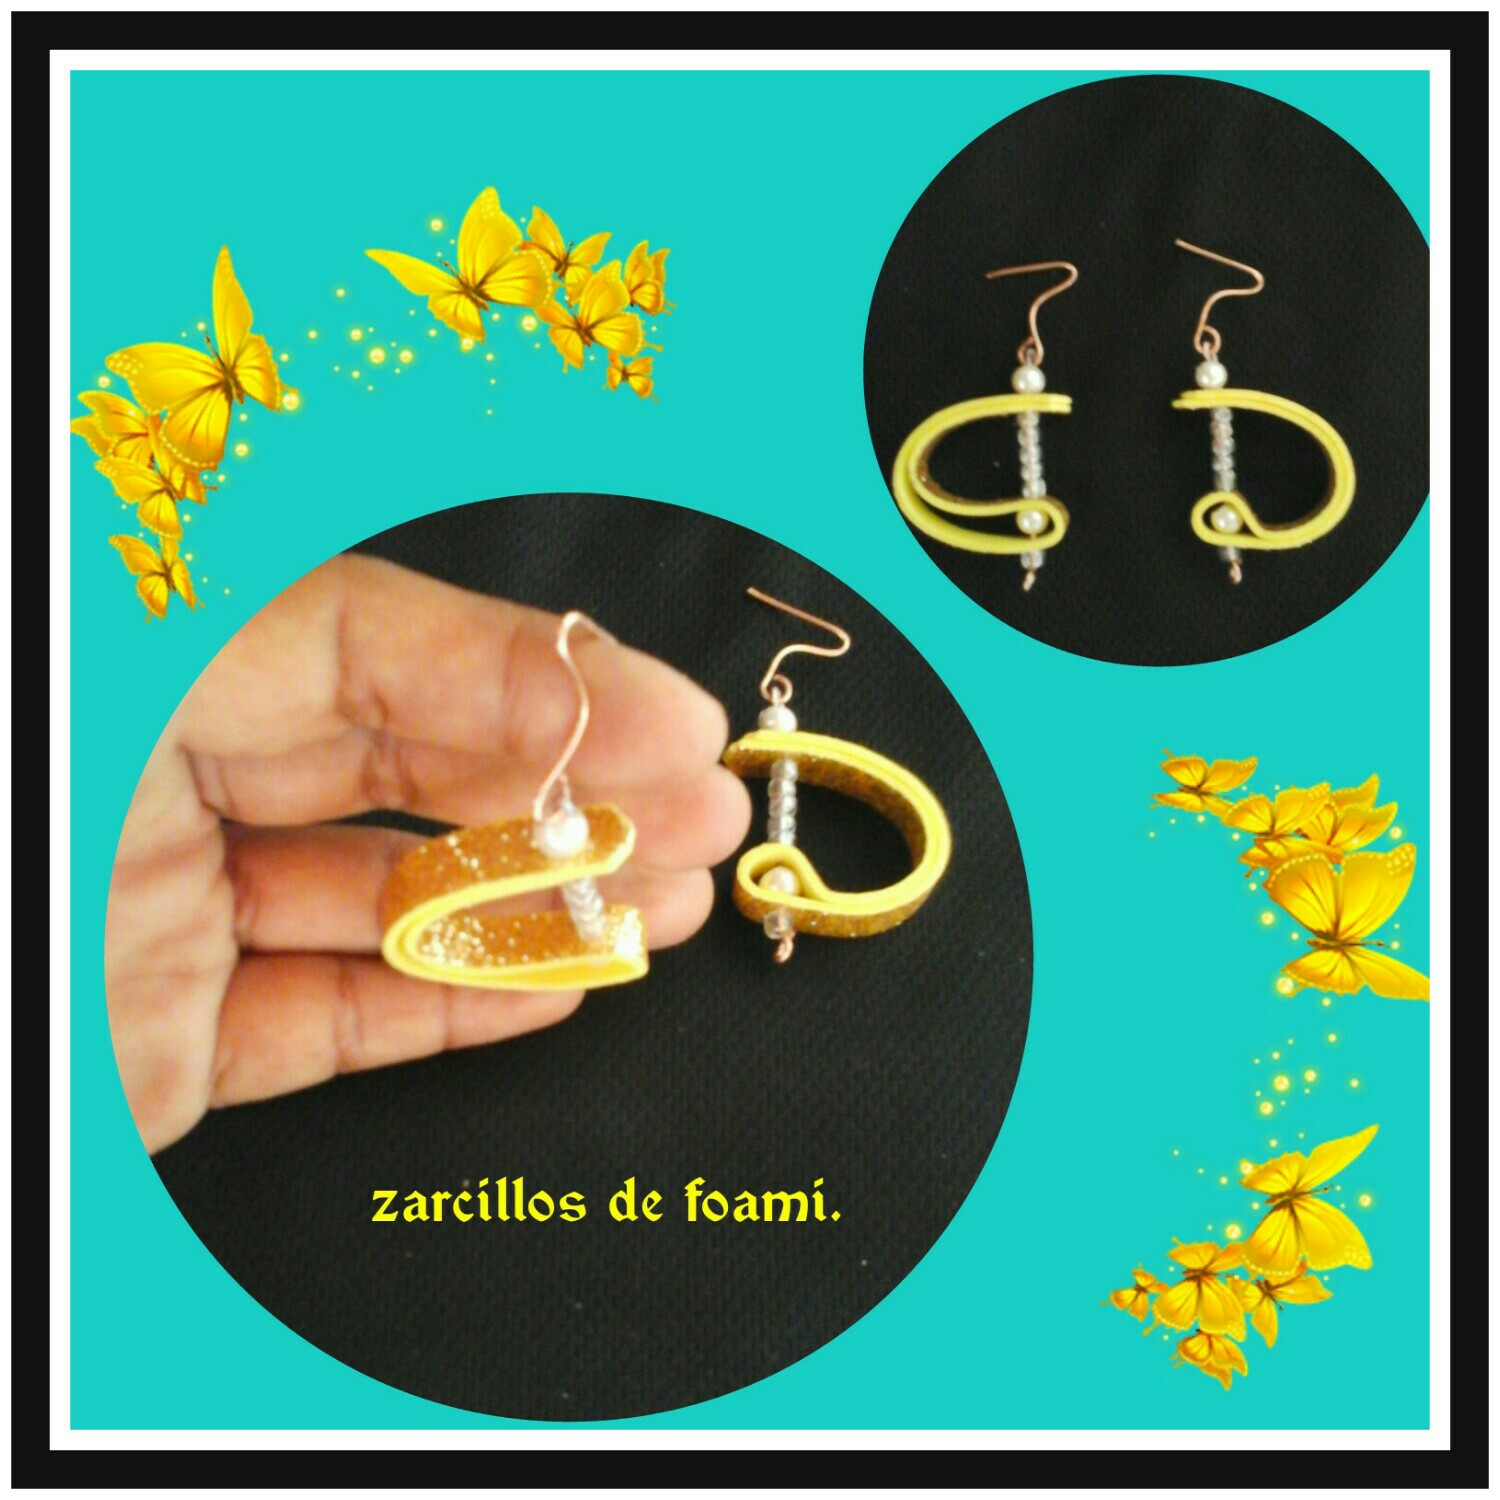
Hoy les traigo un genial propuesta para todos, les mostraré una nueva manera de hacer bisutería con foami, se trata de unos lindos zarcillos, decorados con perlas. Para elaborar estos lindos zarcillos utilicé foami dorado, para que se vean elegantes y poder combinarlos con perlas.
Les puedo decir que son muy fáciles de hacer, así que si les gusta esta idea, pueden elaborar unos y lucirlos con cualquier atuendo.
Amigos sin más quiero invitarte a leer el procedimiento de estos hasta el final y apreciaran el resultado final. Asi que ¡acompañenme!
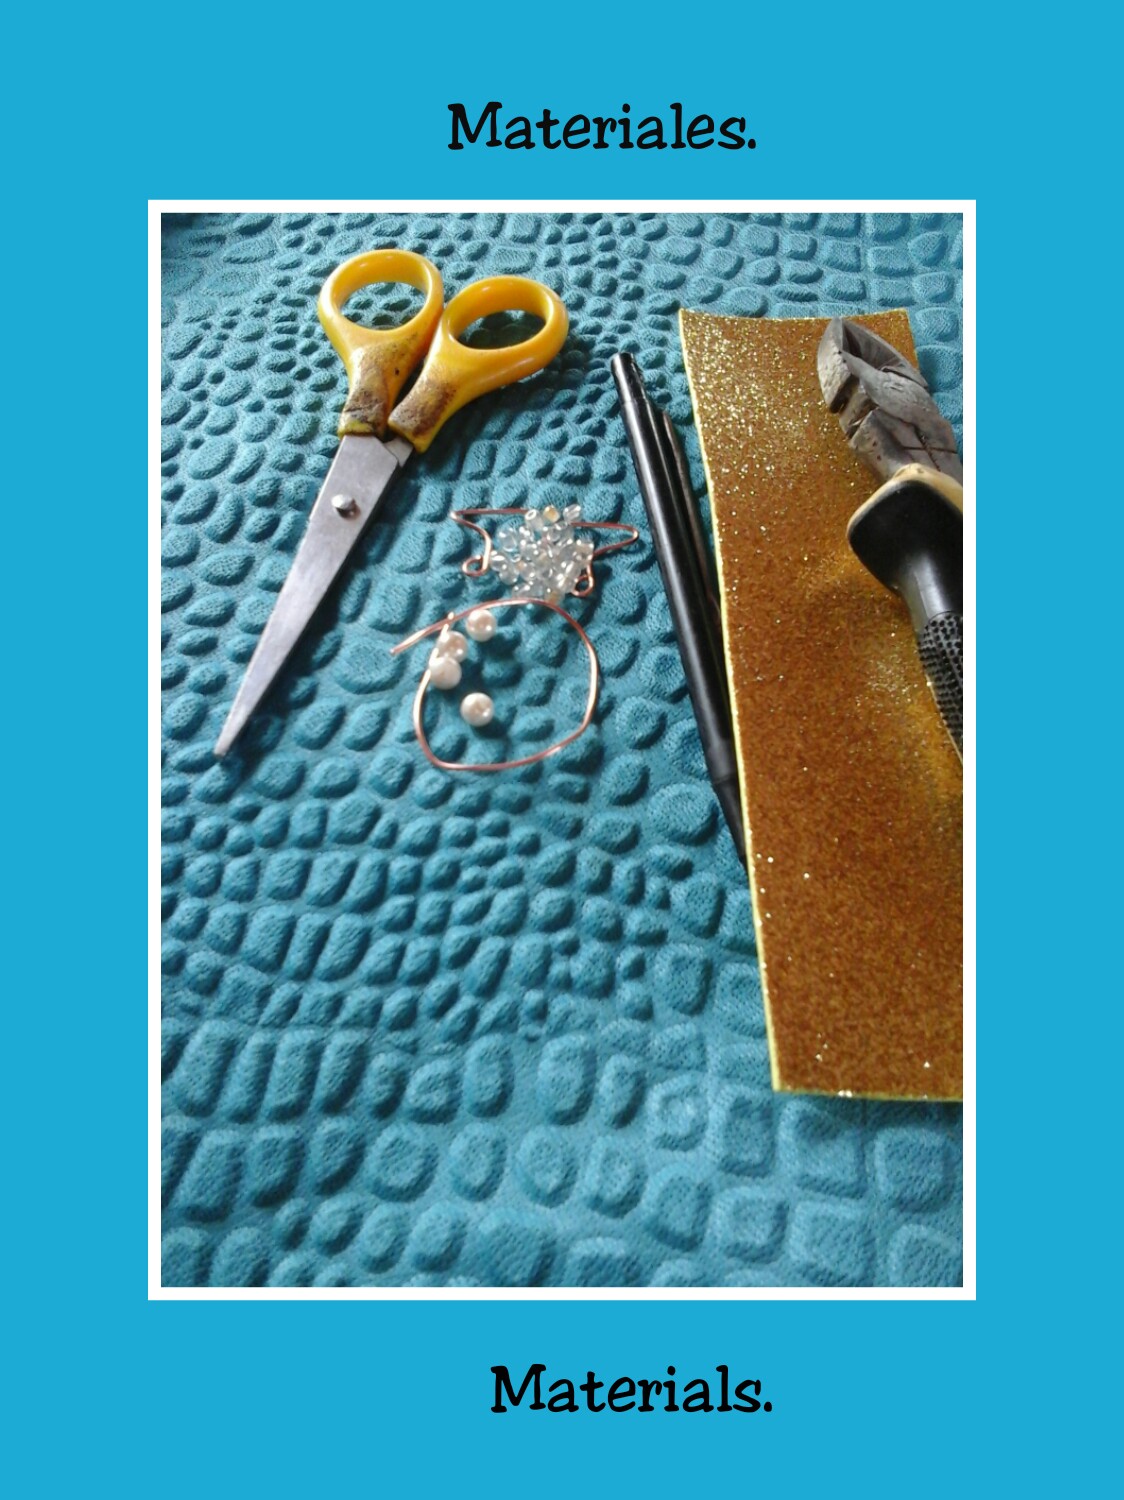
Happy and blessed afternoon everyone! It is a pleasure for me to be with all of you again sharing a new post. Grateful to God for allowing me to be with you again through this beautiful and creative community. Today I bring you a great proposal for everyone, I will show you a new way to make jewelry with foami, it is about cute earrings, decorated with pearls. To make these cute earrings I used gold foami, so they look elegant and can be combined with pearls. I can tell you that they are very easy to make, so if you like this idea, you can make some and wear them with any outfit. Friends without more I want to invite you to read the procedure of these until the end and you will appreciate the final result. So come with me!Materiales que utilizaremos.
- Foami dorado.
- Tijera.
- Una aguja de tejer.
- Tenaza.
- Algunas perlas de 5mm y mostacillas.
- Una regla y lápiz.
- Un trozo de alambre.
- Par de anzuelos.
Materials that we will use.
- Golden foam.
- Scissors.
- A knitting needle.
- Pincer.
- Some 5mm pearls and beads.
- A ruler and pencil.
- A piece of wire.
- Pair of hooks.
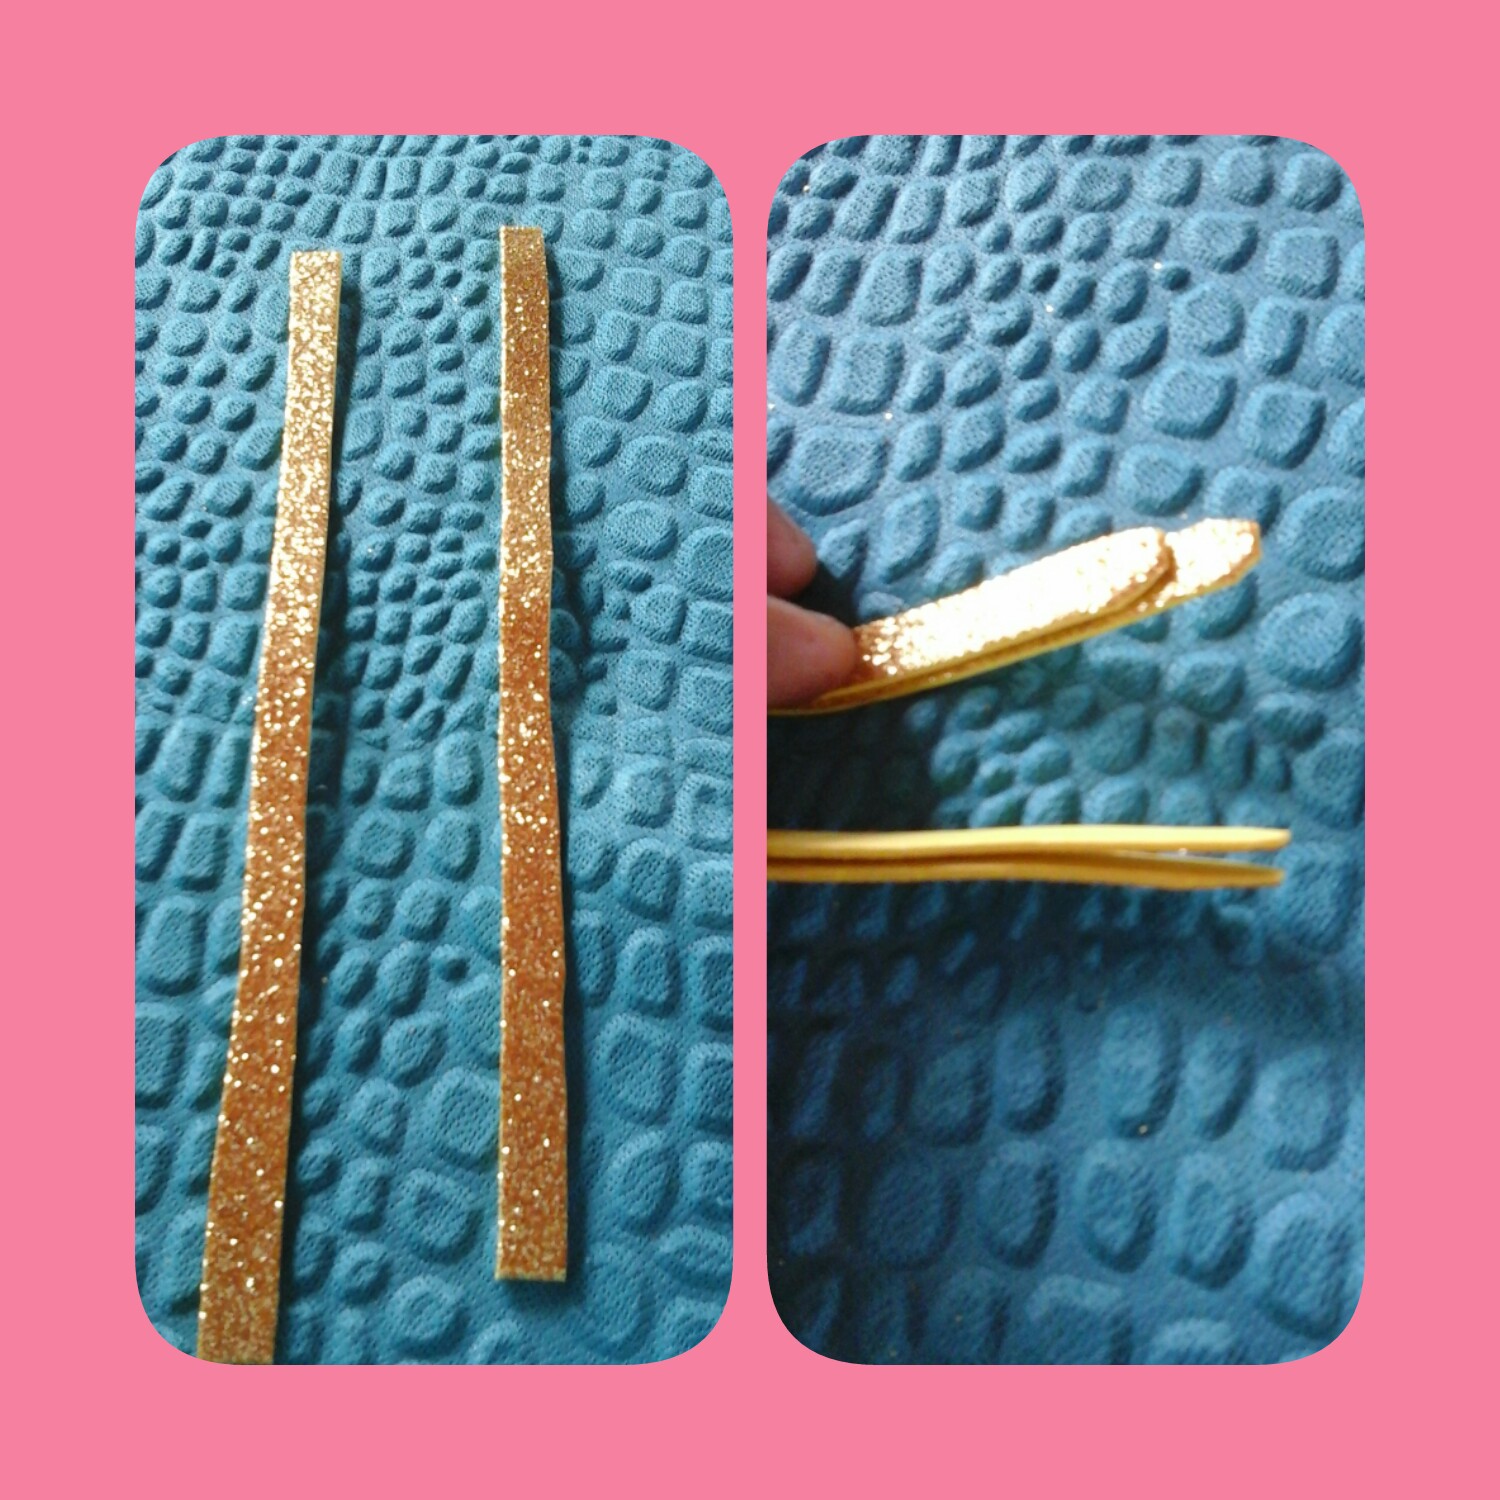
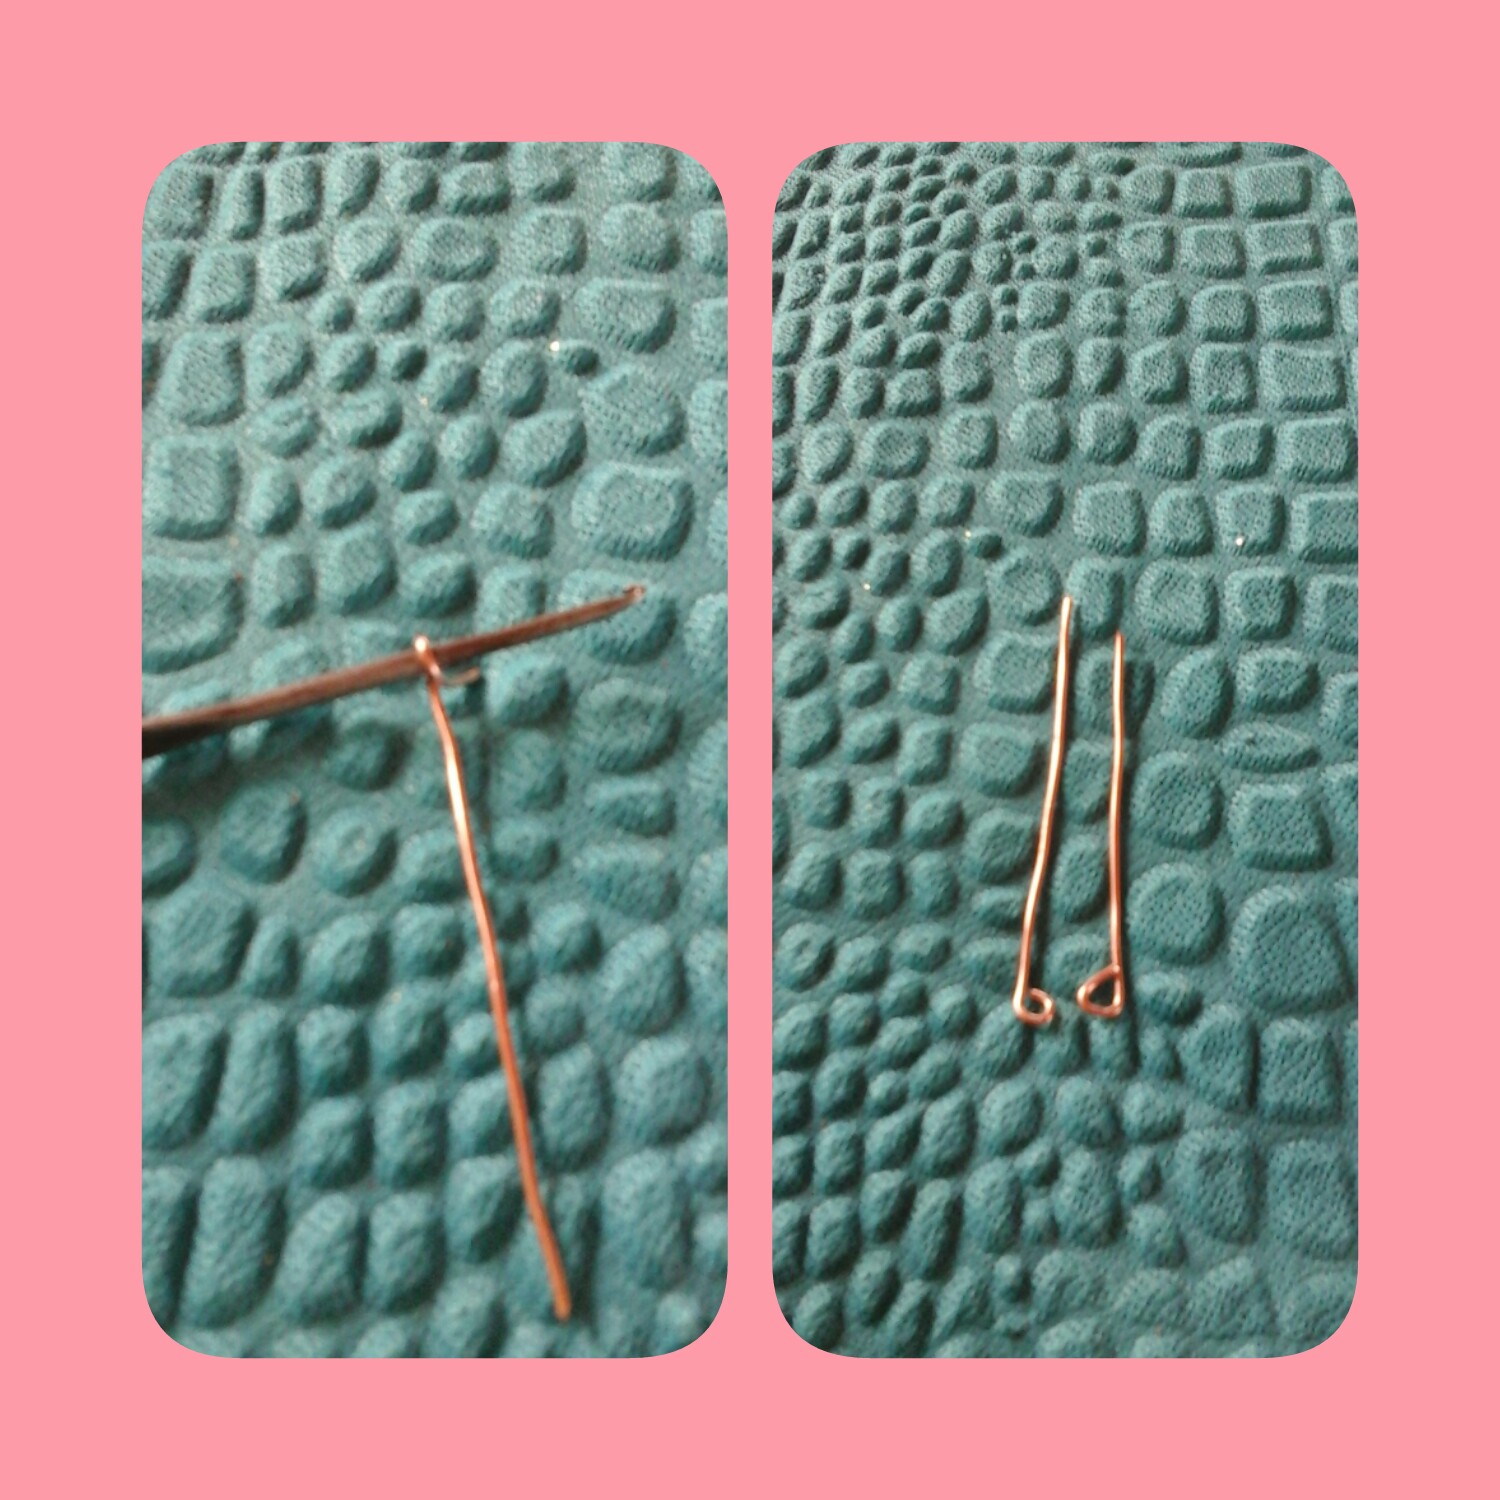
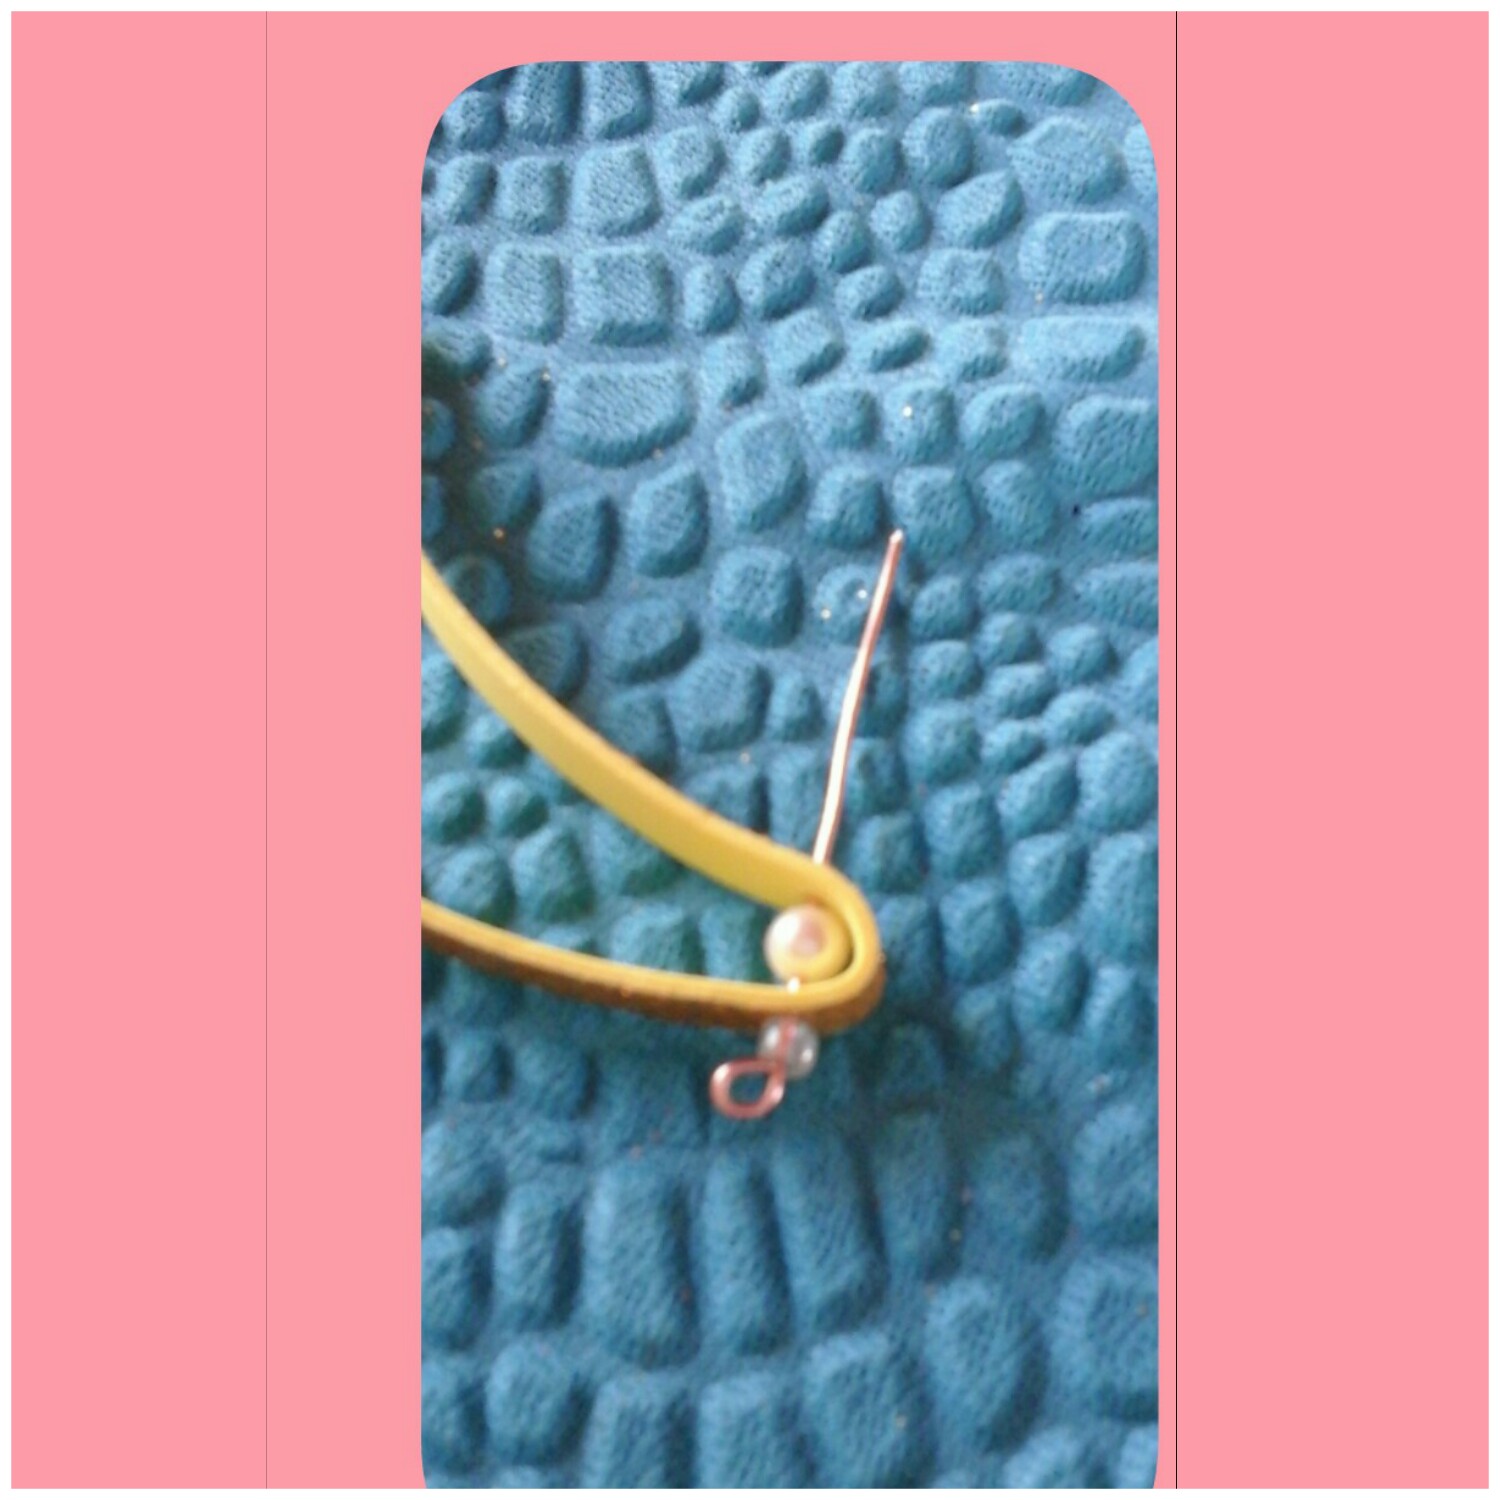
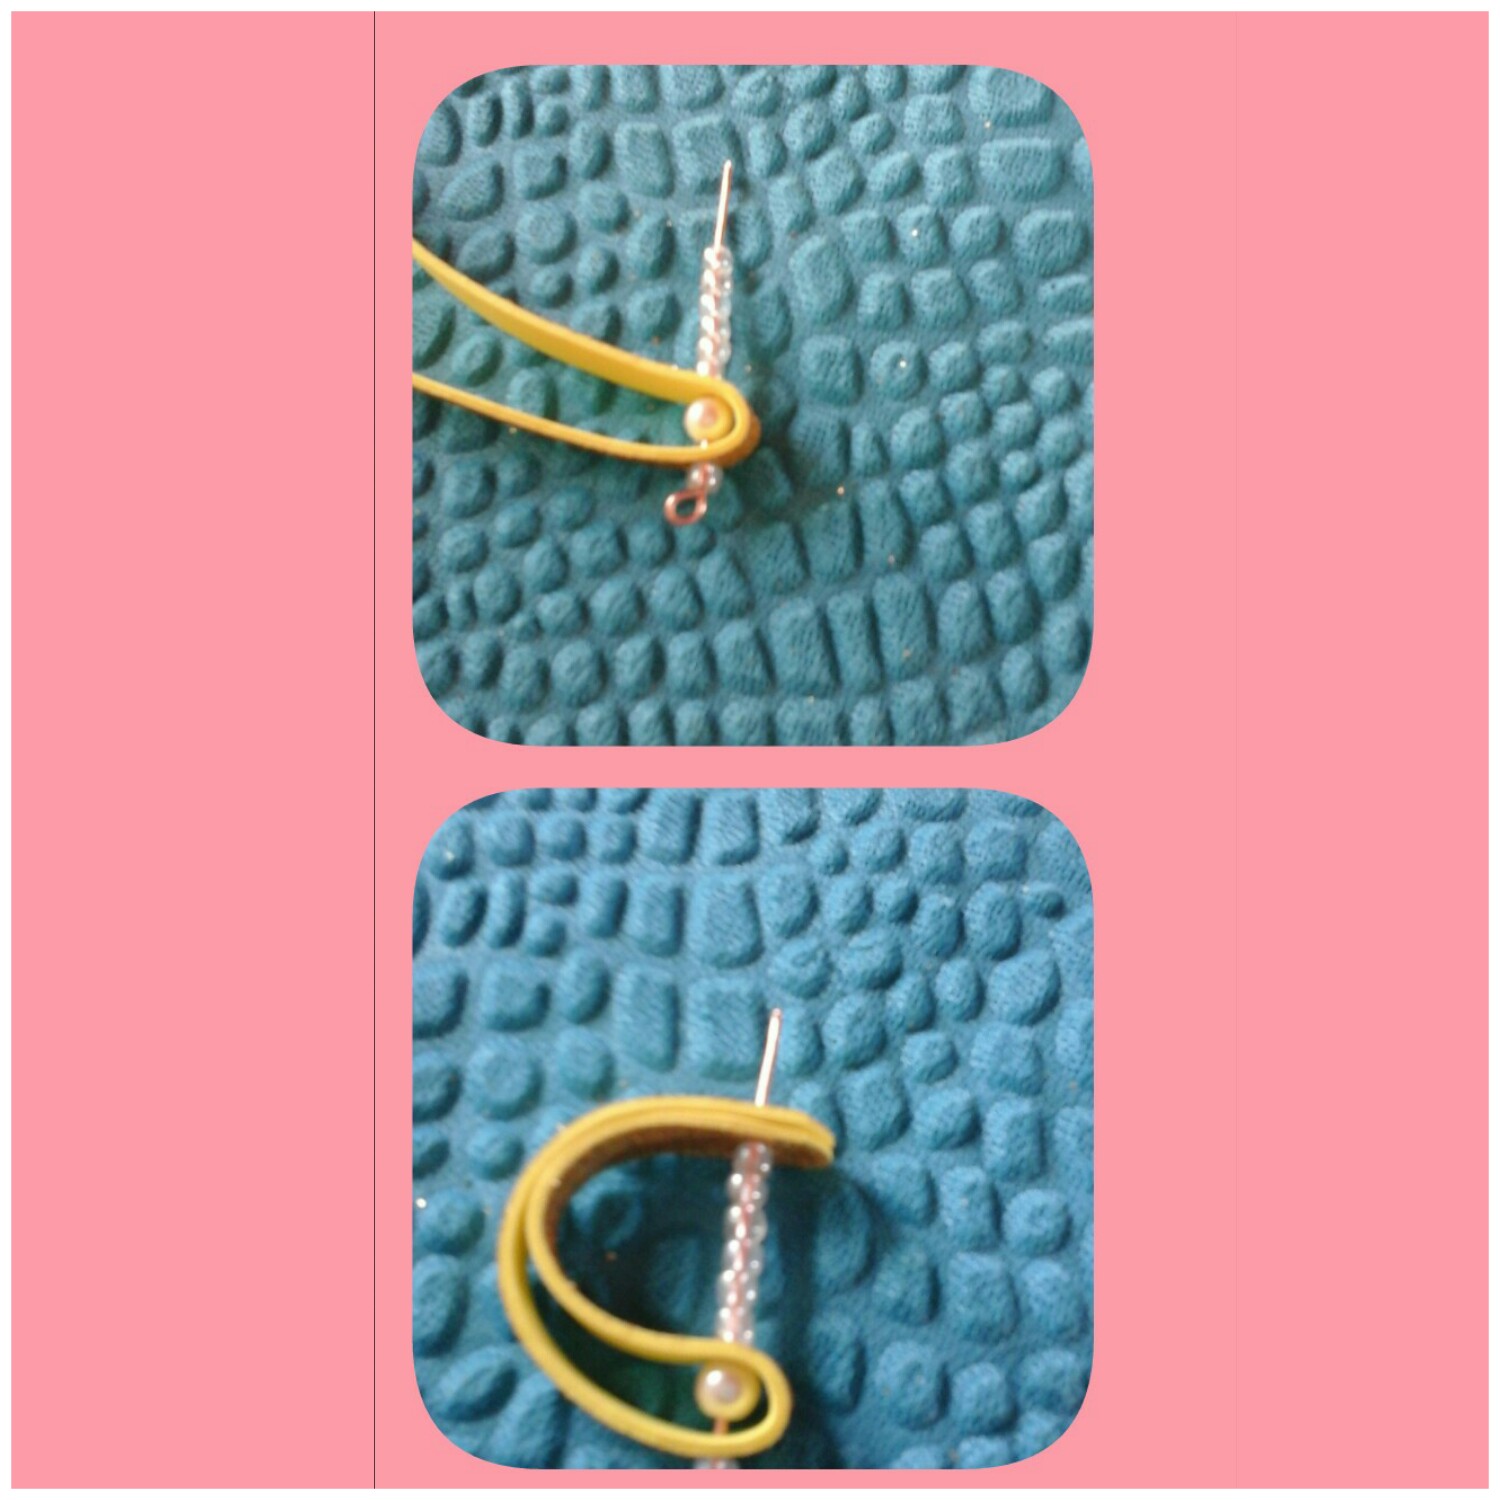
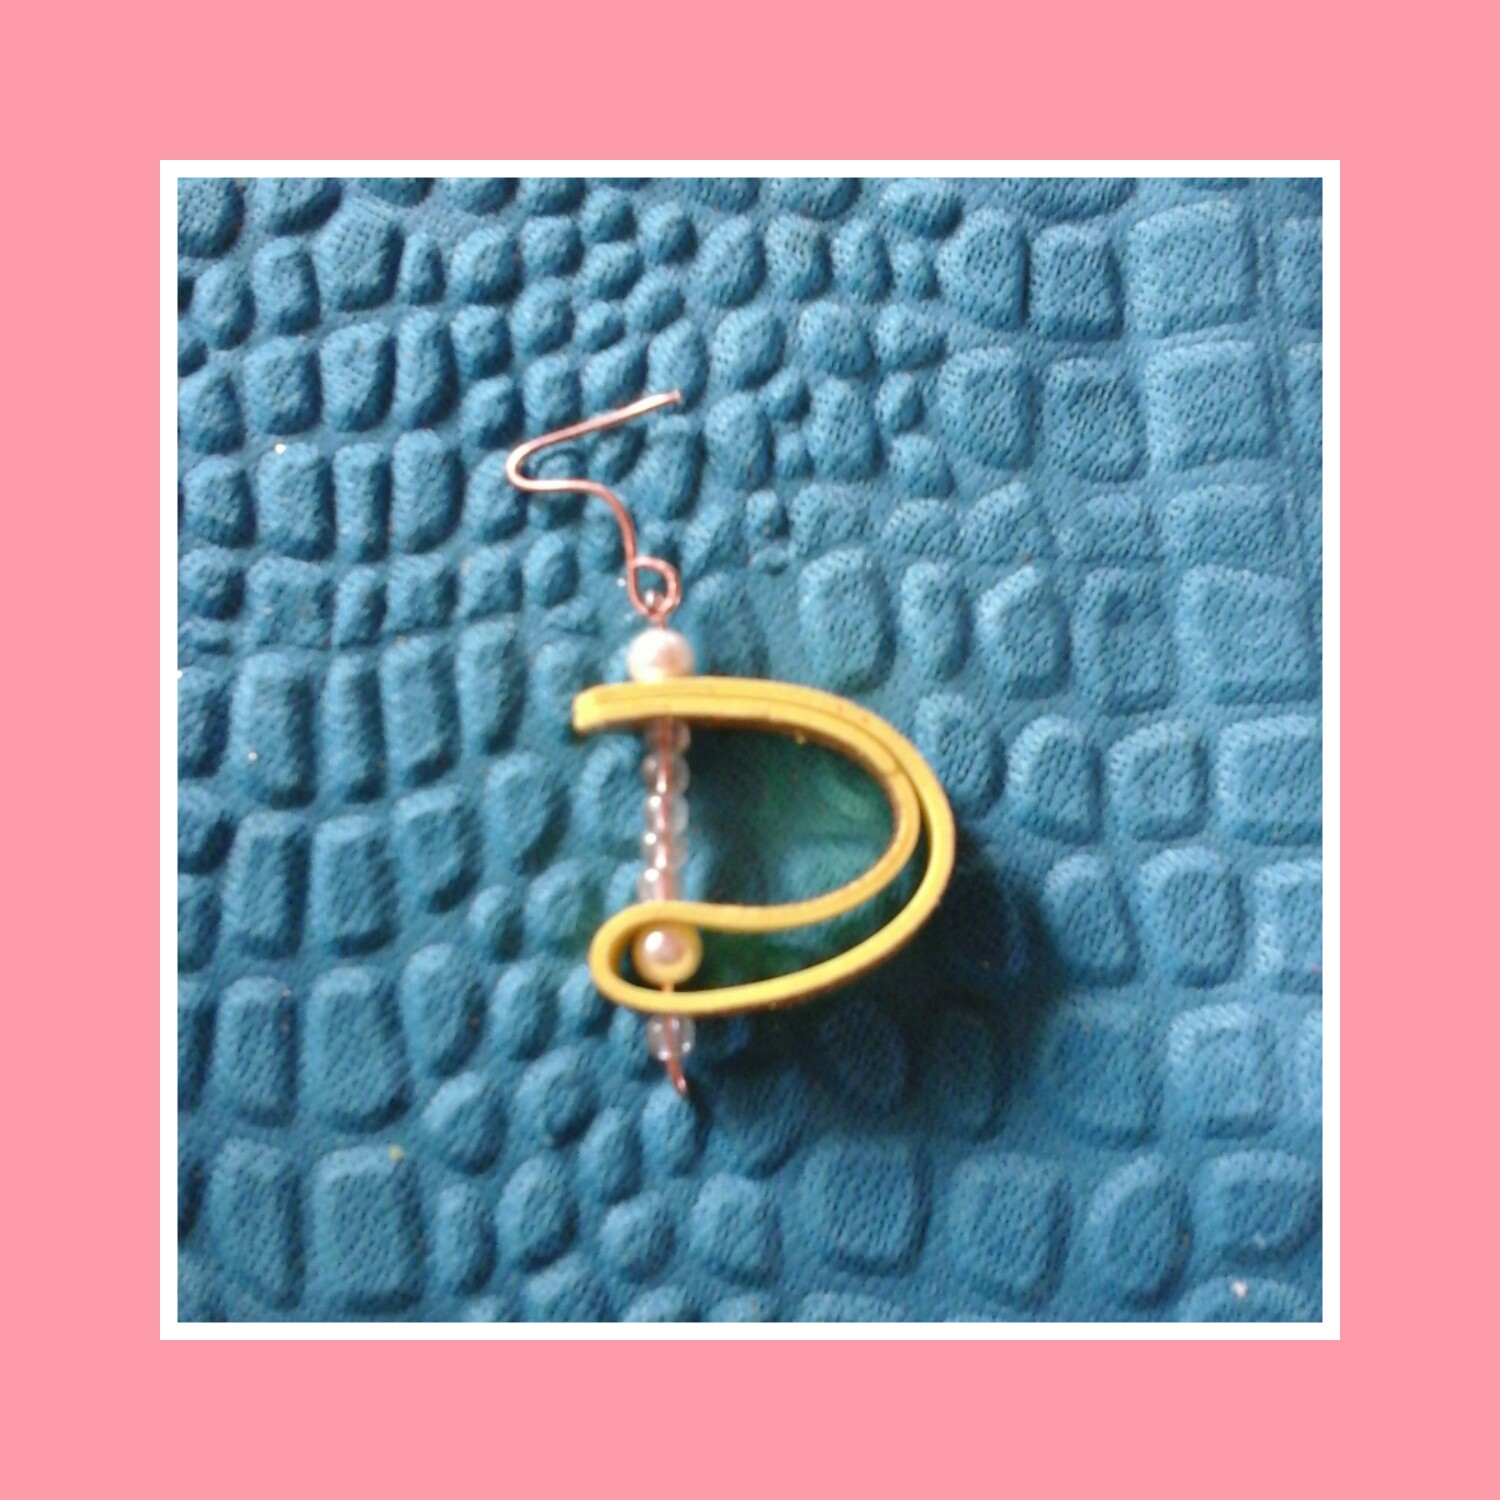
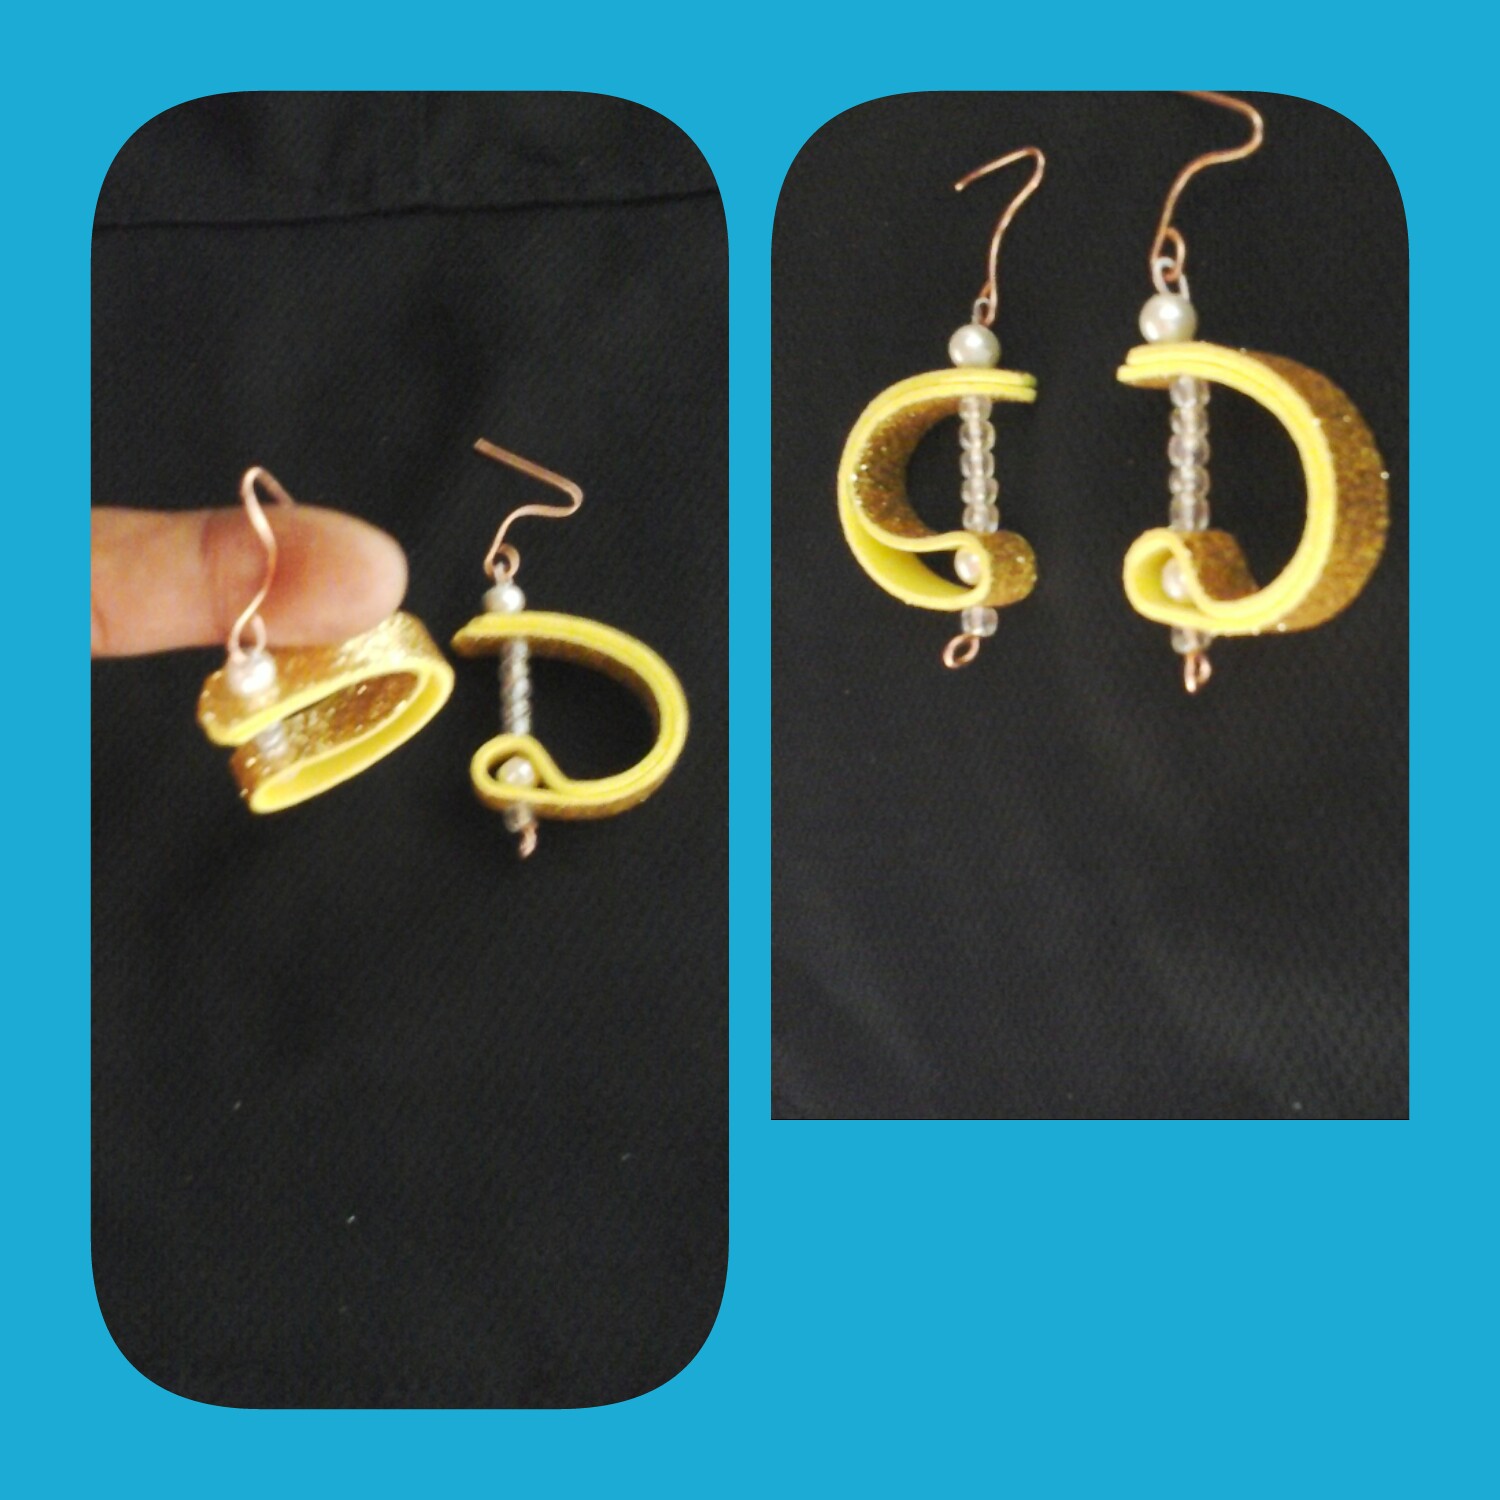
Paso 1. Muy bien, lo primero será tomar el foami y medir 6cm de largo con 1,5cm de ancho. Marcamos y recortamos un par de finas tiras, vean que son muy delgadas, no las quiero muy anchas. Cortamos las puntas y la dejamos un poco redondas.Step 1. Very well, the first thing will be to take the foami and measure 6cm long by 1.5cm wide. We mark and cut a couple of thin strips, see that they are very thin, I do not want them very wide. We cut the ends and leave it a little round.Paso 2. En este paso tomaremos el alambre y cortamos con ayuda de la tenaza, estos deben medir aproximadamente 3cm, colocamos uno de los extremos en la aguja de tejer y doblamos alrededor de la misma, también podemos utilizar un palillo de madera y nos ayudará a obtener ese pequeño aro que deseamos.Step 2. In this step we will take the wire and cut it with the help of the pliers, these should measure approximately 3cm, we place one of the ends on the knitting needle and bend around it, we can also use a wooden toothpick and it will help us to obtain that small ring that we want.Paso 3. Tomamos una mostacilla y insertamos por el alambre, ahora doblamos la tira de foami y atravesamos el mismo alambre solo por una parte de la tira de foami, colocamos una perla y terminamos insertando la otra parte para que la perla quede dentro y en el centro del foami y el alambre.Step 3. We take a bead and insert it through the wire, now we fold the foami strip and we cross the same wire only through a part of the foami strip, we place a pearl and we finish inserting the other part to that the pearl is inside and in the center of the foami and the wire.Paso 4. En este paso introducimos 5 mostacillas en el mismo alambre, una vez que hayamos terminado de introducir las mostacillas, insertamos los extremos del foami al alambre.Step 4. In this step we insert 5 beads in the same wire, once we have finished inserting the beads, we insert the ends of the foami to the wire.Paso 5. En este último paso, introducimos una perla y con ayuda de nuestra aguja de tejer, doblamos el alambre alrededor y cortamos sobrante con la tenaza. Abrimos un poco, colocamos el anzuelo y apretamos un poco para cerrar.Step 5. In this last step, we introduce a pearl and with the help of our knitting needle, we bend the wire around it and cut the excess with the pliers. We open a little, place the hook and tighten a little to close.💎💙Resultado💎💙 Amigos, este el resultado final, así es como deben quedar estos hermosos zarcillos de foami y perlas. Así que desde ya comencémos a utilizar el foami pero elaborando bisutería. Espero que les haya gustado el resultado y que puedan lucir unos así desde ya.💎💙Result💎💙 Friends, this is the final result, this is how these beautiful foam and pearl tendrils should look. So from now on we begin to use the foami but making jewelry. I hope you liked the result and that you can wear some like this from now on.😘💖¡Se les quiere, un fuerte abrazo!💖😘 😘💖¡Love you, a big hug!💖😘 Todo el contenido es de mi autoria.
Fotos capturadas por mi tablet Samsung galaxy, editadas por Collage_maker.
Traductor utilizado ESP/ING (google.com).All content is my own.
Photos captured by my Samsung galaxy tablet, edited by Collage_maker. >Translator used ESP/ING (google.com).

Congratulations @anaarevalo01! You have completed the following achievement on the Hive blockchain and have been rewarded with new badge(s):
Your next target is to reach 600 comments.
You can view your badges on your board and compare yourself to others in the Ranking
If you no longer want to receive notifications, reply to this comment with the word
STOPTo support your work, I also upvoted your post!
Check out the last post from @hivebuzz:
Support the HiveBuzz project. Vote for our proposal!
!discovery 25
This post was shared and voted inside the discord by the curators team of discovery-it
Join our community! hive-193212
Discovery-it is also a Witness, vote for us here
Delegate to us for passive income. Check our 80% fee-back Program