.jpg)
🇪🇸 ESPAÑOL
¡Hola a todos mis Hive amigos!
Hoy quiero contarles sobre mi primera participación en un concurso para Hive, decorando con la técnica del "Decoupage", auspiciado de la comunidad Hive Diy.
Me enteré de él hace unos días y como aún soy nueva en todo este universo hive, tenía muchas dudas sobre que podía hacer para participar.
Comencé por leer detalladamente lo que se pedía, seguí las instrucciones e investigué un poco más a profundidad sobre la técnica de decoupage, ya que aunque me encanta hacer manualidades y conozco varias cosas, jamás había realizado algo con esta técnica en específico anteriormente.
Mientras realizaba mi investigación sobre la técnica, veía que lo más común en Internet era aplicarla en cajas de madera con servilletas ilustrativas superlindas, pero que realmente no tenía a mi alcance. Me decía a mi misma "¿de dónde saco una caja de madera? ¿O una servilleta de esas?", ya que en la descripción del concurso se hacía mención al reciclaje y yo quería cumplir con eso, reciclar.
Luego recordé que también decía que la técnica podía ser aplicada en cualquier superficie y que se podían utilizar papel en general y telas estampadas. Eso me ayudó mucho a buscar entre mis cosas para ver donde podía aplicarla y con qué materiales ejecutarla. Puse mi mente a volar para pensar en cómo hacer mi participación de la forma más reciclada posible, que fuese algo bonito y que a muchos les pudiera gustar.

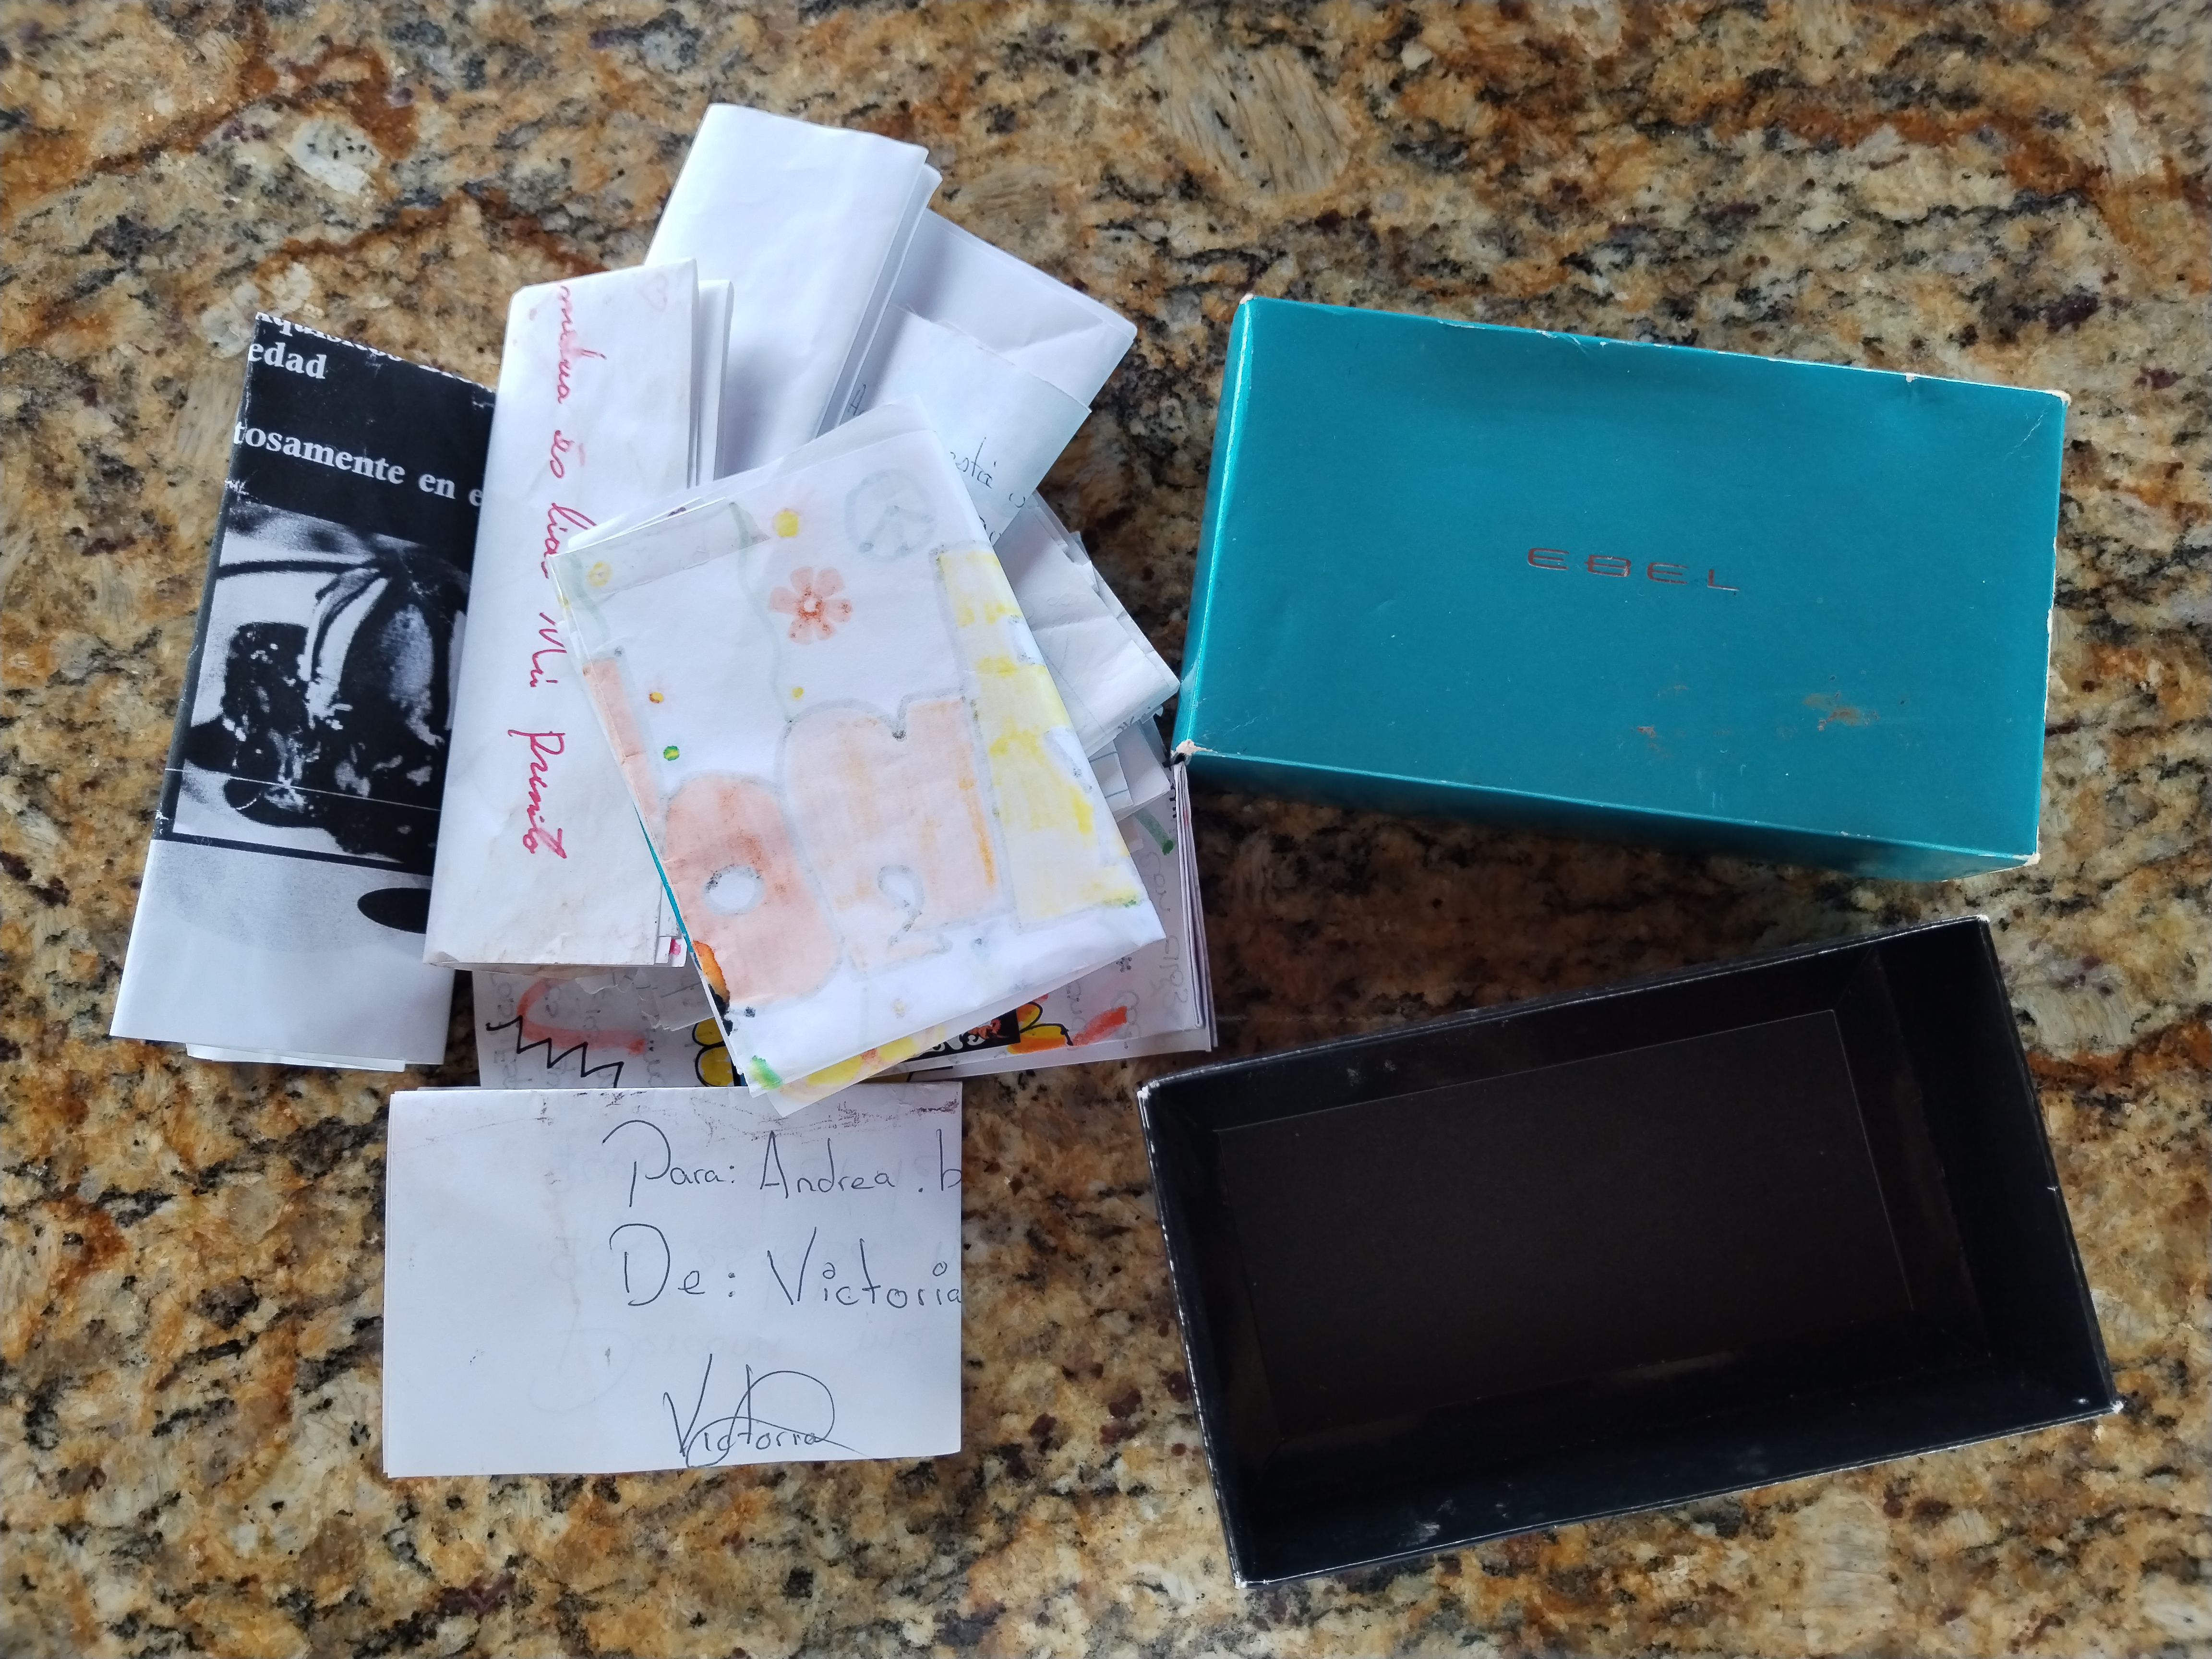
Fue así como buscando entre mis cosas conseguí dentro de una gaveta una cajita que lleva conmigo unos 15 o 14 años aproximadamente, la llamo "mi cajita de recuerdos".
En ella tengo guardas muchas cartas y mensajes escritos a mano que a lo largo de los años me han obsequiado o hecho llegar mis amigos de infancia y algún familiar, también tengo las entradas de algún evento, fiesta o concierto al que asistí en su momento.
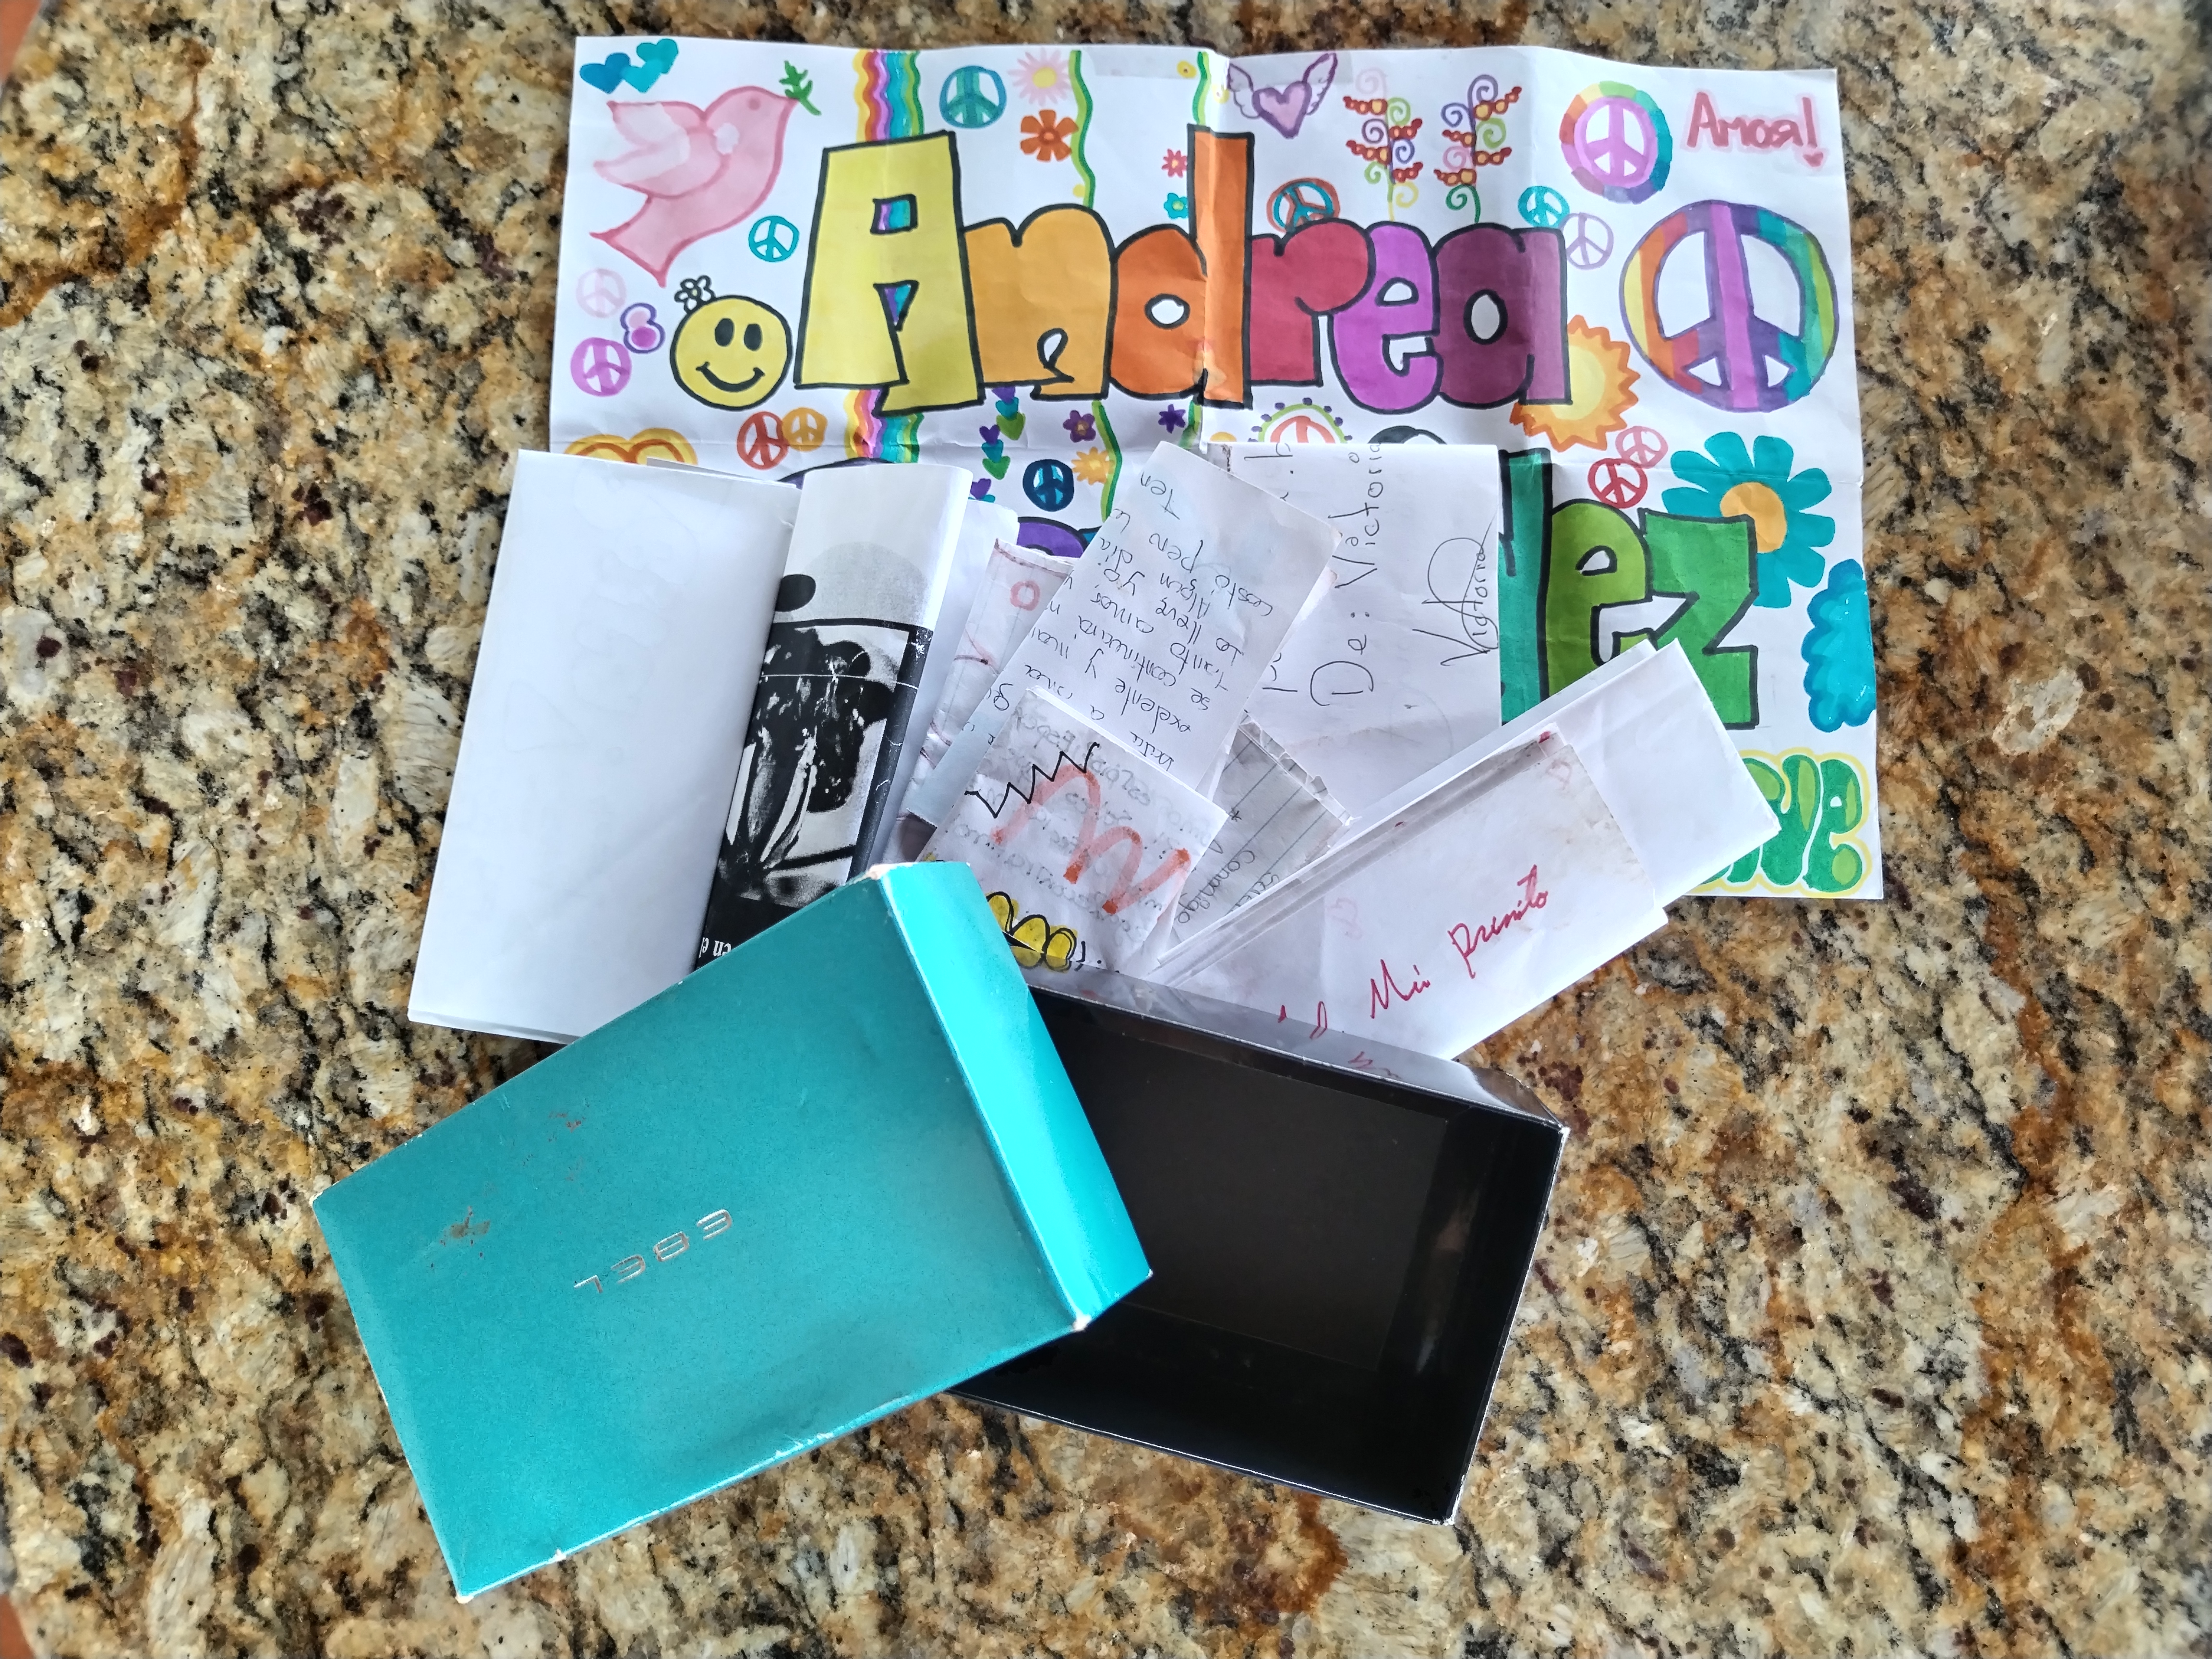
Esa pequeña caja es parte de mi juventud y cuando quiero volver un poco atrás solo debo abrirla y comenzar a leer para recordar que siempre he estado rodeada de amor y de momentos maravillosos vividos.
Esta caja siempre la había conservado original, nunca le había agregado alguna decoración especial, lo especial solo lo llevaba por dentro, sin embargo, este concurso me pareció la oportunidad adecuada para darle a mis recuerdos la decoración que merecen.
Entonces, ya teniendo la cajita, el siguiente paso fue buscar en mis bolsas de manualidades y la caja donde mi abuela guarda sus cosas de costura, algún retazo de tela o papel para decorar mis recuerdos.
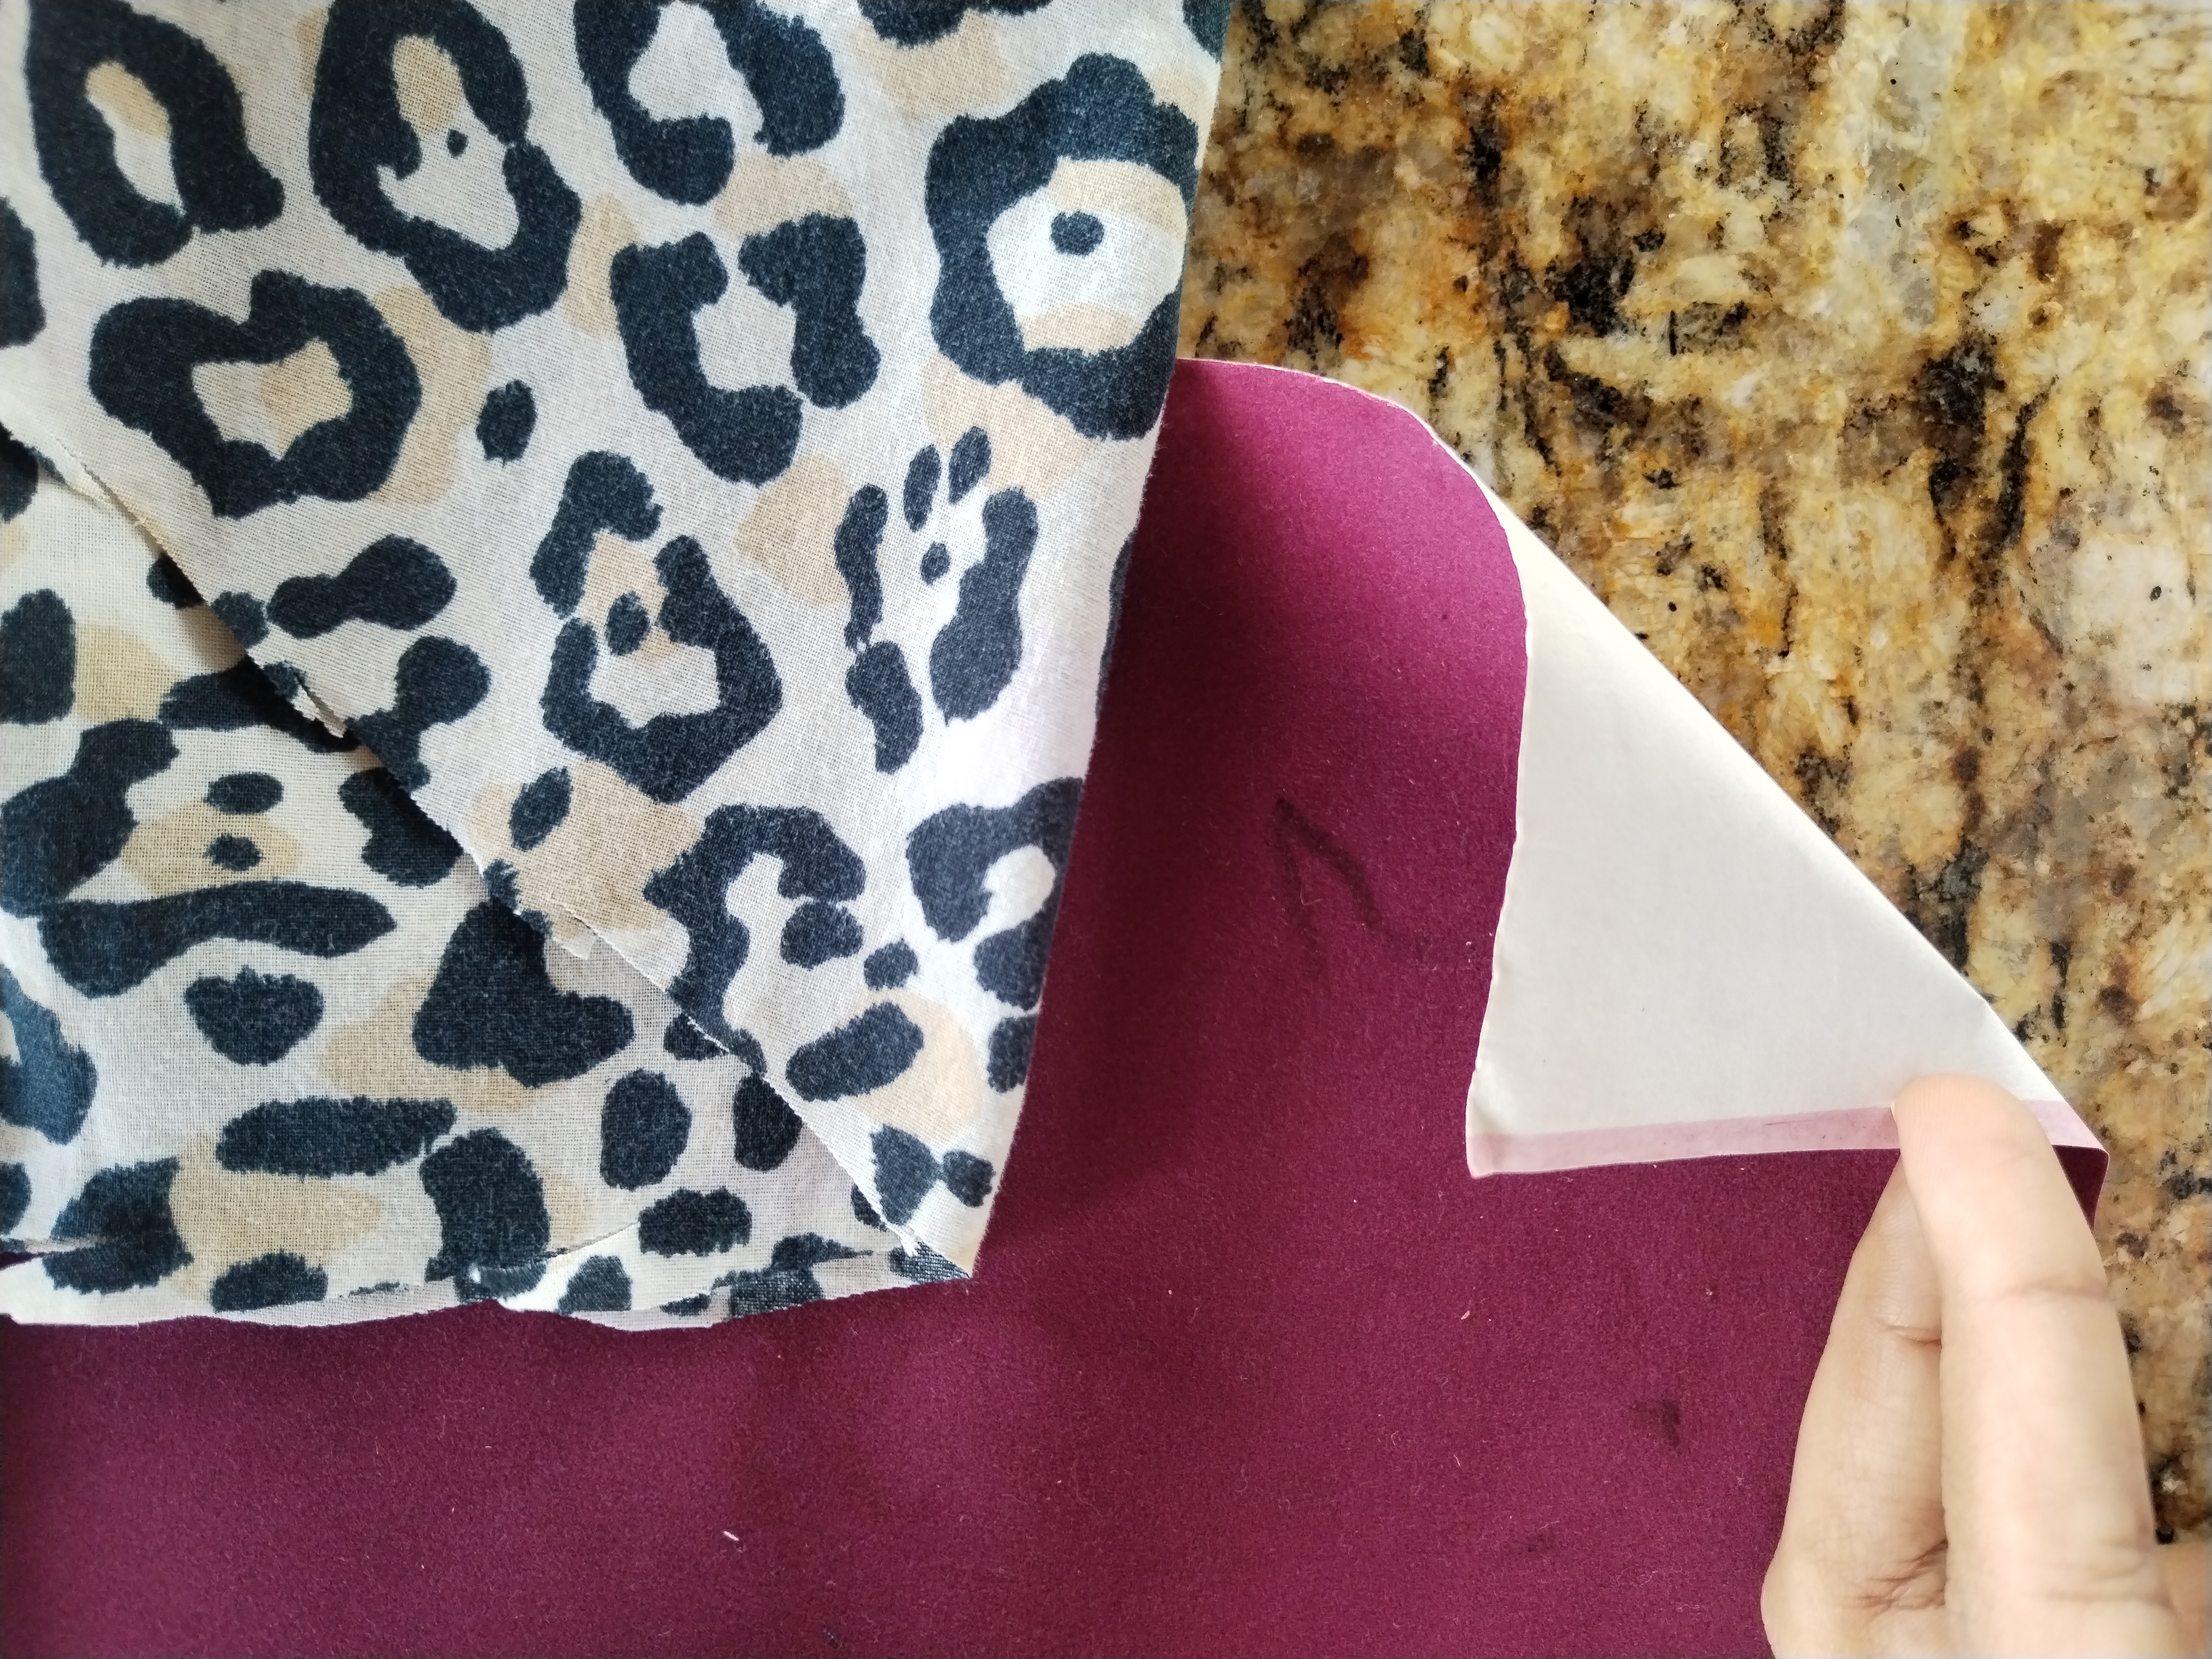
Les cuento que la búsqueda fue mejor de lo que esperaba, conseguí una tela estampada de animal print y un papel gamuzado color púrpura que hacían una combinación espectacular, me dije a mi misma "Así quiero que se vea mi cajita, esta es la combinación perfecta".
Para el concurso me pareció supergenial, pues podía demostrar como aplicar la técnica en esas dos texturas (tela y papel).
Los materiales que utilice para mi técnica fueron:

- La caja para decorar
- Tela de animal print
- Papel gamuzado
- Pega blanca
- Pincel
- Tijeras.
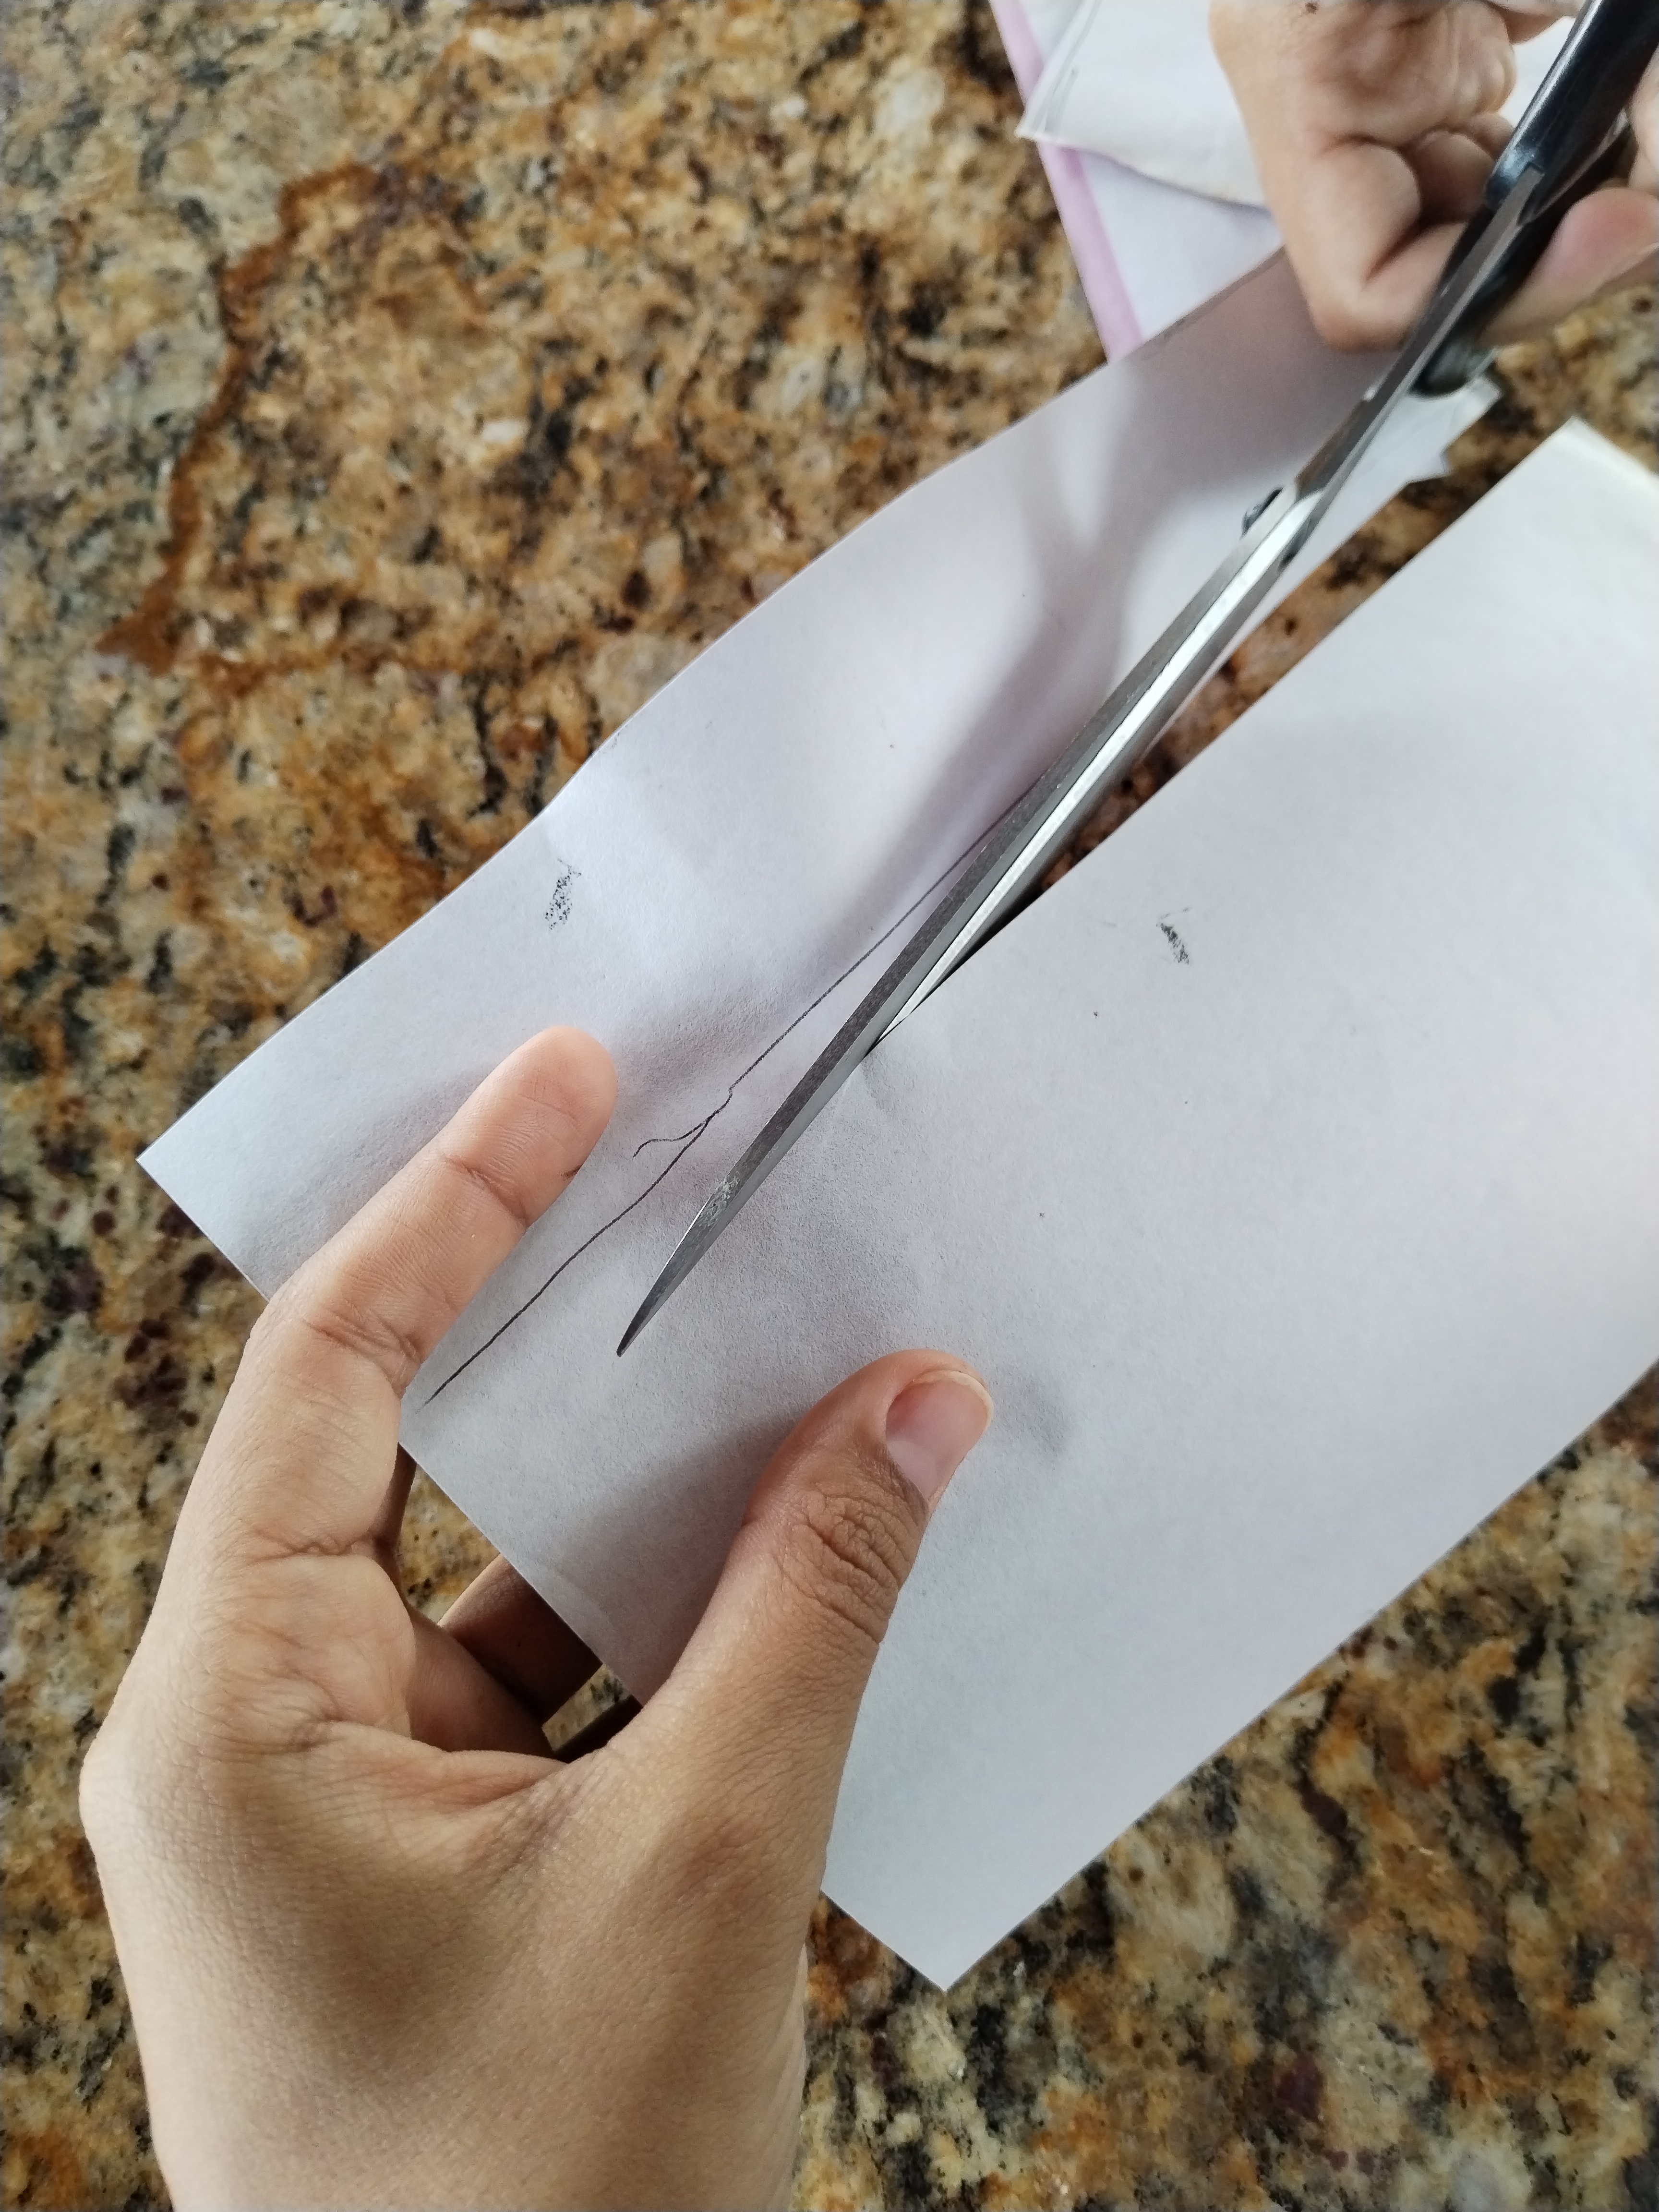
El primer paso fue recortar las tiras de papel que iban a cubrir los extremos de la base de mi cajita y recortar el pedacito de tela que utilicé para cubrir la tapa de la misma.
En segundo lugar, mezcle dos porciones de agua con una de pegamento para hacer el pegamento más diluido y de esta forma poder manejar mejor el pincel sobre el papel y la tela.
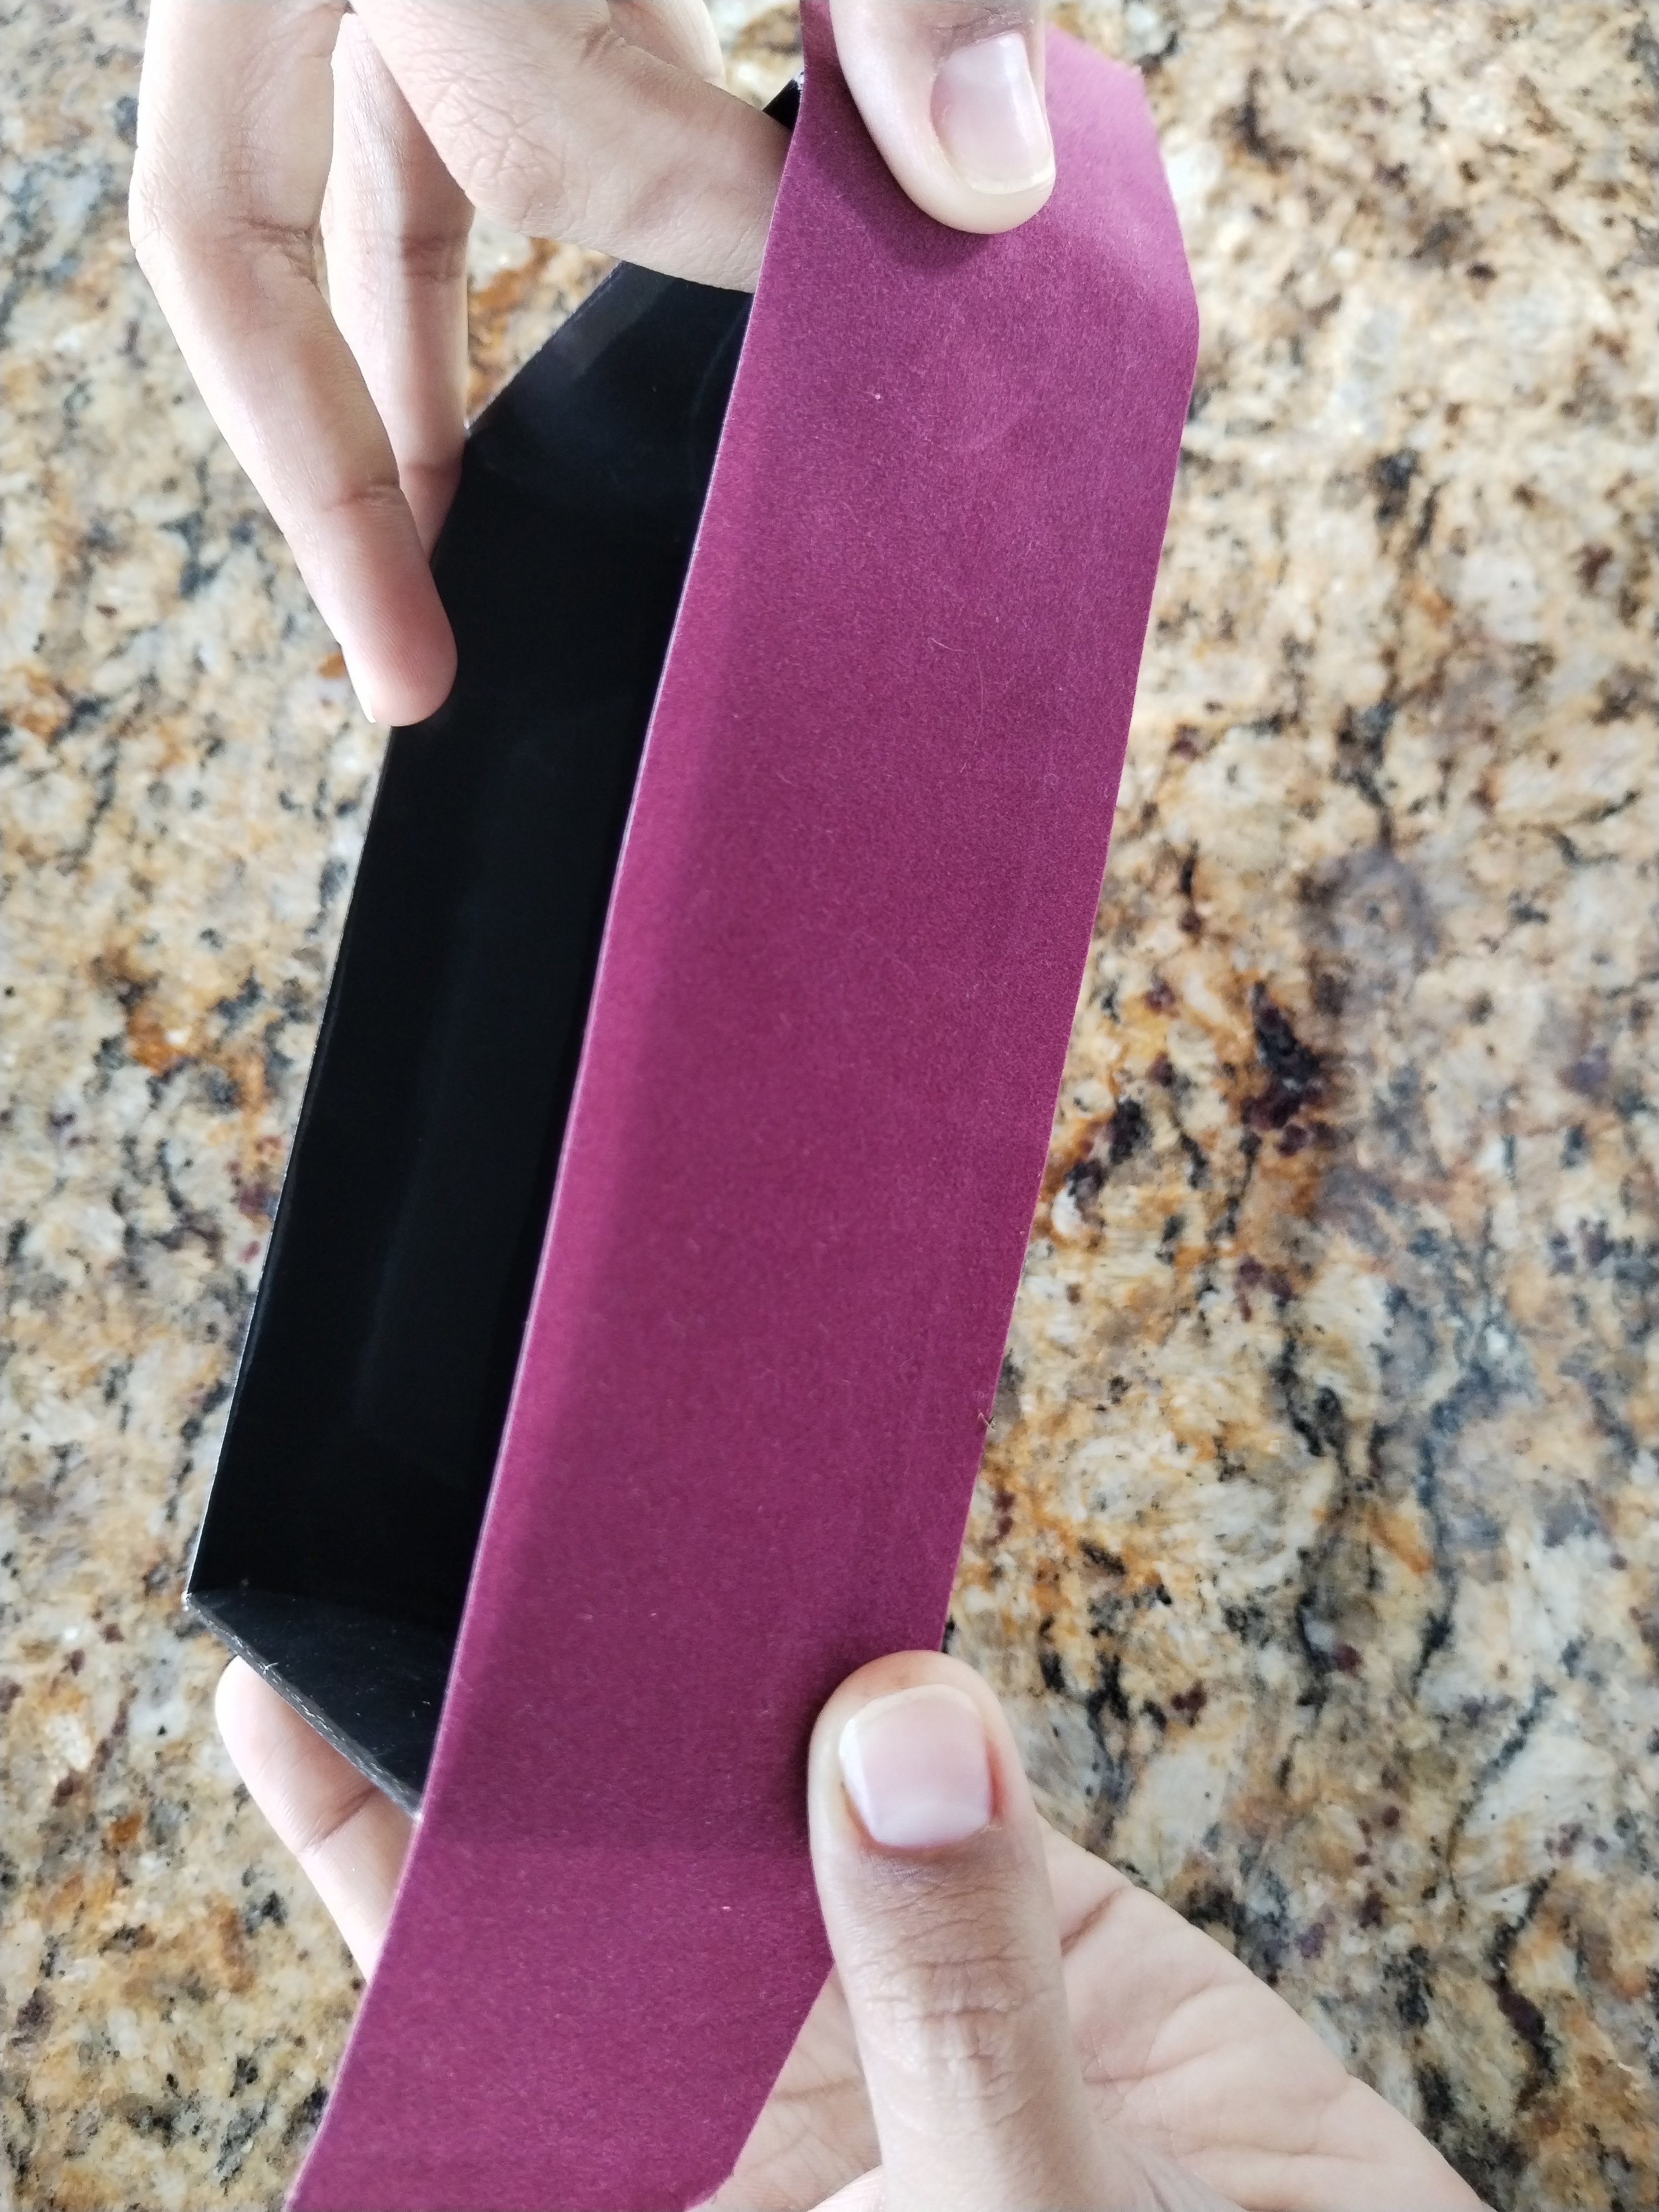
Luego comencé con la base de mi caja donde pueden observar que al ser gamuzado el papel, había que humedecer bastante el mismo para que absorbiera el pegamento y empezará a adherirse a la caja.
En el proceso me di cuenta de que esta técnica, aunque es bastante sencilla de llevar a cabo, hay que hacerlo con mucha delicadeza y cuidando bien cada paso del pincel por la tela o papel para que no queden grumos ni burbujas entre el material y la base donde se aplique, detalles que son muy importantes de cuidar para el acabado final.
Una vez que tenía la base de mi caja bien forradita con el papel gamuzado, empecé a aplicar el decoupage en la tapa de la caja con la tela estampada de animal print.
Luego dejé secar ambas superficies por aproximadamente unas 3 horas.
Cuando estuvieron bien secas y adheridas comencé a recortar con la ayuda de la tijera los excesos de papel y tela respectivamente.
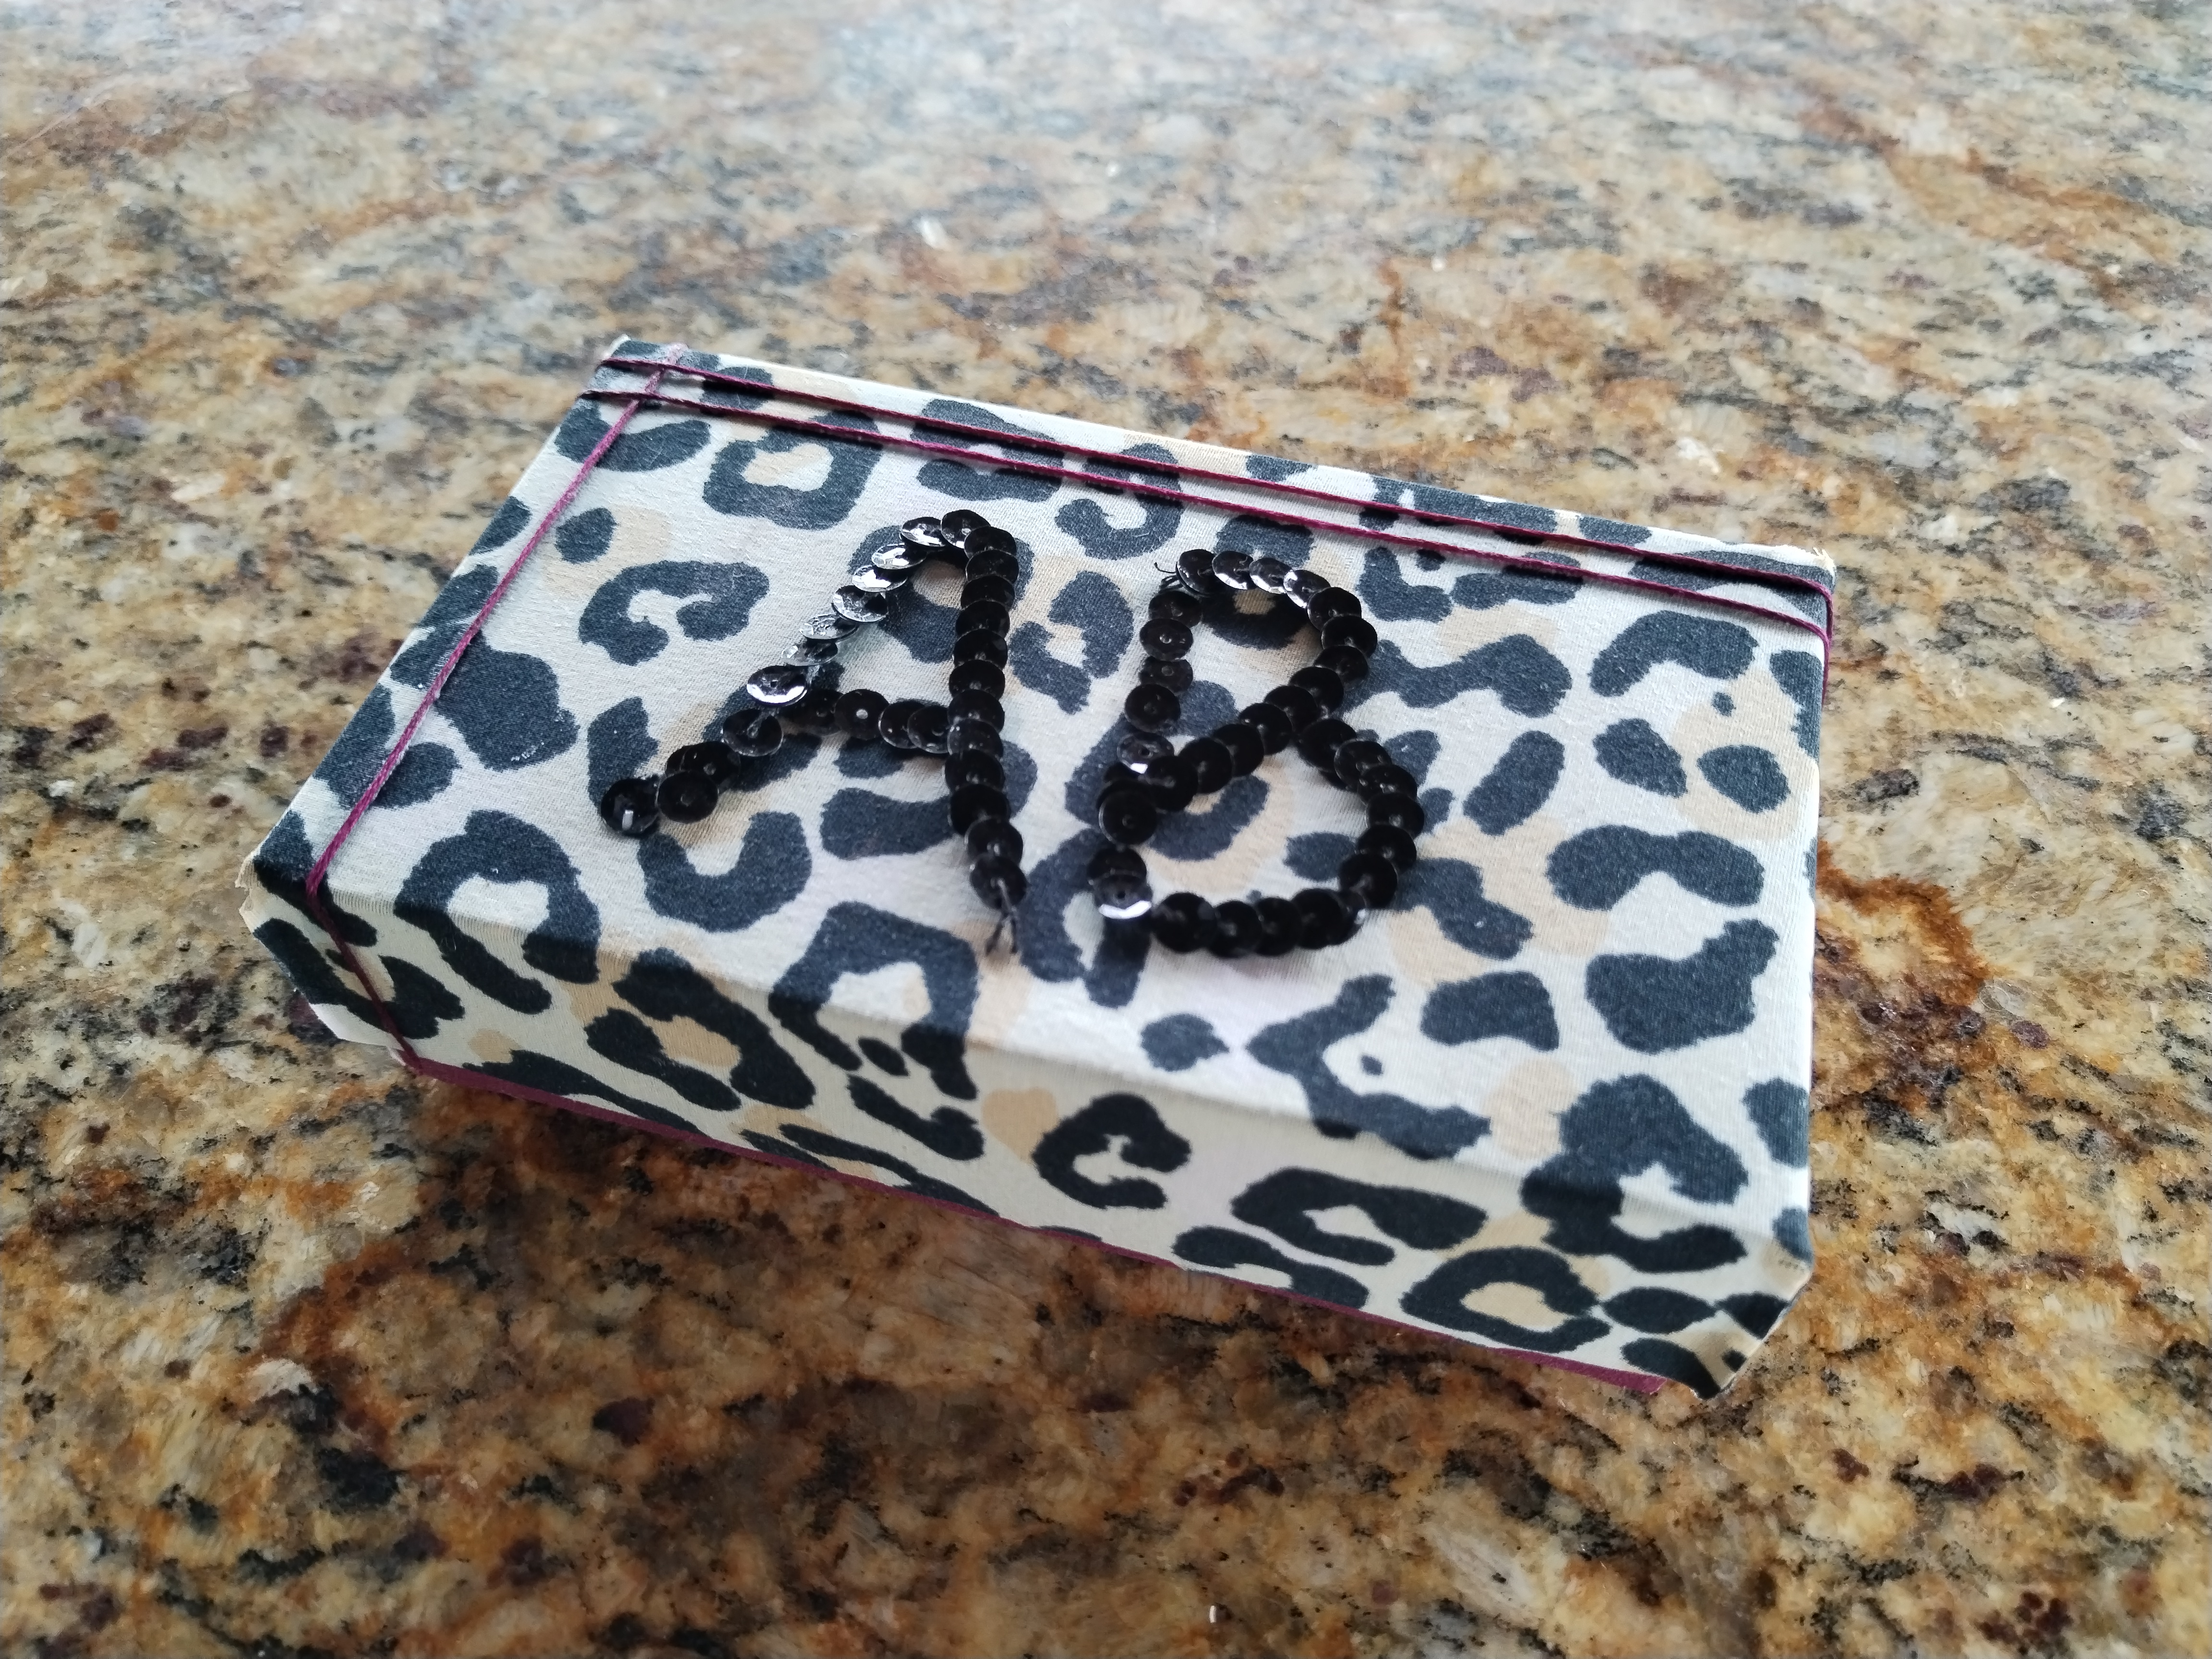
Luego que tuve todos los excesos recortados, decidí darle un toque personal y diferente a mi cajita, colocándole mis iniciales con una tira de lentejuelas y con unos detalles en hilo de bordar del mismo color púrpura del papel gamuzado.
¡Y así es como gracias a la iniciativa de este concurso súper chévere, ahora mis recuerdos están guardados en una hermosa caja personalizada por mi misma, utilizando una técnica que realmente desconocía, pero que me ha encantado aplicar y les diré algo amigos, esta no será la única vez que lo haga!
¡Espero les guste el resultado tanto como me gusto a mí y que también se animen a participar 😁 saludos!!!
🇺🇸 ENGLISH
Hello to all my Hive friends!
Today I want to tell you about my first participation in a contest for Hive, decorating with the 'Decoupage' technique, sponsored by the Hive Diy community.
I found out about it a few days ago and since I'm still new to this entire hive universe, I had many doubts about what I could do to participate.
I started by reading in detail what was requested, followed the instructions and did a little more in-depth research on the decoupage technique, since although I love doing crafts and I know several things, I had never done anything with this specific technique before.
While I was doing my research on the technique, I saw that the most common thing on the Internet was to apply it on wooden boxes with super cute illustrative napkins, but that I really did not have at my fingertips. I said to myself 'where do I get a wooden box? Or one of those napkins?', since the description of the contest mentioned recycling and I wanted to comply with that, recycling.
Then I remembered that he also said that the technique could be applied to any surface and that paper in general and patterned fabrics could be used. That helped me a lot to search through my things to see where I could apply it and with what materials to execute it. I put my mind to flight to think about how to make my participation in the most recycled way possible, that it be something beautiful and that many might like.
That's how searching among my things I found a little box inside a drawer that has been with me for approximately 15 or 14 years, I call it 'my little box of memories'.
In it I have many letters and handwritten messages that my childhood friends and relatives have given me or sent me over the years, I also have the tickets for an event, party or concert that I attended at the time.
That little box is part of my youth and when I want to go back a little I just have to open it and start reading to remember that I have always been surrounded by love and wonderful moments lived.
I had always kept this box original, I had never added any special decoration to it, it was only inside what was special, however, this contest seemed like the right opportunity to give my memories the decoration they deserve.
So, having the little box, the next step was to look in my craft bags and the box where my grandmother keeps her sewing things, some scrap of fabric or paper to decorate my memories.
I tell you that the search was better than I expected, I got an animal print fabric and a purple chamois paper that made a spectacular combination, I told myself 'This is how I want my little box to look, this is the perfect combination '.
For the contest I thought it was super cool, because I could demonstrate how to apply the technique to those two textures (fabric and paper).
The materials I used for my technique were:
- The box to decorate
- Animal print fabric
- Suede paper
- White paste
- Brush
- Scissors.
The first step was to cut the strips of paper that were going to cover the ends of the base of my box and cut the piece of fabric that I used to cover the lid of it.
Second, mix two parts water with one part glue to make the glue more dilute so you can better handle the brush on paper and fabric.
Then I started with the base of my box where you can see that since the paper was chamois, it had to be moistened enough for it to absorb the glue and begin to adhere to the box.
In the process I realized that this technique, although it is quite simple to carry out, must be done very delicately and taking good care of each step of the brush on the fabric or paper so that there are no lumps or bubbles between the material and the surface. base where it is applied, details that are very important to take care of for the final finish.
Once I had the base of my box well lined with the suede paper, I began to apply the decoupage on the top of the box with the animal print fabric.
I then let both surfaces dry for approximately 3 hours.
When they were dry and adhered well, I began to cut the excess paper and fabric, respectively, with the help of scissors.
After I had all the excesses trimmed away, I decided to give my little box a personal and different touch, placing my initials on it with a strip of sequins and some embroidery thread details in the same purple color as the suede paper.
And that's how, thanks to the initiative of this super cool contest, now my memories are kept in a beautiful personalized box by myself, using a technique that I really didn't know, but that I've loved applying and I'll tell you something friends, this is not It will be the only time I do it!!
I hope you like the result as much as I like it and that you are also encouraged to participate 😁 greetings!!
Qué hermosa! por un momento de pronto volvi a mi infancia, la cajita de recuerdos, guao! cuantas cosas lindas uno conserva alli, que bueno le diste ese toque especial y adorable. Gracias por compartir tu técnica con nosotros y participar en el concurso.
Si, hacerlo hizo que reforzarán el valor que ya había en todos esos hermosos recuerdos!! Gracias a ti por tu comentario 😍❤️
🎆🎇🎉🎊🌧️💐✨🌾🌱🌹🌙🌿🍃🥀⚡🌺☘️🍀🌈🌷⭐🪴🌵🌸🌟💮🌴🌳💫☀️💮☔🌲🌳🌍🌌🌠☄️🏵️🐝🌻🌼🍄🐞🦋💙☕💜🍍🎆🎇🎉🎊
Un trabajo precioso, me gustó la combinación animal print con violeta 💜😍 lo amé... Gracias por compartir tu trabajo. Éxito en el concurso 🤞🏼😉😊.
🎆🎇🎉🎊🌧️💐✨🌾🌱🌹🌙🌿🍃🥀⚡🌺☘️🍀🌈🌷⭐🪴🌵🌸🌟💮🌴🌳💫☀️💮☔🌲🌳🌍🌌🌠☄️🏵️🐝🌻🌼🍄🐞🦋💙☕💜🍍🎆🎇🎉🎊
Graciasss, me alegra mucho que te gustara!! ❤️❤️
Hola 👋 me encantó la combinación que utilizaste para darle ese toque especial a tu cajita de esos bellos recuerdos que tienes guardados. Felicidades y mucha suerte en el concurso. Saludos
Gracias gracias, saludos para ti también ❤️🤩
Te quedo muy bonita la caja, me encanto la combinación que realizaste. Me gusto mucho la forma de aplicar la técnica.
Mucha suerte en el concurso.💖
Saludos @andreaelina.✨
Buen contenido me gusto mucho saludos 😸
Excelente trabajo amiga @andreaelina, me encanto tu cajita de recuerdos al igual que la técnica que empleaste ¡Felicidades y éxitos! 😉
Congratulations @andreaelina! You have completed the following achievement on the Hive blockchain and have been rewarded with new badge(s):
Your next target is to reach 900 upvotes.
You can view your badges on your board and compare yourself to others in the Ranking
If you no longer want to receive notifications, reply to this comment with the word
STOPSupport the HiveBuzz project. Vote for our proposal!
Muy lindo tu trabajo te quedó hermosa, a mi me encanta el animal print
🌹🌷☀️🌟✨🌼😬🥰😍🤩🌺🌸🤗🌹🌷☀️✨😊😬🥰🏵️🥀😆🤪😍🤩🌺🌸🤗🌹🌷☀️✨😬🥰🏵️🥀😍🌺🤗🤗🤗☀️🌼😬🤩🌸🤗🤗
Que lindo el resultado amiga. Me encanta el color negro y blanco son mis favoritos. Éxito
@andrealina qué linda quedó tu caja, me encantó el estampado animal print combinado.
Suerte en el Concurso 🤗🤗