
Buenas tardes queridos amigos de esta hermosa comunidad de Hive y Hive Diy. Quiero agradecerles por todo el apoyo que me han dado hasta ahora y quiero desearles los mejores deseos en todas sus proyectos, tanto presentes como futuros, ya que en esta gran comunidad todas las personas tienen maravillas ideas y proyectos por crear.
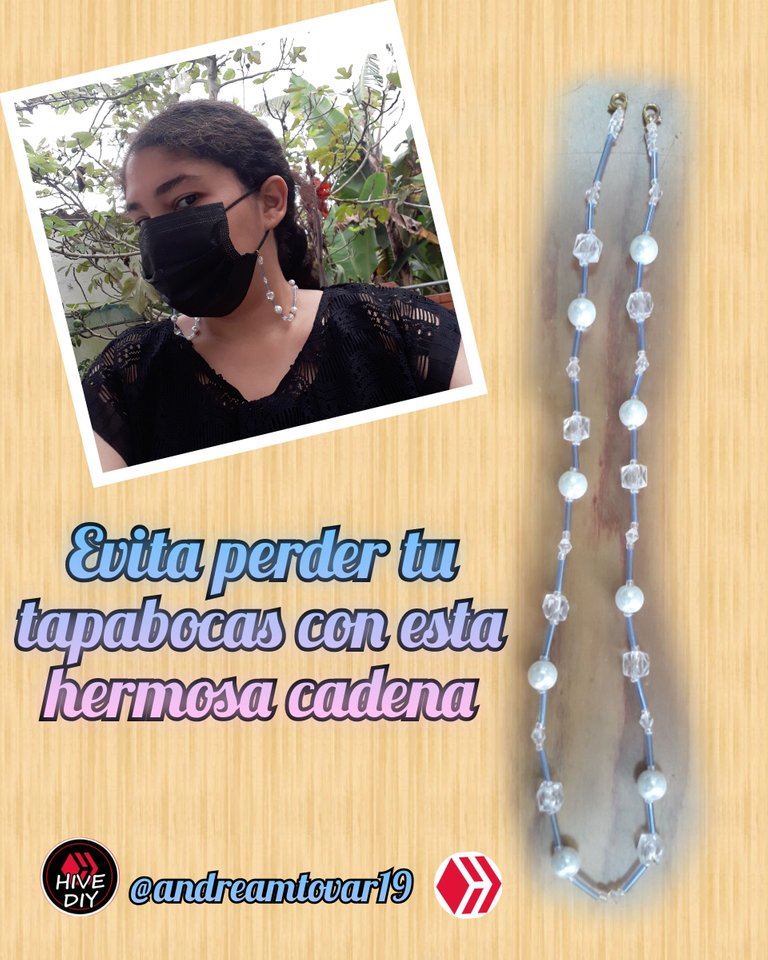
Hoy les comparto una hermosa y muy útil cadena para sujetar los tapa bocas, ya que no sé si soy yo sola pero en estos años de pandemia se me han perdido muchos tapabocas por estar dejándolos en cualquier parte. A mi siempre me ha fastidiado tenerlo puesto porque siento que me asfixio cuando lo tengo mucho tiempo puesto, pero hay que usarlo en estos tiempos por seguridad. Es por esto que en este hermoso día les comparto esta cadena, para colocarla en el tapabocas y tenerlo siempre a mano cuando nos lo tengamos que colocar y además, dejaremos de perderlo 😁.
Esta cadena es muy fácil de hacer, solo necesitaremos 15 minutos de nuestro tiempo y los materiales que indicaré a continuación, estos materiales pueden variar, es decir, podemos escoger los materiales que nosotros queramos e igualmente quedará hermoso y su hechura durará el mismo tiempo. Espero que les guste.
Sin más que decir, empecemos a hacer nuestra cadena.
Lo que vamos a necesitar son…
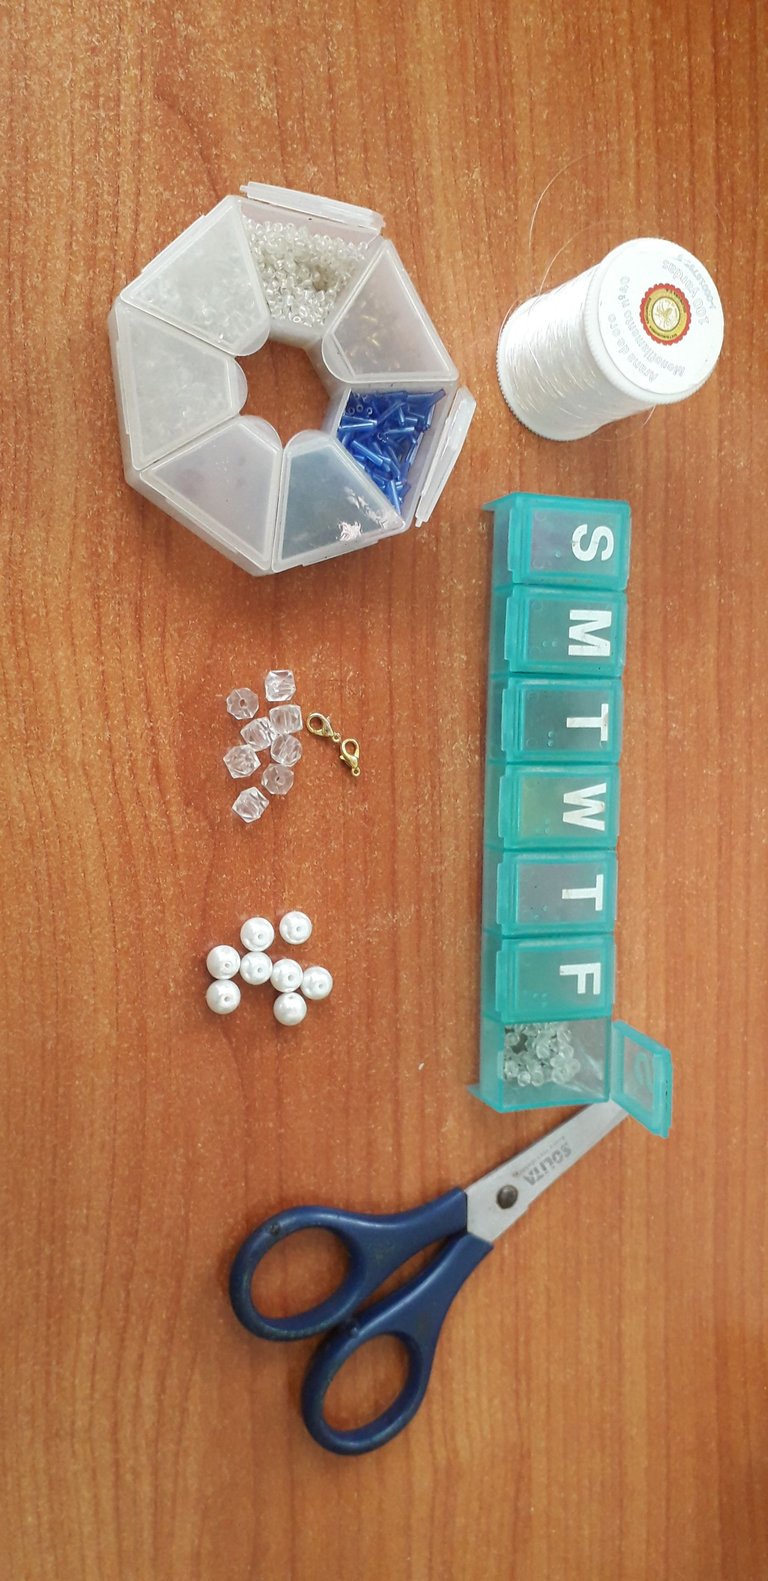
9 Cristales de 3 milímetros trasparentes
8 perlas medianas blancas
8 cristales cuadrados
24 canutillos de color azul celeste largos
2 broches .
1 metro de nylon 0,4
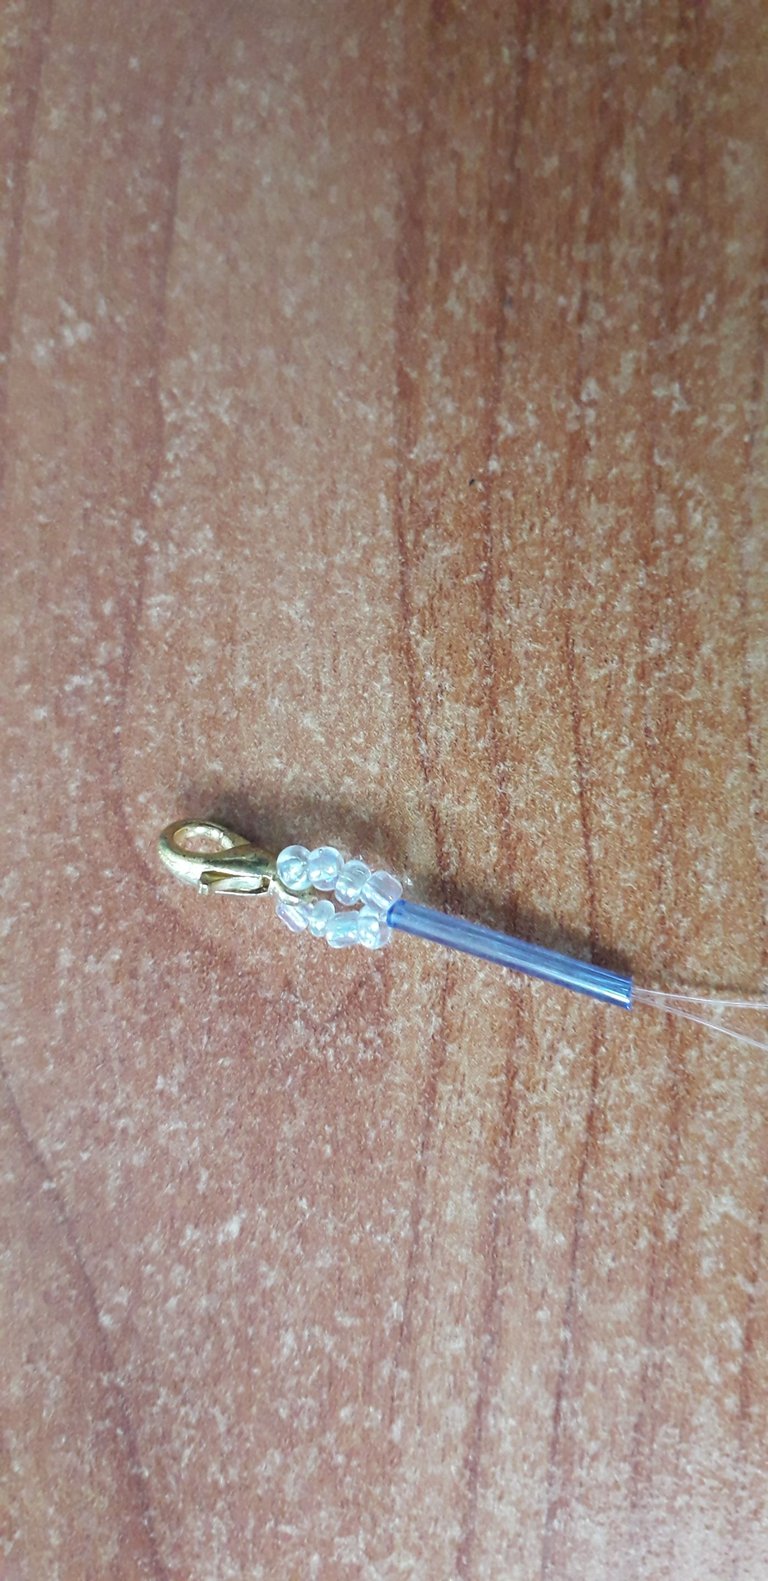
Primeramente vamos a introducir 4 mostacillas, un broche y 4 mostacillas más. Luego para terminar esta anilla vamos a juntar los hilos y añadiremos un canutillo azul celeste largo.

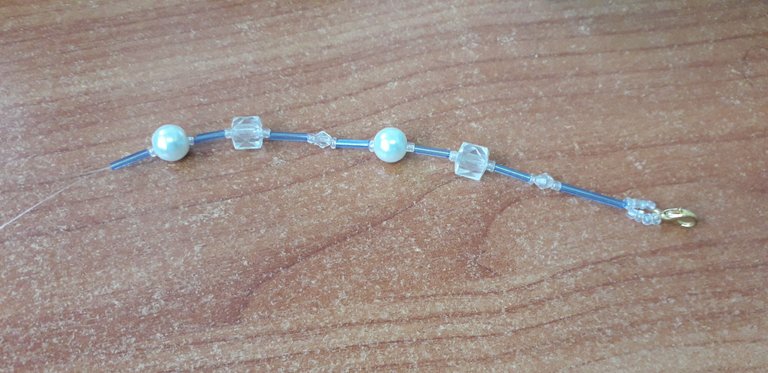
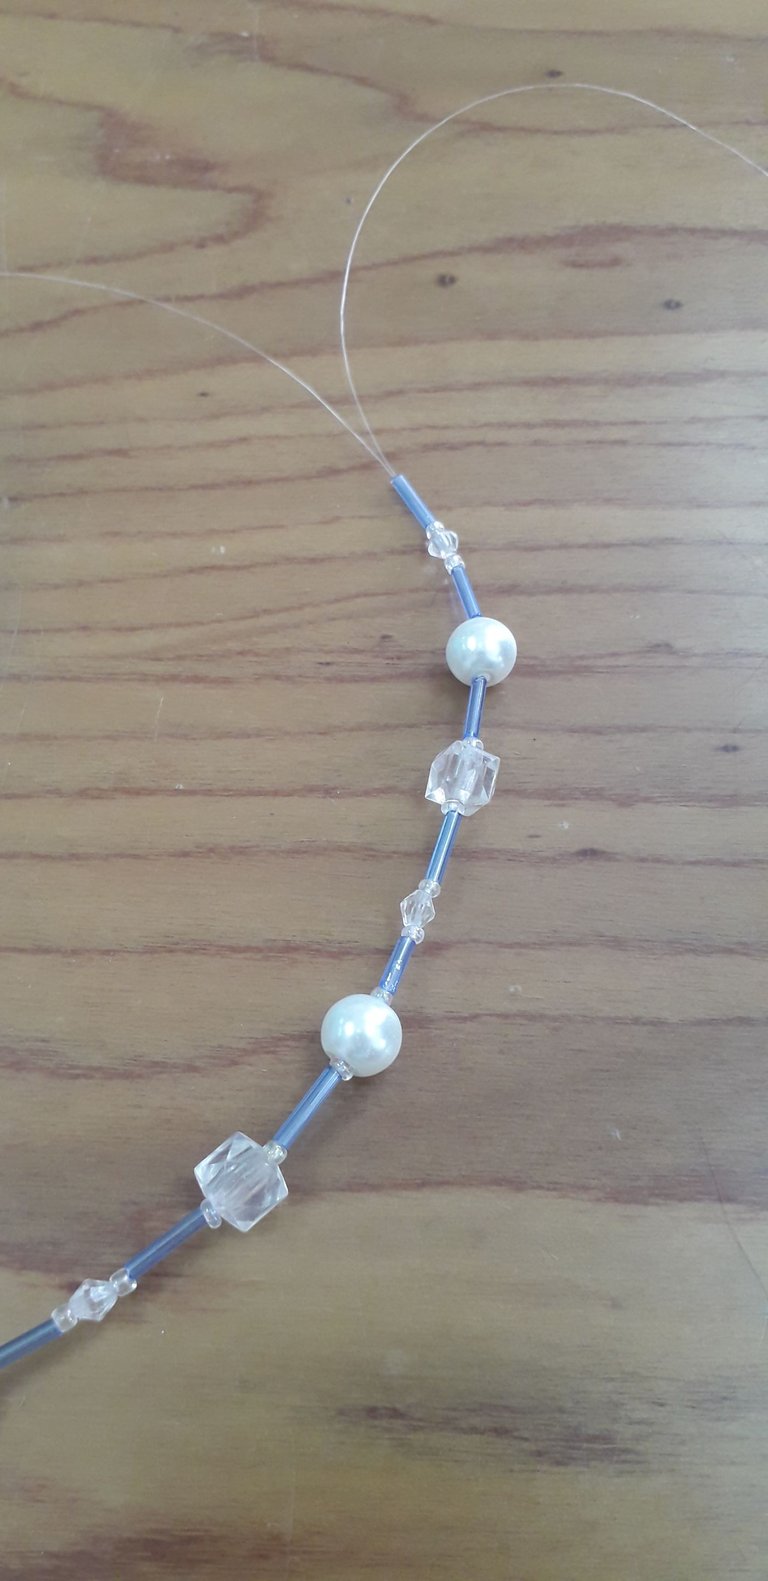
Ahora vamos a trabajar con los 2 nylon juntos hasta el final de la cadena. En estos dos hilos juntos vamos a añadir una mostacilla, un cristal de 3mm trasparente, otra mostacilla, un canutillo, una mostacilla, un cristal cuadrado trasparente, otra mostacilla, un canutillo azul celeste, una mostacilla, una perla, otra nueva mostacilla y un canutillo largo de color azul celeste. Coloqué las mostacillas entre los cristales y canutillos debido a que como los canutillos son muy delgados pueden pasar por el orificio de las perlas o los cristales, en cambio las mostacillas es más difícil que quepan en estos orificios y quedé más delicada la cadena.
Vamos a repetir el paso 2 añadiendo una mostacilla, un cristal de 3mm trasparente, otra mostacilla, un canutillo, una mostacilla, un cristal cuadrado trasparente, otra mostacilla, un canutillo azul celeste, una mostacilla, una perla, otra nueva mostacilla y un canutillo, en este orden hasta terminar con los cristales, los cristales cuadrados y las perlas.
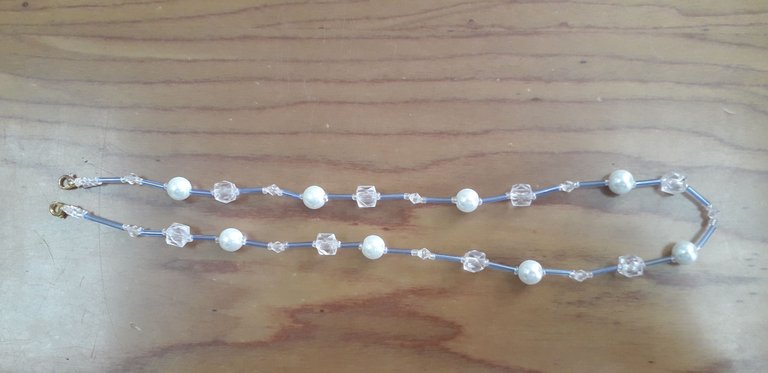
Una vez que tenemos todo el largo de la cadena completa vamos a separar los hilos de nylon y vamos a añadir 4 mostacillas en un lado, en el otro 4 mostacillas, un broche y anudamos para terminar la anilla del otro extremo de la cadena.
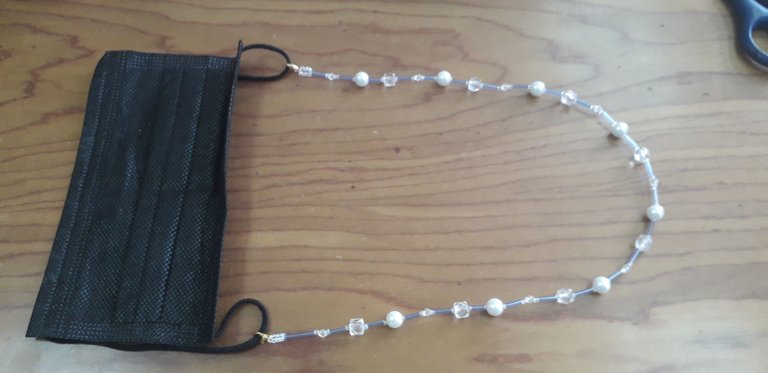
Y listo. Enganchamos los broches al extremo de nuestro tapabocas y lo empezamos a usar.
Que Dios los Bendiga y los acompañe en todos sus caminos.
- Las fotos son de mi autoría y fueron tomadas con un celular Samsung Galaxy J6
- Traductor Español – Inglés utilizado: DeepL
- Edición de imágenes a través de la app Editor de Fotos Polish.

Good afternoon dear friends of this beautiful Hive and Hive Diy community. I want to thank you for all the support you have given me so far and I want to wish you the best wishes in all your projects, both present and future, because in this great community everyone has wonderful ideas and projects to create.
Today I share with you a beautiful and very useful chain to hold the mouth covers, because I don’t know if it’s just me but in these years of pandemic I have lost many mouth covers because I have been leaving them anywhere. It has always annoyed me to have it on because I feel like I suffocate when I have it on for too long, but it is necessary to use it in these times for safety. That’s why on this beautiful day I share with you this chain, to place it on the mask and always have it at hand when we have to put it on and also, we will stop losing it 😁.
This chain is very easy to make, we will only need 15 minutes of our time and the materials that I will indicate below, these materials can vary, that is, we can choose the materials that we want and it will also be beautiful and its workmanship will last the same time. I hope you like it.
Without further ado, let’s start making our chain.
What we are going to need are …
9 clear 3 millimeter crystals
8 medium white beads
8 square crystals
24 long light blue beads
2 brooches .
1 meter of nylon 0,4
First we are going to insert 4 beads, a brooch and 4 more beads. Then to finish this ring we are going to join the threads together and add a long light blue bead.
Now we are going to work with the 2 nylon strands together until the end of the chain. On these two strands together we will add a bead, a 3mm clear crystal, another bead, a bead, a bead, a bead, a clear square crystal, another bead, a light blue bead, a bead, a bead, a pearl, another new bead and a long light blue bead. I placed the beads between the crystals and beads because as the beads are very thin they can pass through the hole of the pearls or crystals, while the beads are more difficult to fit in these holes and the chain is more delicate.
We are going to repeat step 2 adding a bead, a 3mm clear crystal, another bead, a bead, a bead, a bead, a clear square crystal, another bead, a light blue bead, a bead, a pearl, another bead, another bead and a bead, in this order until finishing with the crystals, the square crystals and the pearls.
Once we have the whole length of the chain we will separate the nylon threads and we will add 4 beads on one side, 4 beads on the other side, a brooch and knot to finish the ring at the other end of the chai
And that’s it. We hook the brooches to the end of our mask and we start using it.
I hope you liked it and that you can make your own, with these or with the materials of your choice.
May God bless you and be with you in all your ways.
- The photos are my own and were taken with a Samsung Galaxy J6 cell phone.
- Spanish – English translator used: DeepL
- Image editing through the Polish Photo Editor app.

Que fino, así no perdemos nuestro tapaboca, y así queda mas asegurado. Te quedo genial gracias por compartir.
Mira tu pues! Que ingenioso...yo lo dejo tirado por todas partes y nunca logro encontrarlos cuando los necesito
Hola @andreamtovar19, qué buena idea!, gracias por compartir
Yay! 🤗
Your content has been boosted with Ecency Points, by @andreamtovar19.
Use Ecency daily to boost your growth on platform!
Support Ecency
Vote for new Proposal
Delegate HP and earn more
The rewards earned on this comment will go directly to the people sharing the post on Twitter as long as they are registered with @poshtoken. Sign up at https://hiveposh.com.
Hermoso